
Do you have a question about Mod Podge? I’ve got you covered! Check out the answers to popular decoupage questions here! Click through for answers.
Each week I’ll have a question about Mod Podge from a reader posted right here, as well as the answer. If you have a question about Mod Podge – anything from how it’s used, to formulas, to project help – I’d love for you to post it in the comments below or email me here. Each week I’ll select a question to feature in the newsletter, and provide the answer right here!
Q: “I am starting my very first Mod Podge project soon and I have some questions. I am cutting a flag and I read somewhere that I could cover it in Mod Podge first, then when it’s cut it won’t fray – is that true??? And if I do, once it’s hard from the Mod Podge will that make it difficult to put onto a painted wooden surface (It’s a team flag, not the American flag)?” -Amanda
A: Yes, you can use Mod Podge to stop fraying. I do it on fabric all the time. Once I Mod Podge fabric, I cut it with a craft knife or scissors and boom . . . no fraying!
And Mod Podge doesn’t really make fabric “hard.” It does make it stiffer, but it’s still pretty flexible. You’ll be able to put it on a painted wood surface.
Thank you for the great question and GET PREVIOUS QUESTIONS BELOW!
Q: “Can I use Mod Podge on candles and then burn them?” -Kara
A: The short answer is no . . . but let me explain. You can use Mod Podge on candles and then use them for decorative purposes (just for displaying, not burning). You can use Mod Podge on the outside of glass candleholders and be fine (like Yankee candles).
Now having said that, Mod Podge is non-flammable. But it will melt. So what I’ve heard of some people doing is peeling back the paper and napkin (along with the Podge) as a candle burns.
If you do that, it’s at your own risk. No matter what, just never leave anything Mod Podged that’s near a flame unattended.
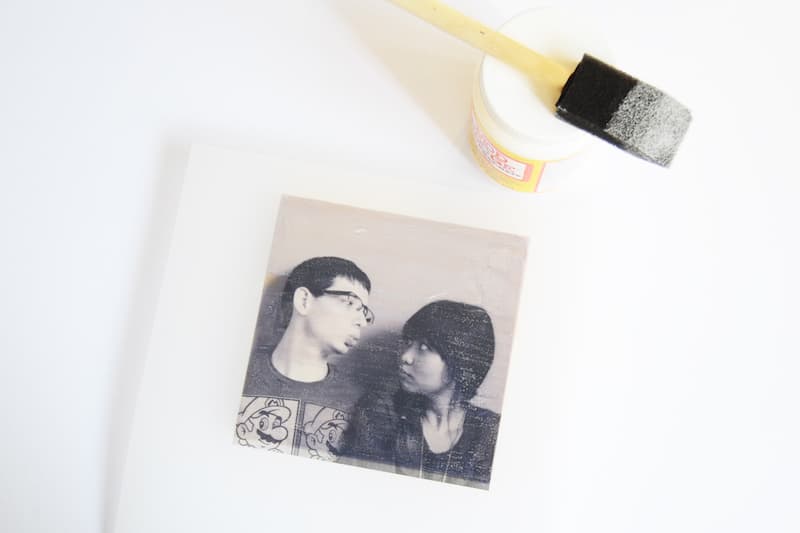
Q: “I’m having issues with rubbing the paper off when I do a Mod Podge photo transfer.” -Matt
A: Mod Podge photo transfers can be tricky and take a little bit of practice – I’m talking about the kind where you use Mod Podge photo transfer medium.
Now, there are photo transfers you can do with regular Mod Podge, but the Mod Podge brand photo transfer medium is its own item and is a one step process. You don’t need glue to go along with it!
I’ve noticed two things with the photo transfers using the medium. 1) you need to make sure there is enough medium between the paper and the surface.
You should not be able to see the image (it should be completely obscured by medium) when you place it down. 2) the paper might not come off the first round.
After you let it dry for 24 hours, you’ll rub the paper off AFTER wetting it. It typically takes me about two rounds to completely remove it all. It’s not because it can’t be done, it’s just that I’m careful because TOO much rubbing can remove the image.
So I’d rather get as much as I can (which is sometimes hard to see when it’s wet), let it dry, and then go back and remove the rest of the paper. Does that make sense? You can definitely wet it again and rub it again without worry.
Q: “My daughter recently moved and a blanket sat on top of a Mod Podge dresser. There is now fuzz stuck to the top of the Mod Podge. How do we remove it?” -Karen
A: This can definitely happen! Especially if the Mod Podged dresser was in a warm place and it re-activated the formula. It won’t happen if you use a clear acrylic sealer on top like Mod Podge spray or Minwax Polycrylic.
But if it ends up that there’s no top coat, you can remove the fuzz with a very fine grit sanding block. Rub gently and you’ll be able to remove it all. You just don’t want to rub too hard and reach the paper/fabric below. Good luck!
Q: “I want to decoupage posters to the cabinets in my laundry room. I can’t find posters that are a good size to use. Do you have any examples where you decoupaged a poster over a plain paper background to fill in the space? Does it show a “pieced together” look? Thanks for any advice!” -Karen
A: Let me start by sharing an example of a poster being applied to a canvas with Mod Podge (find it here). In the post, she uses water from the bathtub to help (you can use a spray bottle).
You can remove the cabinet doors, which might take a few minutes, but will probably make it easier to do when the door is a flat surface on a counter as opposed to vertical.
Now, depending on how thin the poster is, you might have issues with the cabinet color coming through the paper slightly. The poster needs to be relatively thick. If it’s not, you should paint the centers of the cabinets with white acrylic (NOT latex!) paint.
In terms of what to use, if you can’t find a poster that fits, I’d say trim one down with an X-Acto knife. Another great option? Gift wrap! There are also some beautiful, large sheets of paper at place like Paper Source.
If you overlap regular papers, you’ll definitely be able to see it. So I definitely recommend one large piece trimmed to fit. Good luck!
Q: “What is the best way to make photo coasters with Mod Podge?” -Suzanne
A: There’s a great tutorial on the blog for this that you can see here. I have two comments. The paper preference is laserjet printouts – you can get those done at Kinko’s if you don’t have a laserjet printer. The reason is because inkjet printouts will smear. Here’s how to treat inkjet photos, from my FAQ:
“Print the picture onto the paper and let it dry for at least ten minutes. Spray both sides of the paper with clear acrylic sealer (several coats) and let it dry.
Paint with a thin layer of Mod Podge on both sides, then let it dry. Then you can Mod Podge as normal. It sounds like a lot of steps, but it’s not that difficult – you just have to make sure it all dries.”
Now photos will work as well, you’ll just have to add more Mod Podge and really smooth them down!
I’ve got additional coaster tutorials here.
Q: “I love Mod Podge but I think I have ruined some of my art with it. I used the sealant over my button art and now my items look cloudy. My Swarovski crystals don’t shine. Please help me restore my beautiful art pieces!!” -Ruth
A: Mod Podge dries clear, but it can dull the shine on items that are supposed to be blingy, like crystals and glitter. If the rest of the art is cloudy, it should dry with time.
If there’s any glitter on the piece, you’ll have to deal with the dulling as any decoupage medium would do the same thing.
Now with the crystals, I would use a q-tip and paint remover to get rid of the Mod Podge on top. That is your best bet to restore your piece! My recommendation next time is to complete your piece and then glue the crystals on top.
Q: “I use Mod Podge to stick buttons onto my cards. But I have tried loads of things as an applicator but sometimes the buttons are small so I get Mod Podged too!! Has anyone got any good ideas or tips??” -Tia
A: I’ve actually had to apply glitter to a very small area (using Mod Podge) and my life was saved by applicator bottles. You would pour some of the Mod Podge from its original bottle into the applicator bottle.
Make sure to keep the pin in the top to keep the applicator tip from getting clogged and drying out.
Q: “I am currently changing an old standing lamp (the electrical wires are shot) into a Halloween candelabra with flameless candles. It has one main light in the middle and three other smaller offshoot places for candle sticks. I want to replace the center spot with a skull & then drill a hole in the top of the head for a larger flameless candle. I found a foam head, which will be perfect for the center (& easiest to make the hole into), but I know you can’t spray paint straight onto styrofoam or it will melt. Can I Mod Podge the skull & then spray paint over that?” -Christine
A: I’ve used Mod Podge with spray paint many times and never had an issue! You can always paint Mod Podge on a piece of scrap paper and spray paint with the exact spray paint you’ll be using first to be sure . . . but I haven’t had one issue in years.
I’d add several coats of Mod Podge, by the way. Good luck and it sounds like an awesome project!
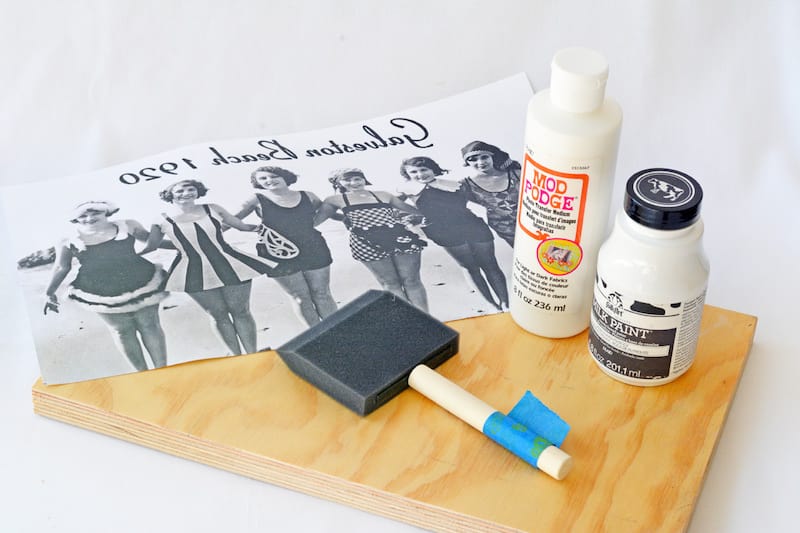
Q: “Can I use regular Mod Podge to transfer an image to a piece of furniture that is painted black?? Thank you!” -Teri Jo
A: That wouldn’t work because the ink is going to be dark, and the background won’t be light when you use regular Mod Podge. You can use Mod Podge Photo Transfer Medium – it has a white background (behind the colors). Get tutorials with that product here.
Q: “I’m curious if I seal a mug with dishwasher safe Mod Podge can I put it in the microwave at all?” -Mary
A: Unfortunately Dishwasher Safe Mod Podge is not microwave safe. You don’t want to melt your Mod Podge, even when it’s fully cured.
Q: “Is it safe to use Mod Podge on mason jars for candle holders? I want to decoupage images on the outside and I am afraid they may start a fire.” -Lee-sa
A: It’s very safe! The key is keeping the Mod Podge on the outside of the jar. Mod Podge isn’t flammable, but you want it on the outside of a jar and not near a flame so it doesn’t melt.
Also regardless, the flame should be monitored at all time. If you feel like you’ll be spending a lot of time away from the project, use LED tealights. Then you don’t have to worry!
Q: “I made a box and covered with fabric. I used Mod Podge Matte on the fabric, and I applied a layer on the fabric. Once the fabric dried it feels rough -what can I do to take away the feeling of roughness ? Also do I need to apply a lacquer to protect it from the dust and grease (make easy to clean).” -Paola
A: Pretty much any acrylic product that you put on fabric is going to make it a little rougher, especially a product that acts as a glue (or a sealer). You can try using #0000 grit steel wood that is every so slightly damp to take away some of the roughness, but it’s never going to feel soft.
It’s just the nature of the project! As far as applying a lacquer, Mod Podge is fine by itself, but if the project is going to experience a LOT of action, I’d brush Minwax Polycrylic on the top to seal. It might help make it feel slightly less rough too by building up the top layer.
Q: “Anyone know how to get dried Mod Podge out of my car seat? Guess it got too hot and bubbled out.” -Ashley
A: Over the course of my Mod Podging career I’ve gotten Mod Podge on everything . . . and someone taught me early on to apply brush cleaner to the affected area until I could wash the clothing (typically what ended up getting Podged).
Once it dries, it’s a big harder to tackle. Learn how to remove Mod Podge here.
I suggest you try the technique(s) in the article OR use brush cleaner and warm/hot water and scrubbing. You definitely want to warm the area up with water and “reactivate” the Mod Podge before trying anything.
Also please do a test on the fabric in question. Remember that anything you try is at your own risk – I can’t speak for all fabrics, and I certainly don’t want you to ruin your item, whether it be a shirt or a car seat. So doing a test is key.
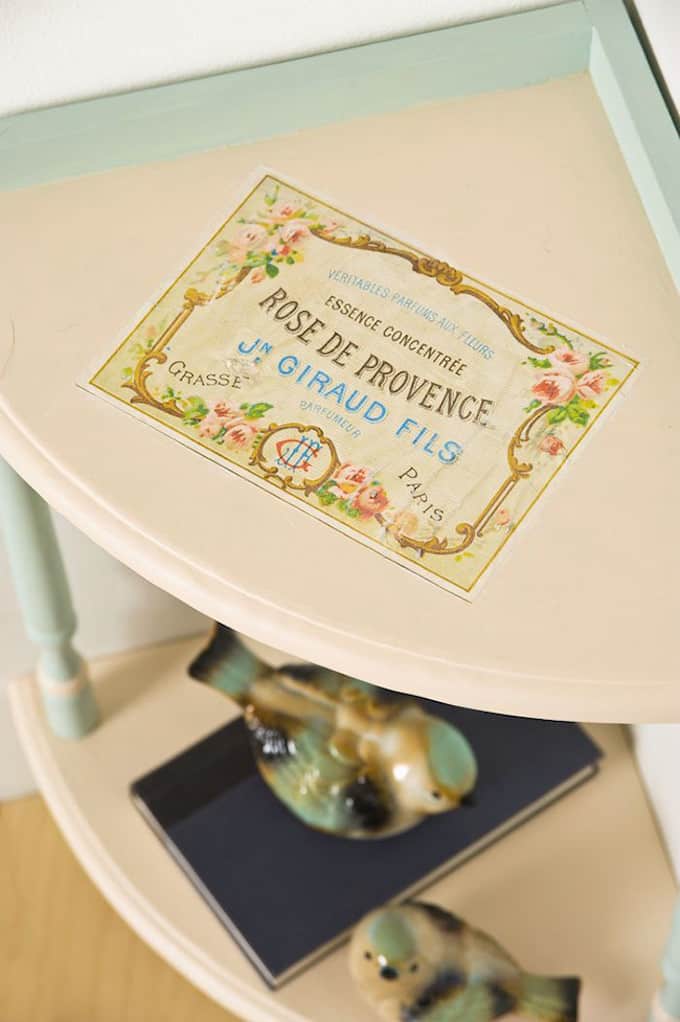
Q: “Is it me or is the Photo Transfer Mod Podge much thicker, also, it doesn’t seem to dry clear? can i just use regular Mod Podge for photo transfer?” -Julie
A: I actually get this question a lot, so I’m glad to finally answer it! Let me explain the two different options for photo transferring with Mod Podge . . . at least generally speaking.
1. Mod Podge Photo Transfer Medium – you cannot use this for regular decoupage . . meaning, you don’t want to use this formula to glue a photo down to a surface (this accounts for the thickness; it is a different formula).
It is specifically and only for photo transfers. It has a white background as opposed to a clear background (opaque). That white background is nice in that the image really pops up off of the surface! To get an idea of how to use this formula, visit this post . . . it will make it clear.
2. Regular Mod Podge – typically meaning either the Gloss or Matte formula. Obviously these formulas can be used for regular decoupage, aka, gluing something to a surface. But they can also be used to transfer images and obtain a clear background.
Just as you’ve seen me share a project above that will clear up how the final product will look, here is a tutorial (this one) which will show you what I’m talking about.
Now, there are a variety of different methods for using regular Mod Podge combined with other ingredients to complete a photo transfer. You can Google or search Pinterest to find the one that works the best for you.
So which do you choose . . . well, it depends on the look you are going for. Any photo transfer completed with Mod Podge is going to look slightly vintage. Take a peek at the tutorials I’ve shared above and see what works best for you!
Q: “Can you tell me what the problem may be if my clear Mod Podge dries milky white in some areas?” -Lisa
A: First read my article Does Mod Podge Dry Clear? There are typically two possibilities if your Mod Podge is milky white. First, it might not be completely dry. Depending on where the Mod Podge is, the climate you’re in, and some other factors, you might need to give it several days to completely dry.
The second possibility is that the Mod Podge might have been applied too heavily in an area, in which case it clumps and dries milky white. For the first issue, you’ll just have to wait longer. For the second issue, it can help to sand down the Mod Podge lightly to get rid of the excess.
Thank you for the great question!
Q: “There are so many different types of Mod Podges, which one is the best for using with glitter on wine glasses?” -Joan
A: I love the new Dishwasher Safe Mod Podge just for this reason! You’ll do the same thing as one of my contributors did on this mug. One thing you should remember is to keep the Mod Podge down from the rim of the glass . . . you don’t want your lips to be touching the Mod Podge every time you drink. Besides that, just remember that the Mod Podge will dull the glitter slightly. Good luck!
Q: “Can I Mod Podge over sticky back gems? I never feel that they are secure.” -Linda
A: This week you’re testing my loyalty to Mod Podge, but it’s okay! ;D I actually want you to have the right supplies for your project – whether Podging is involved or not. You *can* Mod Podge over sticky back gems, but I don’t recommend it.
It will really dull them (as will any other acrylic glue). I recommend using E-6000 to secure them (just add glue to the sticky side before gluing them down).
Trust me, they won’t be able to be removed. You can probably even pop up ones you’ve already stuck down (carefully) and add the E-6000 at this time. Good luck!
Q: “I have a quick question for you. I have a friend who would like me to repurpose a metal box for her. I would like to decoupage it with some pretty papers and fabric. What formula Mod Podge should I use? She will be using it for a jewelry box. Thanks for the help!” -Regina
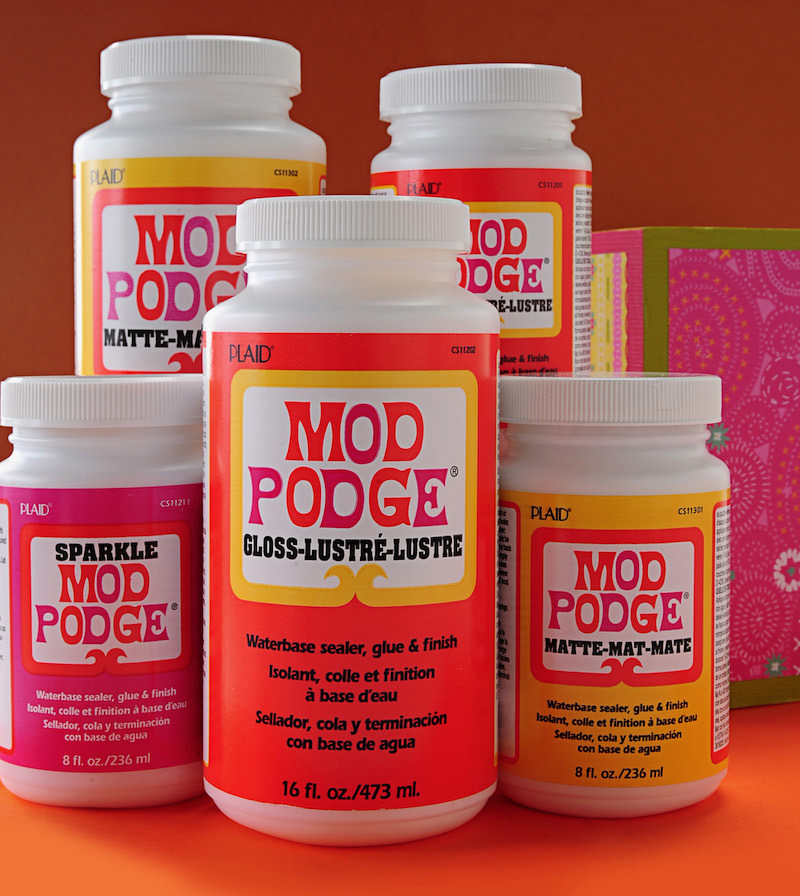
A: You’ve actually got several good options for this project! Before I start, here’s the Mod Podge formula guide so that you can learn more about each one.
Now having said that, I imagine that a jewelry box will get used quite frequently, so I’d personally go with either the Satin or the Hard Coat (if the usage is really extensive). I really love those finishes. But after reading the formula guide, you might decide on another, and that’s okay too!
Q: “I read your piece on all the Mod Podge formulas. It was very informative and I bookmarked it for future reference. But the question I am have trouble finding an answer for is, “What’s the difference between Mod Podge and Royal Coat”? They are both decoupage glues, (glue, seal, protect) and they both are made by Plaid. I wonder because I want to do more decoupage and I would like to use the best product. Is there an advantage to either one?” -J.S.
A: Royal Coat is only made in certain markets and for certain stores . . . . which is why it’s not advertised regularly. Royal Coat is actually stronger than some formulas of Mod Podge, so it’s like a “premium” Mod Podge.
The similar Mod Podge product? Hard Coat . . . it’s very close to the same thing and they have a Satin finish. Both are great, but Royal Coat could help you in situations where you need a “tough” decoupage medium!
Q: “I recently used Mod Podge Dimensional Magic on a domino pendant. I noticed, I missed a spot around the edge. Can I go back and fill it in? If so, will it still look good or should I just make another one?” -Kristi
A: I had this very same question when I first started using Dimensional Magic! Yes, you can go back and fill in DM after it’s dry. It’s pretty awesome. You won’t even notice a seam!
Q: “I have a question, I recently made a lamp with Mod Podge, I decorated the inside of the lampshade with photos on vellum paper. will the Mod Podge acrylic spray keep the photos from burning? I covered them in several layers of Mod Podge then waited for it to dry then sprayed it with the acrylic sealer, will that be enough?” -April
A: Acrylic spray is actually flammable due to the propellants (regular Mod Podge is not). The can should provide warnings. I’d ask at the hardware store if there is a non-flammable coating you can put on the inside, but otherwise, never leave that lamp unattended.
It’s always recommended you Mod Podge on the outside of a shade – BUT as long as the lightbulb isn’t too close OR You use one of those LED ones which are low heat, you’ll be fine.

Q: “I’m planning on using this product on a table top to seal it with a gloss finish. I was just wondering if a standard paint roller (yes the fuzzy kind) would work with Mod Podge? If not any good suggestions on a tool that would cover a large area quickly would be much appreciated.” -Kyle
A: A fuzzy paint roller will definitely leave texture in your Mod Podge – which could be the look you are going for! But if you aren’t, try a brush like this one. It’s a 4″ with gold taklon bristles and VERY soft, which is what you want. You can probably find similar at the hardware store.
Q: “Hi! I’m having some trouble with Dimensional Magic I’m hoping you can help with. I print my image on an ink jet printer. When the ink is dry, glue it into a cabochon with a thin layer of Mod Podge matte. When that is dry, do a thin layer of MP on top of the image. Then when that is dry, I cover with the Dimensional Magic. But when that dries, my ink color disappears (the magenta in particular). Any tips?” -Melanie
A: The problem is the inkjet image – that will bleed with both Mod Podge and Dimensional Magic. Especially the Dimensional Magic. You have a few options.
My first is to get the images printed on laserjet next time. If that’s not possible, spray an acrylic sealer over the inkjet image and let dry. THEN Mod Podge.
And do it several times – you’d rather have several thicker layers of Mod Podge to protect the inkjet image from the DM. That *should* work, depending on the printer you use. I find the best results with the newer HP printers. Good luck.
Q: “I got Mod Podge all over my favorite jeans!! I didn’t realize until they came out of the wash! Any ideas how I can get it out??” -Lottie
A: This one is tough – because your jeans might be ruined forever (learn how to remove Mod Podge here). But there’s something you can try. Scrape away as much of the dried Mod Podge as you can, then scoop a finger full of petroleum jelly out of the jar and apply it to the dried decoupage medium.
Work the petroleum jelly into the fabric with your fingertips and allow it to sit for at least one hour. Wipe off as much petroleum jelly as possible. Saturate the spot with grease-cutting dishwashing liquid. Dampen the fabric slightly and work the dishwashing liquid in by rubbing the fabric together.
Let it sit for at least 15 minutes. Rinse the dishwashing liquid under cool running water. If any petroleum jelly or Mod Podge remain, reapply the dishwashing liquid. Wash the fabric in the washing machine with warm water and laundry detergent.
Hang the fabric to air dry or put it in the dryer on low heat. Do not dry fabric until the Mod Podge and petroleum jelly are completely gone, as heat can set the stain.
Q: “Hey! Wanting to do some shoe decoupage using paper images. Which shoe types work best (canvas? suede/leather? patent?) and which Mod Podge product is most suitable for this? Needs to be somewhat weather resistant and durable. Thank you for any advice.” -Katie
A: I’ve seen people decoupage on a variety of shoes – including all of the types you’ve mentioned. What I’ve discovered is that the smoother the surface, the more difficult it is to get Mod Podge to stick (there’s probably a coating on the leather, as there is with patent).
My recommendation is to either sand a slick surface or use a spray primer (in white) before decoupage. I recommend the Outdoor or Fabric Mod Podge (if you’re using fabric in the future) with a clear, brush on sealer on the top. This just makes them extra durable, since shoes get so much use. You don’t have to add in the brush on sealer, but I would.
Q: “I was wondering if i could keep Mod Podge in a different container other than the plastic one it comes in? As in glass, foam, or a different plastic? Help pleeeease!!!!” -Sidney
A: Absolutely – you can keep in a glass or plastic container (not foam). But just make sure that the container is airtight. You don’t want anything to get in and contaminate your precious decoupage medium!
Q: “Every time I try to Mod Podge I get bubbles in my projects and it looks terrible. Help?” -Patricia
A: When I first learned to Mod Podge, my project looked like a relief map of the Andes Mountains. I found that one of my biggest problems was not using enough Mod Podge. AND I also didn’t let the bottom coat dry for 15 – 20 minutes before applying the top coat.
The first place to start is with my “Learn to Mod Podge” article here. There are several methods for getting no wrinkles.
One thing to remember is that if a paper is REALLY thin you might not be able to avoid wrinkles. I can’t do napkins or tissue paper without wrinkles. For thin wrapping papers, I have to spray it with a misting water bottle first to get it to work.
Q: “Does Mod Podge go bad?? I have an industrial size container and it looks like it has separated with a thin layer of clearish liquid in top – should I just stir it back together? Thanks!!!” -Jackie
A: I’ve consulted the experts on this question and apparently the shelf life is two years when unopened, and six months when opened. Having said that, you’re welcome to stir yours up and see what happens. I’d do a test first.
If it’s a kid’s project or something that doesn’t have to last forever, you’re probably okay. If it’s a really special item, like a gift or piece of furniture, I’d go ahead and buy a new bottle.
Q: “Can I use a heatless blow dryer to dry my project faster? Will that lessen the quality?” -Heather
A: You can absolutely use a hair dryer on your Mod Podge projects! I definitely recommend a lower setting or if you don’t have multiple settings, keep the hair dryer a bit further back.
You don’t want anything to melt on your project. I use a hair dryer all the time . . . sometimes you just can’t wait! 😮
Q: “I have question about Mod Podge. If it is flammable? The liquid one and the spray one? I wanted to use on Unity candles and they want to burn the candles too.” -Maji
A: Mod Podge is non-flammable – the liquid. I still don’t recommend using it on candles unless it is 1) for decorative purposes only or 2) it’s on the outside of glass and the candle is burning inside. Mod Podge WILL melt.
Now the spray is flammable . . . most aerosols are because of the propellant inside. So definitely don’t use that around a flame.
Q: “Has anyone used the Mod Podge for outdoors? Why is it so thick? I had so much trouble working with it.” -Jessica
A: I have used it many times and the thickness is due to the ingredients that help the Podge be very highly water resistant (pretty much waterproof). A few suggestions: 1) shake the bottle if you can, or try to stir it with a thin piece of wood 2) dip your brush in water quickly before working with it.
Don’t add water to the actual formula, but getting your brush slightly wet before dipping in any acrylic formula (paint, Mod Podge, etc) is something I always do to “get it going.”
Q: “I have a question; I plan on making comic book shoes on a cheap pair of canvas shoes, would I need to use Fabric Mod Podge?” -Jessica
A: Yes – I would use Fabric Mod Podge (Outdoor Mod Podge works too but it’s a lot thicker). Even though the canvas shoes are cheap, I’m guessing you want the shoes to last . . . so the Fabric Mod Podge will help repel water.
Even with the Mod Podge, I wouldn’t wear them and stand in puddles. Get a Mod Podge shoes tutorial here. Enjoy!
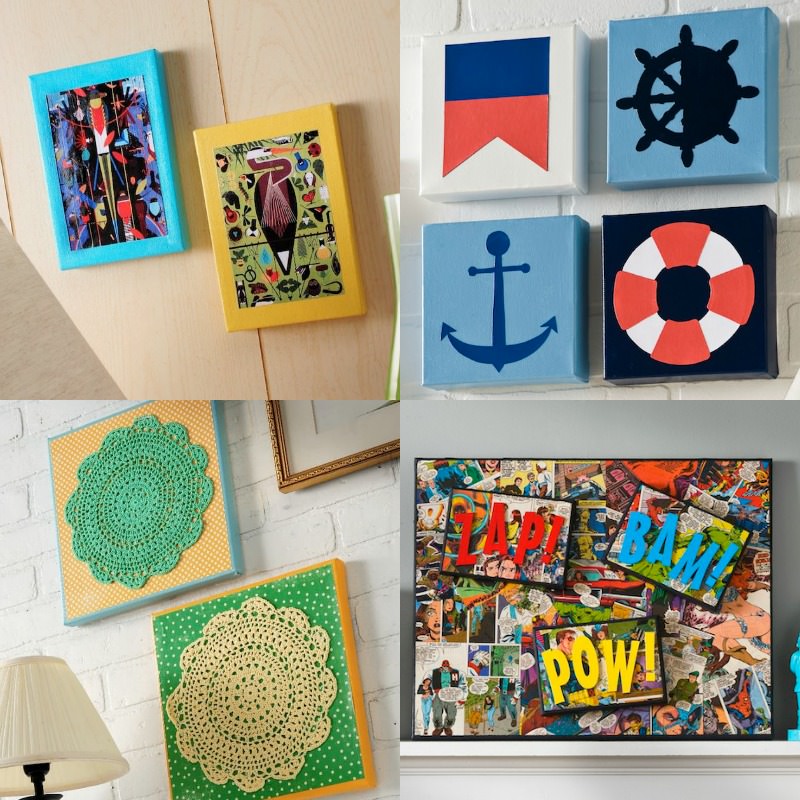
Q: “Is it possible to Mod Podge cut outs from magazines or posters from bands from magazines onto canvas? or is the paper to thin for this and maybe become transparent? My daughter would like to do a project like this so any advise would be very welcome!” -Brigitte
A: Yes, it is possible! There are a few things you have to keep in mind though. The paper is thin, so you need to be somewhat familiar with Mod Podging to make sure there are no wrinkles. Decoupage the cutouts down with a medium layer of MP, then wipe away the excess around the edges.
DO NOT put Mod Podge over the top yet – let the cutouts dry for 15 – 20 minutes. You can use a brayer and turn the canvas over and roll from the inside too to smooth. Once the canvas is dry, then put on the top coat. Good luck.
Q: “Anyone ever paint over a Mod Podge project with acrylic craft paint? How did it work out? Thanks!” -Katie
A: The good news is yes, I have painted over the top of a Mod Podge project with acrylic craft paint! Mod Podge is actually an acrylic product so it plays with well with others just like it.
You’ll just need to let the Mod Podge dry fully. And then you might want to go over the top of the paint again with another coat of Mod Podge . . . but I’ll leave that up to you.
Q: “Can I mix Mod Podge in with Crayola Air Dry Clay to make the clay stronger when it dries? I already use it on the outside to help make it water resistant.” -Mike
A: This is an interesting question that we got in the “Getting Crafty with Mod Podge” group on Facebook. I didn’t know the answer, so Mike did a test and answered the question for us! Here’s what he said: “I kneaded hard coat mod podge with crayola air dry clay until it was easy to mold. Did not crack at all, and is much more solid than just air dry clay on its own.”
Q: “I’m working on coasters and have tested several products, mostly 3 coats of regular Mod Podge and 3 coats of Mod Podge Acrylic. I live in Florida, but it takes around 6 weeks to cure. I bought a couple of other formulas, but thought I would check with you first. Suggestions? Too many coats? They look great . . . just too long.” -Shann
A: So what I would do is use a hair dryer or heat gun between Mod Podge layers (just the regular Mod Podge, not the acrylic). Do it on a low setting and don’t get too close to the project . . . you don’t want to burn anything. But it will definitely help with your cure time.
To a certain extent though, if you live in a humid area like Florida, you will have to wait for things to dry. There’s only so much that can be done about the humidity. But drying like I suggest should help.
Q: “I want to decorate my own wine glasses glitter. What is best to waterproof it? Yet still gives the glitter a shine?” -Elizabeth
A: SO – it turns out there is a Dishwasher Safe Mod Podge! It’s a relatively new product. You can see my article about it here.
You’ll see that the glitter stays shiny even when put over the top . . . though I have to be honest, it IS going to dull the glitter a little. But it’s not going to lose its sparkle, I promise!
Q: “I am making my friend a wooden box for recipes from bridal shower guests. I want it to be the guest book too, and I was going to have guests stamp and sign their thumbprints over the painted wooden surface, then Mod Podge it to seal. From your experience, would this work? Would it smear?” -Audrey
A: I’ve asked some professionals and they say the best things to use are oil based Sharpies (the paint pen kind) and then Stazon ink pads.
You’ve inspired me to do a post about this very thing. I’m going to put together a ton of pens, pencils, etc and see what smears! It’s going to take me a few weeks but I’m excited. So thank you 😀 (that post is here).
Q: “Any ideas or tips to cover a fabric office chair with a prettier fabric using Mod Podge? I am new to this style of crafting and don’t have loads to spend on the project. I have seen covering shoes this way but this is a much bigger surface. Thrift store find!” -Turanga
A: Absolutely! I think you should put fabric on top, and I found this tutorial that should help you.
Though I know the chair in the tutorial is hard and not fabric . . . but the process is still similar. There are three things to consider:
- You’re probably going to have to use a lot of Mod Podge, because some is going to seep into the fabric that is already on the chair, and you want the fabric you’re applying to stick.
- If you use a regular cotton fabric that is lighter, you’re probably going to have to paint the fabric on the chair white first (using fabric paint). This will help with #1, but also, Mod Podged fabric tends to be somewhat transparent. If your chair is red, for example, you’ll be able to see the red through lighter cotton fabric unless you do something first. You might not care about that, but I just wanted to warn you.
- You’ll likely have to use an additional brush on or spray sealer over the top. Mod Podge can be tacky for a bit after it’s applied, so you’d have to wait for a while to use the chair until it fully “cured” – which can happen weeks after it dries. Using an additional sealer helps anyway because it will probably be used a lot, so it will make the chair more durable.
Overall it won’t be that expensive, especially if you use apps for the craft stores with coupons for the items you purchase . . . I don’t ever go to the craft store without a coupon.
Q: “What can I do to fix clear Mod Podge spray clear that I sprayed on chairs painted with paint pens that looks cloudy? Did I ruin the chairs – any help?” -Lil
A: My guess is that it’s probably because you sprayed in the cold – or it’s reacting with the paint pens. My guess is the first. You can bring the chairs into a warmer area and see if it dries and clears up. If not, you’ll have to sand more than likely, and start over.
You can try and paint a gloss over the top but I’m not sure what that to do. What I’m saying is that the reaction has already happened. Always spray in a well ventilated area, but never when it’s too cold.
Q: “I’ve turned into a Dimensional Magic addict, and your tutorials and links are my fix. I’m using it in shallow jewelry bezels, and while I know it’s never going to be as hard as resin, I’m wondering if there’s a way to make it harder. (Bonus points if I can make it harder AND more water-resistant.)
Do you think I could layer some Hard Coat or Outdoor over it? Or Hard Coat and an acrylic sealer? I’ve never used those formulas, so I don’t know if they play nicely together.” -Kate
A: Dimensional Magic is acrylic based so it works fine with other acrylic based products, but the problem is you’re not going to have the crystal clear look of the Dimensional Magic if you paint something over the top. Mod Podge dries clear, but it’s not as crystal clear as Dimensional Magic.
You can try a crystal clear, acrylic based, outdoor brush on sealer (like something you get from the hardware store) and see if it works, but you’d have to do a test. Dimensional Magic is honestly best left on its own!
Q: “I need some advice. I wanted to make a keepsake for my husband by painting one of his childhood toy horses, then using photo transfer put parts of a letter from his mother on it. I’ve tried twice, but when I go to remove the paper, all of the lettering comes off too.
So the finished product after the second try has the words, but because rubbing too much took it off, you can still see the paper edges. So it looks like stickers on it. What am I doing wrong?” -Kristy
A: I’m wondering if it’s the paint that is on the childhood toy – a lot of toys from years ago have a painted coating over the top. Mod Podge photo transfers work best on unpainted surfaces or surfaces that don’t have a coating on top (Mod Podge is fine, it just depends with other coatings). Your best bet might to be refinish the entire toy if it’s possible.
Q: “Any ideas using Mod Podge with plain wooden hangers (like ones that come from IKEA)? Would like to do something to make them not so plain! Thanks!!” -Jennifer
A: I’m excited if not downright thrilled to answer this question! Decoupage on hangers is really fun. Here are just a few suggestions, and I’m sure there are more!
- Paint then add scrapbook paper with Mod Podge
- Glitter (does anything more need to be said?)
- Photo transfer an image
- Cover with washi tape then seal
- Turn into a jewelry organizer
- You can also add a little wooden heart and a bow
Q: “I want to decoupage some photos onto a wooden coffee table top. I have a question . . . I have read different reviews that say photos will be ruined by Mod Podge and one that said to hair spray the photo first and then other reviews say it’s fine . . . I’m so confused and afraid to go further without input. help?” -Maureen
A: If you are using inkjet printed photos, yes, you need to either hairspray or acrylic spray first to avoid bleeding. Laserjet photos are fine to use as is.
“Real” photos on photo paper are also okay to use but you have to use a LOT of Mod Podge. My recommendation is laserjet if you can get access to one of those types of printers, but if you can’t, then spray both sides before decoupaging!
Q: “I have an urgent question. I don’t use Mod Podge. But I am making a collage of photos on a slice of wood from a trunk of a tree for a friend (a surprise). My question, I have all the pictures in place, can I apply a thin layer of Mod Podge over the photos now (not going over the edges) so they stay just exactly where they are?” -Kasey
A: It really depends on what paper you used and how the photos are secured. If the paper is pretty thick, and you secured the photos with spray adhesive (for example), then you are fine to put a layer of Mod Podge over the top (you can even go over the edges).
However if you used a printer and the paper is regular weight (and relatively thin), then putting Mod Podge on the top only could cause it to wrinkle.
Q: “I used an iron on sheet to create a Christmas design sweatshirt with my computer printer . . . I ironed it on but I wanted to make sure it was “sealed” so I got Fabric Mod Podge . . . I spread it on and let it dry 24 hours . . . and it looked great! I put the shirt on and the mod podge is sticking to itself and ruining my shirt!!! I don’t understand why it’s sticking to itself!?” -Susan
Answer: Here’s the official answer from the manufacturers of Mod Podge: Plaid Enterprises: “The project is machine washable in cold water on the gentle cycle or by hand after 72 hours, and line dry. However, Fabric Mod Podge will hold up best on decorative items that don’t have to be washed often.” –source
Q: “I cannot get peel and stick cork here – what can I use to glue cork to the back of coasters?” -Lisa
A: This week I pulled a question from the Facebook page! And it’s a good question. No, you cannot use regular Mod Podge for this purpose – it’s not strong enough (wanted to address that off the bat).
Try E-6000. You definitely want something a bit more industrial. Given that it has an odor/fumes, please use in a well-ventilated area.
What are your burning questions about Mod Podge? Leave them in the comments!


I am doing some diamond painting coasters for Christmas presents and I use the Dishwasher Mod podge. I already put cork backing on the backs of some. Will the Mod Podge hurt the cork or make it slippery? Or am I better off removing the cork?
I painted on a ceramic plate and sealed with mod podge. I checked it at 17 minutes and it was looking so good. Checked again and my plates are now brown/burnt. Can I get the mod podge off without taking the paint off and reseal?
I used modge lodge to glue fabric onto my bible. however, there are a ton of spots that dried dark and i can’t find anything about how to fix it. i’ve done this project with another bible before and it turned out fine. how can i fix it?