
Learn how to paint mason jars with these tips and tricks! I’ll show you how to distress, paints that work with the jars, and more.
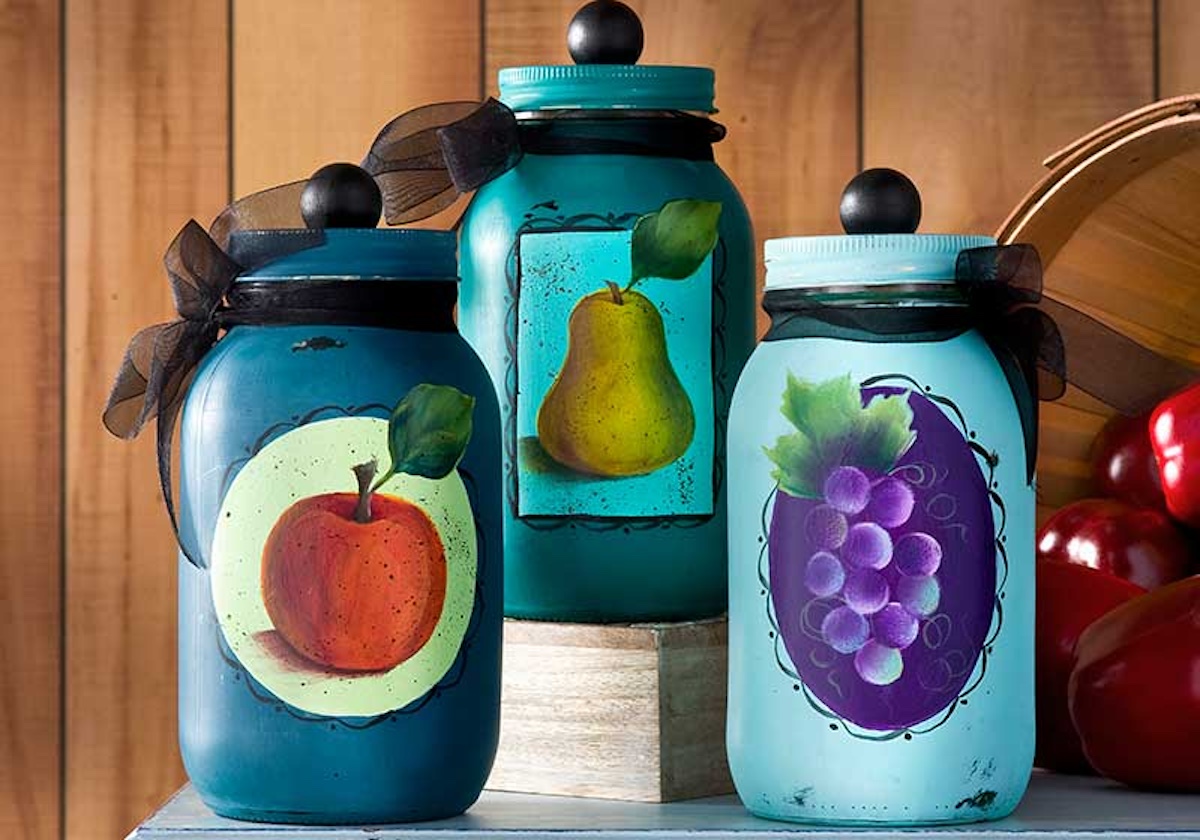
If there’s one thing we love around here, it’s mason jar crafts. In particular, we’re really fans of painted mason jars. If you’ve never crafted with jars before, let me tell you something – you’re missing out.
A painted glass jar is a great craft project for many reasons. Glass jars are really easy to work with, especially for beginning crafters. If you’ve never made anything before, this is a great surface to start your crafting journey.
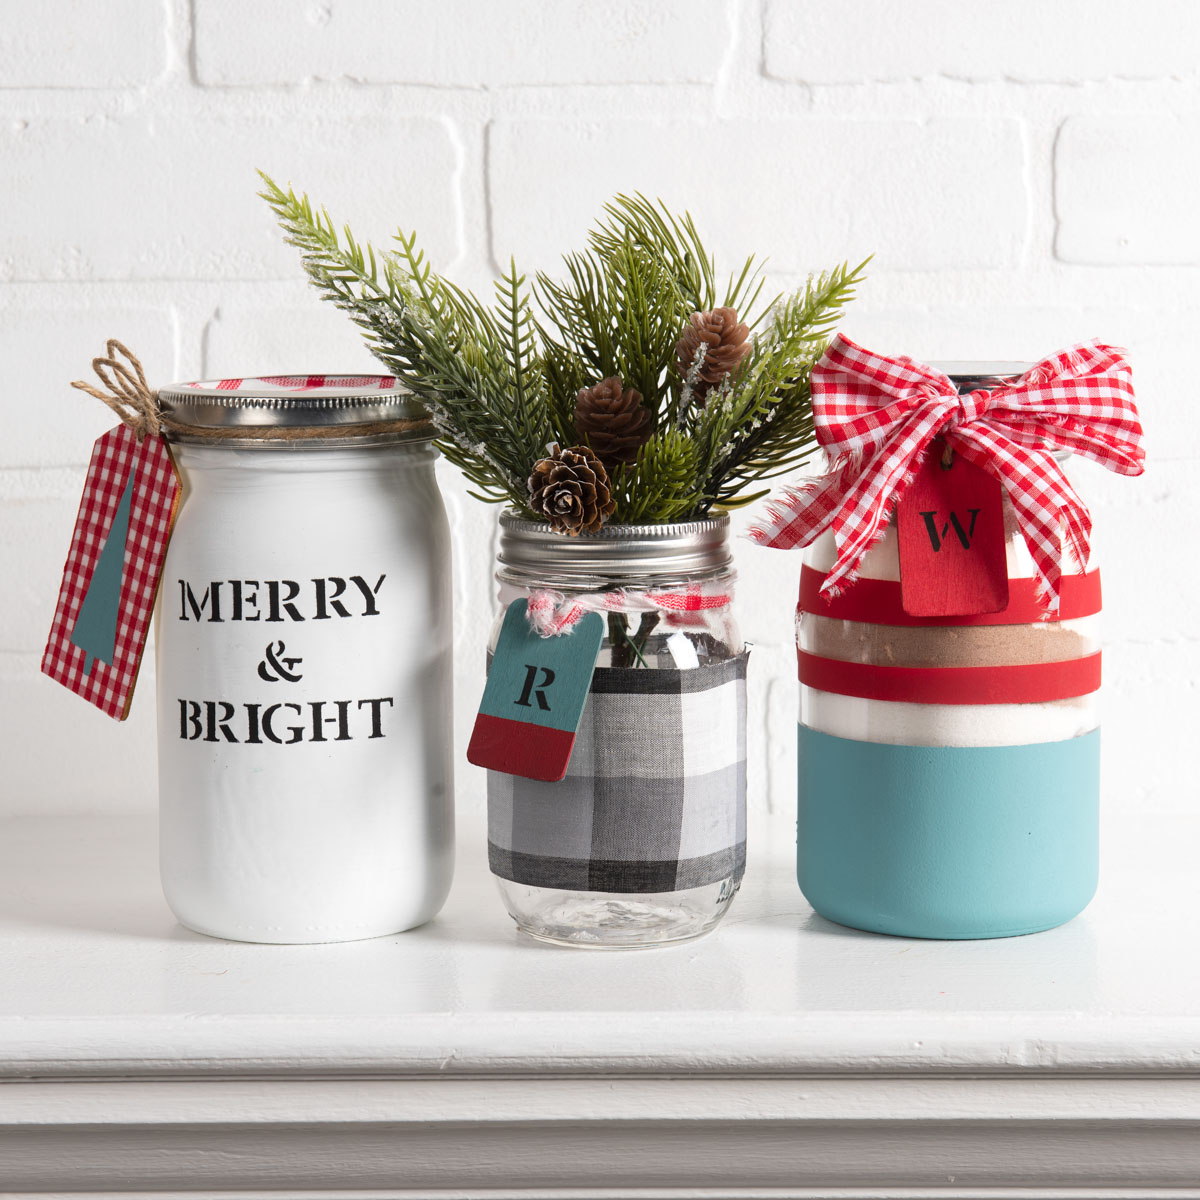
Secondly, these jars make amazing home decor, gifts, and decorations for a birthday, baby shower, wedding, and just about any other celebration you can think of.
Finally, the whole thing is cheap. Not cheap looking, but cheap costing. Because you don’t really *have* to use a mason jar. In fact the glass in your recycles – baby food jars, spaghetti sauce jars, etc. – are all contenders for a little coat of paint.
If you do need to buy jars, you can buy them in bulk. Which is nice when you’re making gifts!
Let me be blunt – once you learn how to paint mason jars, you’re going to be hooked. Your house will be full of them, and everyone will get one as a gift. Don’t say I didn’t warn you!
Mason Jar Painting Tips
In this post I’m first going to show you what you need, then explain the process. Then I will answer FAQs about painting mason jars. Finally, at the bottom of the post, is a printable tutorial card if you’re interested.
Supplies You’ll Need
Here are the basic supplies you should have on hand. The sandpaper is only required if you are planning on distressing.
- Glass jars
- Paint colors of your choice – see the different types you can use in the question below
- Mod Podge or other sealer
- Rubbing alcohol
- Cotton balls or cotton pads
- 150 to 200-grit sandpaper
- Paint brush
Basic Process
You’re going to do four things to bring your jars from plain to fabulous: 1) clean and prep, 2) paint, 3) sand (if you are distressing), and 4) seal. Really, that’s all there is to it. It’s just a matter of knowing how to do these things and the best paints to use.
I discuss the rest below, but for the painting portion, you can do one of two things. Paint the outside by using a brush or spouncer. Use thin coats and let dry between coats.
OR you can paint the inside by swirling the paint around until coated. Pour the excess back into the bottle. Then let the jar dry upside down on a piece of wax paper to drain the excess. Move the jar around frequently.
Important Note: For any glass jar that is going to hold water or other liquids, paint the outside only. Also none of the paints are food safe, so you’ll want to paint on the outside only of jars with unwrapped, edible gifts inside.
How do you prepare the jars?
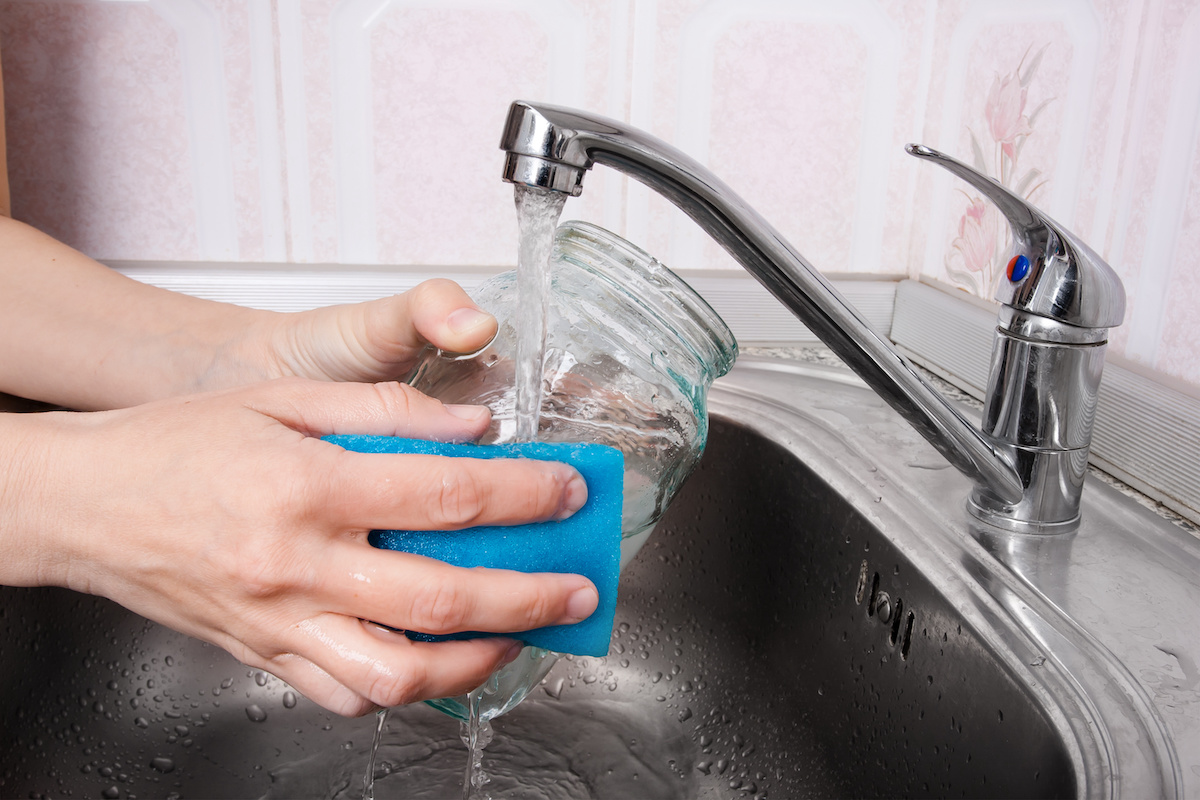
No matter what paint you decide to use, you’re going to need to begin by removing labels and cleaning. Now, I’ve used mild soap and water and that works fine. BUT I find that the best chance of getting your paint stick comes with using rubbing alcohol.
You’ll want to take a cotton swab or pad and clean the outside of the jar. This step is crucial if you want the paint to stick.
You are removing oils from fingers – oils that repel paint. That is why you are cleaning the jars in this manner.
If you’re going to paint the inside instead of the outside or in addition to, you can swirl the rubbing alcohol around the inside of the jar and then pour it back into the bottle. You definitely still need to clean the inside if you want the paint to stick.
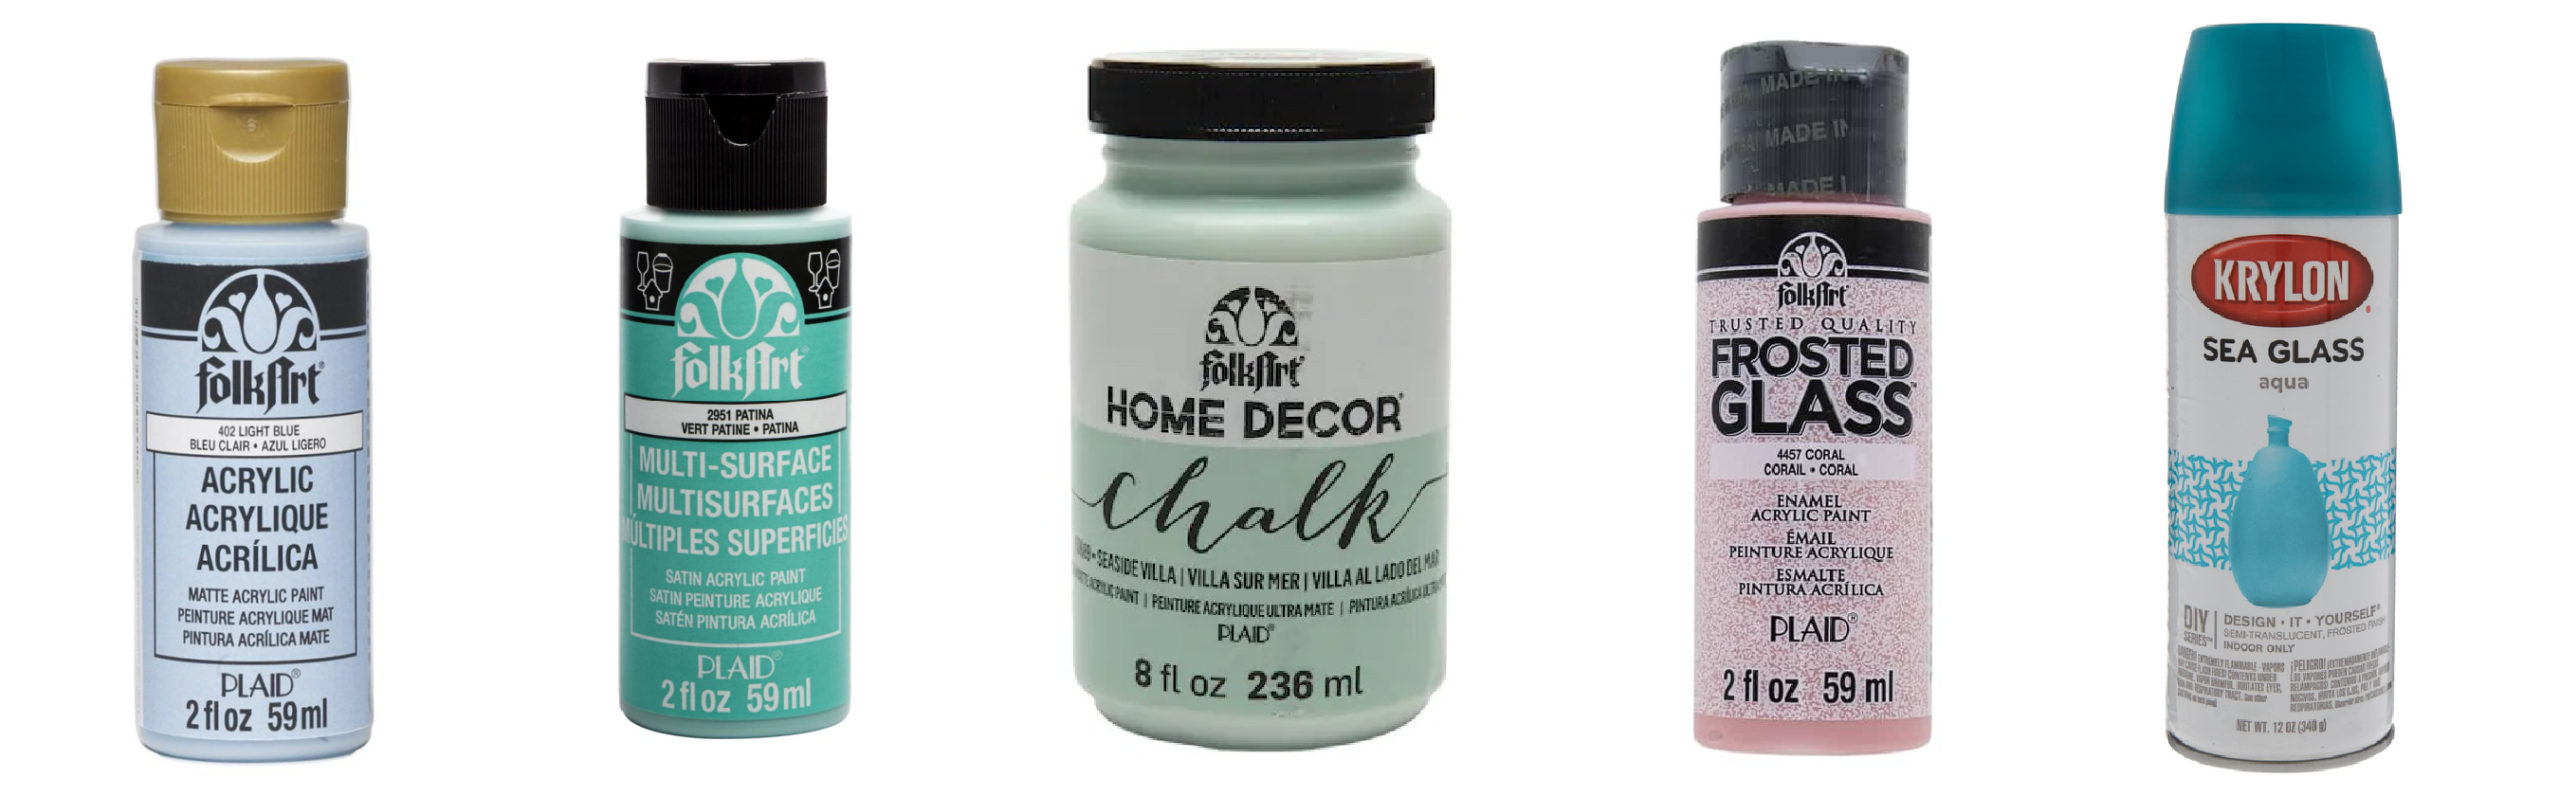
What is the best paint to use?
Read carefully – you’ll need to prime for some of these options. Remember that glass is not porous like wood. It’s hard to get paint to stick sometimes.
You might need to prepare the jar so that the paint doesn’t scrape off.
Acrylic Craft Paint (not multisurface)
Regular acrylic paint can be used, but it doesn’t stick well to glass without primer.
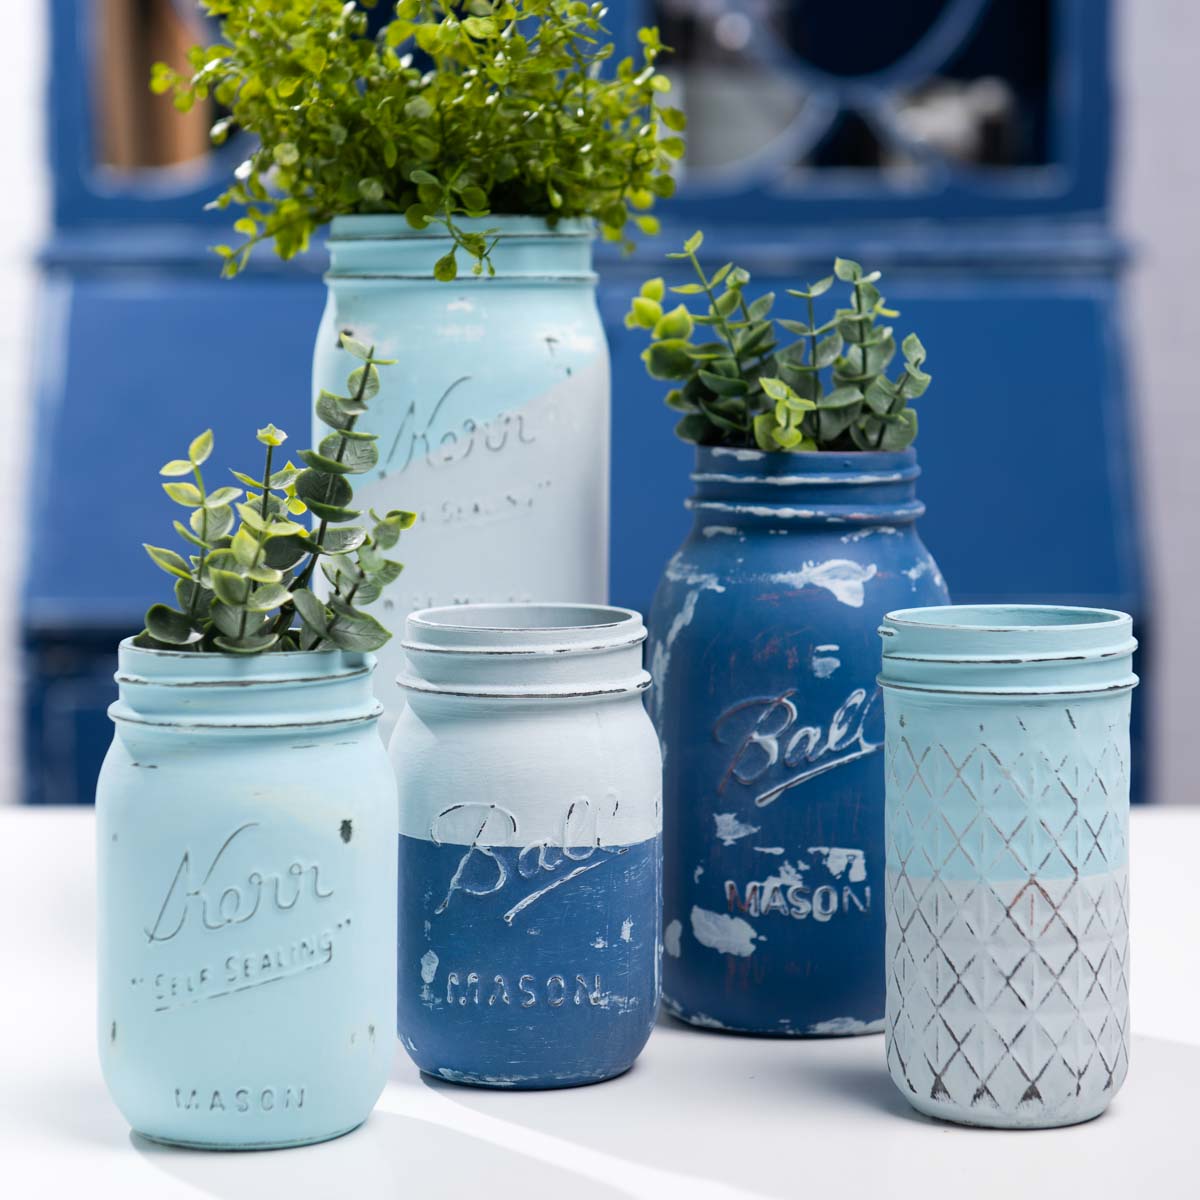
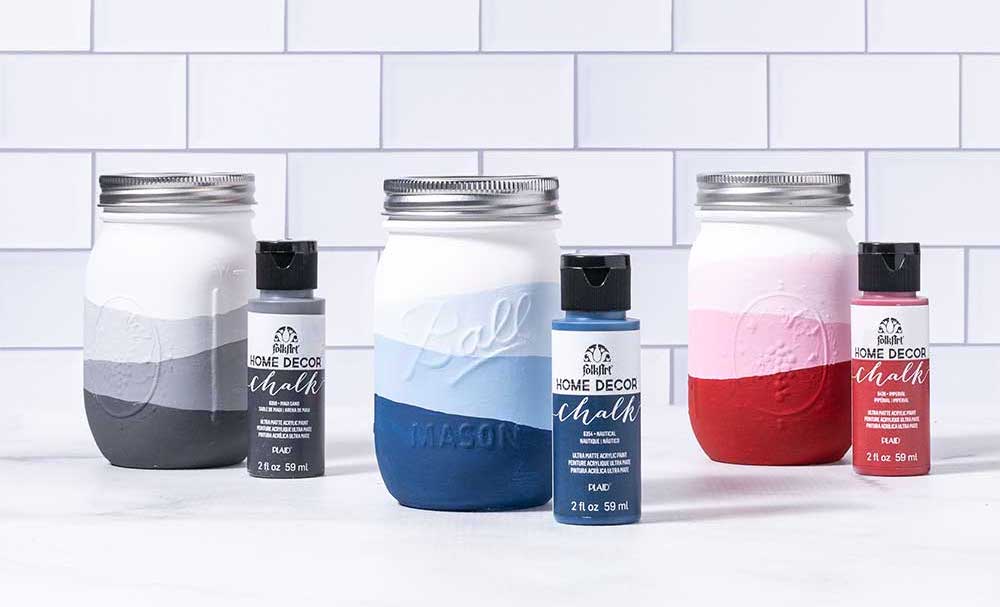
Chalk Paint
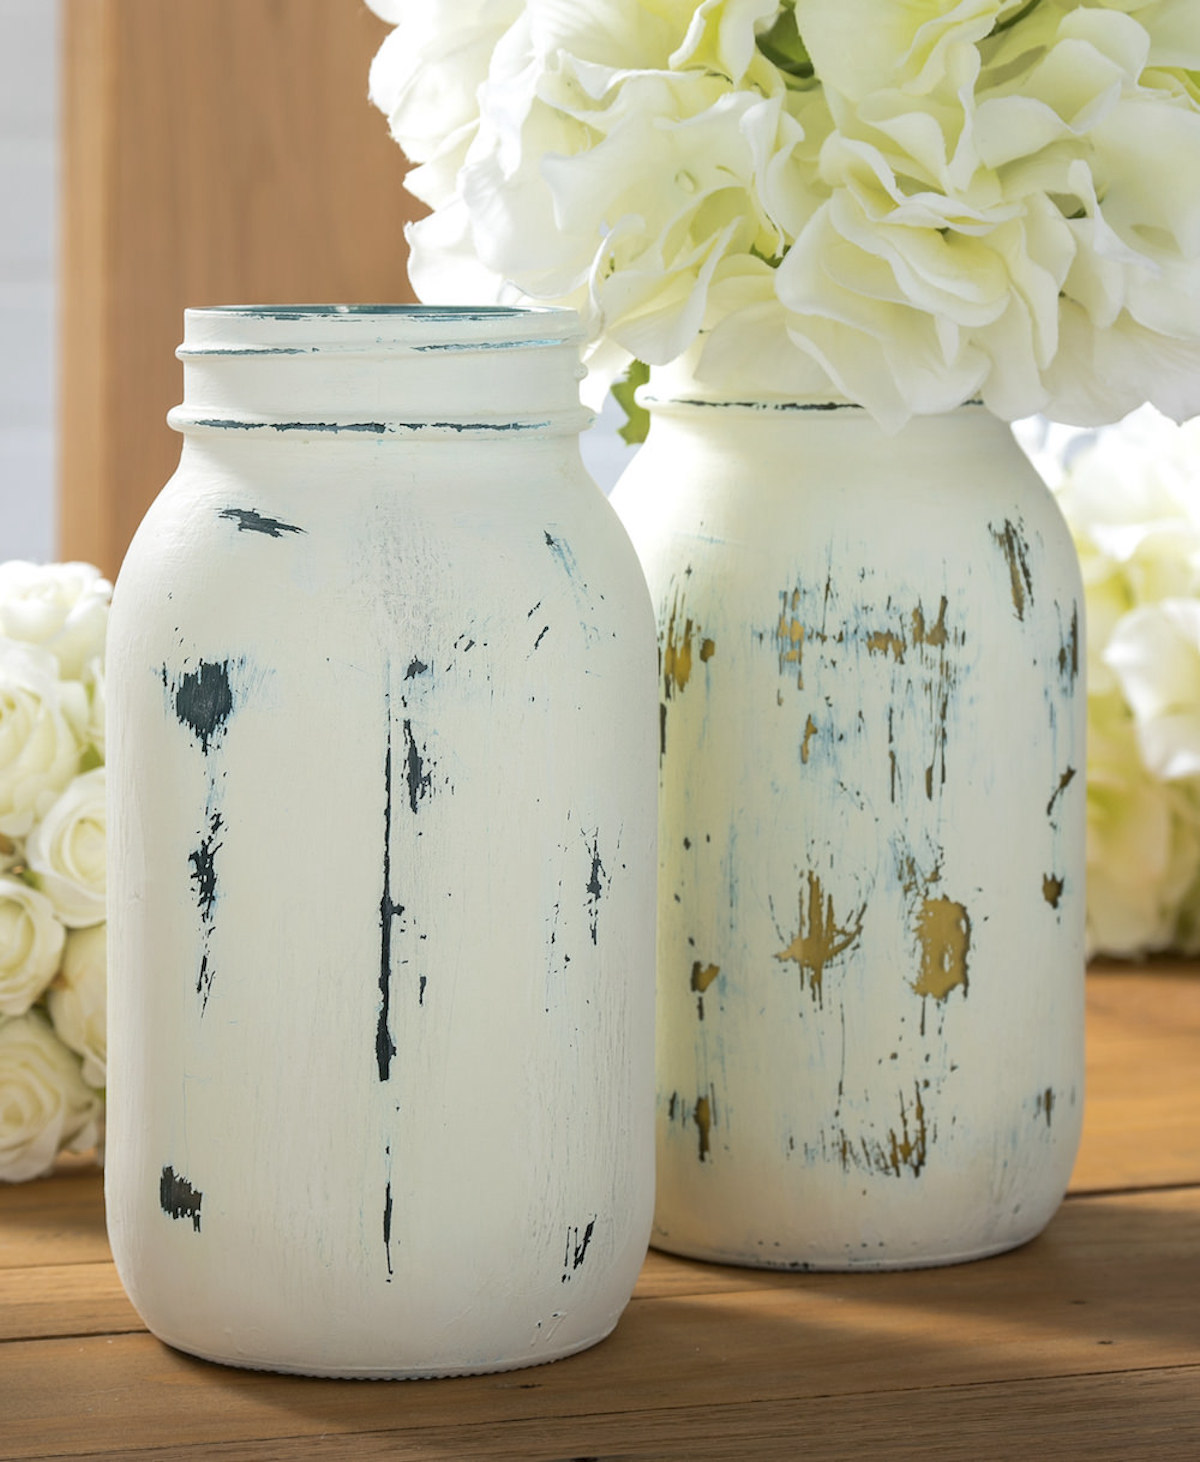
What I love about chalk paint is that you can paint it directly on glass without a primer. You’ll still need to clean the jars, but then you can paint the chalk paint right on the glass. It’s perfect for distressing and layering. Just let the first layer dry completely before adding the second layer.
Glass Paint
Made specifically for glass. Once you paint it on, you’ll likely bake it to cure. This usually involves baking for 20 – 30 minutes at 350ºF. Make sure to read the label for curing instructions.
Multi Surface Paint
This type of paint is a combination of regular craft paint and glass paint. I find this type of paint is finicky depending on the type of glass you’re working with.
I always prime before using multi surface paint, though technically if you follow the curing instructions you shouldn’t have to. All I’m saying is it’s my experience that using a primer with multi-surface is better.
Spray Paint
The great thing about spray paint is that it gives your most even finish on glass of any of the paints. Many people love the fact that there are no brush strokes. This is the most high maintenance in terms of application though, and can’t be used in inclement weather if you spray outside.
But there are some really, really cool spray paint finishes out there, so don’t make any mistake – this is an awesome option.
Do you need to prime mason jars before painting?
It depends on the type of paint that you use (see above), and sometimes, how cheap the glass is . . . . Let’s just say, it never hurts to prime your mason jars. Your mason jar won’t get ruined if you do prime, but there’s definitely a risk of paint chipping off if you don’t prime.
Our recommendation for priming mason jars is Rustoleum Spray Primer. It’s our favorite!
Can I spray paint a mason jar?
Yes. Make sure to read the label to see if your spray paint is appropriate for glass. If not, you may have to prime.
To spray paint, give the jar several light coats at about 10 inches away. Wait at least 15 – 20 minutes between coats on a dry (NOT humid) day. Do 2-3 coats then touch up later that day or the next day.
How do you apply the paint?
You can use either a soft bristled paint brush or a spouncer/sponge. There’s no right or wrong answer here, it’s just a matter of preference.
I like soft bristled brushes, but I don’t mind brush strokes at all. Having said that, a lot of times I use glass paint (especially stained glass paint) with a spouncer for a more even finish.
Obviously spray paint doesn’t require a brush, and that’s why some people love it best. They absolutely love the smooth finish. Remember, several light coats is better than a few thick ones.
How do you get paint to stick to glass jars?
It’s all about cleaning the glass properly (with mild soap and water and preferably rubbing alcohol) and then priming if you need to.
How do you seal chalk paint on glass jars?
You don’t have to seal chalk paint on mason jars, but you can with your good old friend Mod Podge! Tou can also use clear wax made for chalk paint, or a clear spray or brush on finish like Minwax polycrylic. Just keep in mind that the finish of the sealer will be the finish of the final project.
How do you distress chalk paint on mason jars?
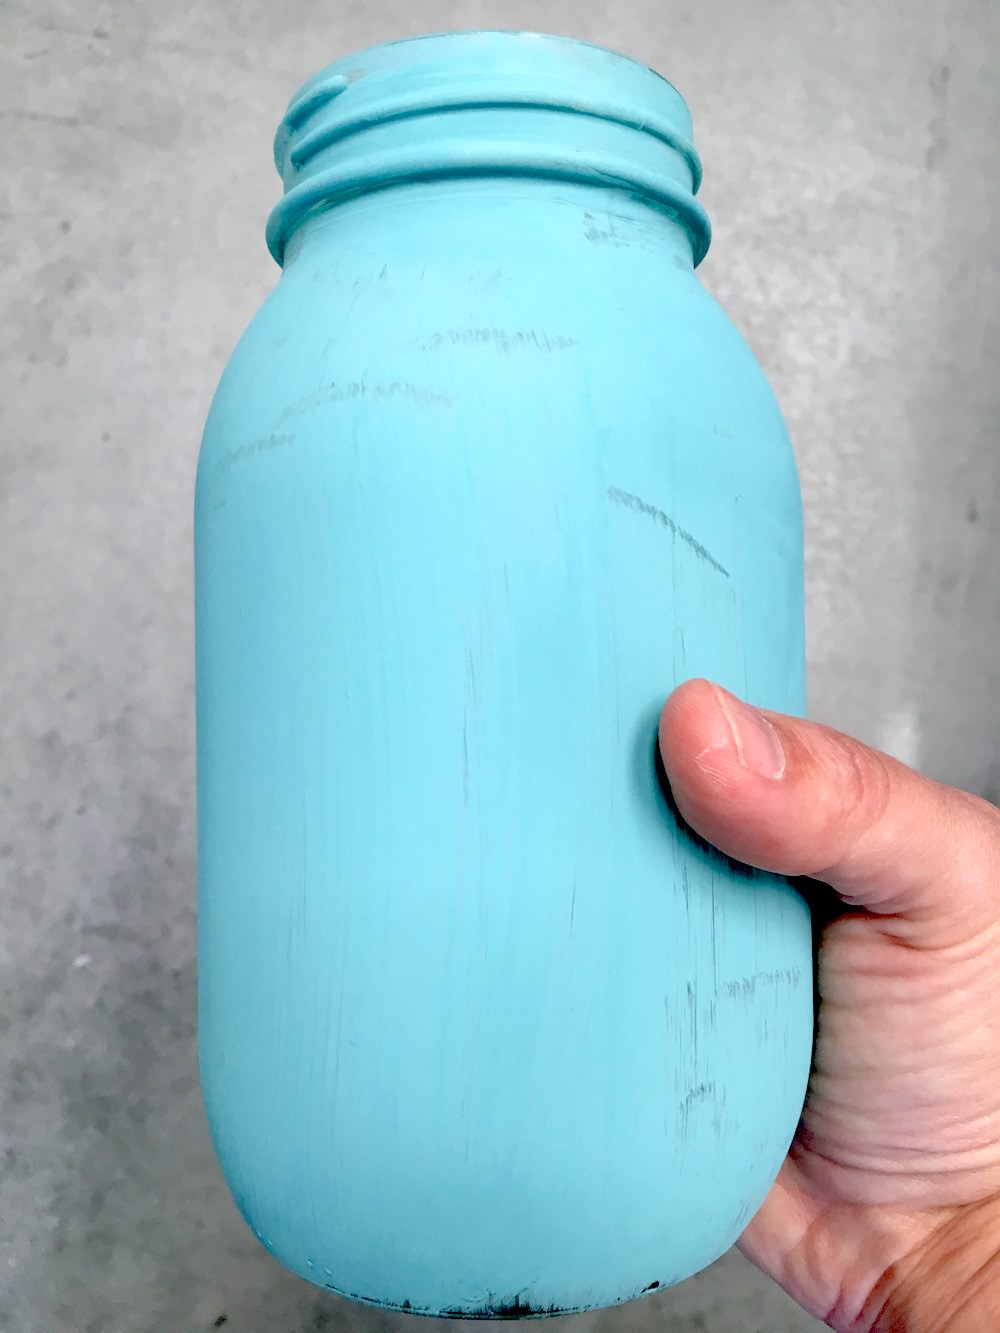
You’ll apply a layer of paint to the jar and let dry. Then paint a second coat onto the same jar and let dry completely. Using a piece of sandpaper, sand in random areas on the mason jar to reveal the color below. Sand more for more distressing.
How do you permanently paint glass jars?
There are two ways I know of that provide a more permanent paint finish on a glass jar. First is using the glass paint and following the bake to cure instructions. Sometimes you can even wash the jar in the dishwasher, depending on the paint you use.
The other method is using spray paint. Let dry overnight and then put in the oven for 20 minutes on a low heat setting. This sets the paint and makes the item pretty waterproof (many readers swear by this!).
How do you waterproof painted mason jars?
There are waterproof sealers available at your local home improvement store. Having said that, I love VHT Engine Enamel. Be sure to observe proper sealing instructions for any sealers you use.
How do you make colored mason jars?
You can dye glass with Mod Podge and a few drops of food coloring (stir it in). You can swirl it around on the inside of the jar or paint/spounce it on the outside.
There are also spray paints available that make a pretty cool beach glass looking finish on jars. I recommended checking them out.
Now that you know how to paint mason jars, you’re ready to try one, right? Take a peek at the tutorial below – save or print it. Then let me know what you think in the comments!

Paint Mason Jars
Equipment
Materials
- Mason jar(s)
- Chalk paint
- Sandpaper
- Mild soap
- Rubbing alcohol
- Cotton balls
- Mod Podge or other sealer
Video
Instructions
- Wash your mason jar with mild soap and water or clean with rubbing alcohol and cotton balls.
- Paint your first chalk paint color on using a paint brush. Let dry.
- Paint the second chalk paint color directly over the first color. Let dry.
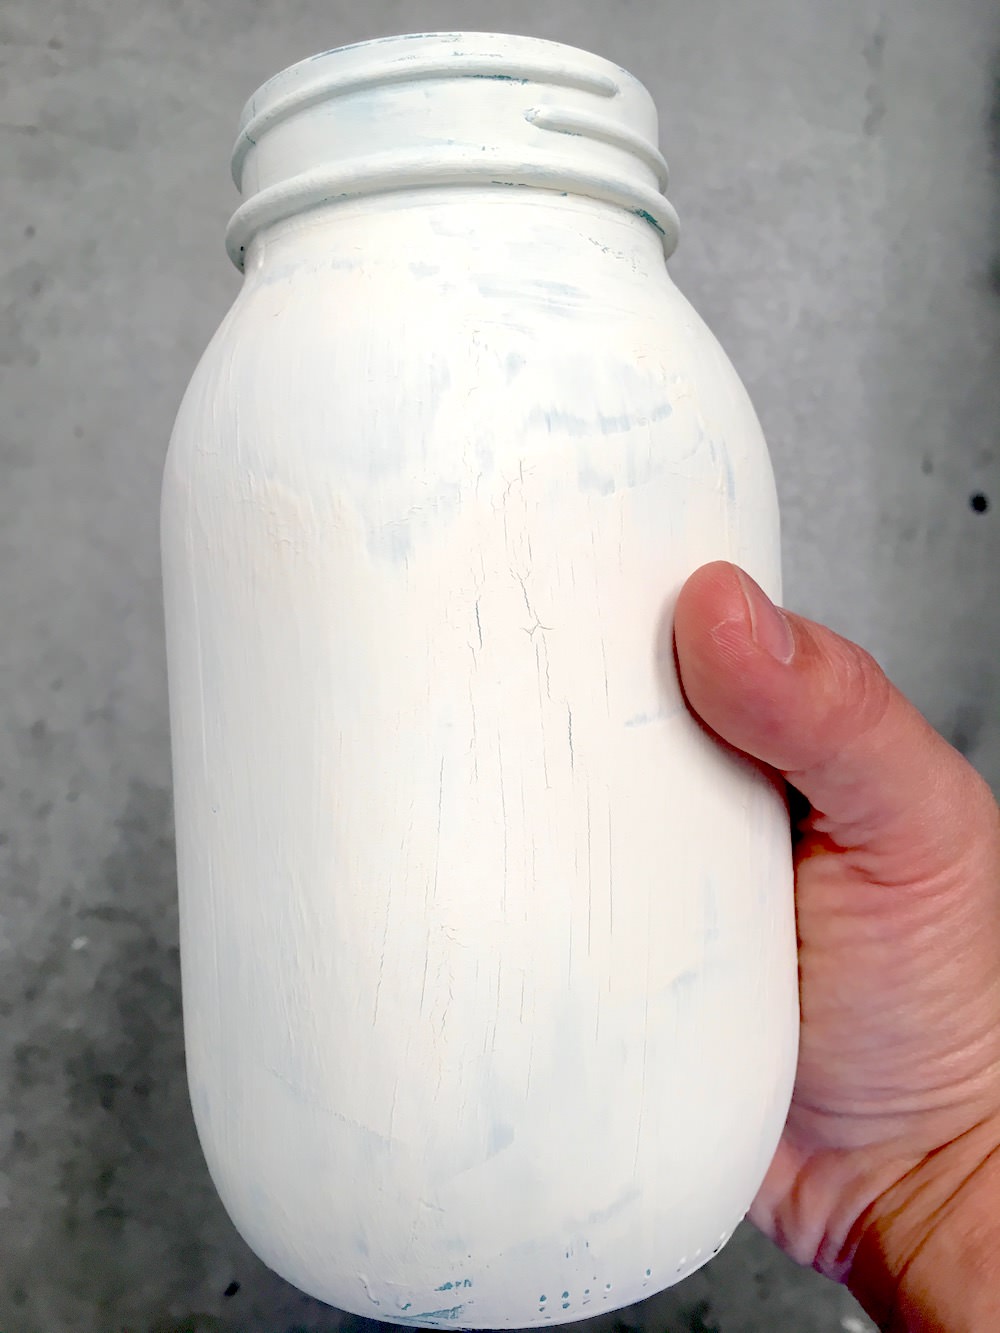
- Use the sandpaper to sand away random areas on the side of the jar. Paint a coat of sealer over the top and let dry completely before using.
If you enjoyed learning how to paint a mason jar, I think you’re going to like these other craft ideas! Take a peek:


Why does it matter That the paint on the outside of the jar is not food safe for food inside of the jar? If the paint is outside of the jar it never comes in contact with the food inside the jar.
So, why is this mentioned as some kind of precaution? Paint doesn’t Seep through the pores of the glass or something
Am I missing something here?
It’s mentioned because although you know that, not everyone knows that. People who have never crafted before (which is a large percentage of my audience) have no idea if paint seeps through glass so they are just making sure!
good morning, i am wanting to use the chalk paint and then before putting the mod podge on, want to add a photo that i made on computer. how would i do this and would it stick if doing the sand paper routine? thanks
Oh so thankful to have found this blog! I’ve been trying to figure out how to do this, correctly! Thank you!
What is the prices for doing two toned/colors on the jars, like the one that is blue on bottom and white in top? I have jars that I am wanting to paint for my son’s wedding this month.
Usually people paint one color, let that dry, then paint the other color. Honestly spray paint is easiest in these situations. Spray paint lighter color, let dry, tape off, spray the bottom (or top).
How do I seal a glass jar after painting with alcohol ink so that it is dishwasher safe?
This person here used Dishwasher Safe Mod Podge: https://tasteofpurple.com/blogs/learn/how-to-seal-alcohol-ink-on-wine-glasses
Honestly? Never tried it – alcohol ink on glass that is!
Hello, I have painted more than 75 jars then I baked in the oven as recommended but the paint isn’t staying adhered when the jars touch each other. What can I do to make the paint stay on these jars I have painted already? I have 2000 jars to paint still. Can you please help me?
Hi Pam. It sounds like the paint isn’t fully adhering to the jars. What should happen is that the jars should be prepared by cleaning them. Then they should be painted (with glass paint), cured, and dried without touching. Can you join our FB group to get more tips: https://www.facebook.com/groups/craftywithmodpodge
You can leave once you get your answer, but I think it would be helpful.
I am having problems with the chalk spray sealer causing bubbling. I allow my paint to dry for 24 hours before dealing with a light coat of spray sealer. Sometimes it’s beautiful and sometimes it bubbles up all over the jar and looks horrible!
Hi Joy! I’m not sure what chalk spray sealer is. Can you send me an email and let me know which products you are using together (with the brands)? Thank you!
Thank you for the in depth blog post – you cover lots of important topics on how to paint mason jars! Keep up the wonderful work!!
Thank you for the kind words!
Hello. We are excited to do this for our ladies craft event. After applying chalk paint and distressing we would like to paint on some flowers but wondering what kind of paint to use on top of the chalk paint and also wondering how long it takes the chalk paint to dry. Thank you for any help. Love your blog.
Hi Lori! Thank you for the kind words! You can use either another chalk paint or any craft paint (like FolkArt or Apple Barrel) on top. I would make sure that it’s glass friendly or multisurface in case people paint the flower colors directly on the glass. Regular craft paint will just chip off glass. Chalk paint takes 20 – 30 minutes to dry depending on the climate. BUT just grab a few hair dryers and keep them about 9 inches from the surface and you’ll dry the jars in no time. Enjoy!
@Amy, awesome! Thank you so much!!