
Painting glass is easier than you think! Learn how to prepare and paint glass for your craft projects – this is the complete guide. Check out my four step process, plus what you can do if you make any mistakes.
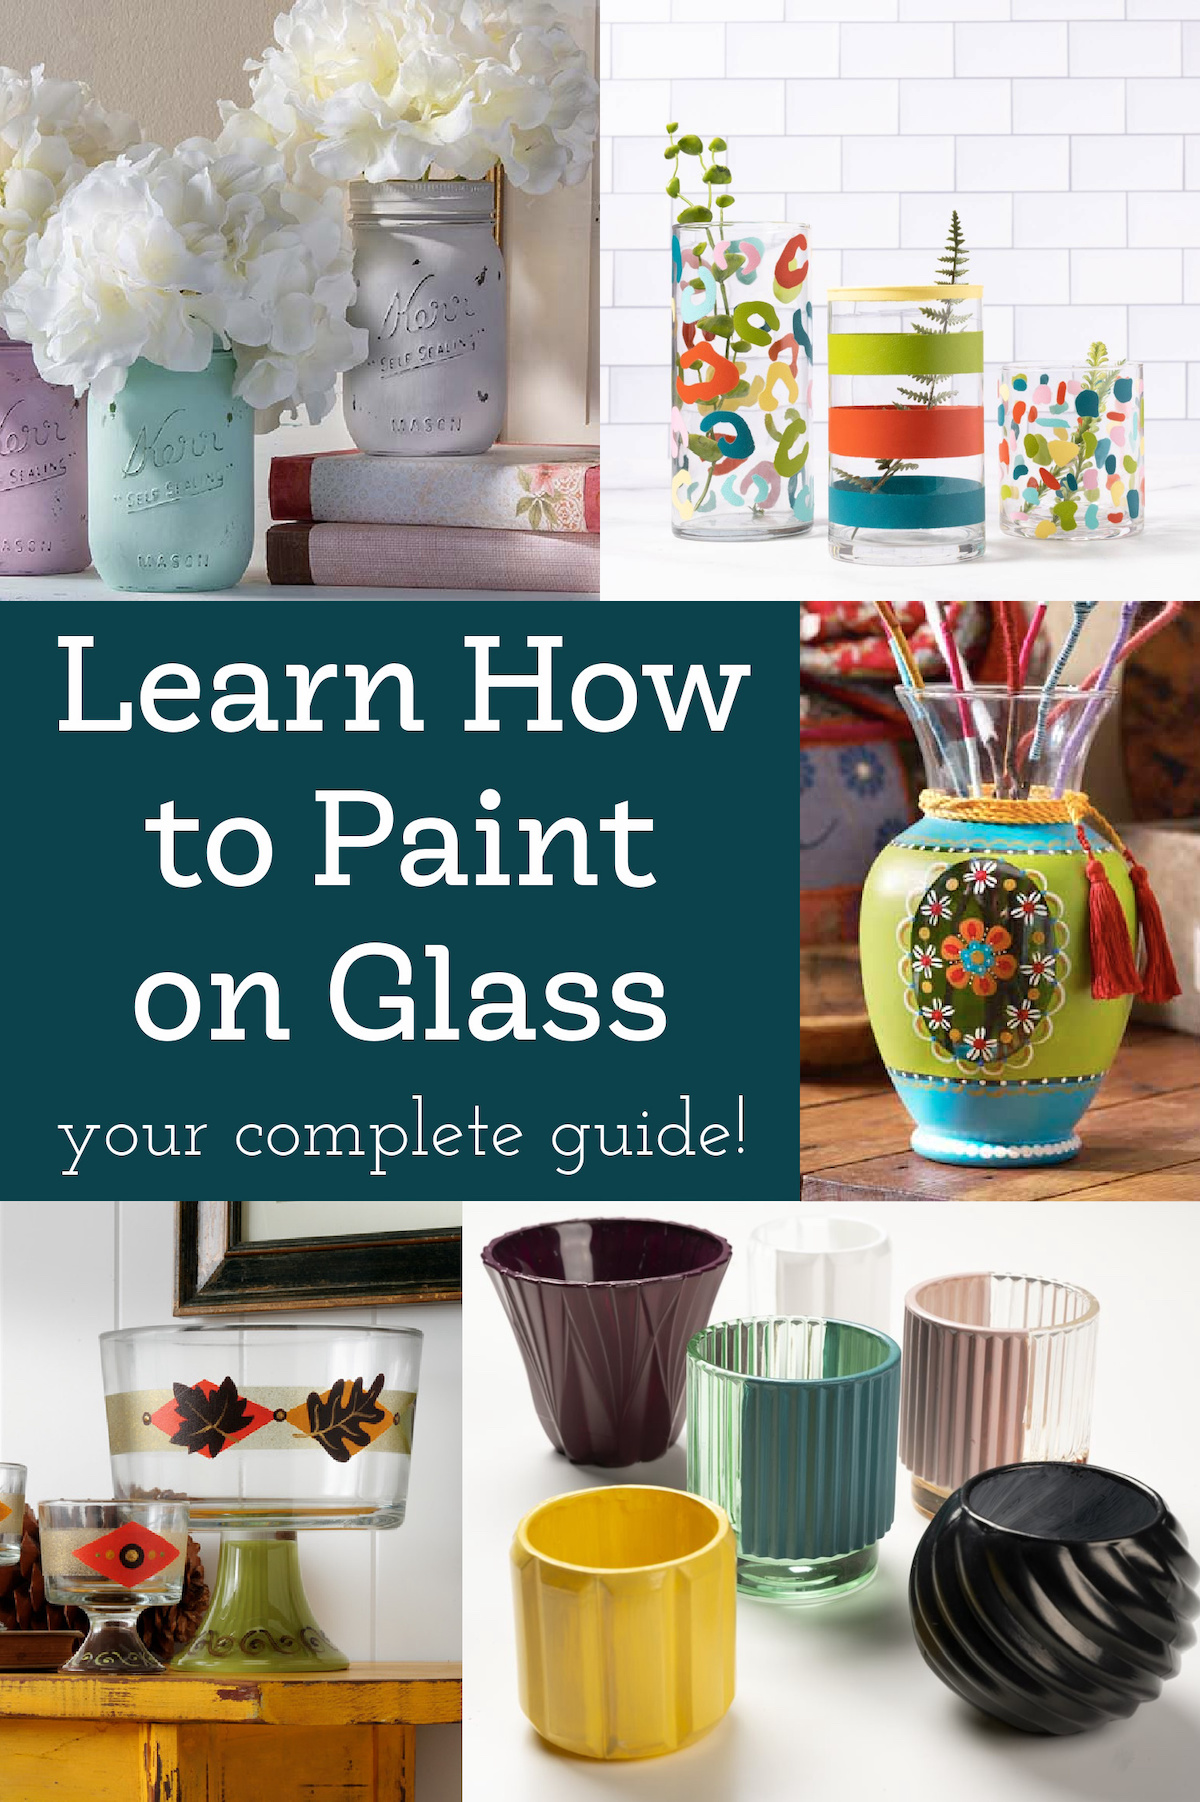
Glass painting is HOT! Not only is it fun, it’s easy for beginners. Painting glassware can be intimidating, so I’m going to show you how to do it in four easy steps. I’ll give you preparation tips, painting ideas (at the bottom), and curing + care instructions.
Let’s get started!
How to Paint on Glass
As you can probably guess since you are reading this post: YES, you can paint on glass. Here are the four steps you’ll go through to achieve project success:
- Prepare the Surface
- Tape off the Area or Pattern
- Paint the Glass
- Cure According to Instructions
If you’re painting the entire surface, you might not even need step 2, so this potentially could be a three step process! Before you begin, you’ll need to gather your supplies.
Supplies You’ll Need
Glassware is available in craft stores and discount stores in a wide variety of shapes and sizes (I love getting it from the Dollar Tree!). Obviously that’s the first thing you need to get – something to paint! You’ll also need:
- Rubbing alcohol or white vinegar
- Glass paint – I’ll discuss in the section below
- Paintbrushes – soft bristled
- Water bin
- Paint tray
- Foam daubers or spouncers (optional)
- Stencil tape (optional)
- Stylus (optional)
Everything on the list above is pretty straightforward, but I want to discuss the brushes and paint a little bit more so you know what you’re dealing with.

Types of Brushes
There are several types of brushes and tools that accomplish different purposes.
Soft Bristled Brushes
These are regular paint brushes, however the bristles are softer than normal brushes. The reason for the “soft bristles” is to reduce brush strokes when you paint.
Once you start painting on glass you’ll see that this particular surface tends to *really* show brush strokes. A softer brush can help with this.
If you can’t find anything that says “soft bristles”, read the package and see if it says the brushes work for glass. I’ll be honest; the more expensive brushes seem to work best and these are the ones I take great care of.
I use these brushes to apply a basecoat of Enamel paint, chalk paint, or add details (with smaller brushes).
Spouncers
Spouncers are basically a sponge at the end of a stick. They are great for applying paint in an even application across a surface. I tend to use these for translucent or frosted paints, like FolkArt Frosted Glass.
When you spounce glass paint on, it dries with a bit of texture (you’ll see what I mean if you use them). That’s why I like using spouncers with the thinner paints. They even out more than acrylics.
Daubers
Daubers resemble spouncers, but they are a more dense foam and not as long. I LOVE daubers for applying polka dots with relatively crisp ages. They are also great for small areas like wine glass stems.
Stylus
Great for adding small dots! Simply dip into a “fresh” puddle of paint and touch the surface. Reload for same-sized dots. Paint descending sized dots with one load; simply continue dotting until all paint has been removed.
NOTE: Be sure when painting dots that you carefully set your tool down straight and lift straight up. If lifted at an angle, painted dots will smear.
Try this: once your tool is loaded, touch the surface, carefully twist in a circular motion, then lift to remove. The extra twist will ensure a full even circle.
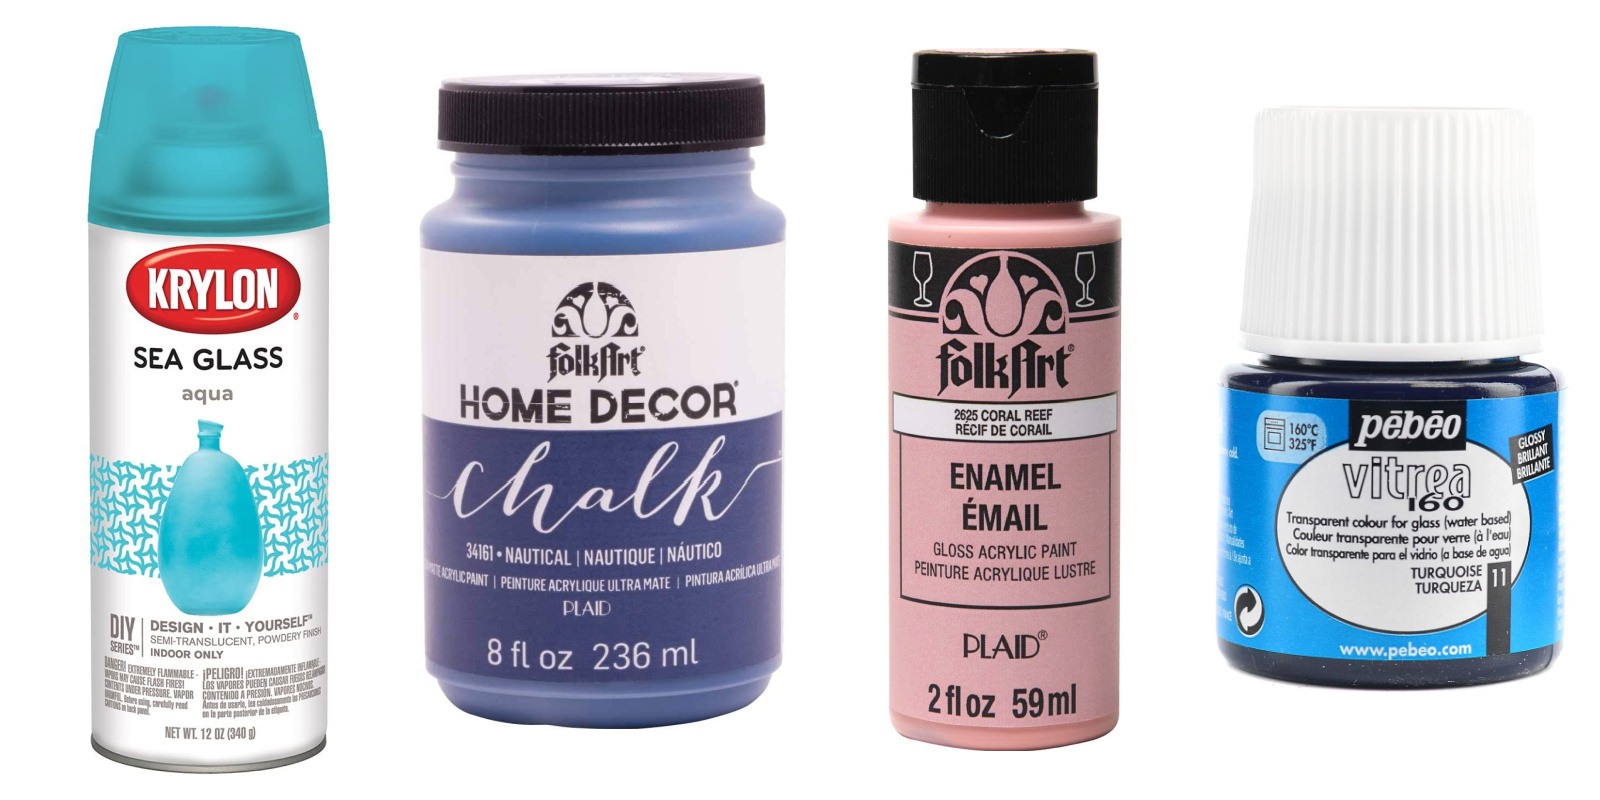
Types of Glass Paint
Enamel Paint
There is a specific type of acrylic paint formulated for glass painting and it will clearly say on the label. There should also be curing instructions.
There are several brands, but the one I typically use is FolkArt Enamels. It is available in craft stores and shop.plaidonline.com in many colors. When cured, it is top-shelf dishwasher safe.
Chalk Paint
I LOVE the finish of chalk paint! It’s a no-shine, smooth finish that adheres really well to glass.
Spray Paint
There are a variety of spray paints suitable for glass, and you can get them in transparent, stone, metallic, solid, and many other types of finishes.
Just make sure to read the can and spray in several light coats. You can typically paint on top with either chalk or enamel paint if you want to add to the design.
Paint Pens and Markers
There are plenty of paint pens and markers on the market; for example, Sharpie oil based. You’ll draw with a paint marker as you would with a regular marker, so there aren’t really any instructions here. You can also draw over other painted designs – just let the paint dry first.
Food Coloring
A final way to color glass – food coloring and Mod Podge. However, those aren’t as permanent as the other types of paint above. Learn how to Mod Podge on glass here.
Now that you’ve selected your supplies, it’s time to go through the steps of painting on glass! You’re going to start with surface preparation and go from there. Here’s how you do it.
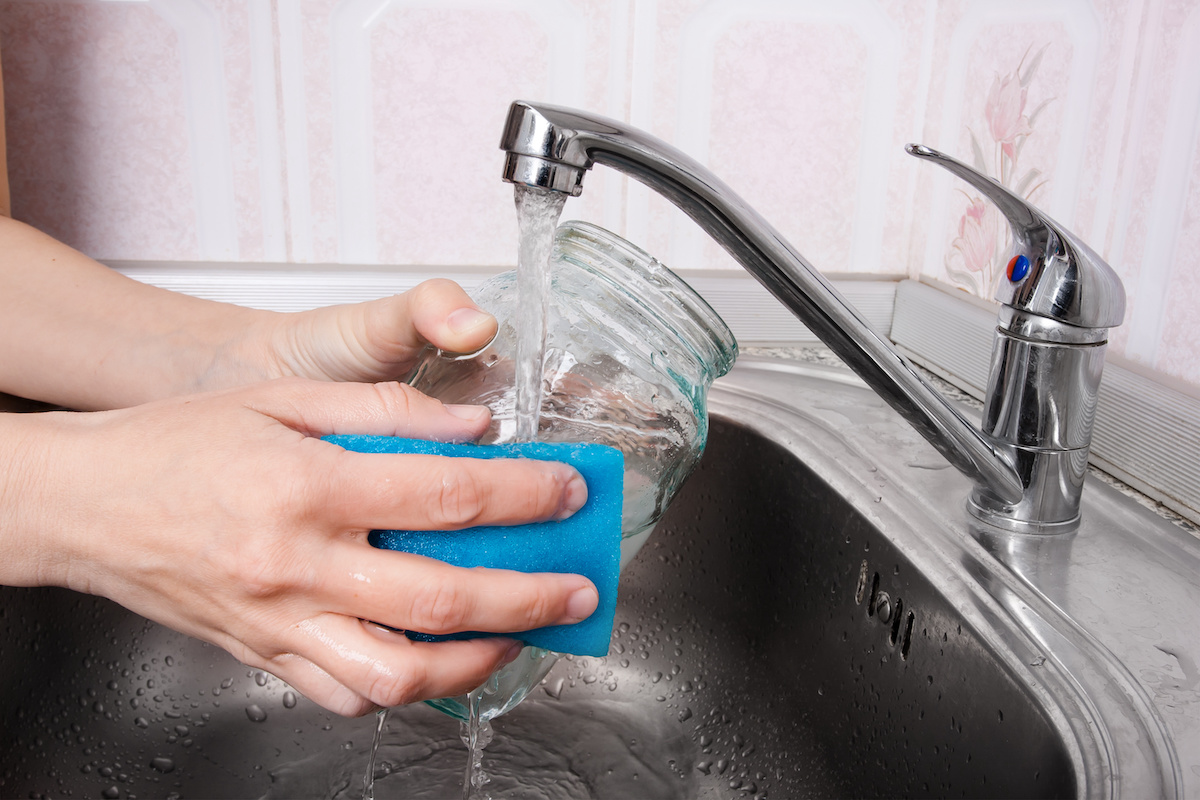
Surface Preparation
This step is crucial if you want the paint to stick. You are removing oils from fingers – oils that repel paint. That is why you are cleaning the jars in this manner.
Thoroughly wash in warm, soapy water to remove dirt, dust, and grease film. Then rinse in warm water and let it dry.
Next, dampen a paper towel with rubbing alcohol or white vinegar and wipe the stemware to ensure it is clean of any remaining soap film. Set aside for 15 minutes to air dry.
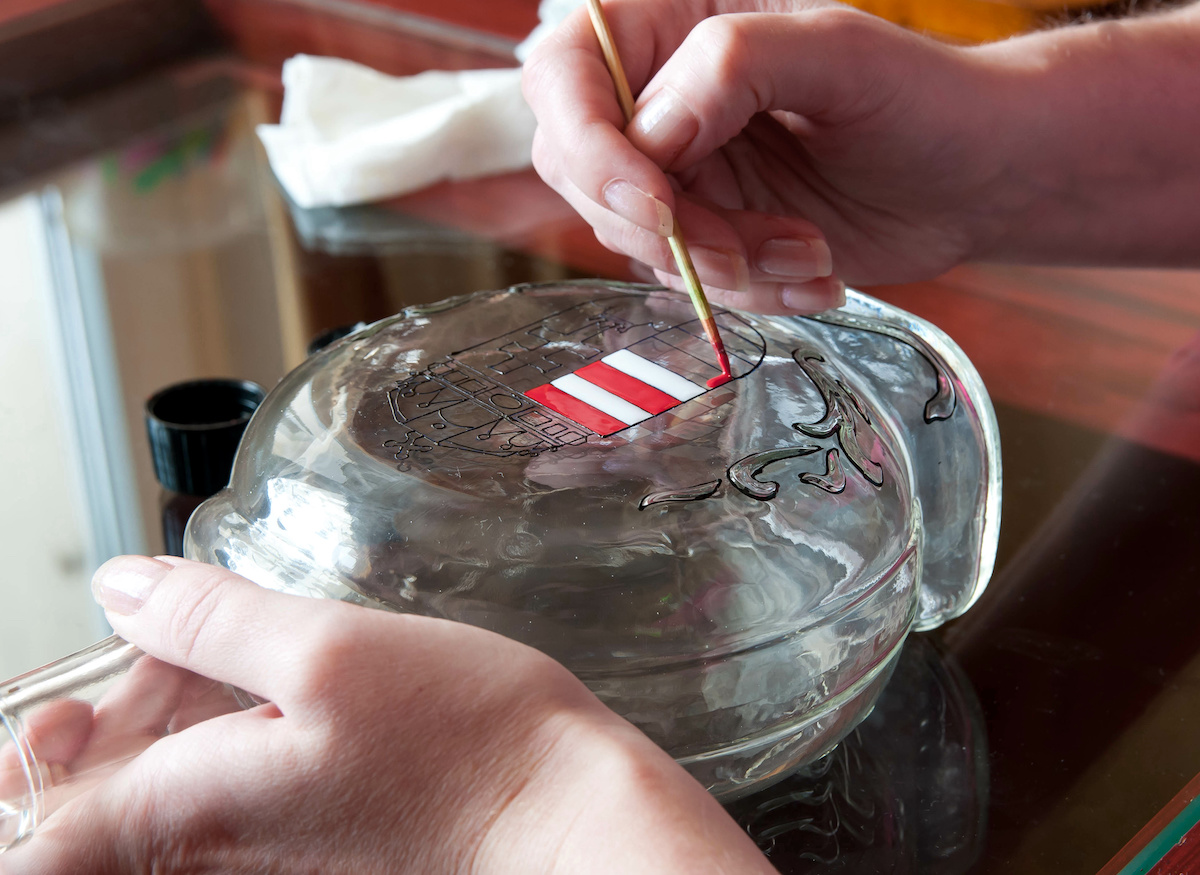
Taping Off the Area or Pattern
If you aren’t painting the entire jar one solid color, you might want to use stencil tape to tape off an area (like a square or other shape). Other options are adhesive stencils or stencils cut with a Cricut machine.
In all these situations, you’ll want to smooth your tape or stencil down thoroughly on the glass surface.
Stripes: Painting stripes is easy and create interesting backgrounds. Paint freehand stripes using your flat brush. Or you may also use stencil tape to mask an area to be striped. Apply paint using a flat brush, dauber, or spouncer.
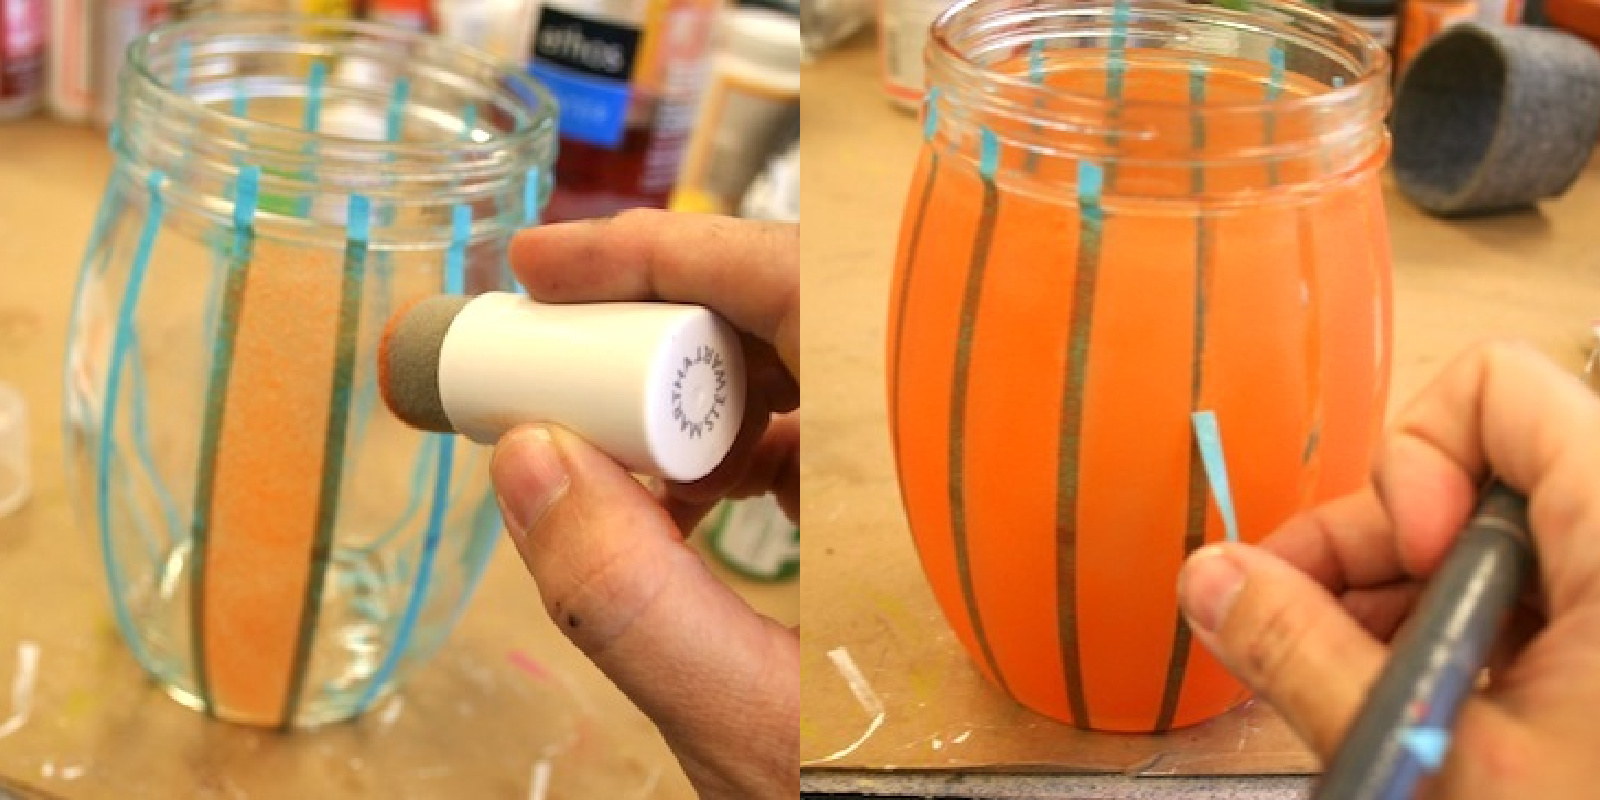
While wet, carefully remove tape. Caution: do NOT allow the paint to dry with tape in place; paint may lift when tape is removed later. Hint: if you need to clean an edge after removing the tape, scrape using your craft knife when paint is dry.
As far as patterns, you’ll want to tape those to the inside of the glass instead of transferring them like you would on wood.
Just place your pattern inside the glassware and tape in place. If a pattern is repeated around the glass, secure several patterns. Voila, you can now see the pattern through the glass!
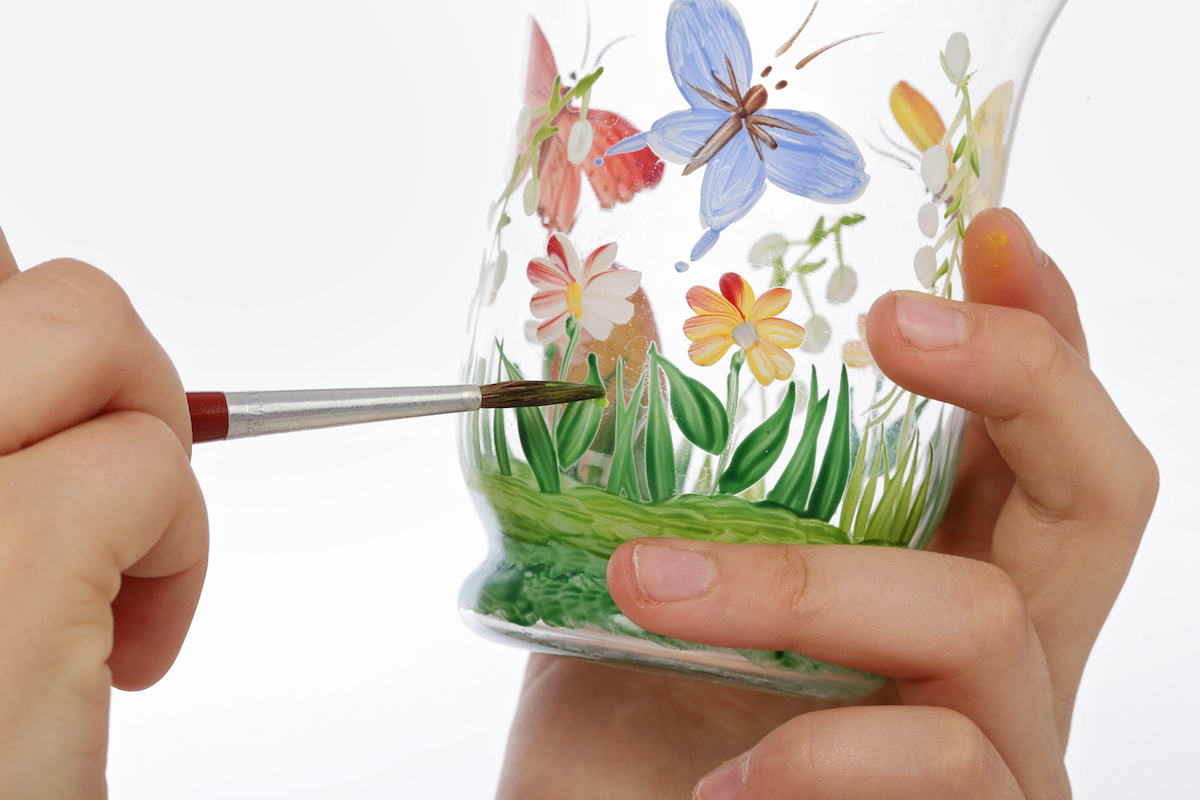
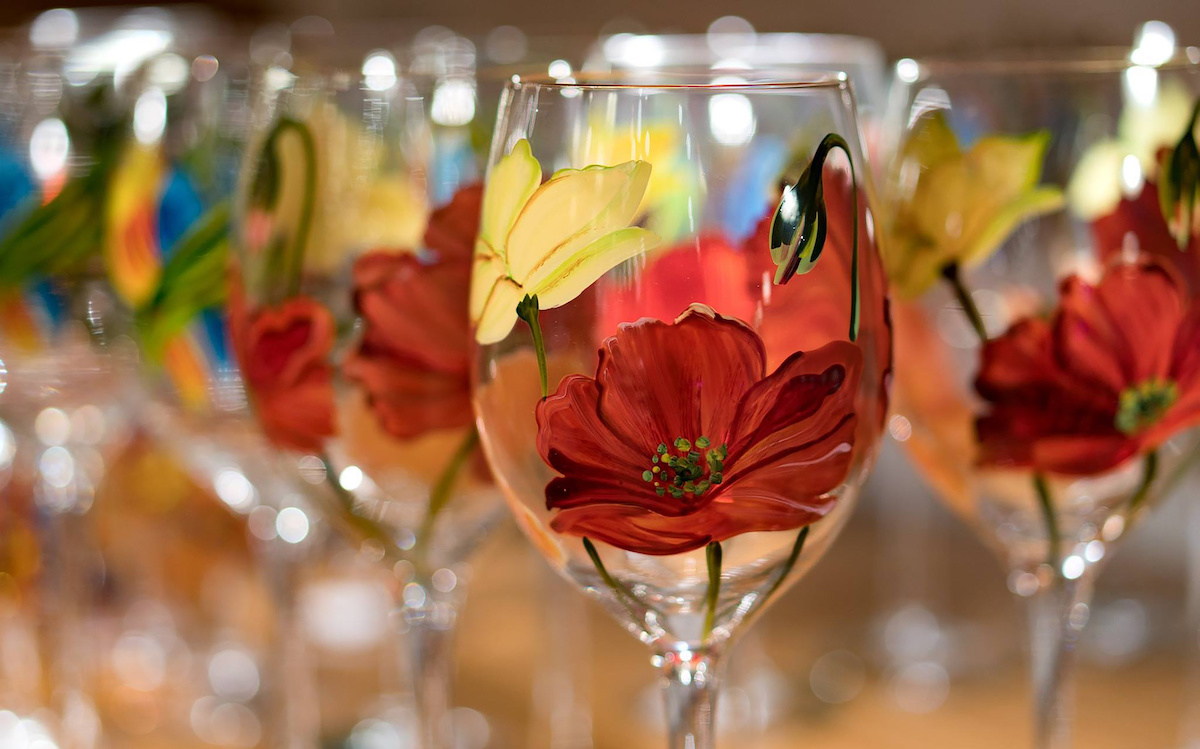
Painting Your Design
The way you paint your design is often determined by your brush or tool, which I’ll go over below.
Typically you’ll start with a basecoat of Enamel or chalk paint on your glass.
Chalk paint tends to show the least amount of brush strokes in my opinion. You can see what chalk paint looks like on mason jars in my post “how to paint mason jars.” It provides a really smooth finish.
Here’s the process I go through:
- Dip the end of the brush into your paint. Don’t overload the brush – keep it on the bottom 1/3 to 1/2.
- Start brushing on the glass. Expect to do a thin layer for your first layer. Enamel and multisurface paint will look thin when applied, but you’re going to build up layers.
- Don’t keep brushing over the same areas when wet. You’ll end up removing what you just painted.
- Paint in layers, letting dry between layers. It may take 3 – 4 coats to cover the glass.
- Add details with smaller brushes, a stylus, or daubers. You can layer the paint but it must be dry before you do so.
Painting on glass is very similar to painting on wood, but I find that it shows more brush strokes. There is nothing that can be done to remove the brush strokes, however if you continue to layer the paint thinly, that will help reduce them. I also find they reduce as the glass cures, especially in the oven.
A spouncer can be used too! This helps with brush strokes (there aren’t any!). However, it does provide a different look on the glass, so I suggest giving it a try and see what look you like best.
Remember – quality of brushes matters. I find that higher quality brushes give higher quality results.
Other Tips
- Remove any stencil or painting tape from your glass before paint dries.
- Experiment with the tools. For example, you can use daubers or small spouncers to paint wine stems, sometimes more easily than a brush.
Once you’re done painting, you’re ready to cure your project!
Curing Glass Paint
ALWAYS read the bottle to get the instructions for your specific paint. Having said that, here are some general guidelines:
Drying Times: Glassware should be thoroughly dry before handling, at least 24 hours.
Curing Instructions: FolkArt Enamels should be cured prior to using; there are two recommended methods:
- Air Dry Method: Air dry the project for 21 days before using.
- Bake Method: Place your painted glassware in a cool oven. Set the oven temperature to 350ºF and bake for 30 minutes. Note: Glass must heat gradually with the oven to avoid breakage. After 30 minutes, turn the oven off; let the glass cool completely in the oven. Set aside for 72 hours.
Care Instructions: Once your painted stemware has been cured, it can be hand washed in mild soap and water or dishwasher cleaned on the top shelf.
NOTE ABOUT CHALK PAINT: it is not washable on glass and there are no curing instructions. Just don’t wash it – it’s used for decorative purposes only.
Troubleshooting
What if my paint doesn’t stick?
Make sure you have cleaned the glass with rubbing alcohol and that you are using the right kind of paint.
You can always spray a clear layer of acrylic spray sealer down on the surface before painting. Some kinds of glass are stubborn and this spray helps. Otherwise, get a new piece of glassware and call it a day.
How do I remove paint from glass?
Before it has cured, you can remove it by washing it off in the sink. If it has dried securely to the glass, use a razor blade, craft knife, or other type of scraper to remove it. This is also how you will remove excess paint before you cure your glassware.
Let me know if you have any questions in the comments! Don’t forget to check out the video before you leave.


If I need to paint several thin layers of enamel paint and let it dry between the layers, how will I remove the painters tape that I’m using to create straight line without it pulling up the several layers of paint that have dried on it? Thank you!
Thanks for the instructions on how to paint on glass. I’m going to try it with my clients.
Very good article for beginners. Thanks
This was a great tutorial. I love the look of painted glasses!