Use glass paint to create these mason jar lanterns with a faux beach glass theme. These look gorgeous with tea lights inside!
Skills Required: Beginner. You’ll be applying sea glass paint to the jar with a spouncer – I’ll show you the easy to way to do it.
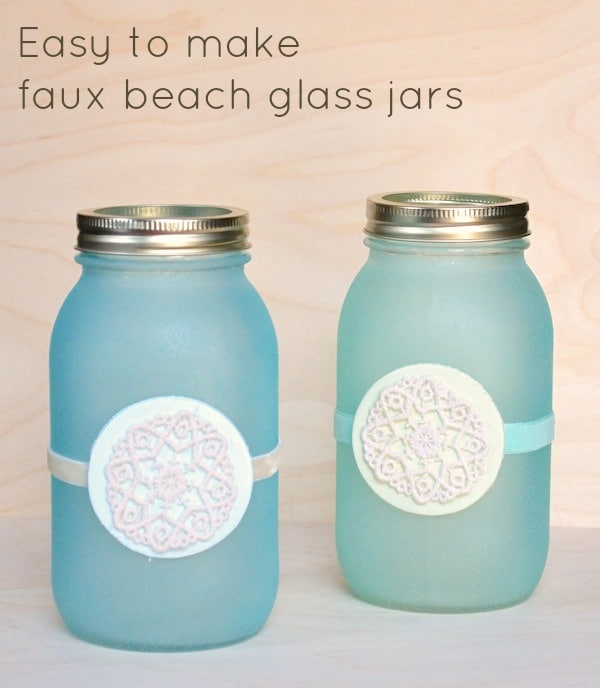
I don’t know about you, but I love a good challenge. With warm weather coming right around the corner, I decided to challenge myself to make some beach decor using what I already have on hand. I wanted to decorate candle holders that reminded me of what it feels like to be at the ocean.
Sometimes with crafting I find myself overwhelmed with all of the possibilities, especially with my ginormous craft stash with never ending supplies. This month I’m focusing on budget friendly items with a summer theme or feel. I decided a great place to start was with some mason jars.
The good news about this mason jar craft project is that you’ll be able to customize it beyond summer. You’ll see. But before I show you how I made it, I’m wondering if you like beach glass too:
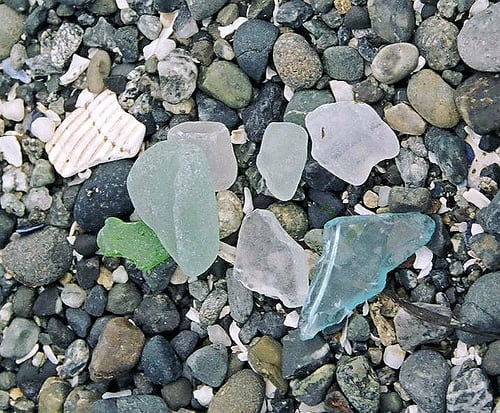
I’ve seen it on the beach many times. If you didn’t know (because I didn’t), beach glass comes from discarded bottles, plates and other items thrown into the ocean.
The sea naturally breaks, tumbles and smooths the glass – and then it washes onto the shore. It’s pretty cool and I’ve seen it in tons of colors; I particularly love the blues and greens.
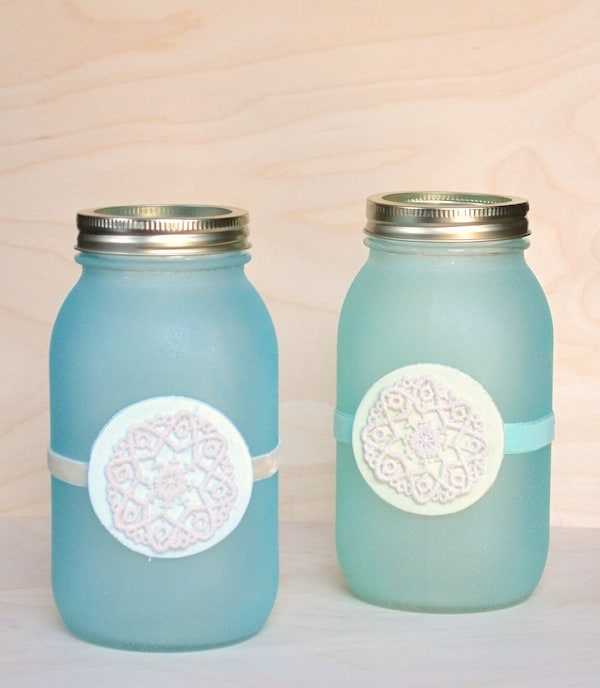
For my project, I decided to mimic the look of beach glass on two mason jars and make painted mason jar lanterns for my place. If you’ve never used glass paint before, now is your opportunity. I’m a huge fan of glass paint! Get my glass painting tips here.
And I want to note that with any of the supplies, you can make some substitutions that can save you money – and will make this project practically free!
Sea Glass Mason Jar Lanterns
Gather These Supplies
- Glass jars
- Glass paint – I used Martha Stewart translucent glass paint in Surf and Beach Glass
- Acrylic paint in coordinating colors
- Mod Podge Dimensional Magic
- Spouncers
- Wood circles
- Doilies or other embellishments
- Ribbon
- Scissors
- Craft glue
- Paintbrushes
Before beginning, you’ll want to make sure that all the oils from your hands have been removed from the jars so that the paint sticks. Either wash them with mild soap and water and let dry or use rubbing alcohol and a cotton ball to clean. Then you can get started. Read our guide on how to paint mason jars for more info!

The first thing I did was take my jars and dab the glass paint directly on there – meaning, I put paint on the sponge and just moved the sponge up and down on the surface. It looks like there is a lot of texture, but it dries with less texture that you can see.
You also might want to consider using a paper towel if you don’t have spouncers. You would likely get more texture to your painting, but it would be cool!
Tip – also don’t be afraid to use any recycled jars you have around the house. In any sizes!

Paint the wood circles with complimentary colors of acrylic paint. Give several coats and let dry.

Paint Dimensional Magic on top of the wood circles (Yes, you can paint it!) and let dry. I did this just to add a glossy sheen.
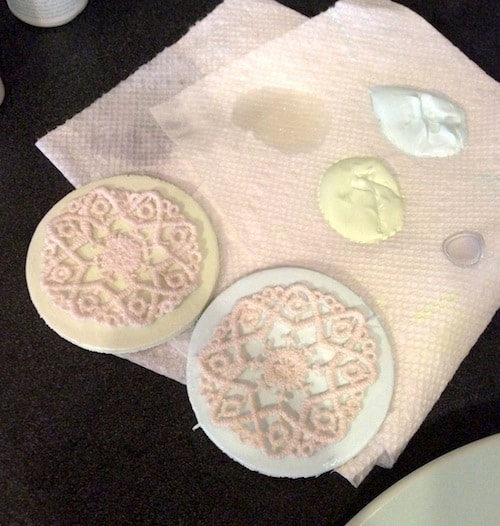
Add the doilies or other embellishments (definitely raid your stash for this one) to the top with craft glue and let dry.

Pick ribbon to go around the middle of your jars and trim to fit. I got this ribbon from the $1 bins of my craft store!

Glue the ribbon to the jar in the middle, and then glue the Dimensional Magic wood circles on top where the ribbon meets. Let dry.
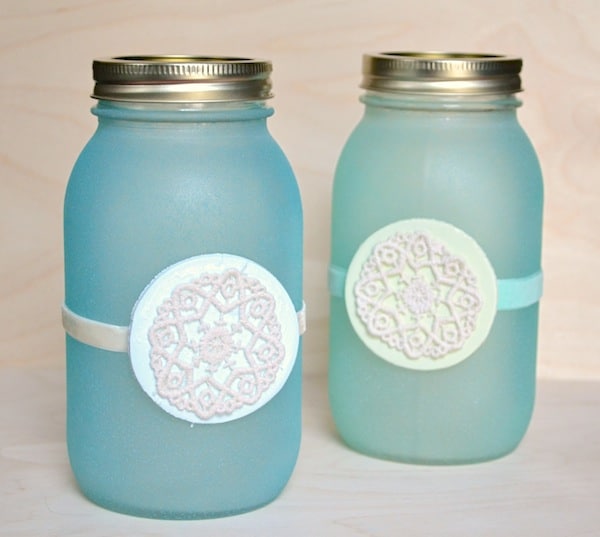
Here are the finished jars. They are so beautiful and the texture is so cool. I just love them!
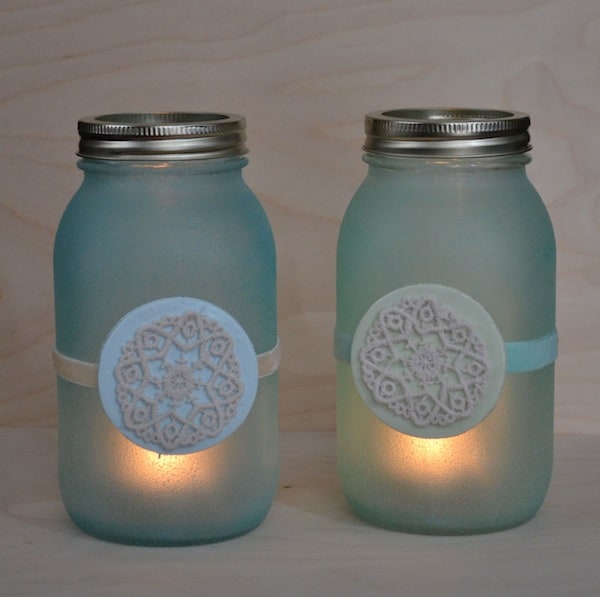
And finally, the lantern portion so that you can see how they look in the evening. Add LED lights if you are going to keep the lids on. You can use real tea lights with the lids off.
This project was inexpensive and I already had a lot of the supplies – and any budget friendly decorating project is a-okay by me. They make great gifts, too!
Mason Jar Lanterns
Equipment
Materials
- Glass jars
- Glass paint
- Acrylic paint
- Mod Podge Dimensional Magic
- Spouncers
- Wood circle(s)
- Doilies or other embellishments
- Ribbon
- Craft glue
Instructions
- Wash the jars with mild soap and water; let dry.
- Dab glass paint directly onto the mason jars with a sponge or spouncer. Work your way around the jars until they are completely covered. Let dry.
- Paint the wood circles with complimentary colors of acrylic paint. Give several coats and let dry.
- Paint Dimensional Magic on top of the wood circles and let dry.
- Add the doilies or other embellishments to the tops with craft glue and let dry.
- Pick ribbon to go around the middle of the jars and trim to fit.
- Glue the ribbon to the jar in the middle, and then glue the wood circles on top where the ribbon meets. Let dry.
- Add candles or flowers and display.
I hope you enjoyed these easy summer project! I’d love for you to also check out these other ideas:





I love this! I’m pinning it right now…
These are so pretty! I love the look of them:)
gorgeous results, and great for satisfying a beach glass craving! thanx for sharing on craft schooling Sunday!
Amy these are BEAUTIFUL. Pinning and I’m going to try to recreate some for my own home. 🙂
These are so pretty! I’m hosting a candle giveaway on my blog that you should enter!
Very pretty. I love the colors and it really does look like natural beach glass.
I’m going to try this with sand dollars instead of doilies for an even “beachier” feel! Thx for great idea!