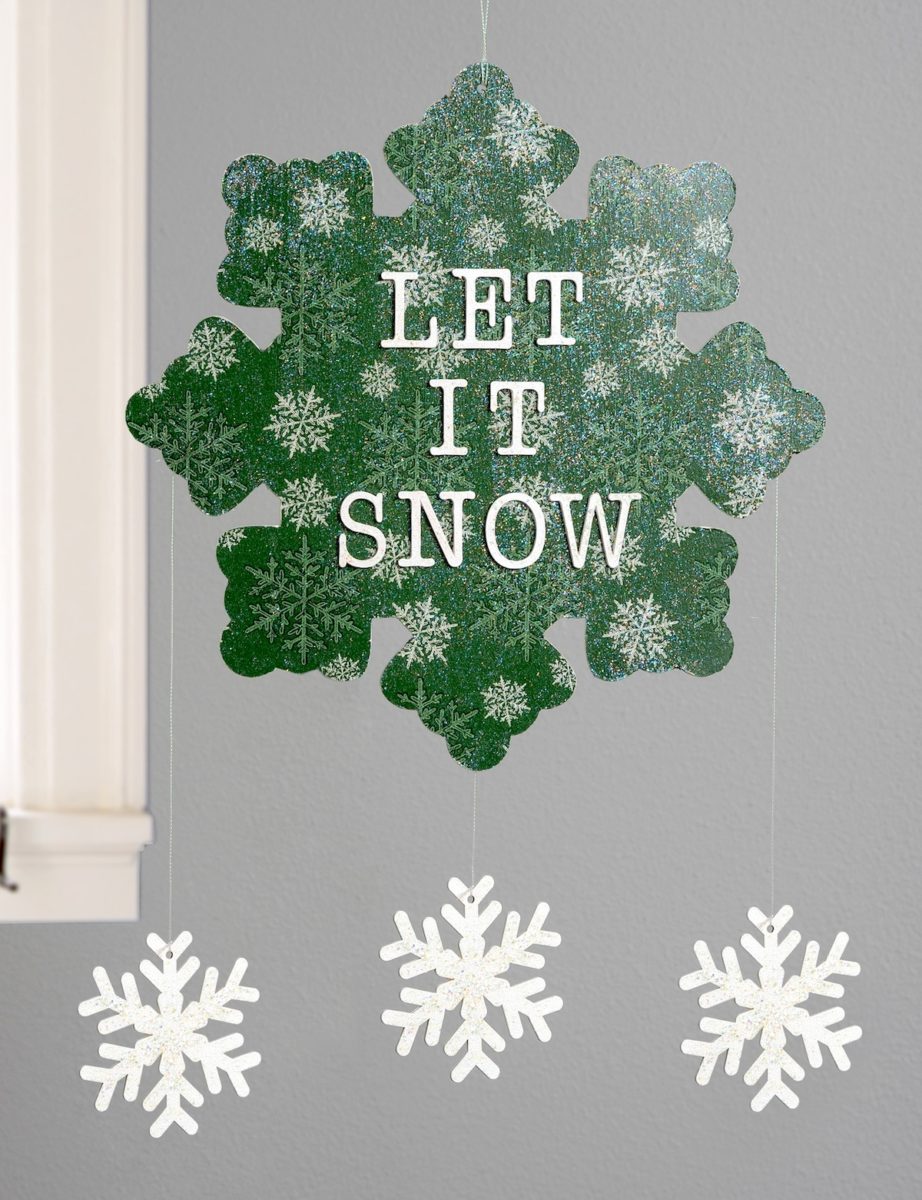
Discover how to add a cozy, winter wonderland touch to your home with this easy DIY wood snowflake decor tutorial. So easy with Mod Podge!
Skills Required: Advanced Beginner. You should have experience with Mod Podge and napkins to do this project.
Who says the winter wonderland has to stay outside? Let’s bring a touch of that frosty charm into our homes with a delightful DIY project that won’t have you braving the cold.
This DIY wood snowflake decor is all about bringing the beauty of snowflakes inside, without the need for mittens or a shovel!
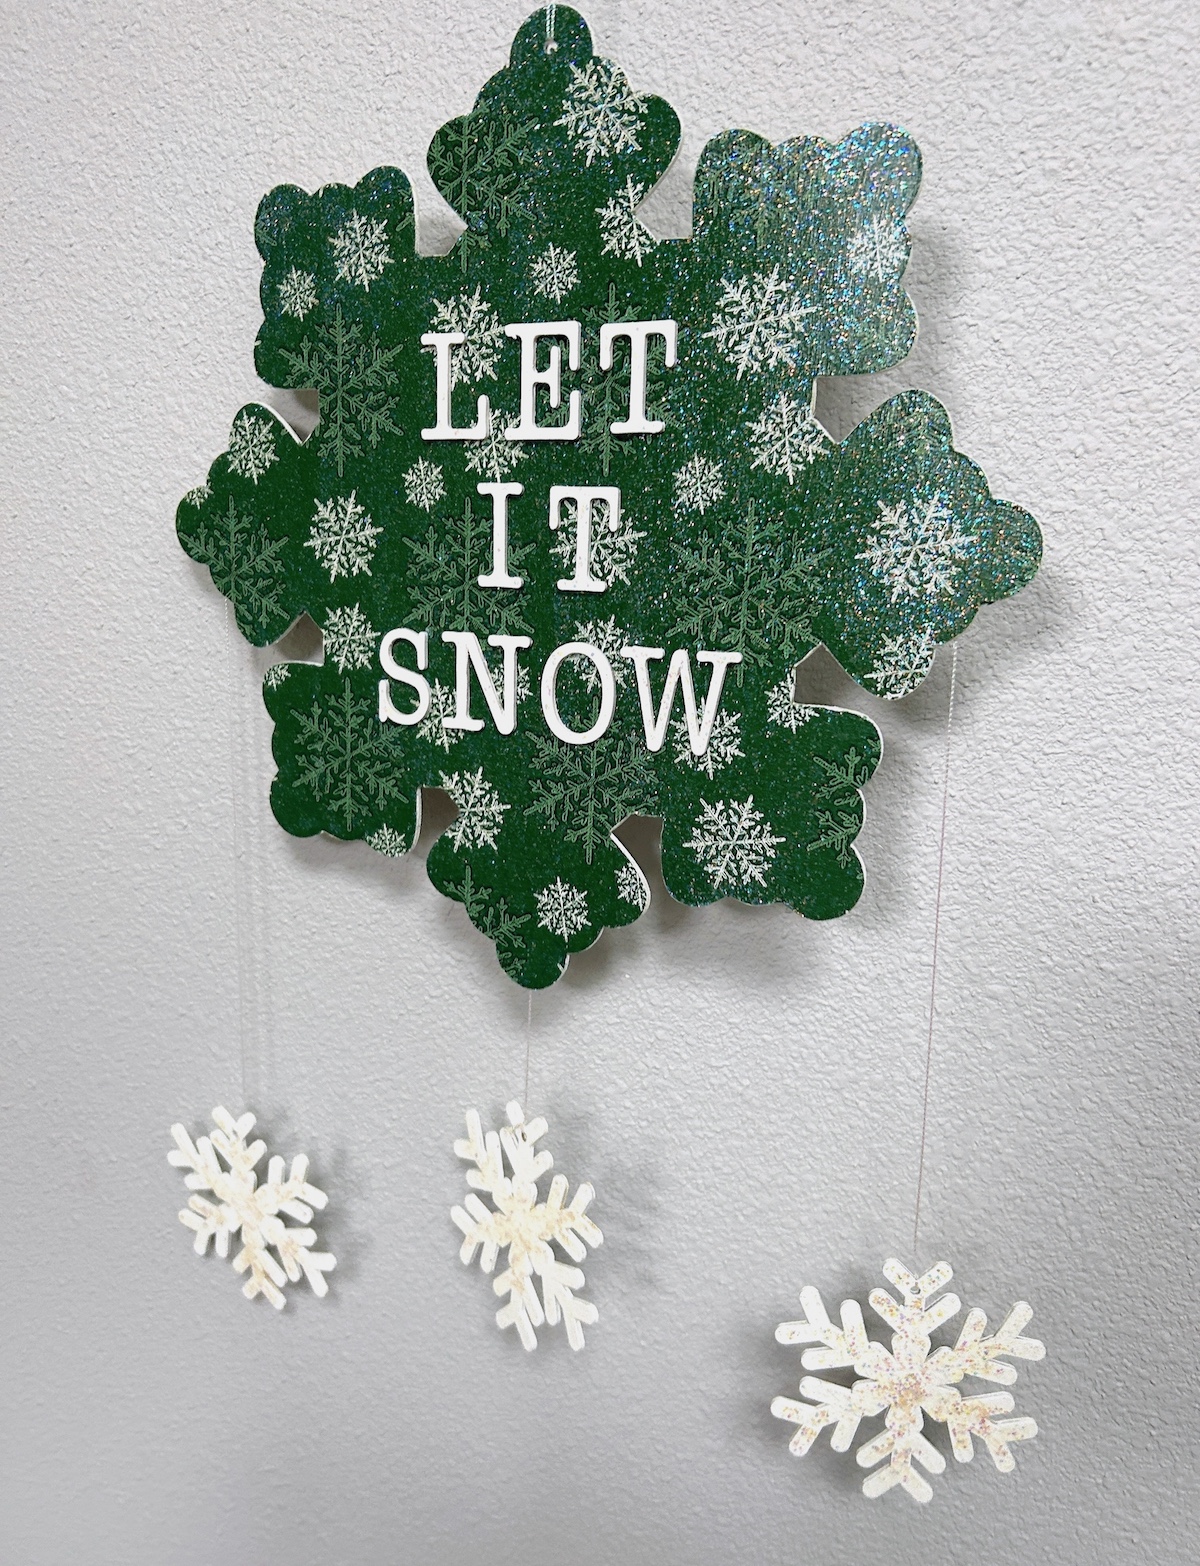
We’ll start with a simple snowflake, but not the kind that melts away. Ours is made from wood, from Dollar Tree, and ready for a transformation.
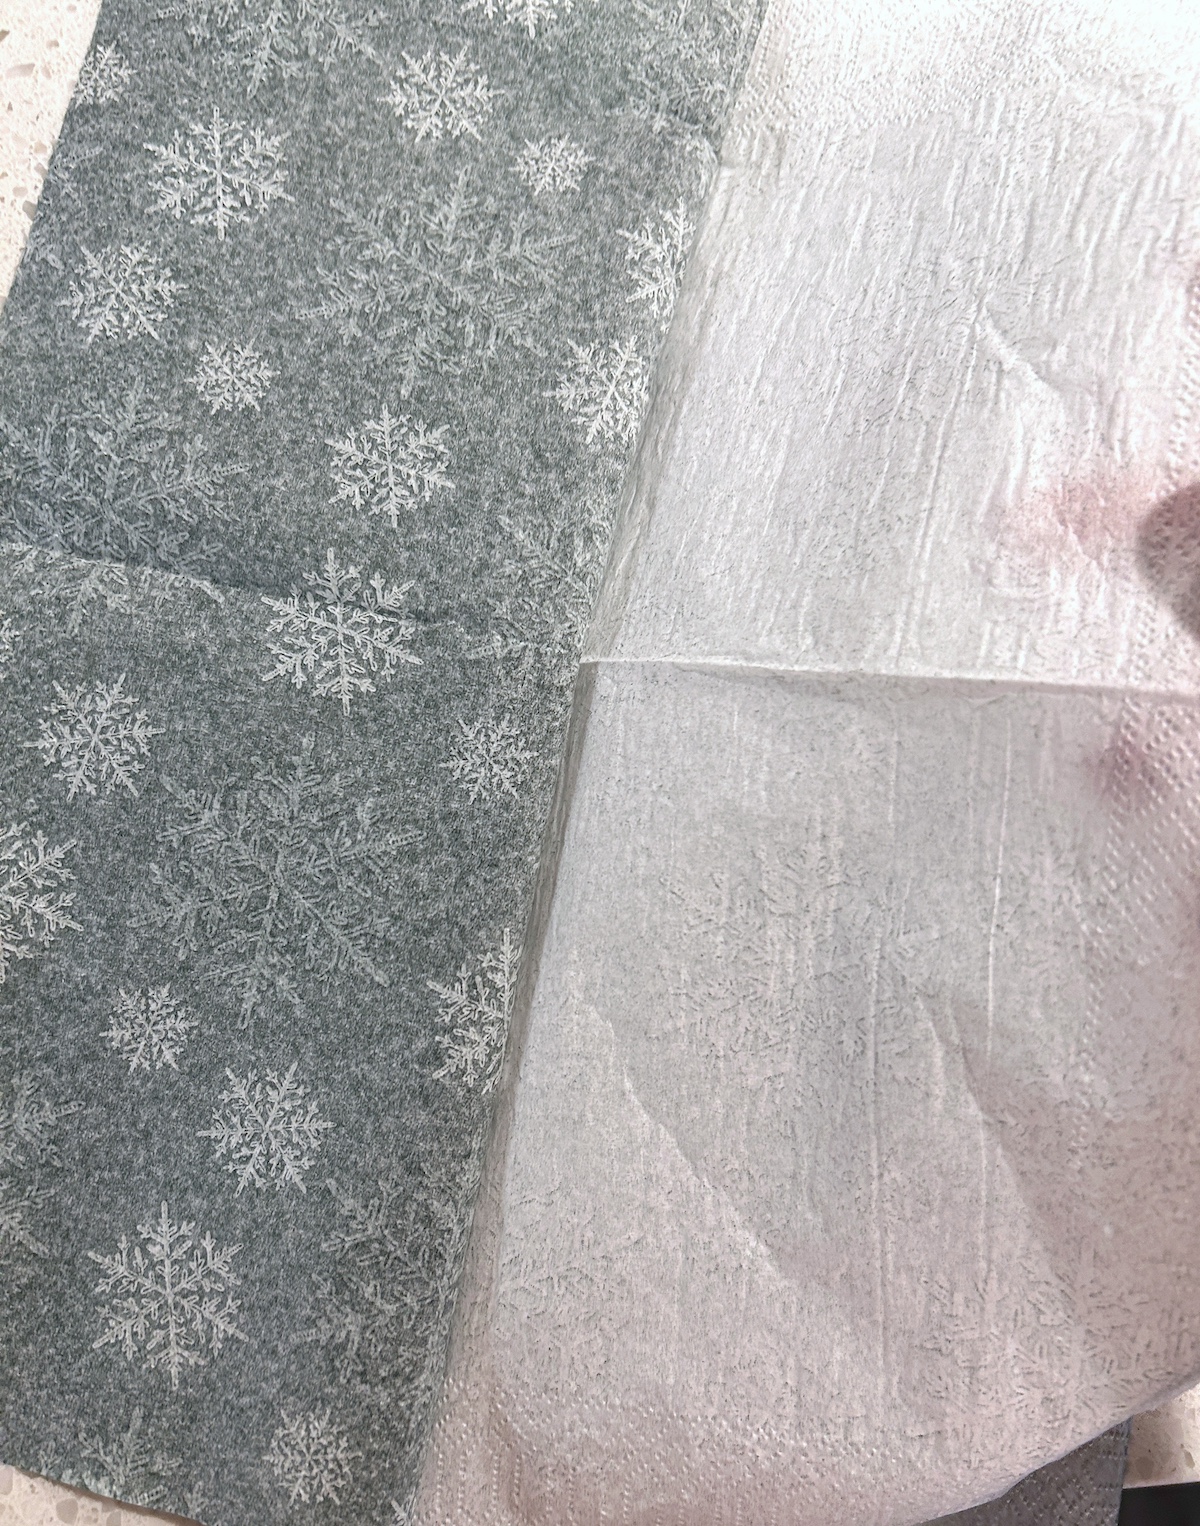
Not only did I get the surface for this project at the dollar store, but I also got the napkins. I’m going to show you how to use the paper napkin decoupage technique to attach the napkin to the wood.
And you’re probably thinking – you mean, a regular napkin?
Yes, a regular napkin with an extraordinary design will give our snowflake that special touch. It’s all about the details, and with a little Mod Podge magic, we’ll transform our wooden piece into a delicate work of art!
To make our snowflake sparkle like it’s fresh from a winter storm, we’ll add a dusting of glitter paint – because everything’s better with a bit of glitter, right?
String it, hang it, and there you have it: a winter spectacle right in your living room. So, gather your dollar store finds and let’s get crafting.
By the end of this project, you’ll have a wooden snowflake decor piece that will make every day feel like a snow day!
First, here’s what you’re going to need.
Gather These Supplies
- Unfinished large wood snowflake
- Snowflake napkins – (tissue paper works also)
- Mod Podge – any formula and Sparkle
- White craft paint
- Glitter paint – I used FolkArt Glitterific in Snowfall
- Wood letters spelling “let it snow”
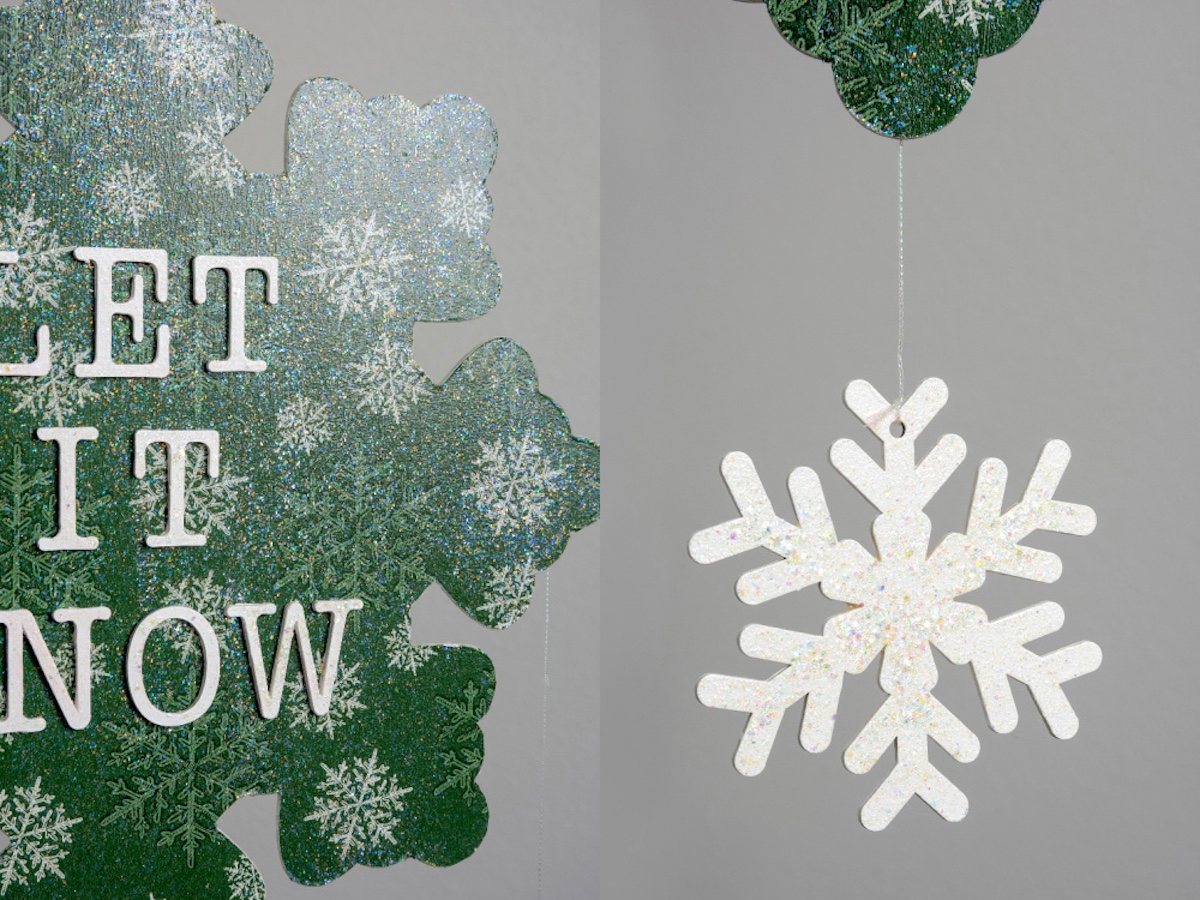
- Wood snowflakes – 3
- Thin iridescent floss
- Craft glue
- Hot glue gun
- Scissors
- Emery board
- Paintbrushes
- Spouncer
- Mini craft iron
- Parchment paper
Tips and Thoughts for This Project
You don’t *have* to paint the snowflake white, however, it makes the colors of the napkin pop. It’s also easy to do, so I always do it. Plus I’m painting the snowflakes and wood letters anyway!
Use a basic formula of Mod Podge underneath the napkin with no sparkles, so it’s smooth. It doesn’t matter which one because you won’t see it. I recommend Gloss, Matte, or Satin.
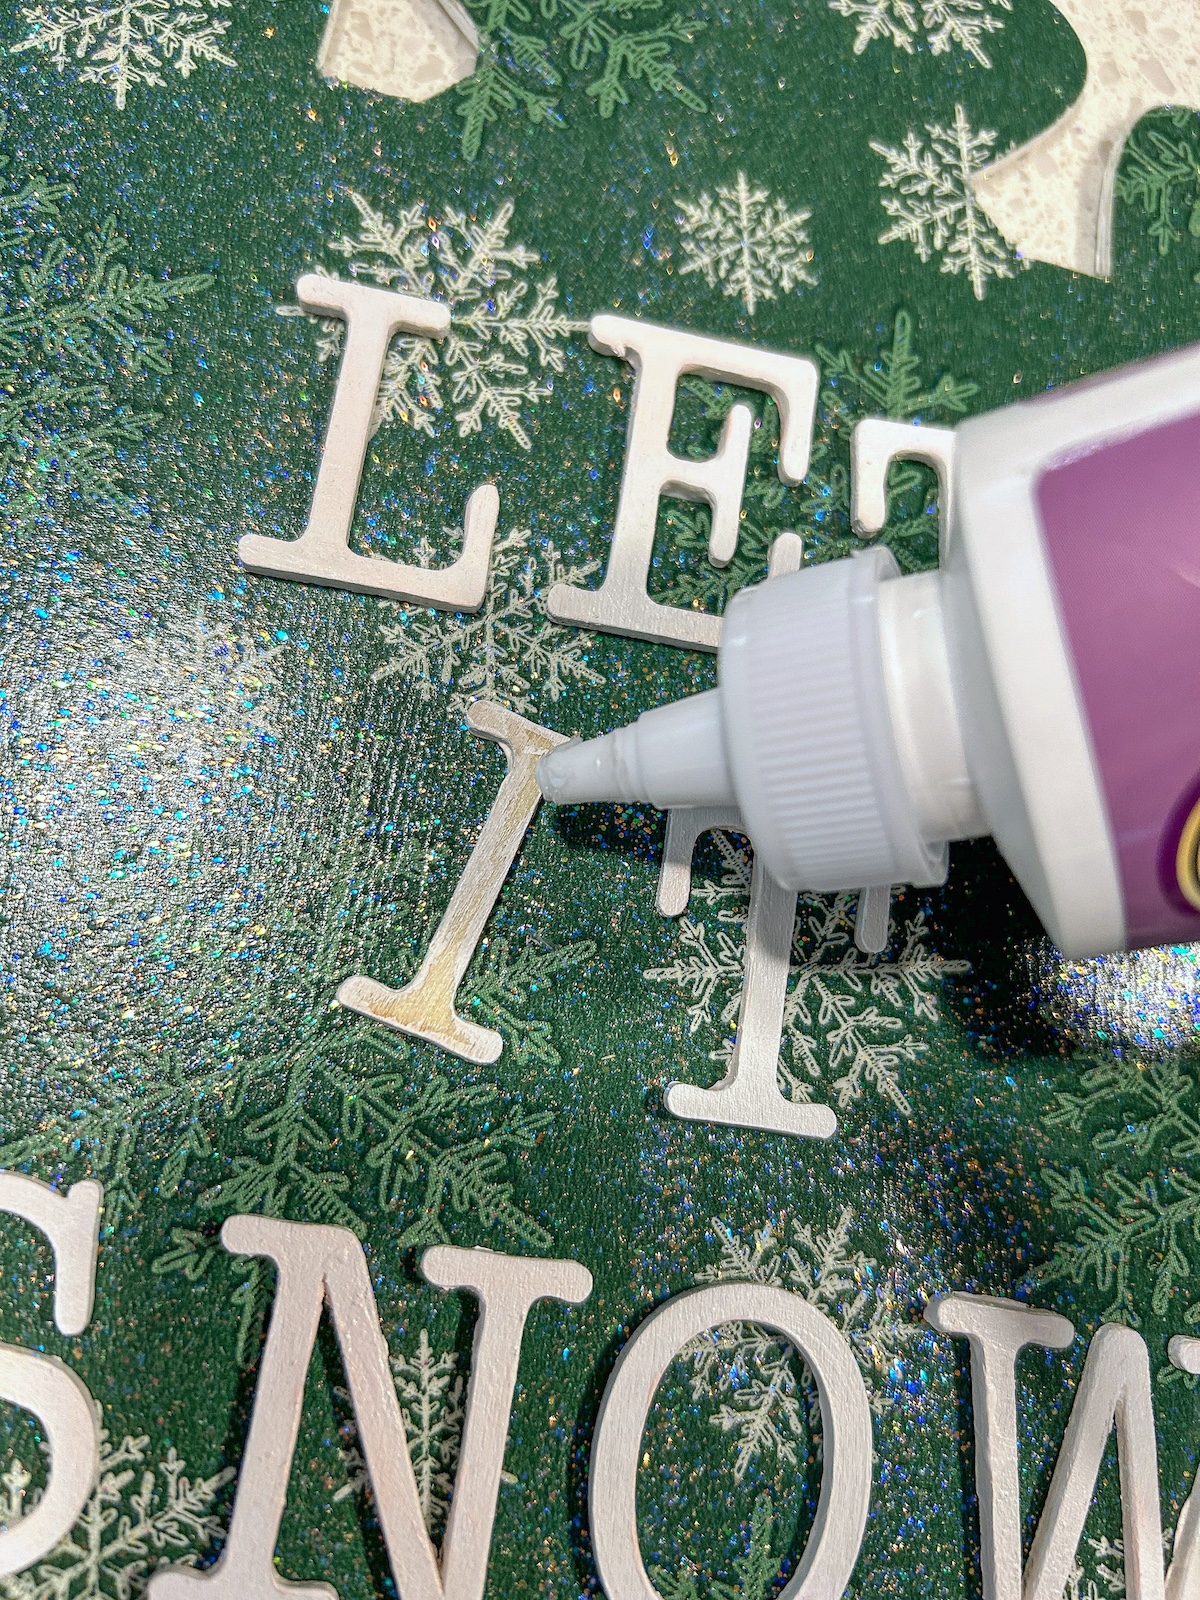
I used craft glue with the letters instead of hot glue because it doesn’t dry right away. You can move the letters around slightly after placing to make sure you’re happy before they dry.
Get the printable how to card for this project below:

Wood Snowflake Decor
Equipment
- Parchment paper
Materials
- 1 Unfinished large wood snowflake
- 1 Holiday or winter napkin(s)
- Mod Podge any formula and Sparkle
- Craft paint white
- Glitter paint
- 9 Wood letter(s) spelling "let it snow"
- 3 Wood snowflakes
- Thin iridescent floss
- Craft glue
Instructions
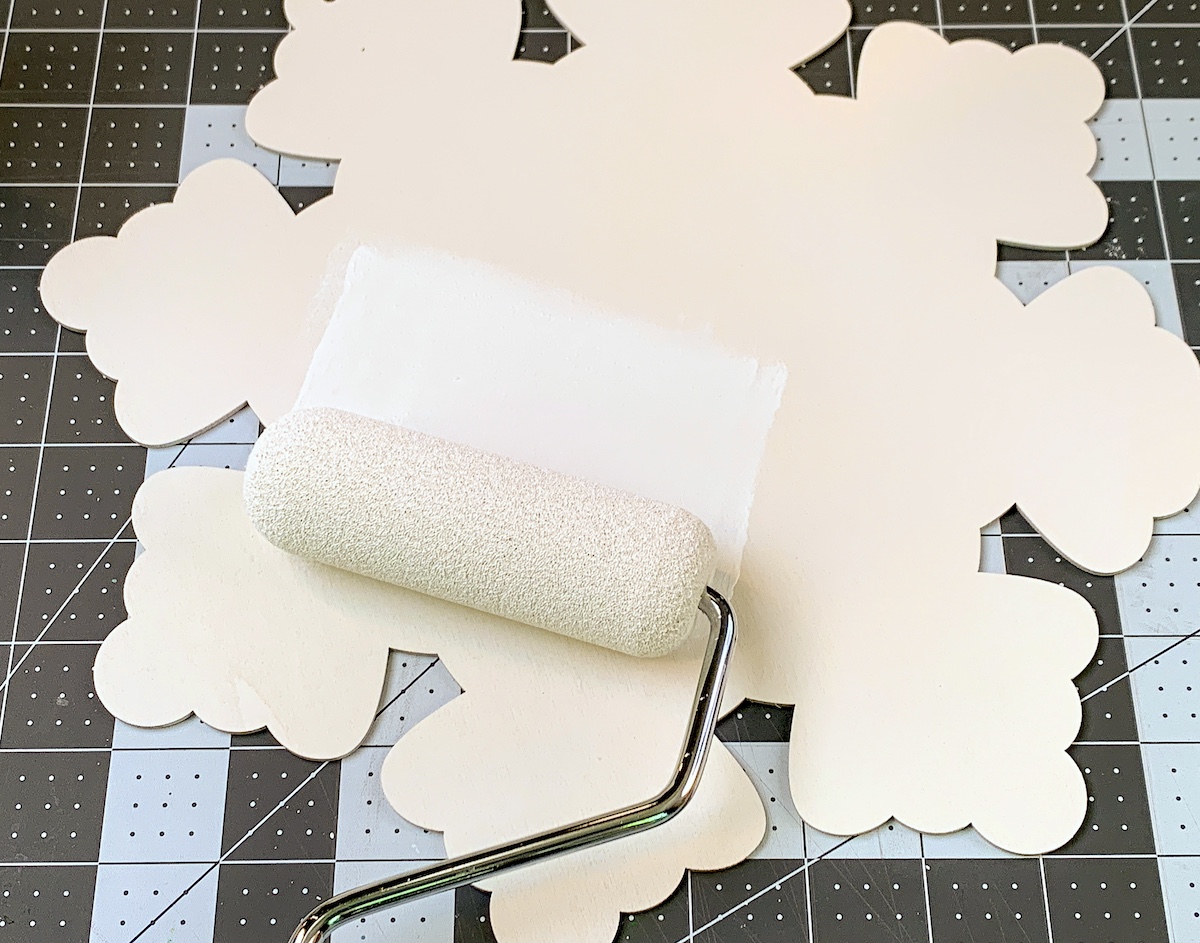
- Paint the snowflake using white craft paint. Roll on one side, let dry, and flip over. Paint other side and let dry.
- Paint the three wood snowflakes and the wood letters with a few coats of white paint, and let dry. Don’t forget to do both sides and the edges.

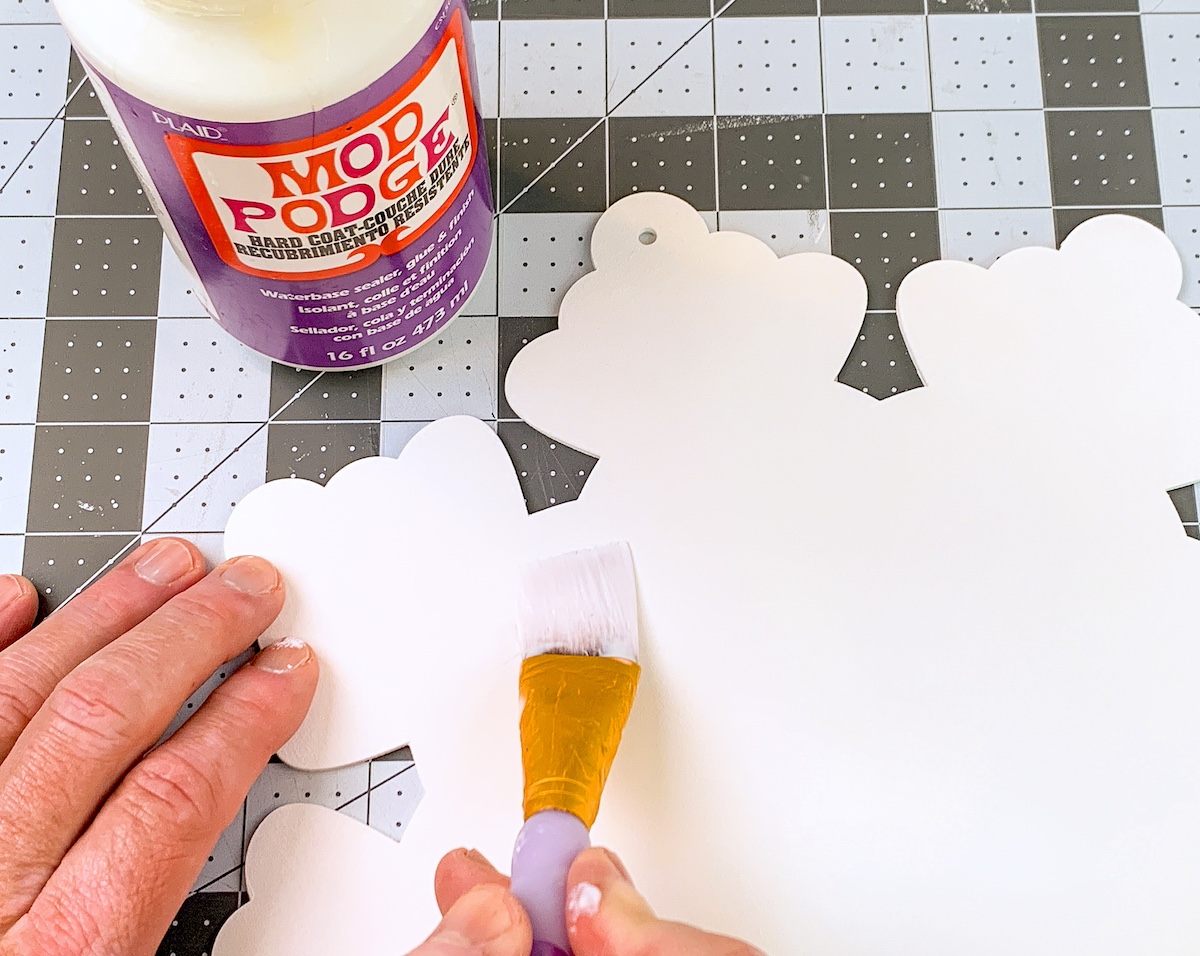
- Apply a coat of Mod Podge to the wood; don't do the edges. Let dry 15-20 minutes and repeat.
- While the Mod Podge is drying, separate the napkin from the bottom layers. You can use tape to help. You just want the top layer with the design.
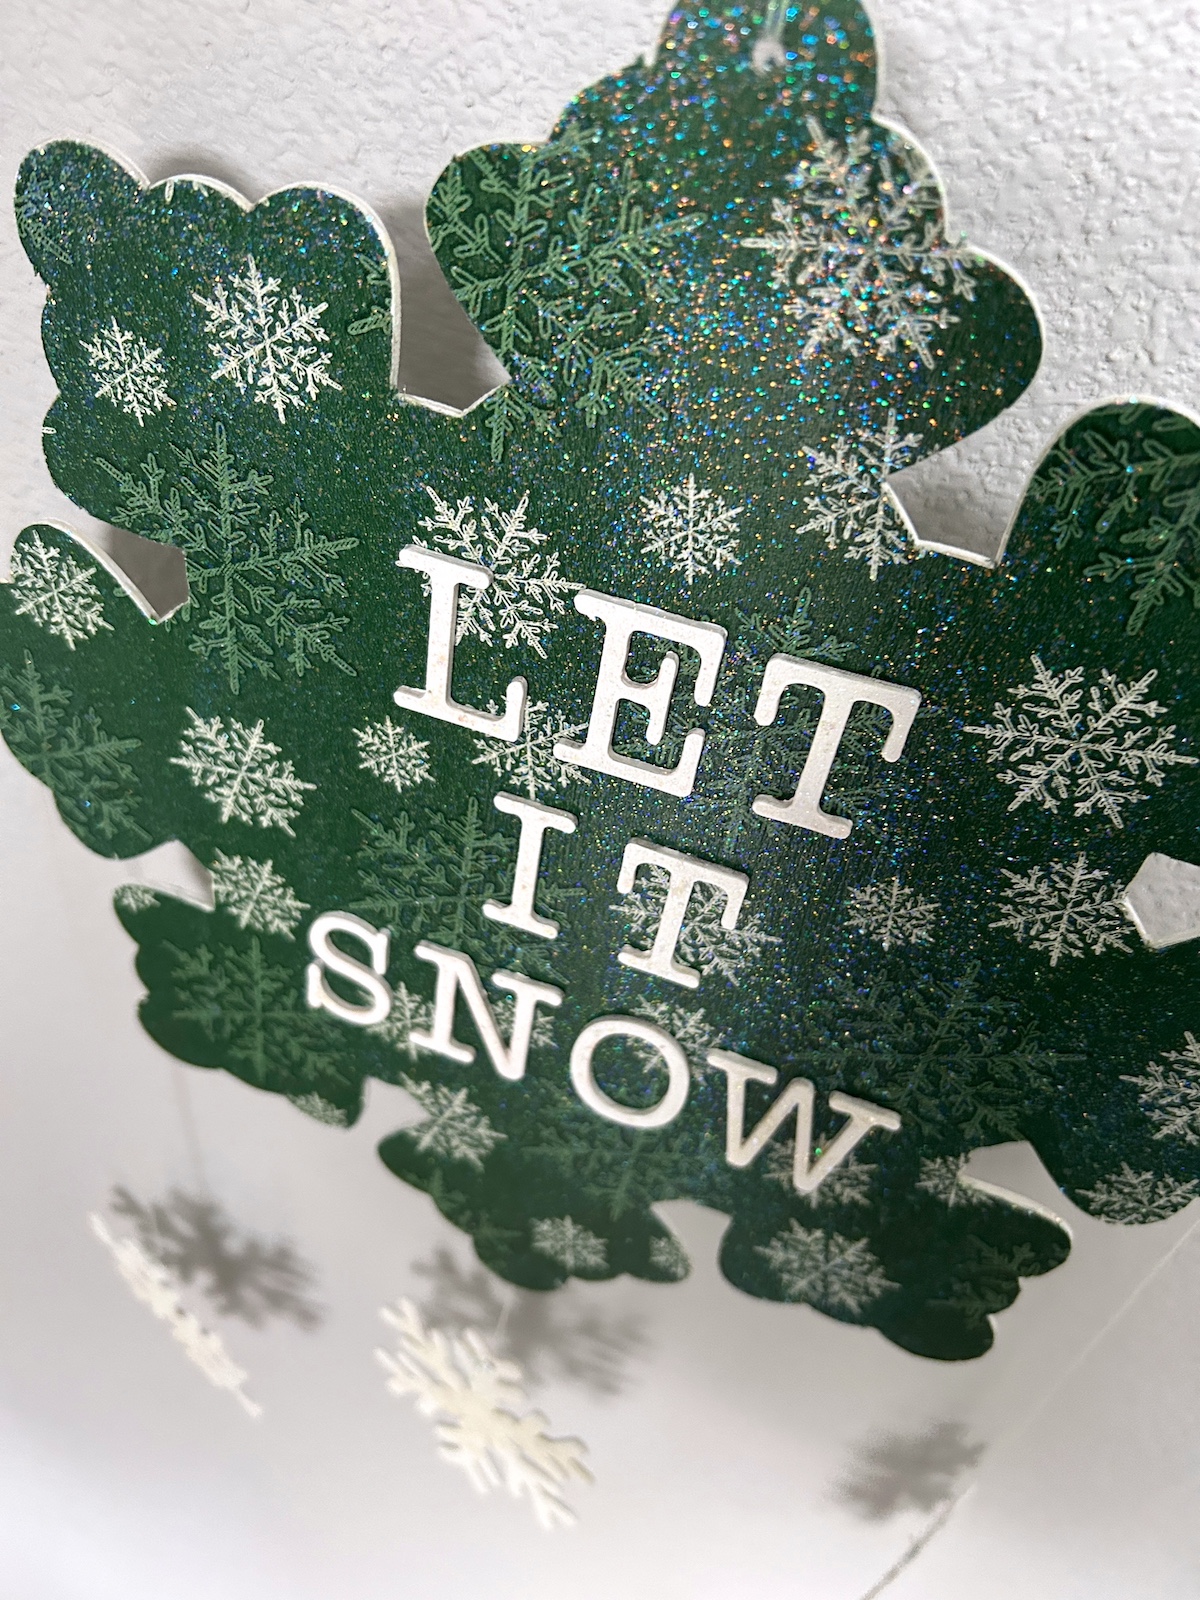
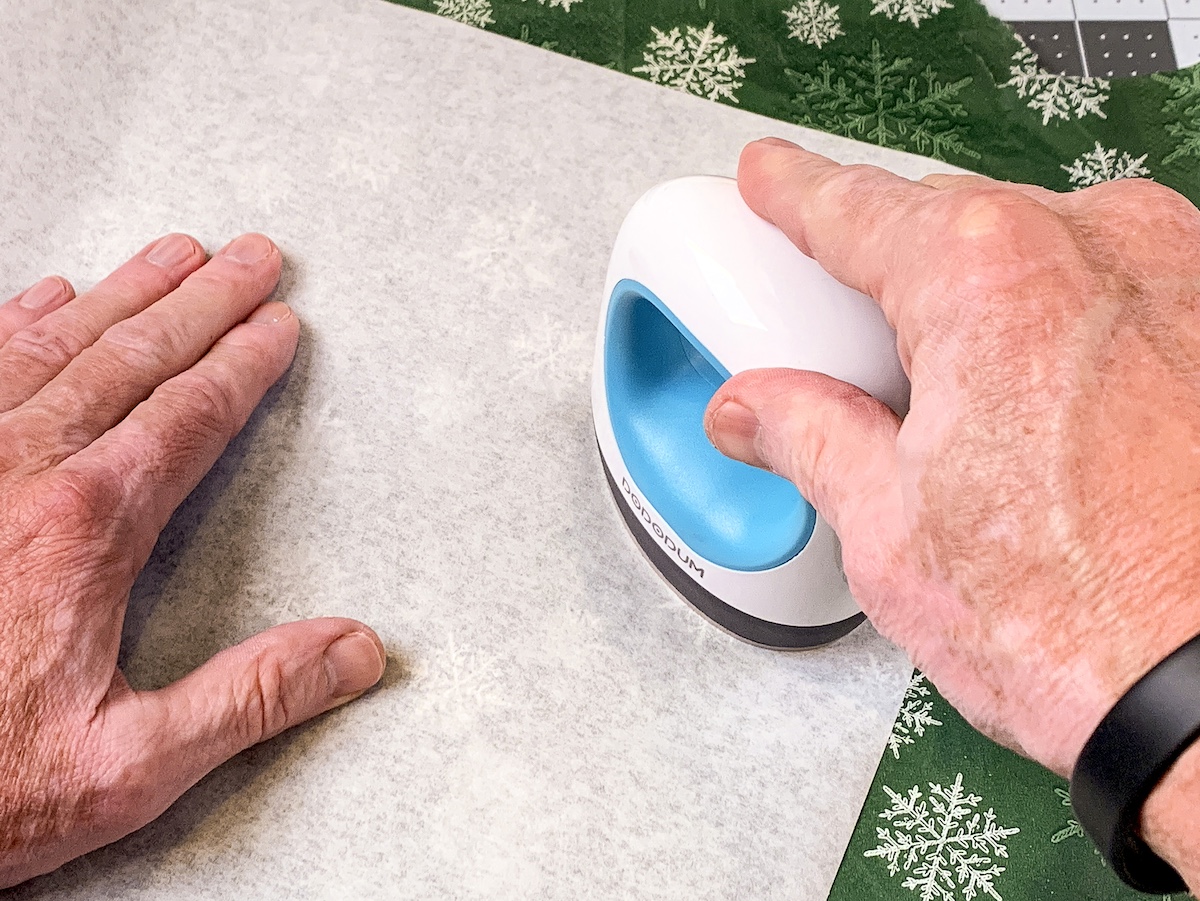
- Place the napkin down onto the large wood snowflake. Place a piece of parchment paper on top of the napkin, and run the craft iron across the top several times. While you are doing this, the Mod Podge is melting below the napkin, and the napkin is adhering. Keep going until the napkin is fully adhered, including the edges.
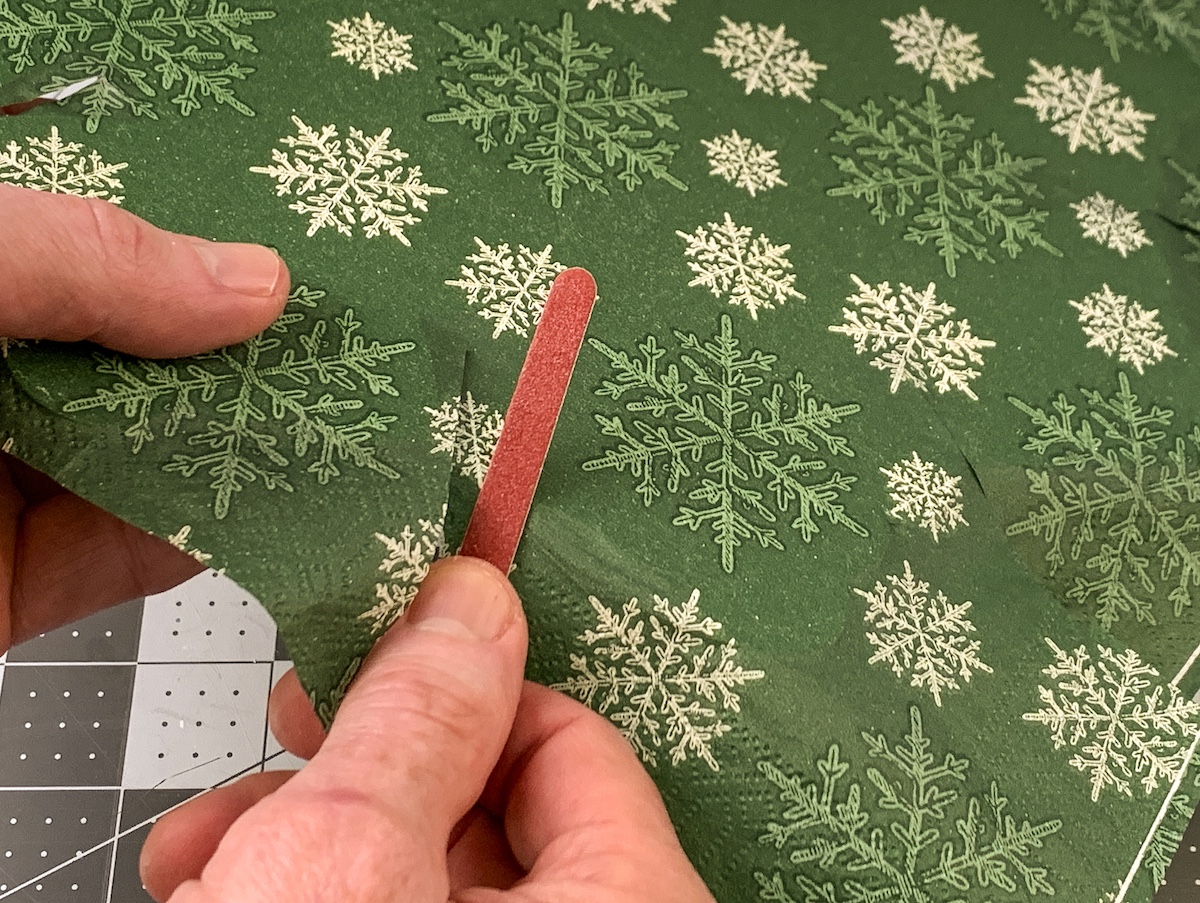
- Let the snowflake cool after ironing. Use an emery board to gently sand away the excess napkin. Sanding at an angle works very well. Continue until all the extra napkin is removed.
- Paint a coat of Sparkle Mod Podge on top of the napkin snowflake. Let dry and repeat.
- Use the craft glue to attach the letters to the front of the snowflake. Adjust until even and then let dry completely.
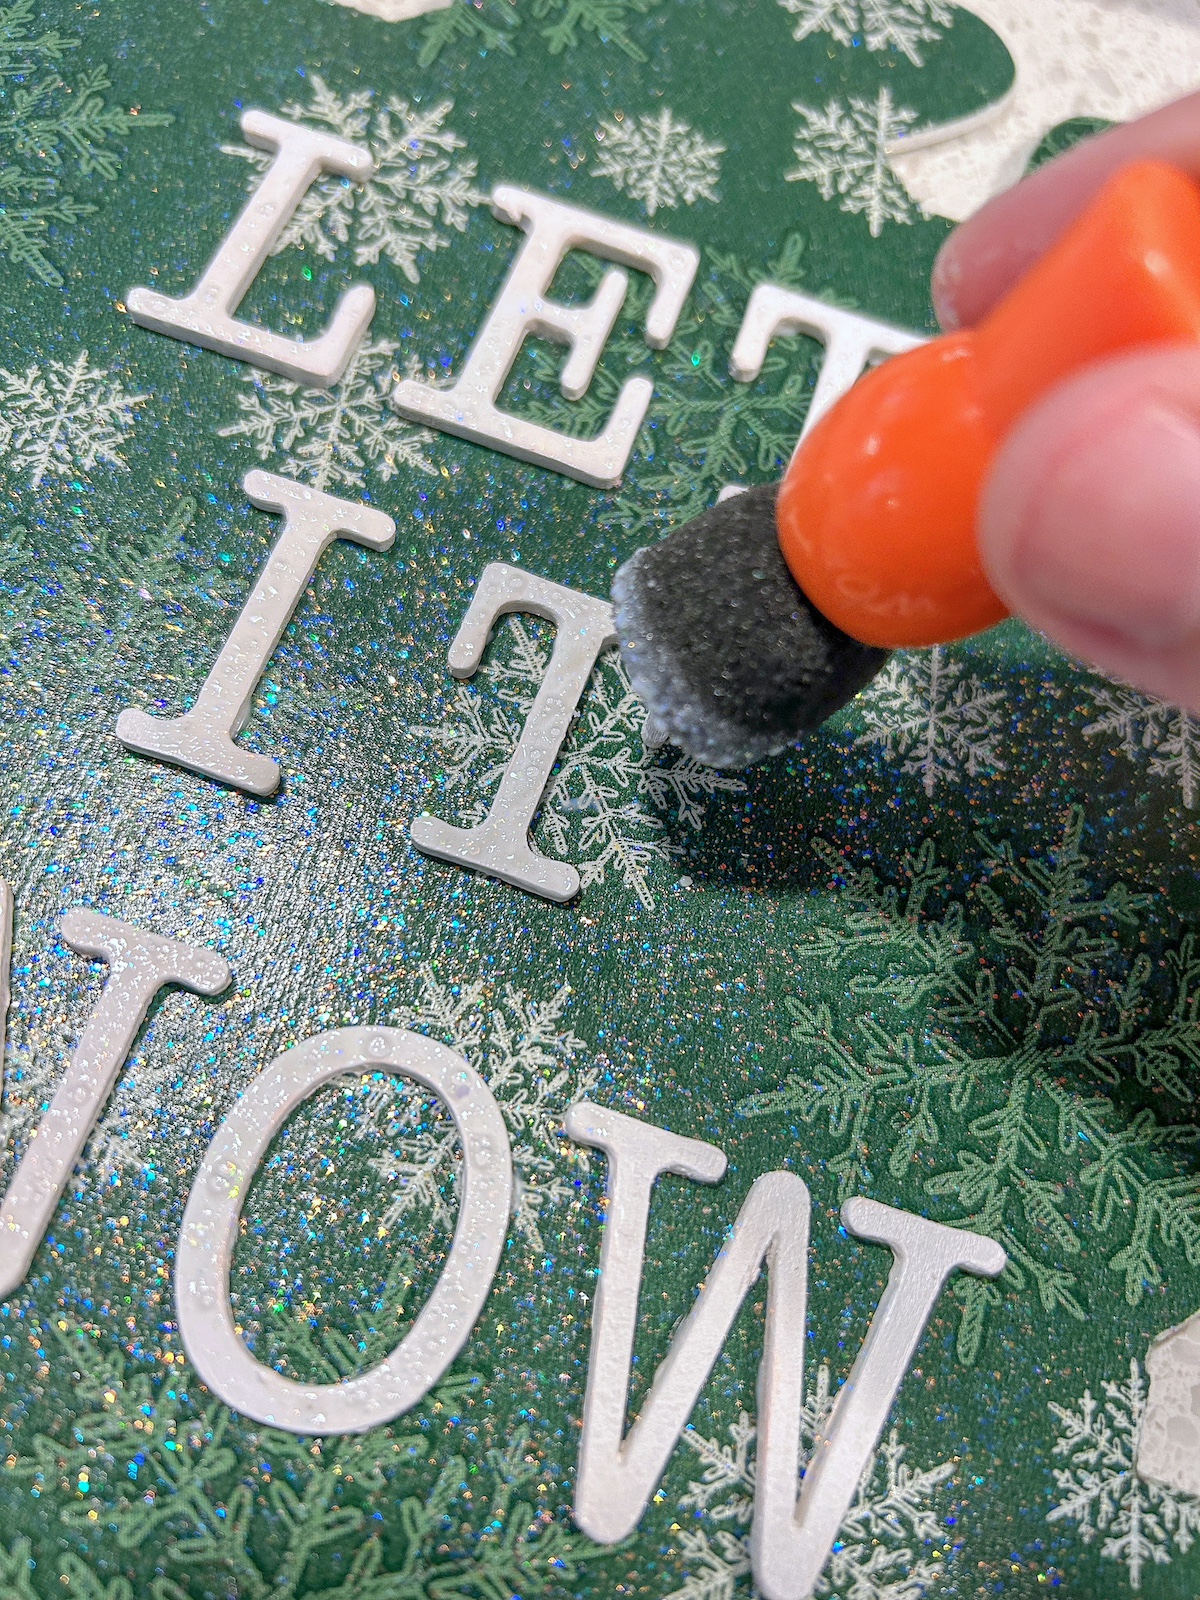
- Use the foam spouncer to apply the glitter paint to the letters and snowflakes (on both sides). If you don’t have a foam spouncer, you can still use a brush, but it’s more difficult to apply. The spouncer keeps it right where you apply it.
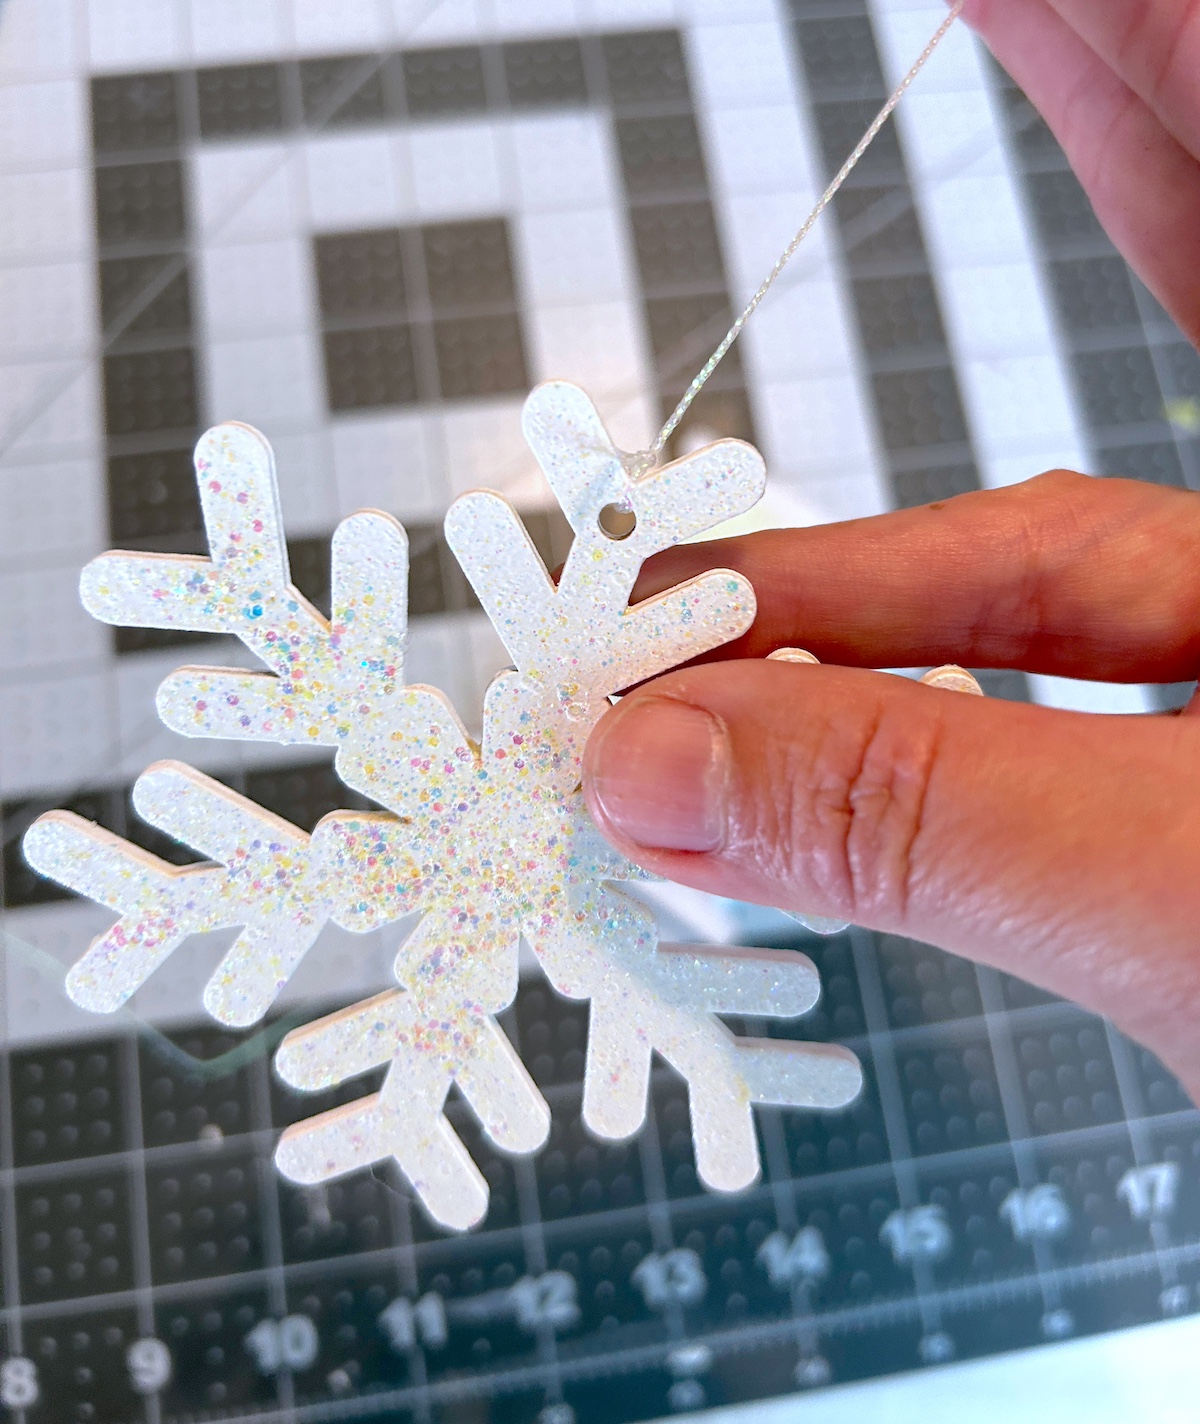
- Cut desired lengths of thin floss and tie them to the individual wood snowflakes.
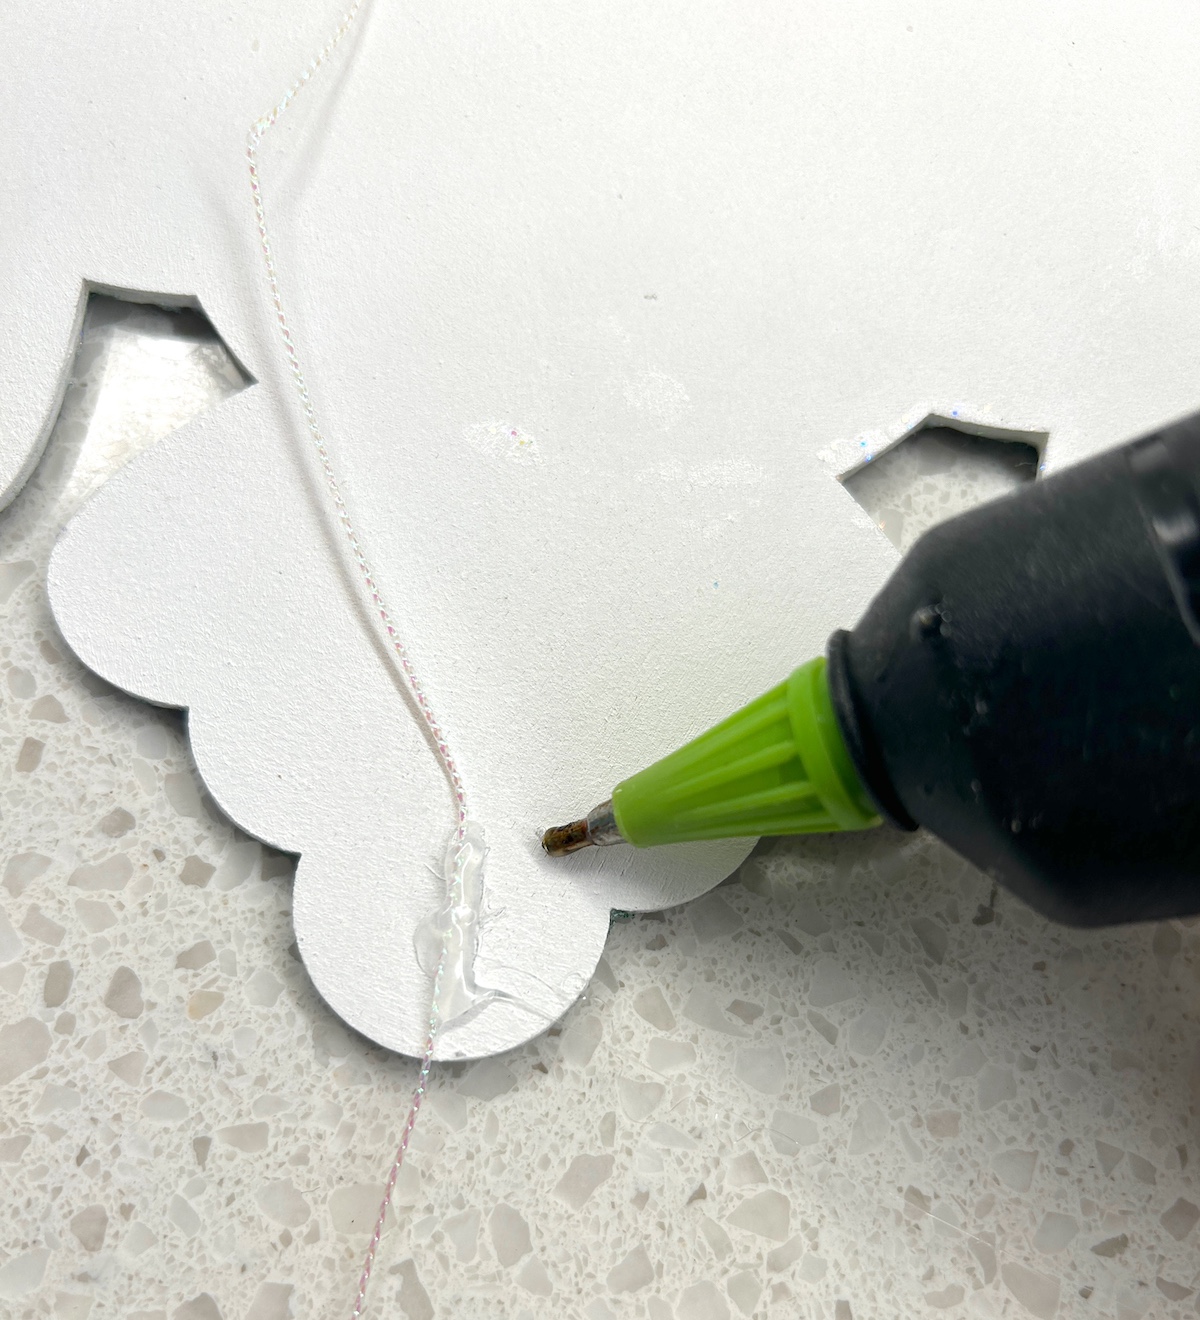
- Hot glue the floss from the hanging snowflakes to the back of the large wood snowflake. Add floss to the top and hang.
Notes
If you enjoyed this wooden snowflake craft, let me know in the comments! I’d also love for you to check out these other projects: