
Learn how to make easy peace wood decor using dollar store supplies, napkins, and Mod Podge! This is a fun DIY for a seasonal display.
Skills Required: Intermediate. To make this winter decor, it helps to have experience with paint and Mod Podge. You’ll be applying both, ironing the napkin down, then adding additional glitter paint.

Christmas is a magical time of year when everything sparkles a little brighter, and our homes become cozy havens of festive cheer. Today, I’m excited to share with you a delightful little project that’s as fun as it is simple.
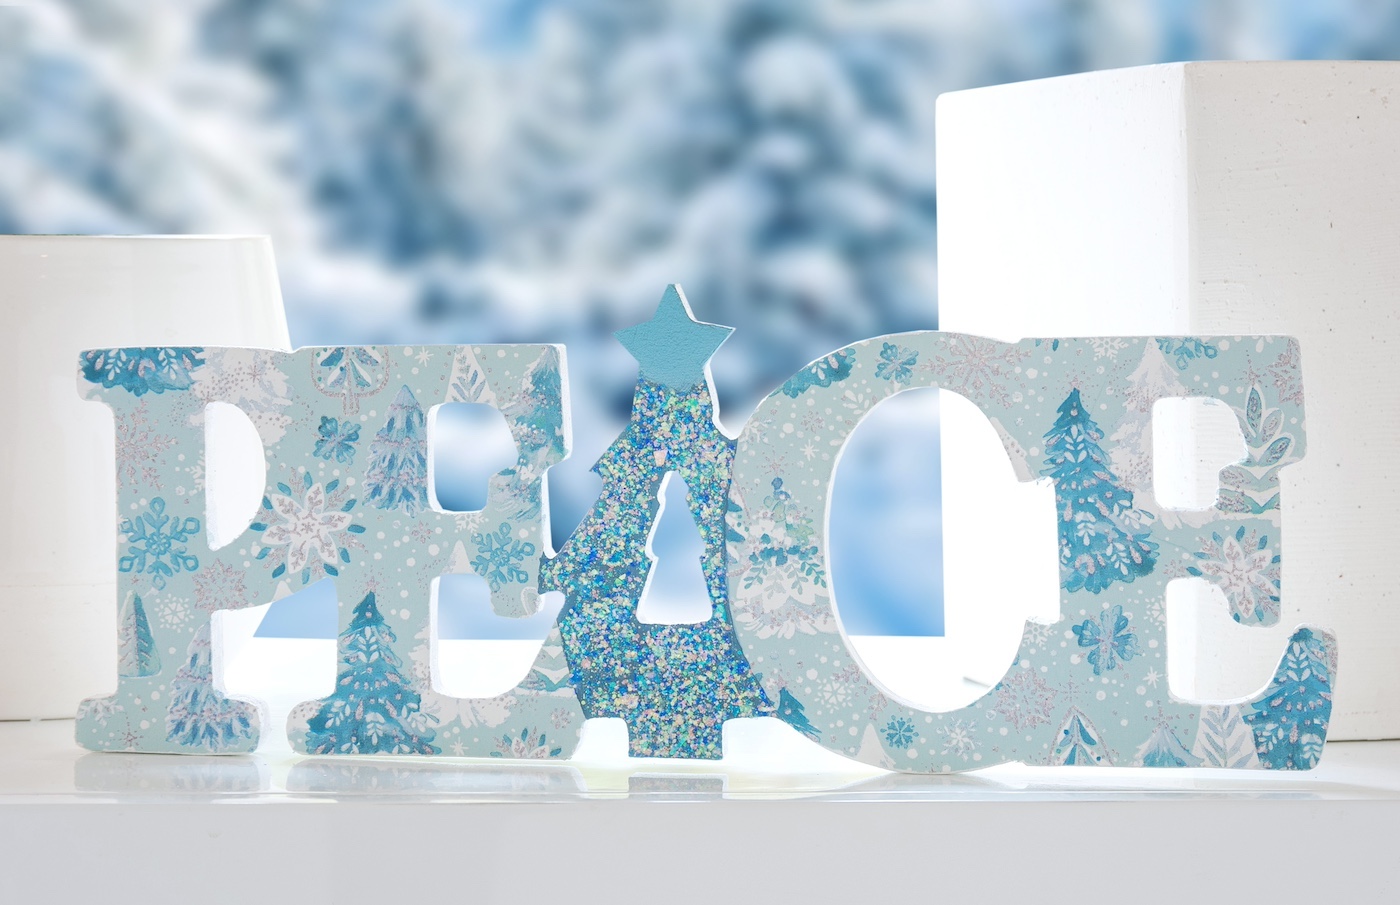
It involves transforming a wood word from Dollar Tree – “Peace” – into a dazzling piece of Christmas or winter decor.
I didn’t have any specific plans when I was strolling the aisles of my local store and found this word. But what I loved about it is that the “A” is a tree . . . and I knew it had to come home with me.
When I got home, I browsed my stash and figured out what I wanted to do. I decided to take this wooden word and turn it into a stunning piece that screams (or rather, whispers) “winter wonderland.”
The process is as easy as it is fun. We’ll start by decorating the front with napkins. Yes, you heard that right – napkins! They’re not just for cleaning up spills anymore.
With a bit of Mod Podge magic, I’ll show you how to iron on napkins and turn the wooden word into a piece of art.
Then we’ll add a final flourish with some metallic and Gitterific paint. It’s like fairy dust for your crafts, adding that essential sparkle that every holiday decoration needs.
The result? A “Peace” plaque that’s not only a joy to create but also a beautiful addition to your holiday decor.
This project is a reminder that the joy of the season lies in the simple things – a little creativity, a touch of glitter, and the good feels of doing something yourself.
Scroll down for the full tutorial, and let’s spread some peace – and glitter – this holiday season. Remember, it’s not just about the destination but enjoying the creative process as well. Let’s get crafting!
Gather These Supplies
- Wood word – I used PEACE from Dollar Tree
- Holiday or winter napkin – also from Dollar Tree
- Mod Podge (any formula)
- Craft paint – white, metallic blue, metallic silver blue
- FolkArt Glitterific – Hologram
- Painter’s tape
- Craft knife and mat
- Emery board
- Paintbrushes
- Spouncer
- Parchment paper
- Mini iron
- Clear spray sealer (optional)
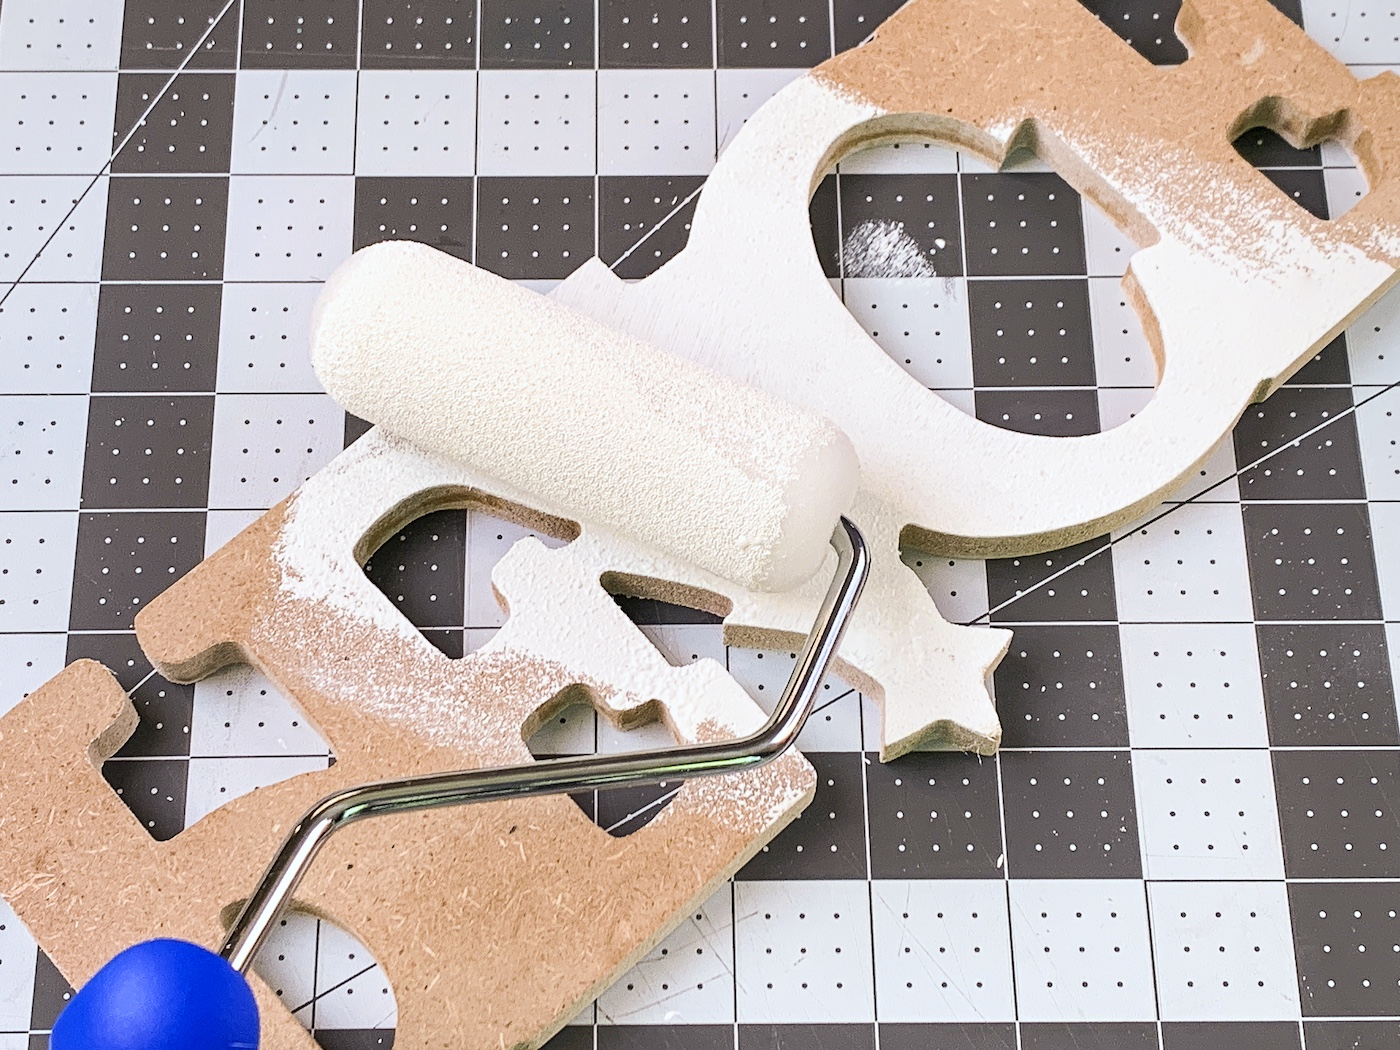
If you’re going to put a napkin on a dark MDF word like the one in this project, you’ll need to use white paint (or something light) on it first. Otherwise you’ll see the dark background of the word through the napkin.
I didn’t seal the napkin on top with Mod Podge. You can, but it might wrinkle. If it does, you can re-iron it (use the parchment paper again). Another option is to use a clear acrylic sealer on top (spray). Apply after the napkin sets and then let dry.
I used Glitterific paint, but you could also use Mod Podge Extreme Glitter. One isn’t better than the other, the Glitterific particles are just larger!
If you use glitter paint, I highly recommend using a spouncer. A brush just moves the glitter particles around while a small foam spouncer makes it easier to “place” the paint.
Get the printable how to card for this project below:

Peace Wood Decor
Equipment
- Parchment paper
Materials
- Wood word
- Holiday or winter napkin(s)
- Mod Podge any formula
- Craft paint white, metallic blue, metallic silver blue
- FolkArt Glitterific Hologram
- Painter’s tape
- Clear acrylic spray sealer optional
Instructions
- Paint the wood word using white craft paint. Roll on one side, let dry, and flip over. Paint other side and let dry. Use a small brush to get inside the letters. Let dry completely.
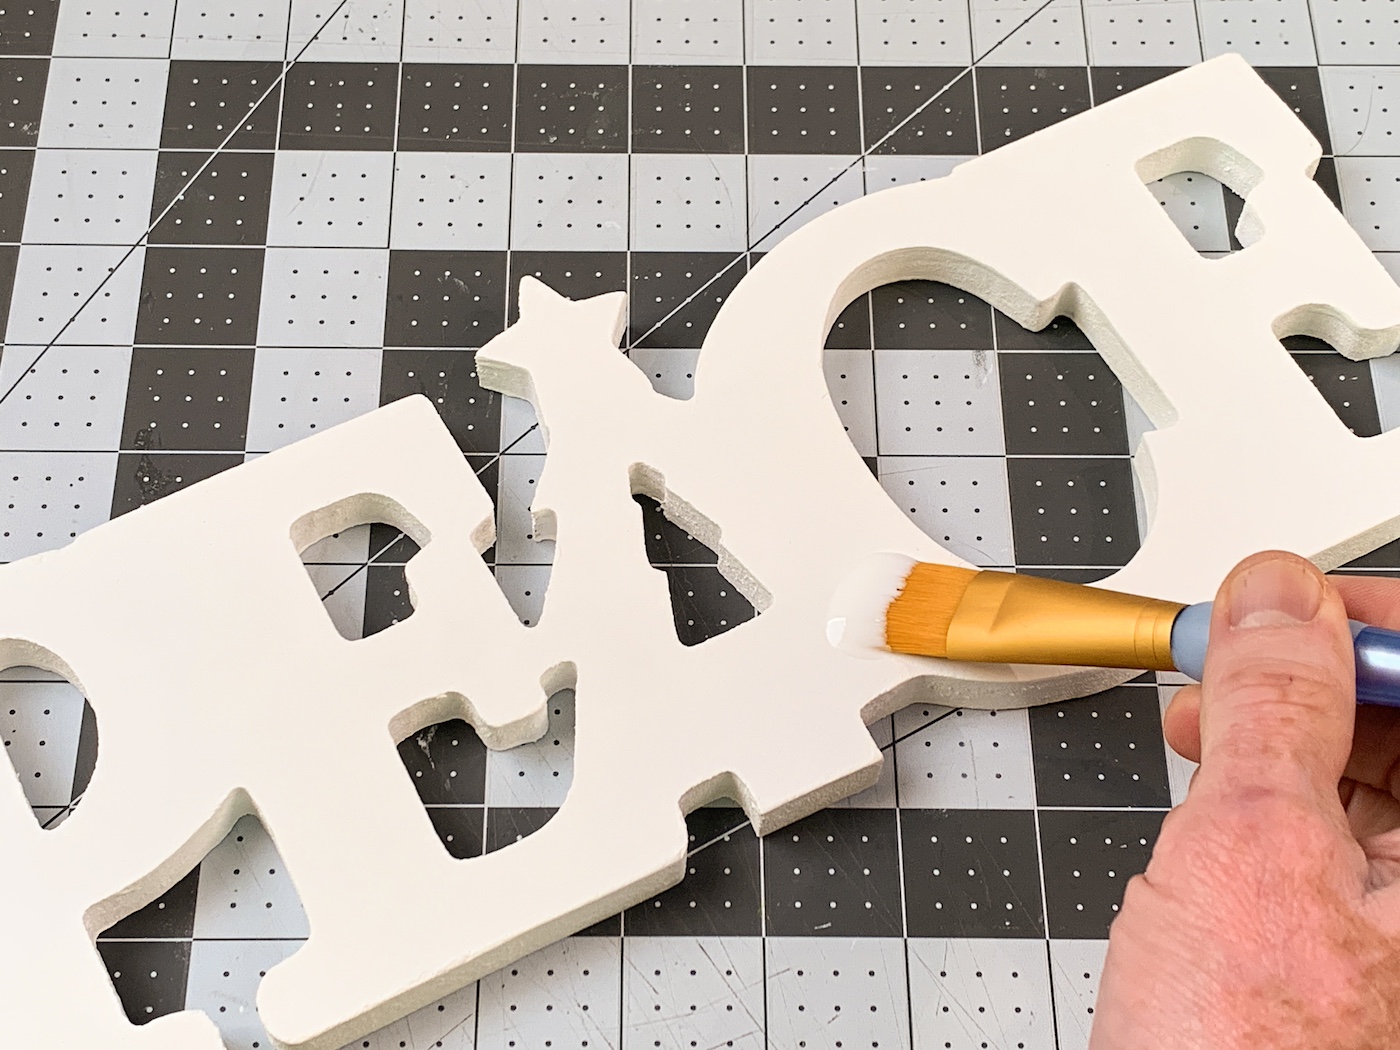
- Apply a medium coat of Mod Podge to the top of the word. Let dry and repeat. Wipe away any Mod Podge that dripped over the edges. Let the two coats dry completely.
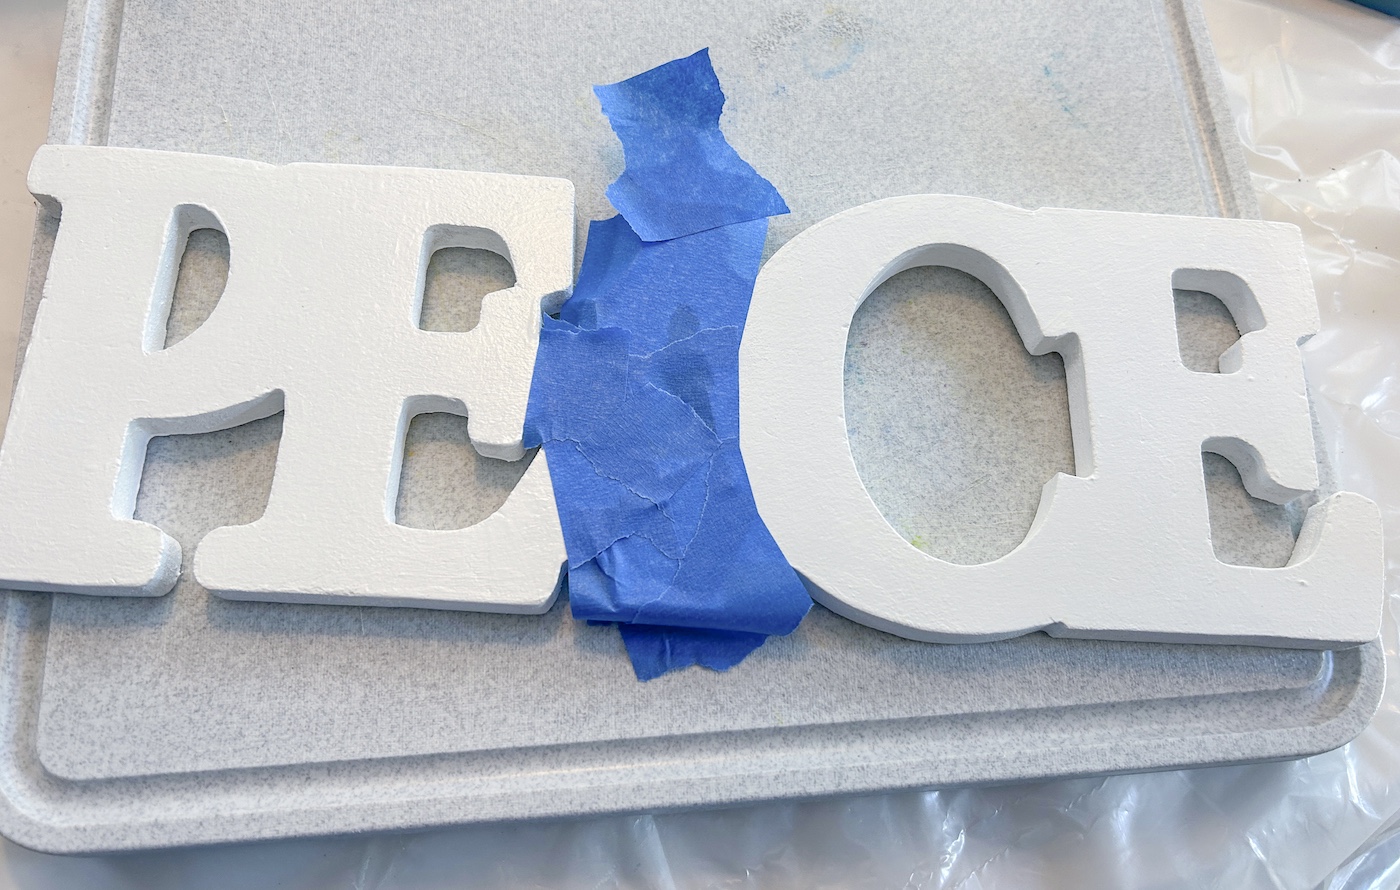
- Use painter's tape to tape off part of the design, if desired. I taped anywhere that I didn't want the napkin to adhere. You can use a craft knife to trim the painter's tape.
- While the Mod Podge is drying, separate the napkin from the bottom layers. You can use tape to help. You just want the top layer with the design.
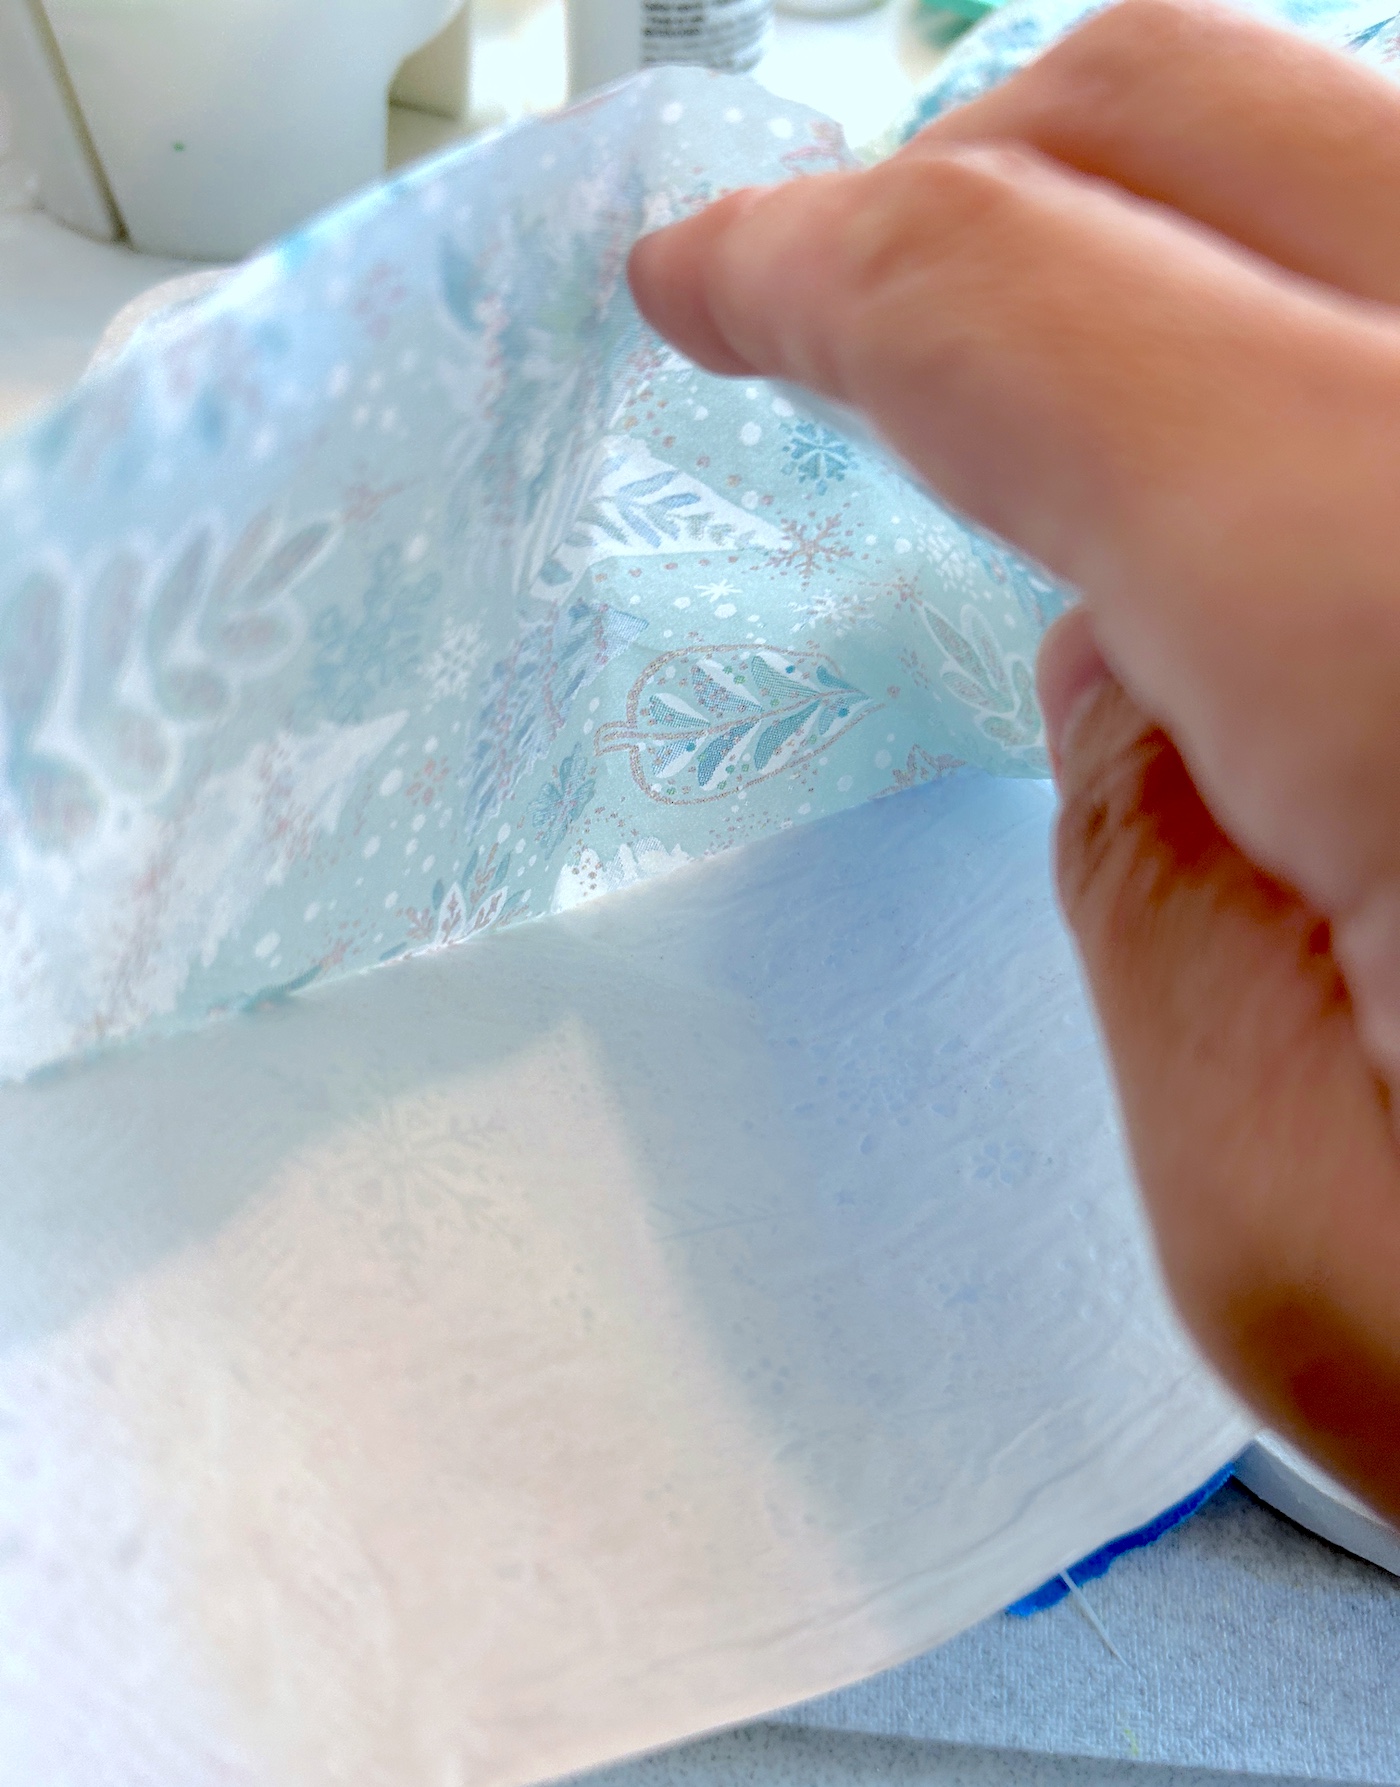
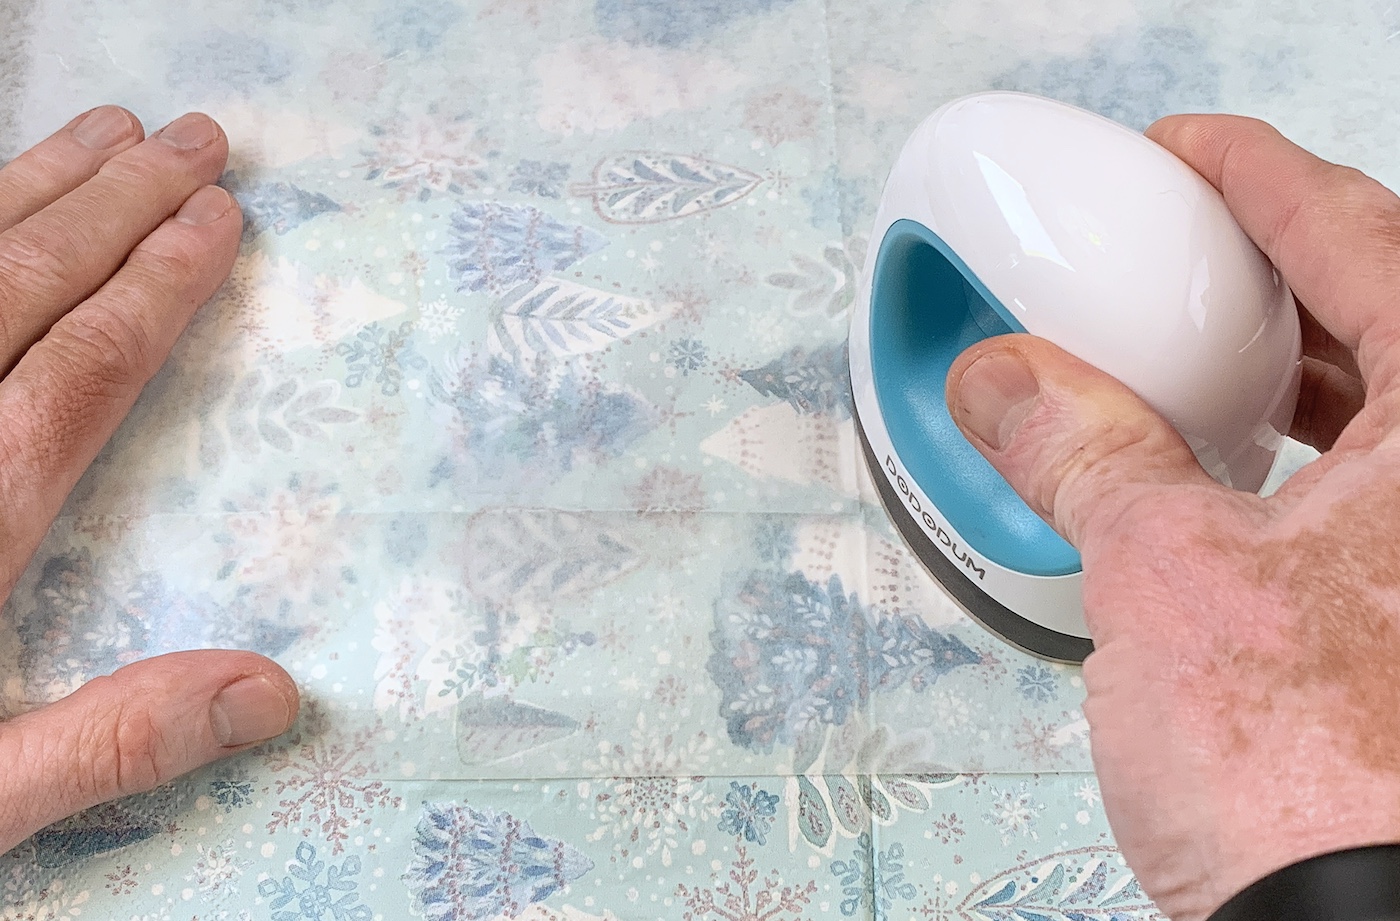
- Place the napkin down onto the word. Place a piece of parchment paper on top of the napkin, and run the craft iron across the top several times. While you are doing this, the Mod Podge is melting below the napkin, and the napkin is adhering. Keep going until the napkin is fully adhered, including the edges.
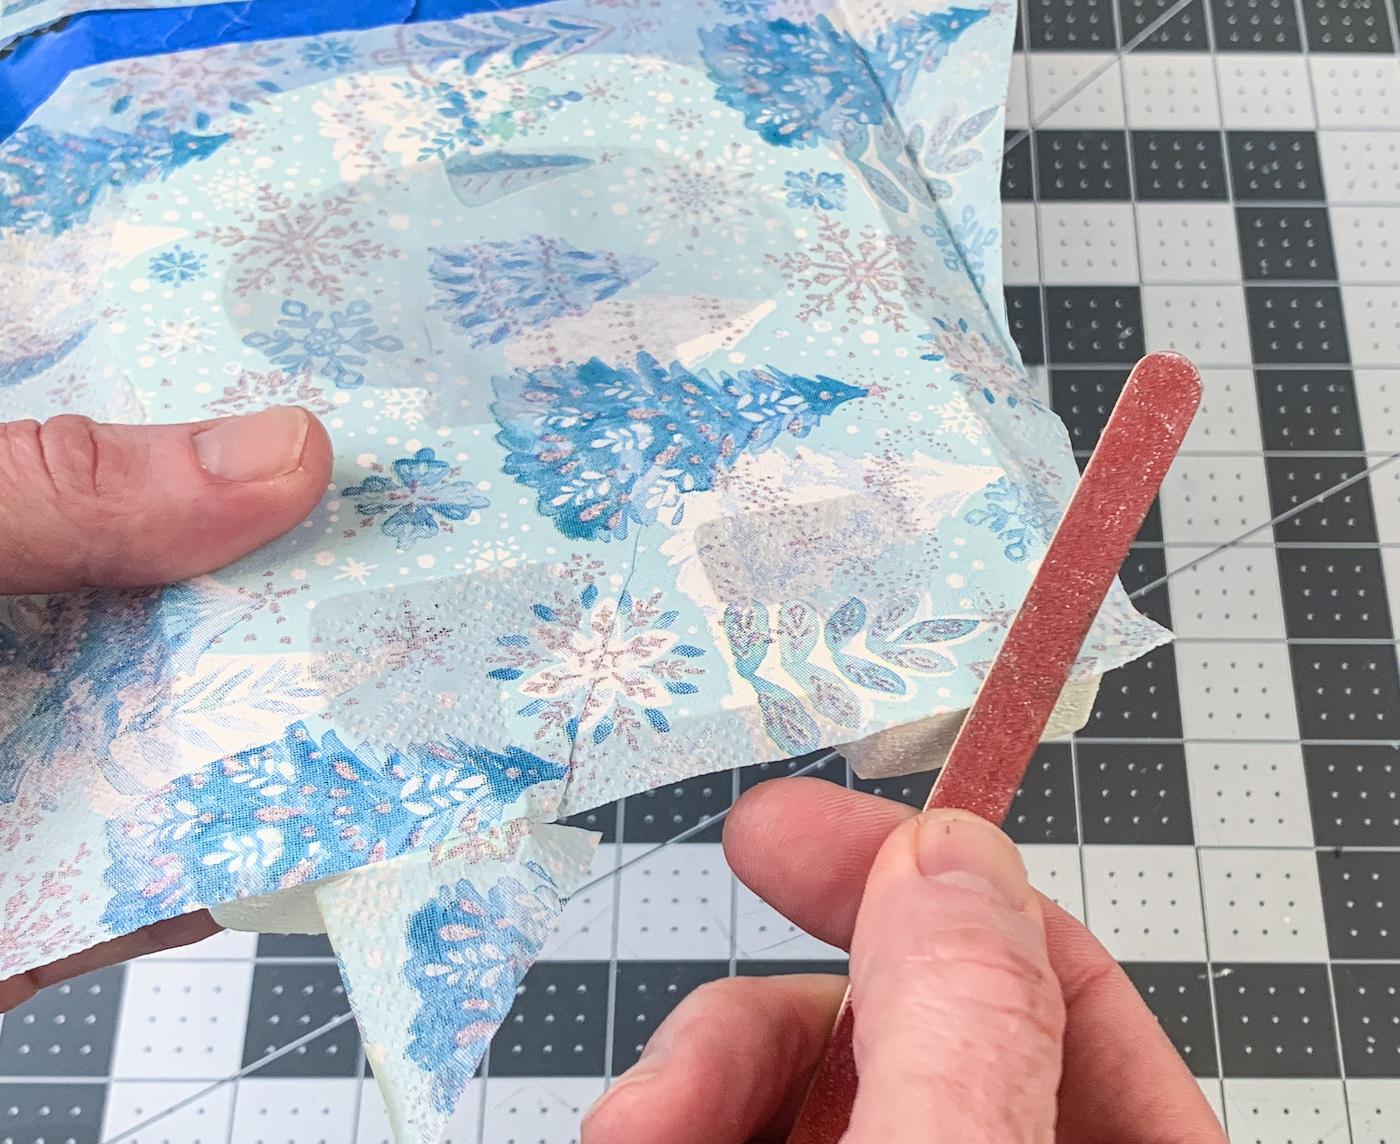
- Let the word cool after ironing. Use an emery board to gently sand away the excess napkin. Sanding at an angle works very well. Continue until all the extra napkin is removed. I used a craft knife to remove the napkin around the painter's tape area.
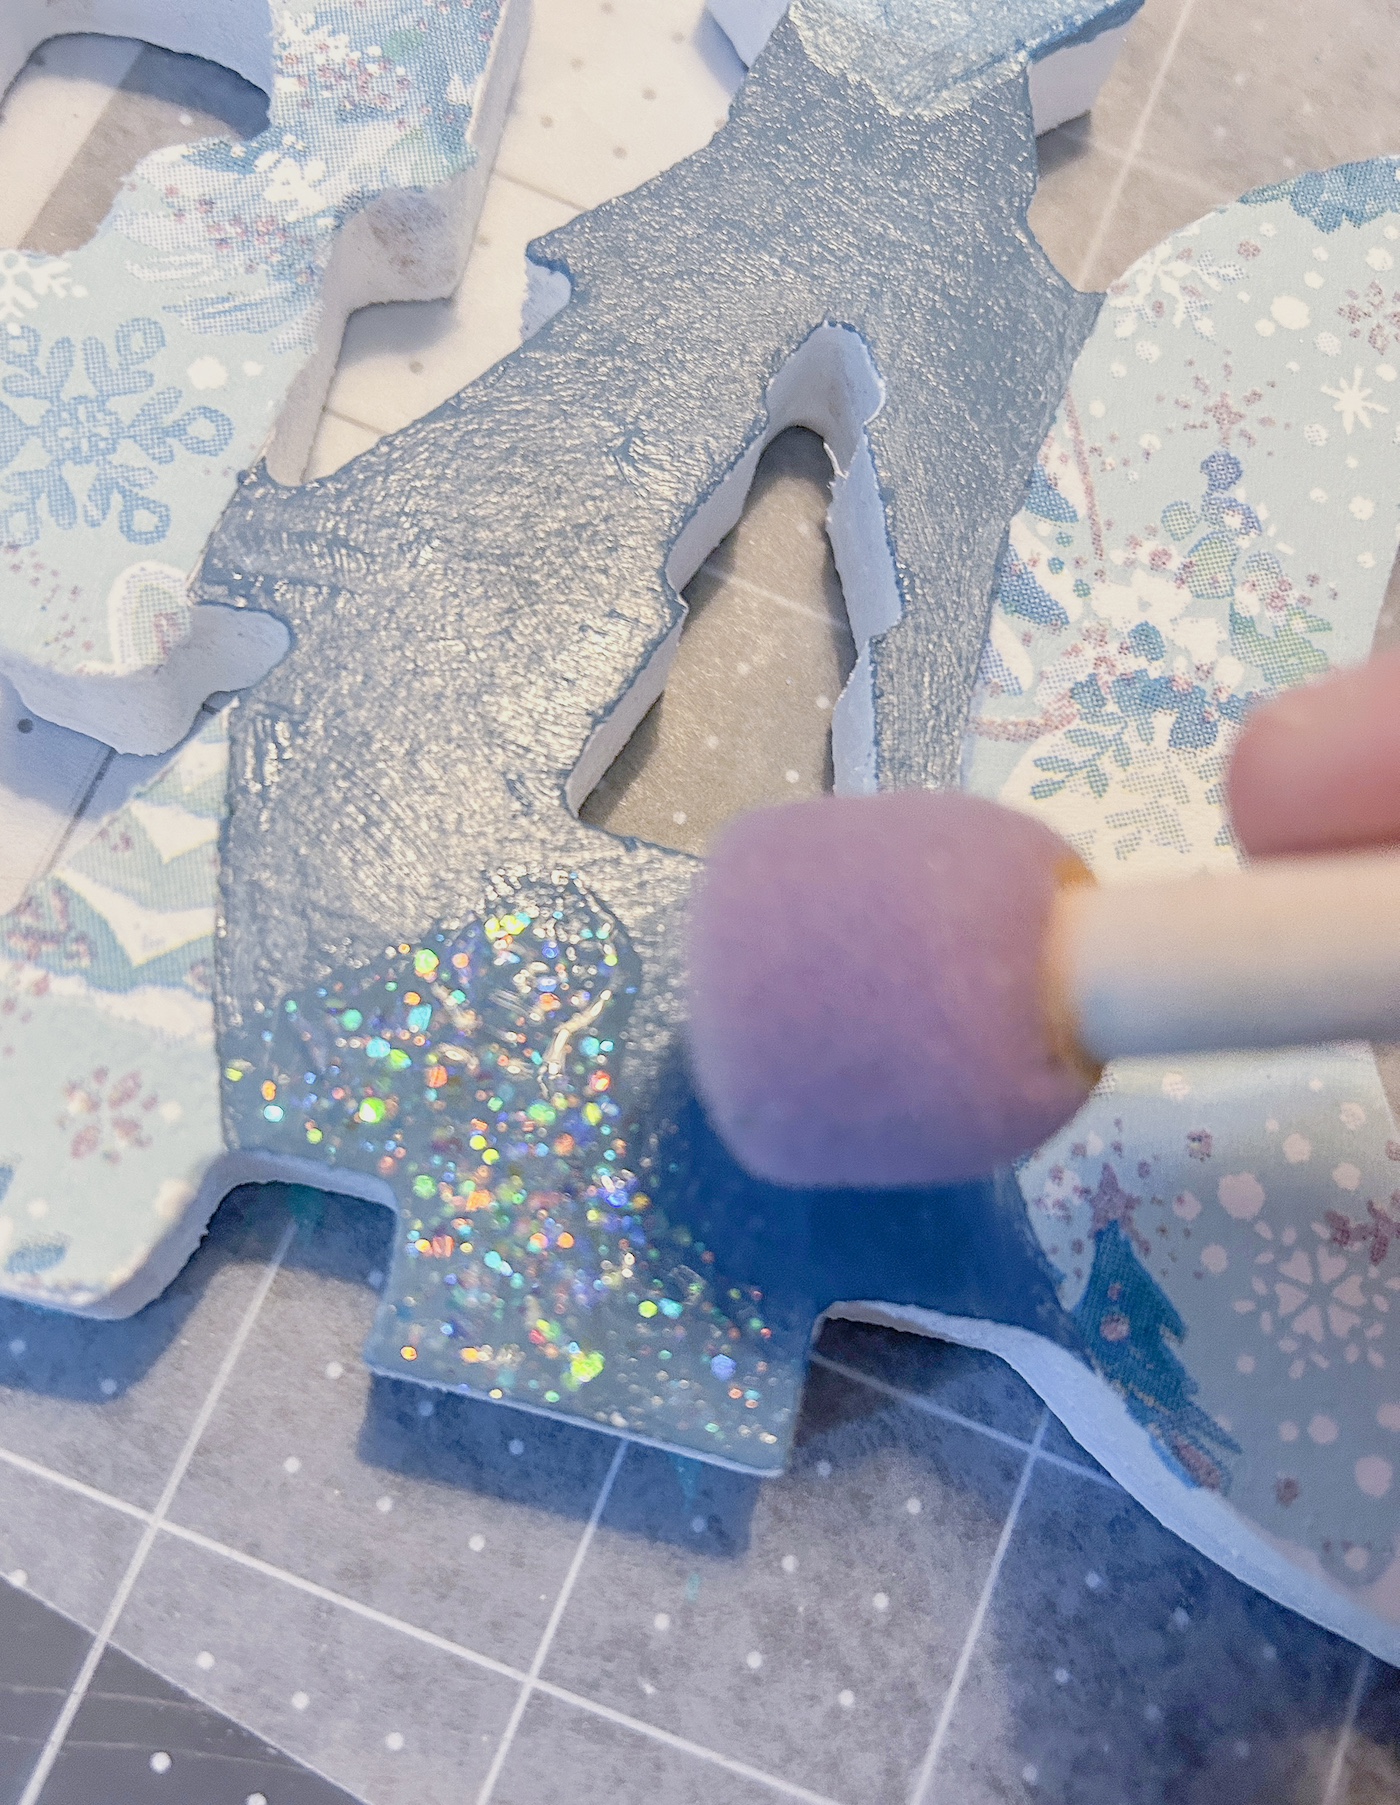
- Remove the painter's tape and paint the tree area using the metallic paint. I used two blues; one for the base of the tree, and one for the star. Let dry.
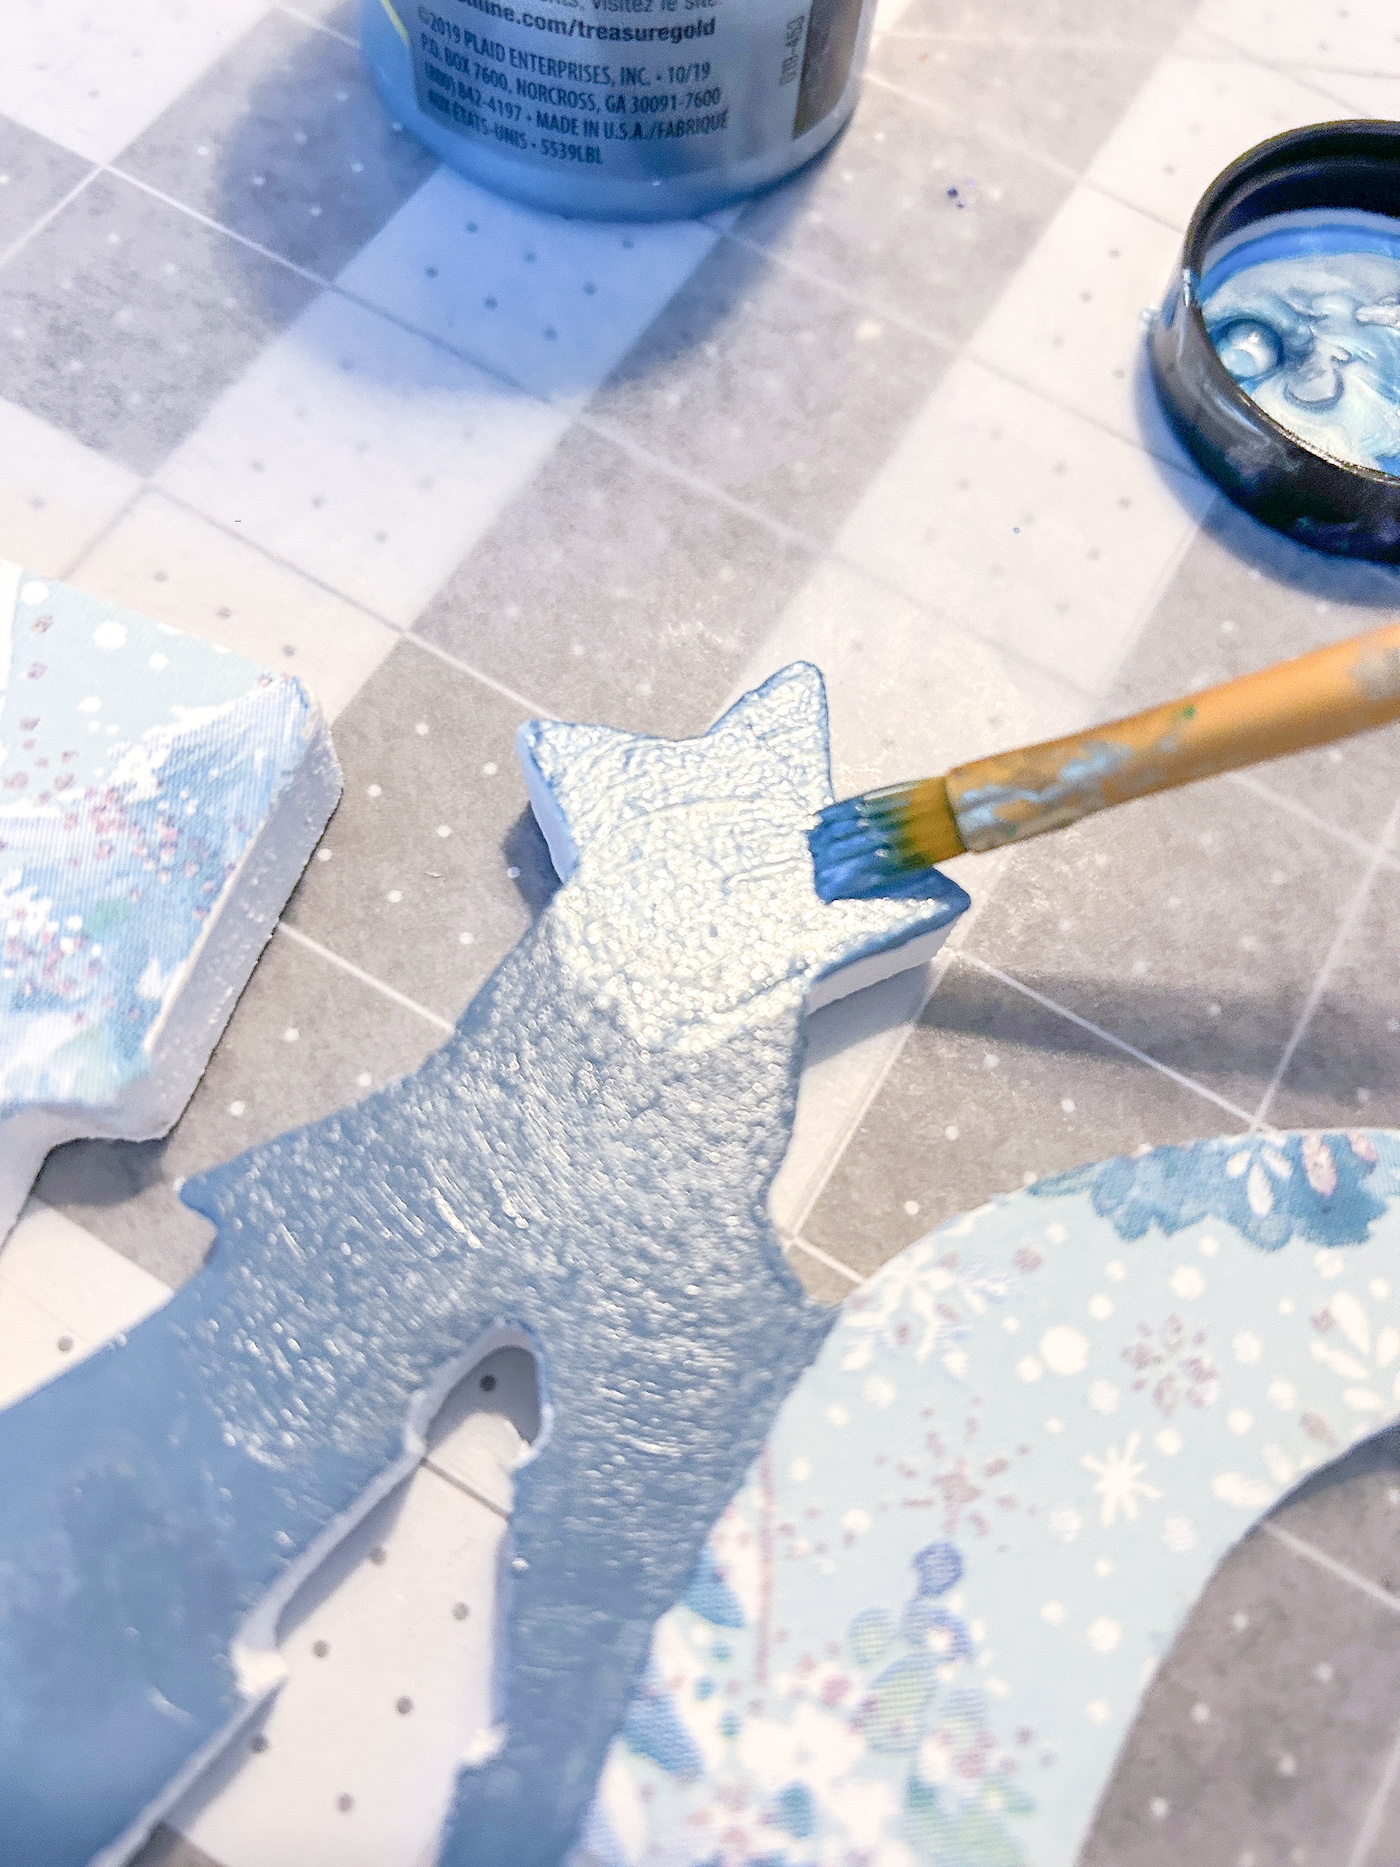
- Apply Glitterific to the tree area with a spouncer. Let dry completely before displaying.
If you enjoyed this peace wood decor, let me know in the comments! I’d also love for you to check out these other winter crafts:


If I don’t own a craft iron, at what temperature should I set my regular iron?