
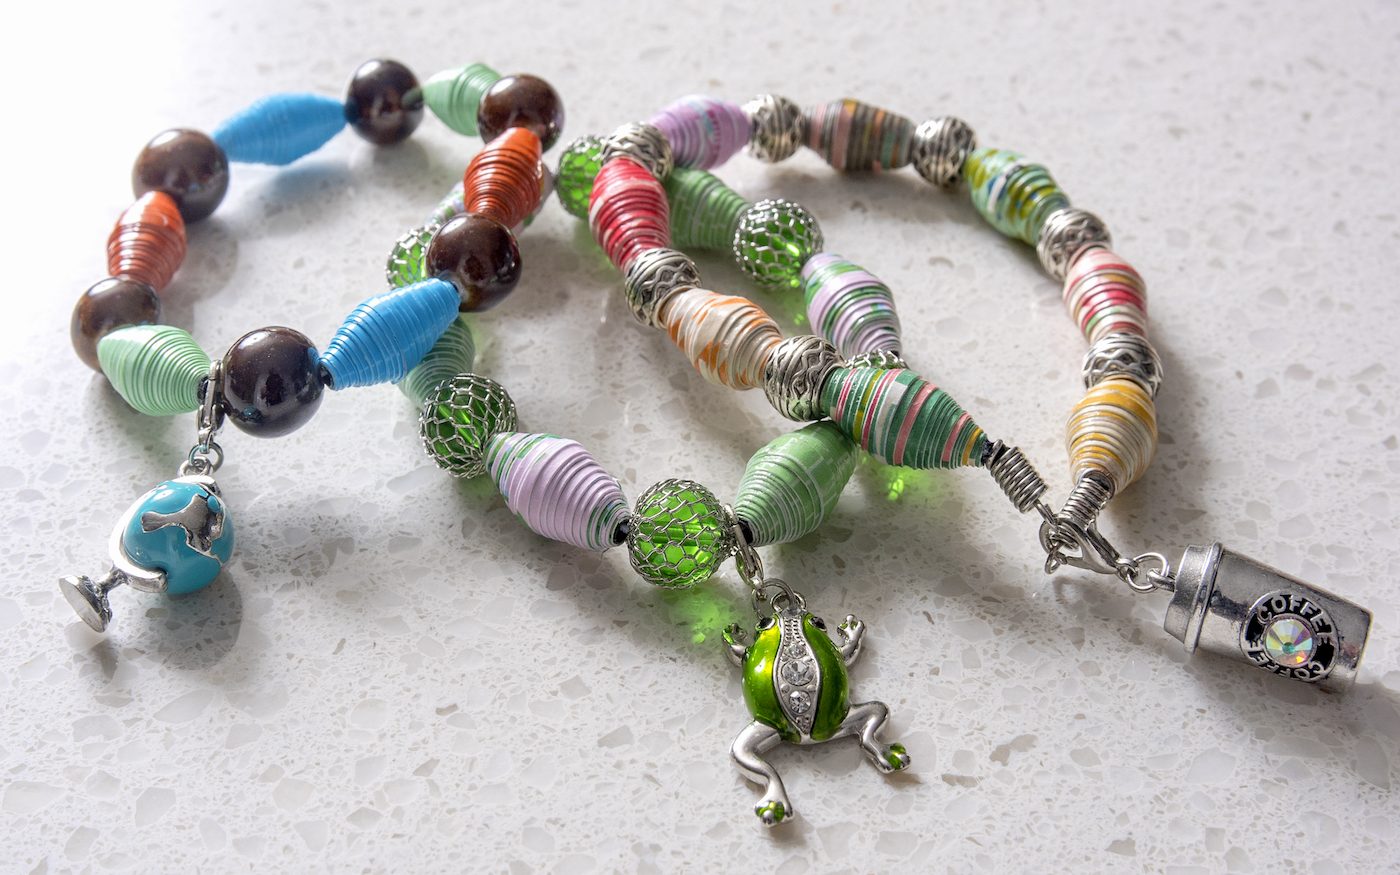
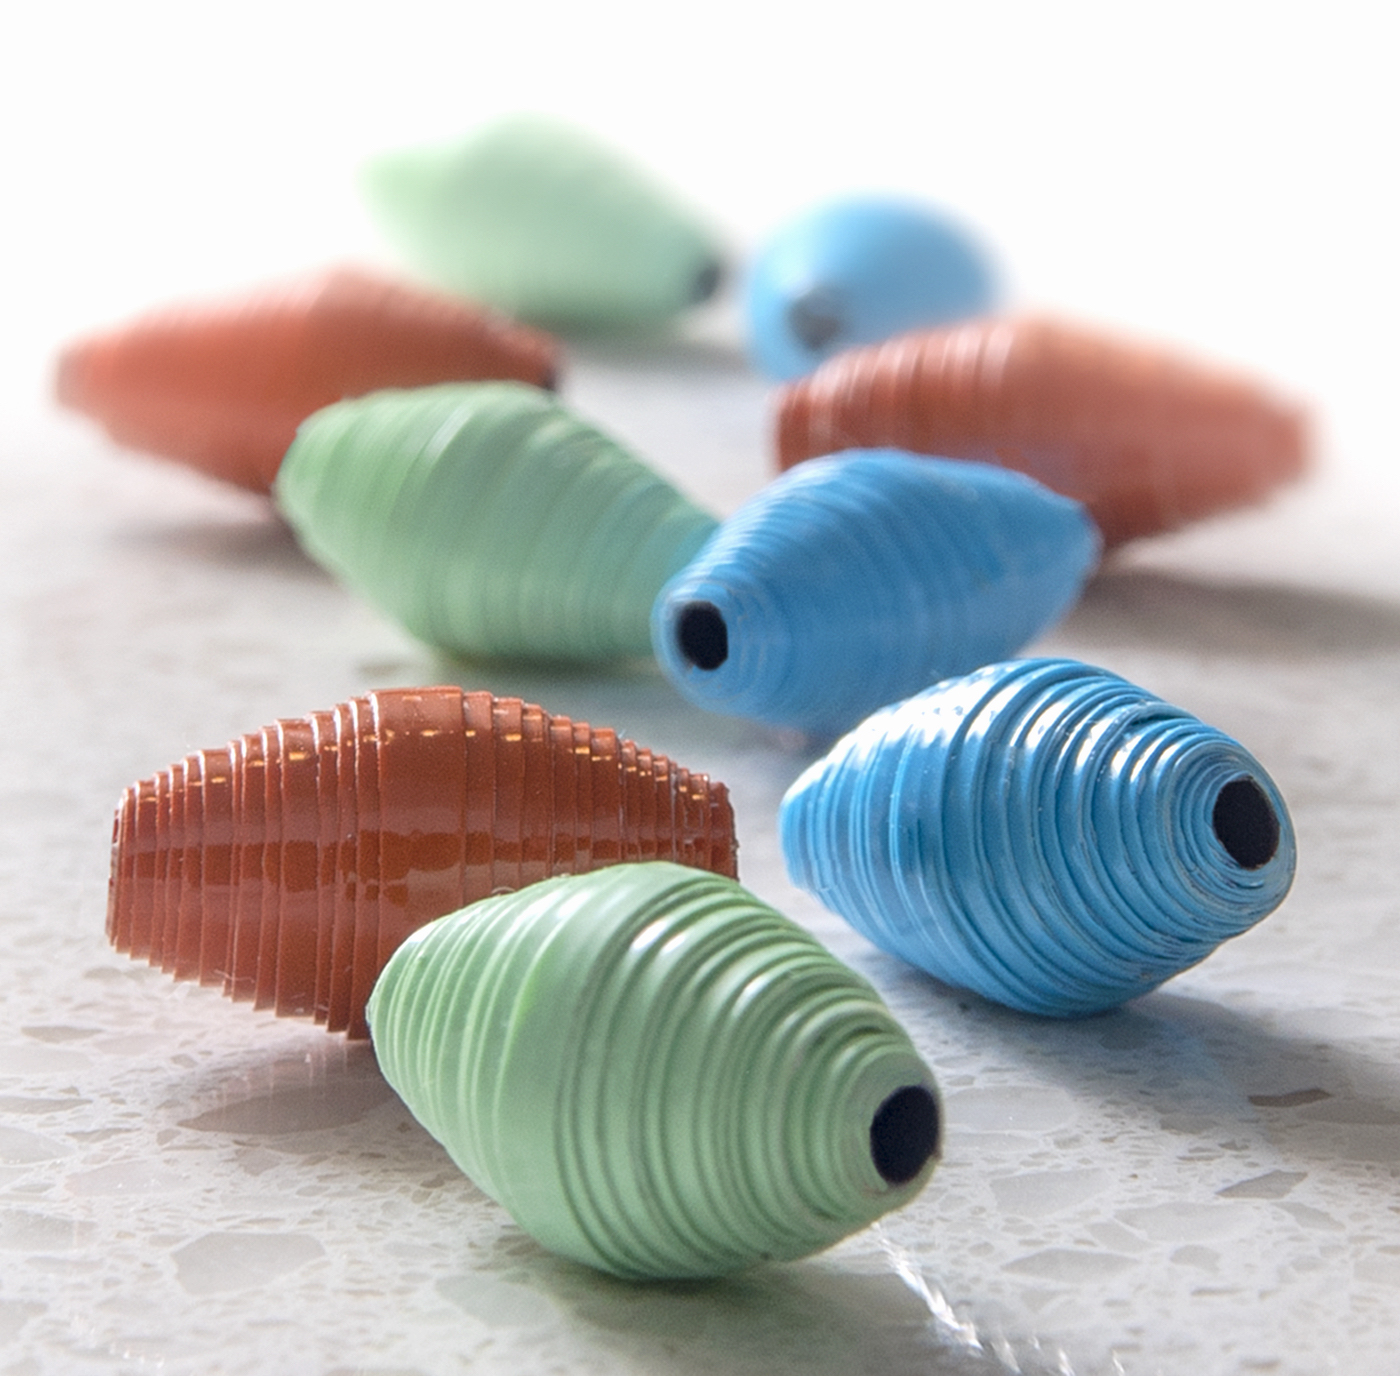
Learn how to make beautiful paper beads quickly with our easy step-by-step tutorial. Perfect for crafting jewelry, these beads are simple, fun, and made in minutes!
Skills Required: None. Even if you’ve never crafted before, these are really easy to make. You’ll be cutting paper and using Mod Podge, along with basic jewelry making if you so choose.
I’m not sure what the challenges are in your life, but I hope one of them is what to do with your leftover scraps of craft paper.
Because if that does happen to be one of your challenges, I have the perfect fashion craft for you – paper beads.
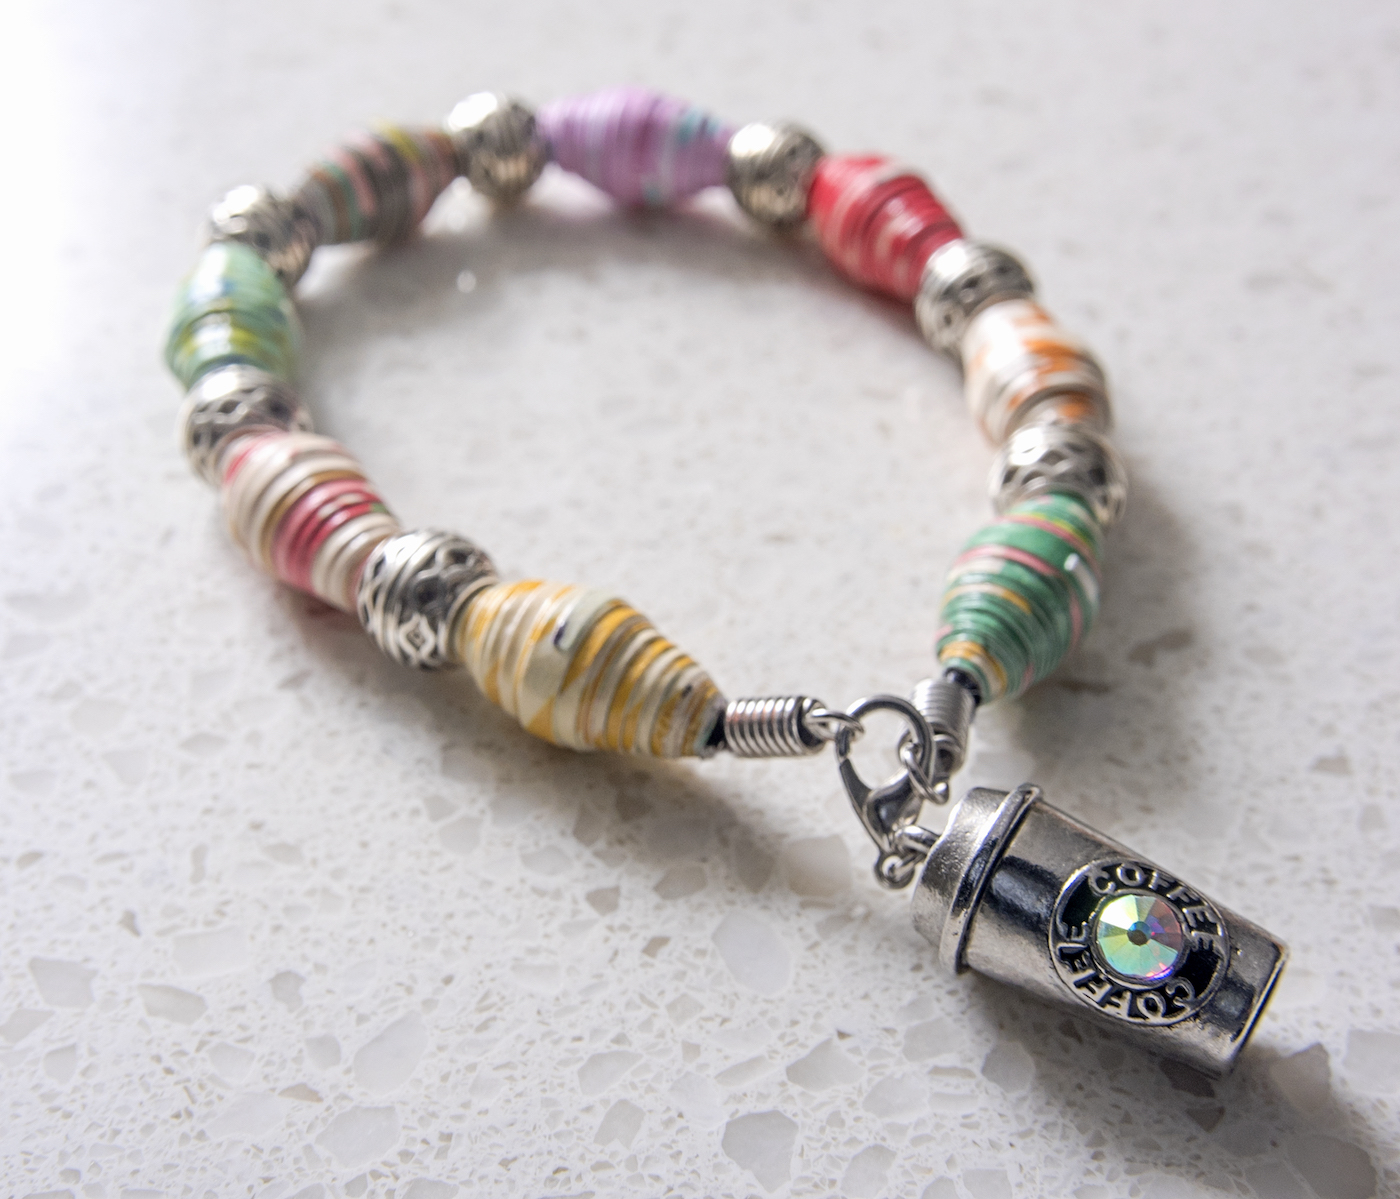
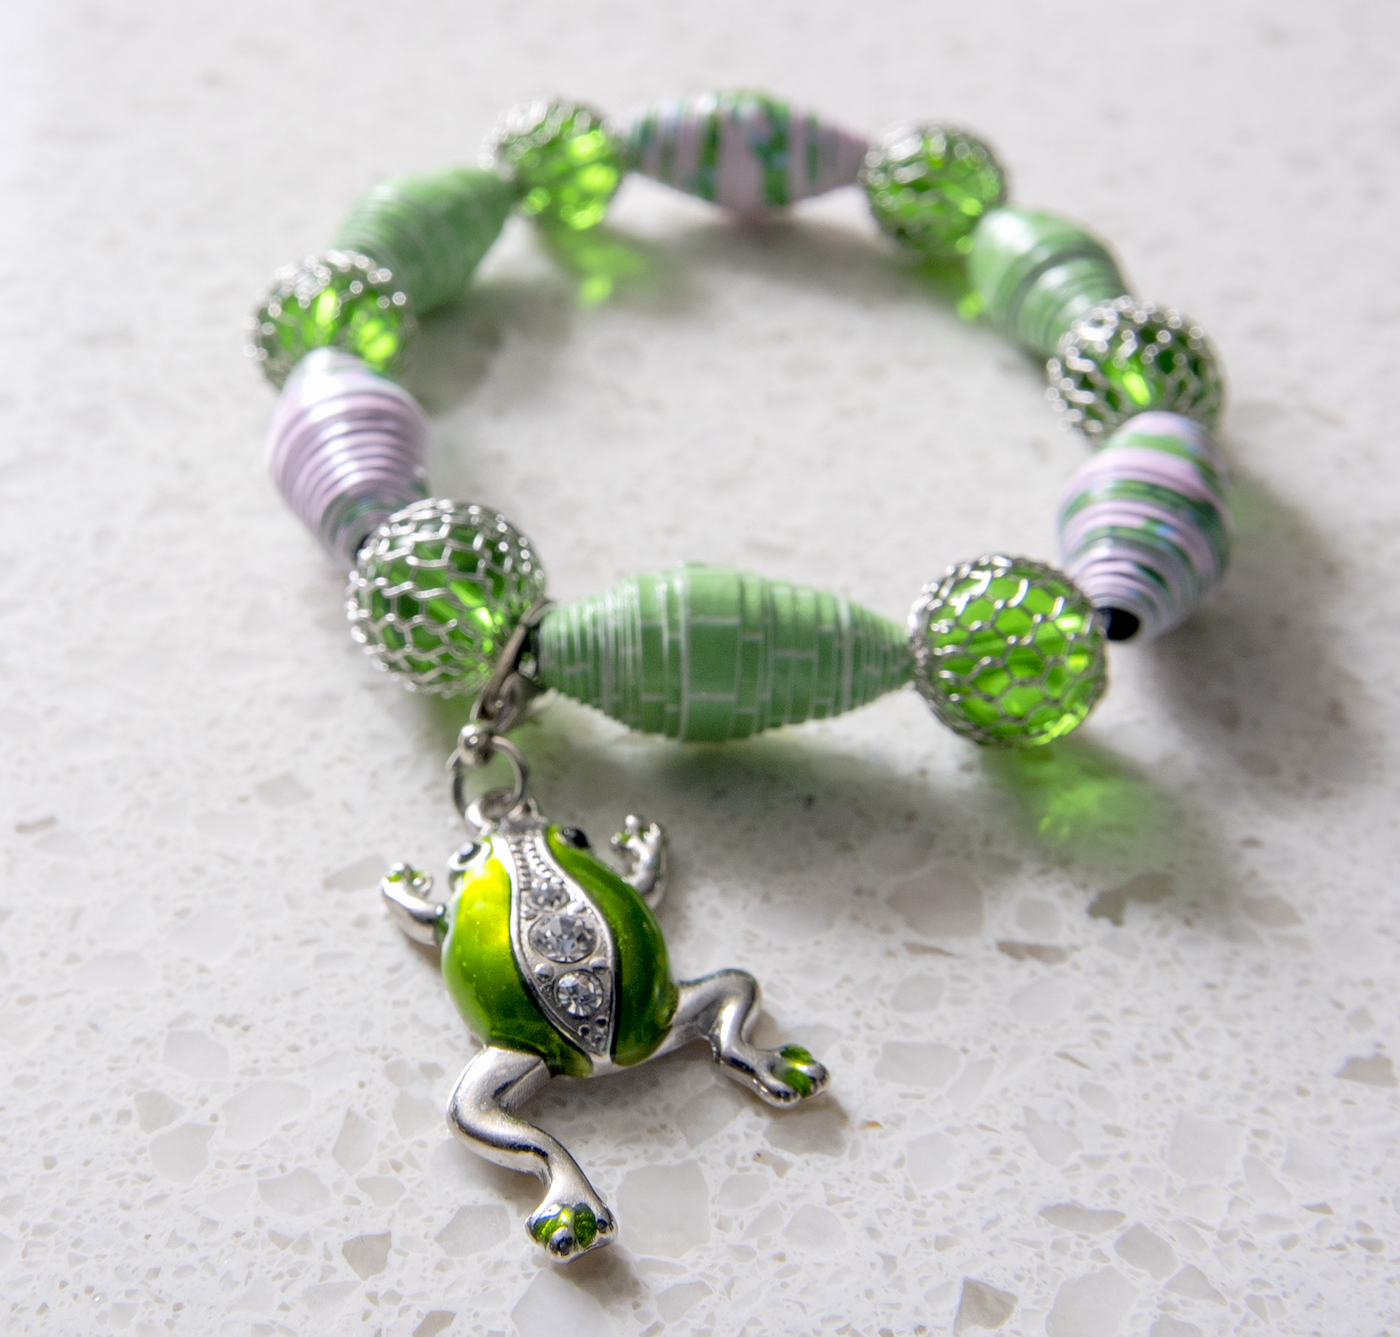
The process is easy to follow and you can have a new necklace, bracelet, or whatever other jewelry piece you like that uses beads in minutes.
Not only can you use paper, but you can use junk mail, magazines, catalogs . . . the possibilities are endless.
I assure you, you’ll be surprised at how sturdy a paper bead is.
There’s a secret for making them even more sturdy, which I’ll share with you in the tutorial as you read on. I promise these are real beads, and they can be used for jewelry making, and they last!
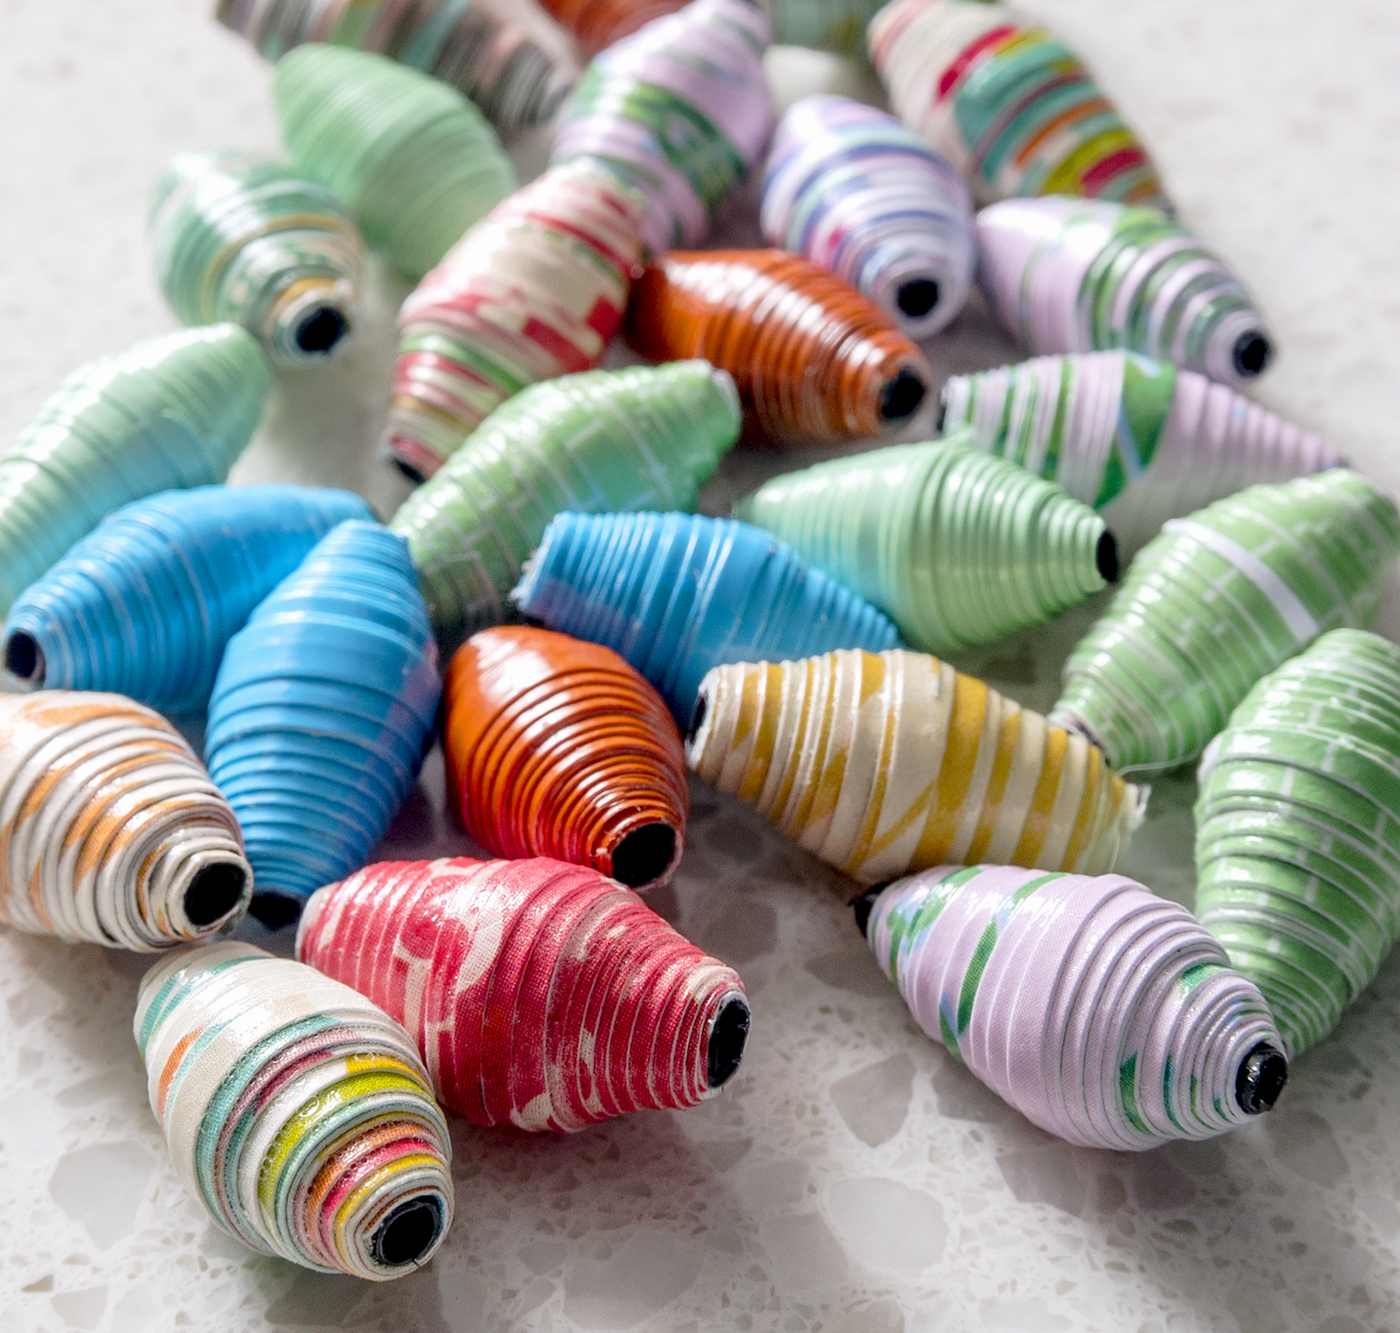
The secret to these simple beads is not really a secret – you’re going to be rolling paper. I wish that it was more like KFC’s Original Recipe, but it’s not.
The process is simply to cut paper triangles (really long ones), roll them up, and seal with Mod Podge. It’s just that easy.
Tips for Making Beads Out of Paper
Before we dive in, let’s answer a few frequently asked questions. If you’re new to this, you’ll want to read on. If you’re interested in the how-to, scroll down!
What paper can I use?
I’ve seen these made from scrapbook paper, wrapping paper, magazine pages, wallpaper, and more. You can even use fabric. I recommend avoiding really thin papers, like tissue paper. They just won’t be sturdy enough.
How do I cut the paper?
You can use scissors to cut your beads, but I recommend a craft knife and mat with a metal ruler. It’s just way easier to get straight cuts, in my opinion.
It’s not *that* important that the edges are neat, but it does make the finished project look nicer.
How do you make the beads shiny?
That, my friends, is where the magic happens. You’ll use Mod Podge to seal your beads. If you want to make them extra shiny, use Super Gloss Mod Podge or a high gloss spray sealer.
This is one of those easy crafts for adults you’re going to get try and won’t want to stop. Honestly it’s also an easy craft for kids or craft for teens to try as well. Trust me on this!
Gather These Supplies
- Paper scraps – I used scrapbook paper
- Cocktail straws or bamboo skewers – hello, Dollar Tree!
- Mod Podge Gloss
- Craft knife and mat
- Ruler
- Scissors
- Paintbrush
- Scotch Tape
The only choice you really have to make is if you’re going to use a cocktail straw or a bamboo skewer to roll your beads. My perspective: the cocktail straw gives the beads a bit more rigidity.
Having said that, you don’t always have straws on hand. In which case, you can use a bamboo skewer and just remove the bead before it dries.
Get the printable how to card for this project below:

Paper Beads
Equipment
Materials
- Paper scraps
- Cocktail straws or bamboo skewers
- 1` bottle Mod Podge Gloss
- Scotch tape optional
Video
Instructions
- Measure a strip of paper approximately 3/4 inches wide and 12 inches long. Cut out with a craft knife or scissors.
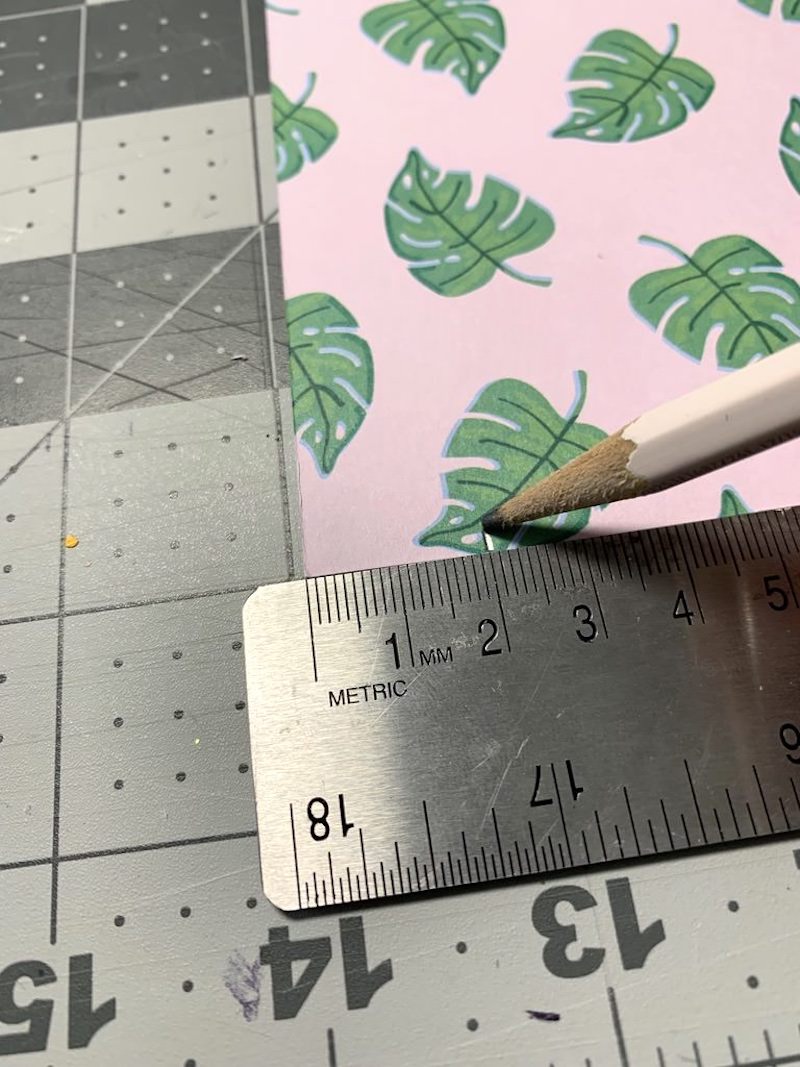
- Measure halfway across the paper at one end and make a pencil mark.
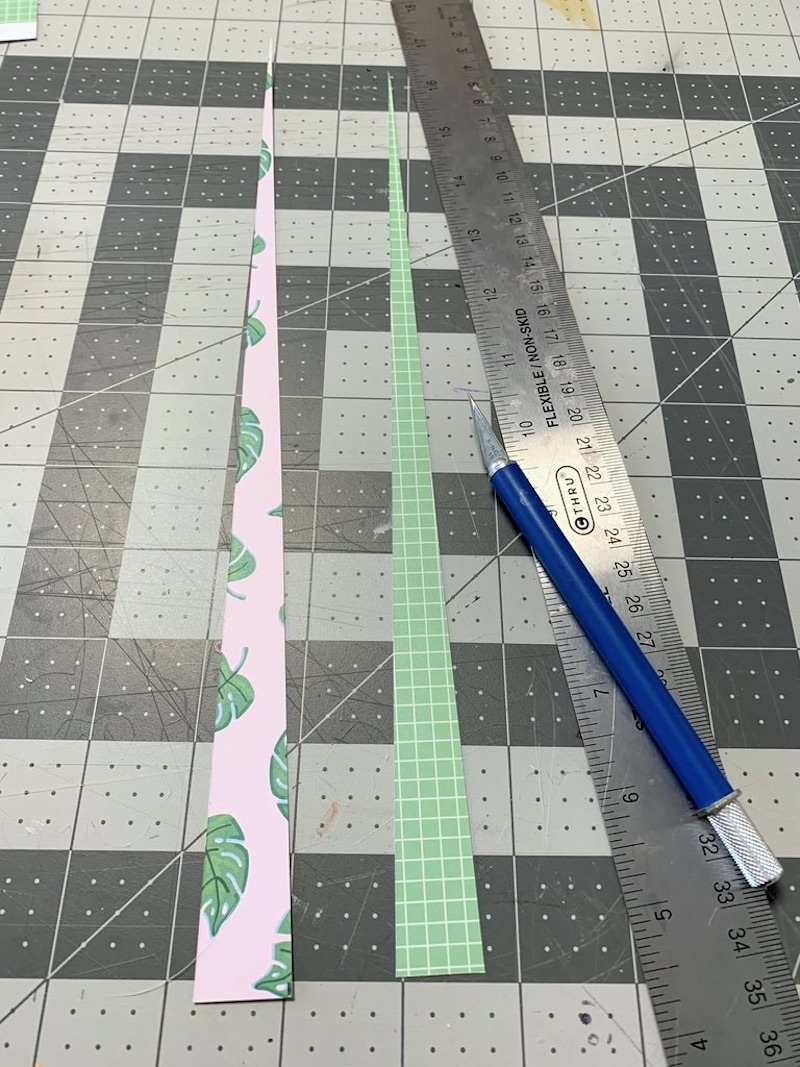
- At the other end of the paper, place your ruler and measure from that end to the midpoint. Trim with a craft knife. Repeat on the other side. You'll notice you just cut out a very long triangle. One of the ends will be 3/4" wide, and the other end will be a tip. You'll start rolling from the wide end.
- Place a piece of tape at the long end of the triangle. Place a cocktail straw on the tape.
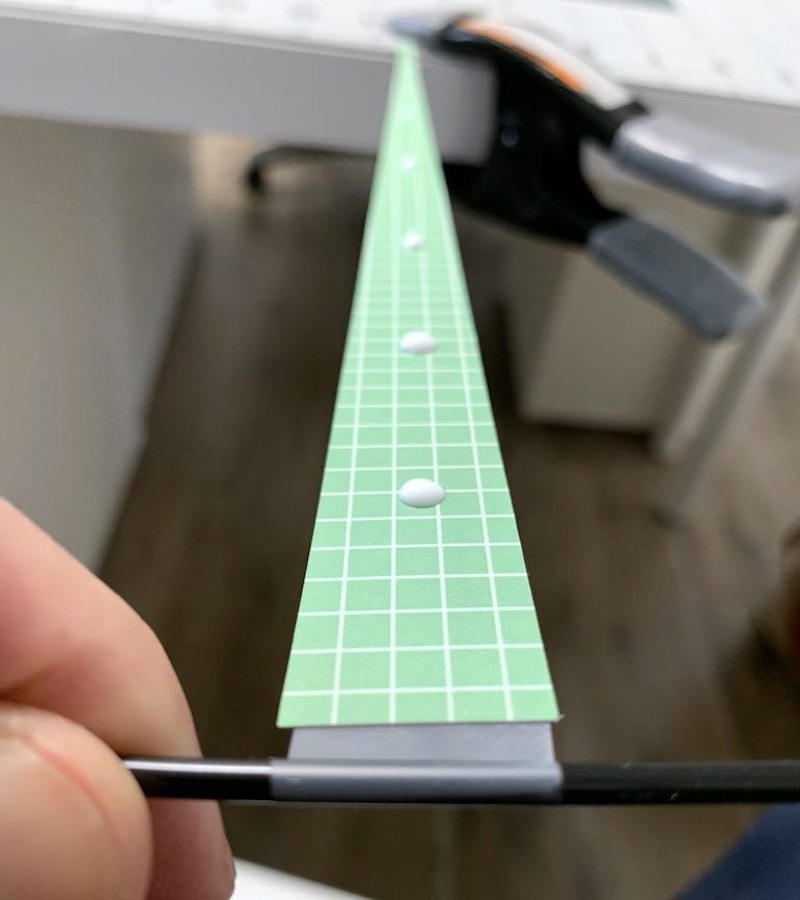
- Add several dabs of craft glue down the length of the paper strip and start rolling your bead, from the long end toward the point.
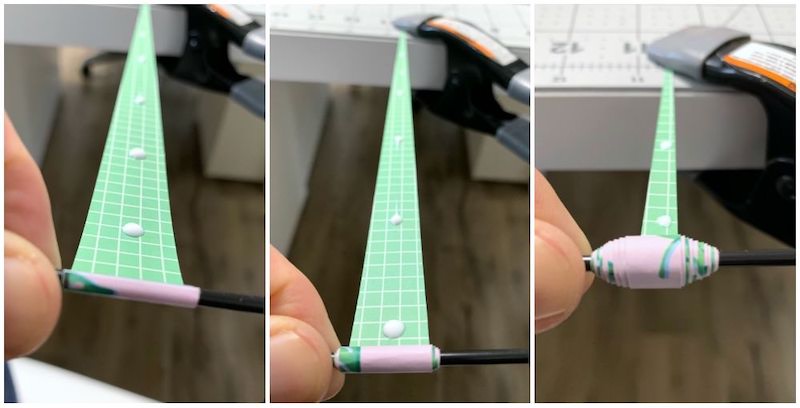
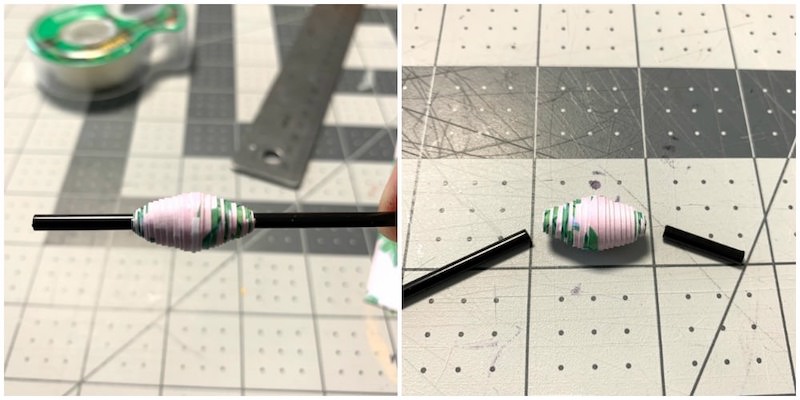
- Once the bead is rolled, smooth with your fingers to make sure the end is secure. Let dry, then trim the ends of the cocktail straw with scissors. Repeat until you have the desired amount of beads.
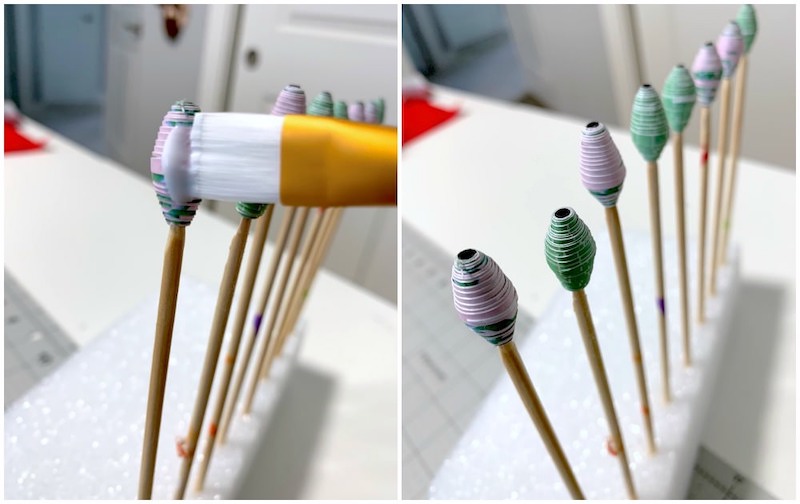
- Paint the beads with several coats of Mod Podge, allowing to dry between coats. Let dry completely before stringing.
Notes
Would you try this beginner project? I’d love to hear your thoughts in the comments! I’d also love for you to check out these other fun and simple craft ideas to make at home:
Crafts for Girls • How to Make Bangle Bracelets • Mod Podge Jewelry •


I love making paper beads. Before now, I always used a white glue. Modge Podge makes it so much easier
Hi – I love the video and I also printed the instructions. Just wondering where to find the templates for the paper beads. Thanks love ModPodge
I am looking forward to trying this out for my earrings making business. Always looking for fresh ideas to create handmade resources and these fit the bill…thanks for sharing! 😁