
Learn how to make a paper plate dragon with simple supplies and paint! So cute and fun for kids – a great summer craft idea.
Hello, crafters and dragon enthusiasts! Are you ready to unleash your inner fire-breathing, craft-making beast?
Because we’re about to dive into the mystical world of paper plate dragons – a place where creativity soars on dragon wings, and the only limit is your imagination (and maybe your supply of paper plates).
We’re talking about a craft so simple yet so magical, it’s like discovering a hidden dragon’s lair in your kitchen cupboard. The plates you use for BBQs and birthday cake are about to get a monstrous makeover.
All you need are some basic crafting supplies – paper plates, of course, some paint, a dash of Mod Podge, and a sprinkle of creativity. And perhaps some sparkle, because let’s face it, even dragons enjoy a bit of bling.
And the best part? This dragon paper plate craft is perfect for crafters of all ages and skill levels.
Whether you’re a seasoned knight of the crafting table or a young squire just beginning your journey, these dragons are sure to bring a smile to your face and a burst of pride to your heart.
So, gather your supplies, summon your courage, and prepare to embark on a crafting quest that will take you through enchanted forests and over rainbow skies.
By the end of this adventure, you’ll not only have a fierce paper plate dragon by your side but also a tale of creativity and fun to share for years to come.
Ready to breathe some crafty fire into those paper plates? Let’s spread our wings and dive into a world where dragons are not just mythical beasts, but a crafter’s best friend! Here’s what you’re going to need.
Gather These Supplies
- Paper plates – about 3 – 5 per dragon
- Acrylic paint – colors of your choice
- Mod Podge Sparkle (optional)
- Googly eyes
- Scissors
- Paper brads
- Craft glue
- Hole punch
- Sharpie or felt tip black pen
- Pencil
- Paintbrushes
- Spouncers
Tips and Tricks for This Project
If you use thin plates (like those found at Dollar Tree), you might want to glue two together. I found I needed a little more stability for my dragons.
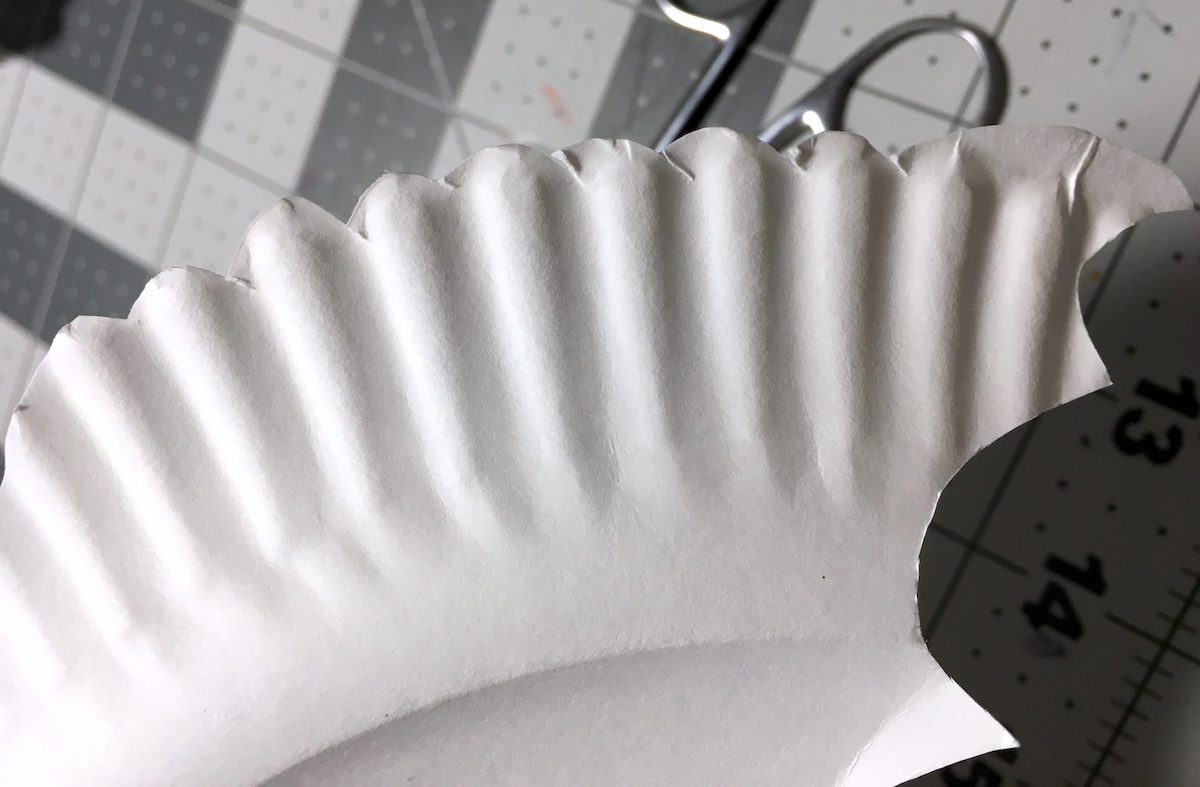
Keep in mind that you want the edge of the plate to be the edge of the wing. It looks so fun!
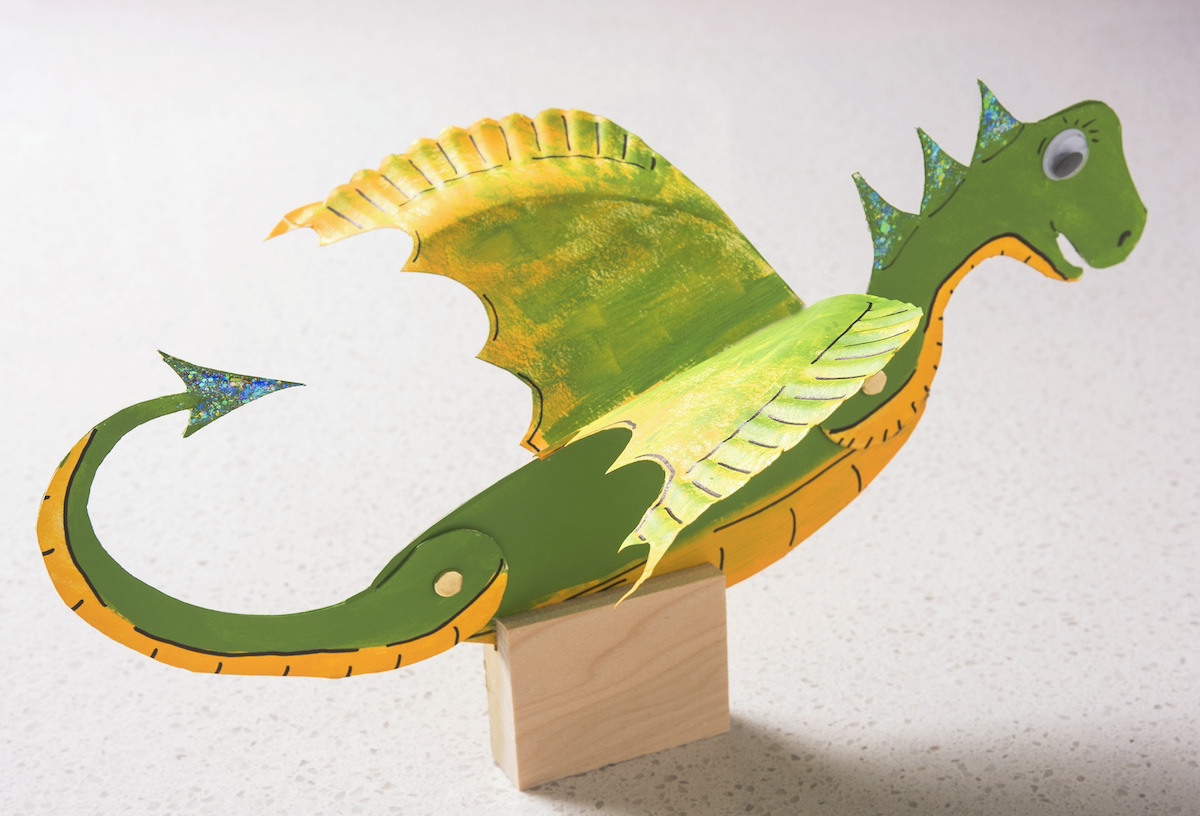
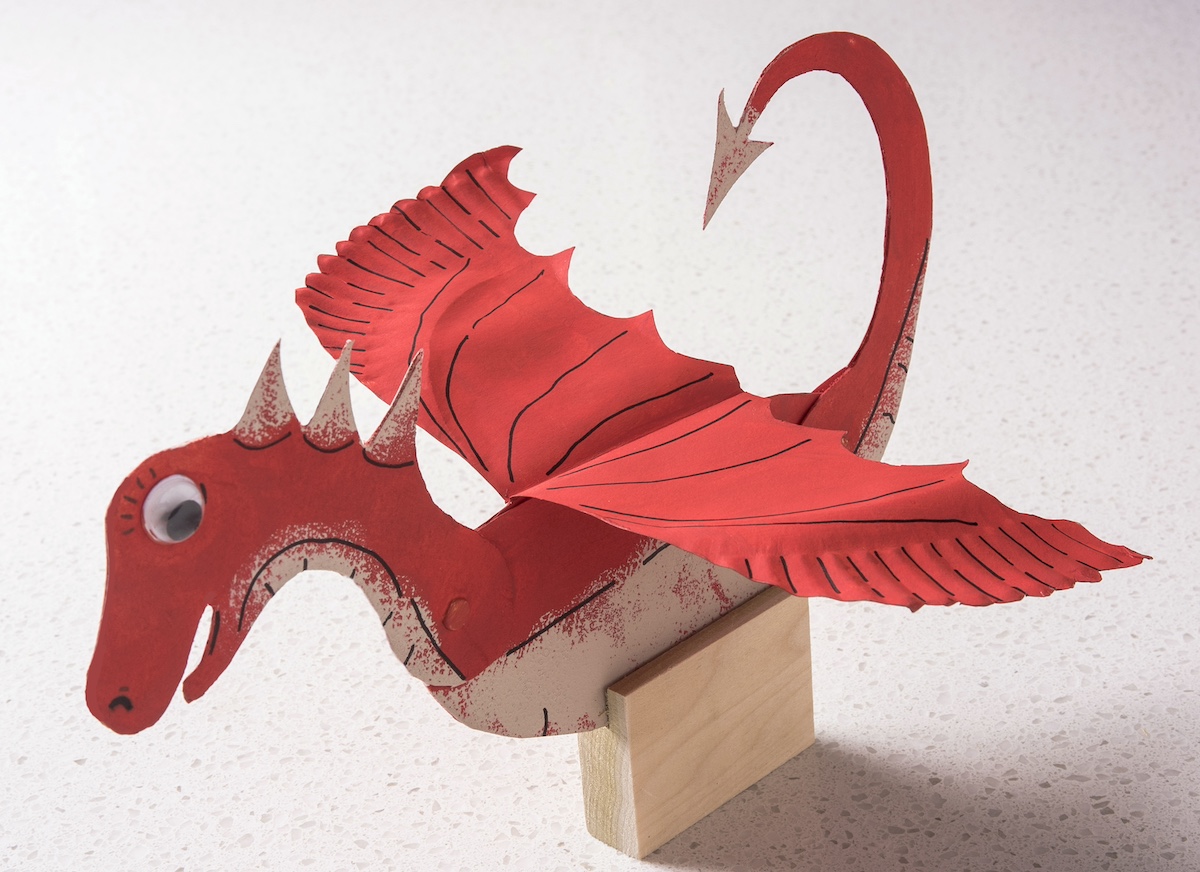
I painted the bodies one color and the chests another color. I also used spouncers to create a speckled look since dragons have scaly skin.
Get the printable how to card for this kids’ craft below:

Paper Plate Dragon
Equipment
Materials
- 5 Paper plates about 3 – 5 per dragon
- Acrylic paint colors of your choice
- Mod Podge Sparkle optional
- Googly eyes
- Paper brads
- Craft glue
- Sharpie or felt tip black pen
Instructions
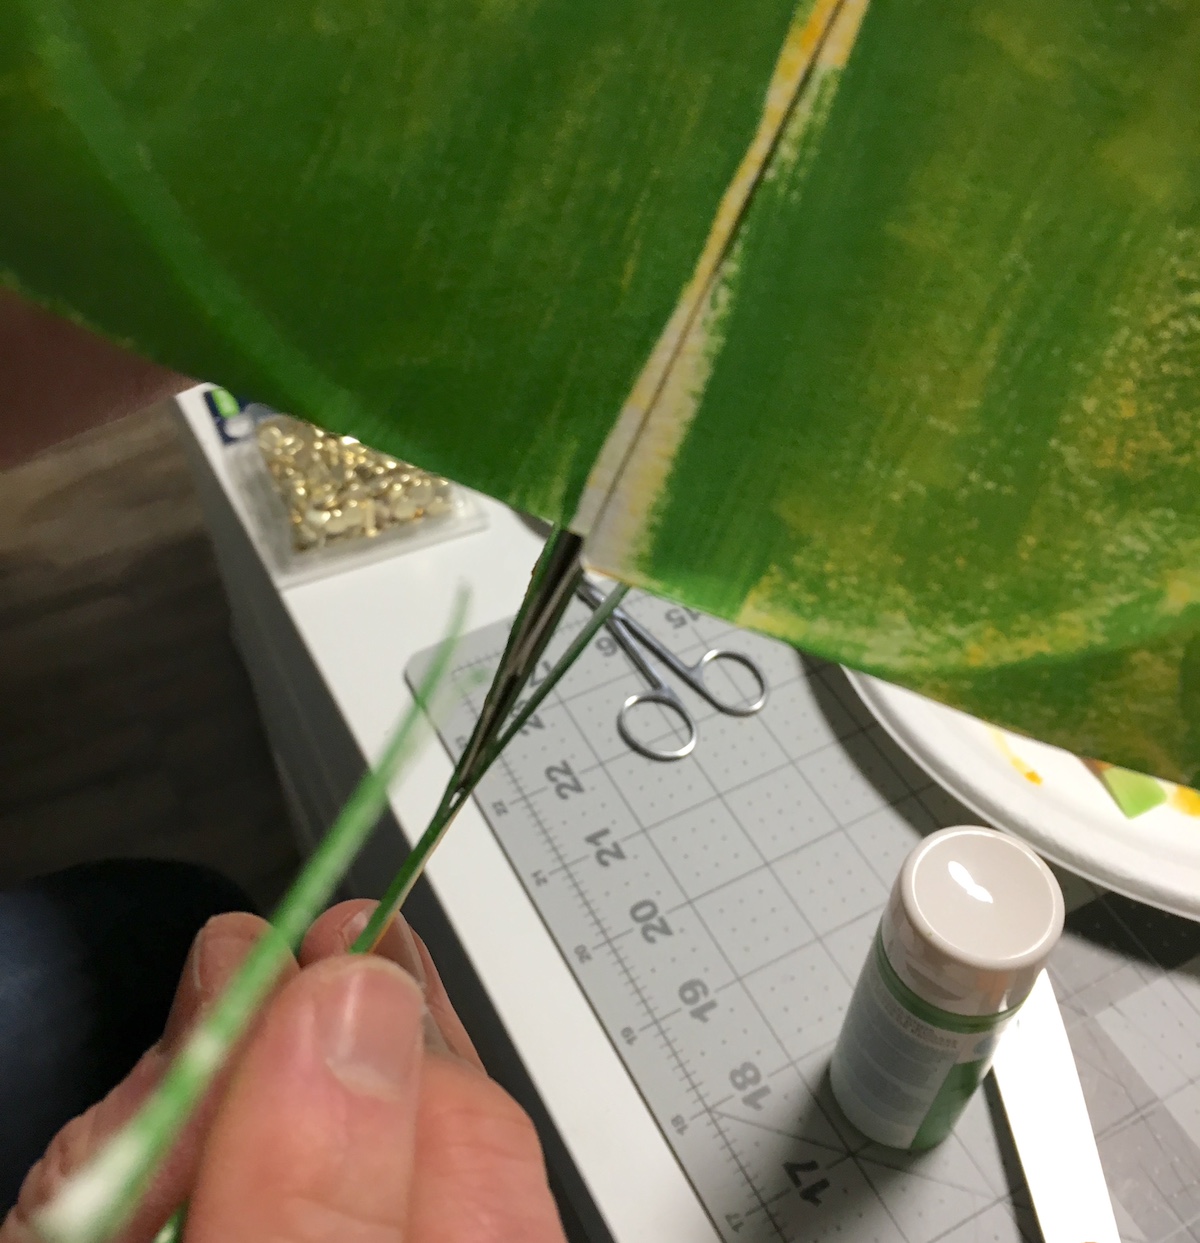
- Draw a wing on the back of a paper plate using a pencil. Cut out with the scissors.
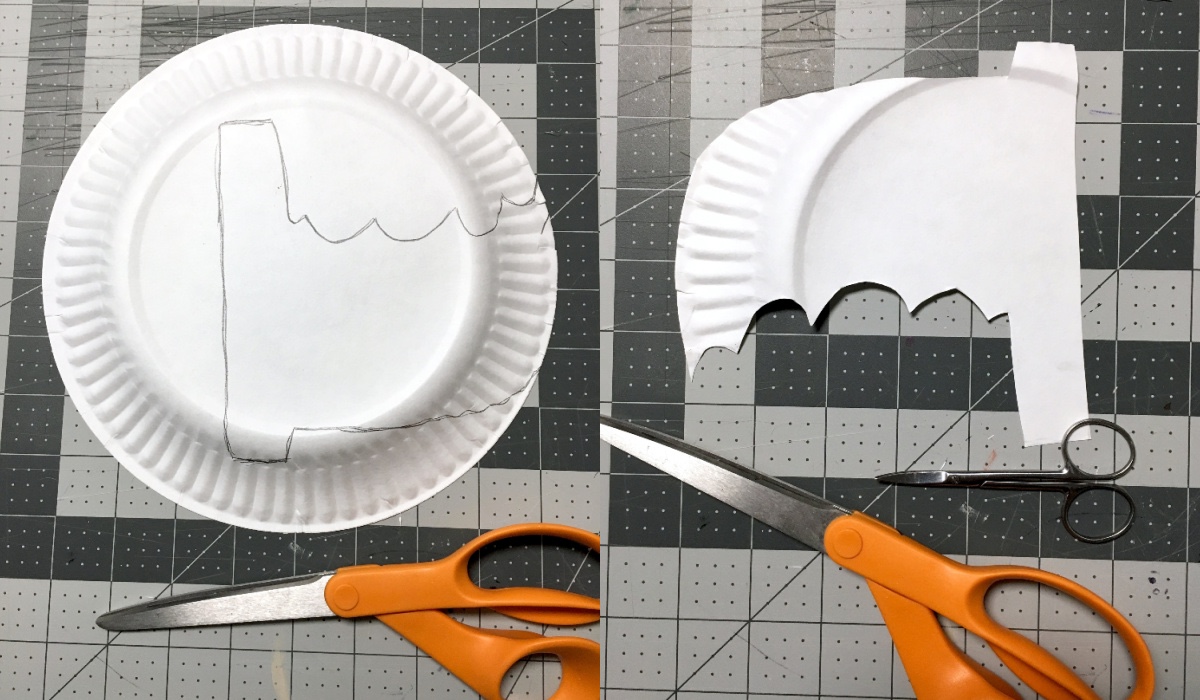
- Use the first wing to trace a second wing on the inside of the second paper plate. Cut out with the scissors.
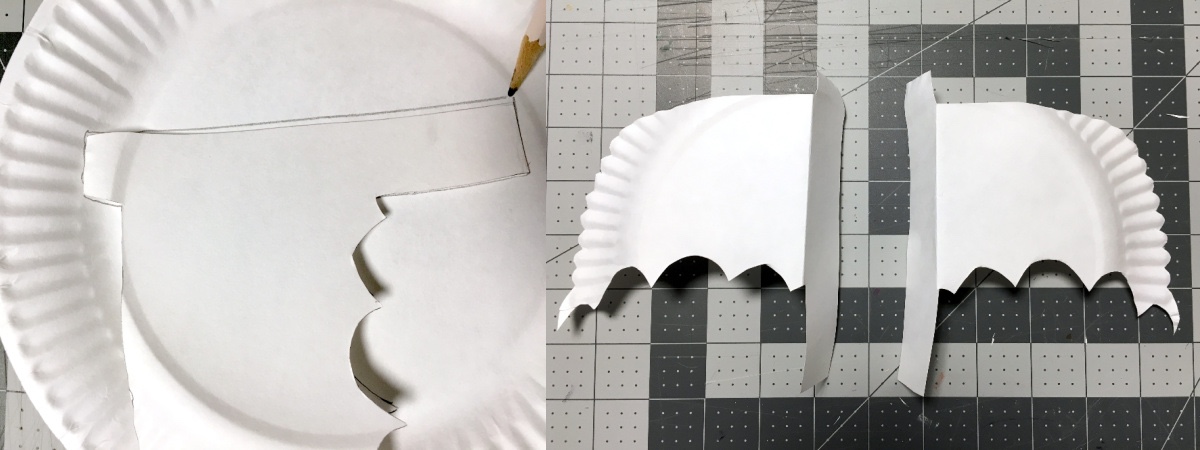
- If desired, you can trim the edges of the plates to be scalloped and look more like wings. Glue them together and let dry.
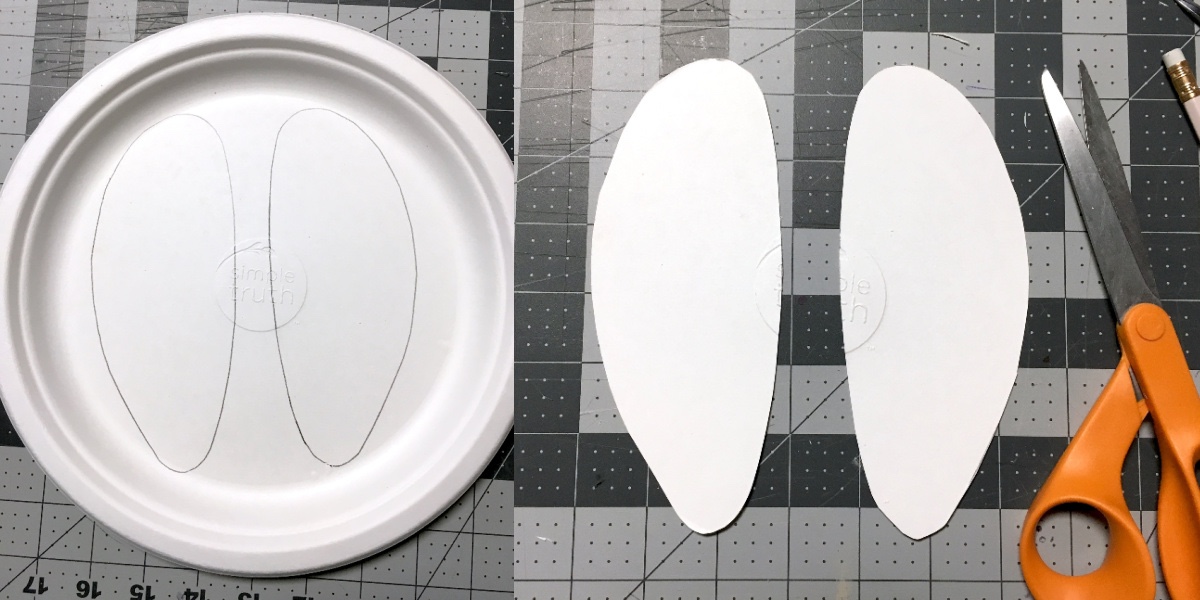
- Cut the center of the body out using another paper plate. You'll want two oval shaped pieces of relatively the same size. Glue them together, sandwiching the wings in between.
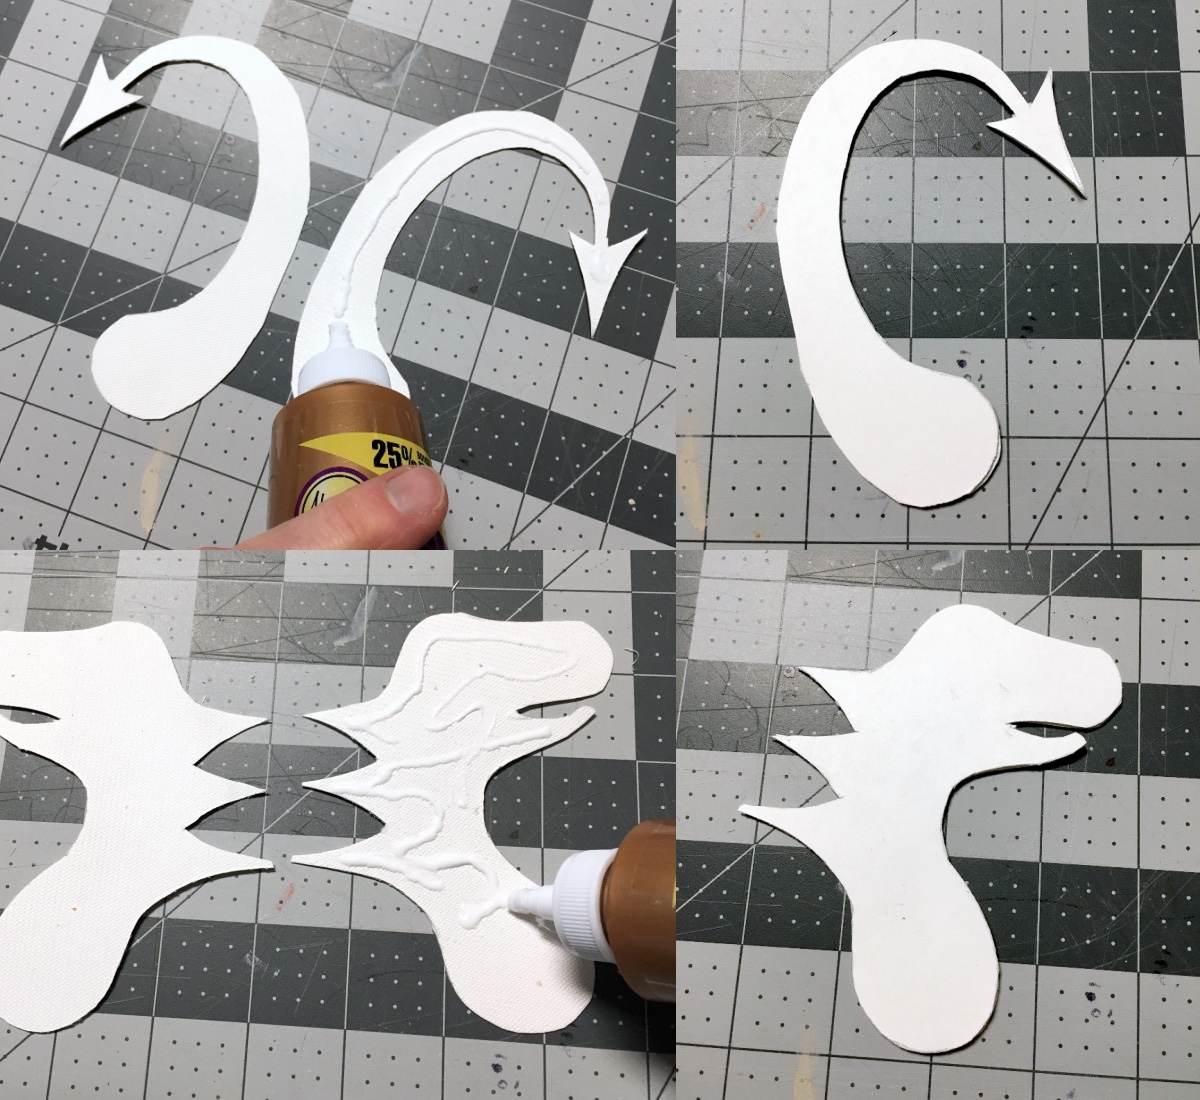
- Draw the head and tail pieces on a paper plate. Cut out, then trace them to cut out one more of each shape.
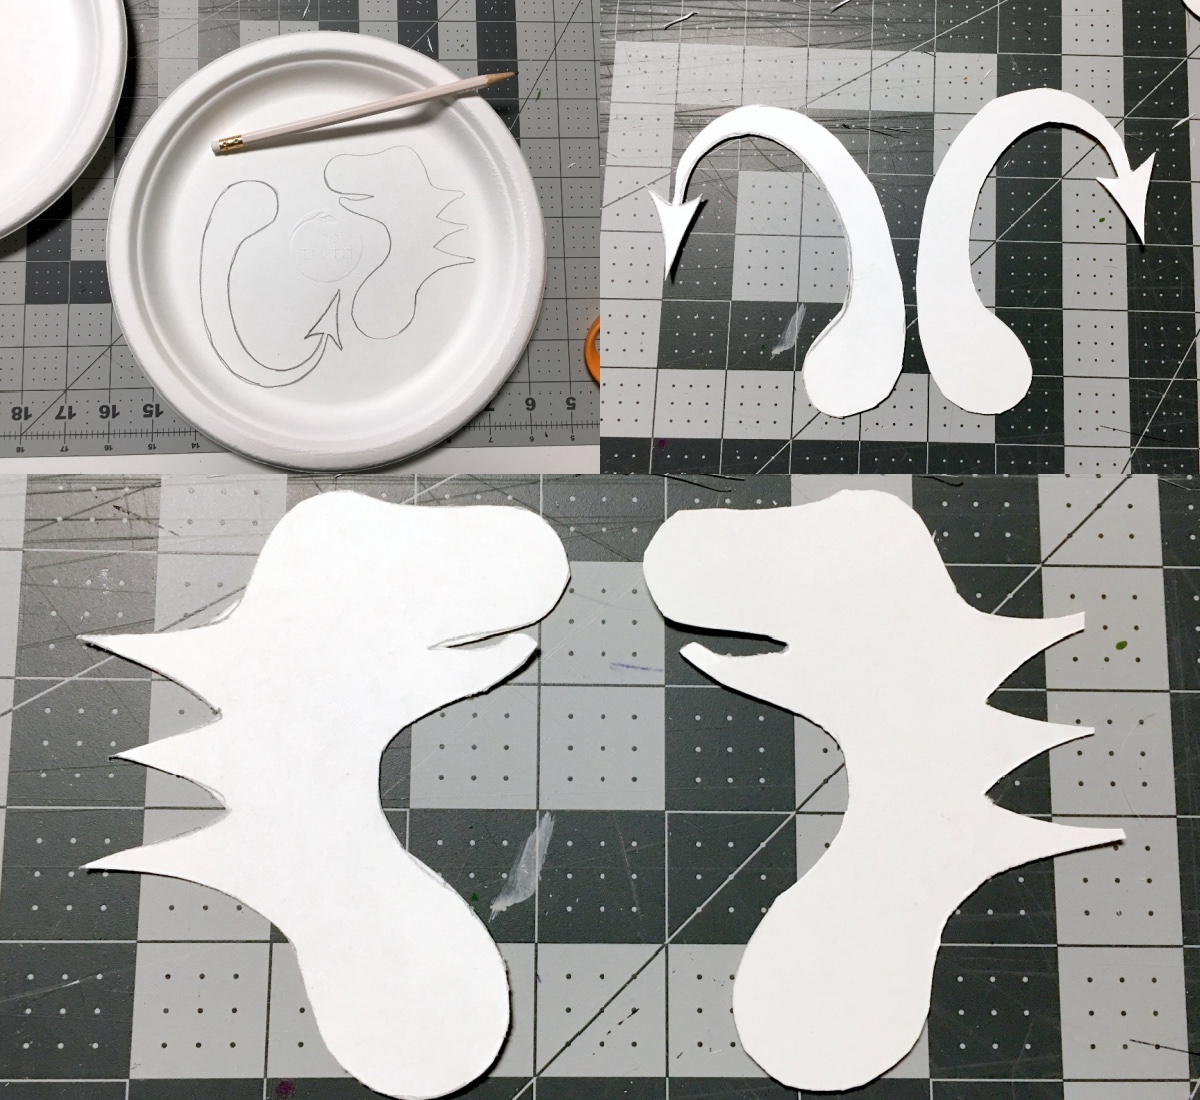
- Glue both head pieces together, and both tail pieces together. Let dry.
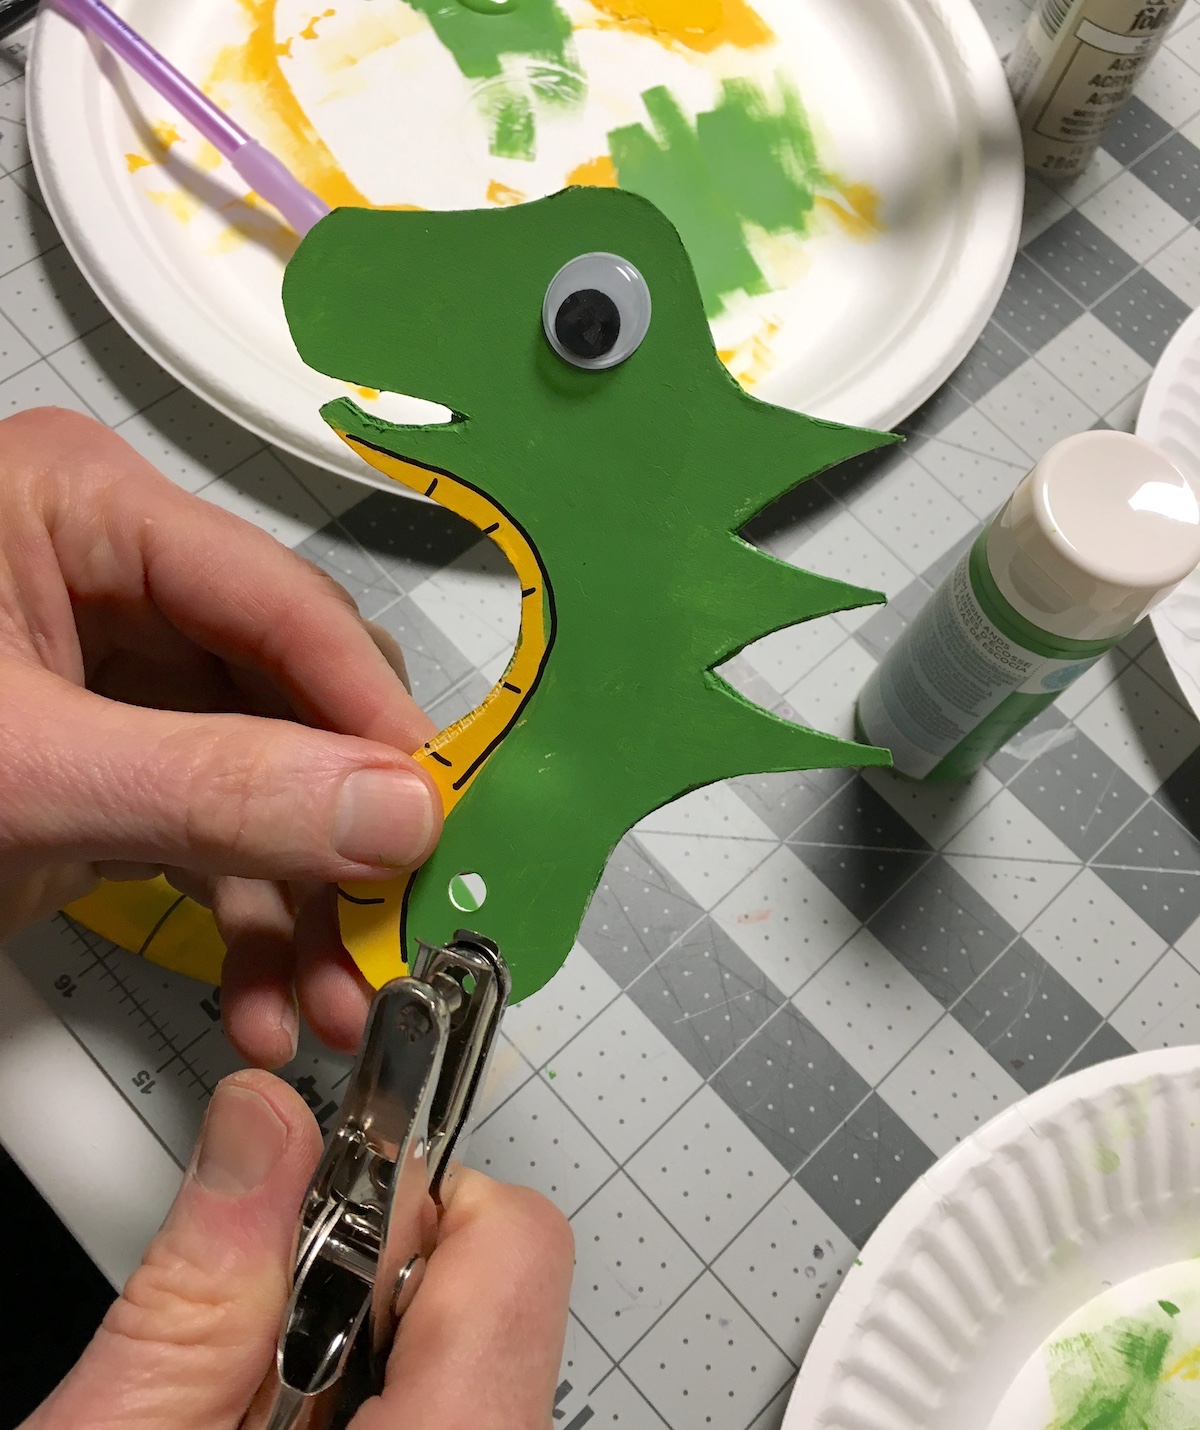
- Paint all dragon pieces with the color(s) of your choice. Let dry. Glue googly eyes onto either side of the head, and add any accent lines with a Sharpie or felt tip pen. Let dry.
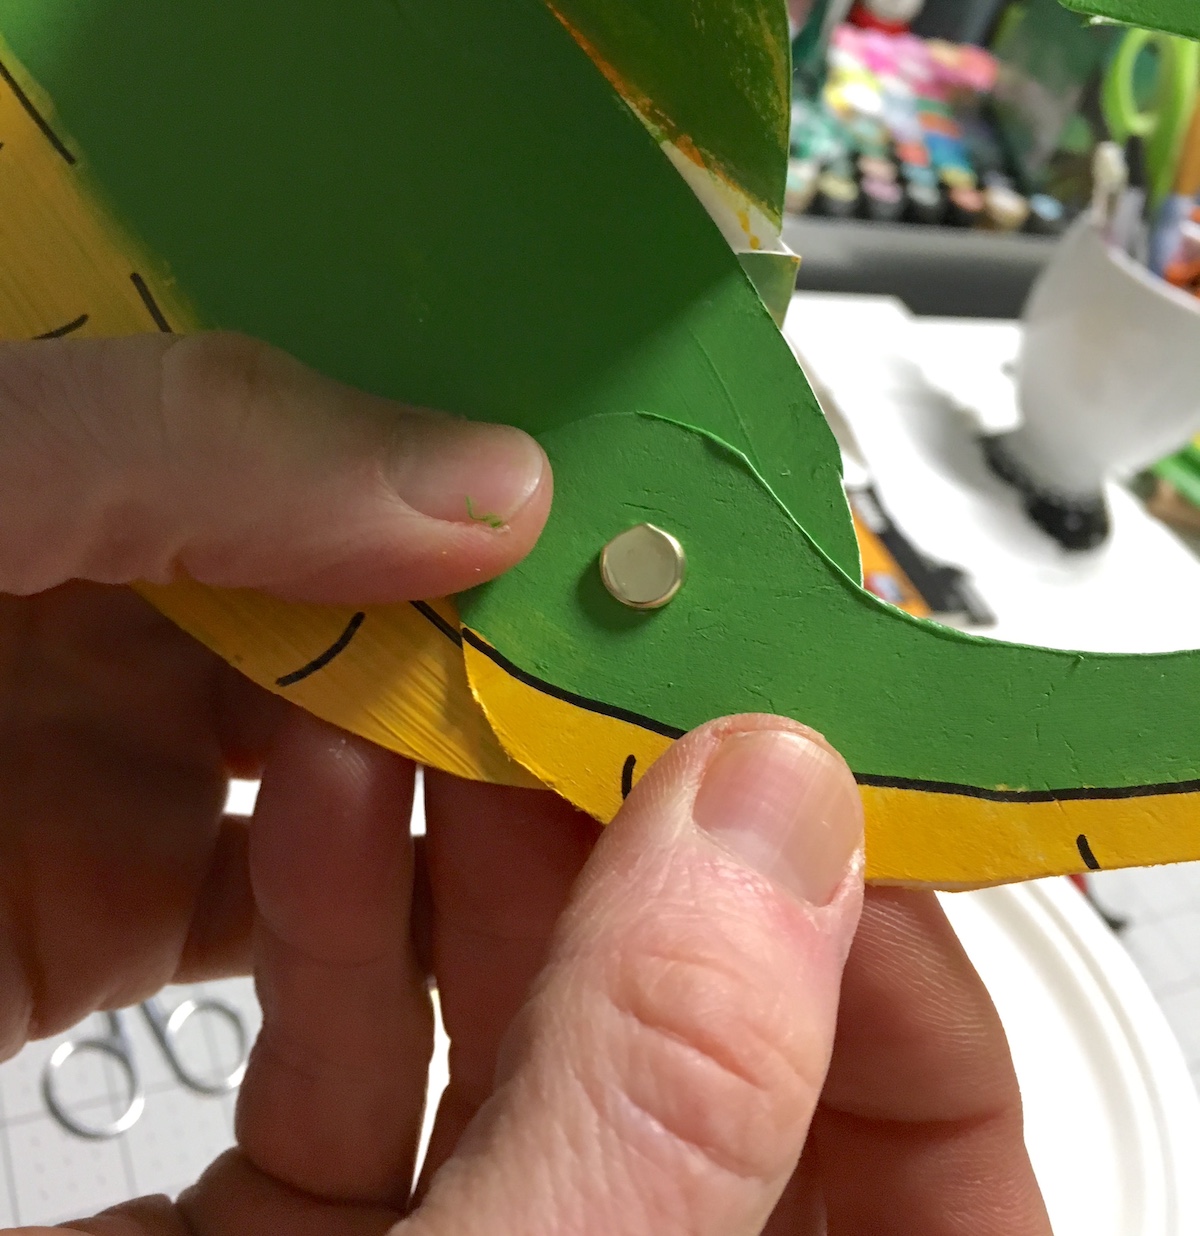
- Use the hole punch to add a hole to the front of the body and the bottom of the head. Add a paper brad to attach.
- Use the hole punch to add a hole to the back of the body and the base of the tail. Add a paper brad to attach.
- If desired, add Mod Podge Sparkle or glitter paint to the ends of the tail and the top of the head. Let dry before using.
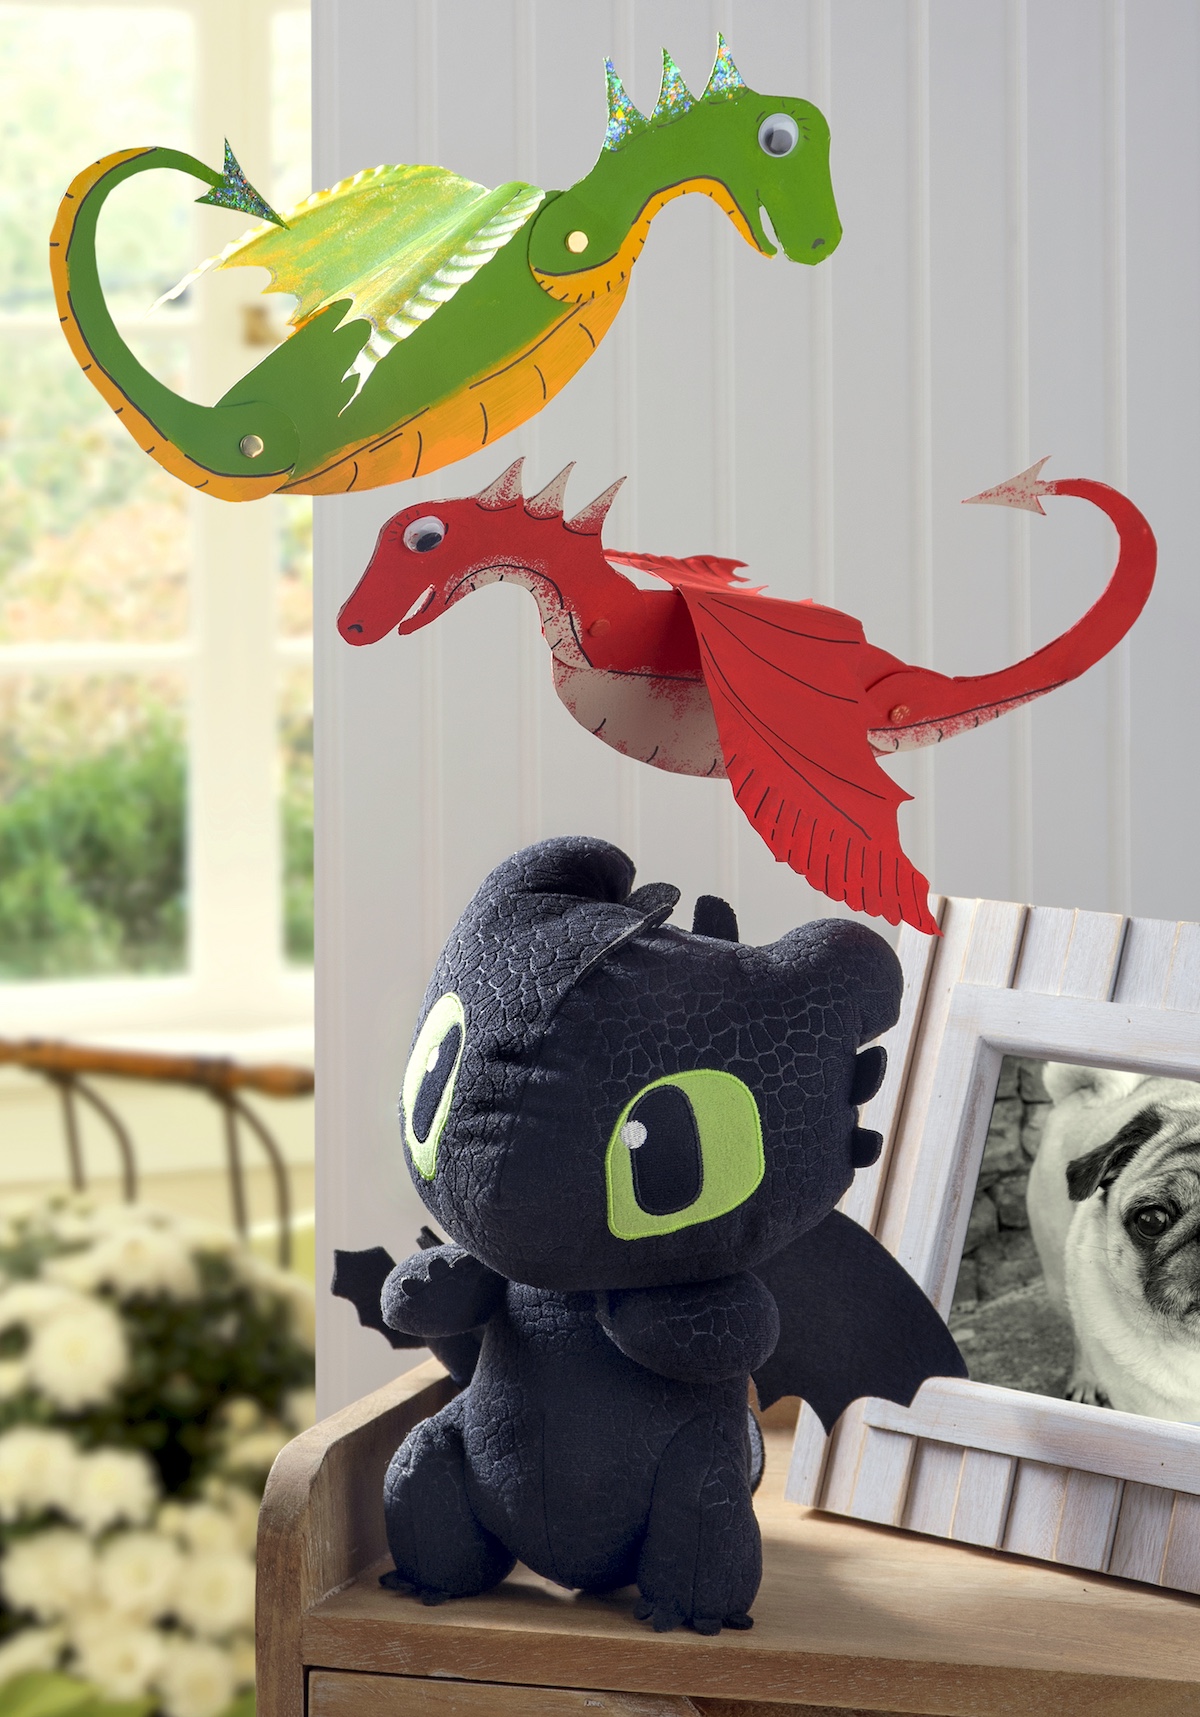
Aren’t our dragons cute??
What do you think? Let me know in the comments! I’d also love for you to visit these other posts:


this is AMAZING and so cute, Amy!!!
My niece loves this movie series! Such a fun craft, too!