
Learn how to make the cutest mason jar lanterns for Halloween using Mod Podge and tissue paper! This is perfectly easy holiday decor for kids or adults. This project is completed in four simple steps.
Skills Required: Beginner. It helps to have experience with Mod Podge since tissue paper is slightly fragile. However, ultimately any wrinkles just add charm to the project. Both kids and adults can make these, though kids might need help with cutting.
If you’re new around here, let me introduce myself – hi, my name is Amy, and I’m addicted to Halloween. And Halloween crafts. And Halloween candy. And decorating. And really anything that is orange, black, or purple. Yes, I would love living in a world where every month is an October!
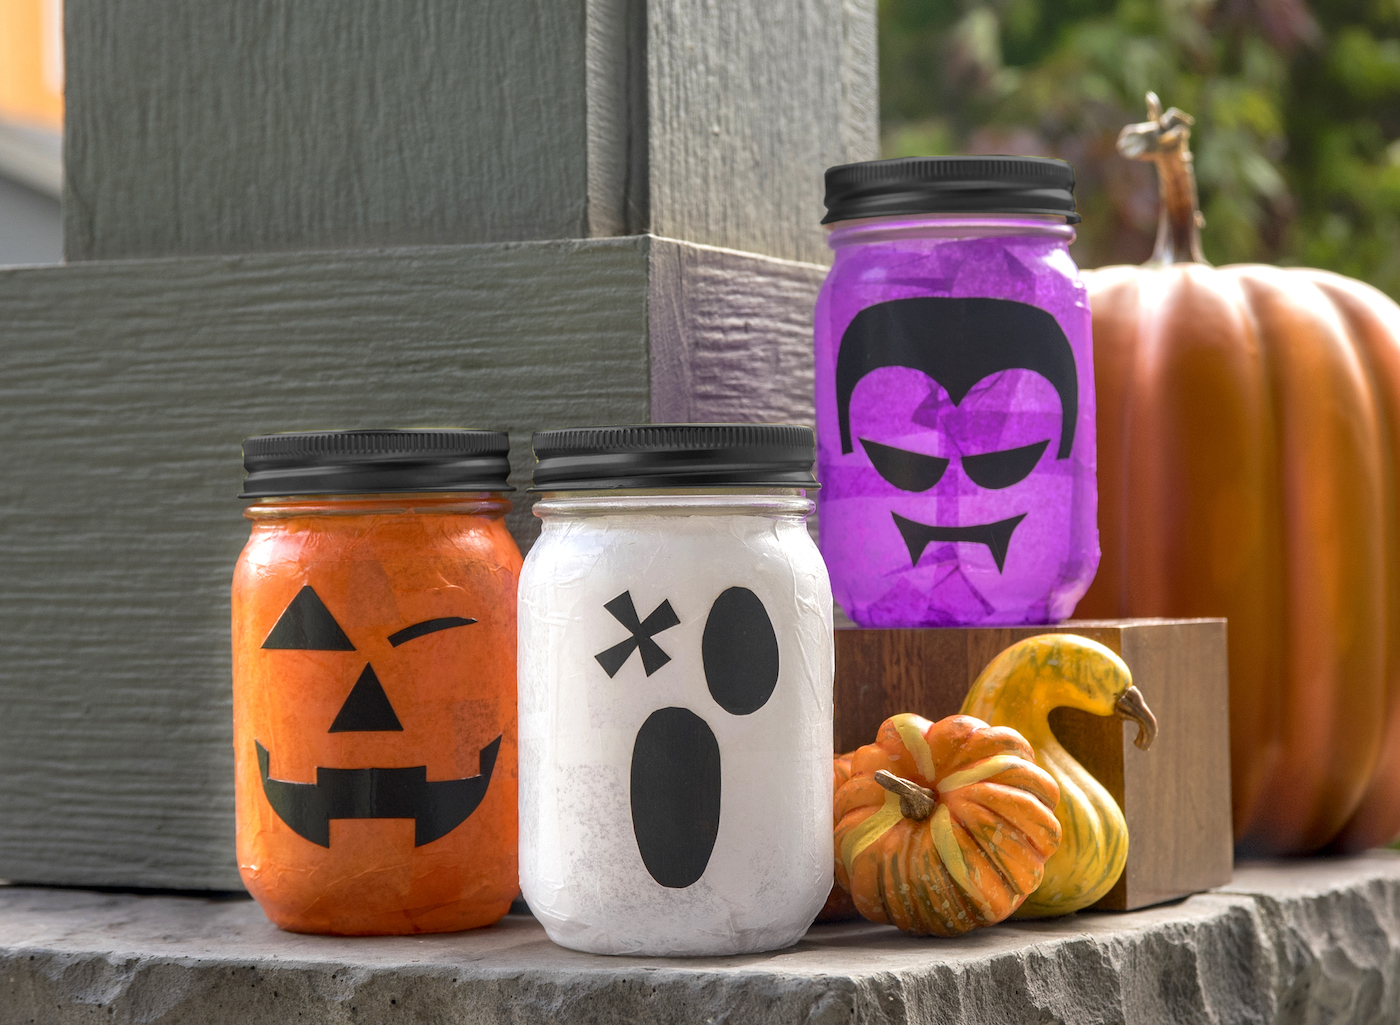
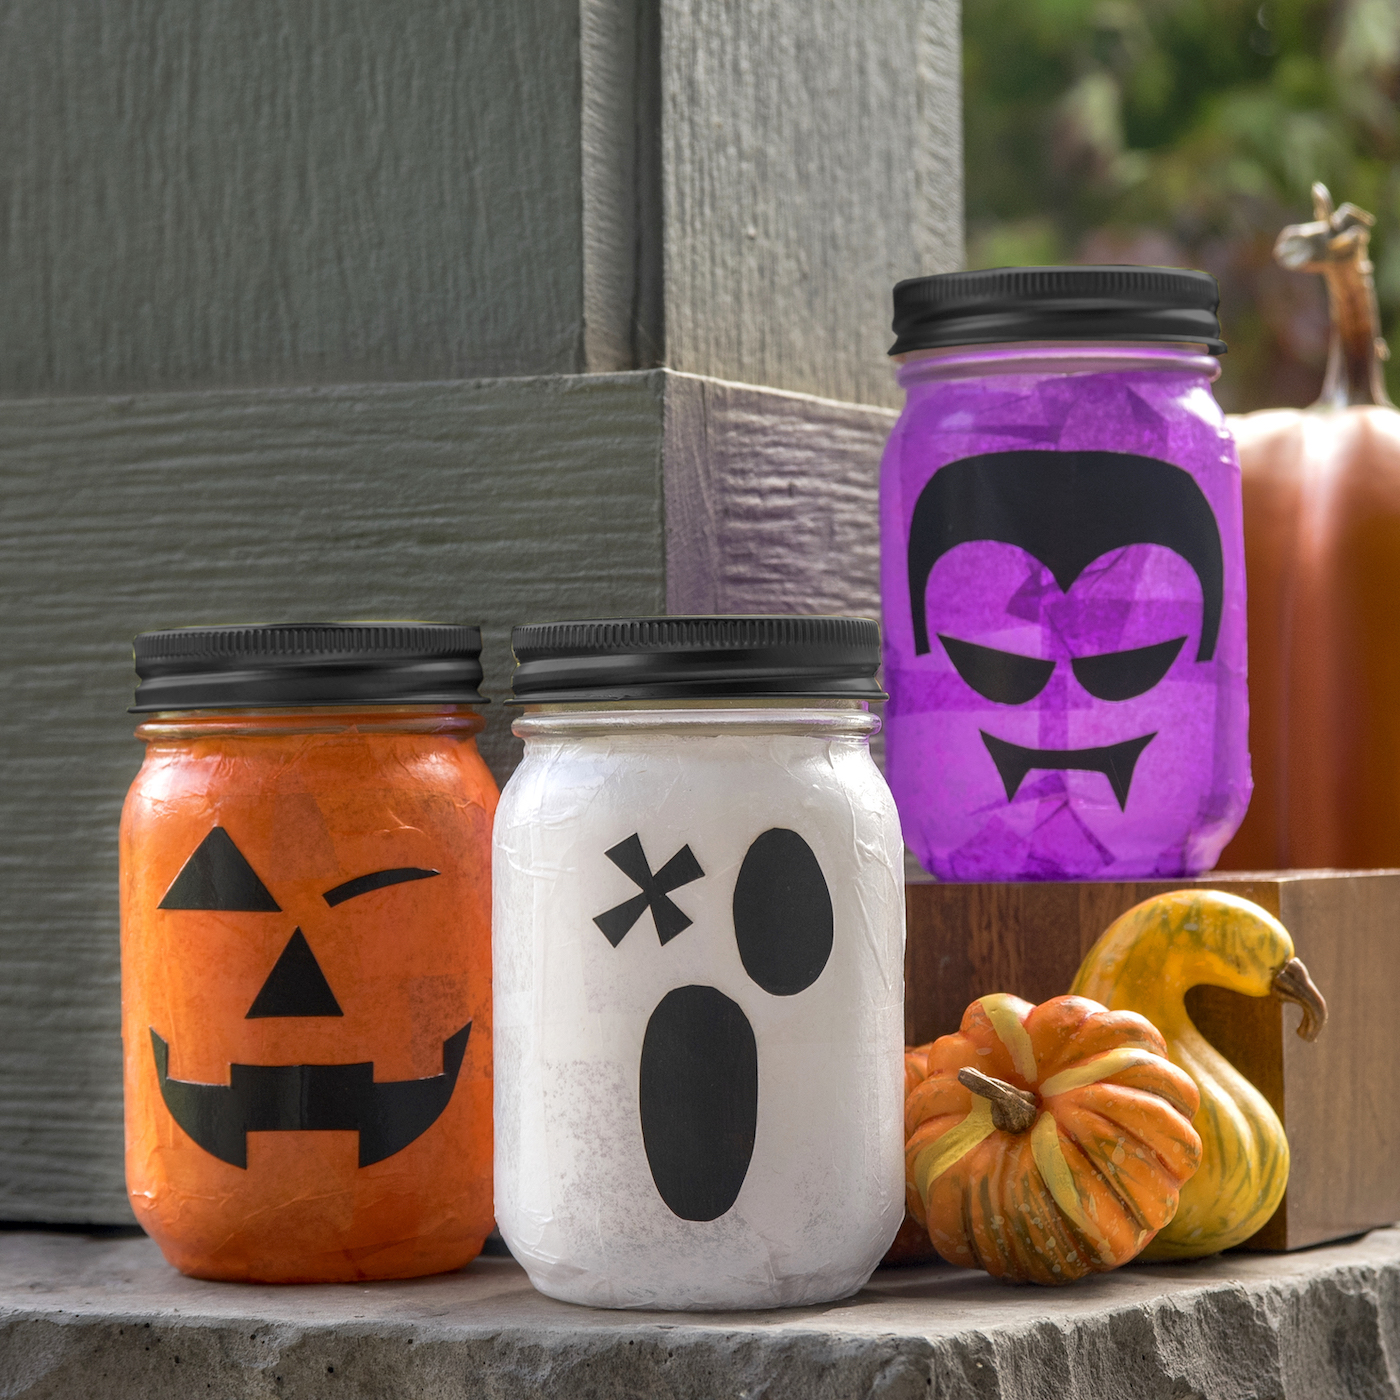
One of the things I’m going to add to my Halloween decorating this year is mason jar lanterns for my front stoop. We get a lot of trick or treaters, and I wanted a simple craft that I could make to accent the inflatables I put in the yard (I know – I’m one of those people).
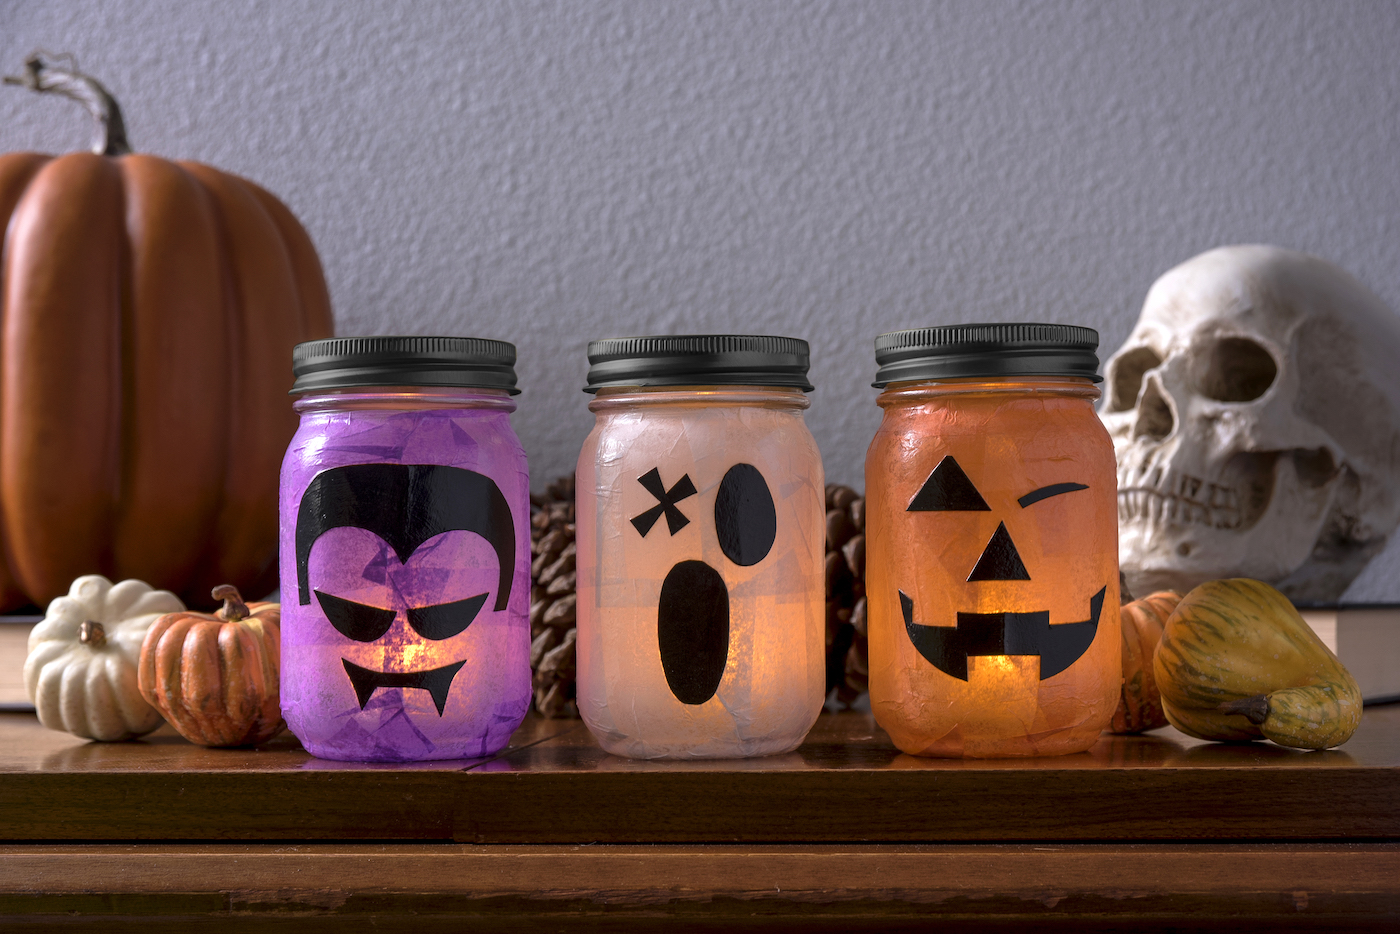
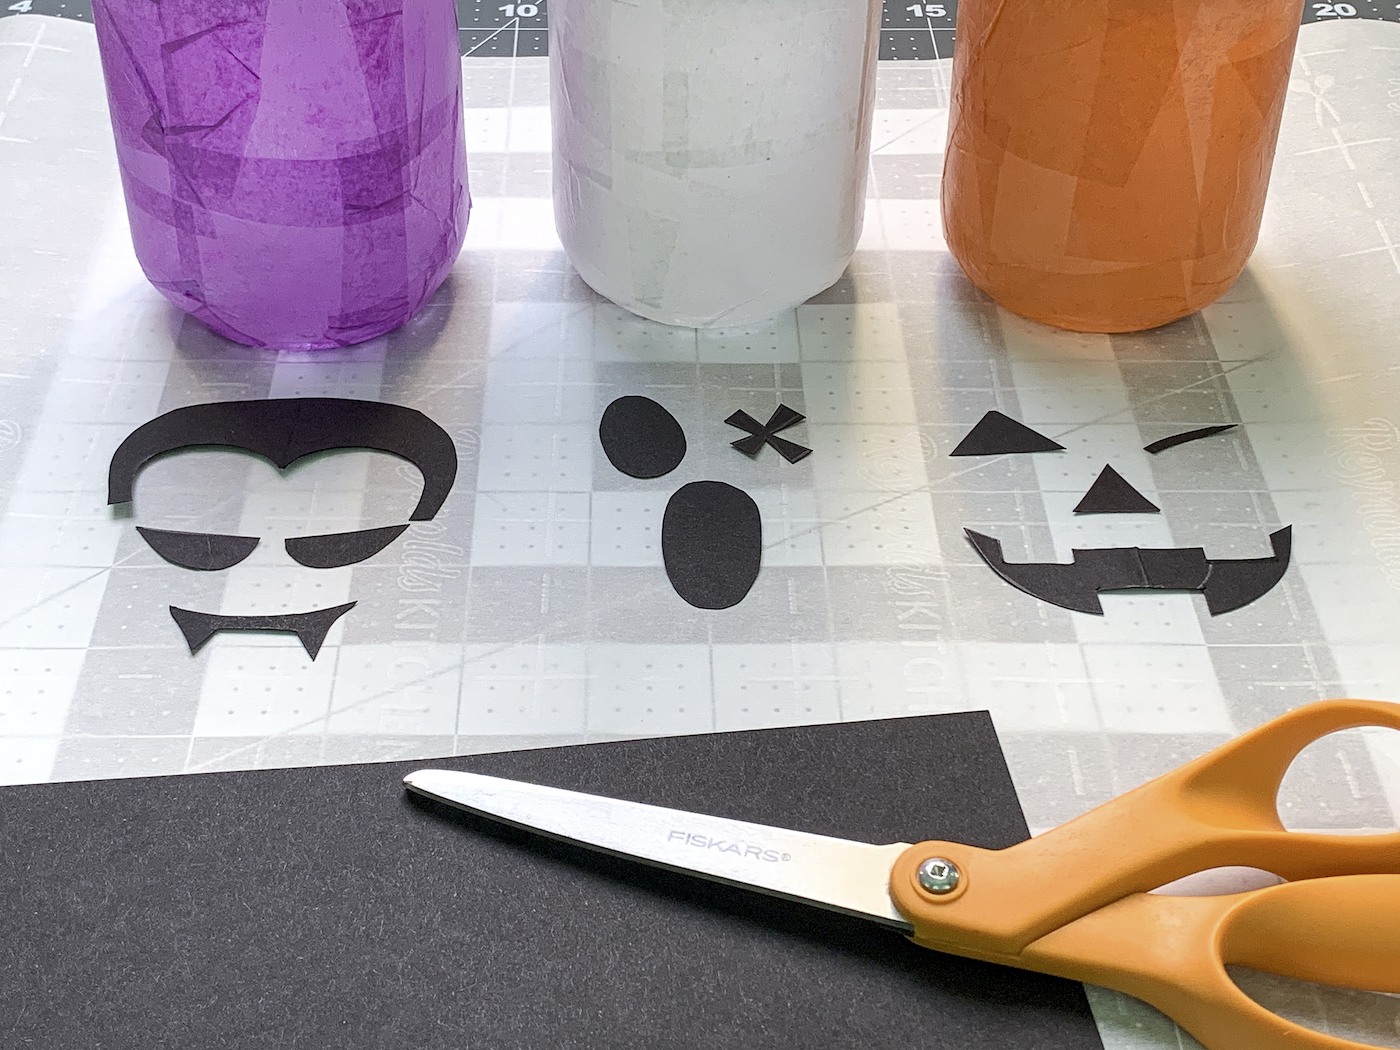
I use jack o’ lantern inflatables, so I thought it would be fun to make a jack o’ lantern. Then it went from there, and I made a ghost and a Dracula too!
These luminaries are so, so easy to make. Even the kids will want to jump in.
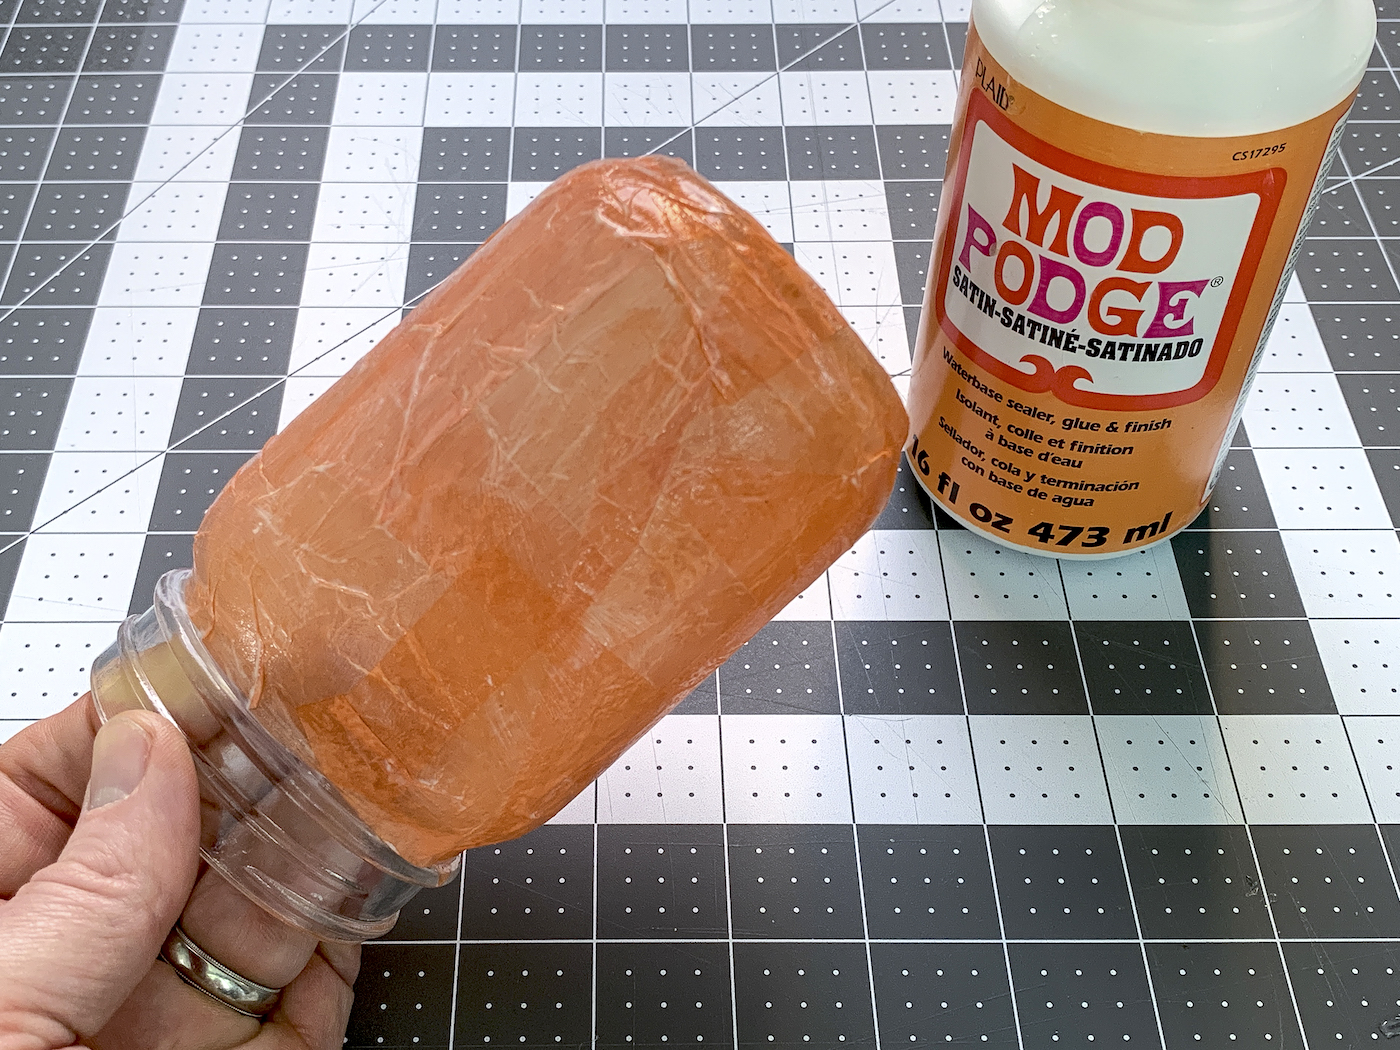
One of the things I love about these Halloween mason jars is that they use tissue paper instead of paint. This is nice because when you add a tealight, the light shines through reasonably brightly – more so than if you use craft paint or spray paint.
I didn’t have any jars on hand to make these lanterns, but if you can turn this into a recycled craft, I highly encourage it. Any kind of pickle jars or similar will work for this project!
Just make sure you clean them thoroughly as outlined in my post about painting mason jars. You want them clean so that the Mod Podge sticks.
In terms of the Mod Podge formula to use, this project utilizes the Satin type. But you can use any formula you like, honestly. Gloss or Matte would work as well.
Are you ready to get the tutorial? This project is completed in four simple steps: jar prep, applying tissue paper, applying faces, and spray painting the lids. Let’s dive in!

Gather These Supplies
- Mason jars
- Mod Podge
- Tissue paper – purple, white, orange
- Cardstock – 1 sheet of black
- Spray paint – black
- Paintbrush
- Pencil or pen
- LED tealights – 3
I love the glow of these lanterns. I can’t wait to make more and display them on my porch. Would you try this Halloween craft? I’d love to know in the comments! Here’s the printable how to:

Mason Jar Halloween Lanterns
Equipment
- Pen or pencil
Materials
- 3 Mason jar(s)
- 1 bottle Mod Podge
- Tissue paper Purple, white, orange
- 1 sheet Cardstock black
- 1 can Spray paint black
Video
Instructions
- Clean the jars with mild soap and water or a cotton ball and some rubbing alcohol. This is to remove all the grease or oils on the sides of the jar, which you need to do for any acrylic product so that it sticks and doesn't bubble.
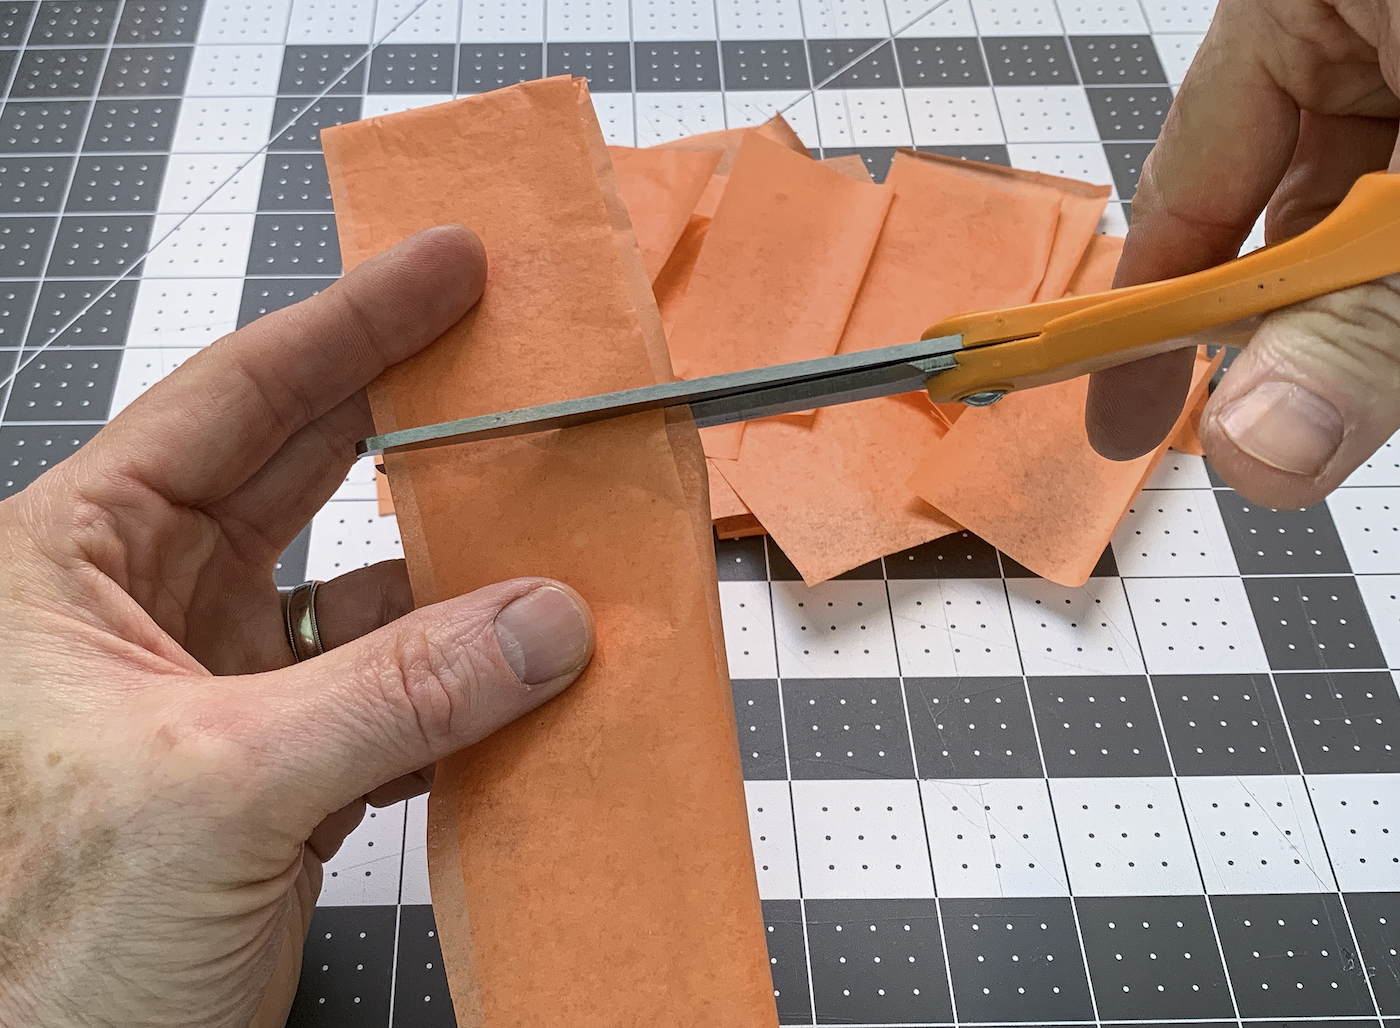
- Cut tissue paper into squares. Cut enough squares to cover your mason jars.
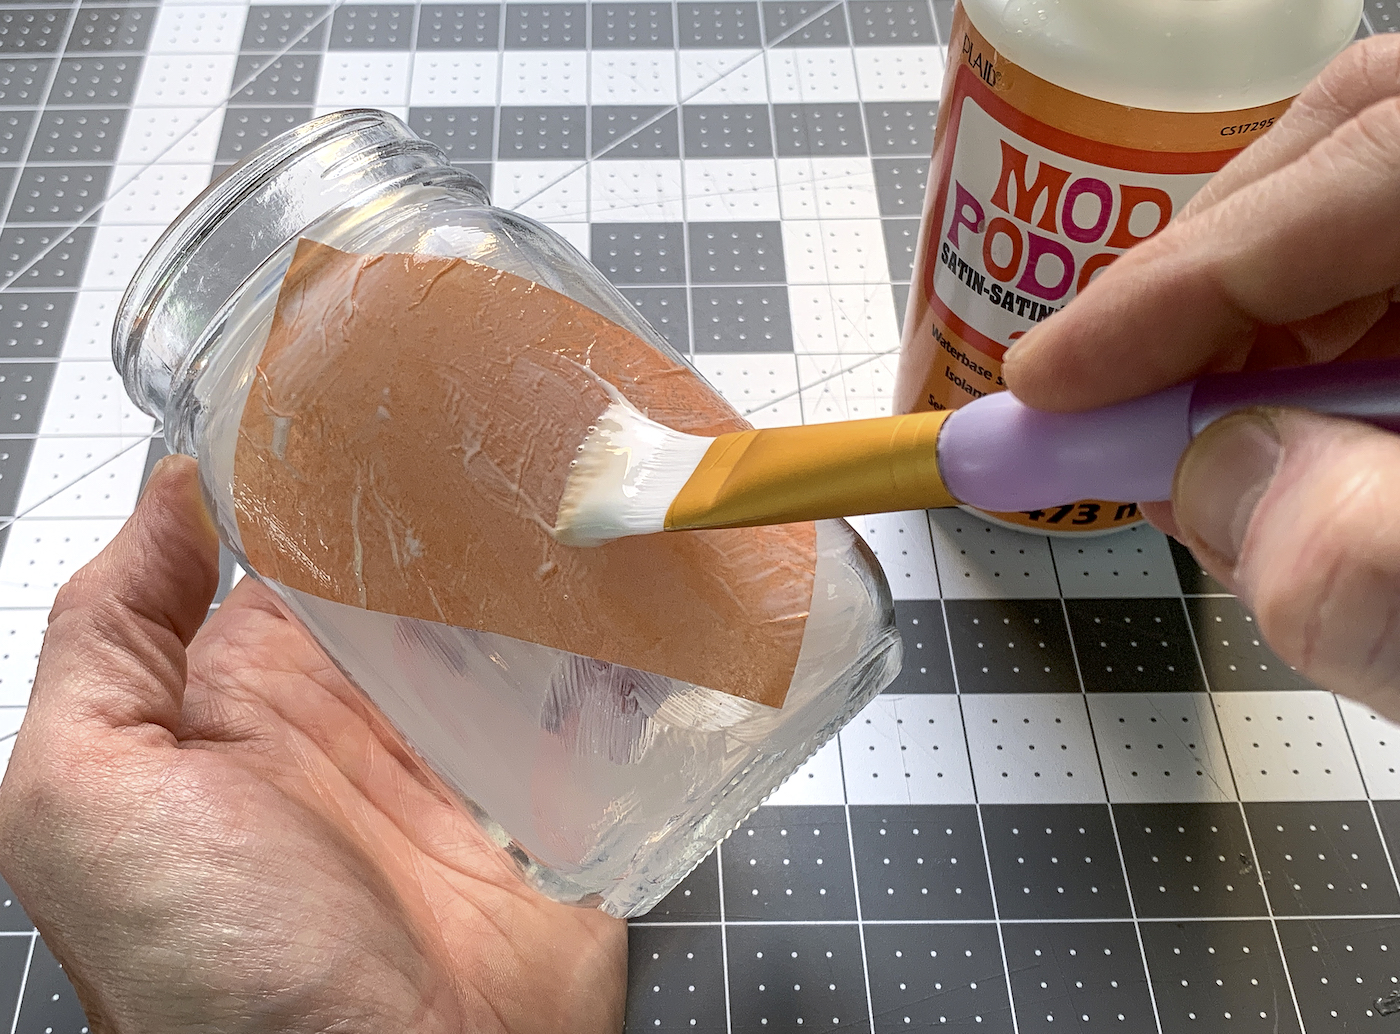
- Add Mod Podge to the side of the mason jar and place a piece of tissue paper down on the wet surface. Brush down carefully with a paintbrush.
- Repeat this process until the entire jar is covered with tissue paper. Trim excess and let dry. Coat the entire jar with Mod Podge and let dry.
- Draw faces on the black paper using a pencil or pen. Cut out with the scissors.
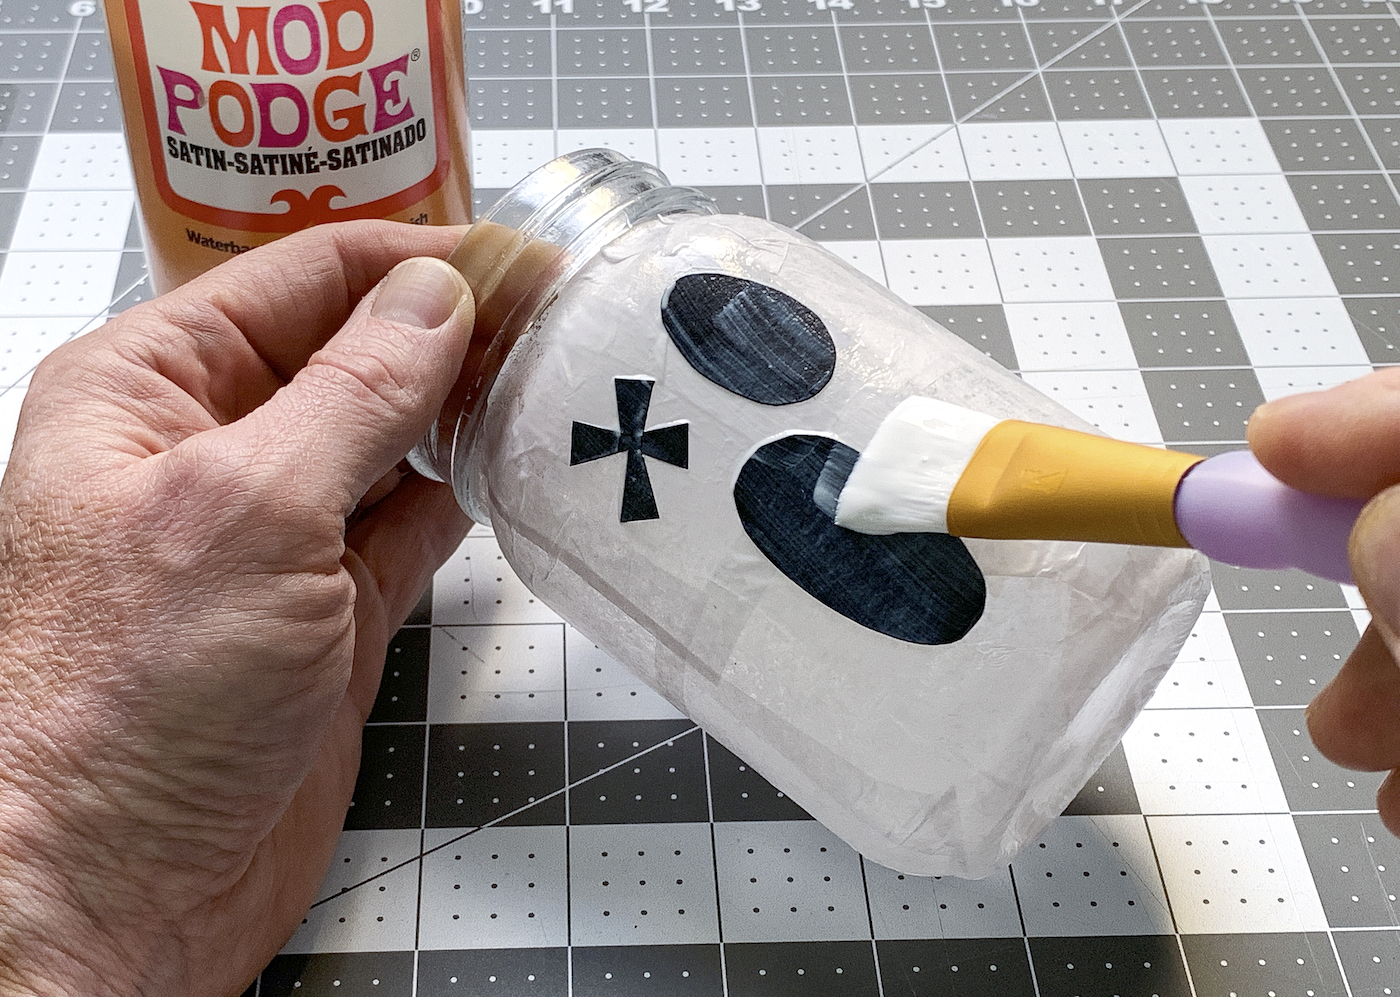
- Apply Mod Podge to the jar and adhere the faces. Let dry and brush a layer of Mod Podge over the top.
- While that is drying, remove the lids and spray paint with black. Let dry.
- Place LED lights on the jar and screw on the tops. Display.
Notes
If you enjoyed these mason jar luminaries, I hope you’ll check out these other Halloween projects and posts:
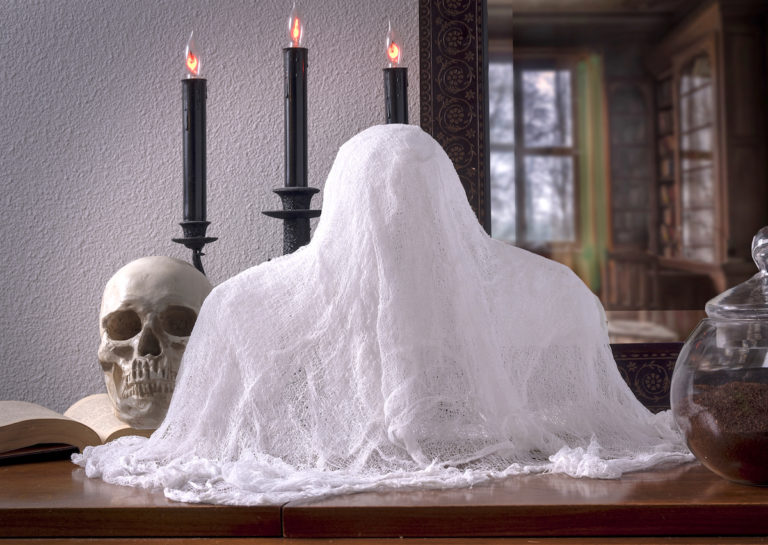
BOO Letters • Cheesecloth Ghost • Coffin Tray • Decorating Wood Cutouts • Decorative Blocks • Door Hangers • Fairy Garden • Halloween Magnets • Halloween Rocks • Mummy Luminaries • Potion Bottles • Spooky Candle Holders • Spooky Pumpkins • Wall Decor • Witch Hat Garland


I’m making a pumpkin, ghost and Frankenstein. I think they will be too cute on my steps for trick or treaters.
Made my Halloween wonderful