
In this budget friendly recycled Halloween craft, you’ll use Mod Podge and old Christmas ornaments to make these cool DIY Halloween ornaments!
Skills Required: None. Even if you’ve never crafted before, you can make these paper mache ornaments. The paint designs can be as simple or complex as you like.
Hey Mod Podgers! I’m Becca from Blue Cricket Design, and I’m super happy to be here today! Mod Podge definitely rocks but not nearly as much as Amy and her awesome blog. Both are two of my favorites!
I’m thrilled to be able to come and play and show off my MP skills. Are you guys ready for a little recycled Halloween craft fun? This is a fun Halloween craft for kids or adults. Or the family can make them together. They make great DIY Halloween decorations once you’re done. Let’s do this!
(also known as Halloween hangy-thingy-ma-bobs!!)
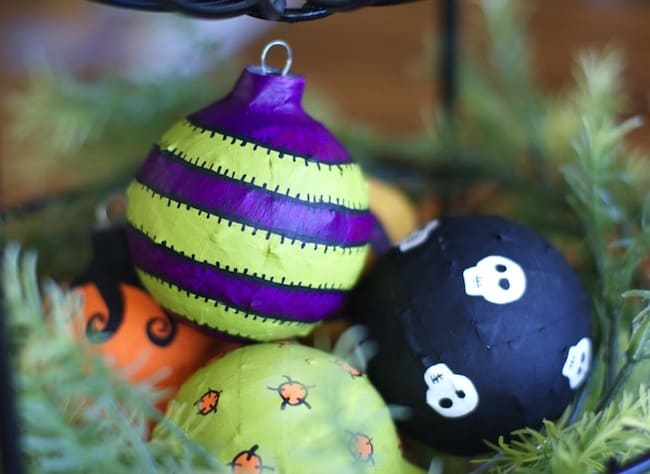
Are these Halloween ornaments too much fun or what? I was introduced to paper-mache Christmas ornaments from my cousin! I thought to myself “Self – wouldn’t these be perfect for any holiday!?!”
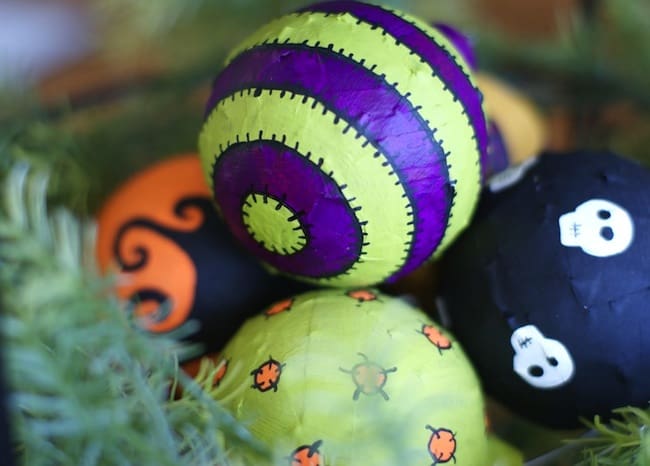
For sure!! Some whimsical painting and Halloween colors make these little guys spook-erific. Here’s the “how-to” low down . . .
Gather These Supplies
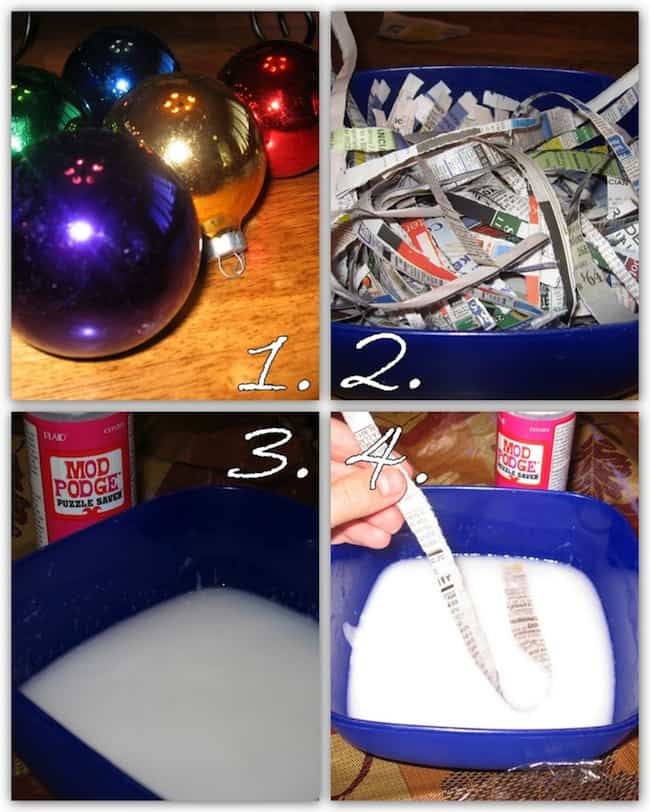
- Those glass ornaments I’m sure you can find in your Christmas stash. If you need to go get some, check your thrift stores first. I picked up a 24 pack for 50 cents. SCORE!
- Newspaper
- The magic craft nectar – MOD PODGE
- Acrylic craft paint
- Wire for hanging
- Beads for added flair
- Paintbrushes
- Patience . . . the painting can take a while
You don’t have to stick to what I’ve done. Add glitter and gems to add sparkle. Or cut out Halloween images from scrapbook paper and decoupage them on! The possibilities are endless.
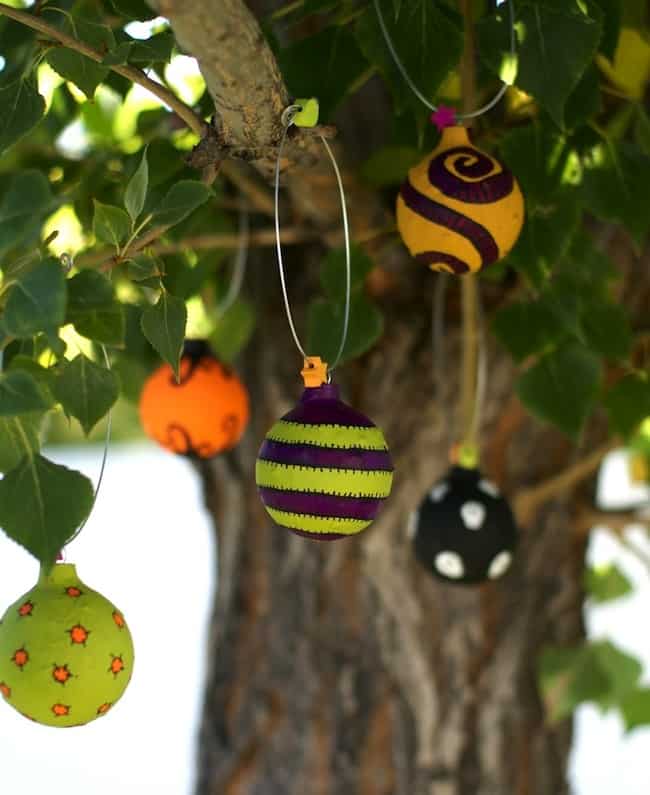
I have my Halloween ornaments hanging on door knobs and cupboard knobs throughout my house.
You could also display in a bowl or basket or jar just as they are. Thanks for letting me share. Amy, you’re the best! Get the printable how to below:

Halloween Ornaments
Equipment
Materials
- Glass Christmas ornaments
- Newspaper
- Mod Podge
- Acrylic paint
- Wire for hanging
- Beads optional
Video
Instructions
- Collect the Christmas balls and make sure all residue is removed.
- Take newspaper and rip it into thin strips. HINT: The thinner the strips, the smoother the paper will lay. Strips should be about 1/4"- 1/2" thick.
- Mix one part water with one part Mod Podge – enough to submerge the paper in.
- Dip each strip into the Mod Podge mixture, being sure to get it completely wet. Using your fingers, wipe off excess mixture.
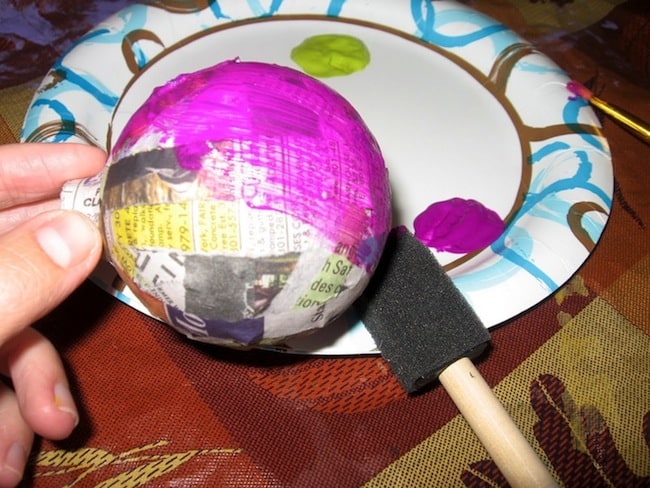
- Start wrapping the wet paper strips onto the ornaments. Continue wrapping paper strips and be sure to get the lip of the bulb.
- Cover all of the ornaments completely and hang them to dry overnight.

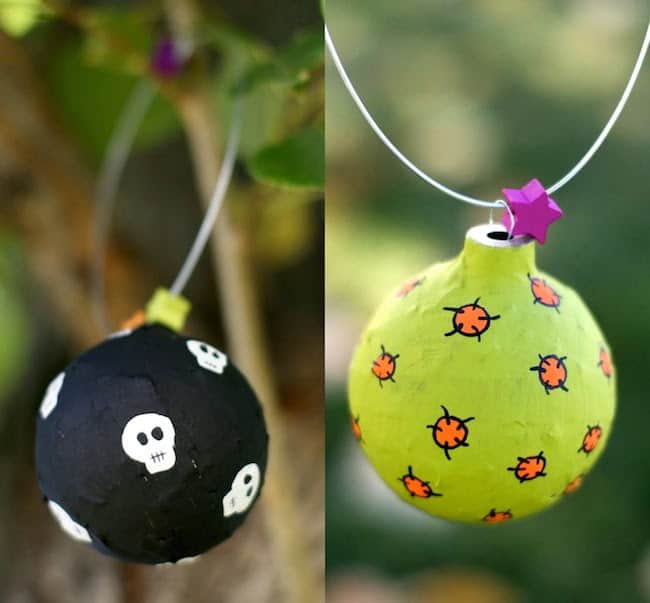
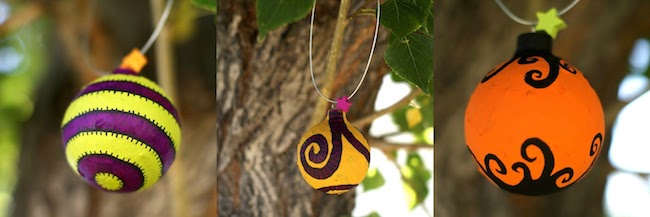
- Once dry, paint designs on the ornaments with acrylic craft paint. Paint a basecoat first, then let dry. Then paint designs on top.
- Let dry completely. Add wire and beads if you plan on hanging them.
If you enjoyed these Halloween ornies, I’d love for you to check out these other holiday projects:
BOO Letters • Button Art • Cheesecloth Ghost • Coffin Tray • Decorating Wood Cutouts • Decorative Blocks • DIY Wreath • Dollar Tree Wood Pumpkin • Door Hangers • Duct Tape Pumpkin • Mason Jar Lanterns • Mummy Luminaries • Paper Cones • Potion Bottles • Spooky Candle Holders • Spooky Pumpkins • Wall Decor • Window Art • Witch Hat Garland


ok, these look awesome. I’m definitely trying this.
those are cute. I love making Christmas ornaments and I can see me making these and painting them for Christmas.You could paint them a solid color then paint a person’s name on them and date it, too.
WOW!! SO CUTE!!
Thanks everyone, for the comments! Didn’t Becca do such a great job?!?
Amy I love it! I made something similar to it last year with crate paper but they are not nearly as cute!! So going to do it! Thanks for stopping by the blog. WE can be bloggy comment friends 😉
Kelly
givingwhatiam.blogspot.com
What a fun idea, these are gorgeous! I’ll be linking.
So cool!
R
I love Halloween ornaments! And these are going to be a hoot to make!
Verra cool! So simple, yet so versatile!