
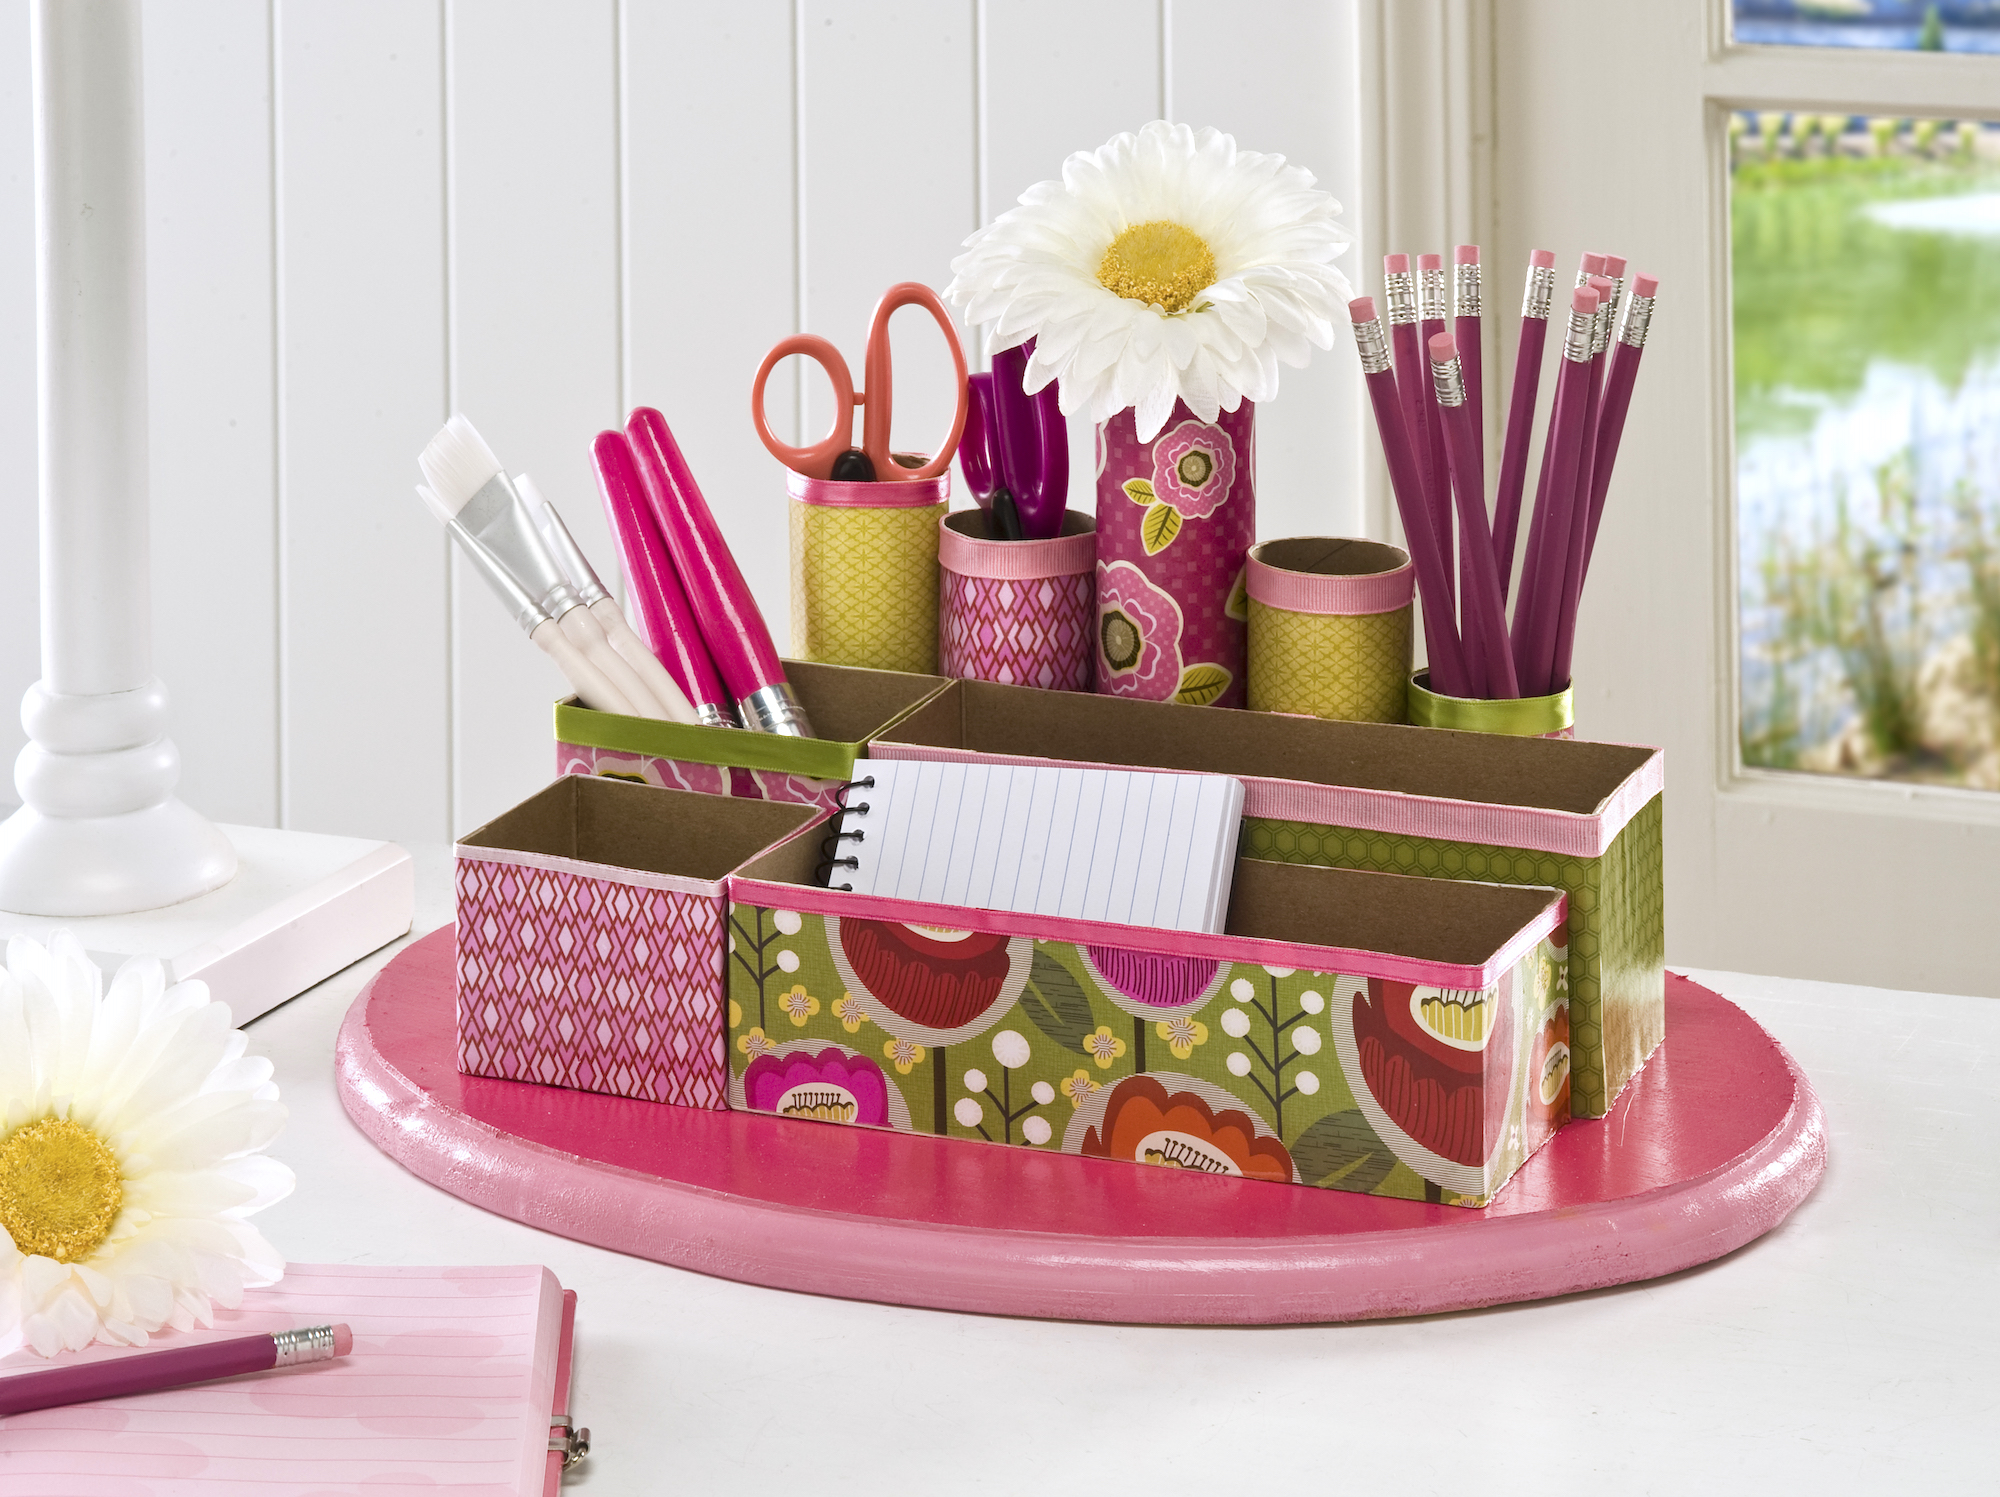
Use old cereal boxes and toilet paper rolls to create a unique DIY desk organizer! This craft organizer is perfect if you’re on a budget.
Scroll down to the bottom of the post to see a video of how to make a recycled desk organizer of your very own. You’ll also get two bonus projects in the video: a drawer organizer and a magazine holder!
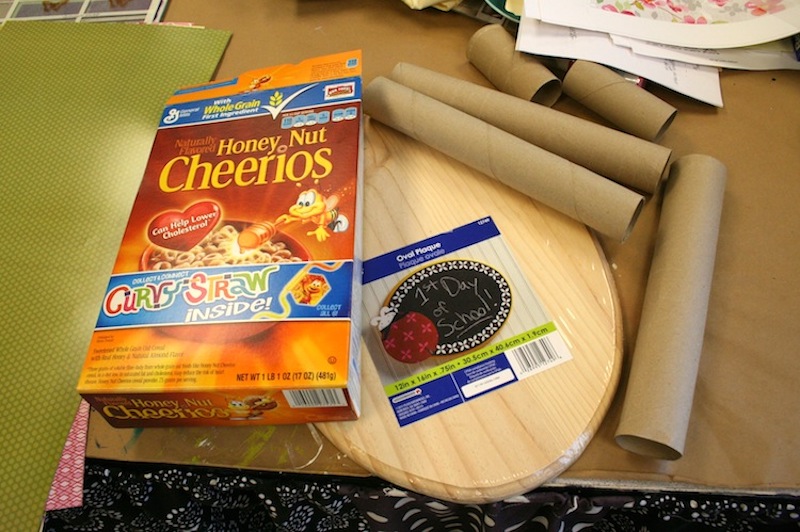
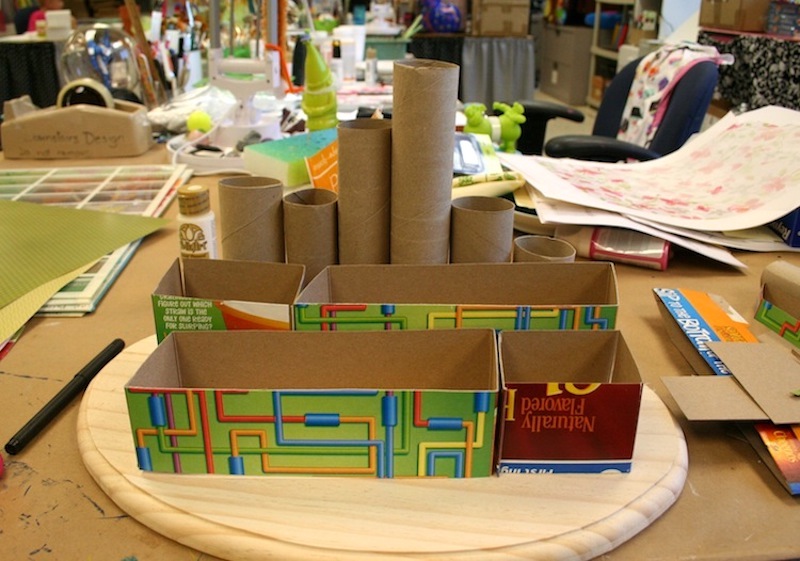
I’ve been saving some cereal boxes and toilet paper/paper towel rolls for a while. I’m not just some weird hoarder – I had a purpose. A decoupage idea with Mod Podge, if you will.
My goal was to recycle these items in a Mod Podge project. I thought, if everyone else can use these items for crafts, I can too. So I challenged myself! It’s kind of fun to do that sometimes to see what you come up with.
Make a Craft Organizer
Based on what I had in my stash, I created this DIY desk organizer, aka the perfect recycled craft. I just used what was on hand so I didn’t even spend one dollar for this. You and your kids should try it for back to school!
I won’t say it’s totally free because you might have to buy some supplies . . . but you should challenge yourself to see how cheaply you can make it by rooting through the recycling bin.
Before we jump into this wood craft, I want to share some things about this desk organizer you should keep in mind while you’re making it. I hope these help!
Paper to Use
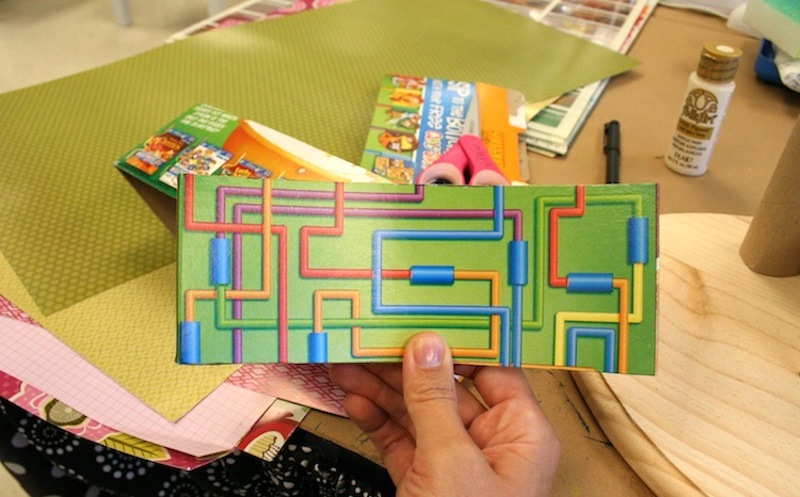
I used a few large pieces of scrapbook paper to make my desk organizer. You can use nearly any paper for this project, but you should keep a few things in mind.
You’ll want the paper to be thick enough so that you don’t see the labels from the boxes through the paper. Therefore papers like tissue paper, wrapping paper, and napkins might be too thin.
There is a way around that though. You can always paint the boxes with a white acrylic paint or primer after cutting them into the desired sizes so that the labels don’t show through. It’s an added step to paint, but it will make your craft organizer look so much better when it’s finished.
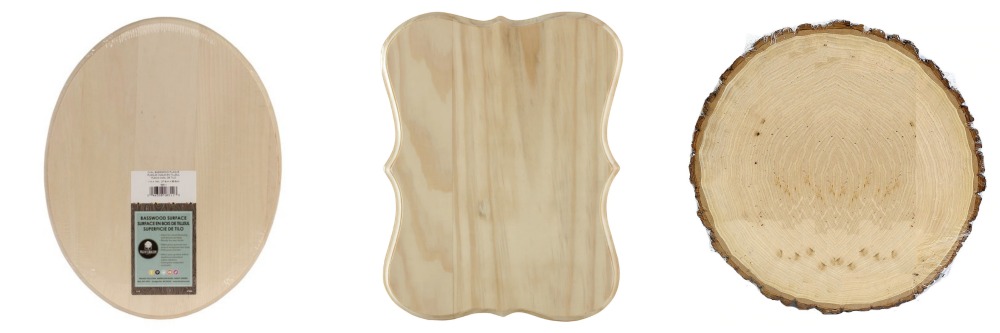
Plaques to Buy
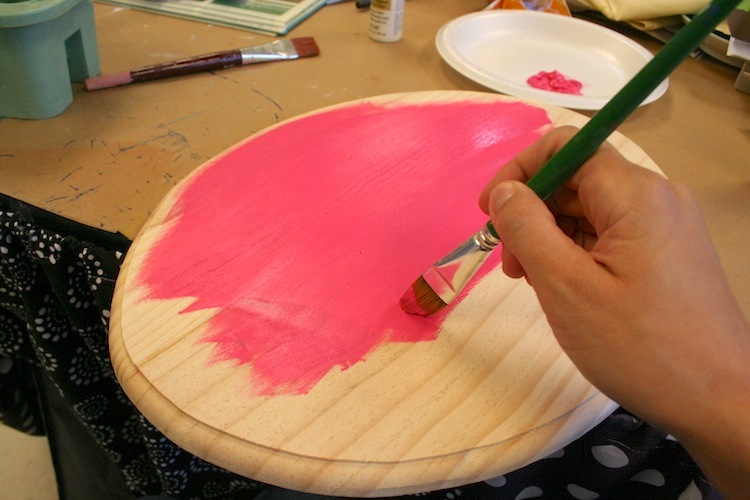
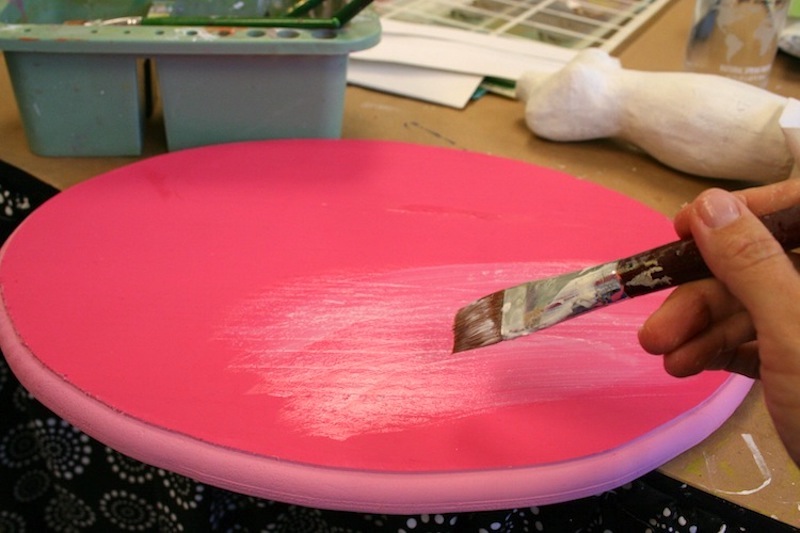
The fun thing about this craft organizer is that you can use any size or style of wood plaque to make it! The wood plaque that I chose was an 11″ x 14″ oval that I purchased from Michaels.
I encourage you to try this in a different shape if you want to. I think even the natural wood slice would look cool for this DIY desk organizer – and you could leave it natural if you so choose.
Formula to Use
I used Mod Podge Satin for this project, but you could use Gloss, Matte, or Hard Coat. You can even add glitter here and there with a little Sparkle or Extreme Glitter Mod Podge. Give the craft organizer several coats of whatever decoupage formula you choose so that it is durable.
You want the toilet paper rolls in particular to stand up to constant putting things in and pulling things out – so I’d say use at least three coats of the formula you select.
Are you ready to make this project at home? Here’s how I made my craft organizer using Mod Podge!
Gather These Supplies
- Cereal boxes and toilet paper rolls
- Wood plaque – large enough to be the base
- Mod Podge Satin
- Acrylic paint in the colors of your choice (white is optional)
- Scrapbook paper
- Ribbon in coordinating colors
- Scissors
- Craft knife
- Craft glue
- Paintbrush
- Pen or pencil
- Ruler
- Tape
Tips and Thoughts for This Project
I had no idea how to measure the cereal box for my bins, I’m going to be honest with you. So I just cut 1/4th of the box off of the bottom and then proceeded to cut the rest of the boxes in that same manner. I knew I would have a front row and a back row, so I made the “back row” of boxes taller than the front row.
Now this is an optional step . . . but I used some white paint on the edges of my cereal boxes and tubes.
Sometimes my paper doesn’t match EXACTLY and I didn’t want the brown of the tubes or the colors of the box to show (since they didn’t match). If you are particular, you might want to do this. If not, don’t worry about it.
What do you think – are you up for making a DIY desk organizer of your own? Let me know in the comments! There’s also a printable how-to card here:

DIY Desk Organizer
Equipment
- Pen or pencil
Materials
- Cereal boxes
- Toilet paper rolls
- Wood plaque(s)
- Mod Podge Satin
- Acrylic paint colors of your choice
- Scrapbook paper
- Ribbon in coordinating colors
- Craft glue
- Tape
Video
Instructions
- Lay out the boxes and paper rolls to create the compartments for your organizer.
- Make the compartments by cutting the cereal boxes down and taping them on the outside. The tape will be covered by paper.
- Trim the paper tubes to different heights to add interest.
- Paint the plaque using the colors of your choice and let dry.
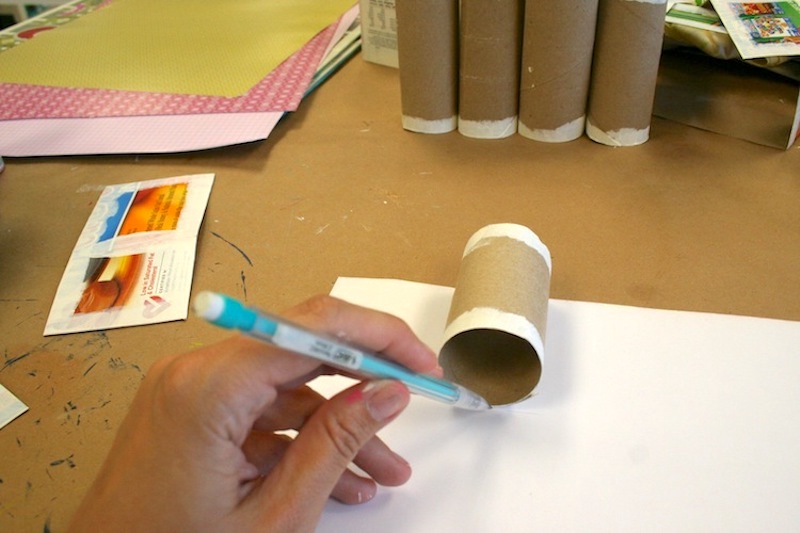
- Use a pencil or pen to trace each compartment on your scrapbook paper. For the larger compartments you might need to cut multiple sheets of paper to completely cover them.
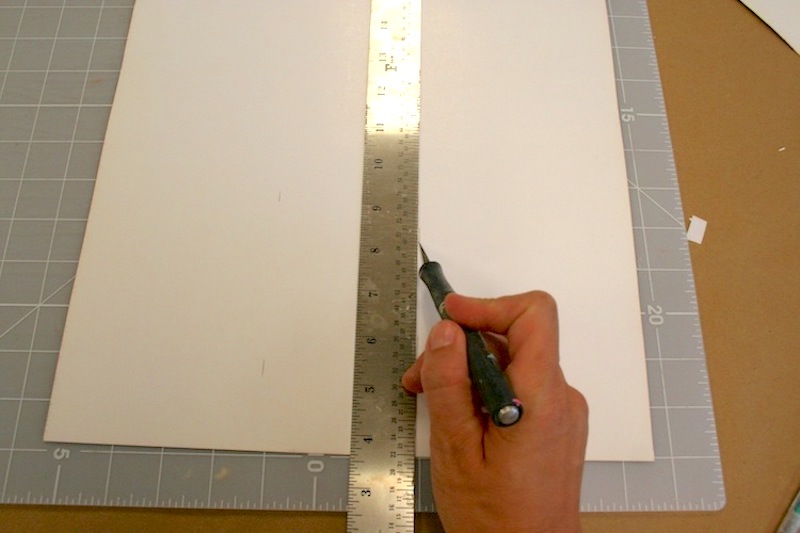
- Cut everything out using a craft knife and mat or scissors.
- Add Mod Podge to the backs of the paper – then proceed to decoupage your compartments with paper and Mod Podge. Work one piece at a time. Hold everything down until it sticks, smooth, and let dry 15 – 20 minutes.
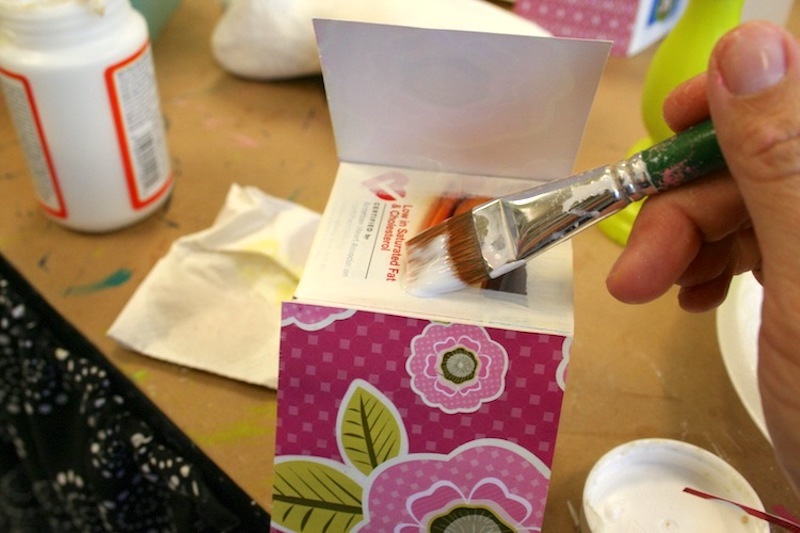
- Give all compartments a top coat of Mod Podge, including the plaque.
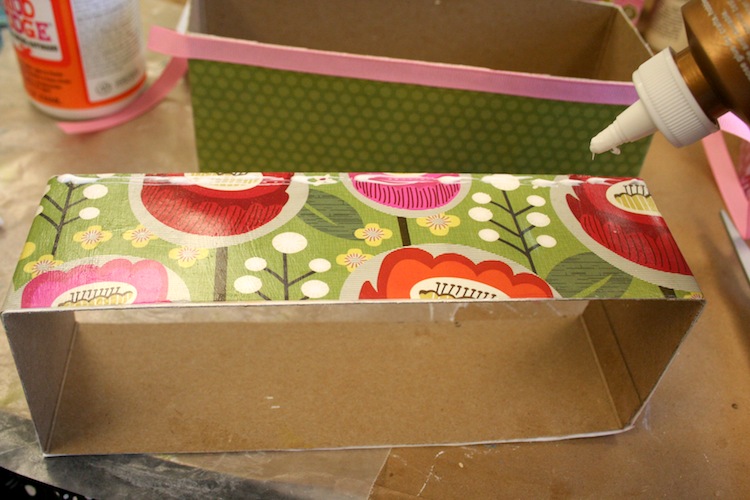
- Add ribbon to the top edge of each compartment using craft glue.
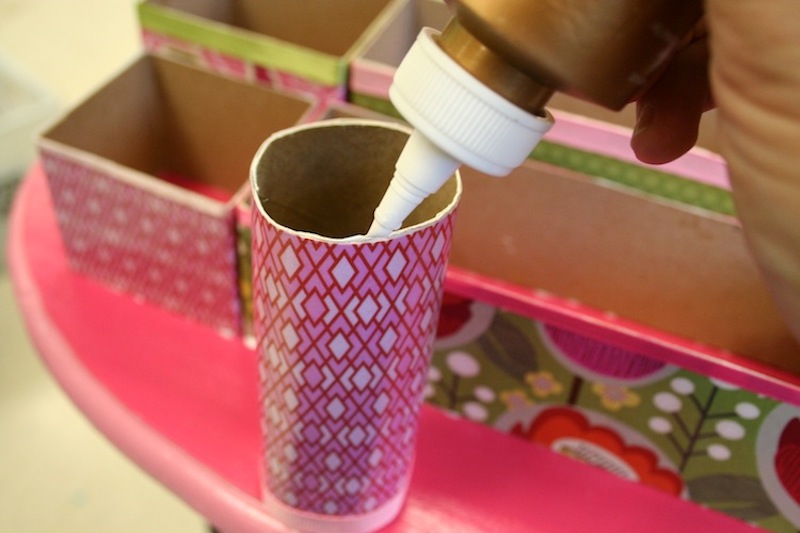
- Glue each compartment down to the plaque using craft glue. It will dry clear. Let dry 24 hours before using.
If you want to check out more recycled crafts, here are other posts that might interest you!


I don’t get it… it says to “scroll down to the video” but theirs no video whatsoever! I’ve tried this site on 2 different PCs, 1 mobile phone, and 1 laptop. Has it been removed or something? Or was this click-bait? Either way it’s not worth it.
Not clickbait! Video is also here: https://www.youtube.com/watch?v=P6hiYh9KlEw
Love it
Looks beautiful, think I might try it
What a super way to recycle!
Well, that is a cool project! It’s great because you can customize it really easily!
this is an awesome idea for storage as well as for the use of recycling products