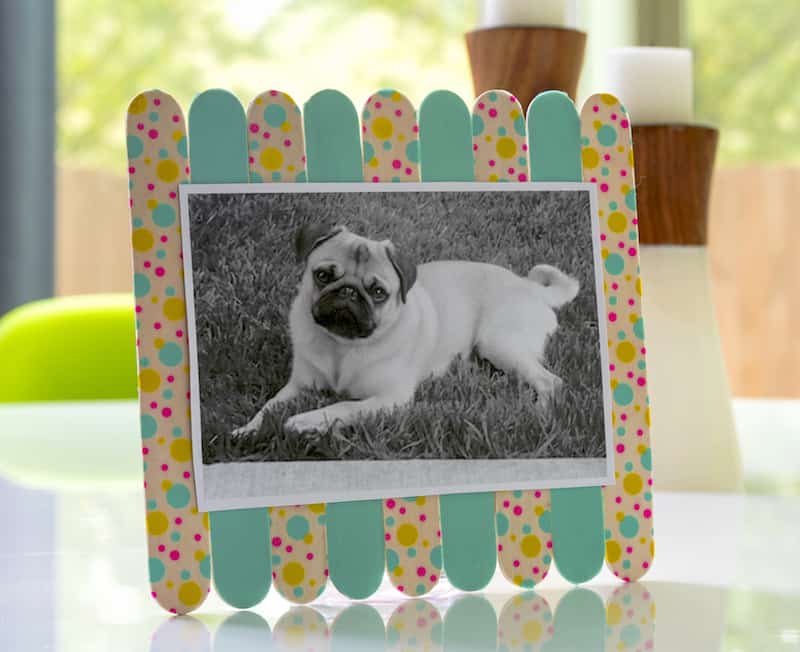
Learn how to make an ice cream stick photo frame the easy way! This DIY popsicle stick frame is so simple even a kid could do it. Decorate with fun patterns of washi tape.
Skill Level: Beginner. Perfect craft idea for kids, tweens, or adults who want to make something simple to display photos.
We’re all about fun kids’ crafts around here. Maybe you’ve seen our slime recipe, our DIY checkers, or even our complete list of arts and crafts for kids? I love finding and making crafts that are easy for children to do.
With the kids home for the summer, you’re going to need a fun, brightly colored project for them to do to keep their little hands and minds busy. Might I suggest a popsicle stick picture frame for you? This is such a great boredom buster!
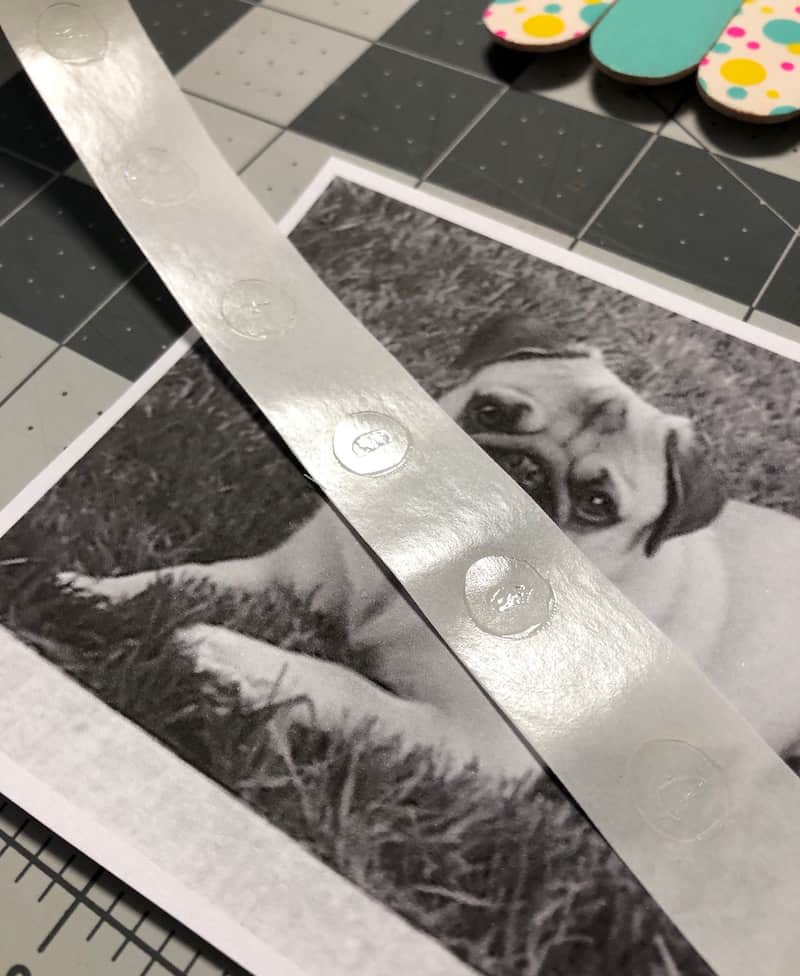
This frame is just about the easiest popsicle stick craft there is! If you can use tape and glue, you can make it. It holds a 4″ x 6″ printed image on the front using Glue Dots. The pattern on the front of the sticks was created using washi tape.
All washi tape is not created equal! I would say that the really inexpensive types that I buy (you know, the 50 cent or dollar bin kinds) don’t stick as well as the nicely wrapped ones that sit on the shelves at the craft stores.
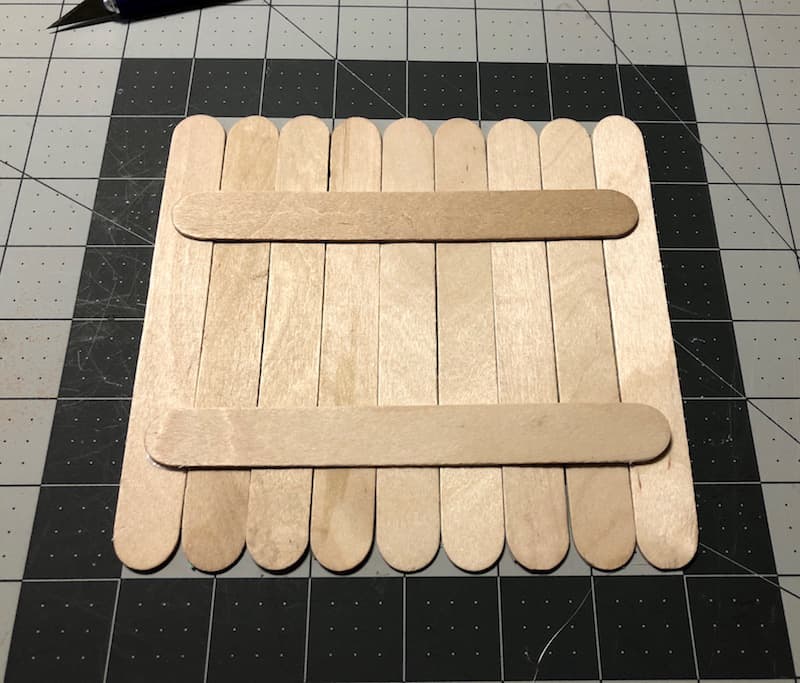
Our frame used sticks that were 3/4″ x 7″. They were the “jumbo” sticks from Michaels. The craft stores and Walmart are going to have the best selection of popsicle sticks of various sizes.

You can also find them at Dollar Tree sometimes, but they usually only have the smaller size. Of course you can get popsicle sticks online as well.
Are you ready to get started? Here’s the tutorial:

Ice Cream Stick Photo Frame
Equipment
- Scissors or craft knife and mat
Materials
- Washi tape
- 11 Popsicle sticks jumbo size
- Craft glue
- Glue Dots
- Mod Podge Gloss optional
Video
Instructions
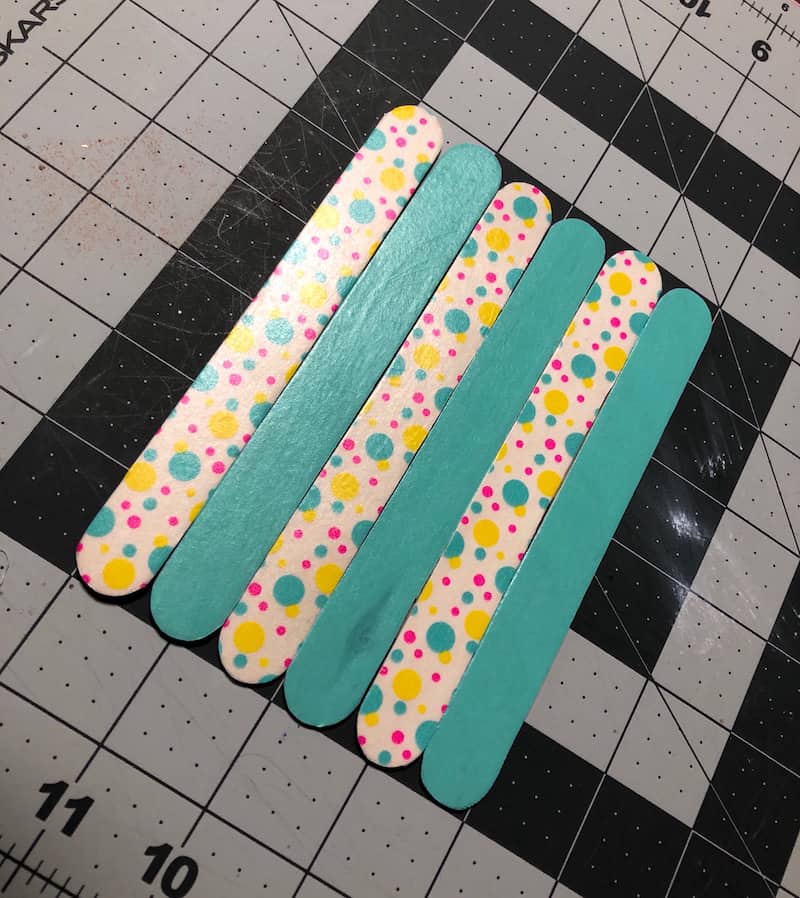
- Lay out the correct number of sticks for your frame. Add a strip of washi tape to the front of the stick, smoothing down and then tearing or cutting carefully after you've reached the end.
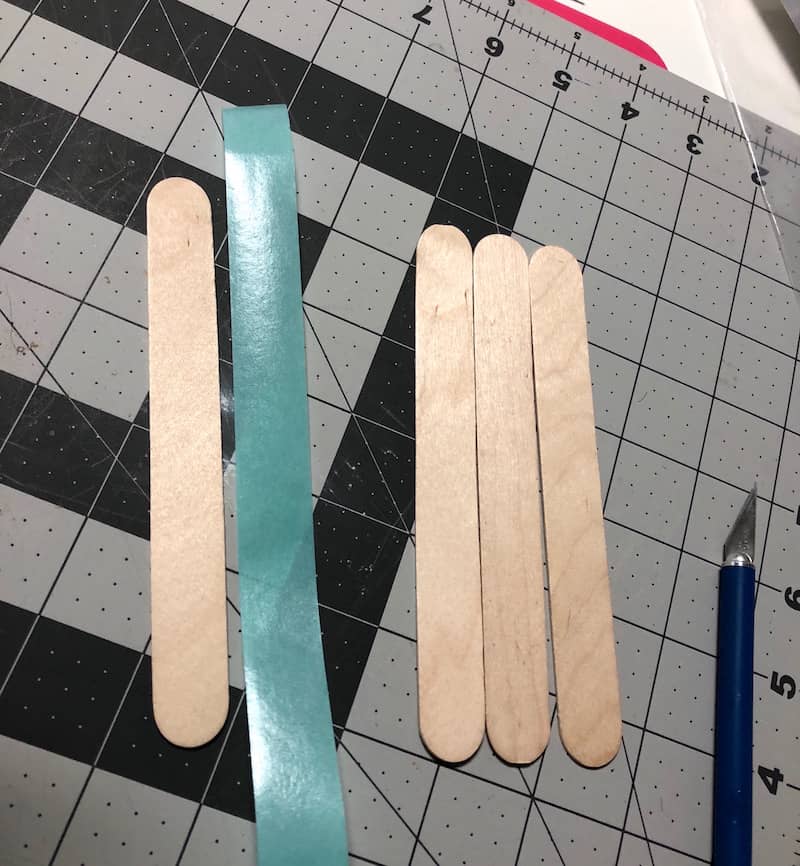
- Trim around the edge of the stick if desired. You can just smooth down the tapes around the edges as well.

- Repeat the process with additional popsicle sticks until you are satisfied with the number you have/size of your popsicle stick frame.
- Use craft glue across the back (with two additional popsicle sticks) to secure your frame. Let dry for about an hour.
- Print out an image and use Glue Dots to adhere it to the front of the frame.
Notes
- Glue magnets to the back and put on the fridge
- Hot glue string to the back and hang
- Display on a plate stand
What projects are you doing for summer with your kids? Anything with popsicle sticks or washi tape? Let me know in the comments! Plus check out these additional crafts I think you might enjoy:
Art Coasters • Backpack Charms • Birdhouse Craft • Cardboard Dollhouse • Decoupage a Treasure Box • DIY Window Clings • Egg Carton Art • Mason Jar Night Light • Student Name Sticks • Washer Necklaces