
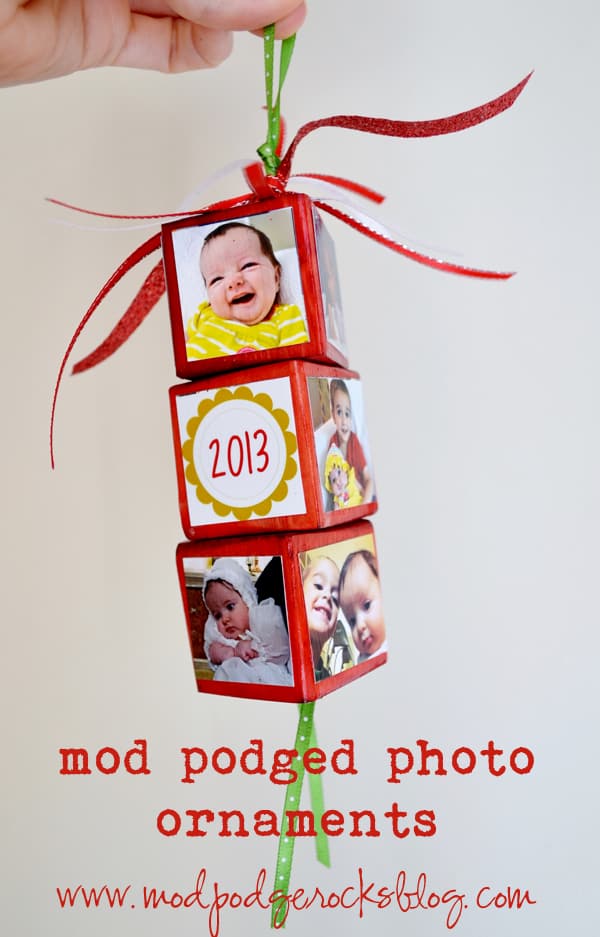
Create festive, personalized photo Christmas ornaments using your favorite pictures, wood blocks, and Mod Podge. These DIY photo ornaments make great gifts!
Hello there, fellow Mod Podgers! It’s Linda here, from burlap+blue, with a festive and fun personalized photo Christmas ornaments tutorial to share with you all today.
Do you like wooden photo blocks? Do you like wood Christmas crafts? Do you like photo crafts? If so, you’re going to love this idea.
It’s hard to believe the holidays are upon us, and this easy Mod Podge project will make a GREAT gift for the loved ones in your life (I should know . . . I’ve already made four of these cuties to give away)! Here’s how you make a bunch of these fantastic photo ornaments.
Photo Christmas Ornaments
Gather These Supplies
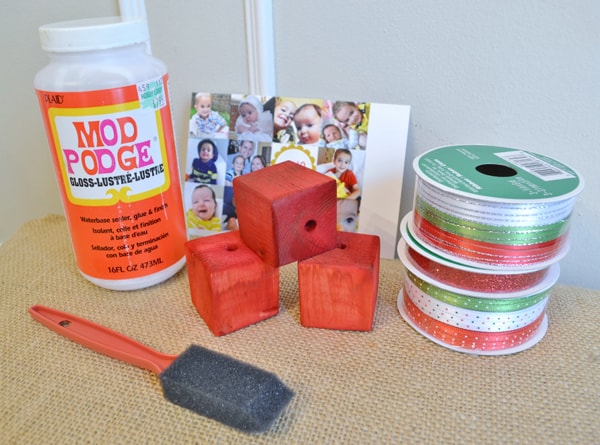
- Mod Podge Gloss
- Wood blocks (sanded, with a hole drilled through the center)
- Foam brush
- Square photos
- Ribbon
- Rit Dye (optional)
Step 1: First, you’ll need to resize and print out the images you want to use on your blocks. The blocks that I used are 1.5″ cube, so I shrunk my photos down to 1.25″.
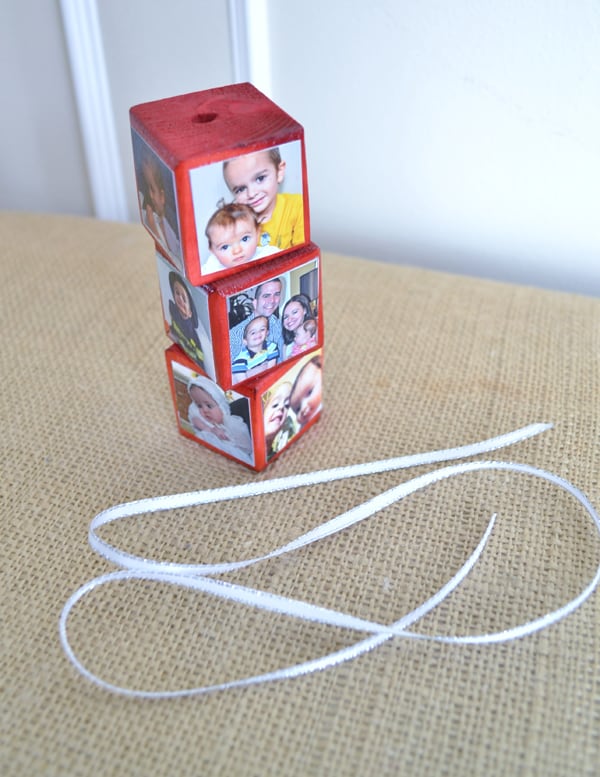
I used four photos per block, and used three blocks per ornament for a total of 12 pictures per ornament.
Don’t forget to also create a square for the date! If you’re unable to make the blocks yourself, you can easily find them online (here’s a link to some I found on Amazon).
FYI – I used Photoshop Elements to resize my images, but any photo editor should work (I love PicMonkey).
Step 2: If desired, use Rit dye to dye your blocks. Here’s a tutorial I did last year on dyeing clothespins – just use the same technique for dyeing your blocks.
Step 3: Using scissors, cut our your images, and Mod Podge them onto the four sides of your blocks.
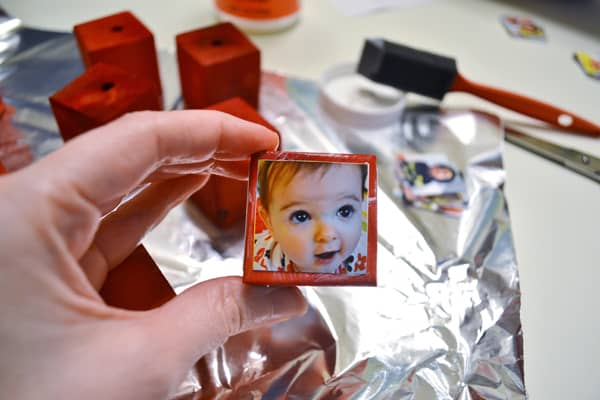
Step 4: Let dry. Apply three coats of Mod Podge to seal, allowing your blocks to dry well in between coats. Almost done!
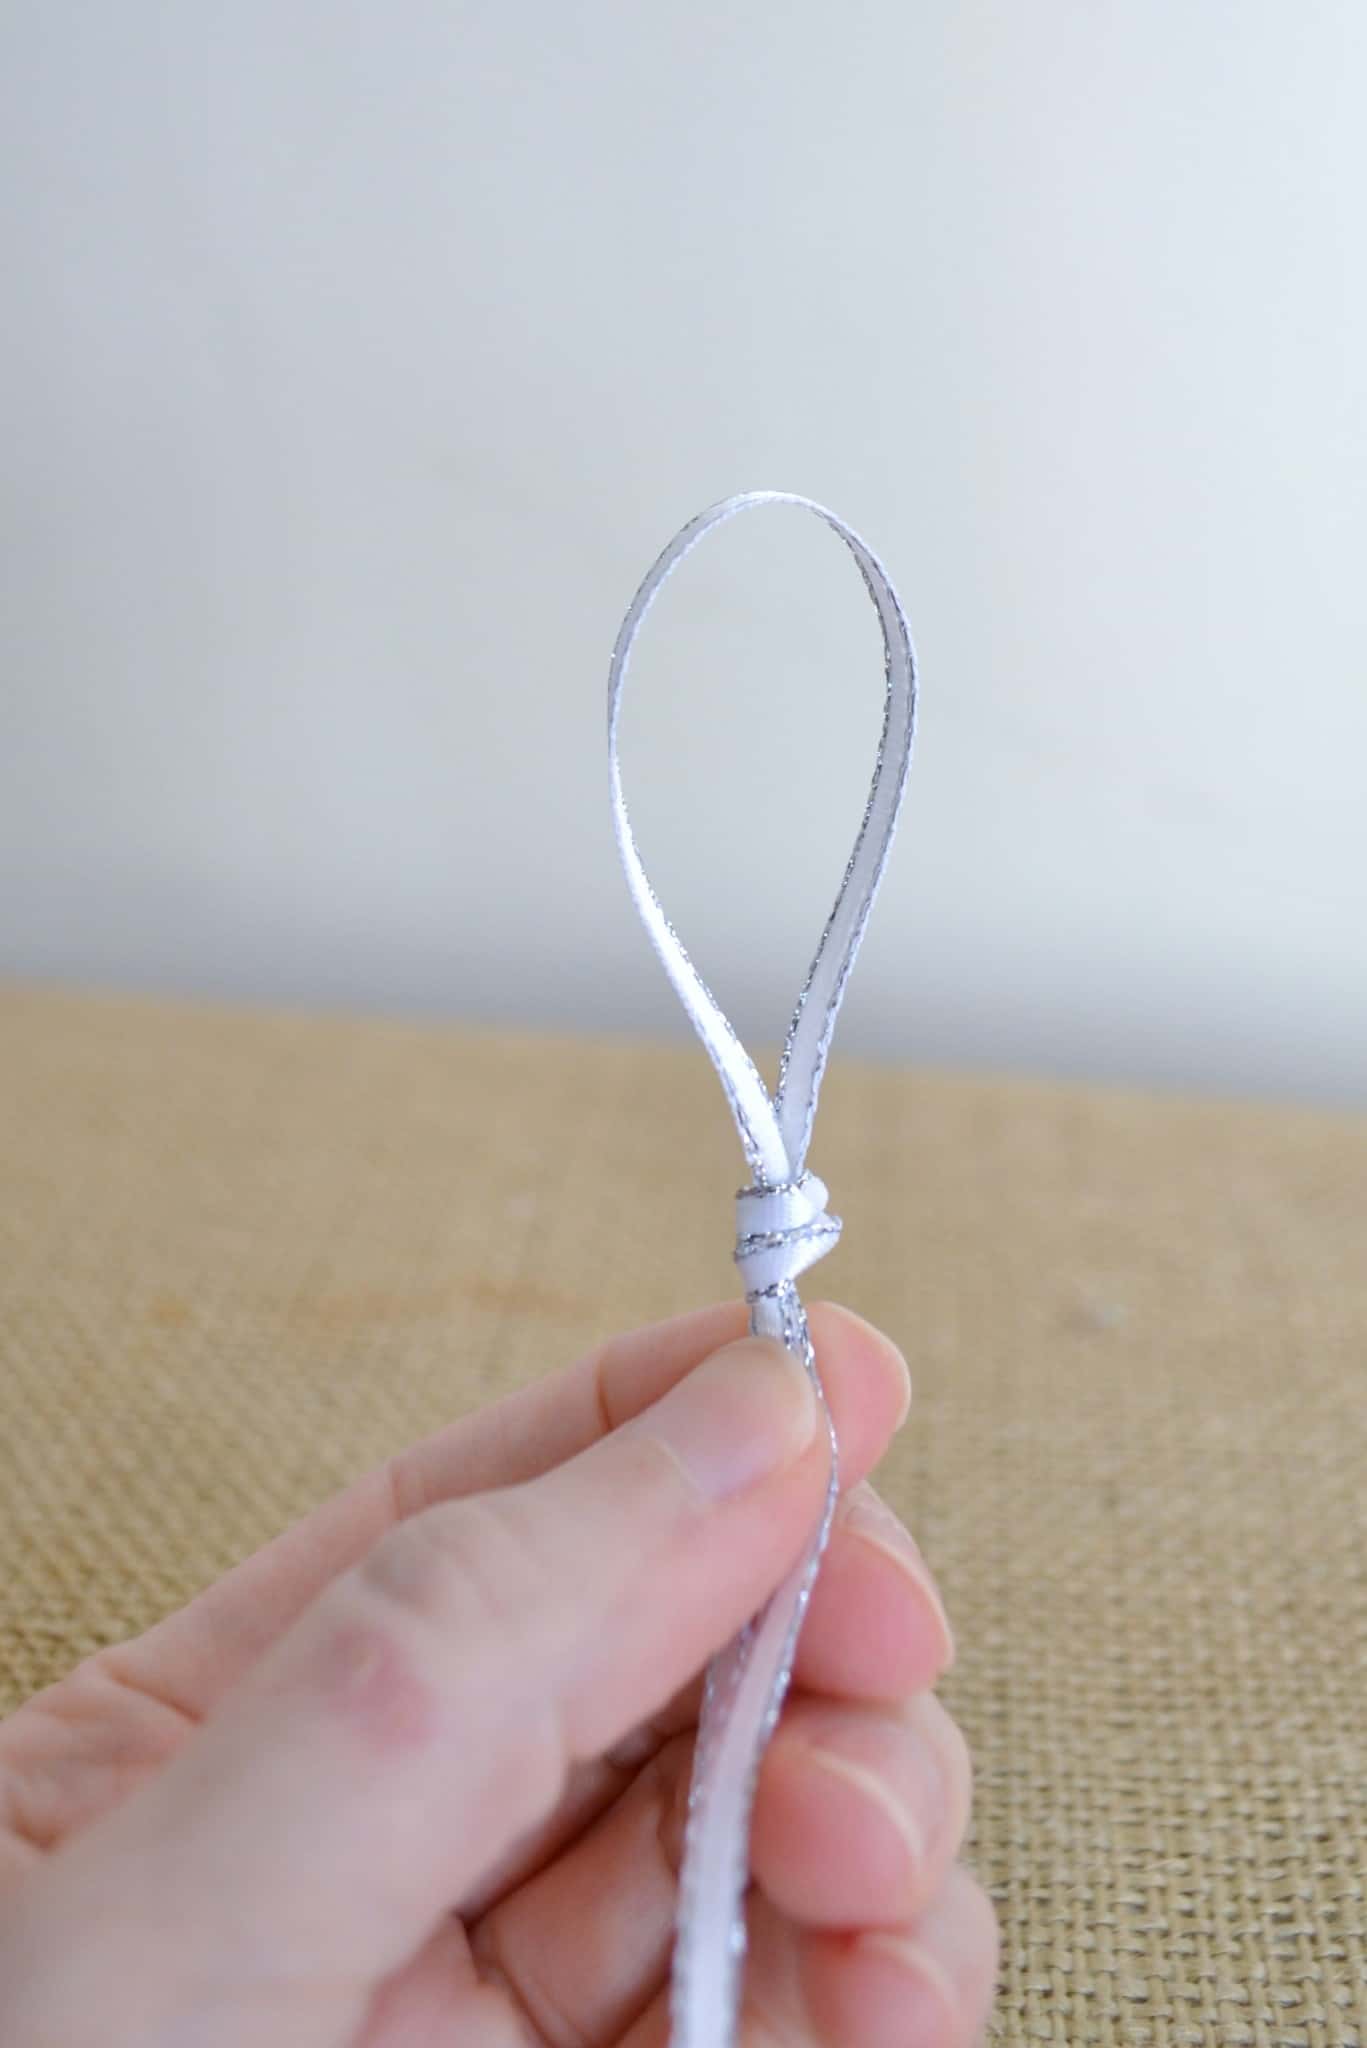
Now we’re ready to add the ribbon. I used a length of ribbon that was 25″ long, you may need a different length depending on the size of your blocks.
Step 5: Fold your ribbon in half, and tie a knot at the top of your ribbon. This is how your ornament will hang from your tree (or wherever your recipient decides to display it).
Step 6: Take the loose ends of your ribbon, and string all three blocks onto it. You can tie a knot between each block (like the photo below), or skip it. I think it looks fine either way!
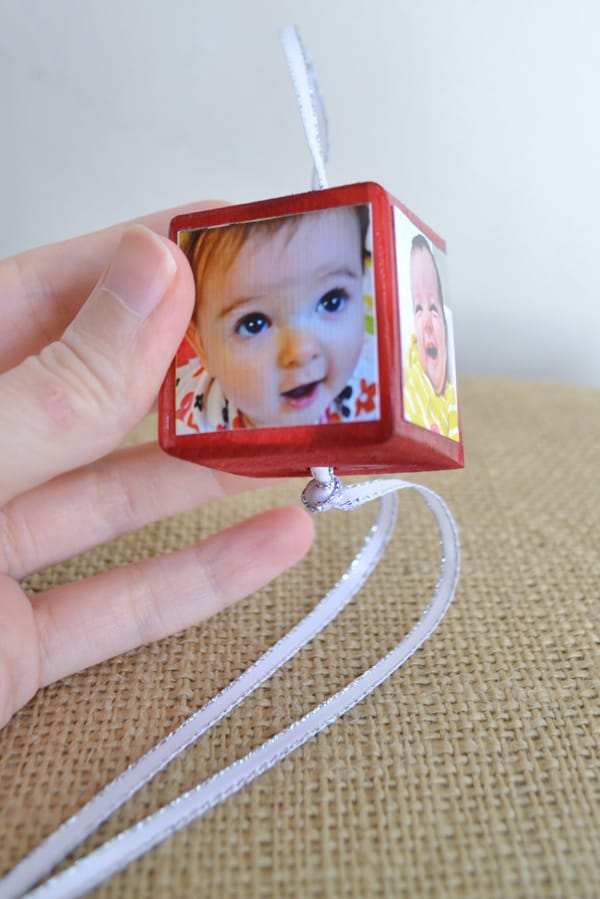
Once done, tie a knot at the bottom of the ribbon to hold the blocks on. Lastly, take lengths of ribbon and tie to the loop end of the ribbon to decorate it!


Photo Christmas Ornaments
Equipment
- Computer and printer
- Scanner
Materials
- Mod Podge Gloss
- Dye or acrylic paint
- 3 Wood block(s) sanded, with a hole drilled through the center
- Photos
- Ribbon 25" length
Instructions
- Scan in and print out the images you want to use on the blocks. The blocks that I used are 1.5" cube, so I shrunk my photos down to 1.25".
- Use Rit Dye to dye your blocks, or use acrylic paint to paint them. Let dry.
- Using scissors, cut our the images.
- Mod Podge them onto the four sides of the blocks. Let dry. Apply three coats of Mod Podge to seal, allowing the blocks to dry well in between coats.
- Fold the ribbon in half, and tie a knot at the top of the ribbon. This is how the ornament will hang from your tree.
- Take the loose ends of the ribbon and string all three blocks onto it. Tie a knot between each block if you choose.
- Tie a knot at the bottom of the ribbon to hold the blocks on.
- Take lengths of ribbon and tie to the loop end of the ribbon to decorate it.
Notes
Thank you so much for letting me share my photo ornaments with you all today! You can find lots of other tutorials and inspiration on my blog!
If you enjoyed these DIY Christmas ornaments, here are some others for you to check out:
Confetti • Crystal Photos • Decoupage Fabric • Kids’ Handprints • Letters • Mason Jar Lids • Mod Podge Glitter • Night Light Bulbs • Painted Wood • Paper Bags • Paper Balls • Paper on Glass • Rhinestones • Rustic Glitter • Salt Dough • Seashells • Shadow Box • Sugar


do you glue the photos on the block first? or do you use the mod podge on the back of the photo, or the block and then stick the photo on the block and then mod podge the front again.
Hi Kathy! You would add Mod Podge to the block and the back of the photo if you like (optional). Smooth down and wipe away excess that squeezes out the sides. Wait 15 -20 minutes. Apply a top coat! Let dry.
WOW … I was just looking for DIY directions for photo block ornaments and here you are! Great timing as my gifts are headed to Australia! I wanted to ask what kind of paper did you use for the photos? Assuming it isn’t regular copier paper, is it photo paper? Cardstock? And thank you for including specific directions on how to loop the ribbon through! Some of us craft-challenged souls need help with stuff like that.
Hi Diane! You can use regular copier paper up to cardstock – the thickness is up to you. Cardstock is easier to Mod Podge without wrinkles!
Great! And THANK YOU for the speedy reply!
Love it!!! Pinning and doing!