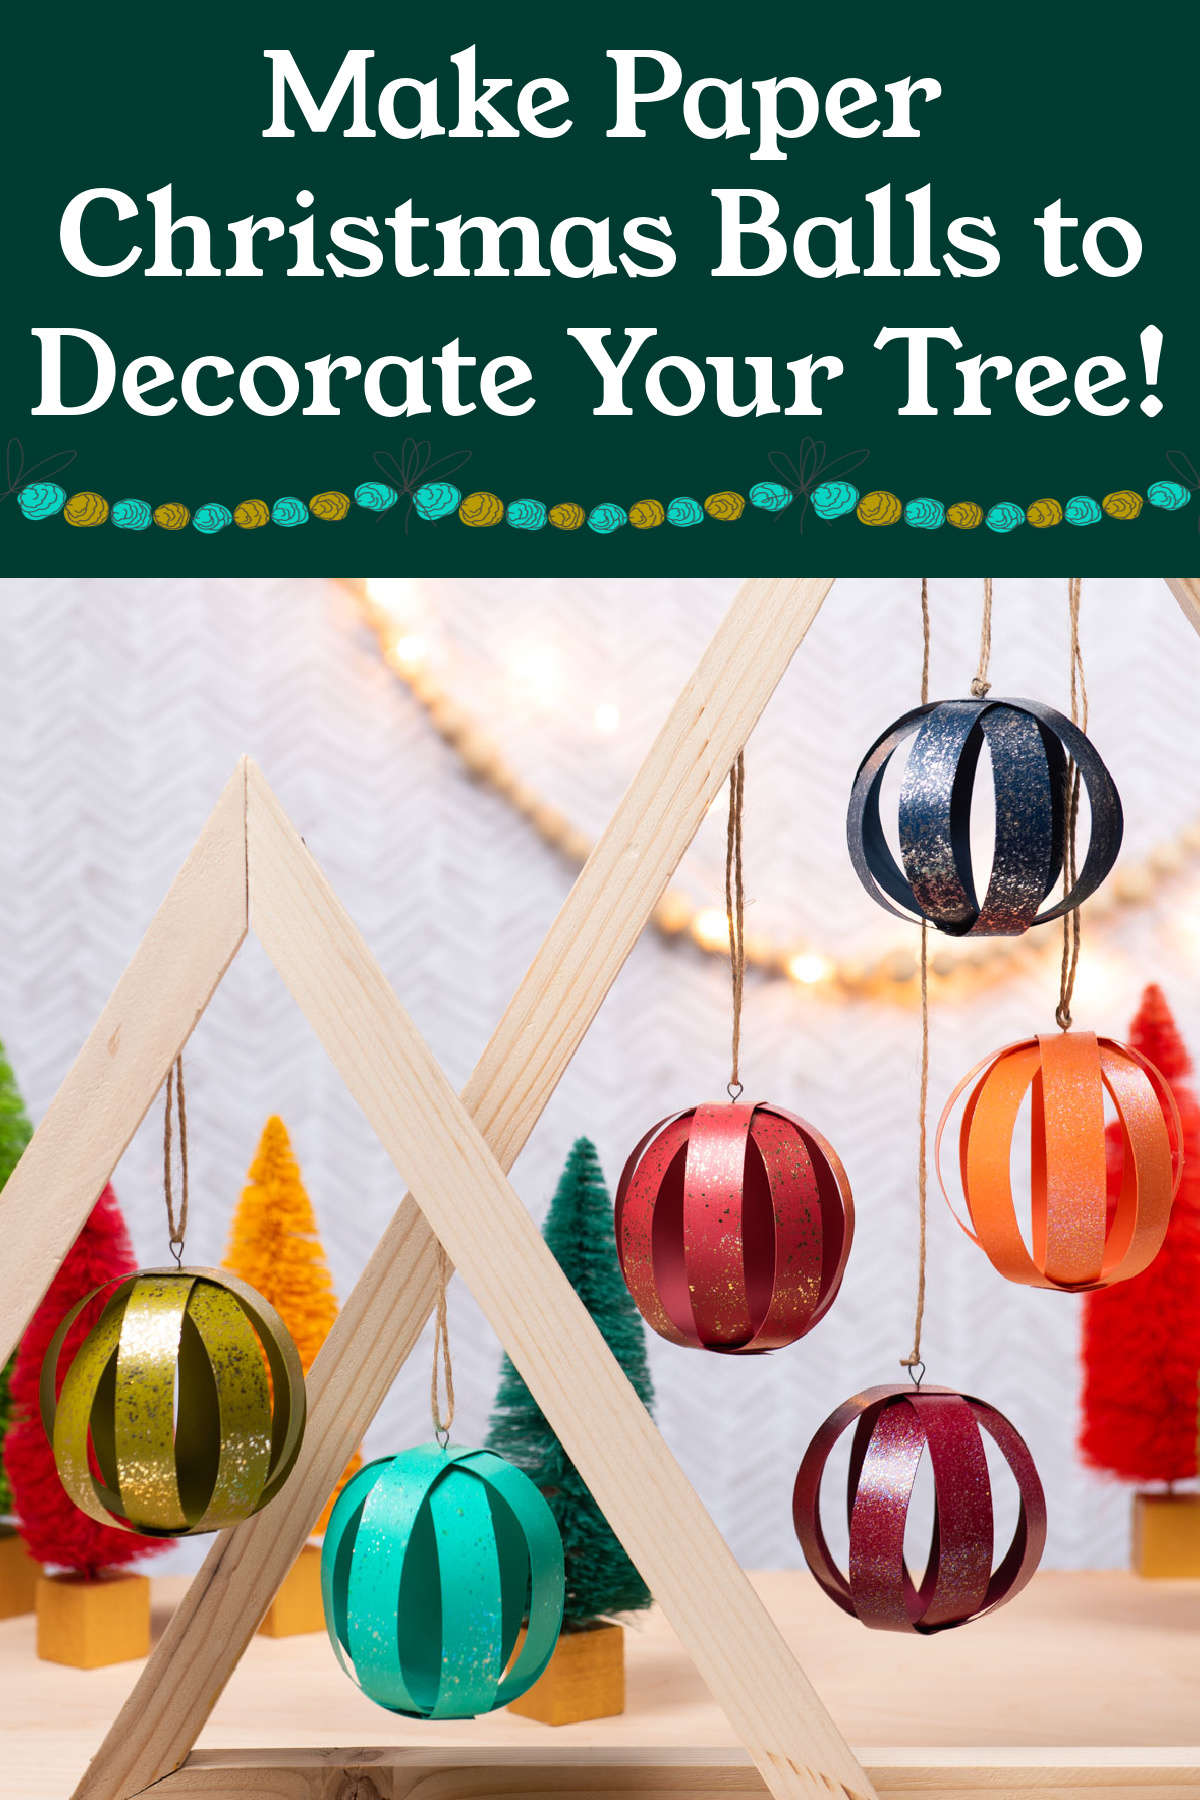
Add shimmer and shine to your tree this year with these unique glitter ornaments! The lights of your tree will glisten off of these beautiful paper Christmas balls. Perfect family project for the holidays!
Skills Required: None. Even if you’ve never crafted before, you can make these ornaments. You’ll be Mod Podging paper, using a craft knife, then using a glue gun. If you haven’t made anything, just work slowly.
Over the years I’ve done a LOT of Christmas crafts and made a LOT of Christmas ornaments. I’m sure you can imagine that I’m a craft blogger so it’s what I do. And I enjoy it!
Having said that, every now and again I like an easy project. A project that I’ve done many times before, or is super simple. Something that I don’t have to think about and can just do . . . and enjoy the making part while letting my brain escape.
These paper Christmas balls are just that sort of project.
They’re a great Christmas craft for kids, but they’re also fun for adults. They look good not only on a Christmas tree, but randomly hanging around your holiday home and in doorways. Trust me, you’re going to want these paper ornaments as part of your Christmas decor!
These paper Christmas balls can be made in four easy steps. You’re going to Mod Podge the paper, then cut it into strips. Then you’ll glue the paper together and add a hanger.
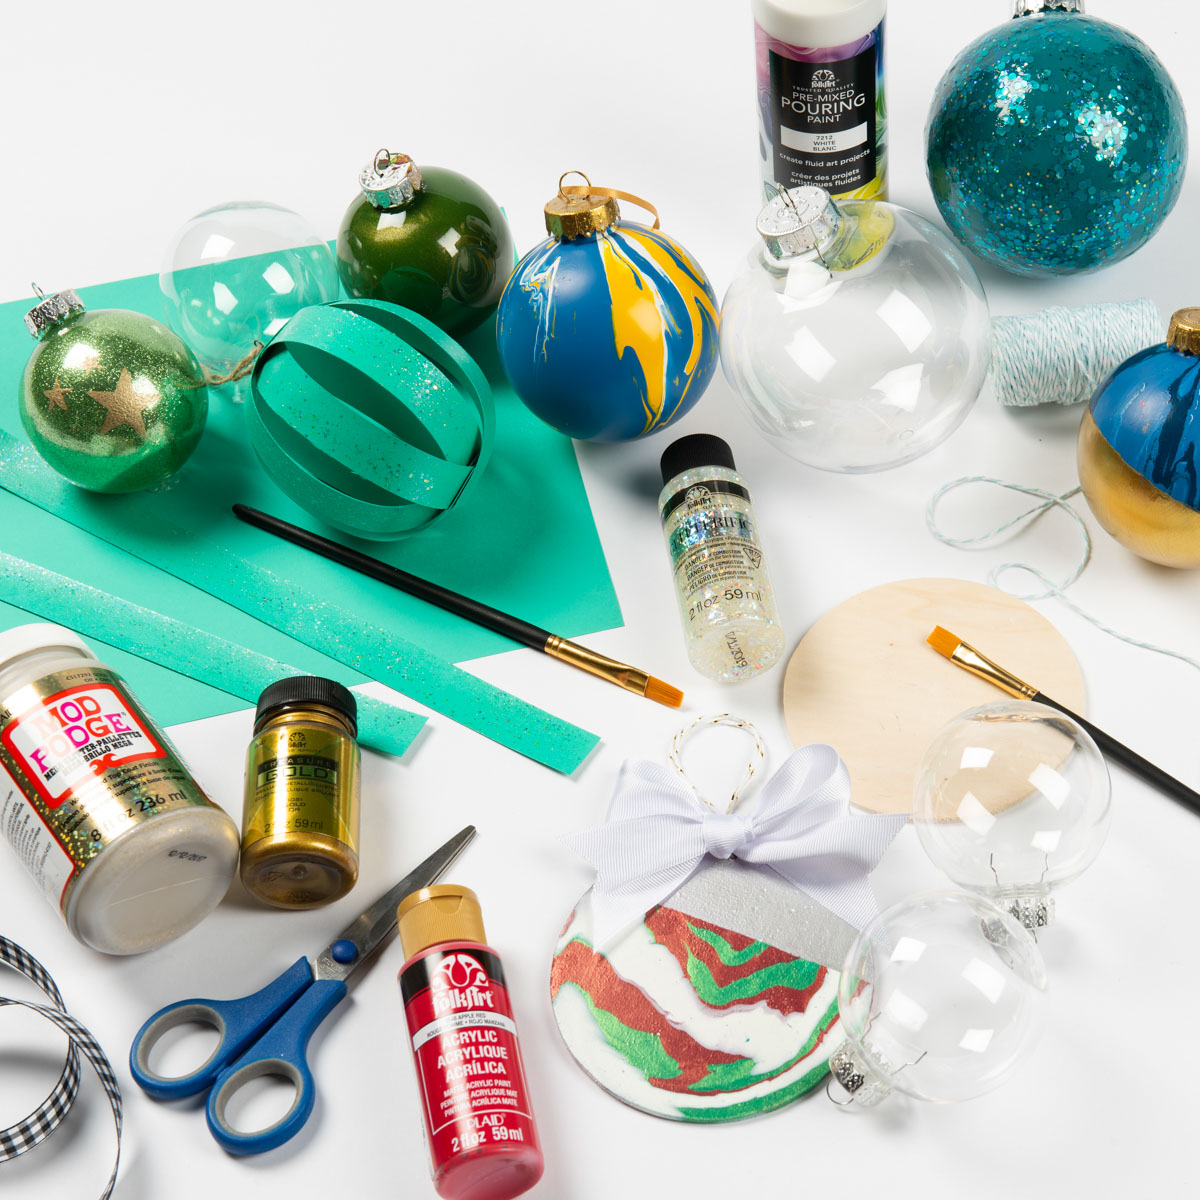
Supplies to Use
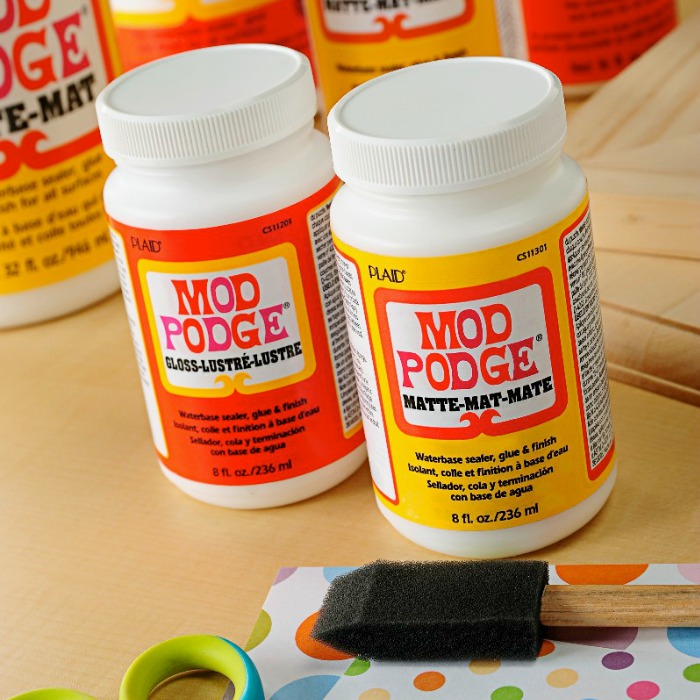
There are essentially two parts to these Christmas ornaments: the paper and the Mod Podge. Let’s start with the Mod Podge. You can really use any formula you like, but I imagine you’re going to want sparkles.
As far as the paper, you’re going to want to use something a little thicker like cardstock or scrapbook paper. It needs to have some “body” to it so that the paper ball holds its shape.
Are you ready to make these Christmas baubles for your tree? Check out the how-to below! You’re going to want to view the video in the post as well.
Gather These Supplies
- Mod Podge Mega Glitter – comes in three colors
- Colored cardstock
- Glue gun
- Craft knife and mat
- Ruler
- Pencil
- Paintbrush
- Embroidery floss
- Needle
- Scissors
You don’t have to use Mega Glitter. The levels are Sparkle Mod Podge (a little glitter), the Extreme Glitter Mod Podge (more glitter), or Mega Glitter Mod Podge (lots of glitter!).
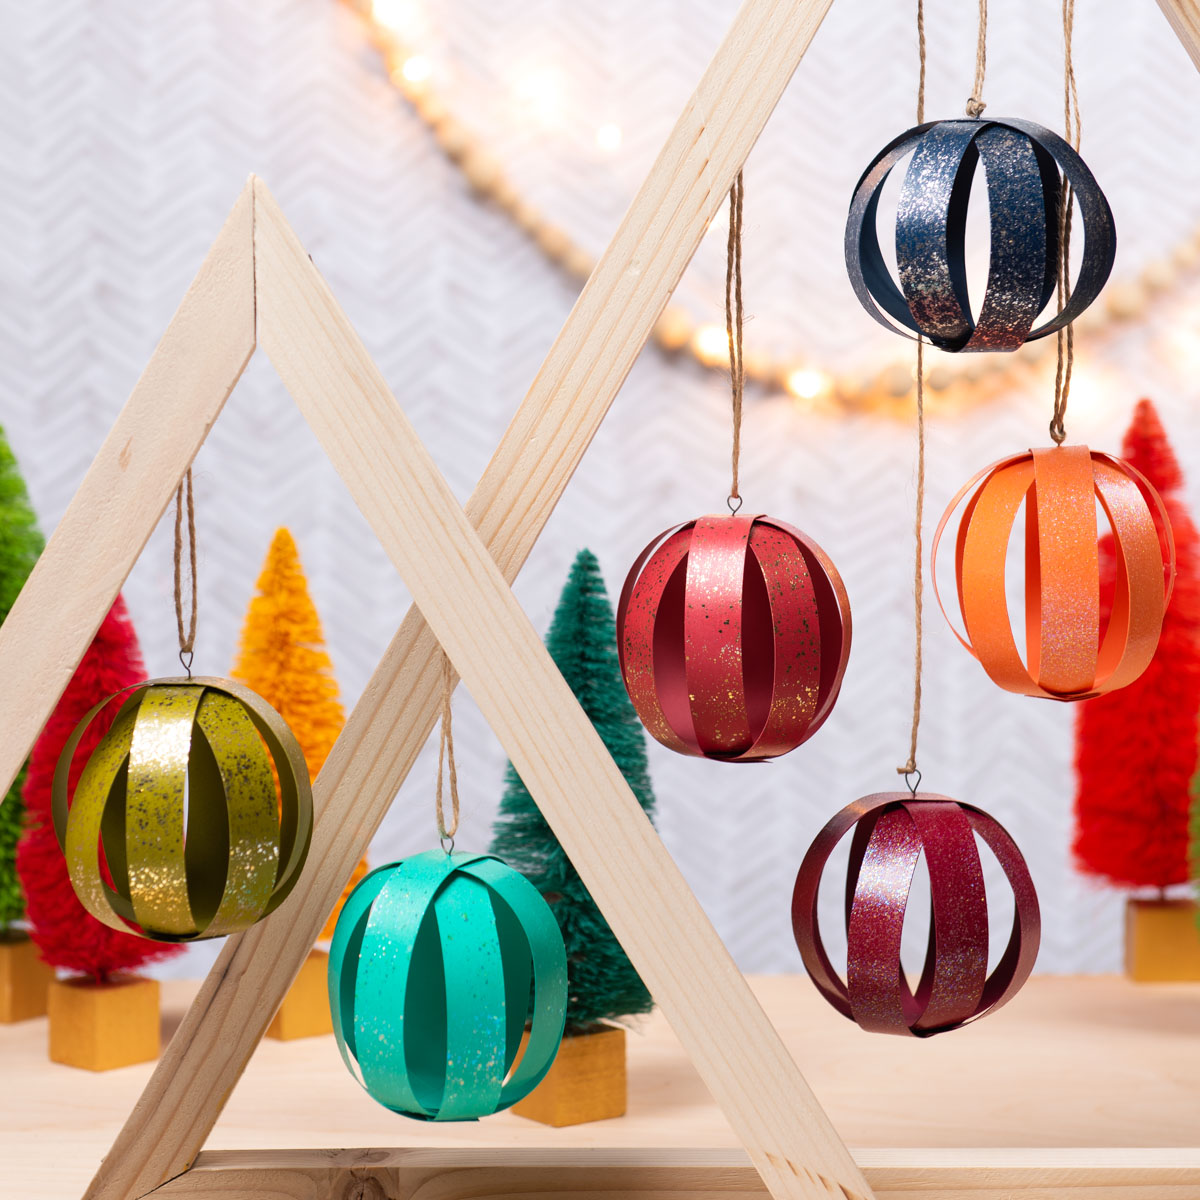
You’re going to love how the sparkles of these paper Christmas balls. Which, I don’t know if you’ve noticed . . . are more pronounced on darker paper. But look great on any color, to be honest.
Get the printable how-to below.

Paper Christmas Balls
Materials
- Mod Podge Mega Glitter
- Colored cardstock
- Twine
Video
Instructions
- Place the cardstock on your work surface. Using a paintbrush, apply a layer of Mod Podge Mega Glitter to the cardstock and let dry.
- Grab your craft knife, mat, and ruler. Cut the cardstock in 3/4″ strips. On the back of each strip, make a small dot in the center with your pencil.
- Using the hot glue, attach the strips in the center, first making a cross with two pieces. Use the hot glue to attach two more strips, splitting the cross shape with an “X.”
- Join the ends at the top with the same method as above, starting with the first strip. You’re going to cross, and then cross. Let cool.
- Punch a small hole in the top of the paper ball using a needle and thread and add your desired hanger.
Notes
If you enjoyed making this paper craft for Christmas, let me know in the comments! I’d love for you to check out these other ornament ideas:
Confetti • Crystal Photos • Decoupage Fabric • Glass Balls • Kids’ Handprints • Letters • Mason Jar Lids • Mod Podge Glitter • Night Light Bulbs • Painted Wood • Paper Bags • Photo Blocks • Rhinestones • Rustic Glitter • Salt Dough • Seashells • Shadow Box • Sugar