
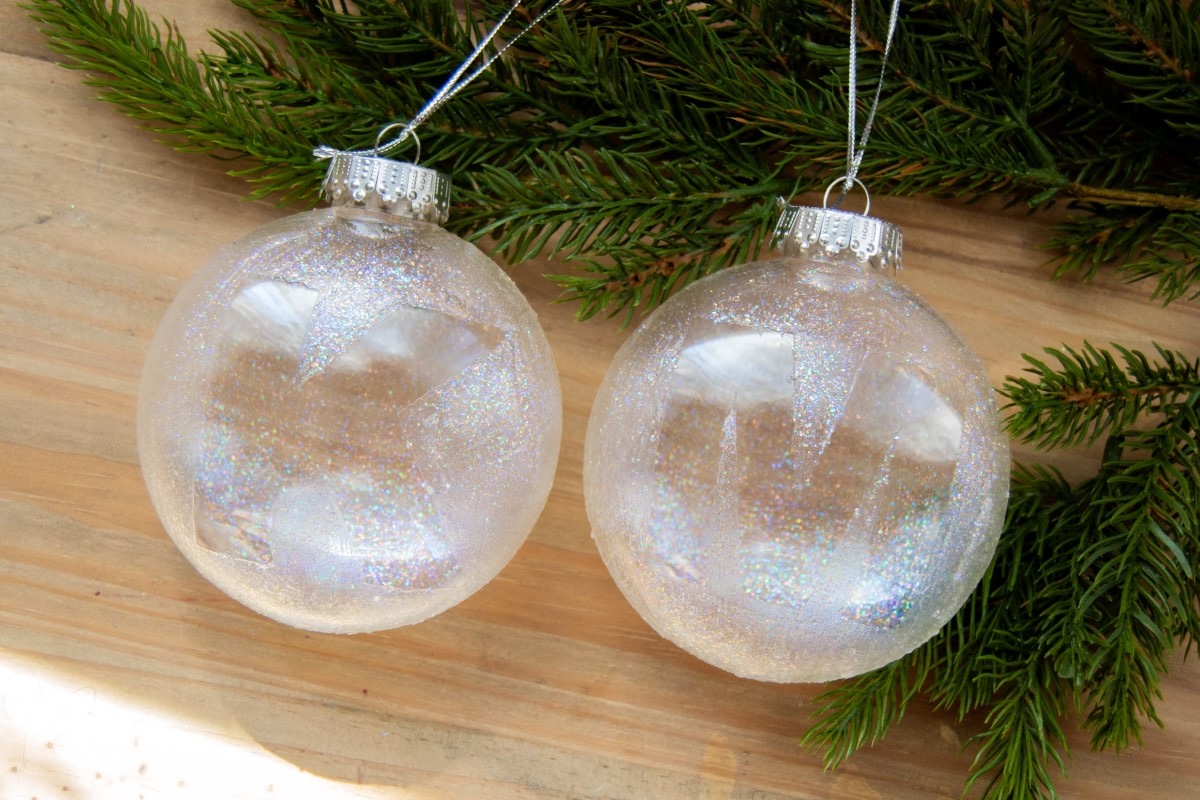
Do you love the look of sparkle and bling on your tree? These pretty Mod Podge glitter ornaments are EASY to make – and look like a million bucks.
Skills Required: None. Even if you’ve never used Mod Podge before, you’ll find success. It’s a very simple project with sparkly results.
In the heart of the holiday season, where every flicker of light and jingle of a bell brings a smile, there’s a simple joy that comes from making a Christmas craft with your own two hands.
Today, I’m guiding you into the crafty wonderland of creating Mod Podge glitter ornaments, a DIY ornament project that’s not just about decking your halls but about sprinkling a personal touch of magic onto your Christmas tree.
Imagine hanging these glittering beauties from the branches of your tree, each one catching the light and reflecting it in a merry dance. With a handful of supplies and a sprinkle of creativity, you’ll find yourself on a merry path to creating something truly magical.
This tutorial is your step-by-step guide to crafting glitter ornaments with Mod Podge that stand out in the best way possible. Whether you decide to fill your ornaments with vibrant paper shreds or let the glittered monogram shine on its own, the choice is yours, and the possibilities are endless.
It’s about embracing the festive spirit, experimenting with your artistic side, and creating ornaments that you’ll be proud to hang year after year.
So, let’s set the scene: your favorite holiday tunes playing in the background, a cup of hot cocoa within reach, and all your crafting supplies laid out in front of you.
As we embark on this creative journey together, remember, the magic of the holiday season isn’t just found in the glitter and sparkle but in the moments we create and cherish along the way.
Ready to add a bit of DIY flair to your holiday decor? Let’s get started on making those glittery, monogrammed masterpieces that will shine bright on your Christmas tree, making every glance a reminder of the joy and creativity that this season inspires!
Gather These Supplies
- Clear round glass ornaments (I used the flatter round ones)
- Sparkle Mod Podge
- Wide paintbrush
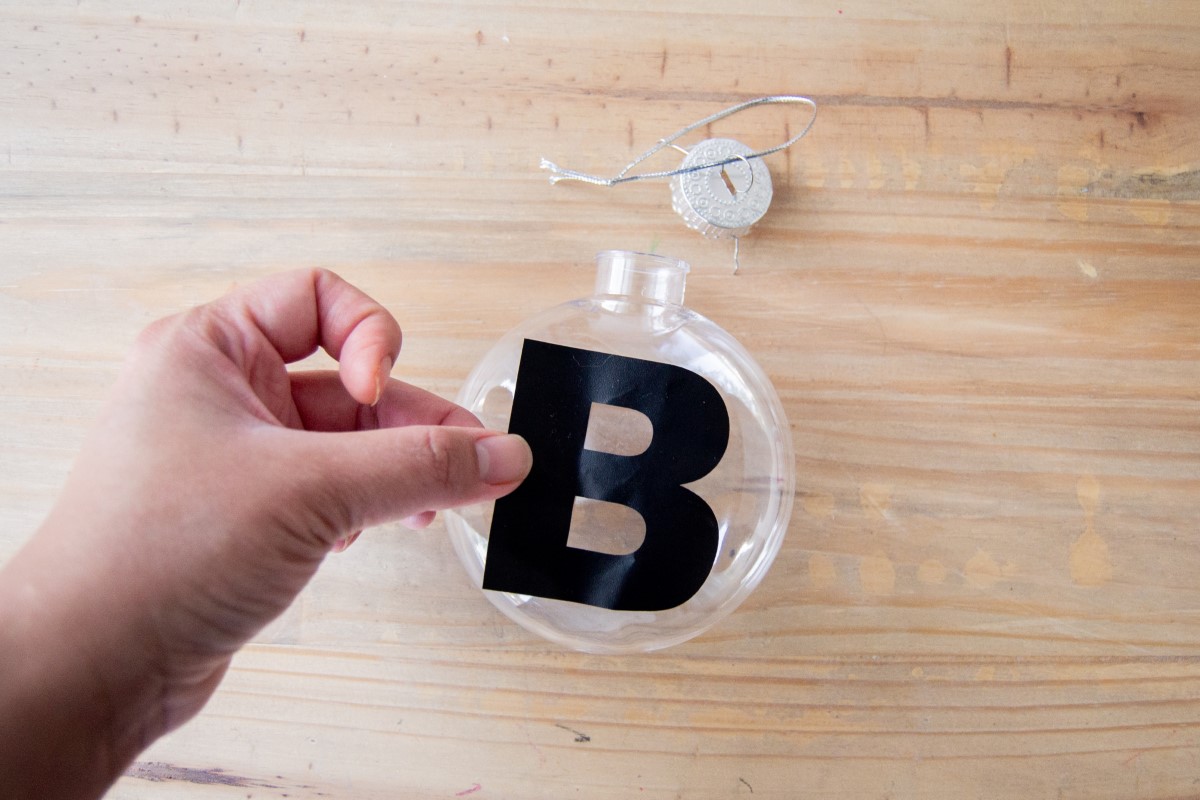
- Vinyl letters
- Tweezers
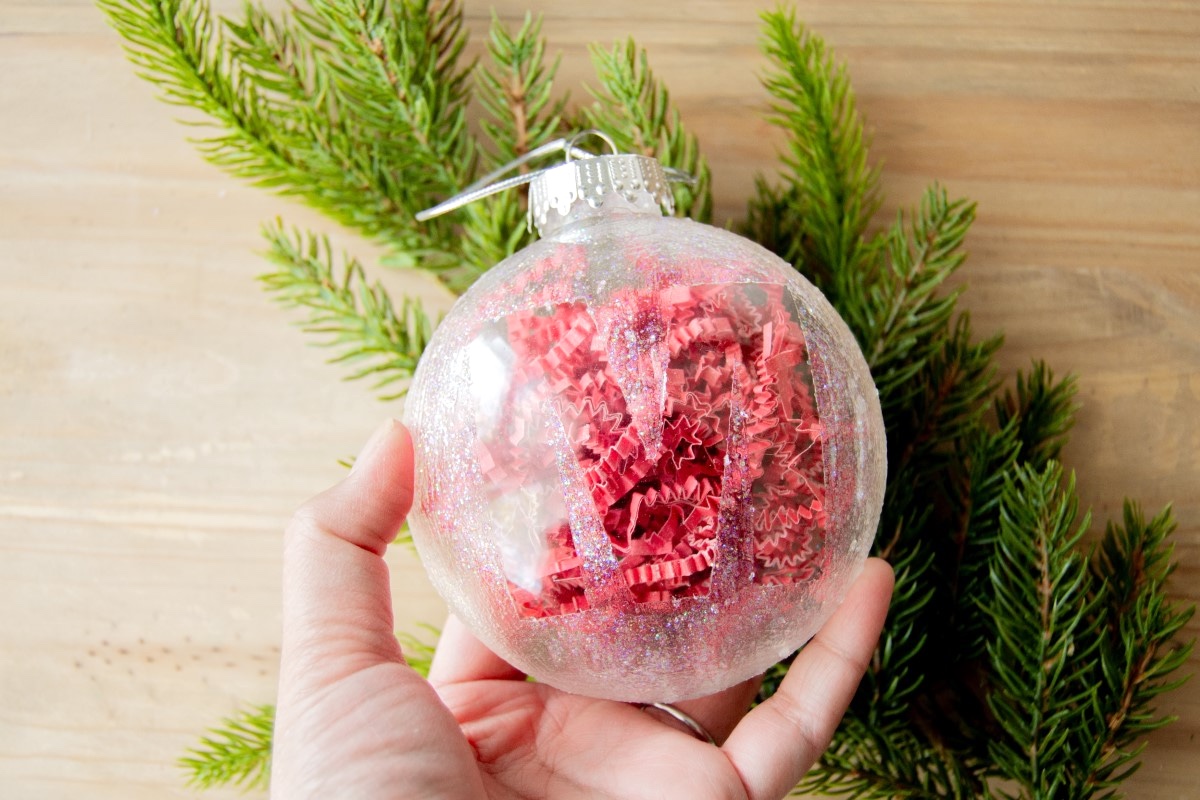
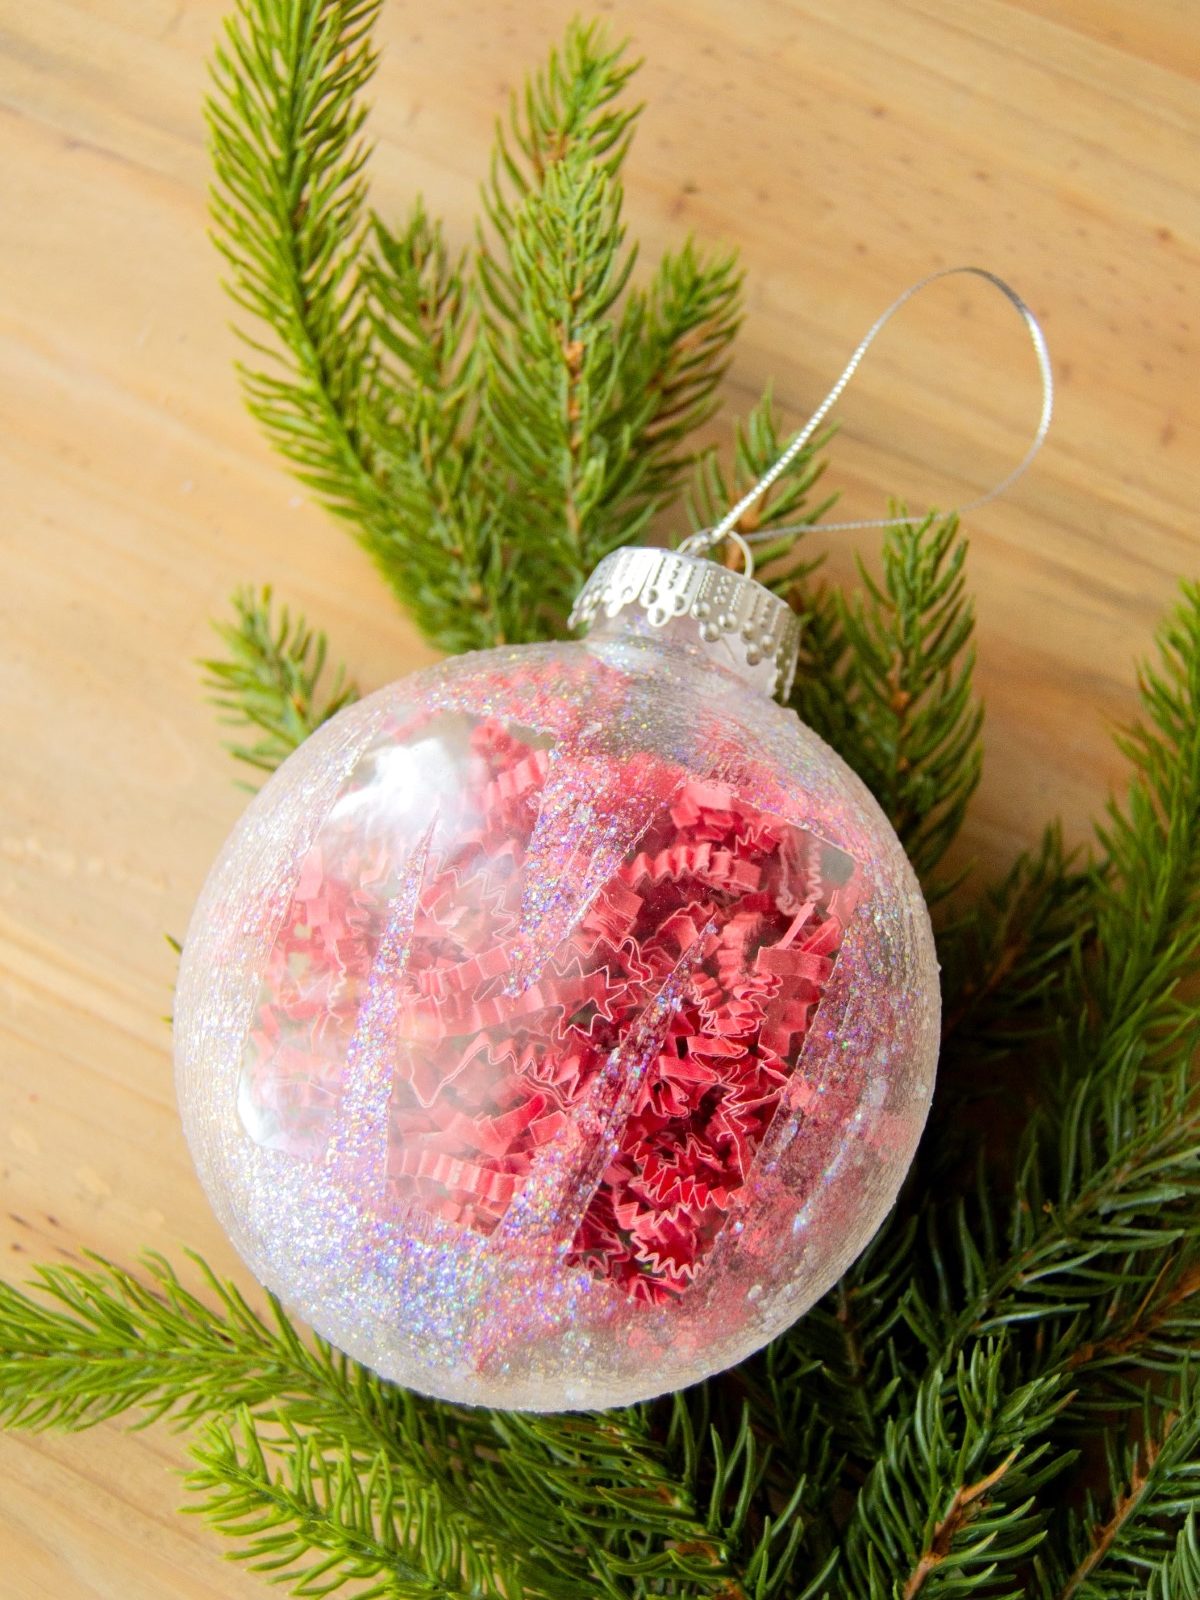
- Paper shreds or pompoms (as fillings for the ornament, optional)
Tips and Tricks for This Project
Make sure the ornaments are clean before using. Use mild soap and water or rubbing alcohol and a cotton ball. You want to make sure there are no fingerprints or oils on your glass surface.
You can use Extreme Glitter Mod Podge or even Mega Glitter for this project – but if you use either of those formulas, I recommend using a spouncer for application.
One idea I had – I wonder what these would look like with some paint inside them? You wouldn’t see the sparkling lights through the ornament, but it’s another idea.
Get the printable how to card for this project below!

Mod Podge Glitter Ornaments
Equipment
- Tweezers
Materials
- Clear round glass ornaments I used the flatter round ones
- Mod Podge Sparkle
- Vinyl letters
- Paper shreds or pompoms as fillings for the ornament, optional
Instructions
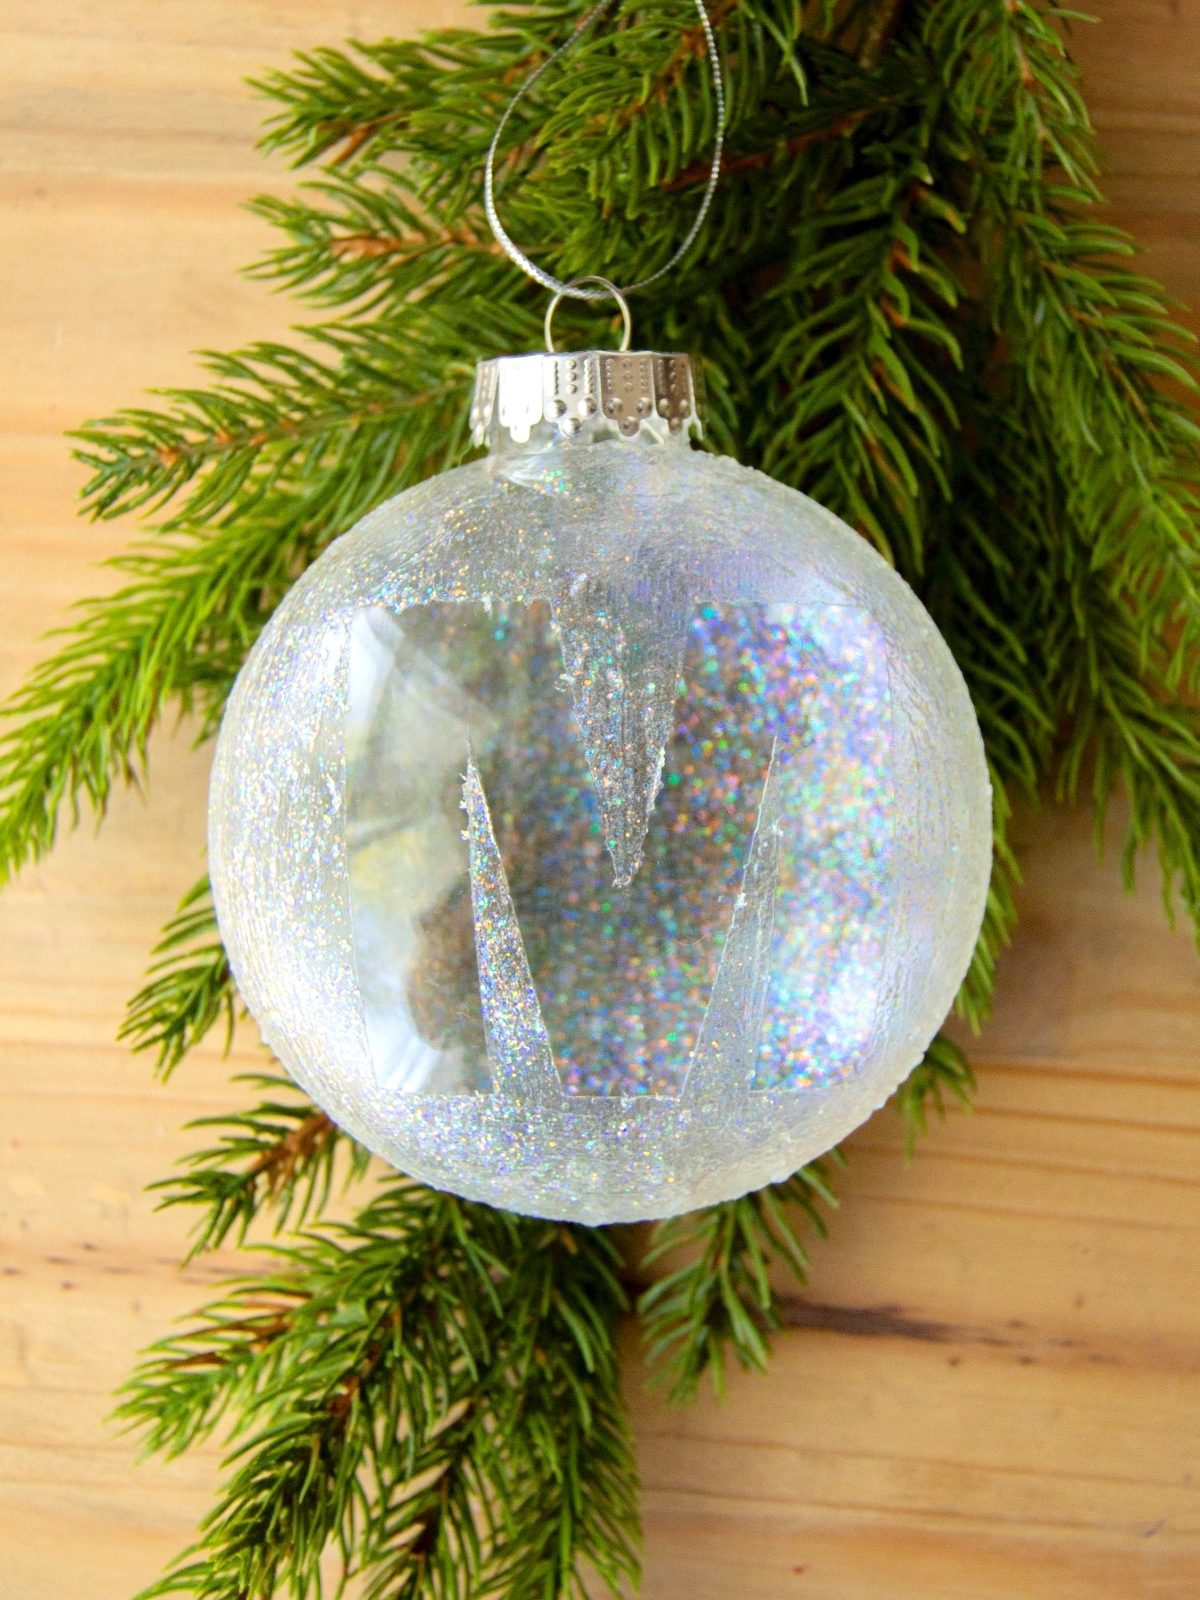
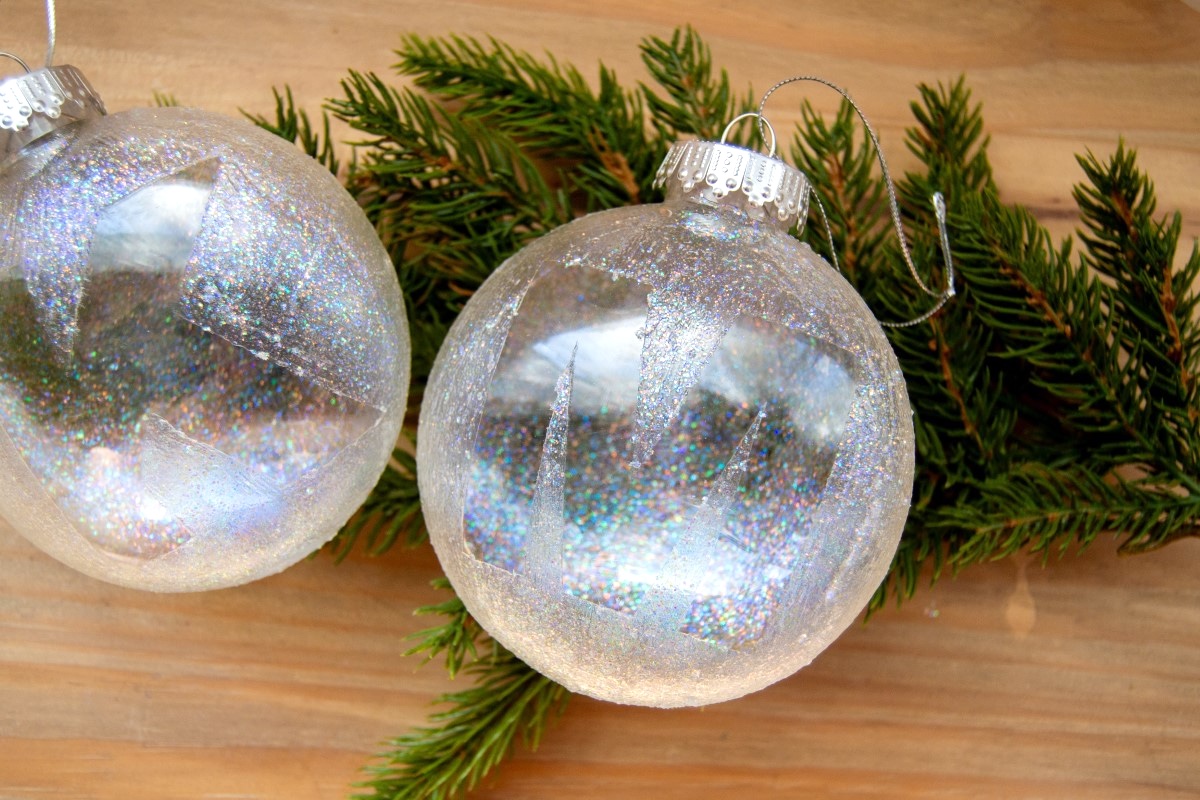
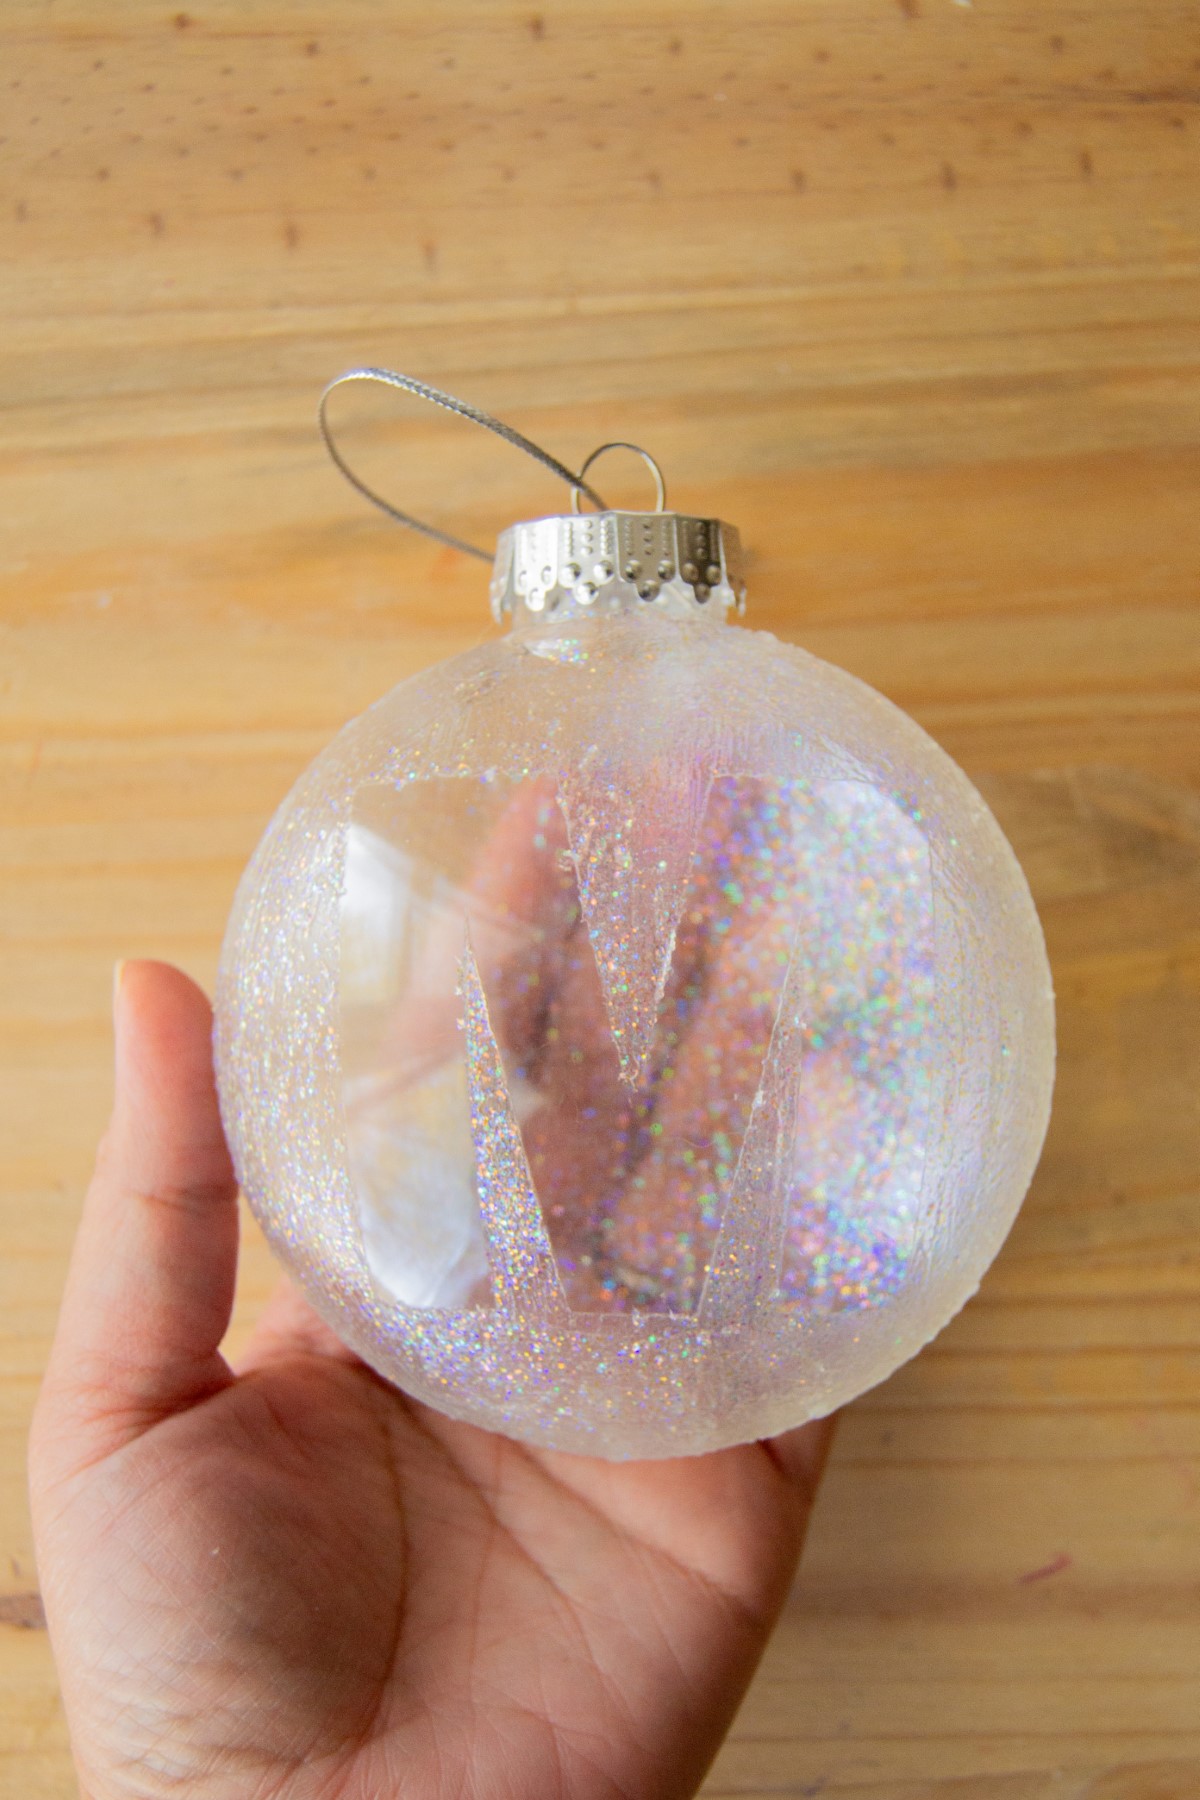
- Remove the top of the ornament by carefully pulling it out. Clean the ornament’s surface using a cotton pad with alcohol and let it dry. Once dry, attach your vinyl letter, making sure it is centered. Burnish all sides to ensure no edges lift up during the Mod Podging process.
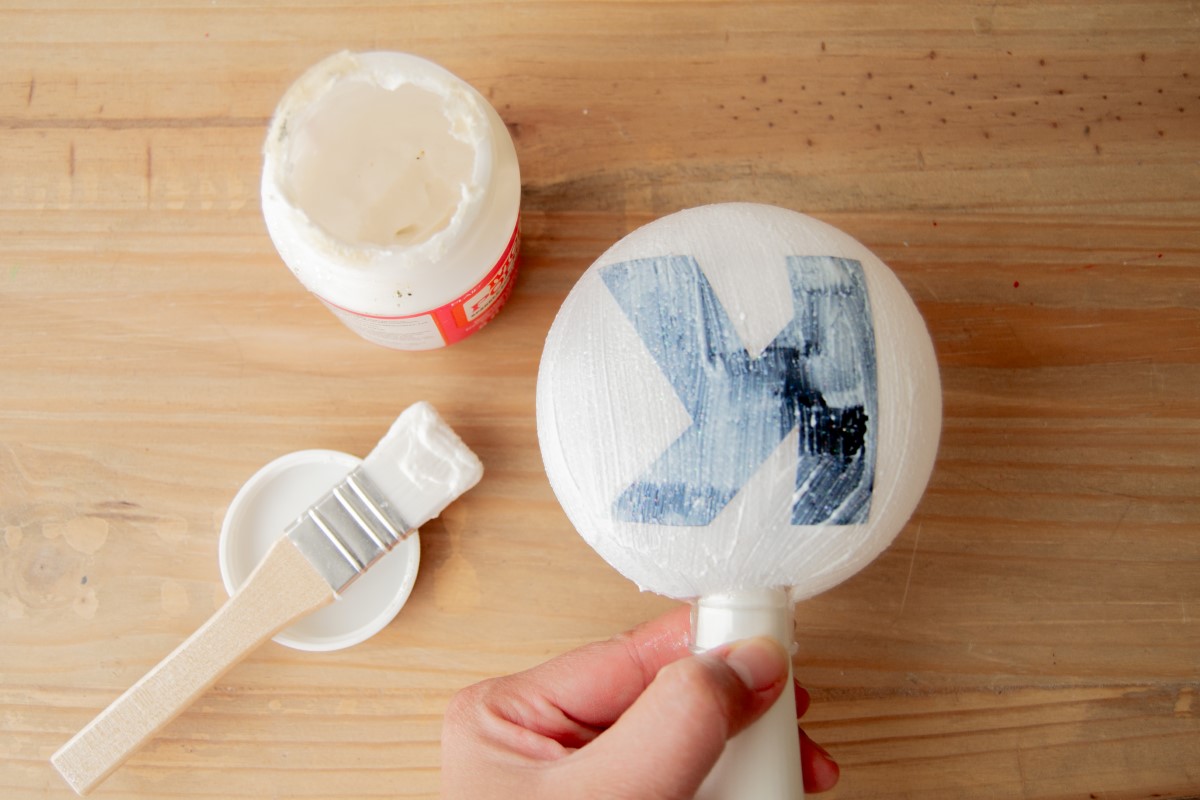
- Use a wide brush to cover the ornament in Sparkle Mod Podge, taking care to not miss any corners and edges. I applied one thick coat all over the front and back.
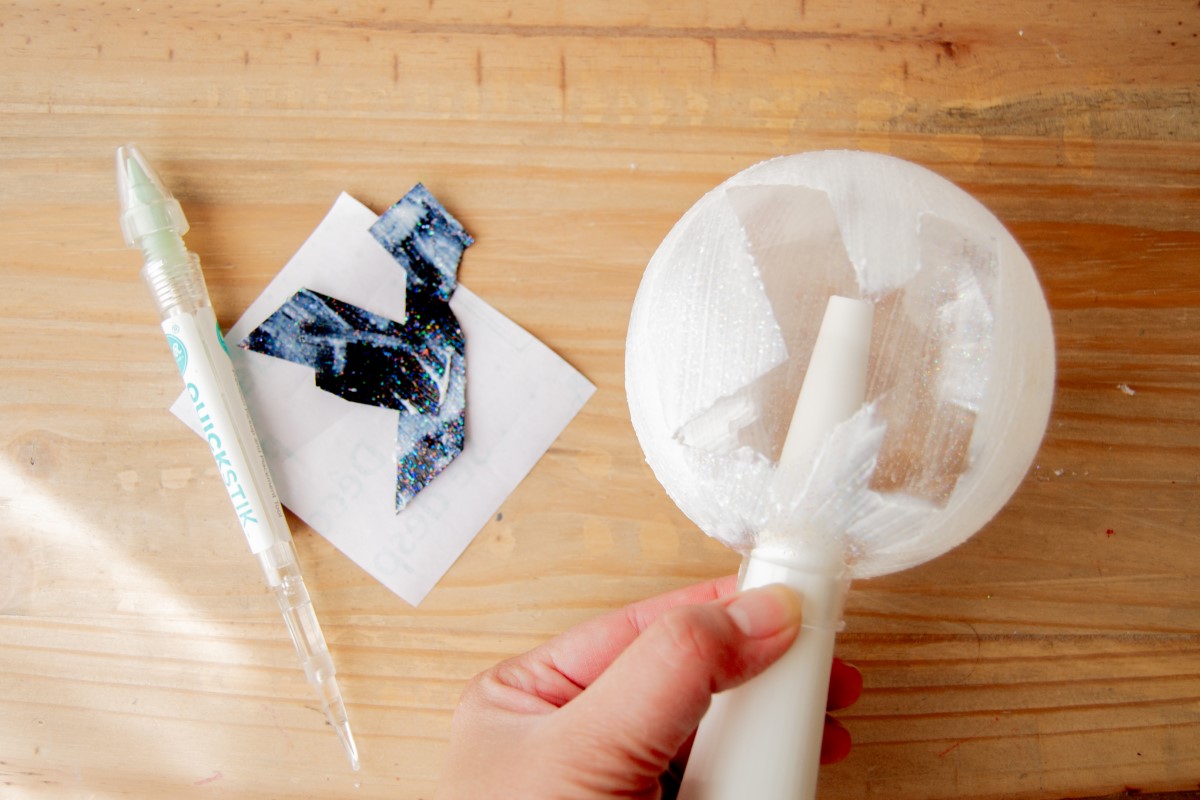
- Remove the vinyl letter while the Mod Podge is still wet, using a pair of tweezers or a pointed tool to lift up the edges carefully. Use the same tool to clean up any edges where Mod Podge has seeped through. Stand your ornament upside down to dry.
- Once the first coat is dry, add a second layer of Sparkle Mod Podge, taking care not to go over the monogram’s lines. Let it dry.
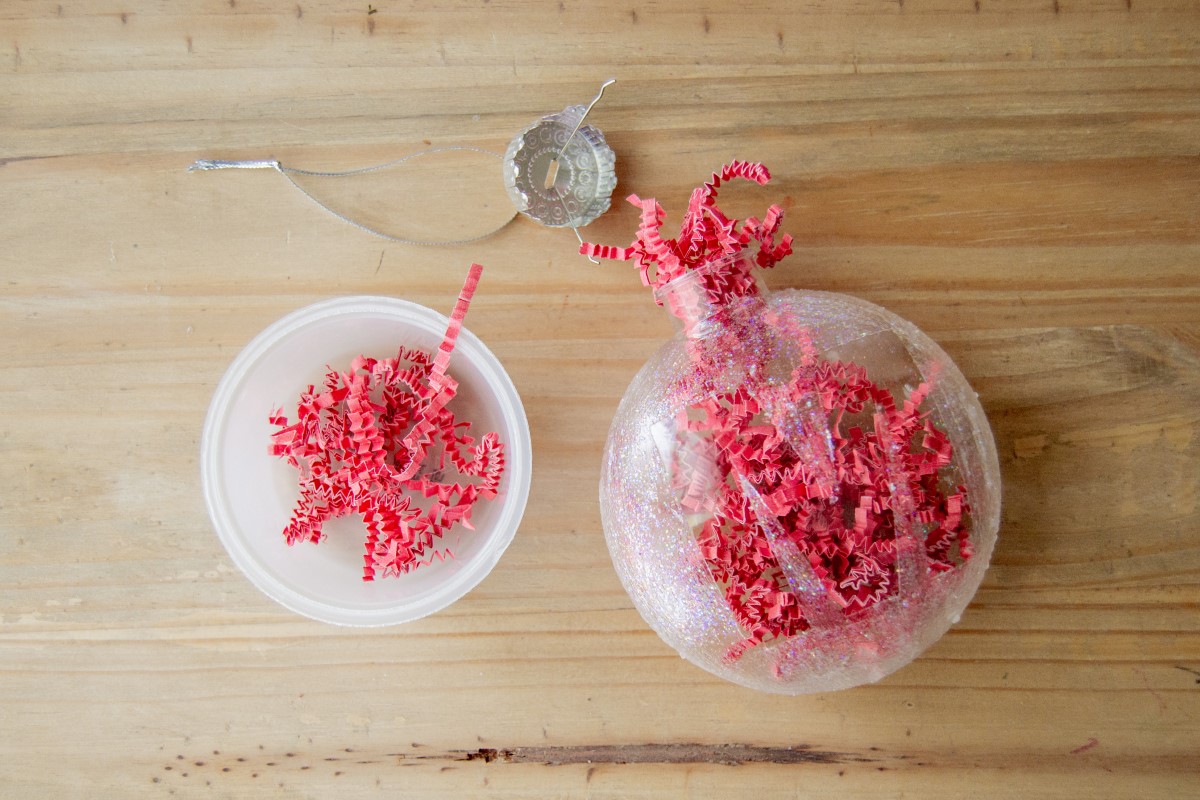
- Fill if desired. Carefully add the paper shreds inside and add the ornament top back on.
Notes
If you enjoyed these Mod Podge ornaments, let me know in the comments! I’d also love for you to check out these other posts:


Love these and my kids would love making them too!
This is awesome! Your projects are so fun and inspiring! Thank you for the ideas and making them so accessible!!!
You’re terrific!
Joanna
I love these Amy. What a difference a little bit of Mod Podge and glitter makes.