
Mod Podge Glitter Ornaments
Discover how to make DIY glitter ornaments with Mod Podge. Perfect for personalizing your Christmas tree with sparkle and charm.
Yield: 2 ornaments
Cost: $2
Equipment
- Tweezers
Materials
- Clear round glass ornaments I used the flatter round ones
- Mod Podge Sparkle
- Vinyl letters
- Paper shreds or pompoms as fillings for the ornament, optional
Instructions
- Remove the top of the ornament by carefully pulling it out. Clean the ornament’s surface using a cotton pad with alcohol and let it dry. Once dry, attach your vinyl letter, making sure it is centered. Burnish all sides to ensure no edges lift up during the Mod Podging process.

- Use a wide brush to cover the ornament in Sparkle Mod Podge, taking care to not miss any corners and edges. I applied one thick coat all over the front and back.
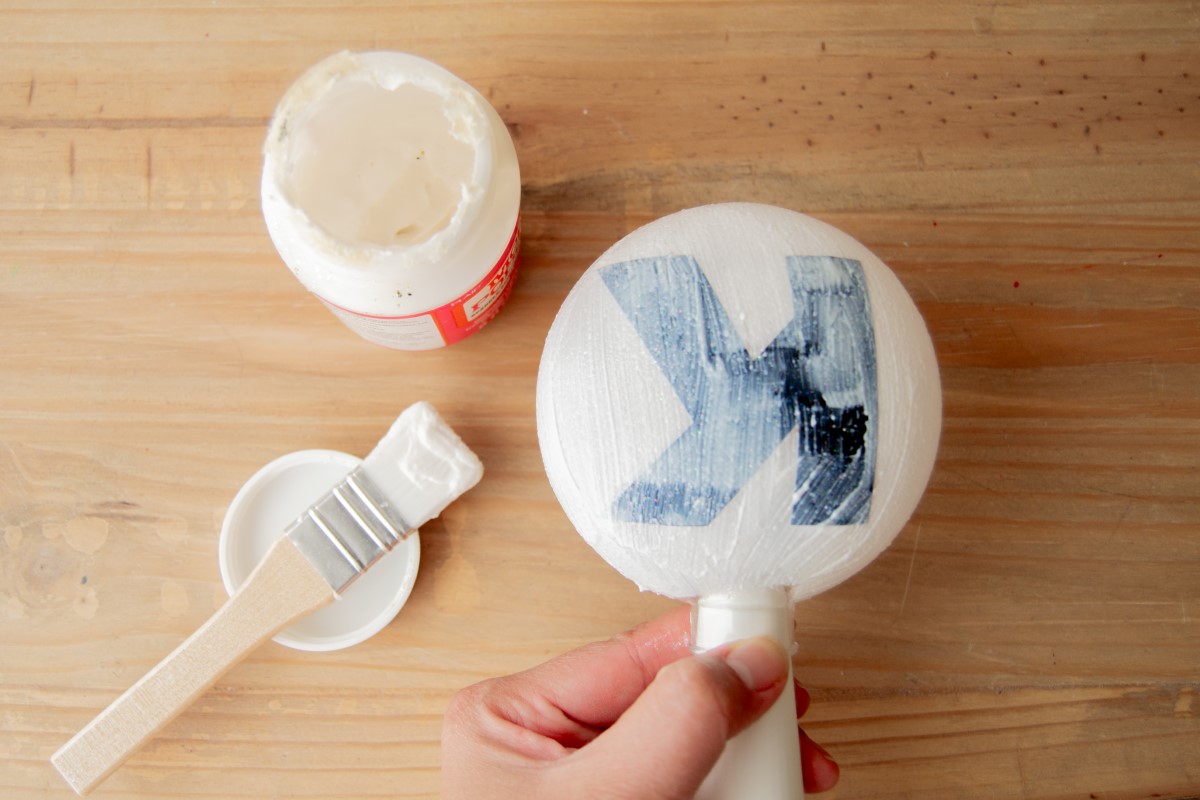
- Remove the vinyl letter while the Mod Podge is still wet, using a pair of tweezers or a pointed tool to lift up the edges carefully. Use the same tool to clean up any edges where Mod Podge has seeped through. Stand your ornament upside down to dry.
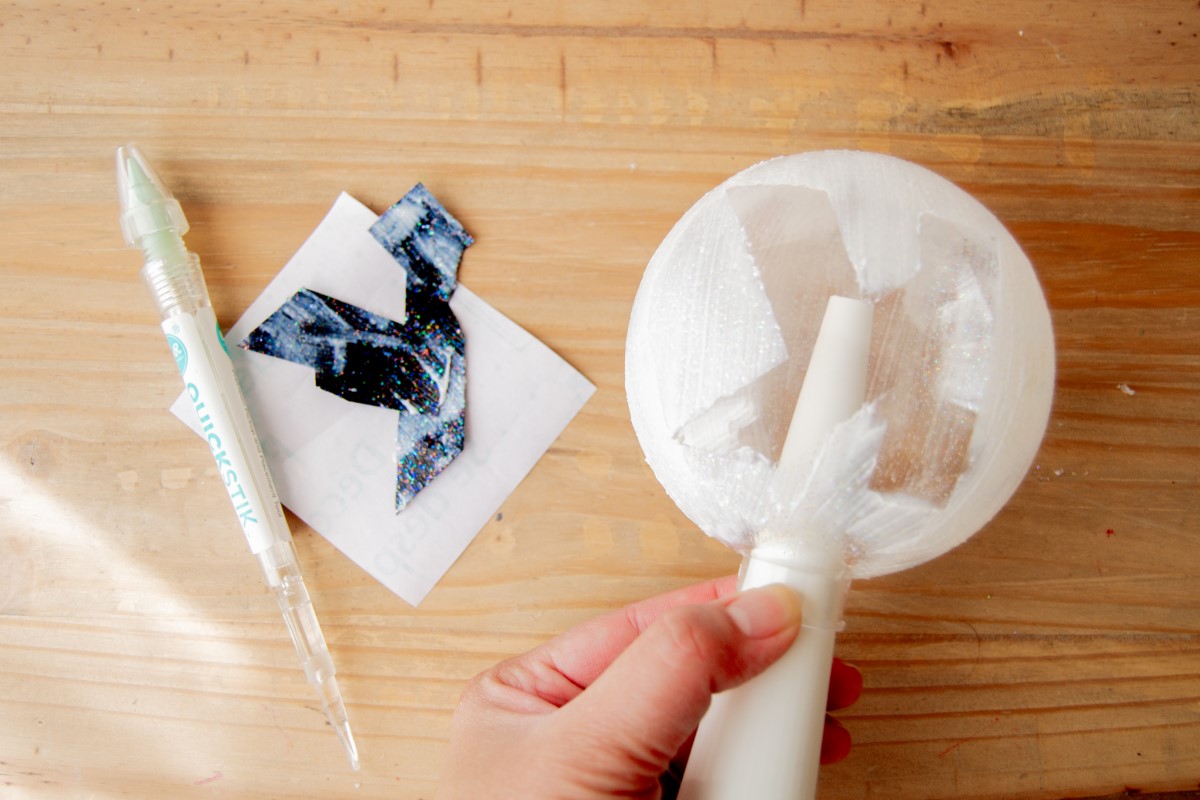
- Once the first coat is dry, add a second layer of Sparkle Mod Podge, taking care not to go over the monogram’s lines. Let it dry.
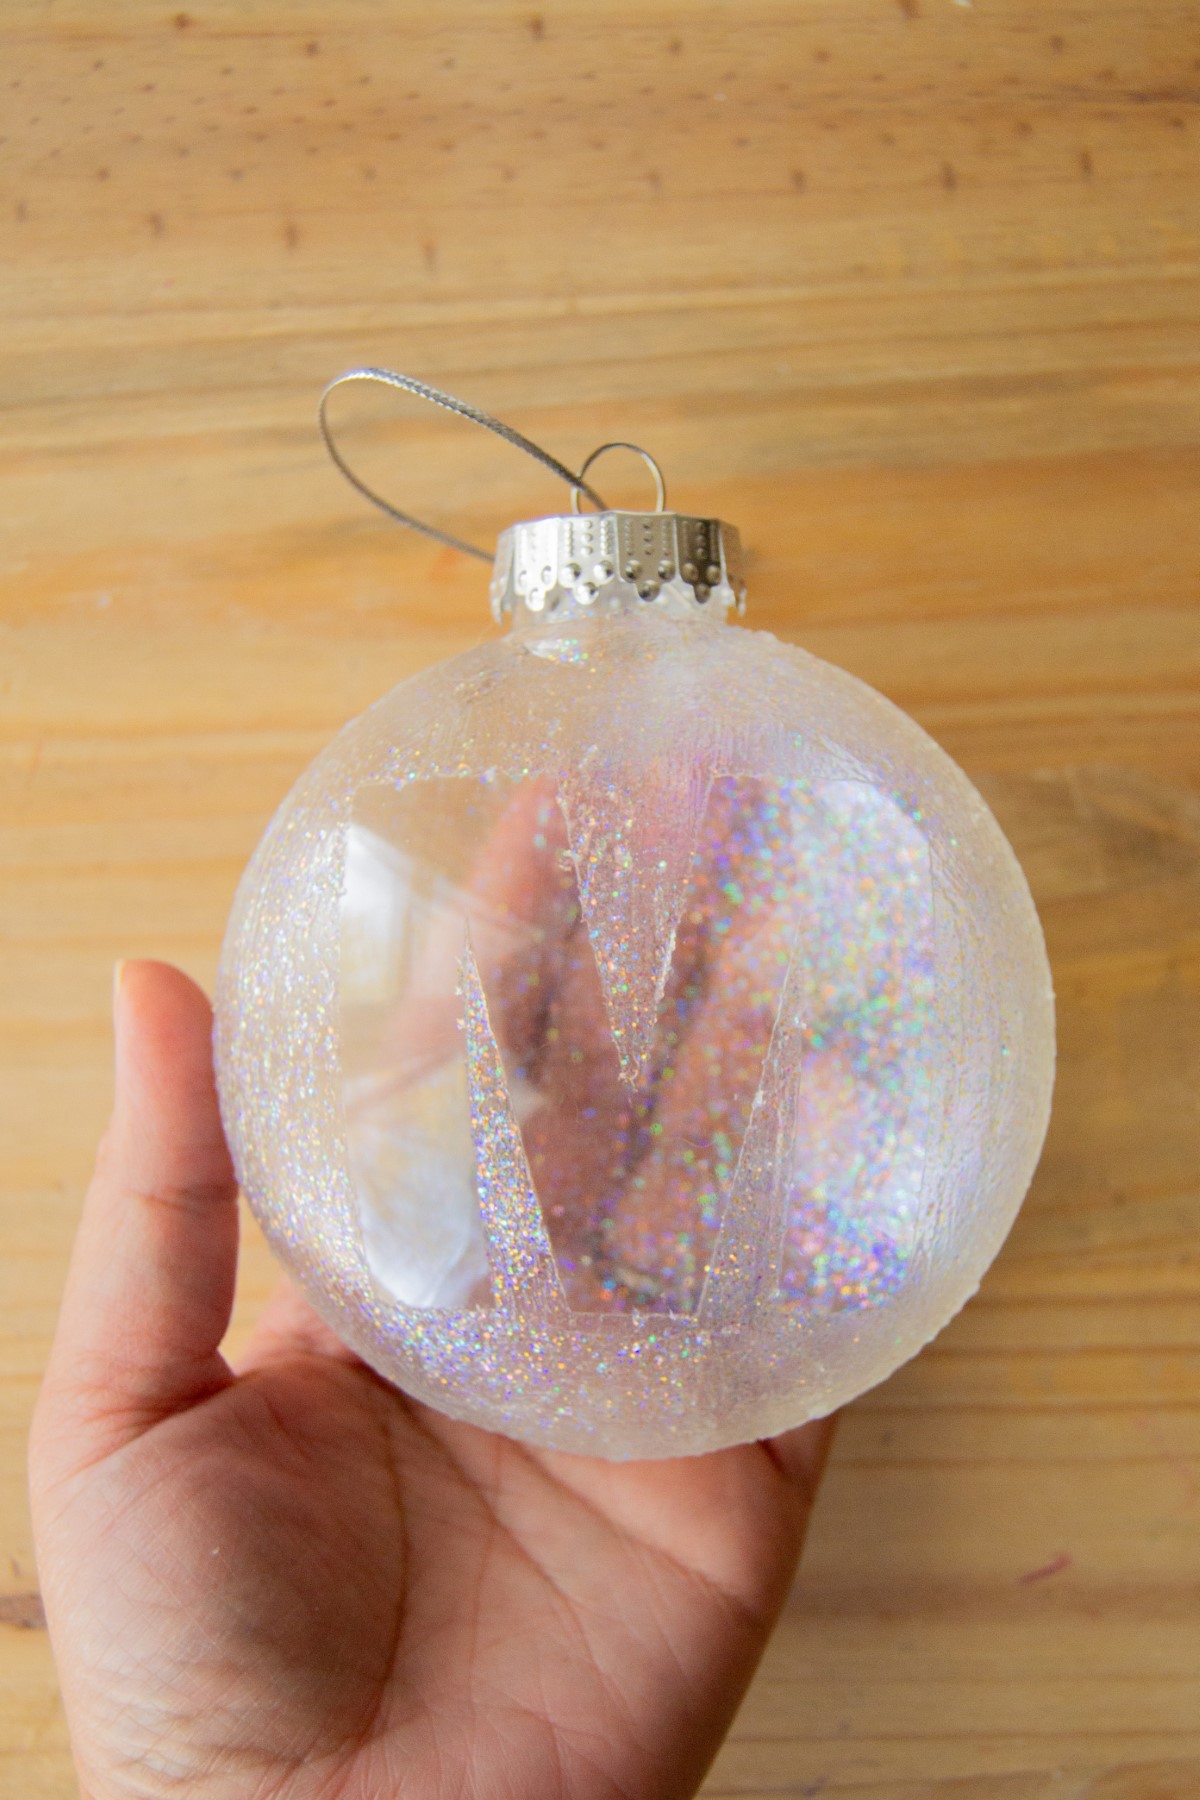
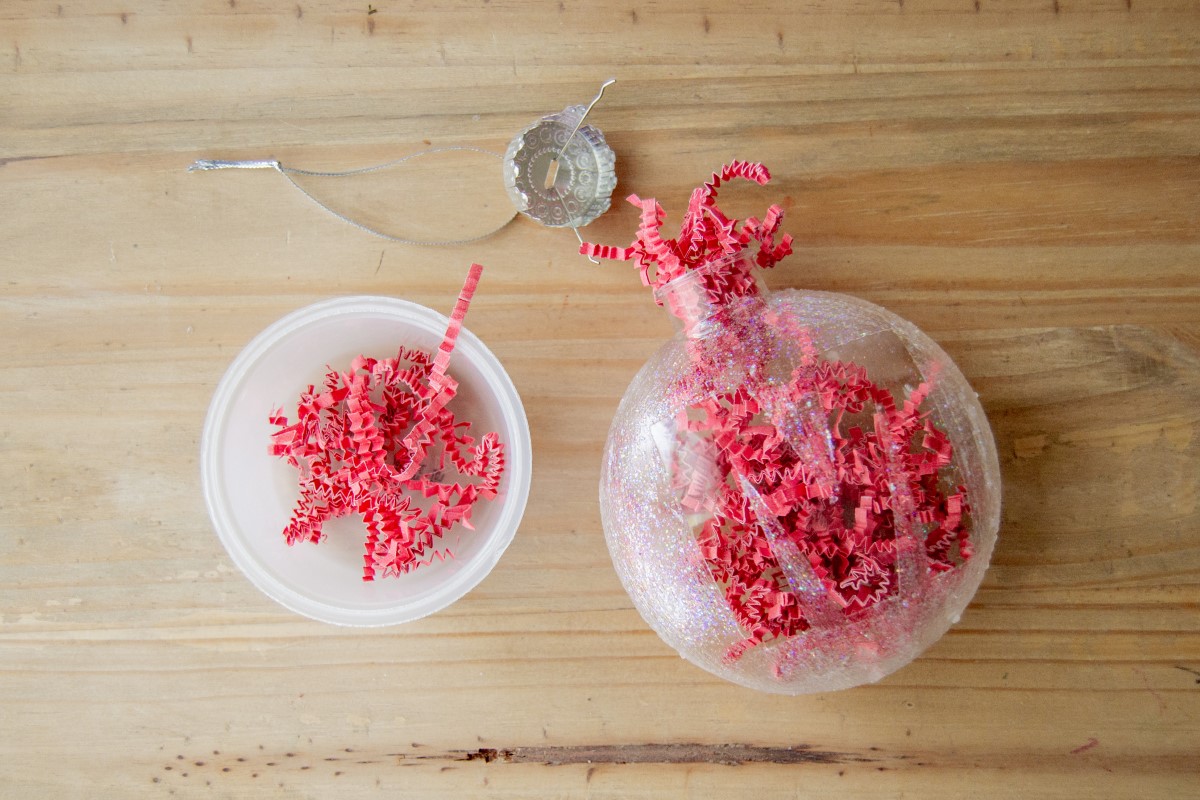
- Fill if desired. Carefully add the paper shreds inside and add the ornament top back on.
Notes
Tip: use a heat gun to help adhere the vinyl onto the ornament if it has problems sticking.
I used a spool stand to help the ornament stand upright while drying, but a bottle with a slim top or something similar would work as well.