
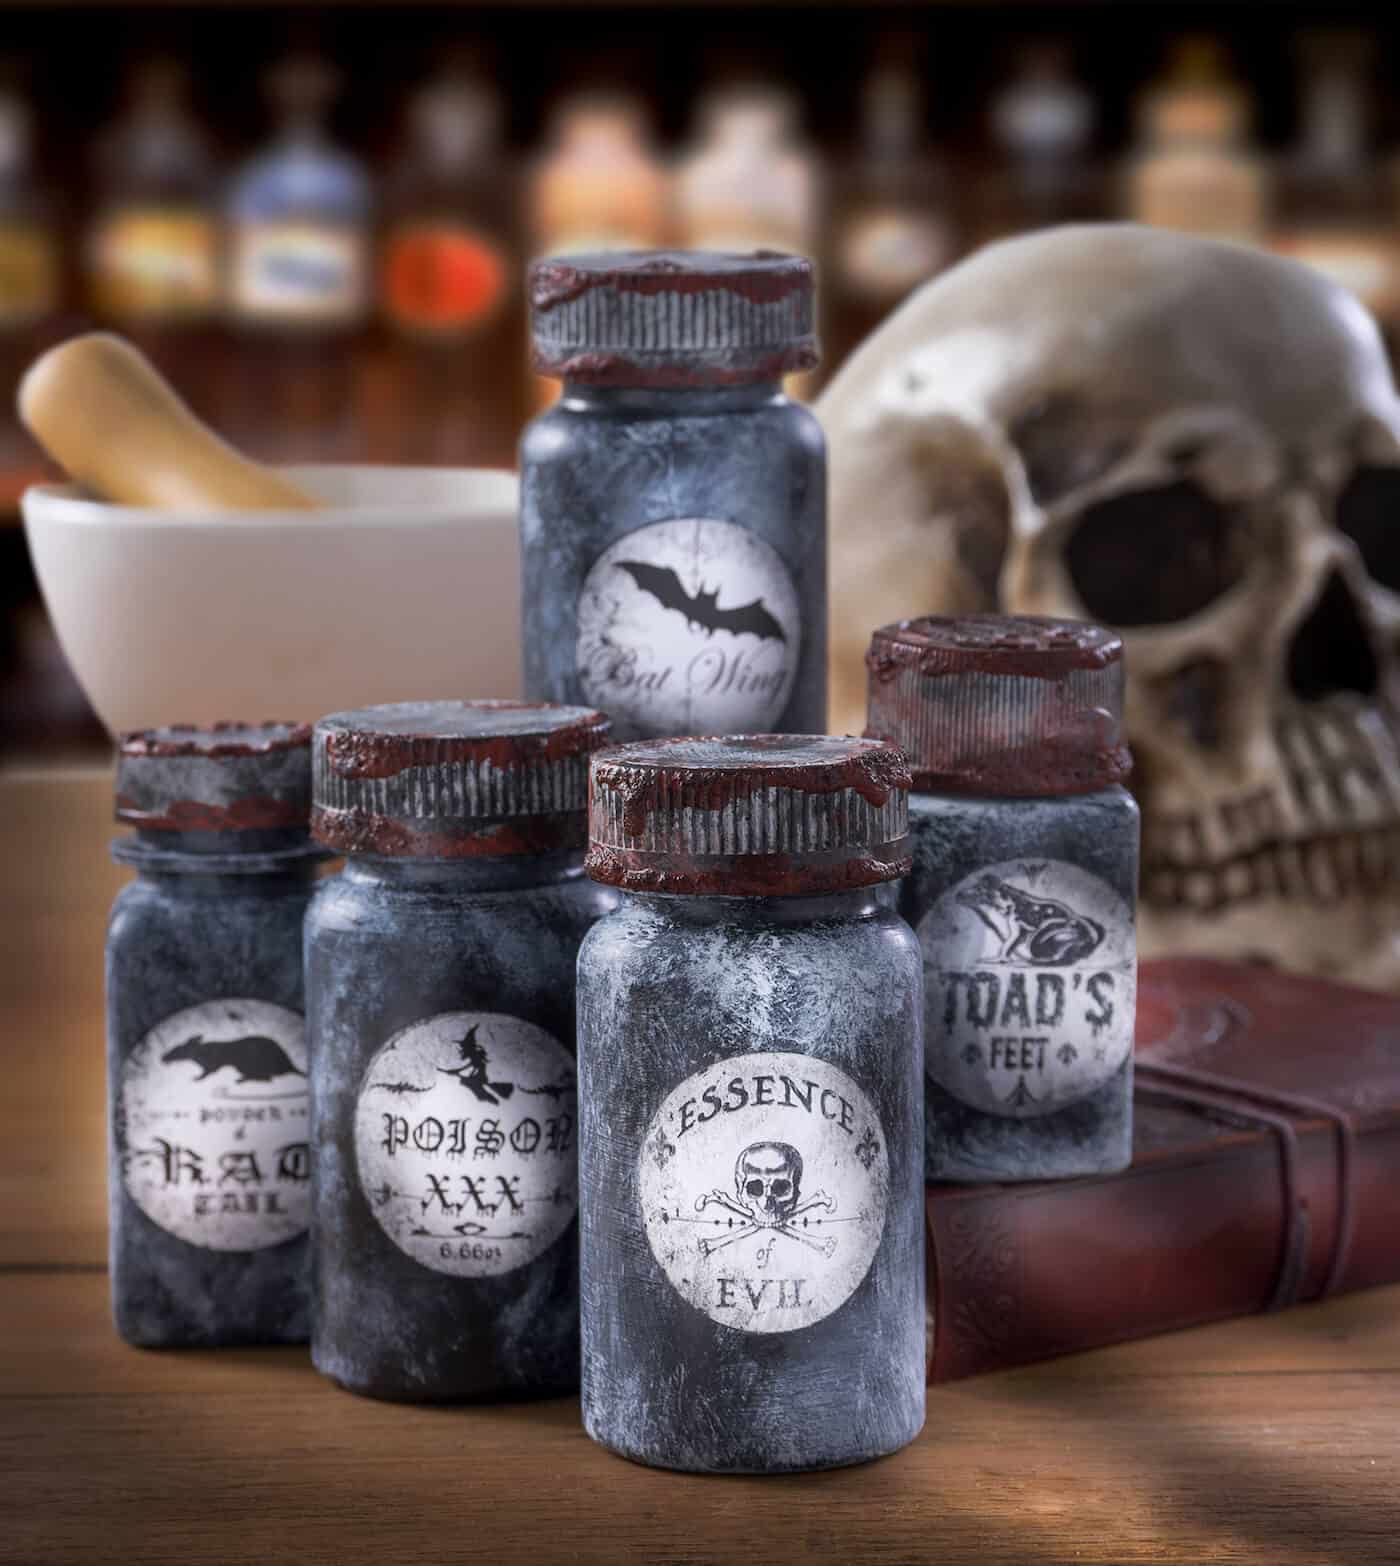
Learn how to make these cool Halloween potion bottles from old pill bottles! You’ll get free printables in this post, too.
Skills Required: Beginner. You’ll be doing a lot of painting, including stippling with paint brushes. Plus you’ll attach labels. There’s a lot of room for error due to the idea being that these look “old.”
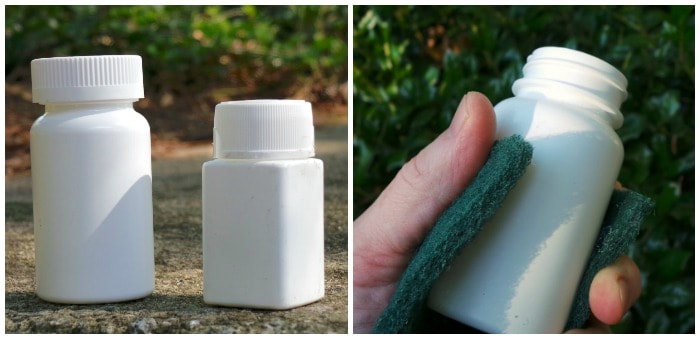
Steve saves everything. I’m not as big of a fan of saving things, but he can picture the use he’s going to have for them. He takes pills for his heart condition, and as a TON of leftover bottles . . . which he’s been saving for crafts for quite awhile.
For Halloween this year, he decided to create these DIY potion bottles out of those old pill bottles! And the real treat is that he created some printable labels you can use with your potion bottles! Fun, huh?
You just need to print these bad boys out, some paint, Mod Podge, and get your Halloween craft on. Learn how to make them just in time for the holiday below!
Gather These Supplies
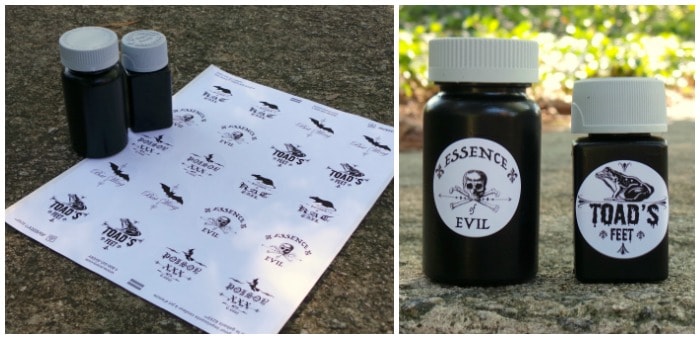
- Old pill bottles
- Pill bottle labels printable sheet
- Avery inkjet labels – you can do the full page and use a punch or we used these 1 1/2″ labels
- Mod Podge – use Matte or the Antique Matte
- Acrylic paint – black, light gray, medium gray
- FolkArt Painted Finishes – Rust
- Paintbrushes (and a stencil brush)
- Sandpaper or scrubbing pad
Another way to get the rusty finish is to use texture or modeling paste instead of the painted finish above. Use that first to make texture in certain areas, then let dry. Paint over with a rust colored paint and let dry.
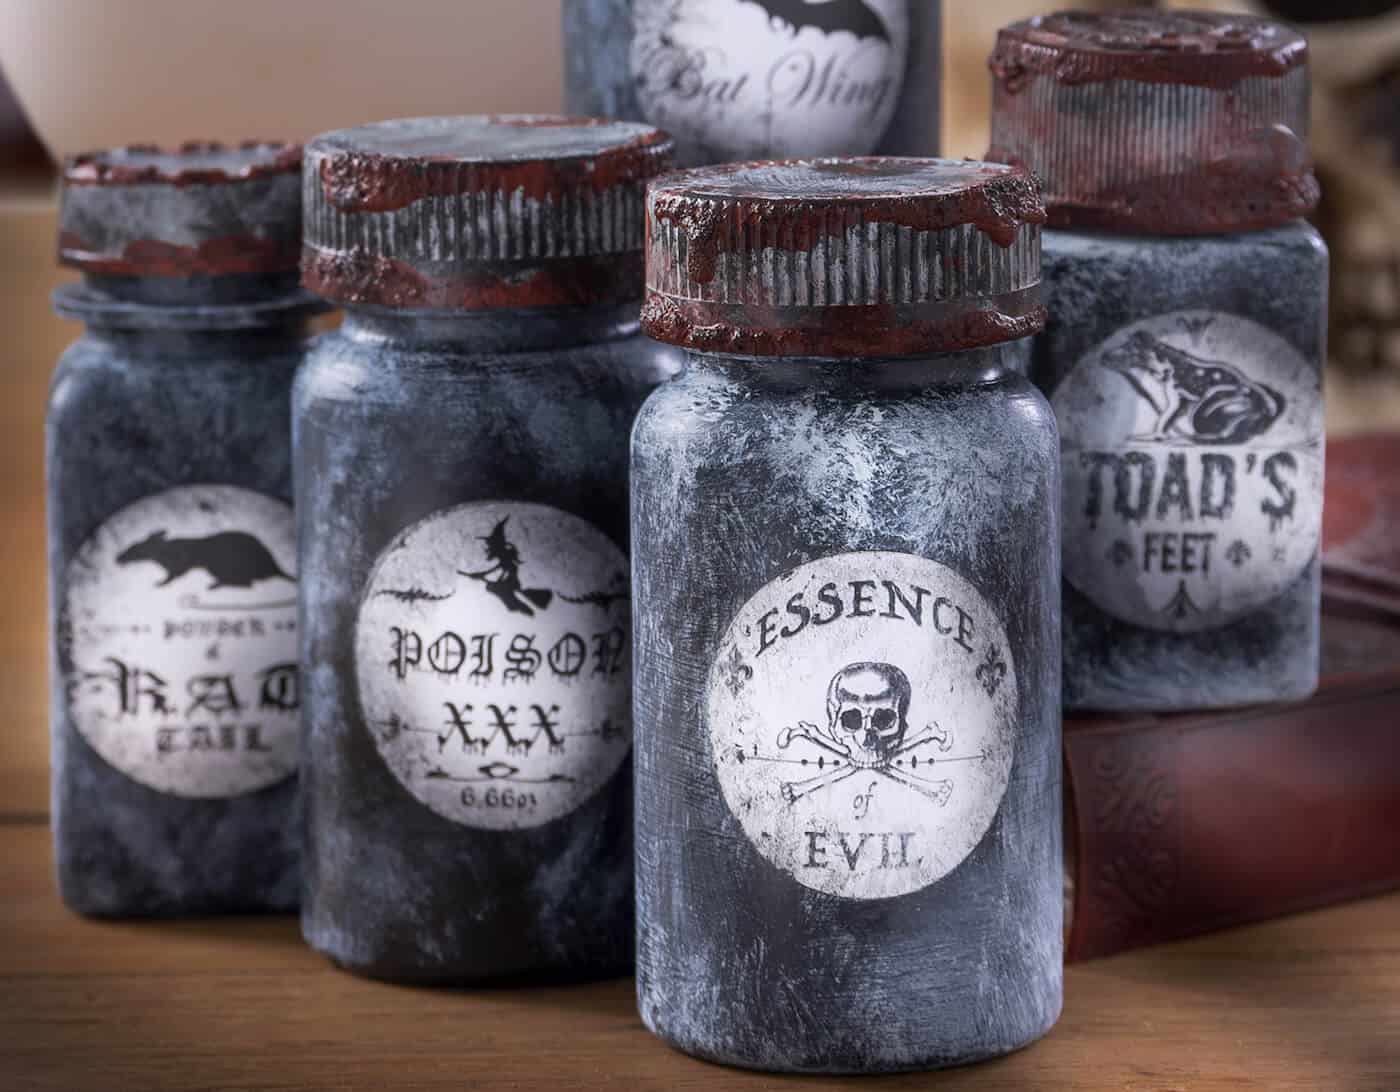
Are you partial to poison, toad’s feet, rat tail, or essence of evil? Let me know in the comments! Happy Halloween!

DIY Potion Bottles
Equipment
- Paintbrush(es) including a stencil brush
- Sandpaper or scrubbing pad
Materials
- Old pill bottles
- Pill bottle labels printable sheet
- Avery inkjet labels
- Mod Podge Matte
- Acrylic paint black, light gray, medium gray
- FolkArt Painted Finishes Rust
Instructions
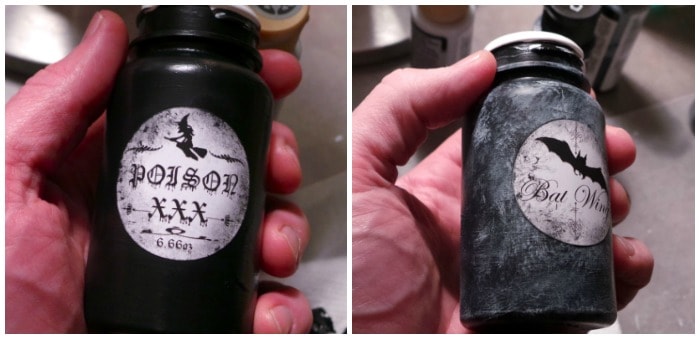
- Use sandpaper to rough up the surface of the bottles before painting.
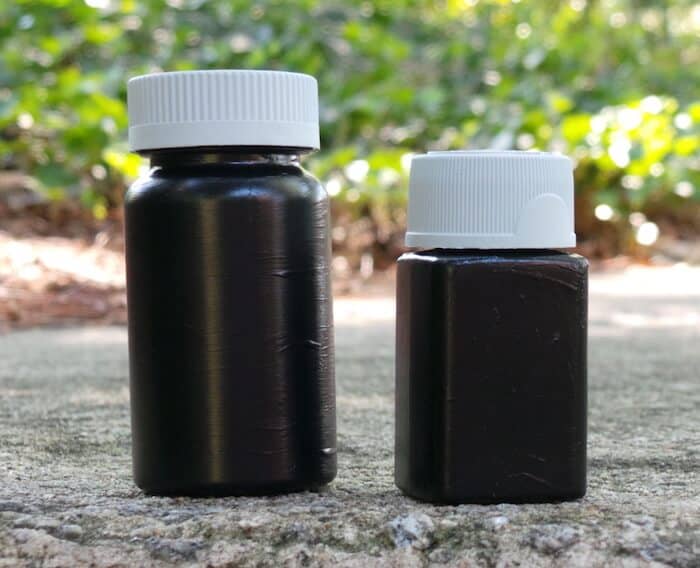
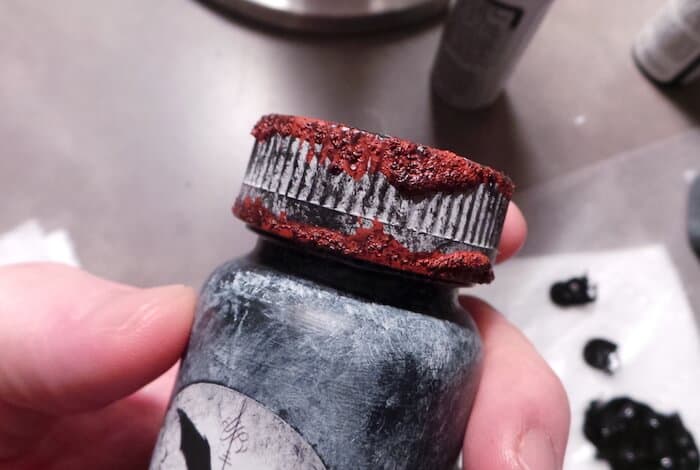
- After the bottles are roughed up, add black to the base (you can spray paint). Paint the lids medium gray. The lids don't need to be roughed up because they will probably have textured ridges and printed letters on the top. Let dry.
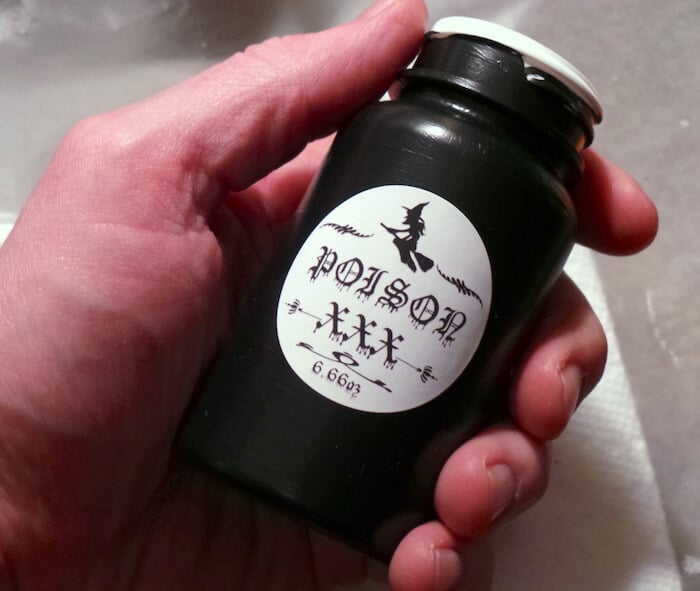
- Print out the pill bottle labels; cut or punch out. Place the labels on the bottles.
- Seal the bottles with Mod Podge. This will prevent the labels from removing and the paint from chipping. Let dry.
- Start distressing with the medium and light gray shades. Brush randomly with a stencil brush, layering, even going onto the label.
- Do this with the lid as well. AND on the lid you'll want to add some of the FolkArt Painted Finishes – Rust. It gives texture and looks like blood/rust/some other identified substance.
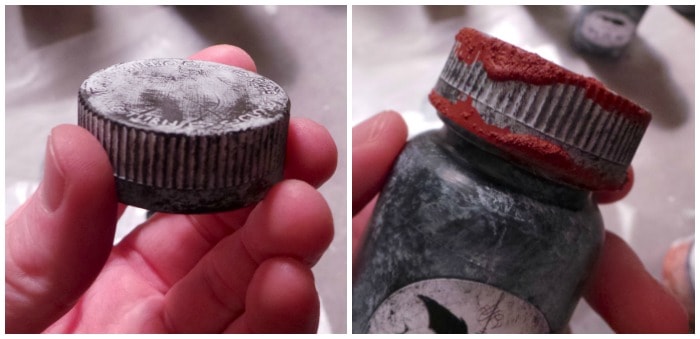
- Add a little black paint to the top of the rust to age it even more. Let dry.
- Paint the entire bottle again with Mod Podge to seal. Let dry.
Notes
If you enjoyed this Halloween project, I’d love for you to check out these other ideas and freebies:
Cheesecloth Ghost • Coffin Tray • Decorating Wood Cutouts • Decorative Blocks • DIY Wreath • Door Hangers • Fairy Garden • Halloween Ornaments • Mason Jar Lanterns • Mummy Luminaries • Paper Cones • Spooky Candle Holders • Spooky Pumpkins • Wall Decor • Window Art • Witch Hat Garland


What a fun way to reuse empty bottles. These look really cool! Now I’m going to have to start saving bottles.
Love your idea, its great Halloween bottles 🙂
I do some Halloween makeup and nails and other Things at my blog.
Wish you a lovely weekend and Halloween:-)