
Learn how to make paper mache pumpkins using balloons, twine, and Mod Podge! This is a fun craft for fall decorating and great for families.
Skills Required: Beginner. The steps are simple. You’ll be inflating the balloon with twine around it, applying newspaper and Mod Podge to make the paper mache, then painting. This idea is perfect for older kids or parents to do with their children.

I don’t know what it is about this year and my fall decorating, but I’m all about the pumpkins! I think that what I’m looking for is decor that can easily transition from autumn to Halloween through Thanksgiving. So I don’t have to change everything out for each holiday.
And we all know that pumpkins fit that description.
Pumpkins are the universal symbol of cool weather! I’ve been trying all sorts of styles including these pumpkin wood blocks, napkins on wood pumpkins, and even toilet paper pumpkins (on my other blog!).
So my next project? Paper mache pumpkins!
While I was shopping for fall crafts at Dollar Tree, I remembered to buy balloons to give this a try. I already had the felt, paint, wine corks, twine, and Mod Podge . . . and then I grabbed newspaper from the recycling bin.
So for me, this project only cost $1.25! Technically less than that because 25 balloons come in a bag. But we don’t need to get too technical. I know you hear me knocking.
You have a lot of options for customization of this project. First, you can use really any Mod Podge formula. I used Hard Coat just to make them a bit more solid, but the Gloss, Matte, or Satin are fine too.
For painting the outside, I used regular acrylic craft paint. But you can use chalk paint as well. Honestly I’d love to try these with chalk paint next!
The topper is made with felt, but you could use craft foam or a piece of thicker fabric. The stem could be a twig or something else that has a similar shape to the wine cork. Feel free to get creative!
Are you ready to make these cute pumpkins? I’d love to show you how to do it. You’re going to love the process!
Paper Mache Pumpkins
Equipment
- Clip or clothespin
Materials
Video
Instructions
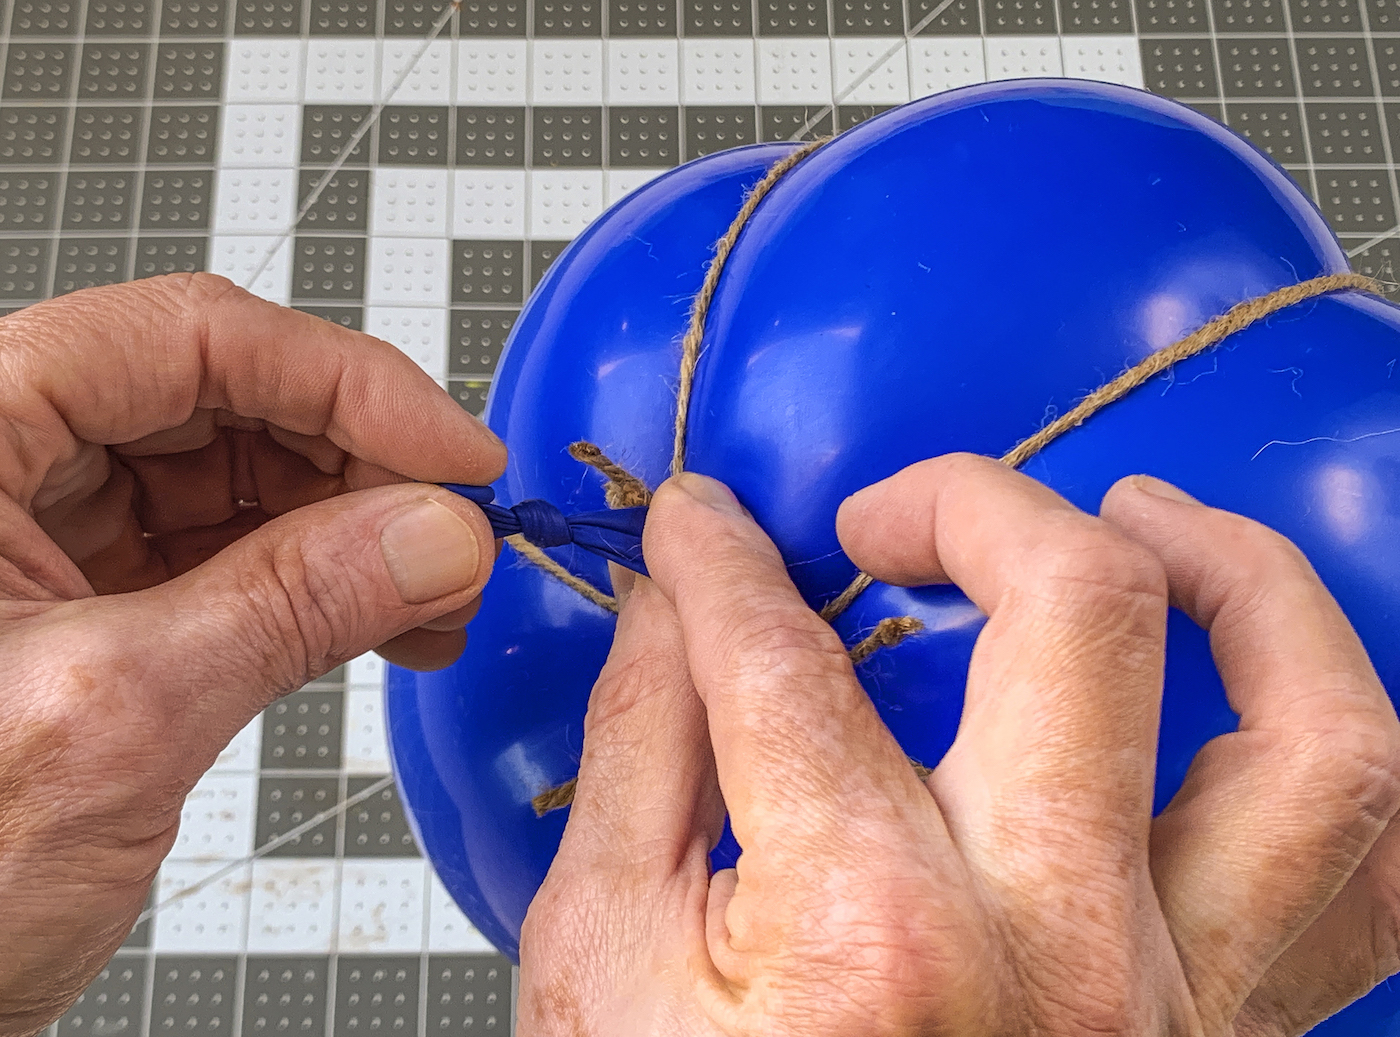
- Blow up a regular party balloon to slightly over half full. Use a clip or clothespin to hold the balloon shut securely. You will need to add more air in a bit.
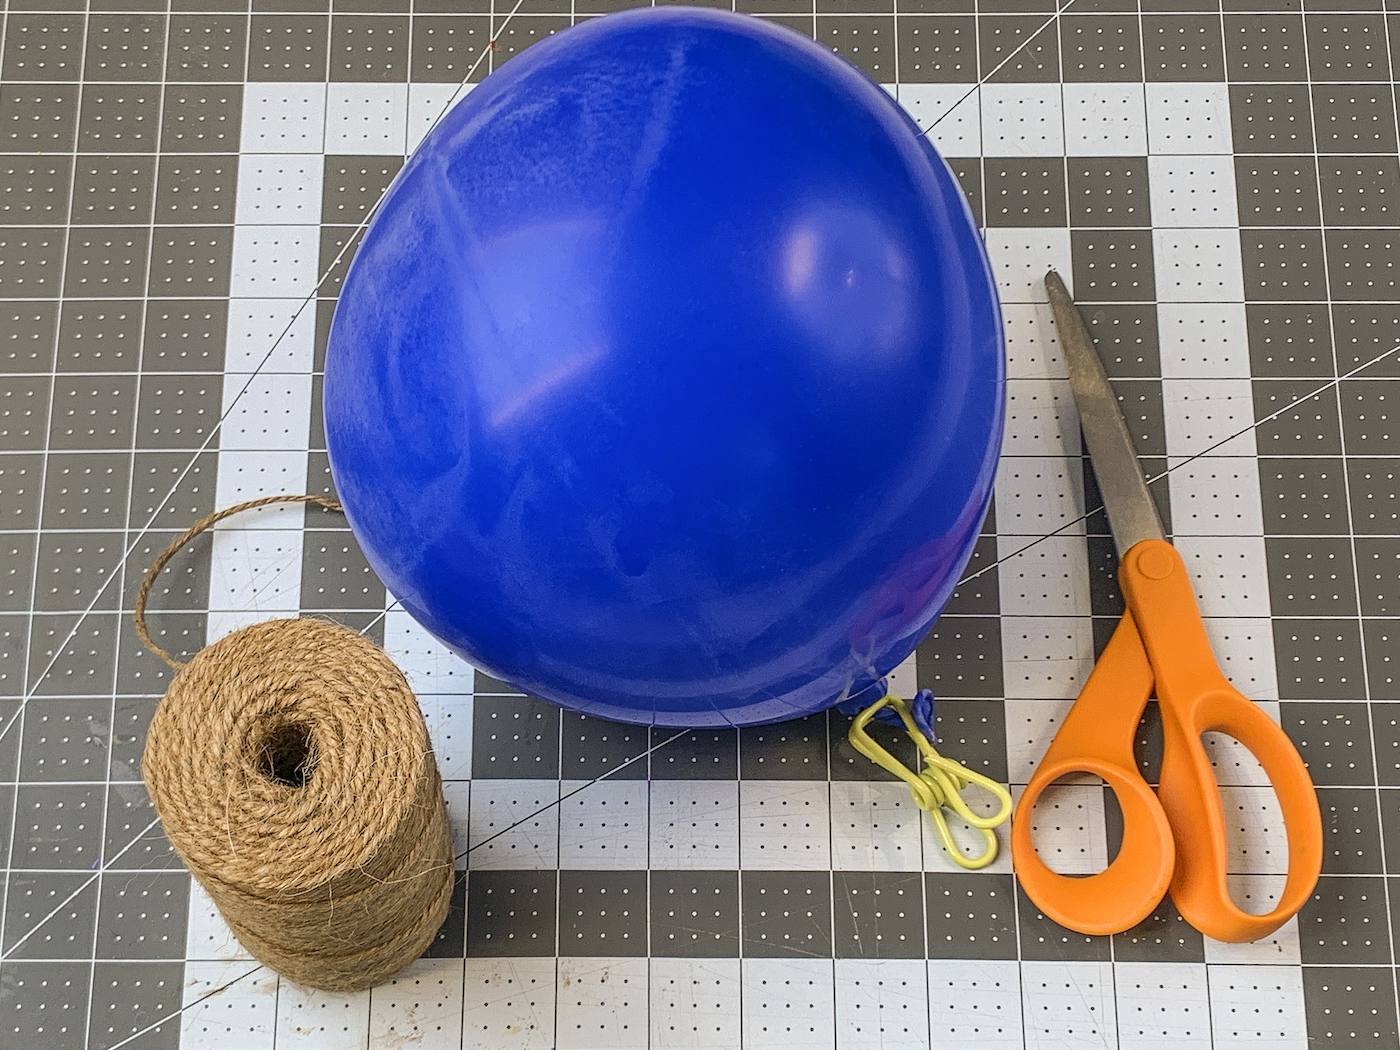
- Cut a length of twine and secure around the balloon from the top to the base with a knot.
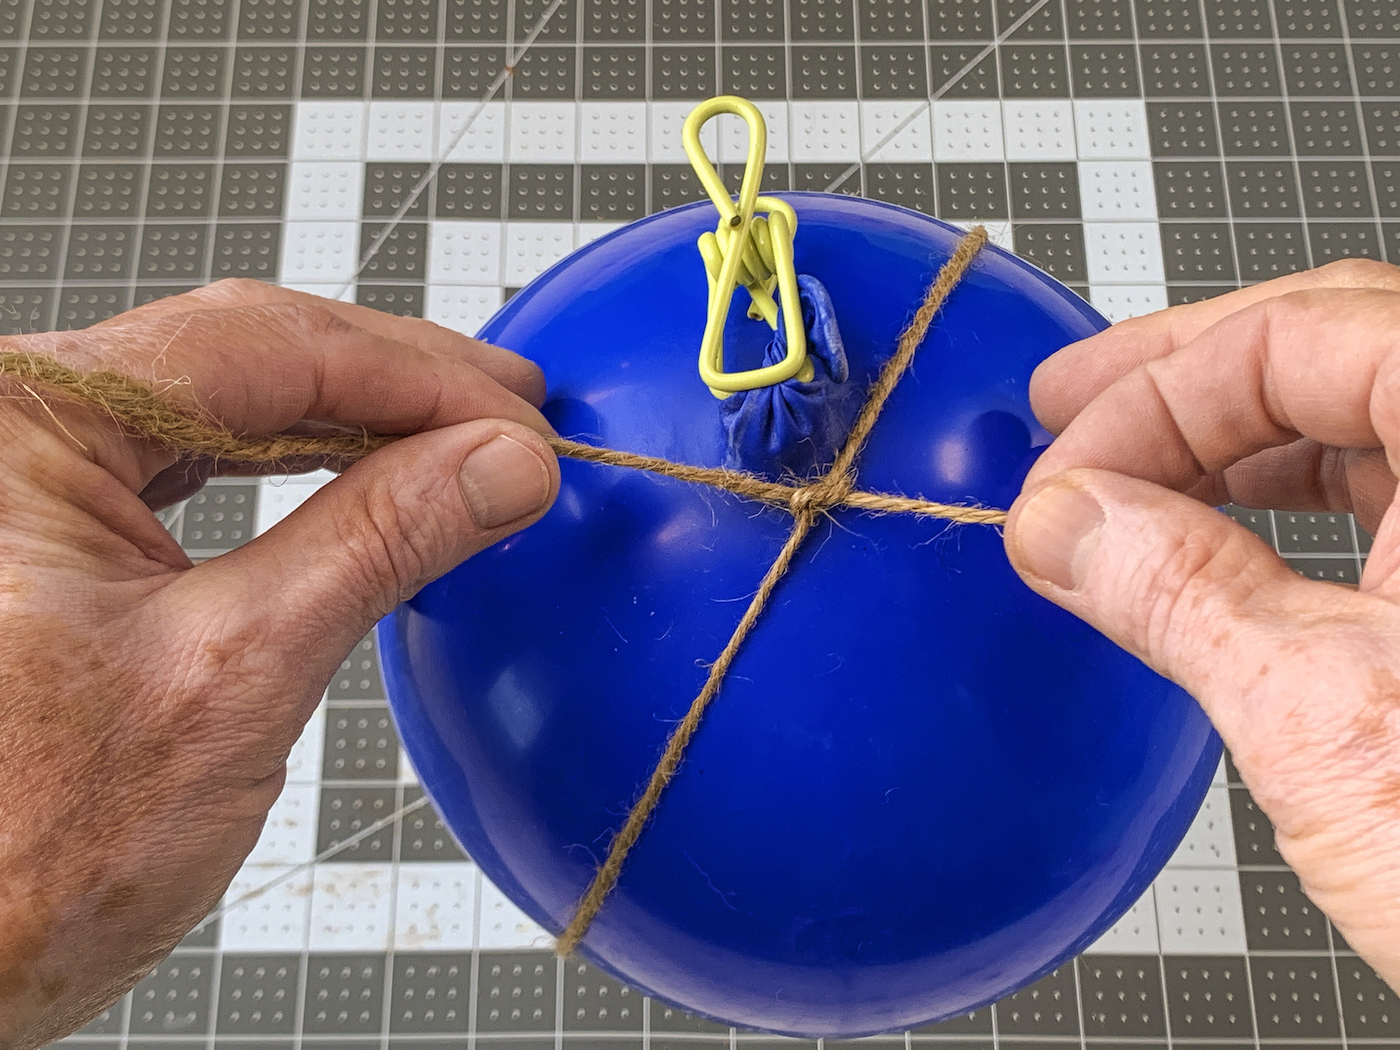
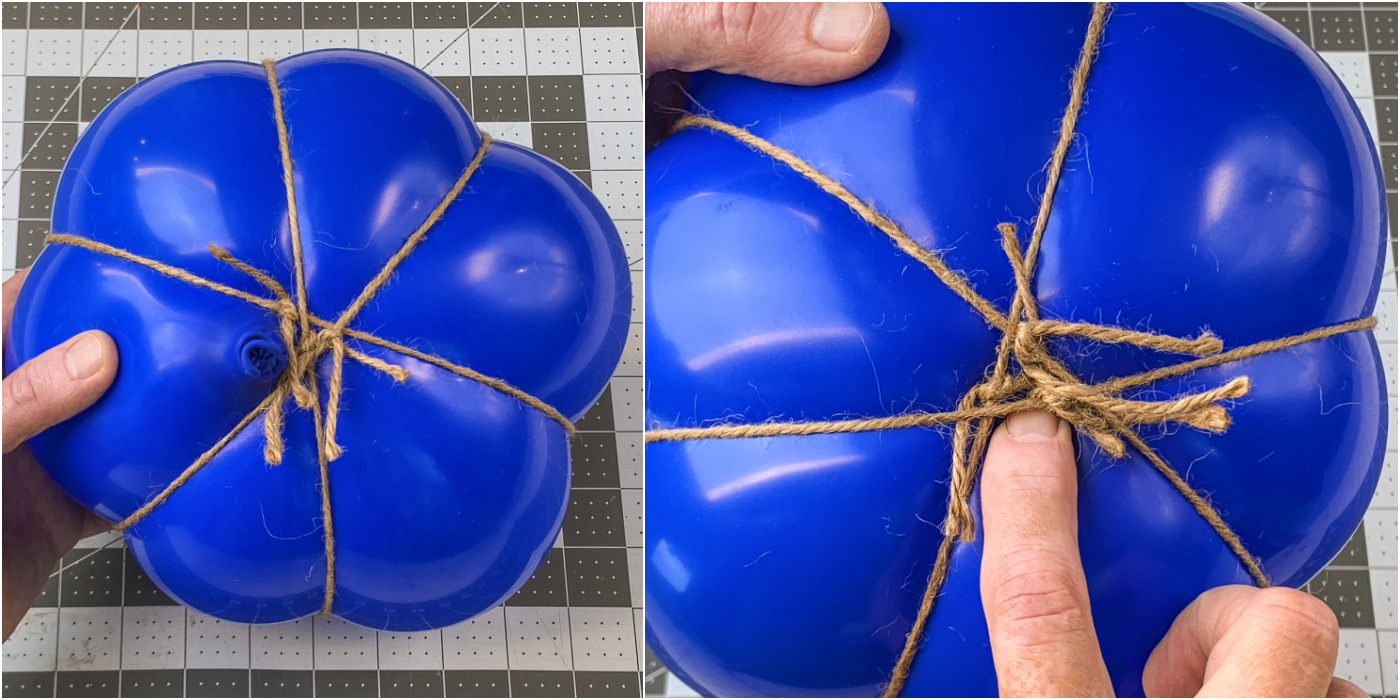
- Repeat with two more strings around the balloon, forming a snowflake at the top (the opposite end of the neck that you blow into).
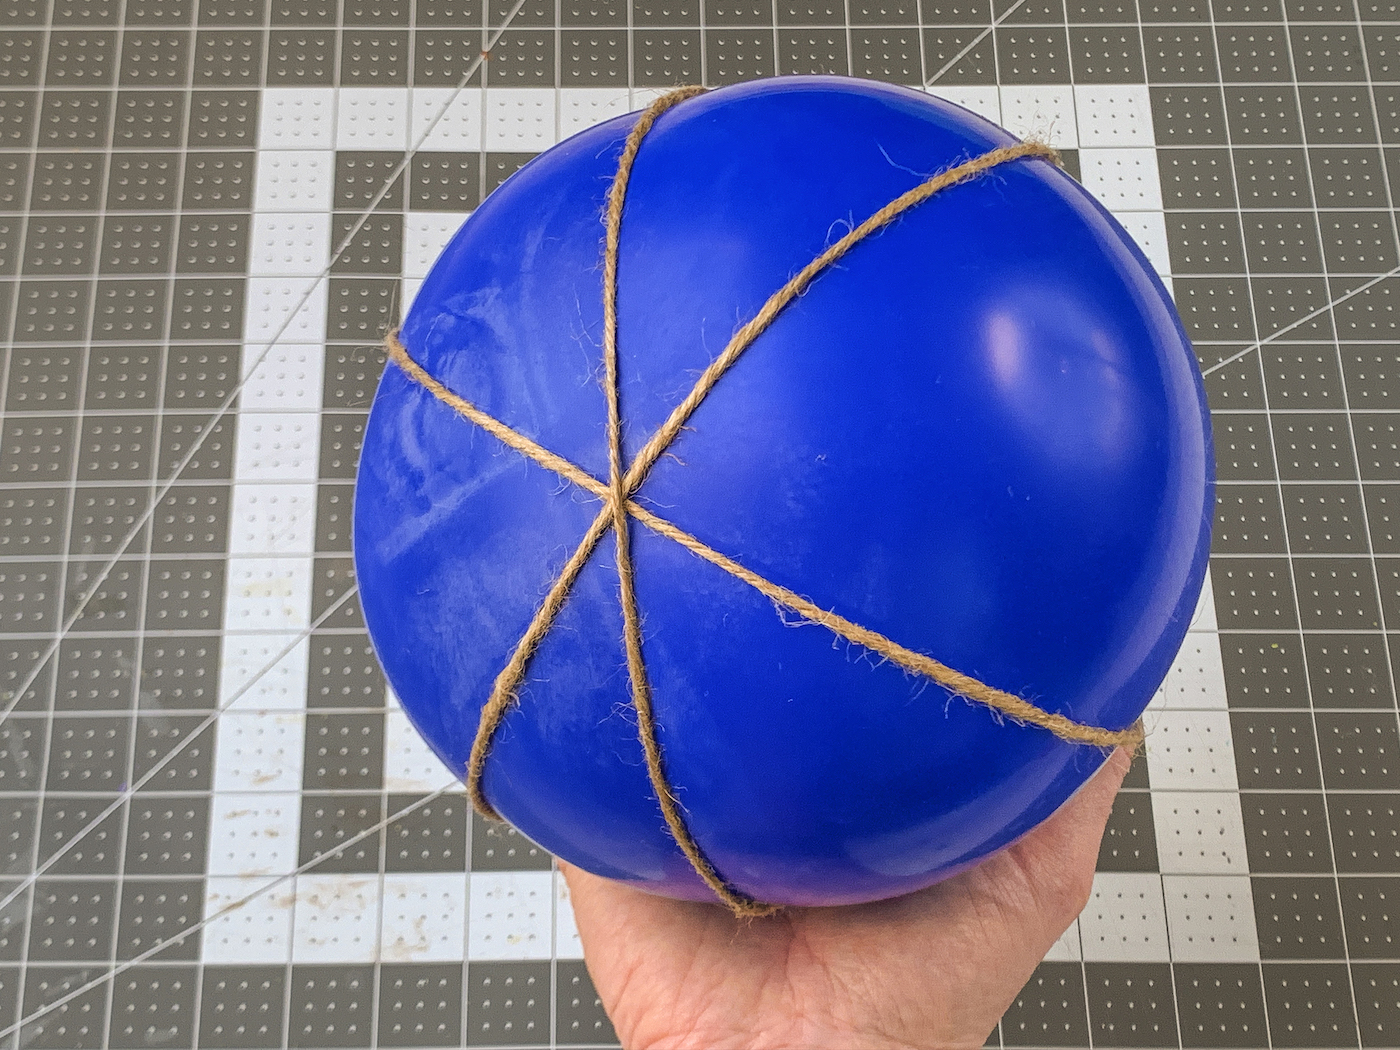
- Inflate the balloon to a little more than two-thirds full, or whatever your desired size. This is to create the pumpkin ribs. Tie off the end of the balloon.
- Adjust the strings to make the ribs of the pumpkin more even.
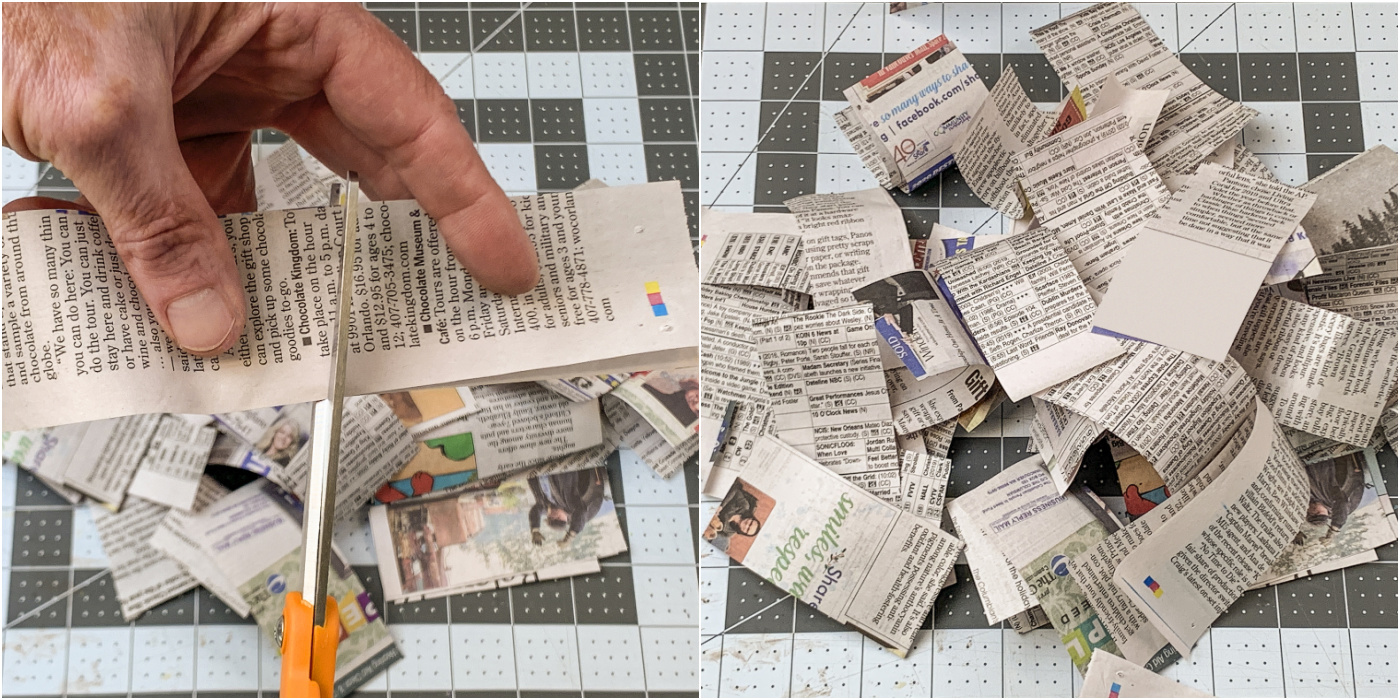
- Open a newspaper page and cut into small pieces using the scissors. My pieces were about 1” x 1”.
- Working in one area at a time, apply Mod Podge to the balloon surface with a paintbrush. Stick a newspaper piece down into the Mod Podge, and then brush over the top. Continue doing this with additional pieces of newspaper and Mod Podge.
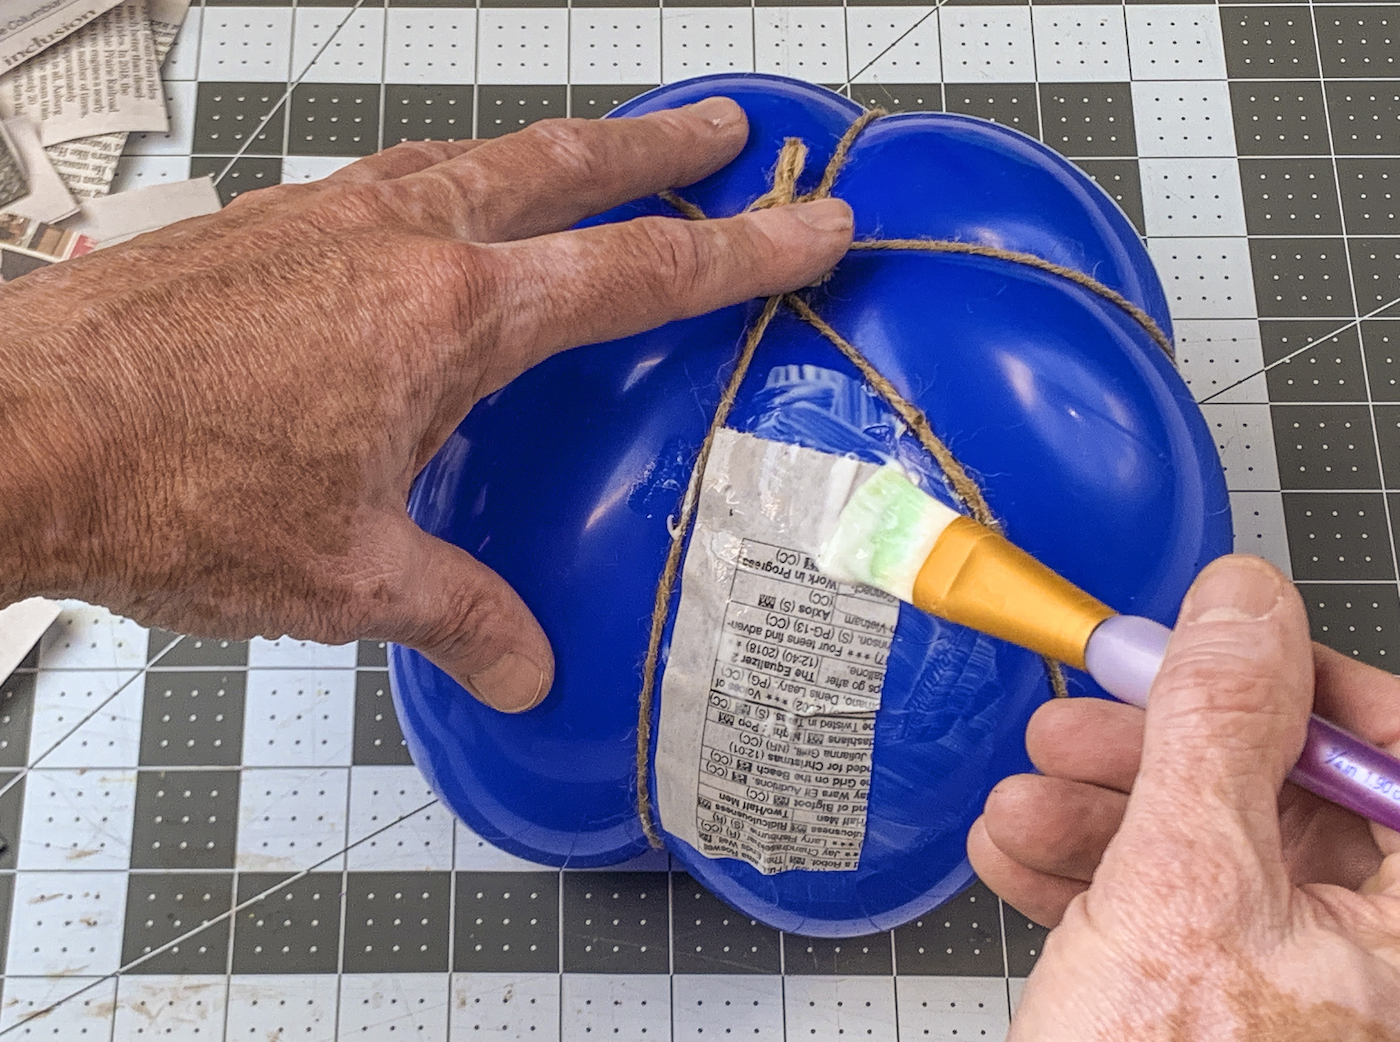
- Continue applying strips of newspaper and Mod Podge, going over the twine, from the top of the balloon towards the neck. You’re going to cover the entire balloon with one layer and let dry.
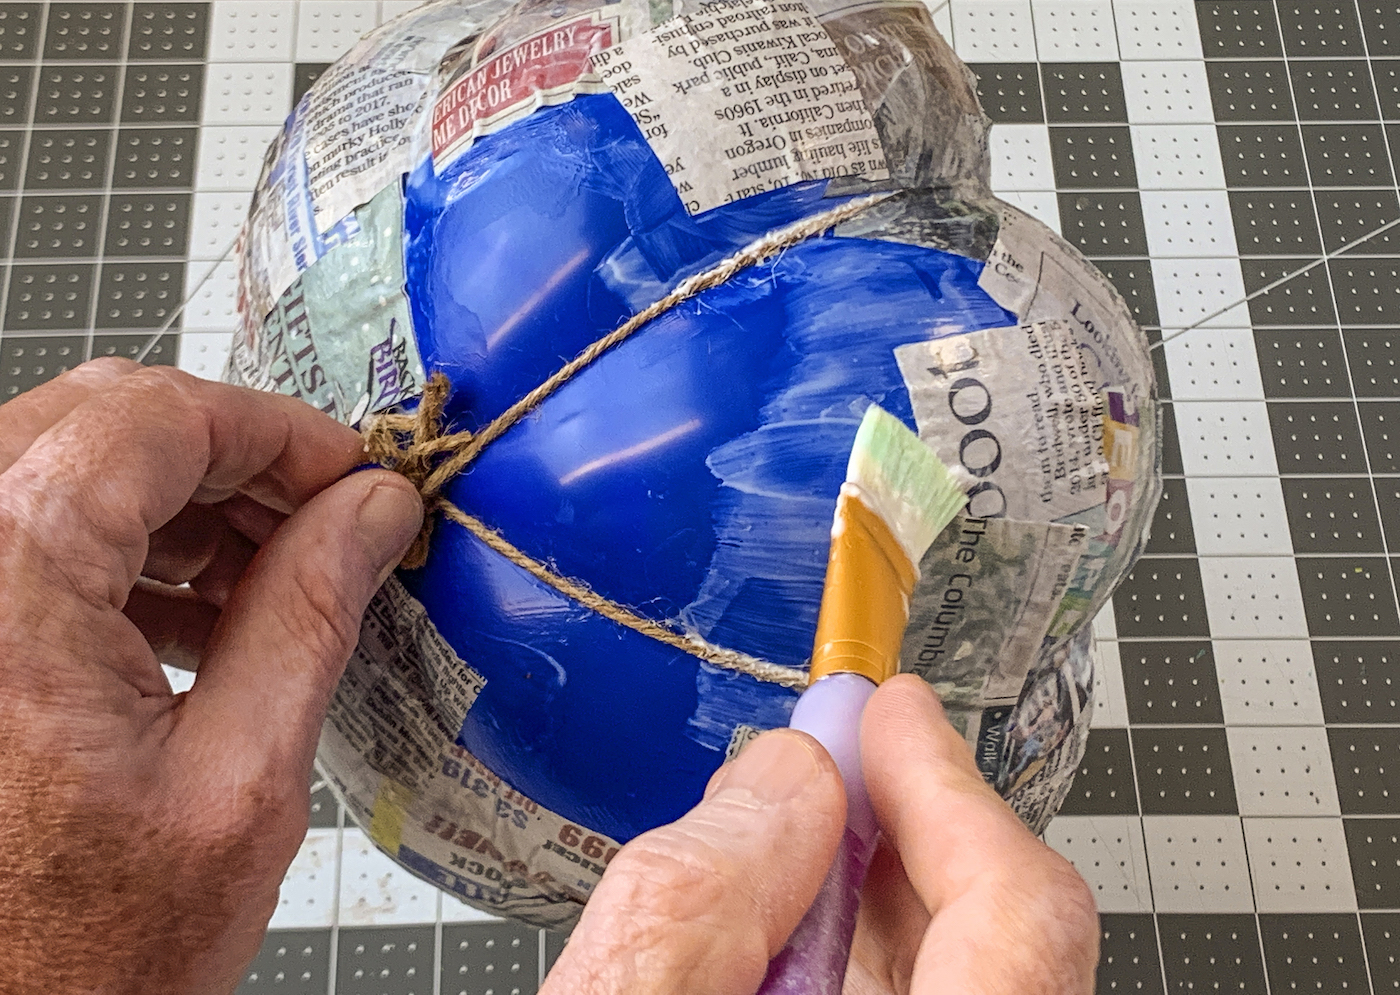
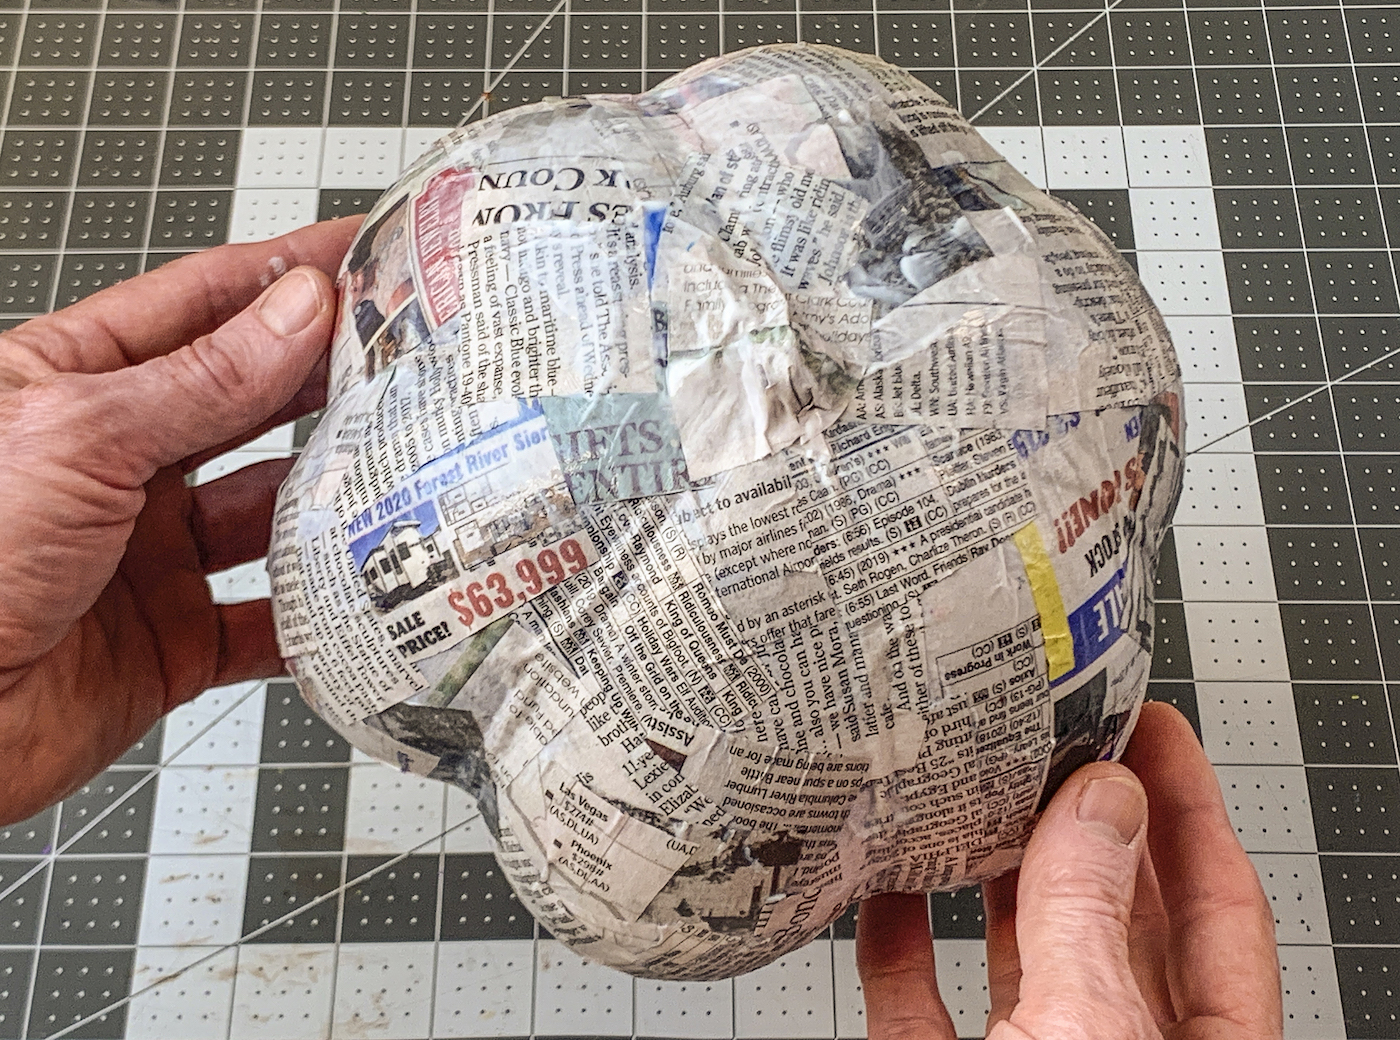
- Repeat this process two more times. You want three layers of newspaper and Mod Podge on the balloon. Let completely dry before painting.
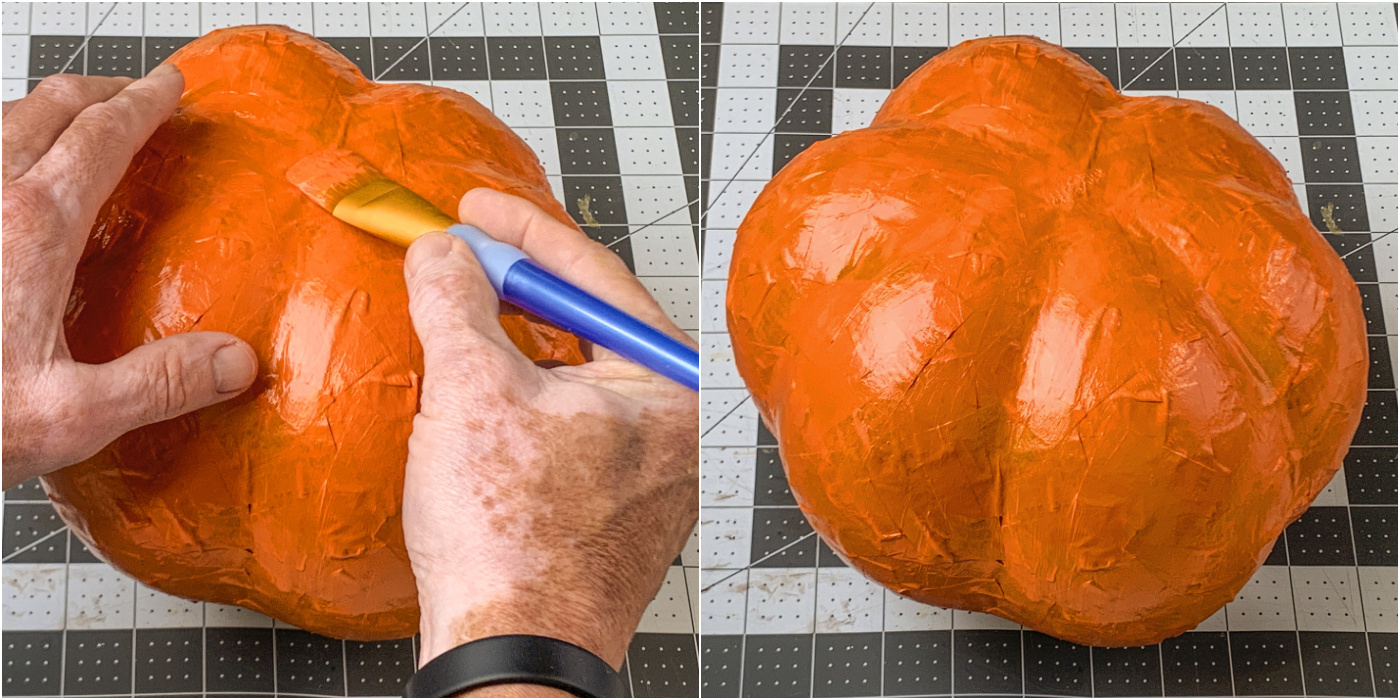
- Paint the pumpkin with a layer of orange paint and let dry completely.
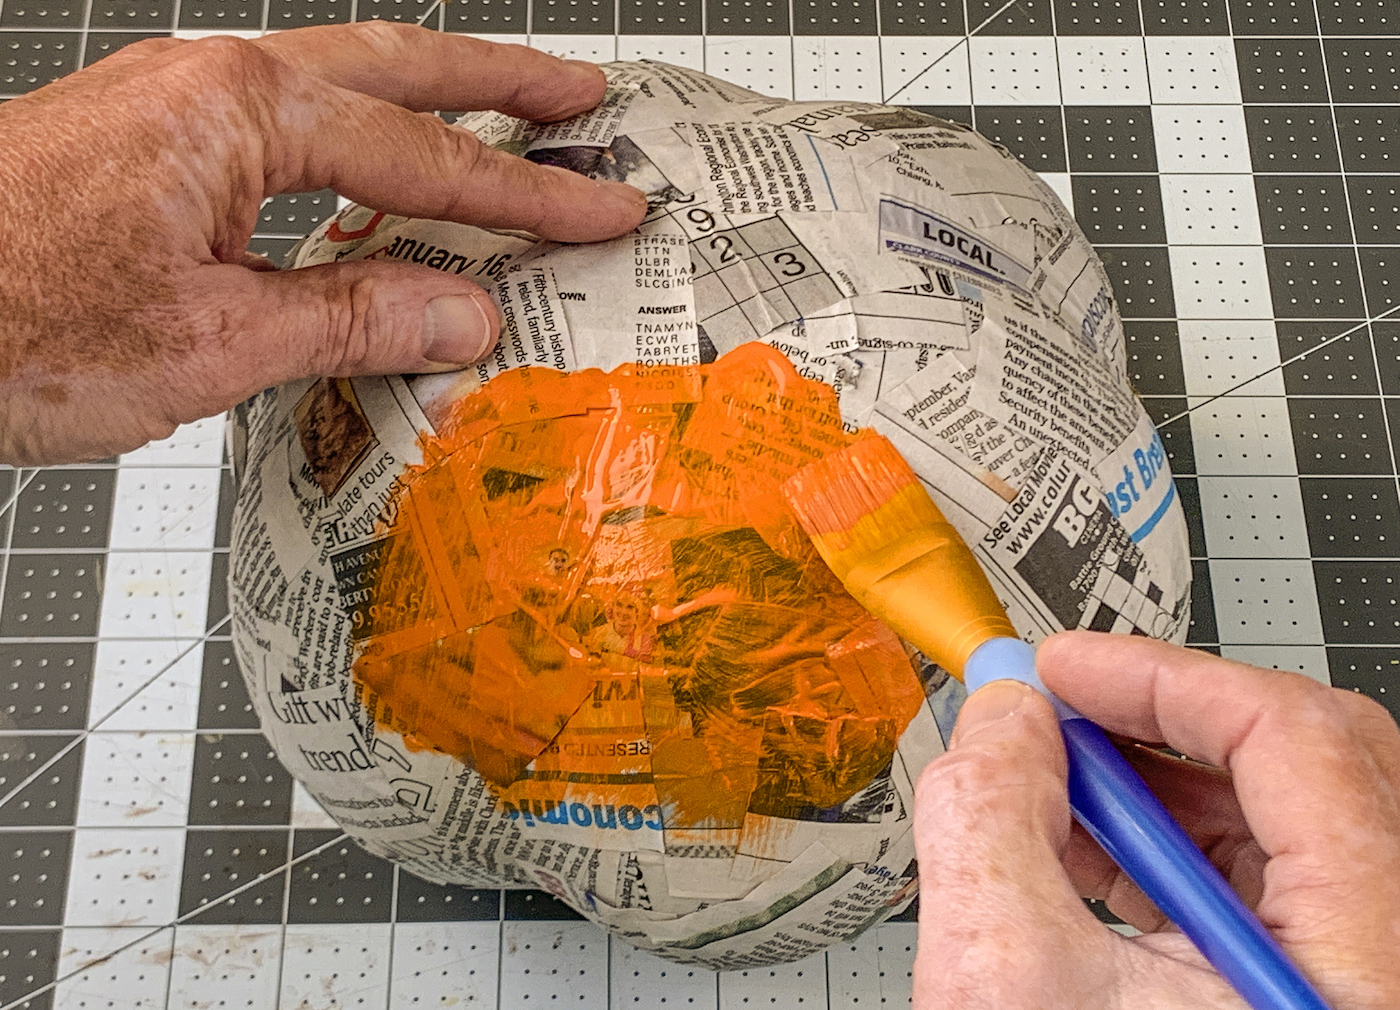
- Paint a few additional layers of paint and set aside the pumpkin to dry completely.
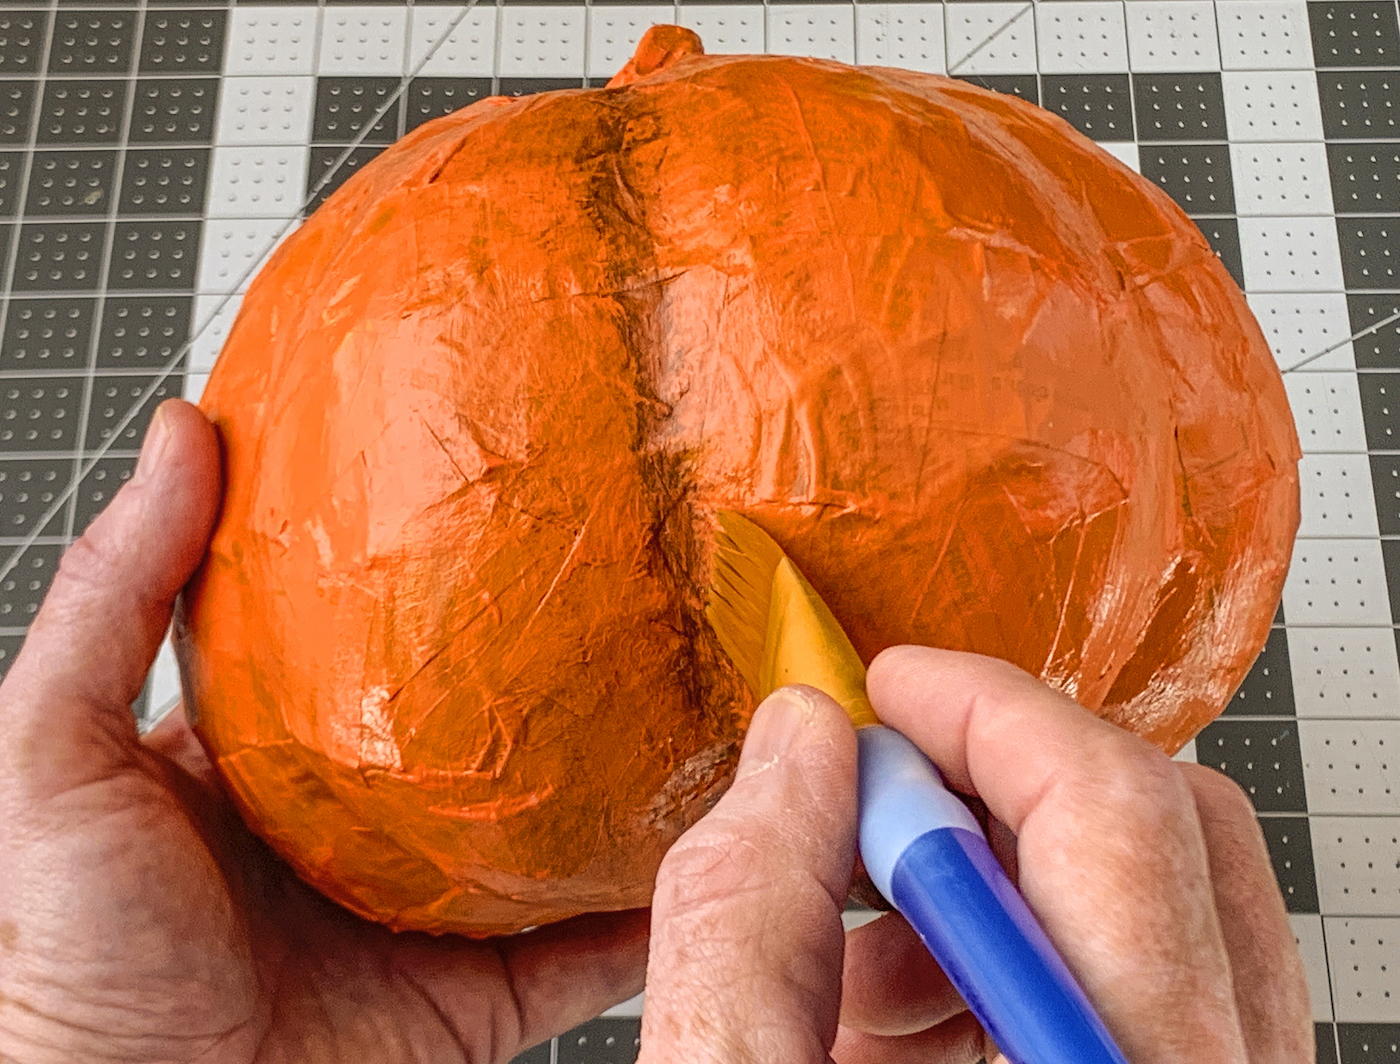
- Dip a paintbrush in some brown paint and tap a lot of it off. Brush some of the paint into the ridges between the pumpkin ribs. If you need to remove paint, wet another paintbrush and brush some off. Repeat with the rest of the ribs and let dry.
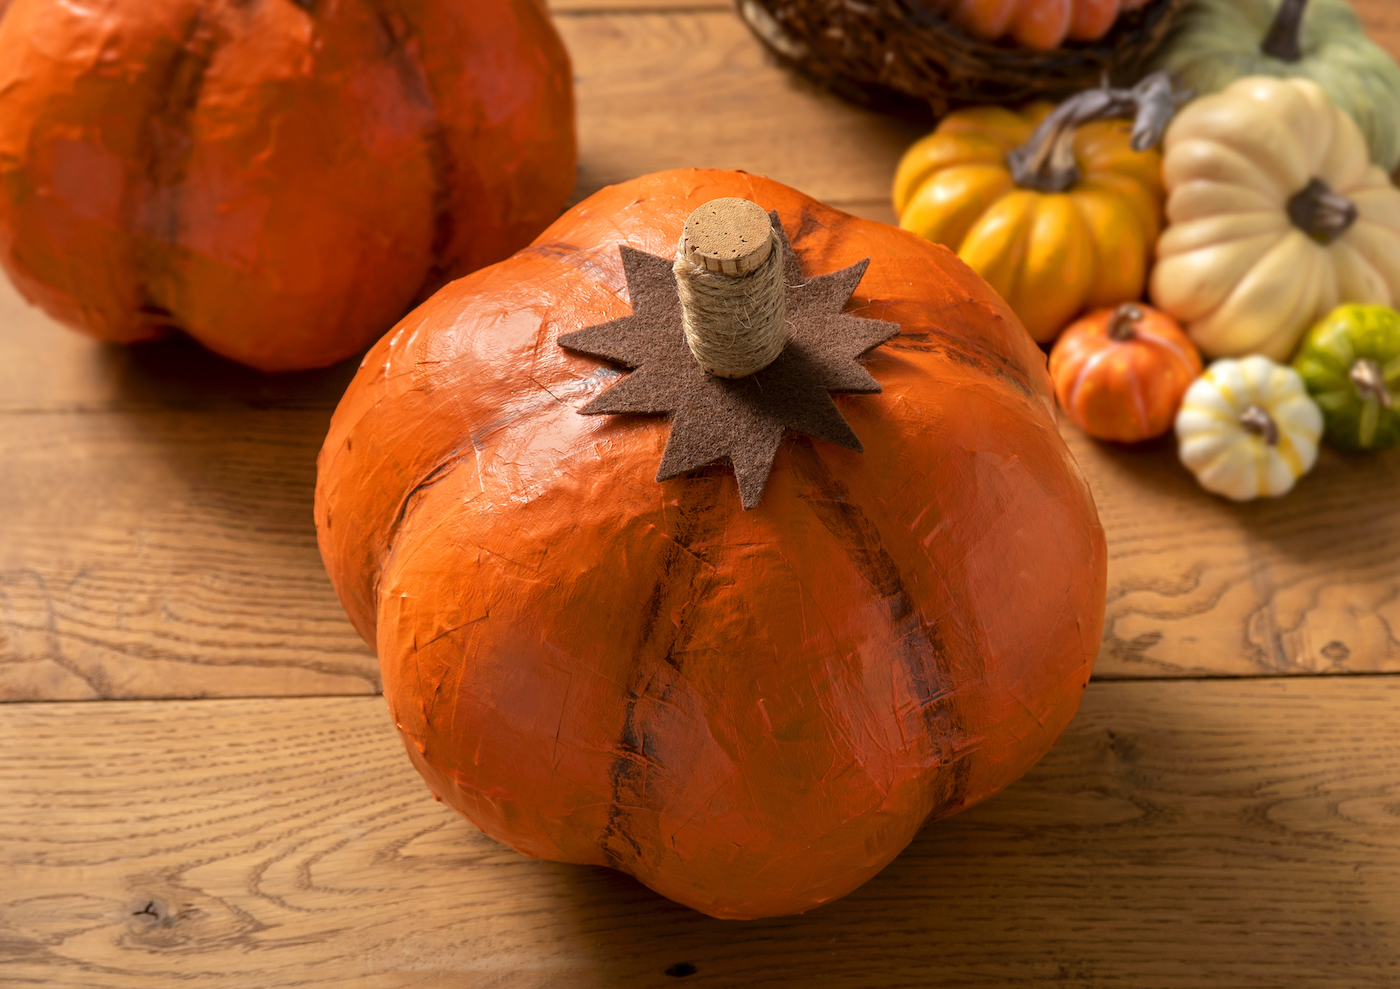
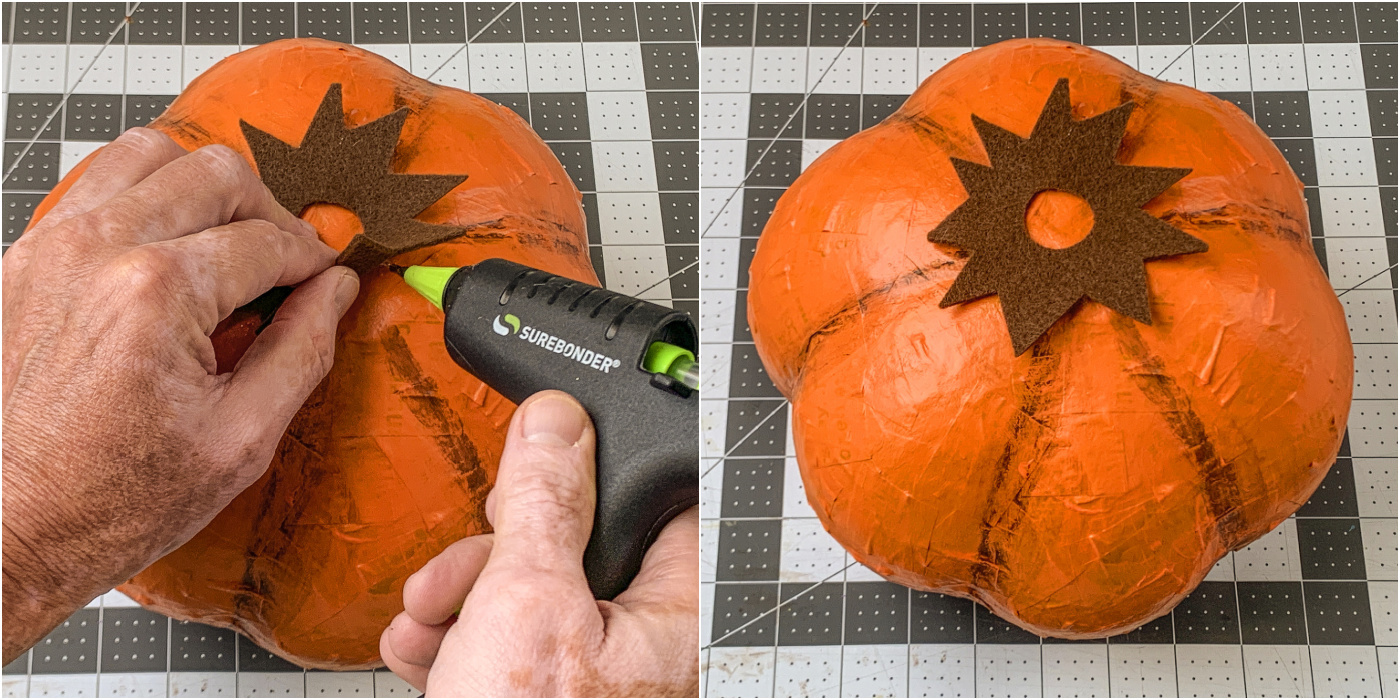
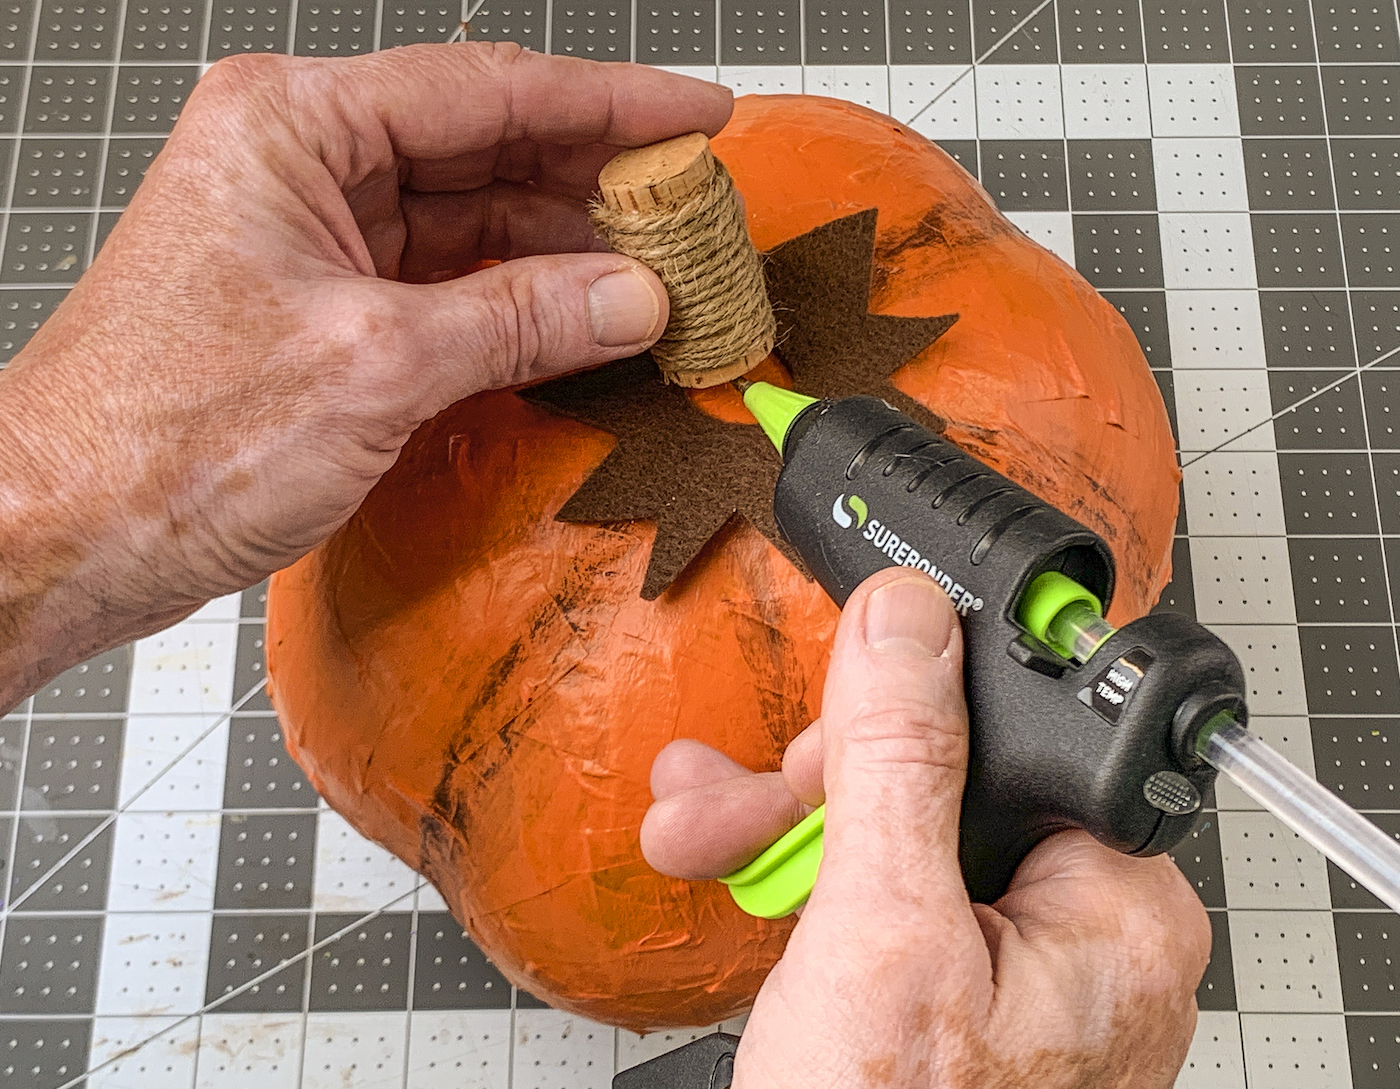
- Using the felt, cut leaves or a topper that can sit under the wine cork stem. Hot glue it to the top of the pumpkin. A hole was cut in the middle of my topper so that the stem could be glued directly to the pumpkin.
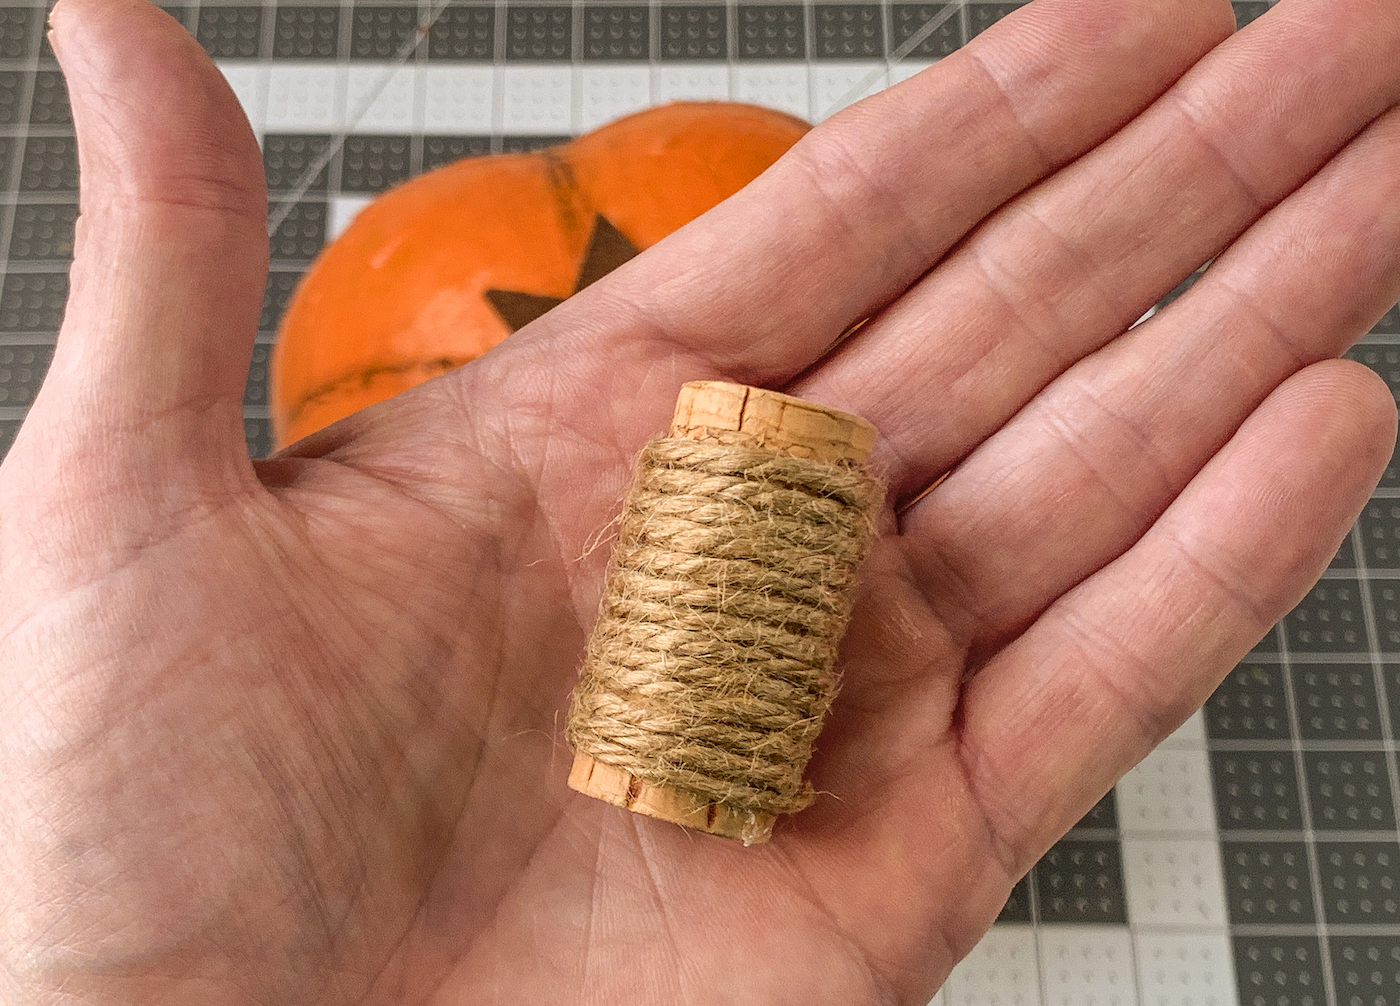
- Cut a length of twine. Hot glue one end to the base of the wine cork. Wrap the twine around the cork and secure the end near the top with hot glue. Trim with scissors.
- Attach the wine cork to the top of the pumpkin with a hot glue gun. Let cool completely before displaying.
- Repeat to make an additional pumpkin. This time you can make the balloon smaller when you inflate it so that your second gourd is slightly smaller than the first.
Notes
Did you enjoy this fall craft idea? Don’t forget to let me know in the comments! I’d love for you to check out these other posts:
Confetti Pumpkins • Decorate Paper Craft Pumpkins • DIY Fall Napkin Rings • DIY Fall Sign • DIY Leaf Bowl • DIY Nautical Pumpkin • DIY Pumpkin Seed Art • Fall Leaves Frame • Glitter Acorn Decor • How to Preserve Leaves • Mod Podge Map Pumpkins


Great idea. We already had everything except for the balloons. A quick trip to the drugstore and the papier-mâché on the first batch is drying now. I plan on making the final coat in polyurethane so we can display it in the yard. Thank you.
Super fun! I’ll be giving this a try.
These look great but aren’t you scared they will pop? How do they not pop?
The balloons inside can be popped if you want! The *frame* you construct for the pumpkin is enough so the balloon just deflates inside usually. I’ve never had it explode! But if it scares you just stick a pin through the paper mache at the end.
Love this. Will definitely be giving it a go… thank you.
Thank you!!
I think this is a great idea.we have been doing the toilet paper pumpkins for years and it’s time for something different.
I hope they turn out awesome!
Thaks Amy. I’m thinking of putting a few pieces of ight-weight candies inside, & create pinyatas that kids can break very easily. what are your thoughts about this? We coyld add this to our Reformation Day/Halloween party.
I think that’s a great idea!