
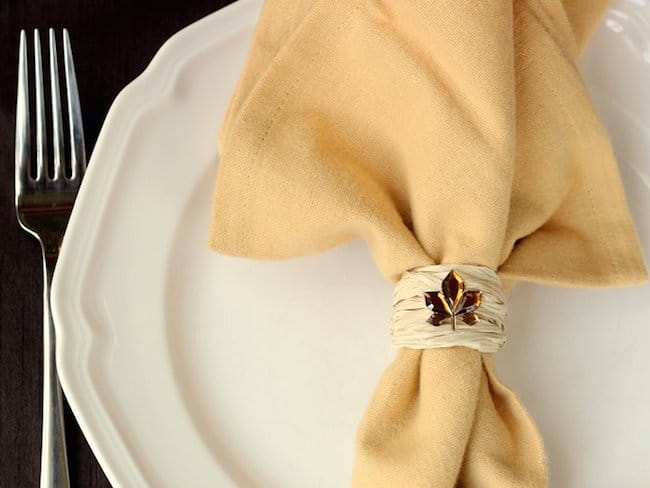
Make DIY fall napkin rings for fall using an unlikely supply – a balloon kit! These napkin rings are so easy to make, budget friendly and look great on your autumn table.
Hi Podgy People! It’s Shannon from Rosyscription back again. Today I want to show you an easy fall craft project that would be an elegant idea for your autumn tablescape: DIY napkin rings.
How to Make Napkin Rings
I’m always amazed at the versatility of Mod Podge. Not only can you cover and seal stuff with it . . . but you can shape things, too! Fabric, yarn, rope . . . decoupage is a wonderful sealer and shaper for these materials.
I made a bracelet with raffia and decoupage this past summer, and it inspired these fall DIY napkin rings that I made this month.
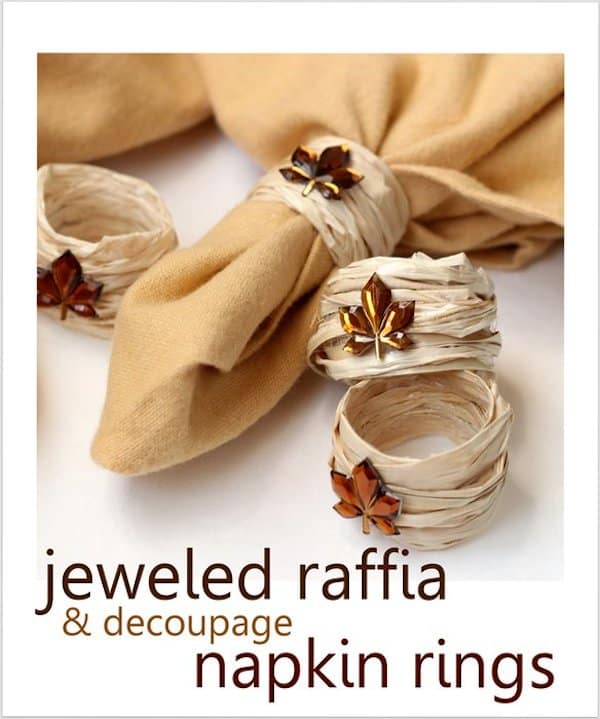
You can learn how to make Thanksgiving napkin rings with raffia and Mod Podge below – you’re going to be shocked how simple it is!
Fall Napkin Rings – What I Learned
There are some things to remember when you use Mod Podge to hold fibers together. First, you need a surface that will serve as the mold for your material. But you also need to ensure that the fibrous material and mold will separate once the glue is dry.
When you are working with a small object like a napkin ring, how do you find a cylindrical object that will allow you to easily release the rings once everything is dry?
I figured out that a long balloon works perfectly! Especially the kind that you can use to make balloon animals. The diameter is perfect for a napkin ring!
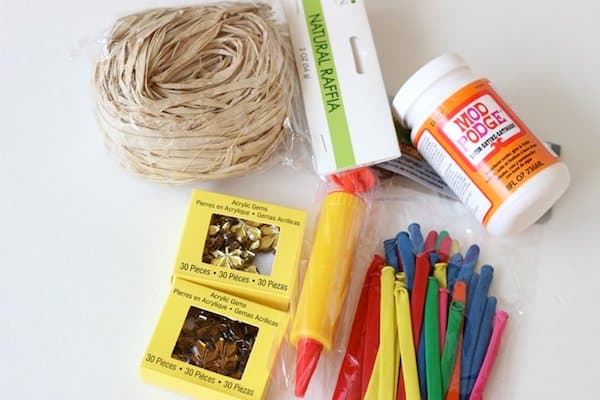
These napkin rings were also affordable to make . . . I found my balloon kit and raffia at the dollar store. And the gems were only $1.50 for a big box of them at the craft store!
Let me show you how I made these simple fall napkin rings. Once you get the hang of the idea, you’re going to be able to adapt this to several holidays and celebrations.
Homemade Napkin Rings
Gather These Supplies
- Raffia
- Mod Podge Satin
- Long balloon kit
- Rhinestone leaf gems
- Hot glue
- Scissors
- Foam brush
- Pin
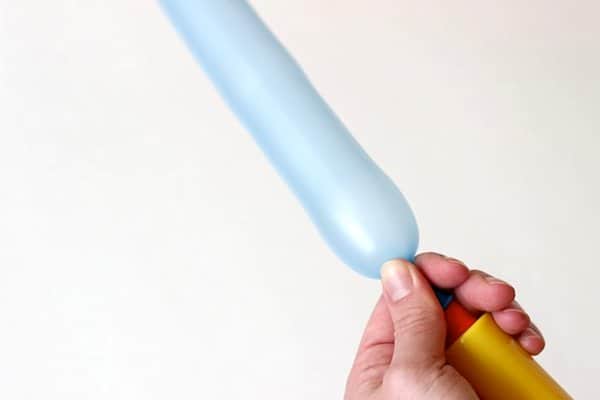
Step One: Inflate your party balloon with the pump provided and tie the end shut.
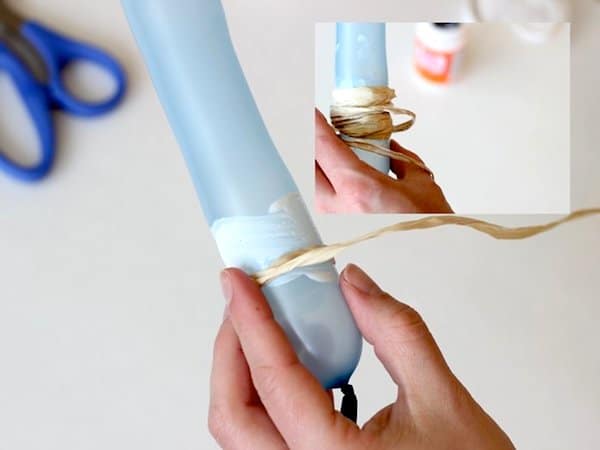
Step Two: This is where we get a little messy! Brush a thick coat of Mod Podge around a section of the balloon. Take one end of the raffia and wrap it around that area. Keep in mind that you are decoupaging the raffia onto itself . . . not to the balloon.
The cylinder is just there to support your shape. Liberally apply more Mod Podge as you continue to wrap the fiber around the balloon.
If you need more raffia, you can add it. But one strand of raffia gave me a decent width for a napkin ring. Secure the end down with more Mod Podge. (You may need to tuck the end into fibers to get it to stay put, too.)
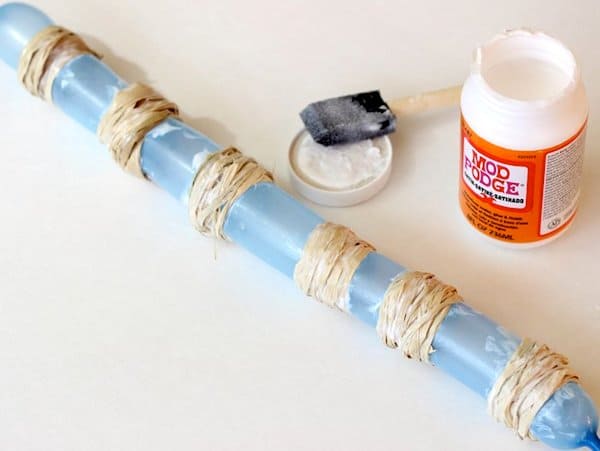
Step Three: Repeat step two and work your way down the balloon. Wrap more pieces of raffia with Mod Podge to make your desired quantity of napkin rings. Hang the balloon to dry overnight.
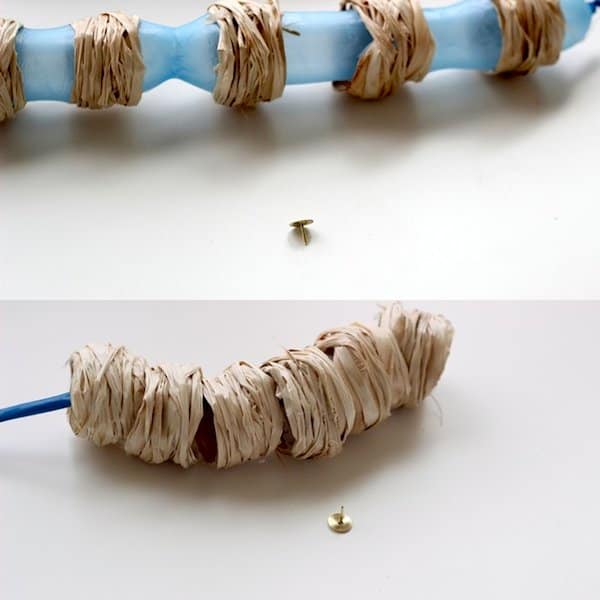
Step Four: Now comes the fun part! Use a sharp pin or scissors and pop your balloon to release your pretty napkin rings. Pop! The balloon will peel right away from the decoupage and raffia.
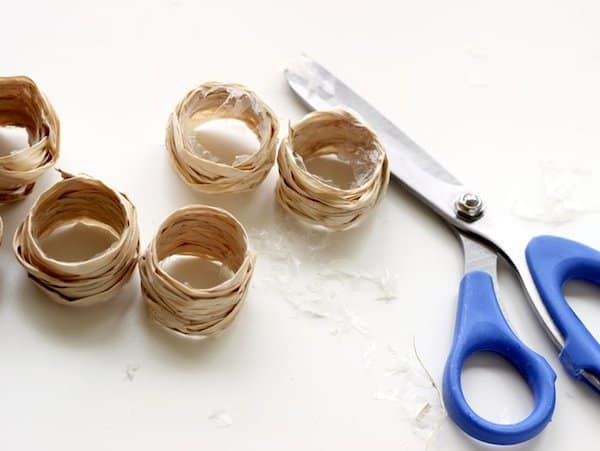
Step Five: Use scissors to clean up some of loose or hanging raffia and dried decoupage from the edges of each ring.
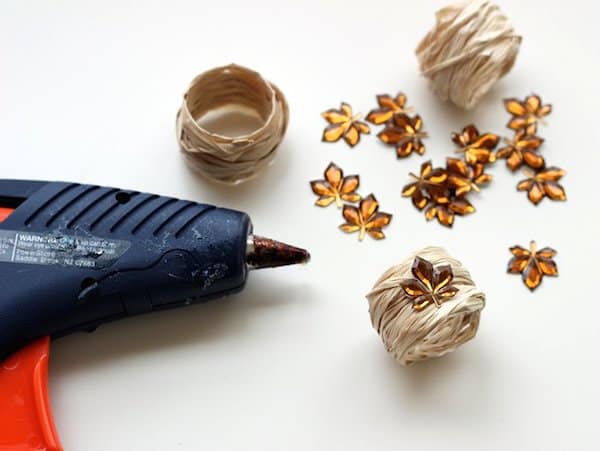
Step Six: Attach a jeweled leaf to each circle with your hot glue gun. If you can’t find a pretty jewel, try a button or an acorn top. Personalize it for your table!
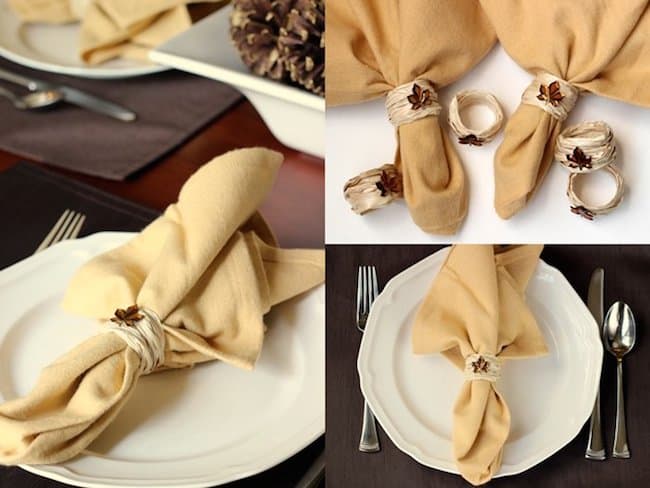
Enjoy your new fall napkin rings at your next dinner party this season! See how easy it is to use decoupage to turn fibers into a shape?
I’m loving how the natural material resembles corn husks. The contrast of organic raffia with a pretty jewel is simple and understated.
Why not make a set of these DIY napkin rings for your Thanksgiving table? You can tell your relatives all about the amazing things you can make with Mod Podge over pumpkin pie (beats talking about your aunt’s latest bunion trouble, right?).

Fall Napkin Rings
Materials
- Raffia
- Mod Podge Satin
- Long Balloon Kit
- Rhinestone leaf gems
Video
Instructions
- Inflate your party balloon with the pump provided and tie the end shut.
- Brush a thick coat of Mod Podge around a section of the balloon. Take one end of the raffia and wrap it around that area. Keep in mind that you are decoupaging the raffia onto itself . . . not to the balloon.
- If you need more raffia, you can add it. Secure the end down with more Mod Podge.
- Repeat step two and work your way down the balloon. Wrap more pieces of raffia with Mod Podge to make your desired quantity of napkin rings. Hang the balloon to dry overnight.
- Use a sharp pin or scissors and pop the balloon to release the napkin rings.
- Use scissors to clean up some of loose or hanging raffia and dried decoupage from the edges of each ring.
- Attach a jeweled leaf to each circle with the hot glue gun. Let cool before using.
This craft is part of our fall crafts for adults and Dollar Tree fall crafts. If you like this project, you might also like these other autumn and Thanksgiving project ideas:


These are super cute. Do you think jute cord would work? It’s the 4ply #72 I just have a lot because I broke my back and decided to crochet a huge jute rug but never did lol.
I absolutely think the jute would work!
I love the natural look of these napkin rings. I had been looking for something for a Farm House look that would look good with my black and white buffalo check placemats and this is perfect!
Easy to make and a real hands on project!
It is very nice idea. They look wonderful.
Have a nice weekend..
Cali
Fab project, and never thought of using mod podge this way! thanks for sharing on Craft schooling Sunday!