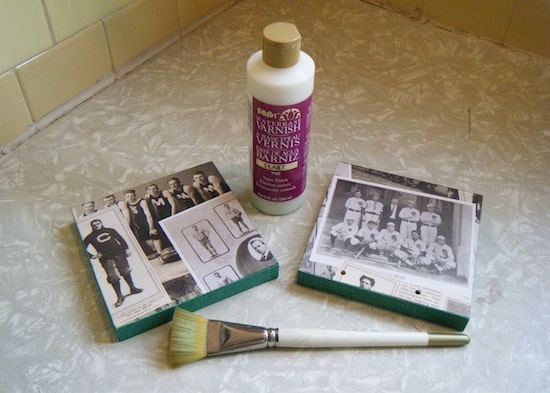
Looking for an original idea for the sports fan in your life? Learn how to make bookends! These baseball bookends use scrap wood and Mod Podge to personalize.
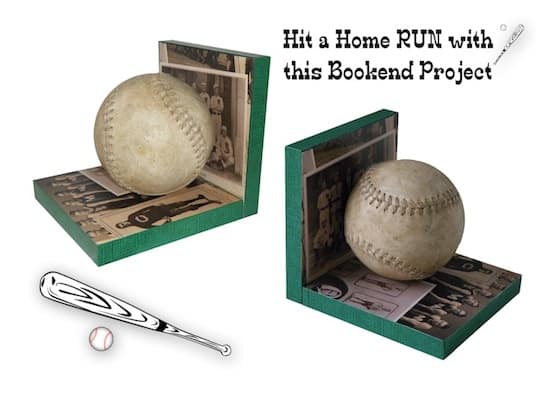
Need a great project for the sports-oriented man (or woman) in your life? This week Man Podger Walter delivers the perfect wood craft idea – decoupage baseball bookends.
All you need are wood and Mod Podge (well, and a few other things). I’ve never told you, but my grandfather was a Brooklyn Dodger. Yep! His name was Herbert Olson and he was a catcher. I’m not sure for how long – but I know it was in the late 50’s/early 60’s.
He passed away not so very long ago, so I kind of think of this decoupage idea as a tribute to him. Man Podger Walter had no idea that he made something with so much meaning to me.
I think this would make a great Father’s Day craft, or something special for your favorite baseball fan.
I think he hit a home run with this project! Try different variations to fit your liking. Don’t forget to make two so you have a complete set of baseball bookends.
Here’s how to make these for yourself.
Make Baseball Bookends
Equipment
- Screwdriver
- Ruler or tape measure
Materials
- 4 Wood square(s) 5" x 5"
- 2 Baseballs
- Mod Podge Gloss
- Acrylic paint
- 8 Wood screws
- Self stick rubber pads
Instructions
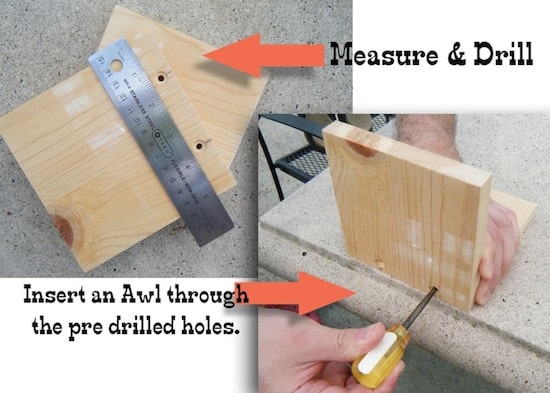
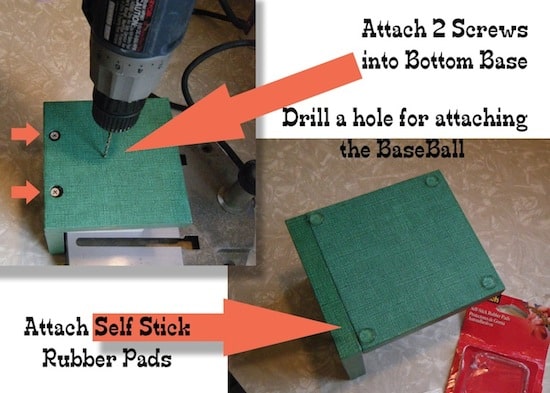
- Measure 1 1/2" in at each end from both the left and right sides of one of the pieces of wood. Drill two holes; I used a countersink bit so that the screws would sit flat down in the recess.
- Hold the drilled 5" x 5" piece of wood upright next to the other piece (base). Insert an awl and penetrate the base.
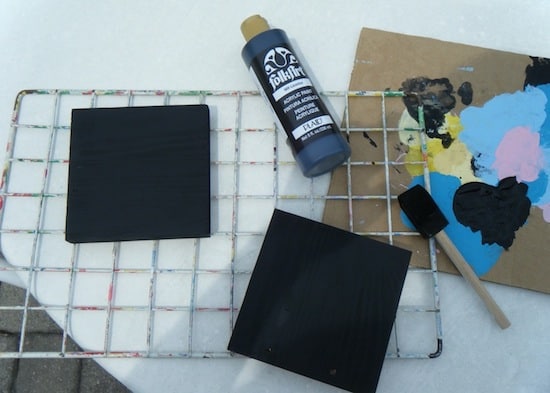
- Paint both wood pieces with the acrylic paint and let dry.
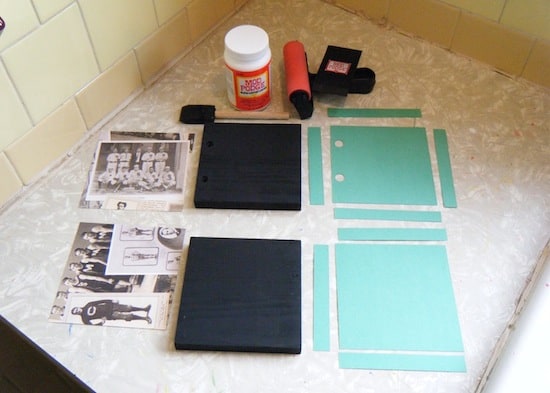
- While the paint is drying, cut pieces of paper to fit the pieces of wood – both the front and back, as well as the sides.
- Decoupage the paper and cardstock to the wood. Let dry for 15 – 20 minutes before applying a top coat.
- To assemble, attach top with two screws into the bottom base using a screwdriver. The base is complete. Repeat with the other side.
- Attach the baseballs in place. You can use industrial glue like E-6000 to attach the baseball in place. Personally, I eyeballed where the contact point was and drilled through the upright piece and then screwed the baseball into place.
- Attach four self stick rubber pads to both bases before using.
Notes
Walter, thank you so much – you totally hit a home run. To all of you, please visit the rest of the Man Podger projects here. Also don’t forget to check out these other projects:




What a great idea for my grandsons! They love anything to do with sports and I would love to make these for them! Thanks for the great tutorial!
Very clever!
Walter that is perfect! Easy to do, practical and very, very cool. Terrific!
These are actually really cool!
So cute! Visiting from tt&j. I just linked up a Mod Podge project too!
I love this!!!! I am thinking of all the little league pictures of my brother! I can’t wait to try this!
Aaack! I love these! I still have some ‘yard’ baseballs from my son’s little league days. I’d love to make these for him now that he’s a dad himself and is coaching his own son. (Yes, I’m THAT old!) But I gotta tell ya, I think I’ll just buy some bookends and go from there 😉
Those are so fabulous. My son has a couple signed balls from the local teams around here. It would be cool to make him a set with those:)
What a great idea. I have a party every Monday. I would love for you to stop by and link up your bookends and any other projects you would like to share. https://diyhshp.blogspot.com/
Ah these are awesome! I have to make some for my husband and my dad for their next birthdays or Christmas. Love it! I would love it if you would stop by and link this up to the crafty link party going on right now at Lines Across My Face.:) Rachel
Brilliant Idea!! I have wondered what to do with those baseballs I have been saving. My kids get the “players ball” each year and being that I have 2 boys that makes a set. I think this is a great gift idea for the grandparents/family.
FYI, I’m guessing this is your grandpa
https://www.baseball-reference.com/register/player.fcgi?id=olson-001her
That’s him! It doesn’t have his major league stuff – but it says that’s just minors. He’s passed away now (last year). 🙁
Love it! Great gift for him. I’ll be testing this out as it gets closer to Christmas
I love these! Do you have the template for the vintage photos by any chance?
Love these!! My fiance’s Uncle was a Dodger as well….(Ralph Branca)