
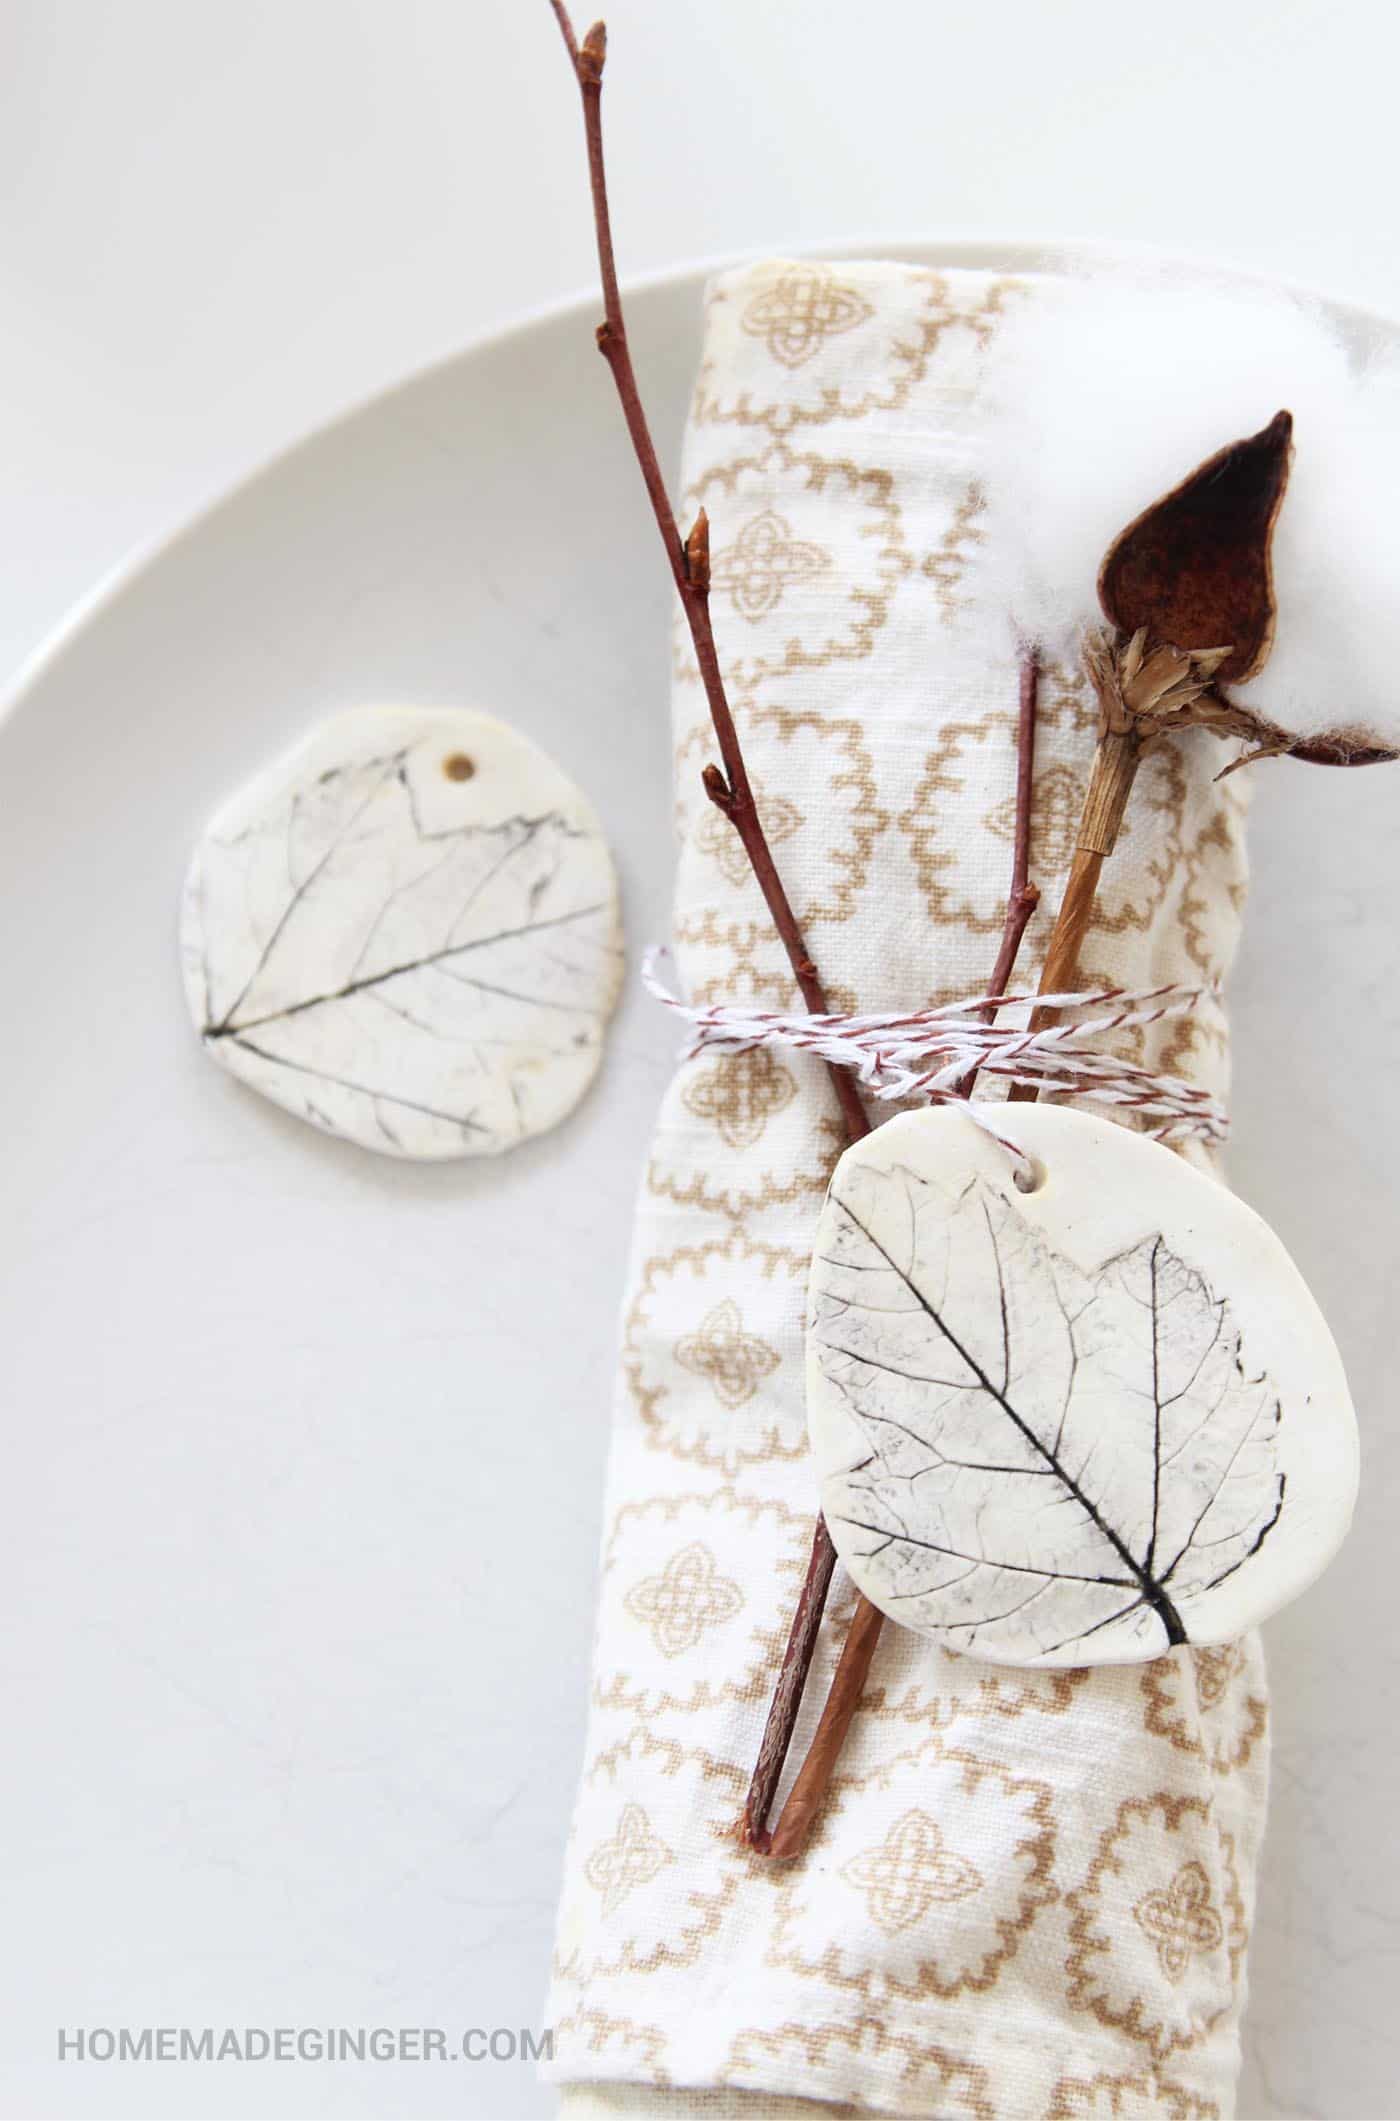
Use Mod Podge on clay in this gift tag project, that works well for place settings as well. Perfect for fall and SO easy to make.
Skills Required: None. You’ll Mod Podge on polymer clay (you can use air dry too), using it as a sealer after you press the leaf and paint. It’s a very simple project; kids will love it too!
I’m not much of a Thanksgiving decorator. It’s that holiday that gets smashed in between Halloween and Christmas, and is sometimes kind of forgotten.
Instead of getting out entirely new decor or crafting something up that can only be used for a few weeks, I like to think of transitional projects.
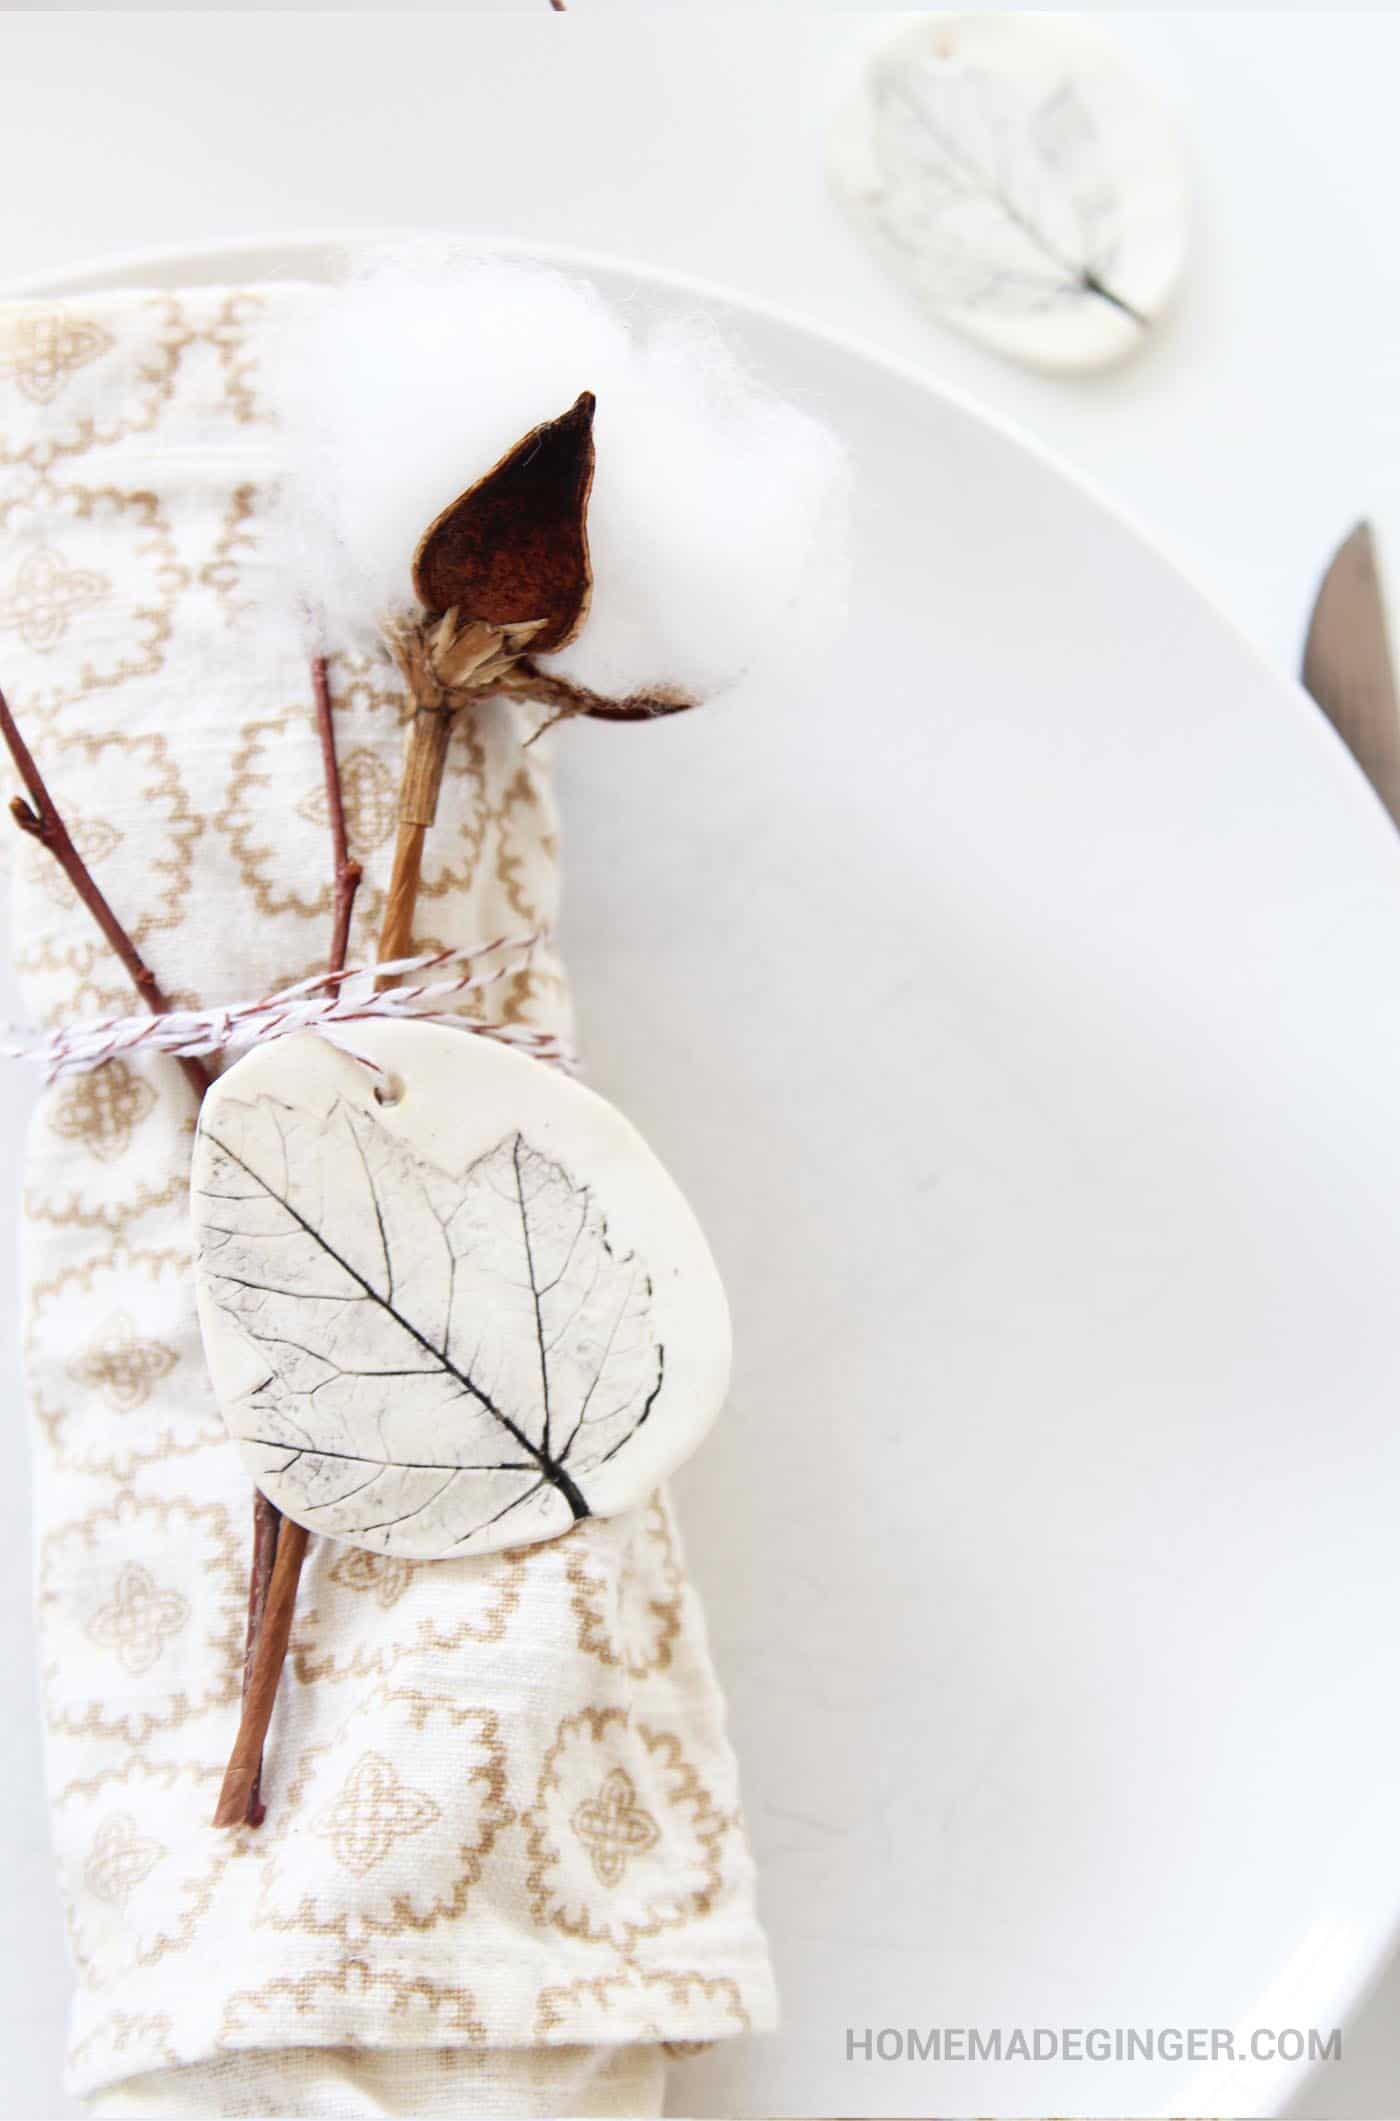
These little clay leaf charms are the perfect example of a transitional project. They look so elegant and simple on your Thanksgiving table, but can also be used for a Christmas ornament later!
I love the organic feel of these clay gift tags. These would work well with any type of decor or tablescape – modern, farmhouse, industrial, rustic. They make great DIY napkin rings!
They are so neutral and understated . . . I love them. If you want to, you can customize the color of the paint to any that you like.
Mod Podge on Air Dry Clay
It’s really easy to use Mod Podge and clay together (including polymer and air dry). Mod Podge is a great sealer for clay, which is what makes it so perfect for these charms/gift tags.
Before we dive into the tutorial, let’s go over a few basics of this project.
Type of Clay to Use
For these clay gift tags I used polymer clay, and I recommend either Fimo or Sculpey clay. I usually buy based on whatever color is my favorite at the time and what’s on sale! Keep in mind with the polymer clay, you’ll have to bake it.
If you want to avoid baking (maybe kids are doing this project), then you can use air dry clay. It usually takes anywhere from 24 – 48 hours to dry.
Real or Fake Leaves?
You can use either real or fake leaves to make the imprint on your clay. Just remember that no matter what you use, it’s got the possibility of getting clay on it.
Sometimes it can be easier to just buy faux leaves depending on where you live. The dollar store has some great options for faux leaves and they are perfect for using in this project.
Mod Podge on Clay Gift Tags
Gather These Supplies
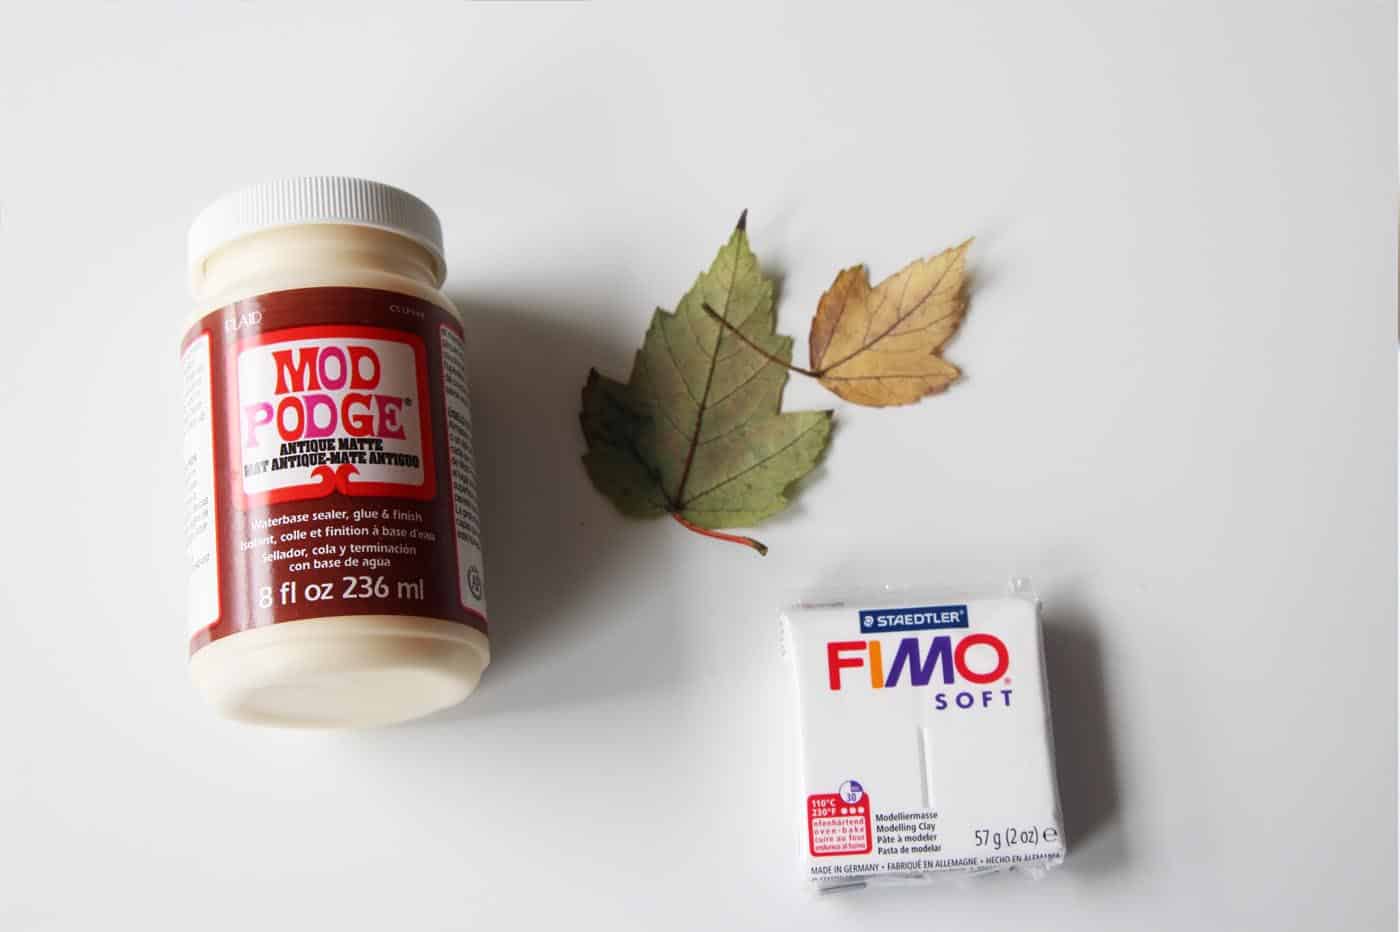
- Antique Mod Podge – if you can’t find this formula, regular Mod Podge will work; you can add a little stain or acrylic paint to it for the same effect
- Polymer clay
- Leaves – real or faux
- Black paint
- Paintbrush
- Rolling pin

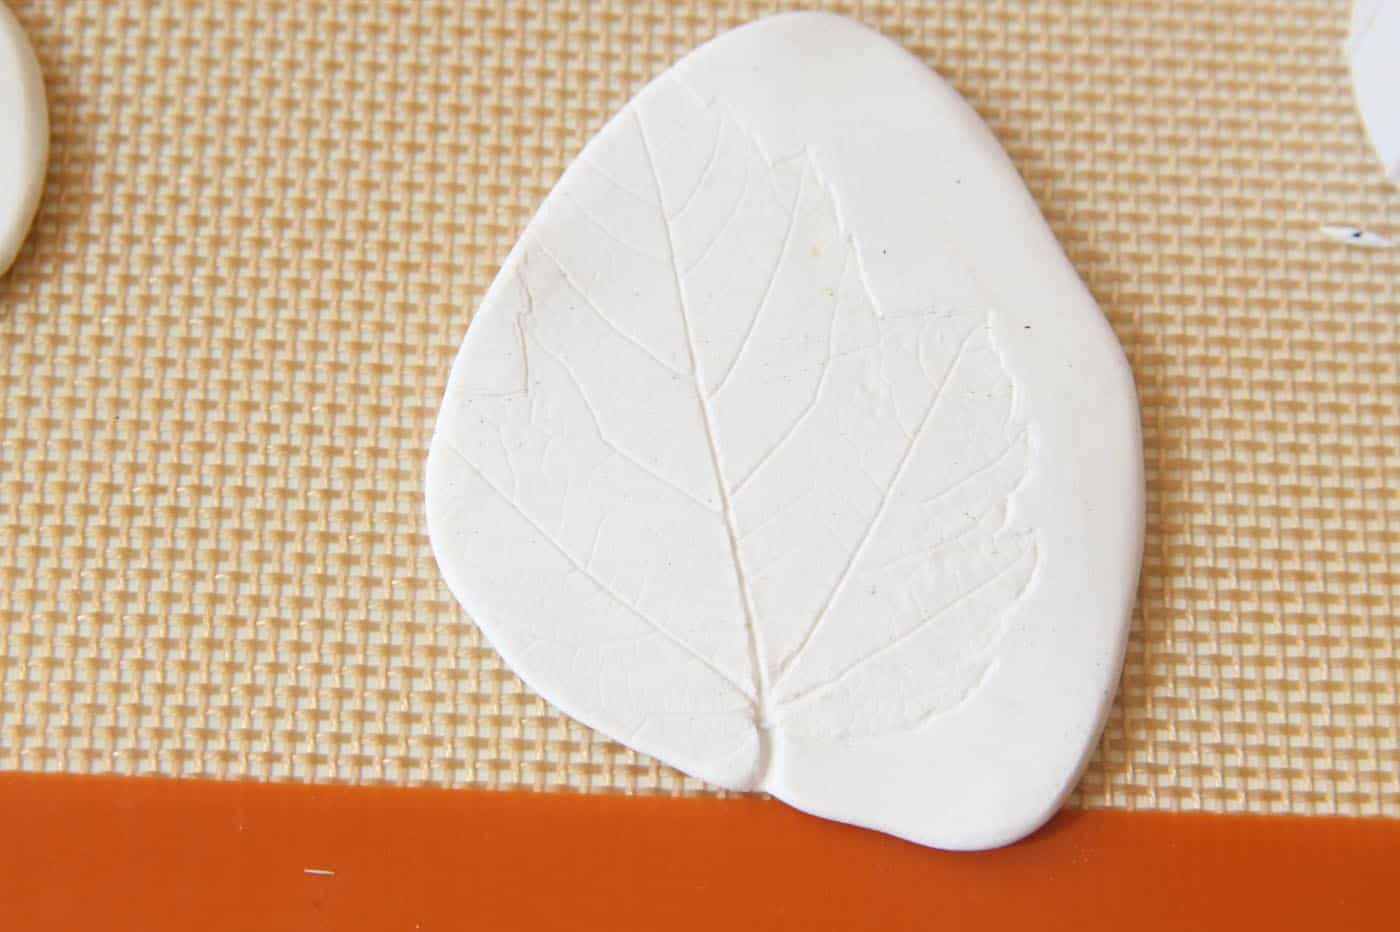
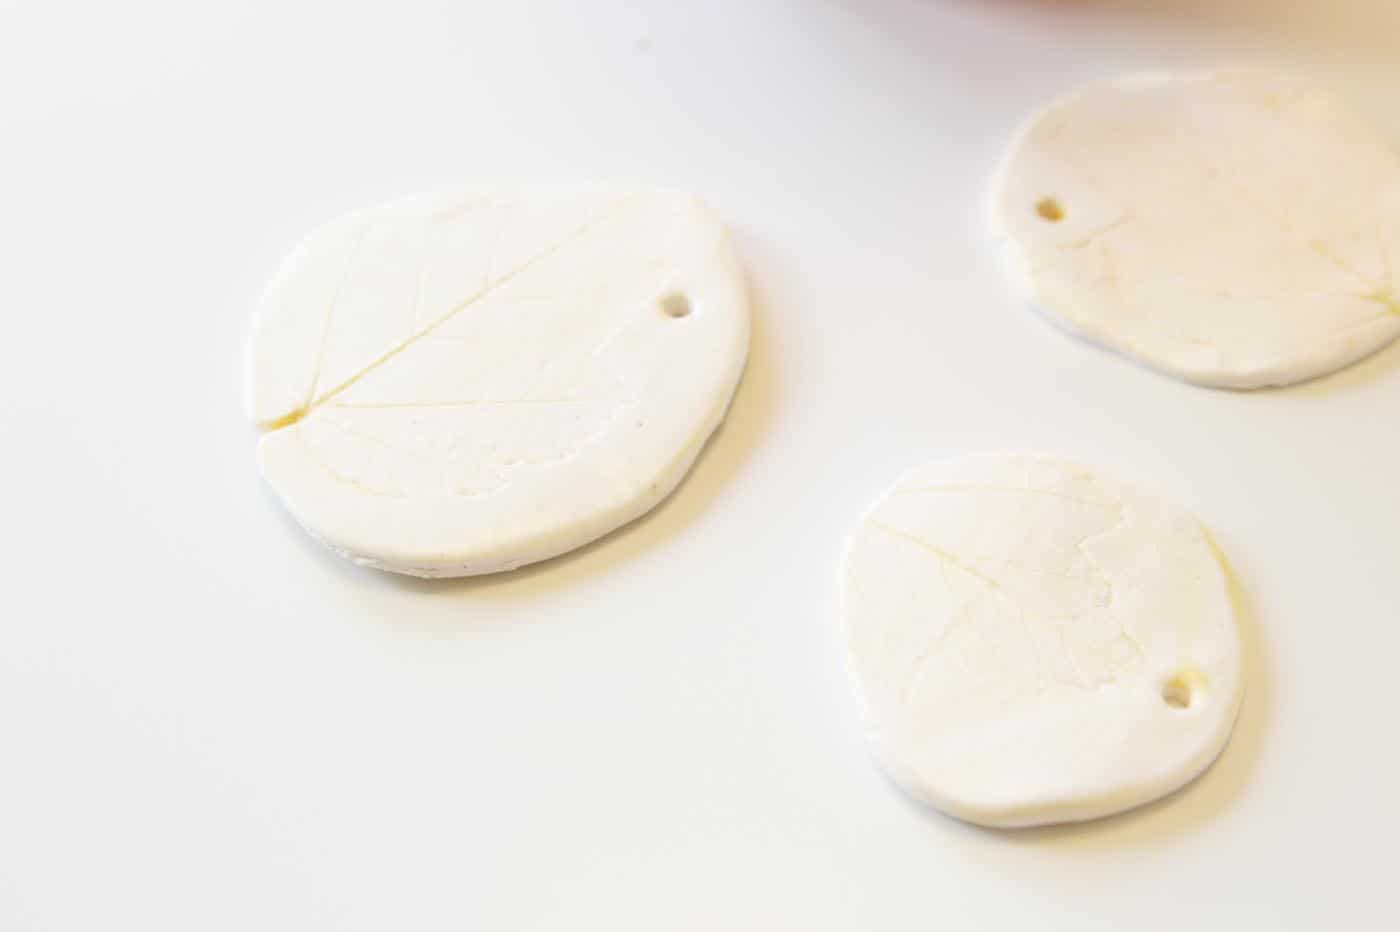
Step One: Using a dowel rod or the end of a paint brush, roll out a piece of clay. Press the leaf into the clay, vein side down and roll it again, making sure that the leaf is imprinted onto the clay.
Note: I rolled the clay out on my Silpat baking mat, since I planned to bake the clay immediately after making the imprint. If you do this, make sure to thoroughly clean the mat before putting food on it again.
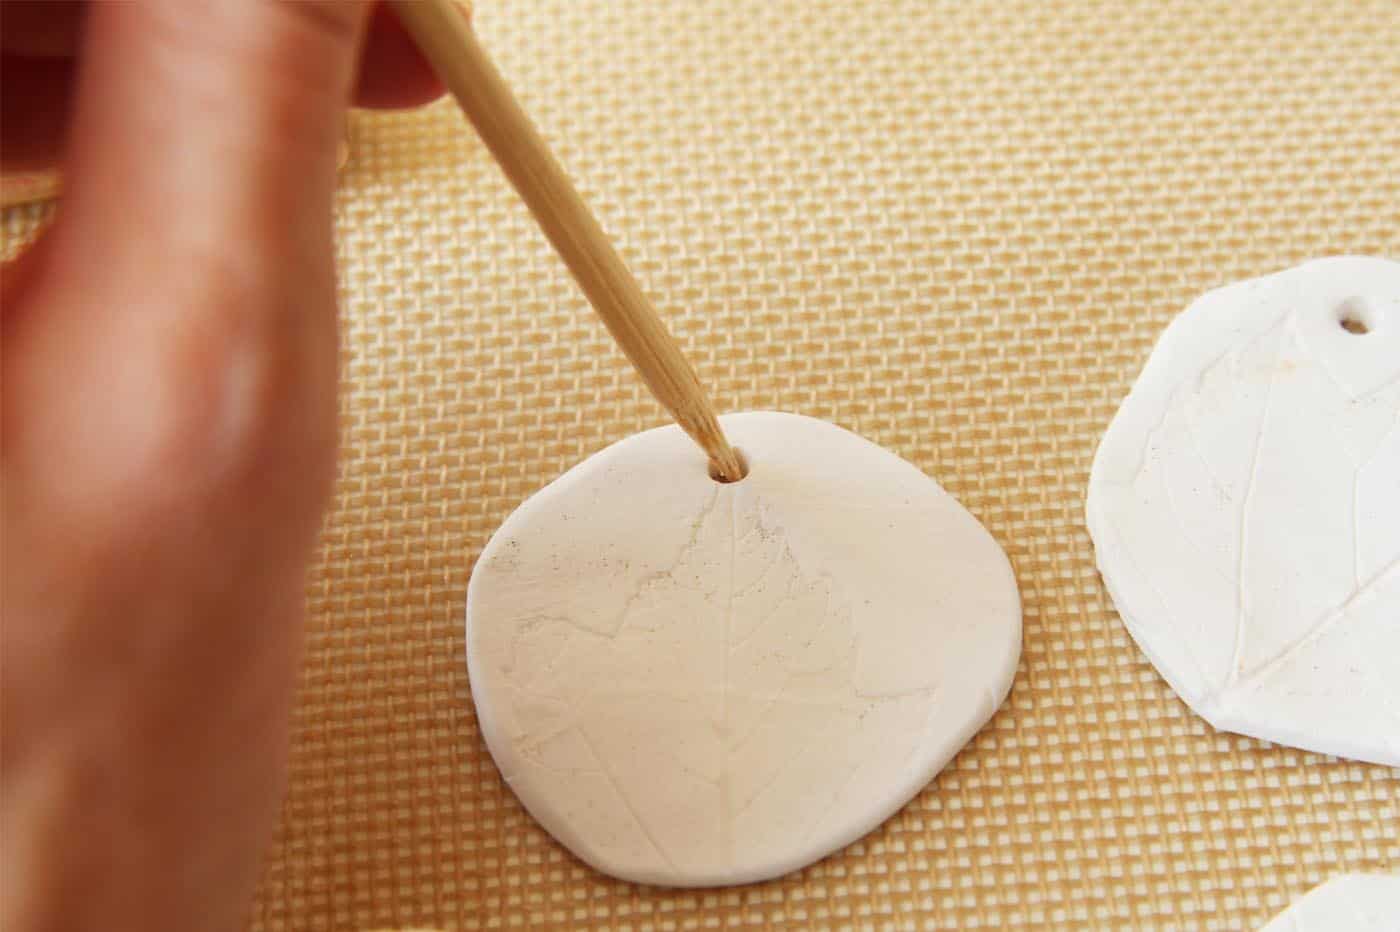
Step Two: Make a hole in the top using a toothpick or skewer. Don’t forget to do this before baking!
Step Three: Bake the clay pieces according to the package instructions.
Step Four: Once the clay pieces are cooled, brush on a layer of Antique Mod Podge. This will give them a sheen, but also add a bit of a warm hue which is perfect for fall decor.
If you don’t have access to Antique Mod Podge, just use regular Mod Podge. It will seal your gift tag, you just won’t have the warm hue.
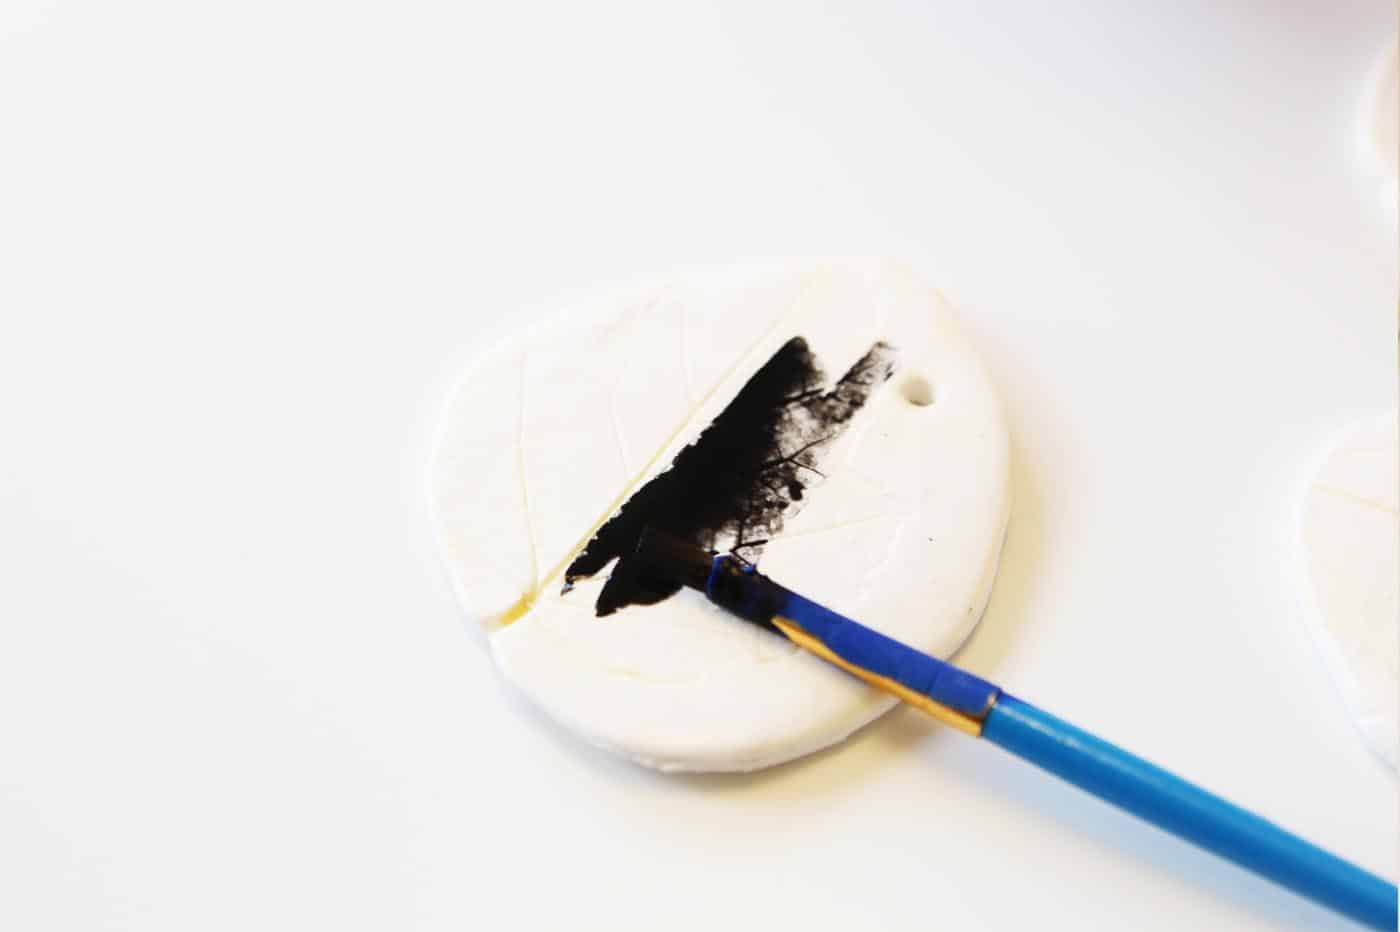
Step Five: Once the Mod Podge is dry, water down some acrylic paint or use black watercolor and brush on the paint to the leaf so that the paint will sink down into all the veins.
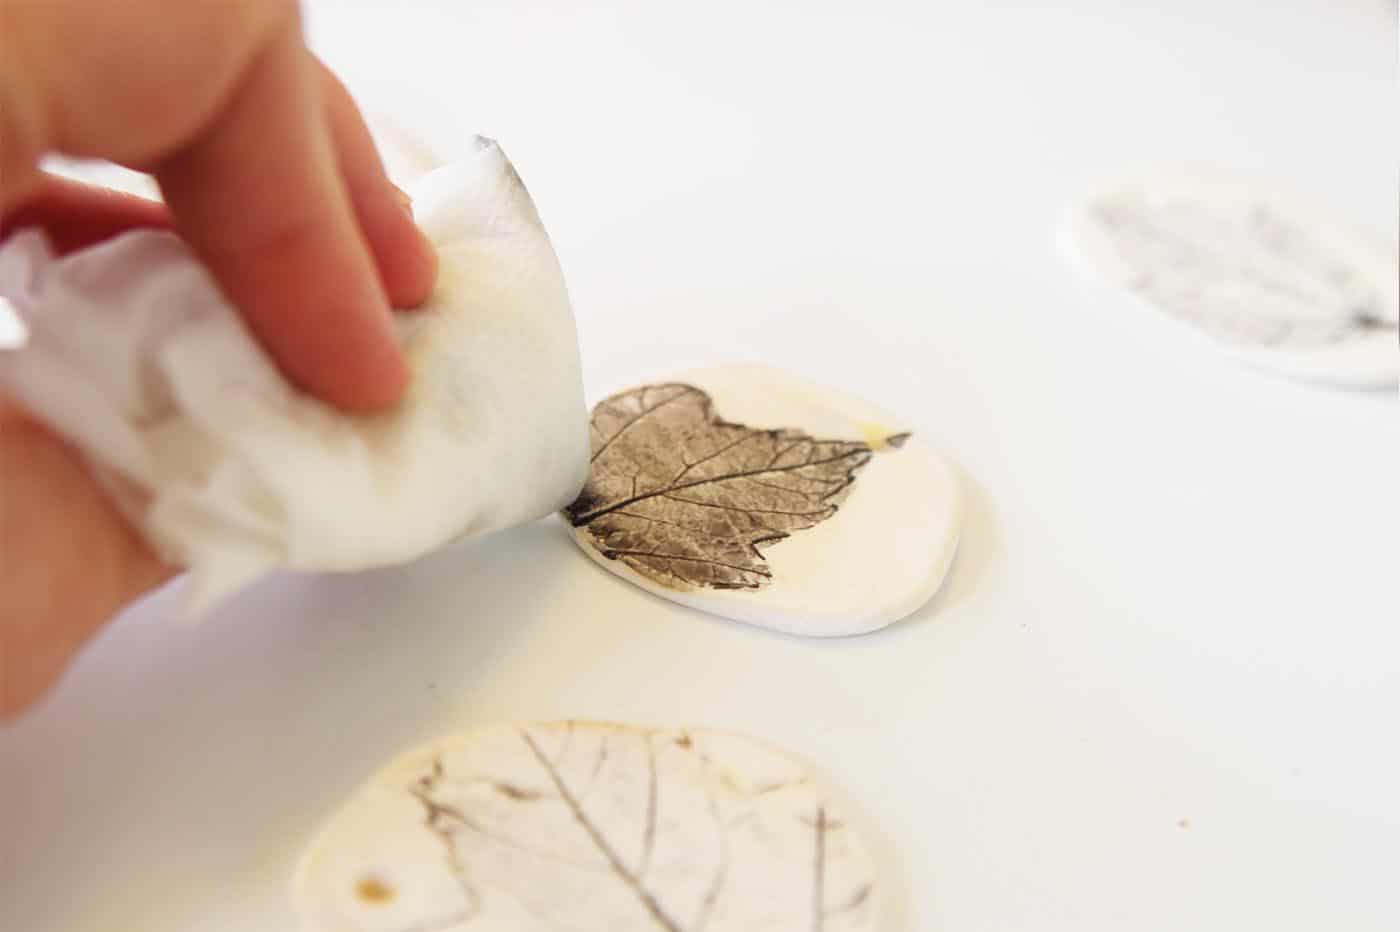
Step Six: Allow the paint to dry, then take a damp cloth and wipe of the black paint, leaving behind only the paint that sank into the veins and grooves.
Wipe until you get the desired effect, and you can always add more paint back in if necessary.
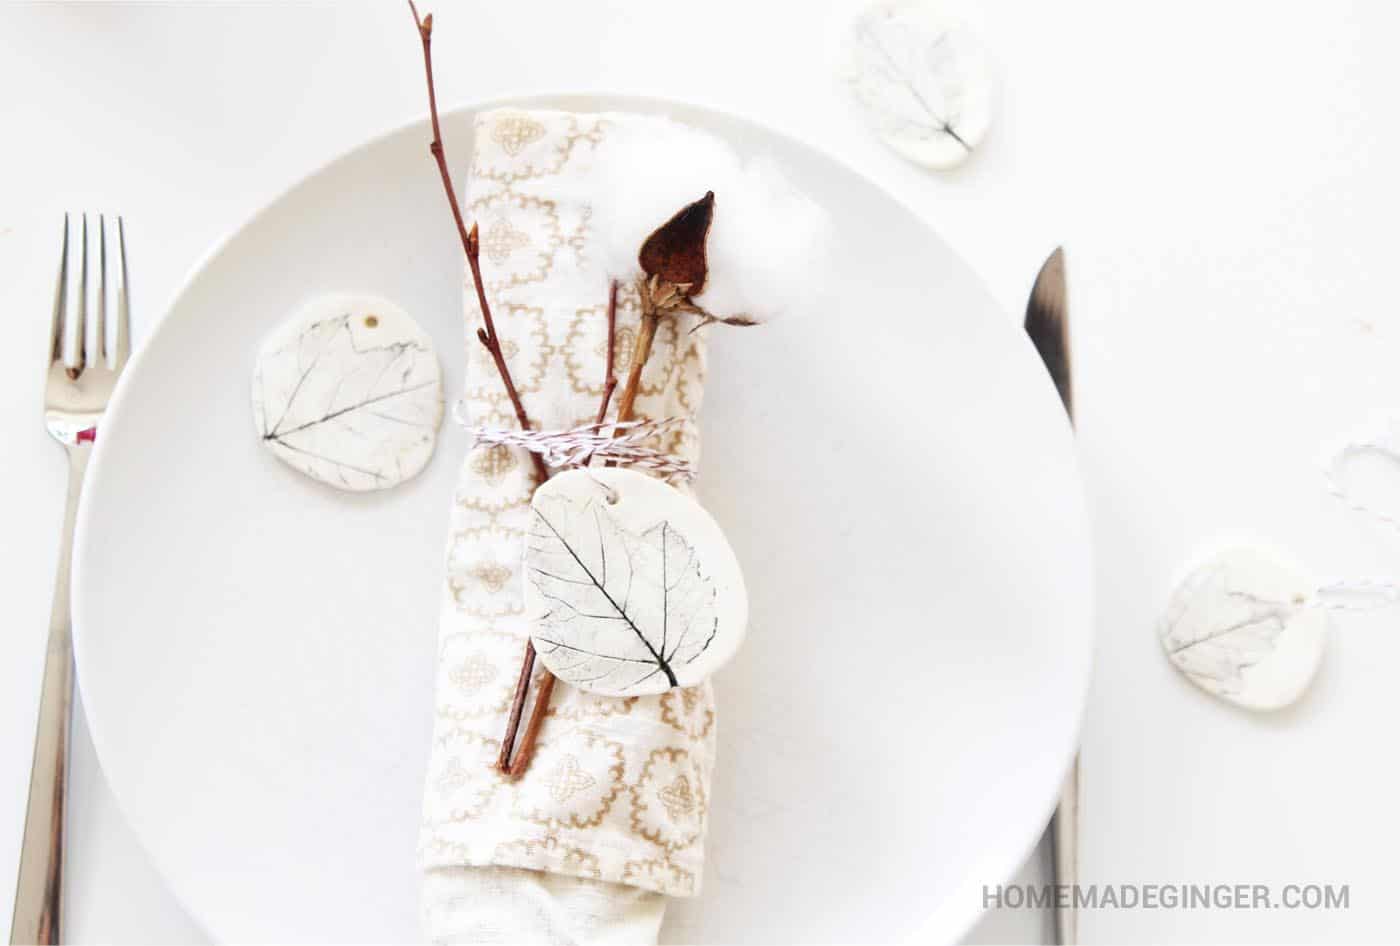
Step Seven: Tie a string around the leaf charms and add them to your Thanksgiving place settings!
I love how these turned out. Beautiful and classic with just a touch of modern! The Mod Podge on clay really seals the tags and ensures they will last for years.
This leaf charms craft is also a project that kids can easily help with, which are the best kinds of crafts in my opinion!
I hope you will try your hand at these little clay charms – and maybe experiment with different colors or sheens of Mod Podge to put your own twist on it! Now that you know how to Mod Podge on clay, what are you going to make?
This project is part of our fall crafts for adults, Dollar Tree fall crafts, and Thanksgiving crafts for adults! If you like these clay gift tags turned Thanksgiving napkin rings, I’d love for you to check out these other holiday ideas as well:


I love Modge Podge I have used it for varied purposes forever, also on my acrylic layered over fabric dolls sanded smooth and hard . Recently I discovered that when using matt Modge Podge the lighter the shade of paint I am sealing the more a little polished “sheen” shows up instead of a true matte. My Halloween crows look delightfully matte as do the dark green Bayou frog witches but the pumpkin scarecrows show a little shine and elf/trolls dolls look quietly glossy. Just a heads up.
If using air dry clay, do you seal with Mod Podge after the clay has dried or before?
You would do it after dry!
Im new to this, can I stamp onto airdried clay & if so before or after it’s dried …
Thank you
Hi Marie! It’s a great question. When air dry clay dries (which can take multiple days), it’s very hard and you can’t stamp into it. So you have some time at the beginning. And that’s definitely when you want to do it! Before it dries 🙂
These are lovely and I will be making them for our Thanksgiving table. Thank you!
Thank you so much Davena!
I’m just curious. For your projects, is there a really simple way to print out the instructions that I’m just not seeing? (I do not like to read on the internet and there’s so much going on the page it’s distracting.
Hi Betsy! You can use this service: https://www.printfriendly.com/
Just enter the URL of the project you are interested in!
These are really beautiful! I definitely need to make some!
NEAT!! I want to try it & maybe try some fall colors dry brushed over your finished product–just a thought. Thanks for sharing your creativity.
This is just lovely!!!