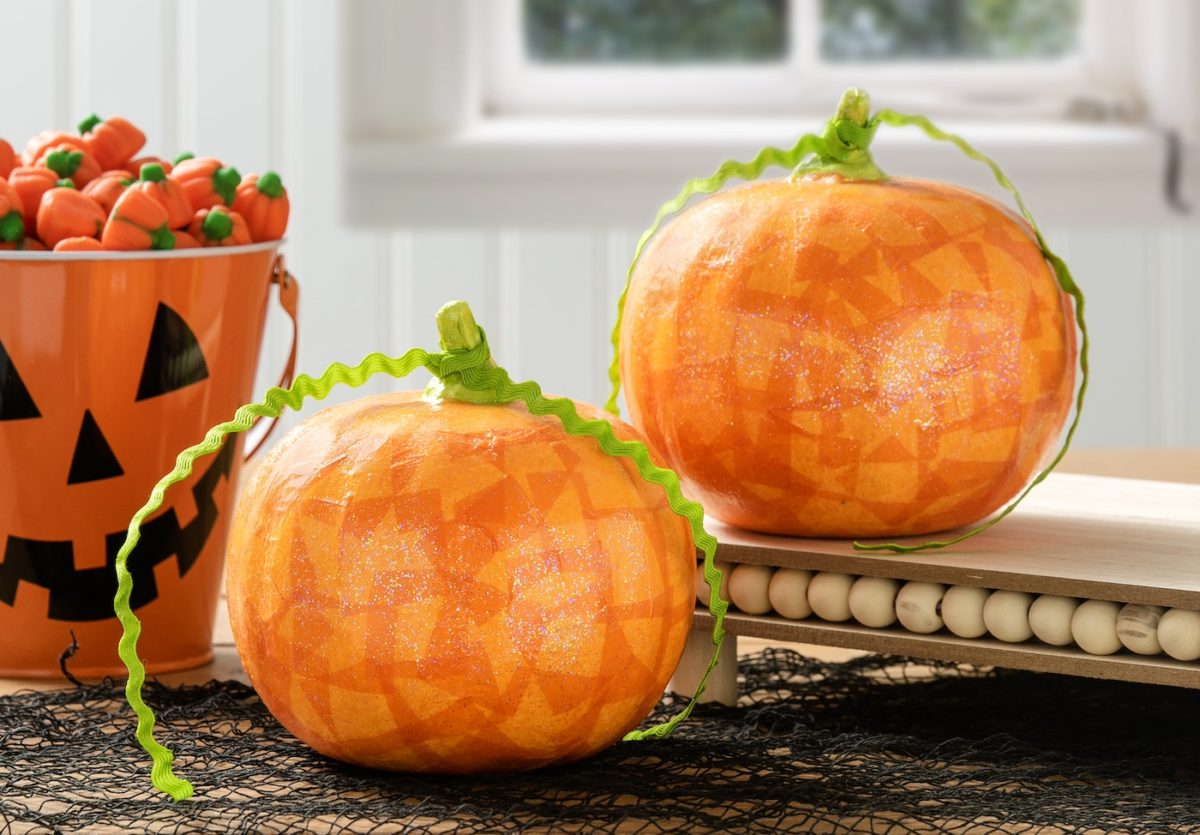
Learn how to decorate paper craft pumpkins with basic supplies including paint, tissue paper, and Mod Podge! Kids will have a blast with this fall craft.
Skills Required: Beginner. This fall craft is perfect for children of all ages. You’ll paint, cut tissue paper, then apply it with Mod Podge. Very easy, even for those that have never crafted before.
This last week I was in Target and realized I hadn’t been to the craft section in awhile. I really like the colors of paint they have, the wood surfaces, and they also have Mod Podge (just as an aside).
I was hoping to find something cool to decorate . . . when I came upon a 2-pack of small paper craft pumpkins that needed . . . everything.
Little did they know, they were about to get a dazzling makeover, Mod Podge Rocks style!
I embarked on a mission to transform these little guys from ‘meh’ to ‘marvelous’, and guess what? You’re coming along for the ride.
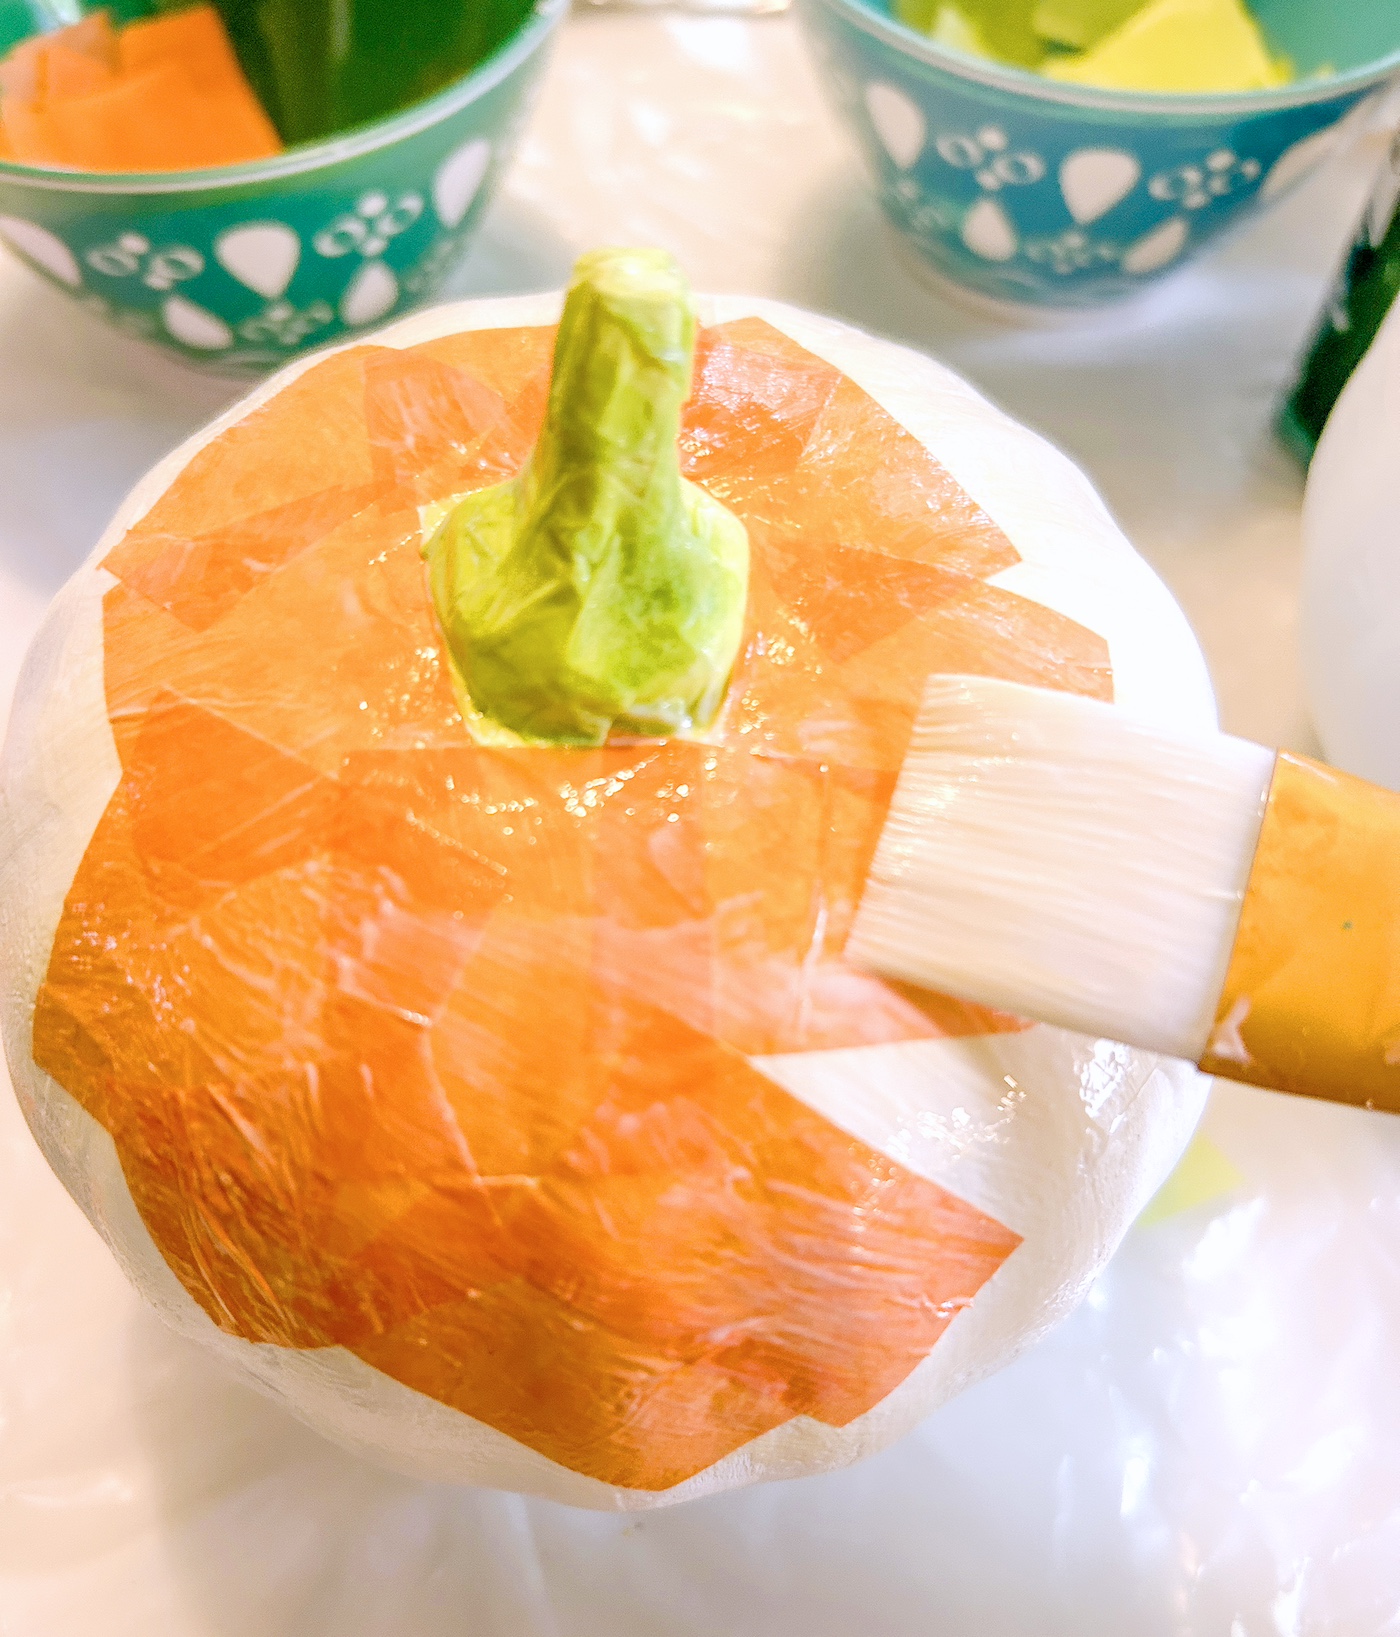
You’re going to base coat these bad boys with some white paint, then add a touch of pizzazz with brightly colored tissue paper.
And to seal the deal, you’re going to coat them in Mod Podge. For the uninitiated, Mod Podge is like the fairy godmother of the craft world, turning everything it touches into something spectacular.
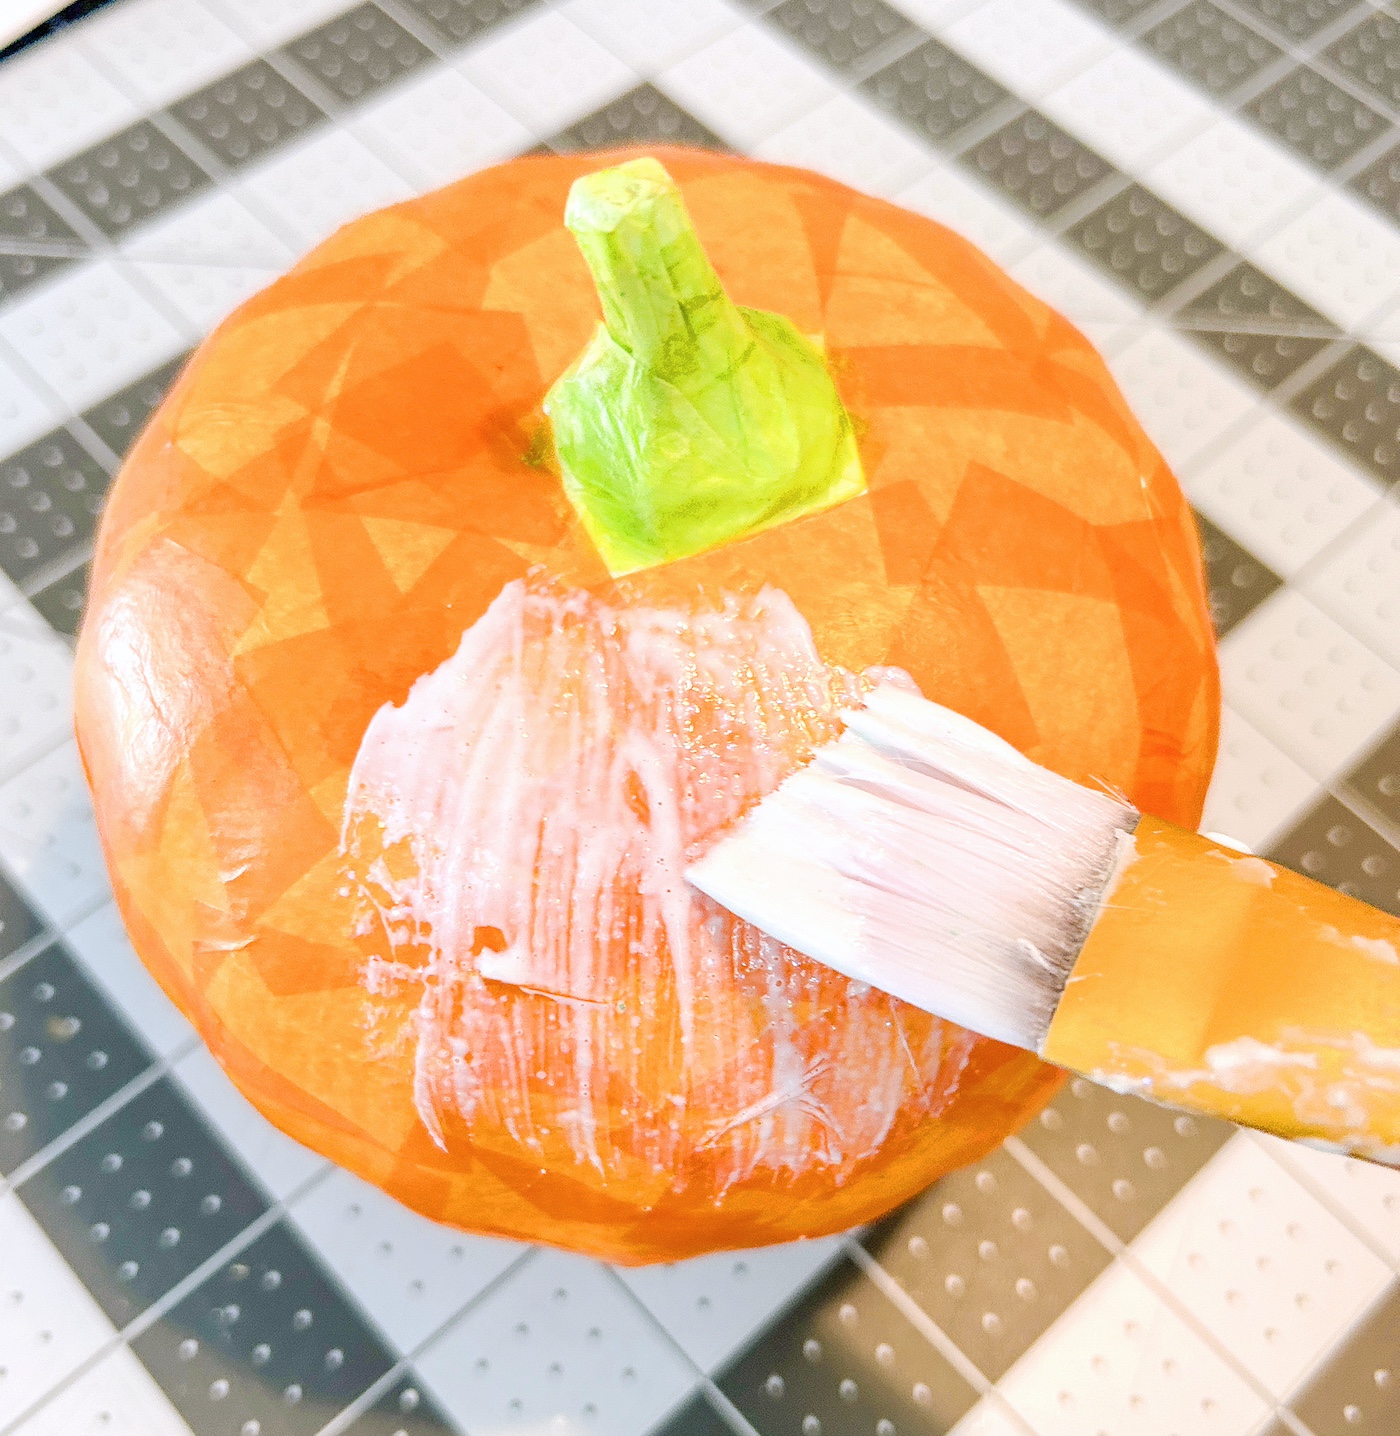
But I’m not just stopping there. We’re going to add Sparkle Mod Podge on top. Why? Because if there’s one thing I’ve learned in my crafting adventures, it’s that a little sparkle never hurt anyone.
Now, you might be thinking, “This sounds like a fun fall or Halloween craft for kids.” And you’d be right.
It’s the perfect way to spend an afternoon, especially when the leaves start turning and you feel that crisp autumn air. But here’s the secret – it’s not just for kids.
There’s something incredibly satisfying about transforming these plain paper pumpkins into something that could be a centerpiece at your next Halloween bash or a charming addition to your fall decor.
So, grab your Mod Podge and let me show you how it’s done. I promise it will be more fun than trying to carve a real pumpkin (and way less messy).
Scroll down to check out the project in all its glory and maybe, just maybe, try it out with your kids – or just for yourself. Here’s what you need:
Gather These Supplies
- Paper craft or paper mache pumpkins
- White craft paint
- Tissue paper – orange and green for the stem
- Mod Podge – any formula
- Mod Podge Sparkle
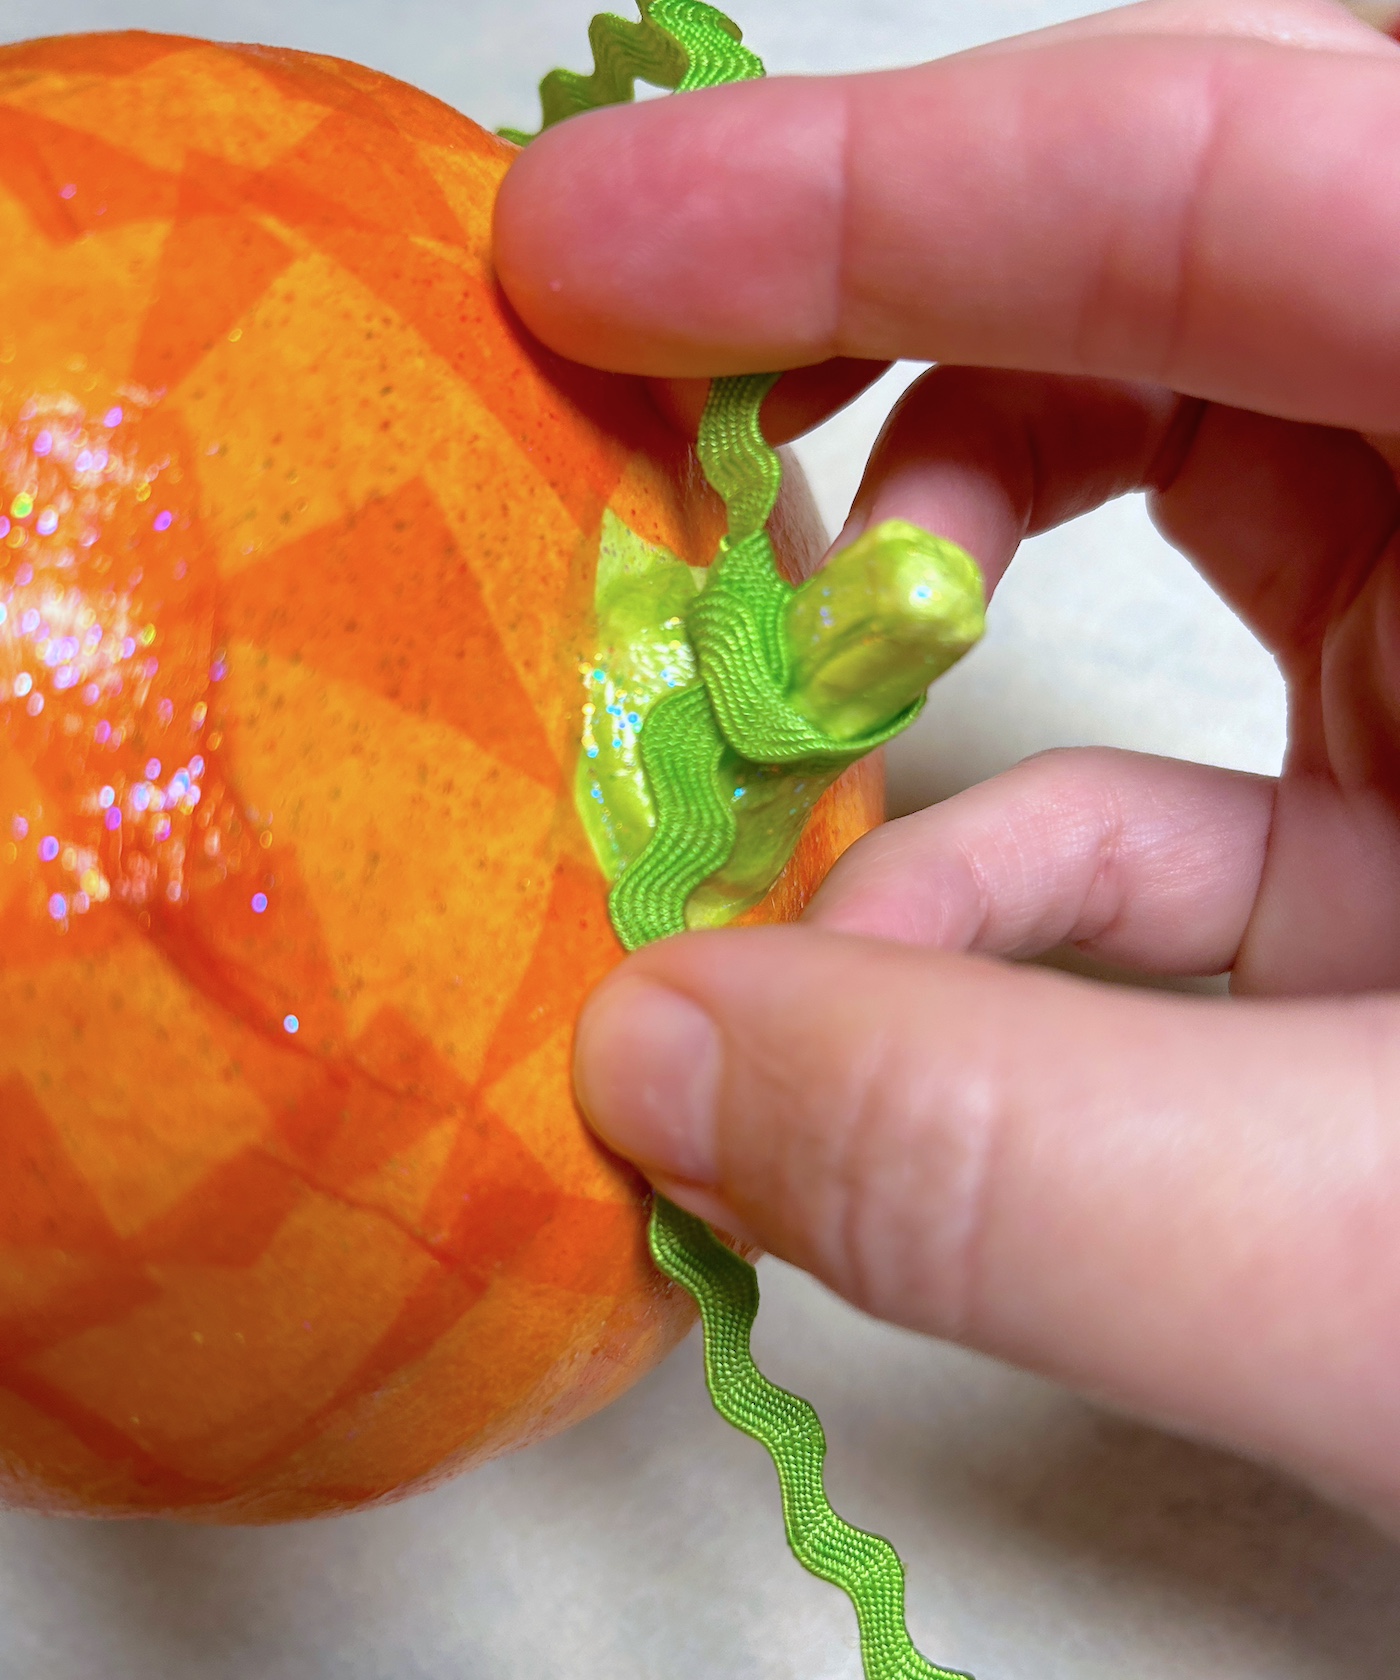
- Ric rac trim (or yarn, ribbon, etc)
- Scissors
- Paintbrushes
Tips and Thoughts for This Project
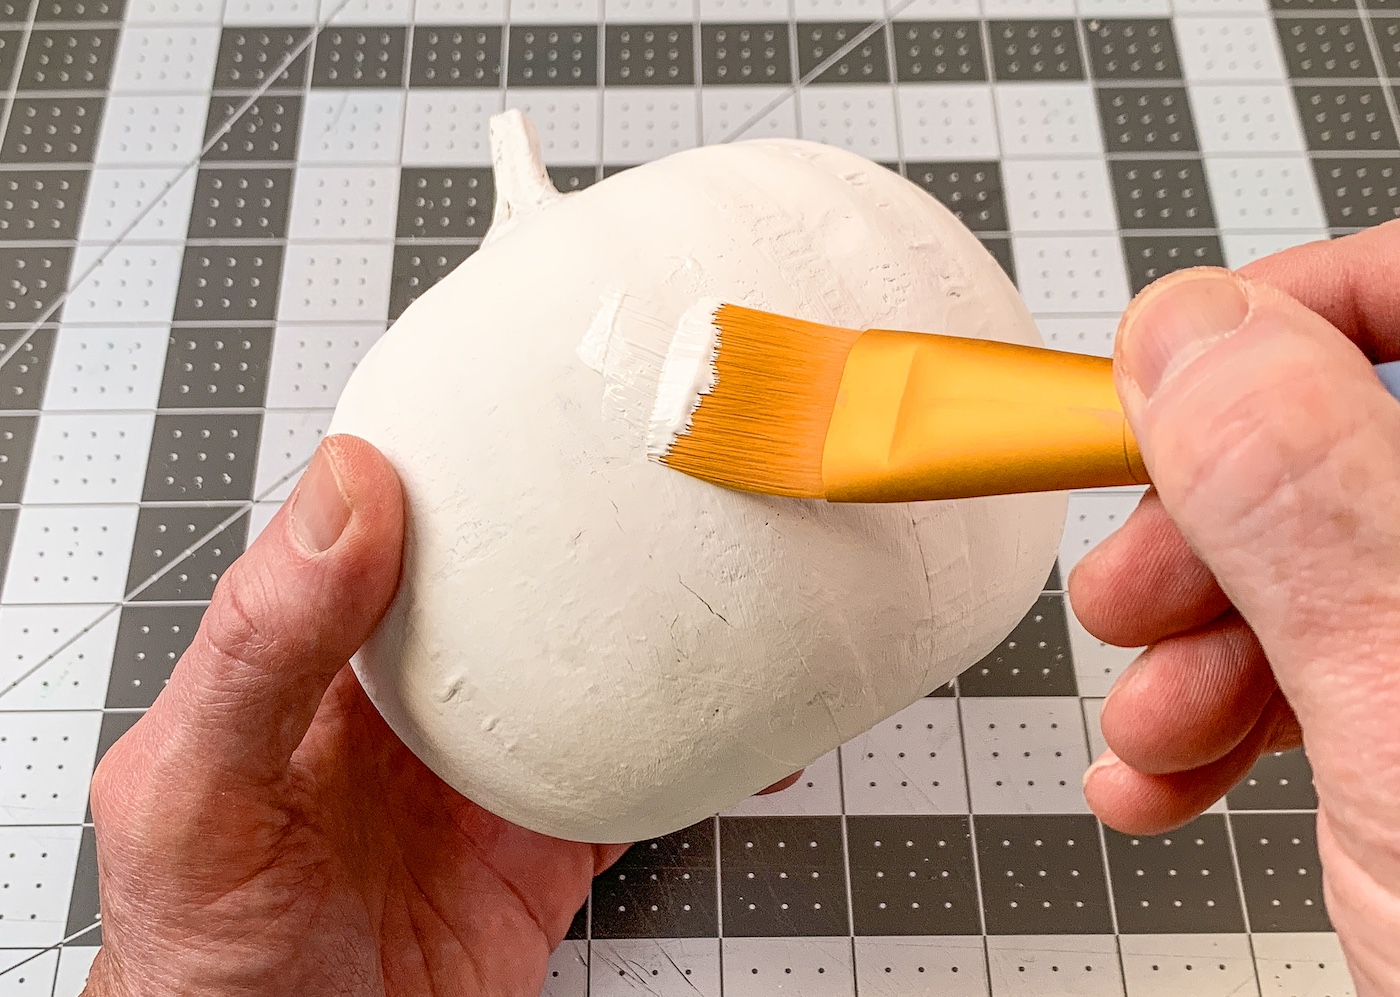
The reason I paint the pumpkins with white craft paint is so the tissue paper *pops* off the surface. If you just apply the tissue paper, the brown will show through and the colors will look dingy. If you’re using something thicker like fabric pieces, you might not need to basecoat with white.
I applied the tissue to the top half of the pumpkin first, let that dry, then did the bottom half (and let it dry (turned over).
You can use Sparkle Mod Podge to apply the tissue paper, but I always use my basic formulas for that. That’s simply to make my bottle of Sparkle Podge last longer.

Get the printable how to for this kids’ craft below:

Decorate Paper Craft Pumpkins
Equipment
Materials
- Paper craft or paper mache pumpkins
- Craft paint white
- Tissue paper orange and green
- Mod Podge any formula
- Mod Podge Sparkle
- Ric rac trim
Instructions
- Paint both pumpkins with white acrylic craft paint. Let dry completely.
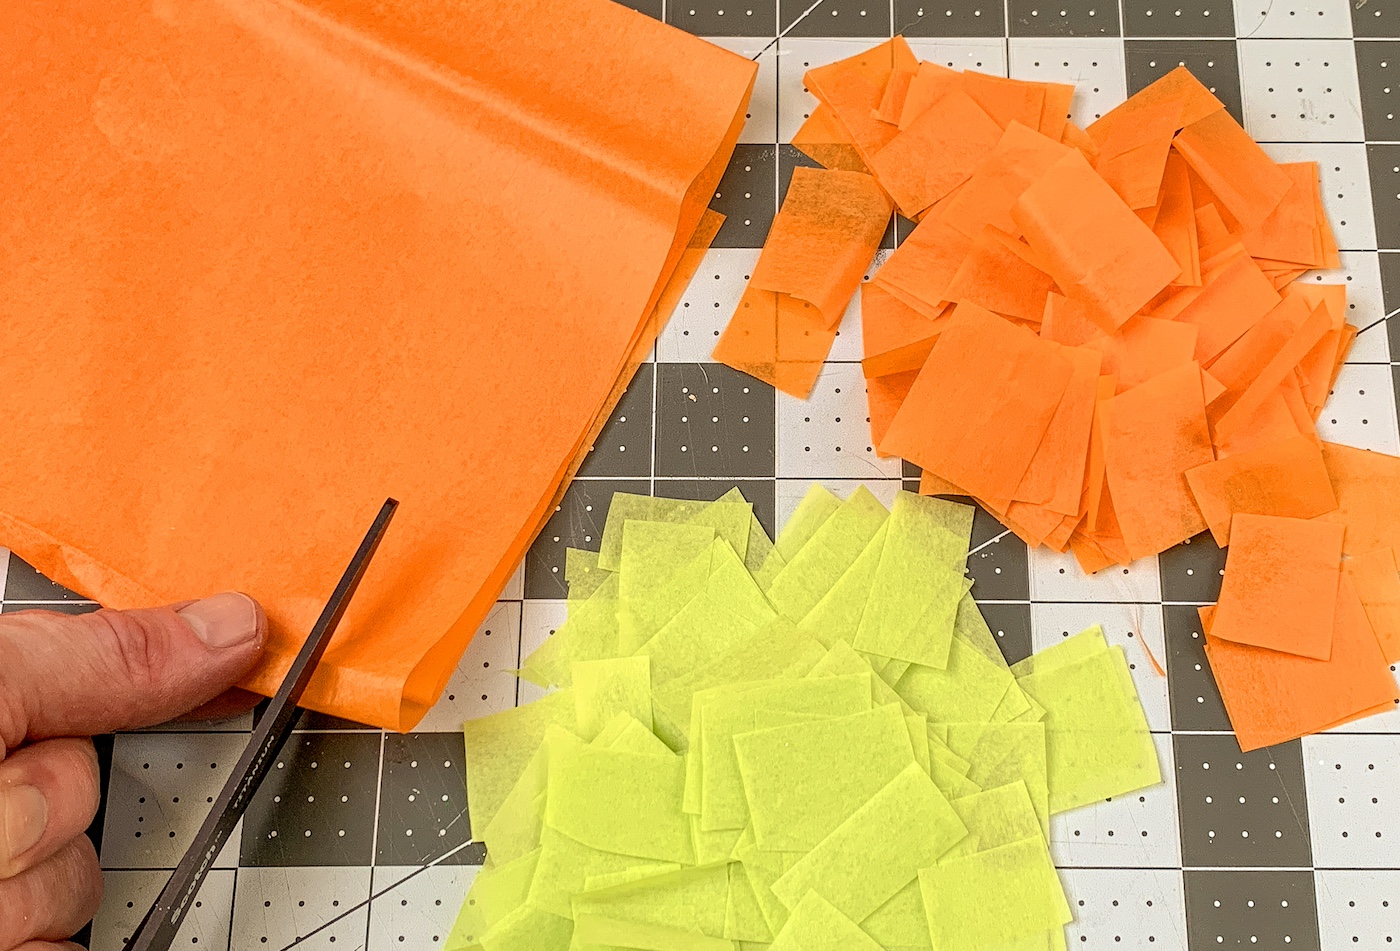
- While the paint is drying, cut the tissue paper into small squares and put into color piles for the kids.
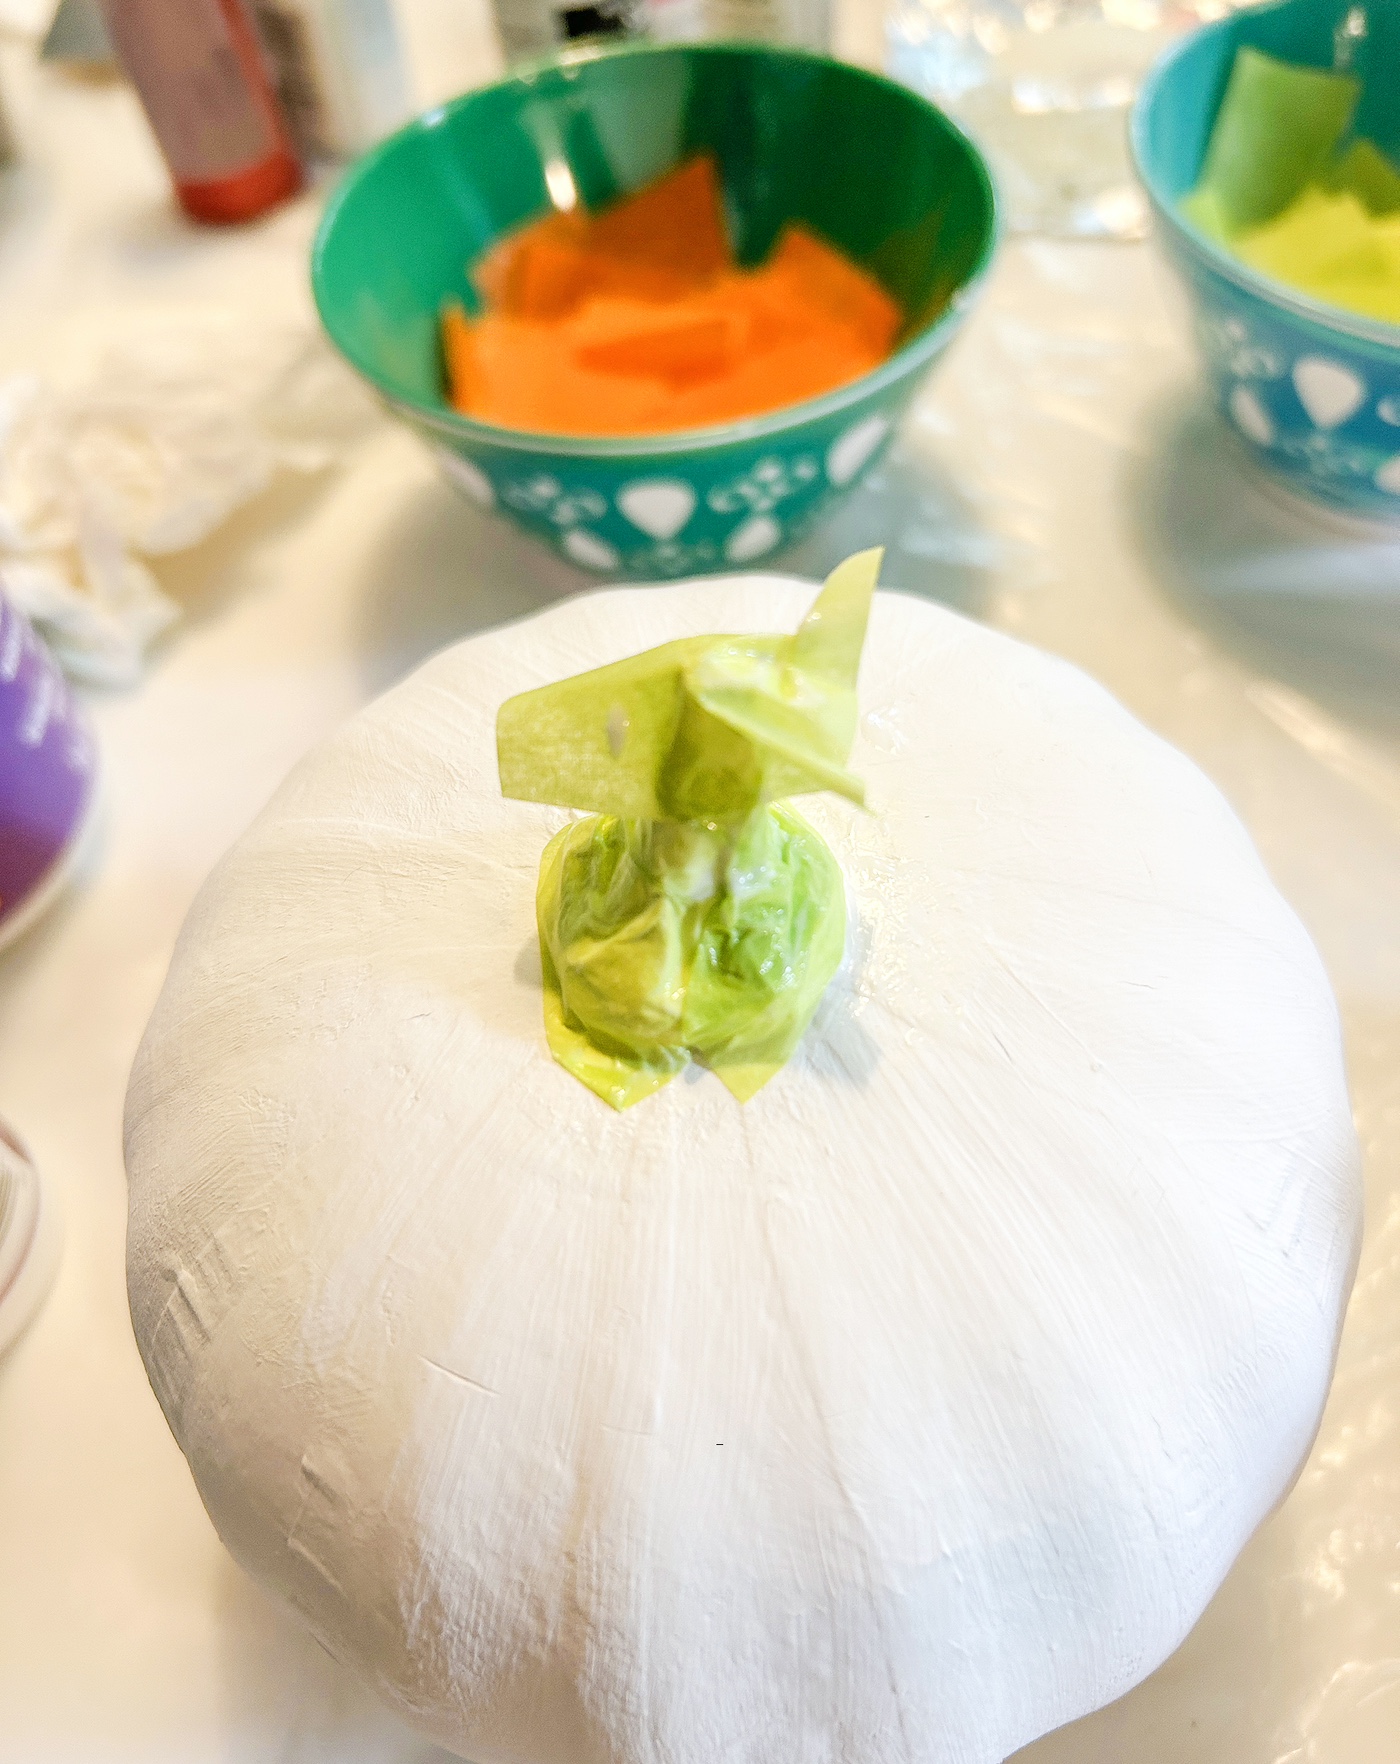
- Do the stem by applying Mod Podge down on the surface, then smoothing one pieces of green tissue paper over the top.
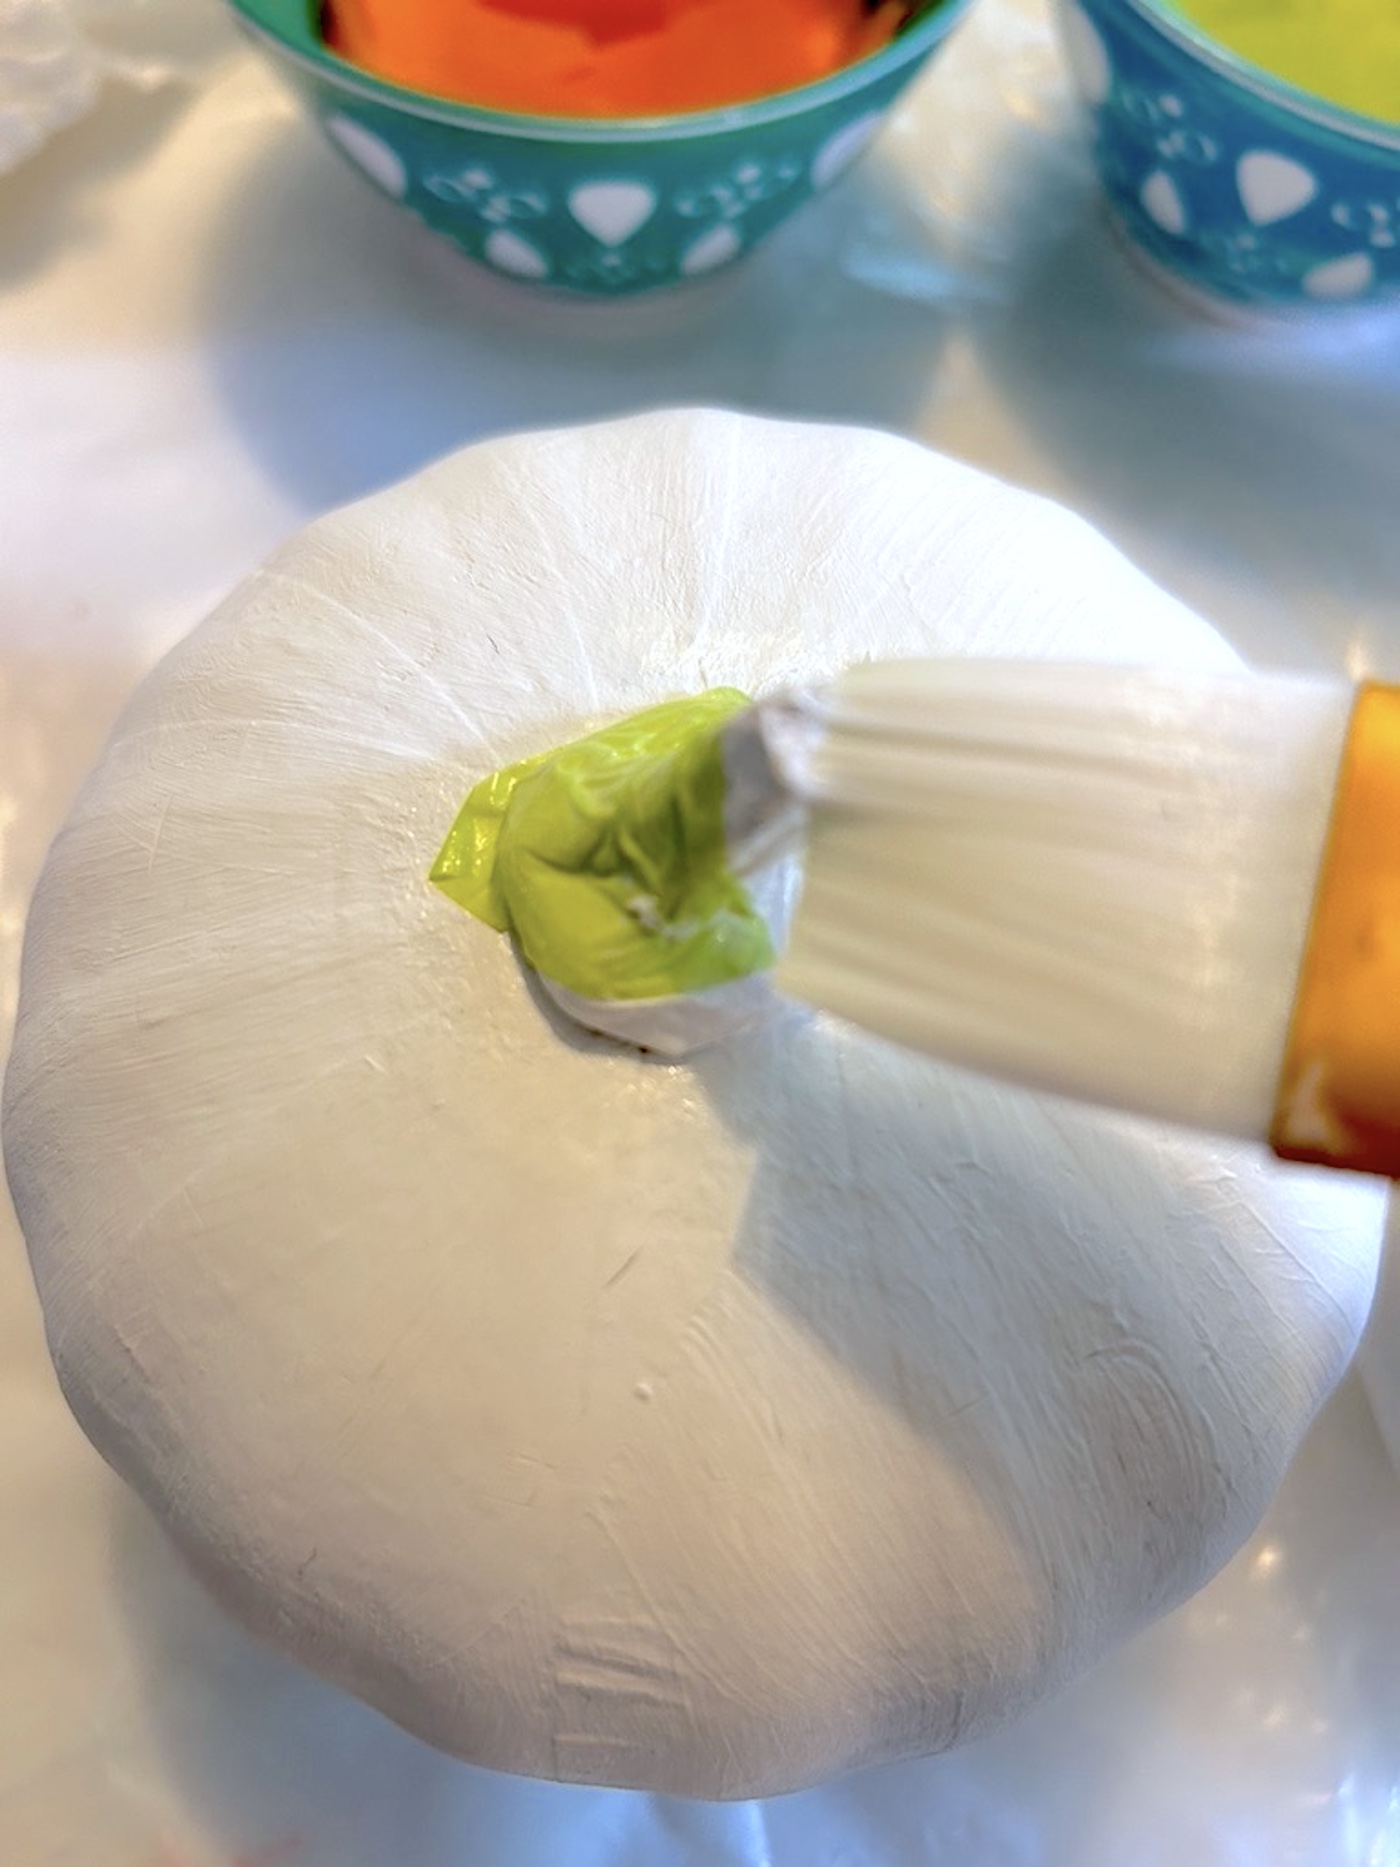
- Smooth down the tissue paper around the stem with the brush, adding more squares as needed until covered. Let dry.
- Apply Mod Podge to a small section of the pumpkin and place a piece of orange tissue paper down. You don't need that much Mod Podge. Brush over the top to smooth. Continue adding squares to cover the pumpkin, working on section at a time. Let dry.
- Apply a coat of Sparkle Mod Podge over the top of the entire pumpkin and let dry. Add more for more glitter if desired.
- To finish, cut a piece of ric rac or ribbon and tie onto the pumpkin stem.
If you enjoyed this craft, let me know in the comments! I’d also love for you to check out these other holiday posts: