
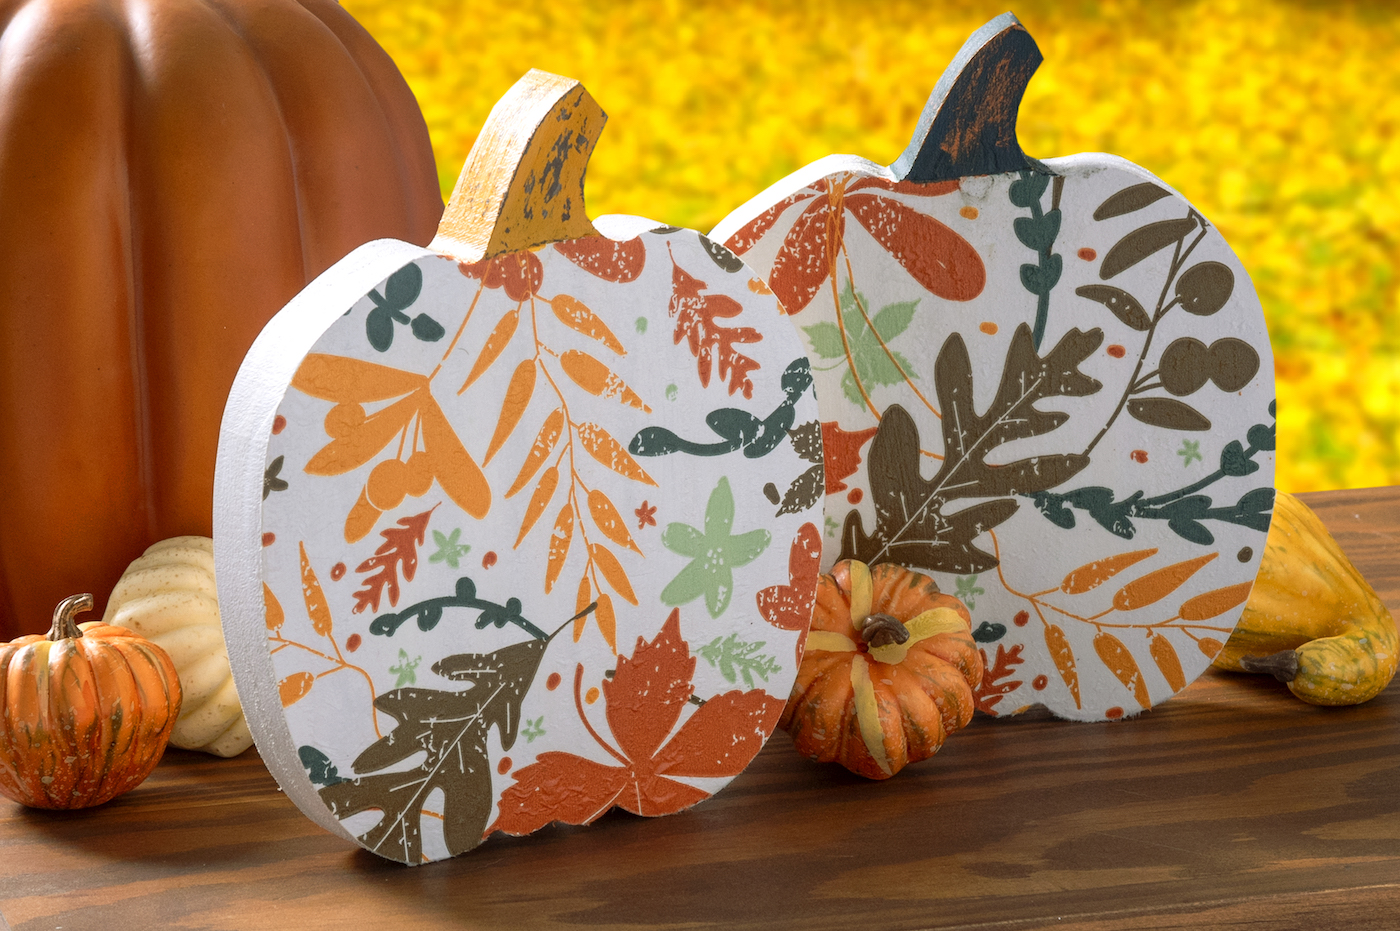
Learn how to make this wood pumpkin craft using pumpkin shapes, paint, and fall napkins! This is a perfect decorating idea for beginners.
Skills Required: Intermediate. You should have experience with Mod Podge since wrinkles are a risk with napkins (and other thin papers). You might want to attempt decoupaging a napkin on a test wood surface (like a $1 plaque) first if you’ve never done it before.
There I was, just minding my own business, when I spotted the cutest wood cutouts at Target in the craft section. PUMPKINS! Who doesn’t love pumpkins? I love decorating pumpkins. I love painting pumpkins. I mean, I love any fall crafts.
Anyone who knows me knows that.
But with this particular wood surface, I already had something in mind. I had some fall napkins in my stash that I definitely wanted to use, and so I decided that some pumpkin decor was in order. And that’s how this project began!
If you’ve never decoupaged napkins before, you’re going to like this project. You’ll use the iron on method of decoupage, which is pretty fun.
The great thing about napkins is that they have a design printed on them that almost becomes part of the surface of the wood when applied.
It’s a very unique look, and you’ll see when you make this. Very different than scrapbook paper! I’m just warning you, you might get hooked. Learn how to make these cute pumpkins for your fall decor below.
Easy Painted Wood Pumpkins
Gather These Supplies
- Wood pumpkin cutouts
- Fall napkins
- Mod Podge Gloss
- Craft paint – colors to match your napkins, plus white
- Paintbrush
- Craft knife and mat
- Sandpaper (optional)
- Candle or piece of wax
- Parchment paper
- Mini iron or heat press
- Scissors
A few notes about this project before we get started:
- I got these wood pumpkin cutouts from Target, but you can get them at craft stores or Dollar Tree during the holiday season, as well as online.
- I used Mod Podge Gloss but you can use Matte, Satin, or another basic formula.
- You can use chalk paint instead of craft paint for this project. You should use a light or white background if you want your napkin to pop.
- Your home iron will work for this project, but I recommend getting an iron just for crafts. Use medium heat and no steam.
Prep the Surface
If your wood shape has any rough edges, you can remove them with the sandpaper if you like. You can also keep them rough if you’re going for a more rustic look. Remove the price tag too!
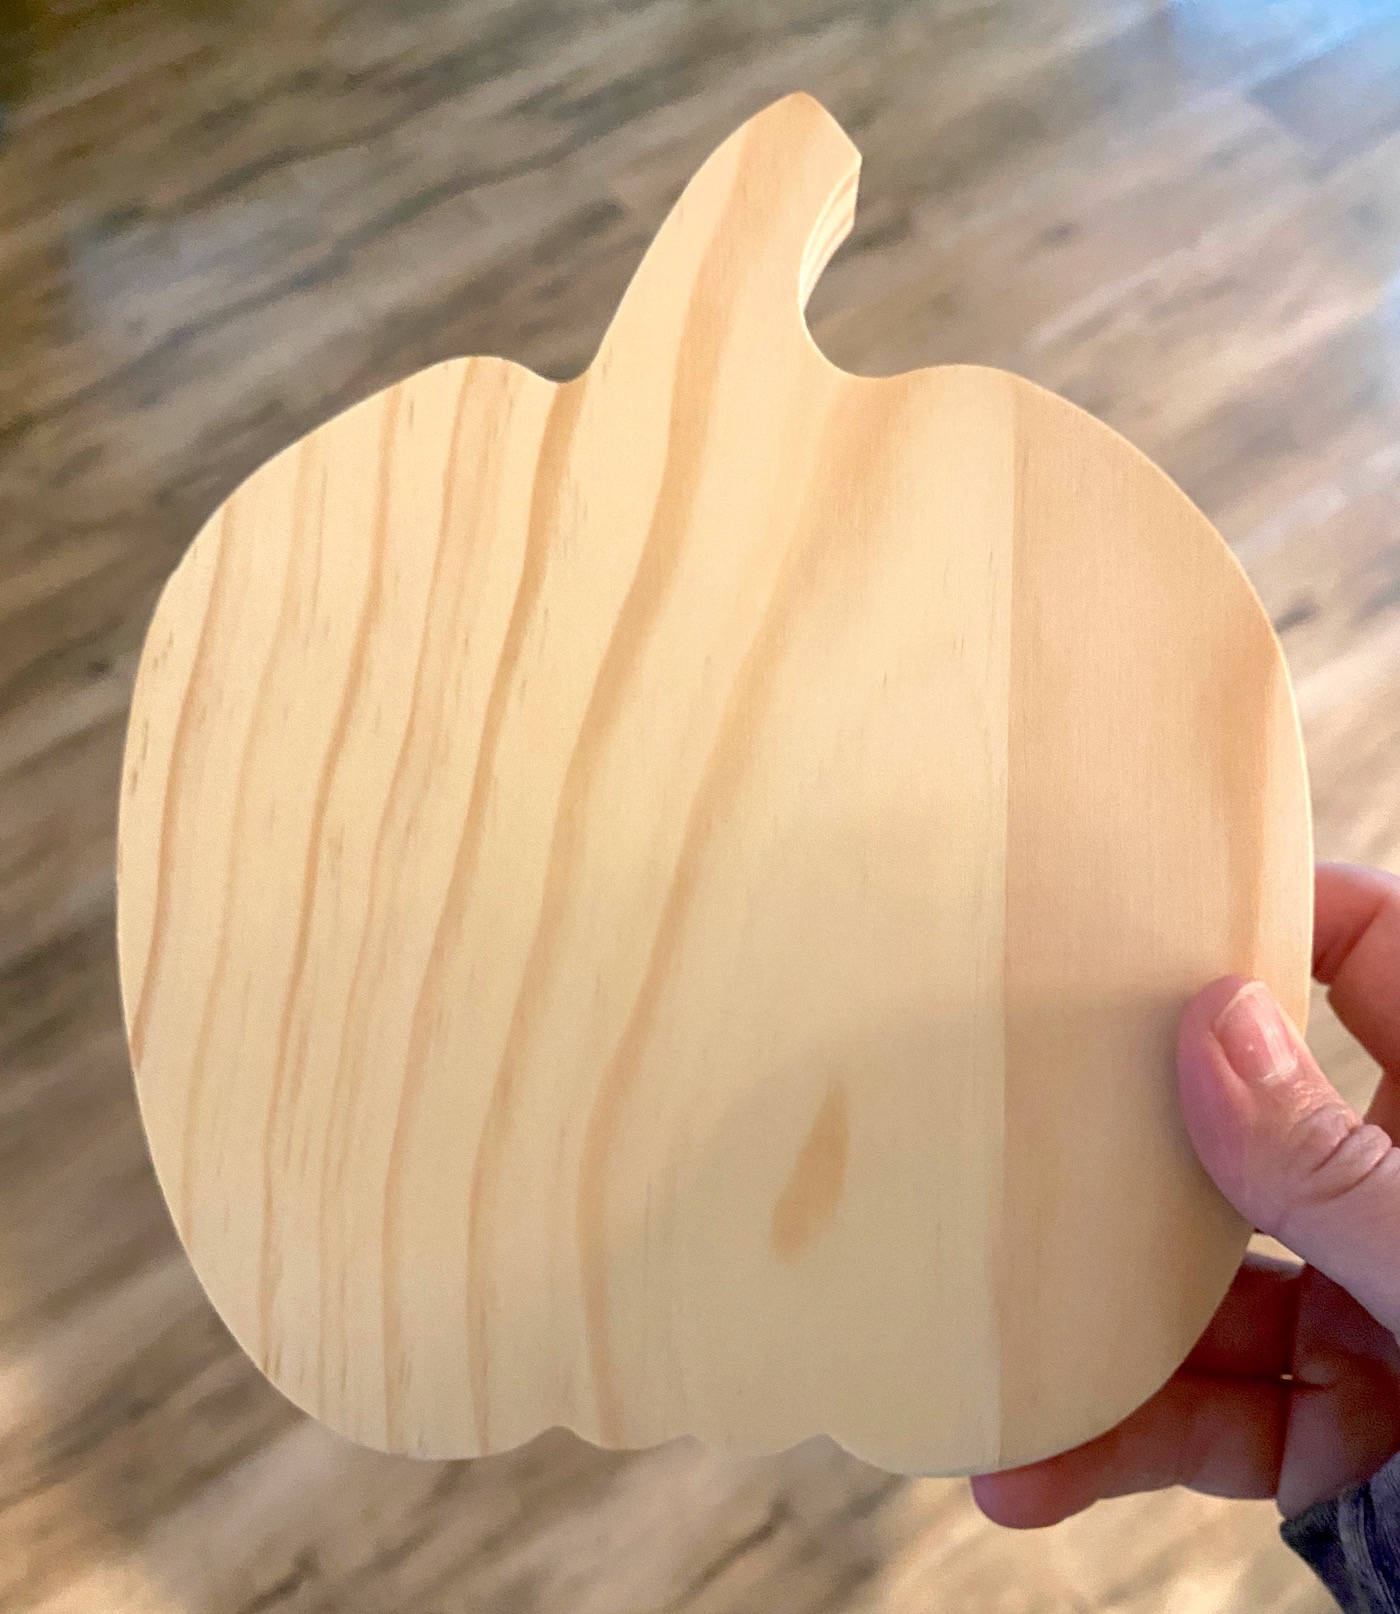
Isn’t my pumpkin cut out cute? Make sure that when you look for cut outs, you look for “chunky” or “standing” so that they will stand on their own. Regular wood cutouts are very thin.
Paint the Wood
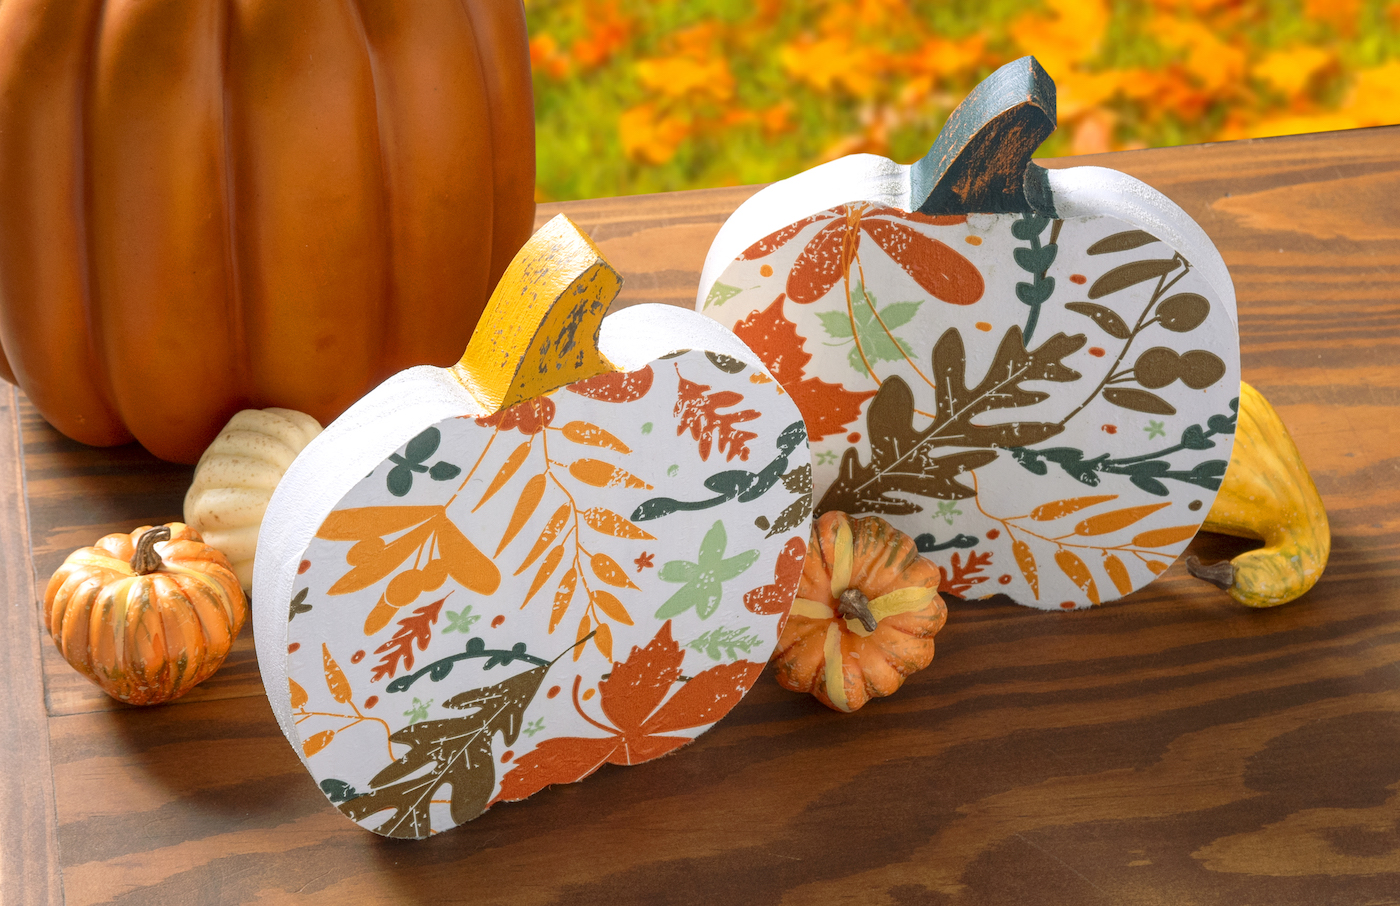
Paint the entire pumpkin with white paint. This includes the front, back, and sides. Give the wood several coats, letting dry between coats. I painted two pumpkins for my decor (they look great in a set).
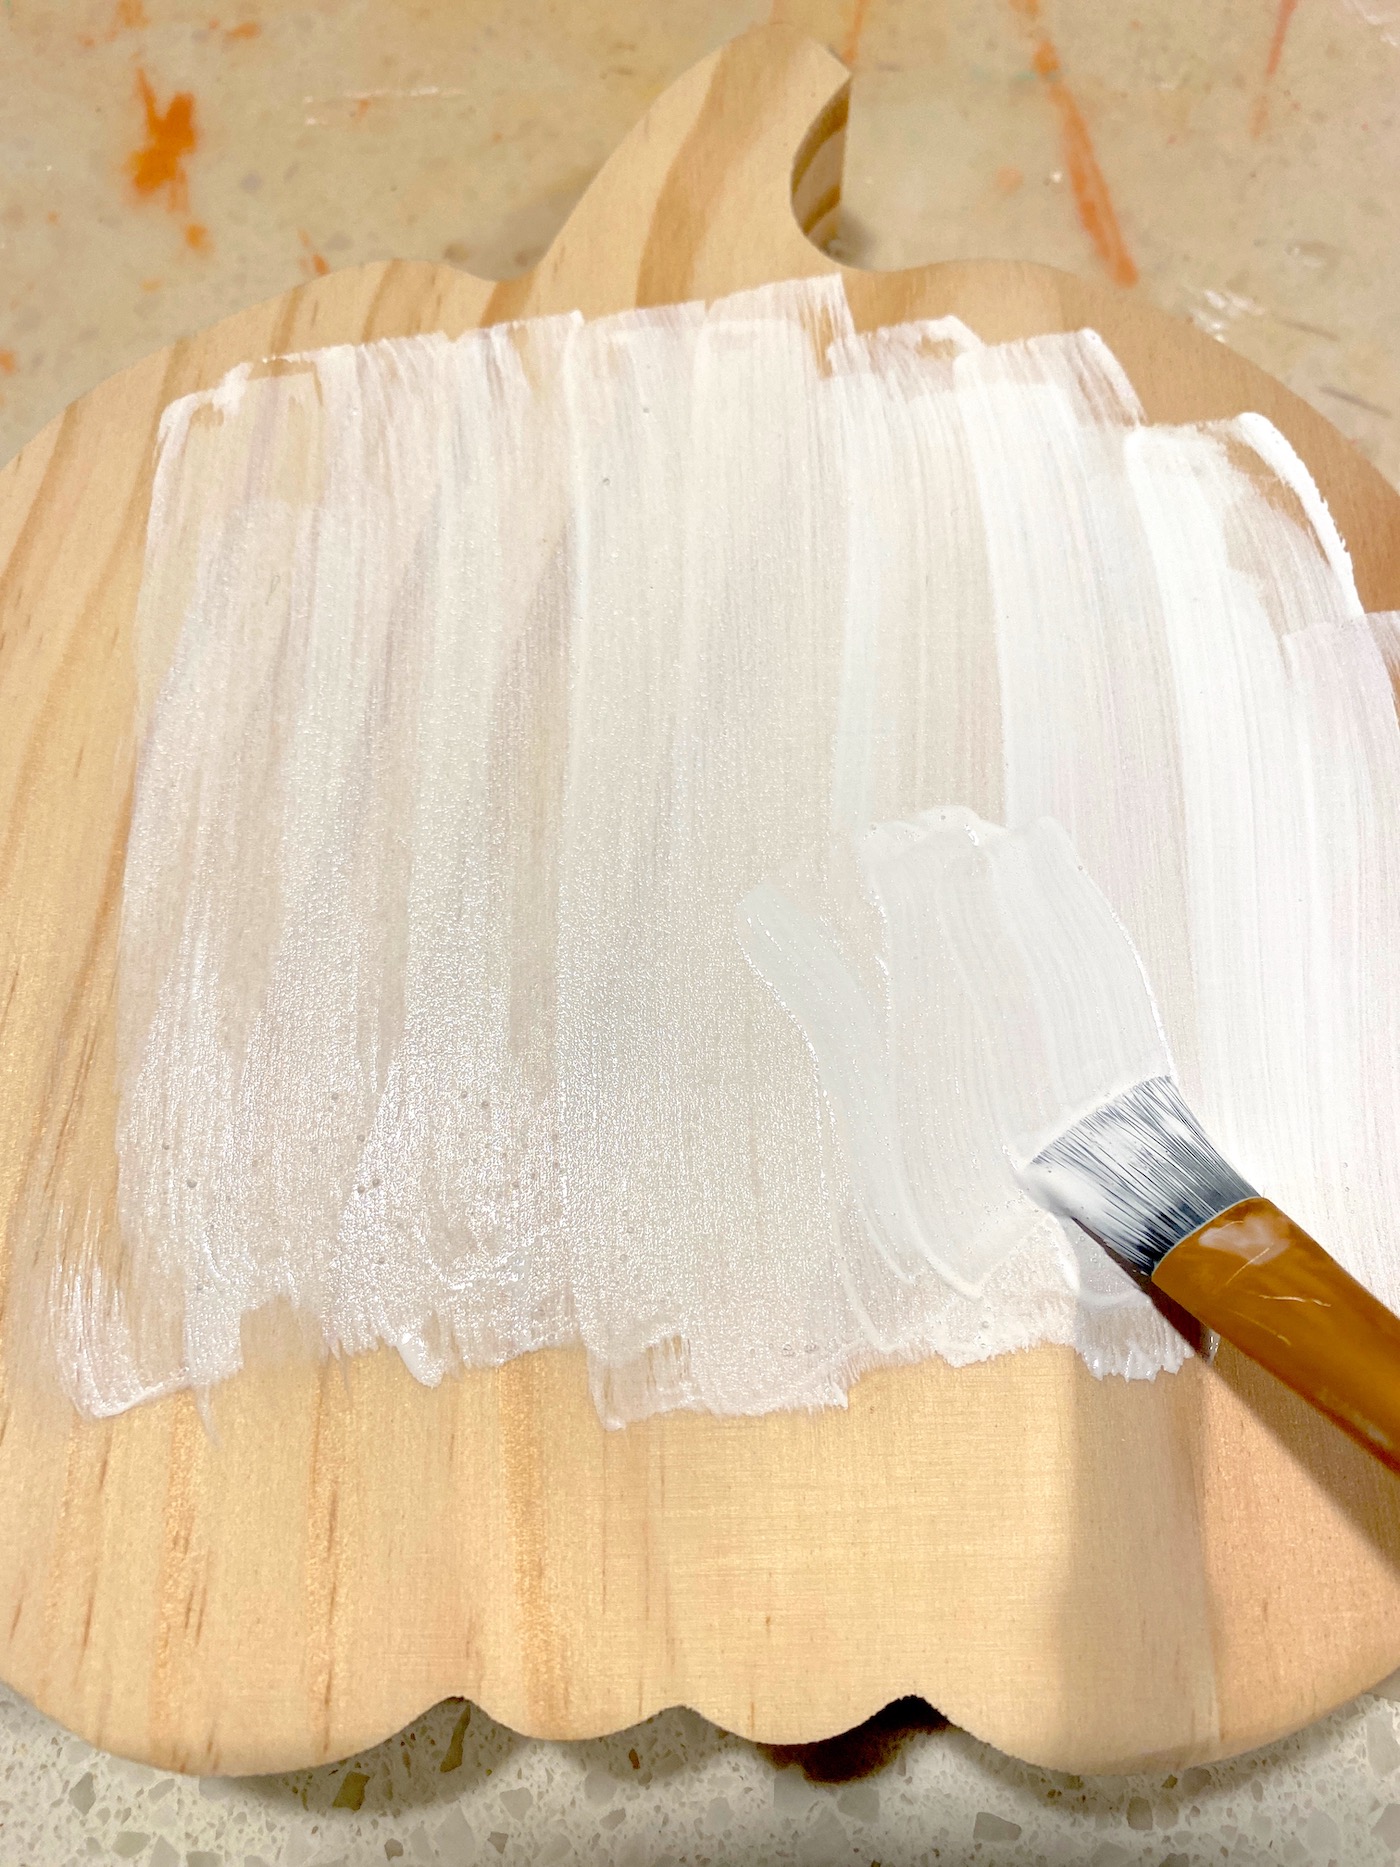
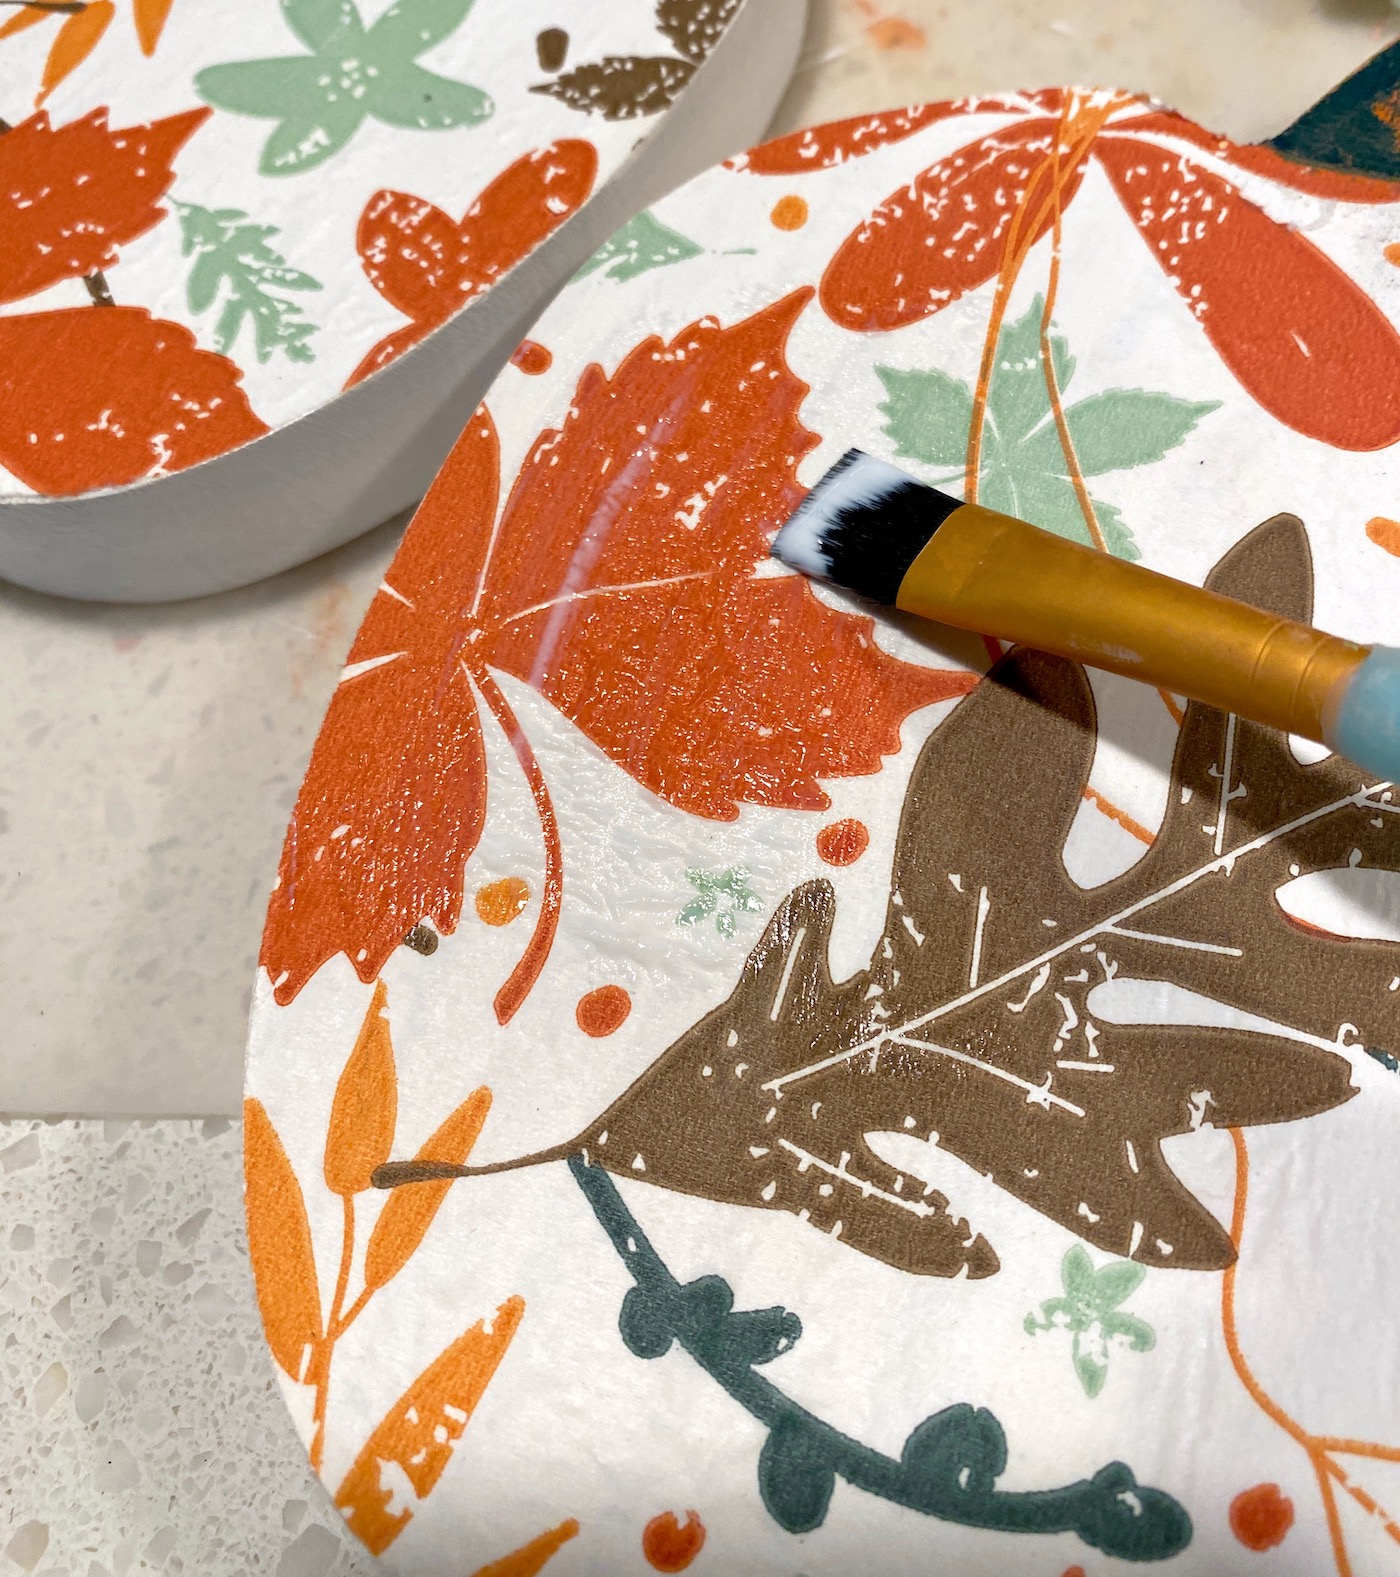
Once the paint has dried, paint two coats of Mod Podge over the front of the pumpkins. You will paint a coat, making sure to get the edges, and let dry.
Then you’ll paint a second coat and let dry. Avoid the stem. The Mod Podge will dry completely clear.

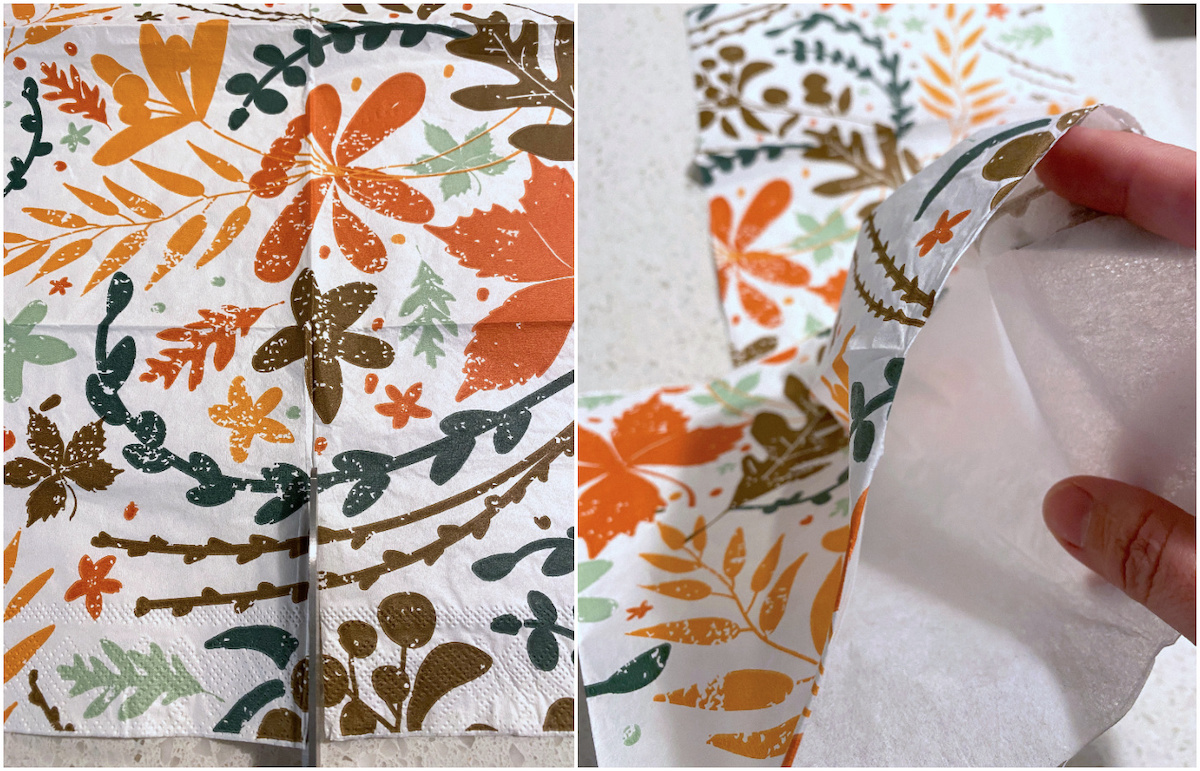
Separate the Napkin
While the Mod Podge is drying, separate the napkin layers. The reason you’re going to do this is because napkins are made of 2-3 layers typically, and you just want the top layer with the design.
If you use the napkin without separating it, it will wrinkle badly because the layers will glue down independently of each other.
Cut the napkin slightly larger than the wood shape, and gently rub the layers together to separate. You can also use a piece of Scotch tape in one corner on the white portion and pull.
Place the Napkin and Iron
The wood piece should be on your work surface with the Mod Podge side up. Place the napkin down on the pumpkin and situate it the way you like. Turn your mini craft iron up to the top level (level three). If you use a real iron, go to medium heat with no steam.
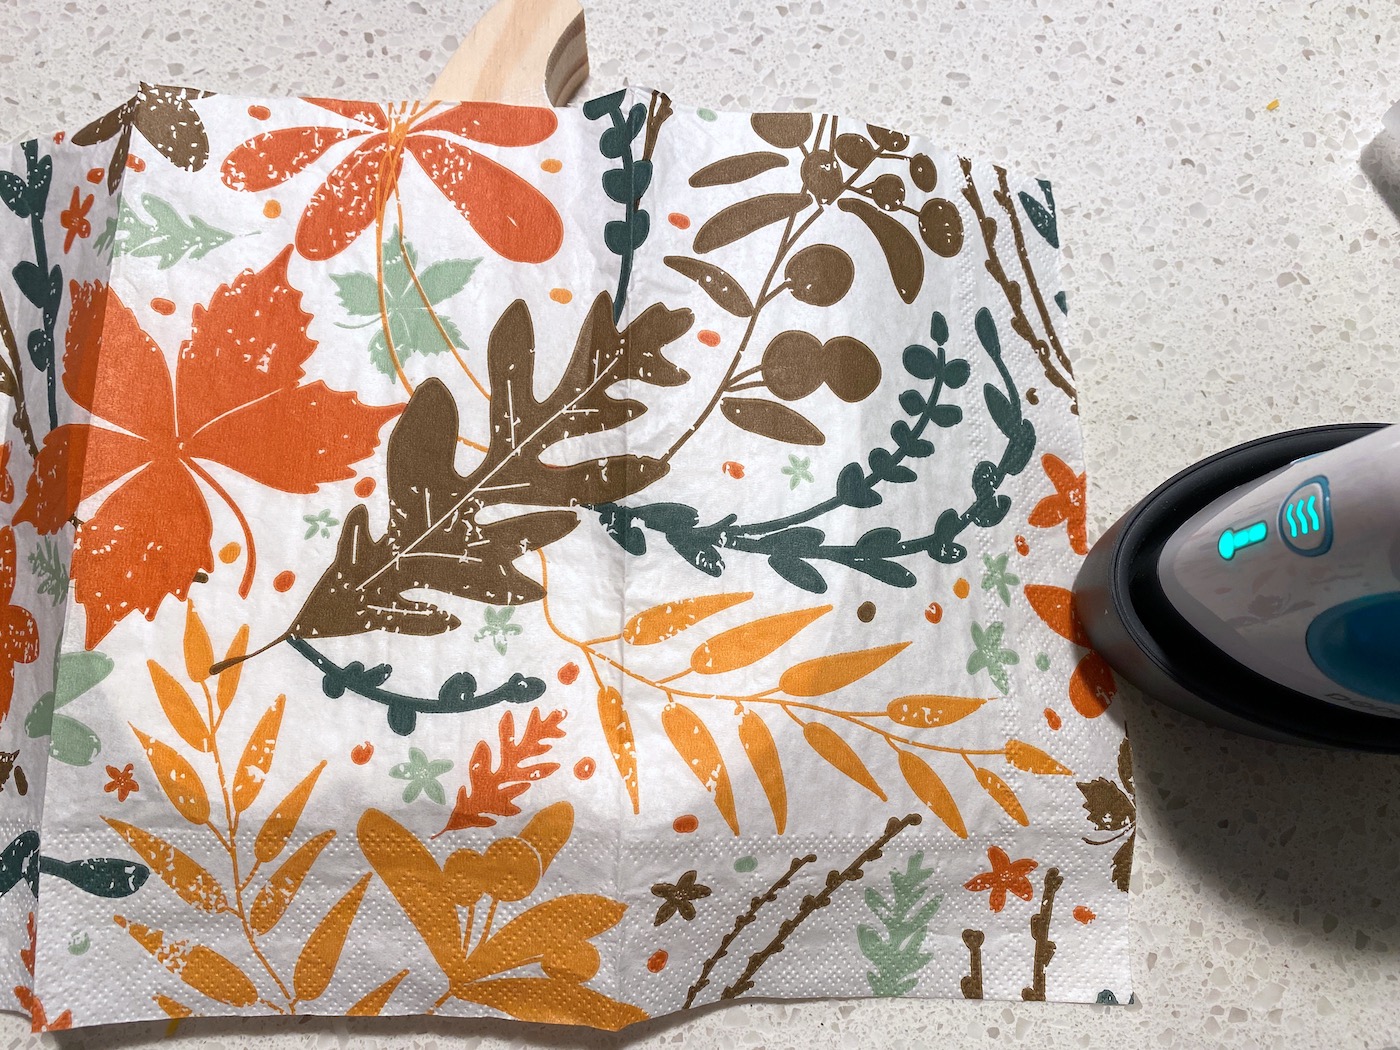
Place a piece of parchment paper on top of the napkin, and run the craft iron across the top several times. While you are doing this, the Mod Podge is melting below the napkin, and the napkin is adhering.
Keep going until the napkin is fully adhered to the surface. It should just take a minute or two on a surface this small. Lift up and check under the parchment paper to see if you missed any spots.
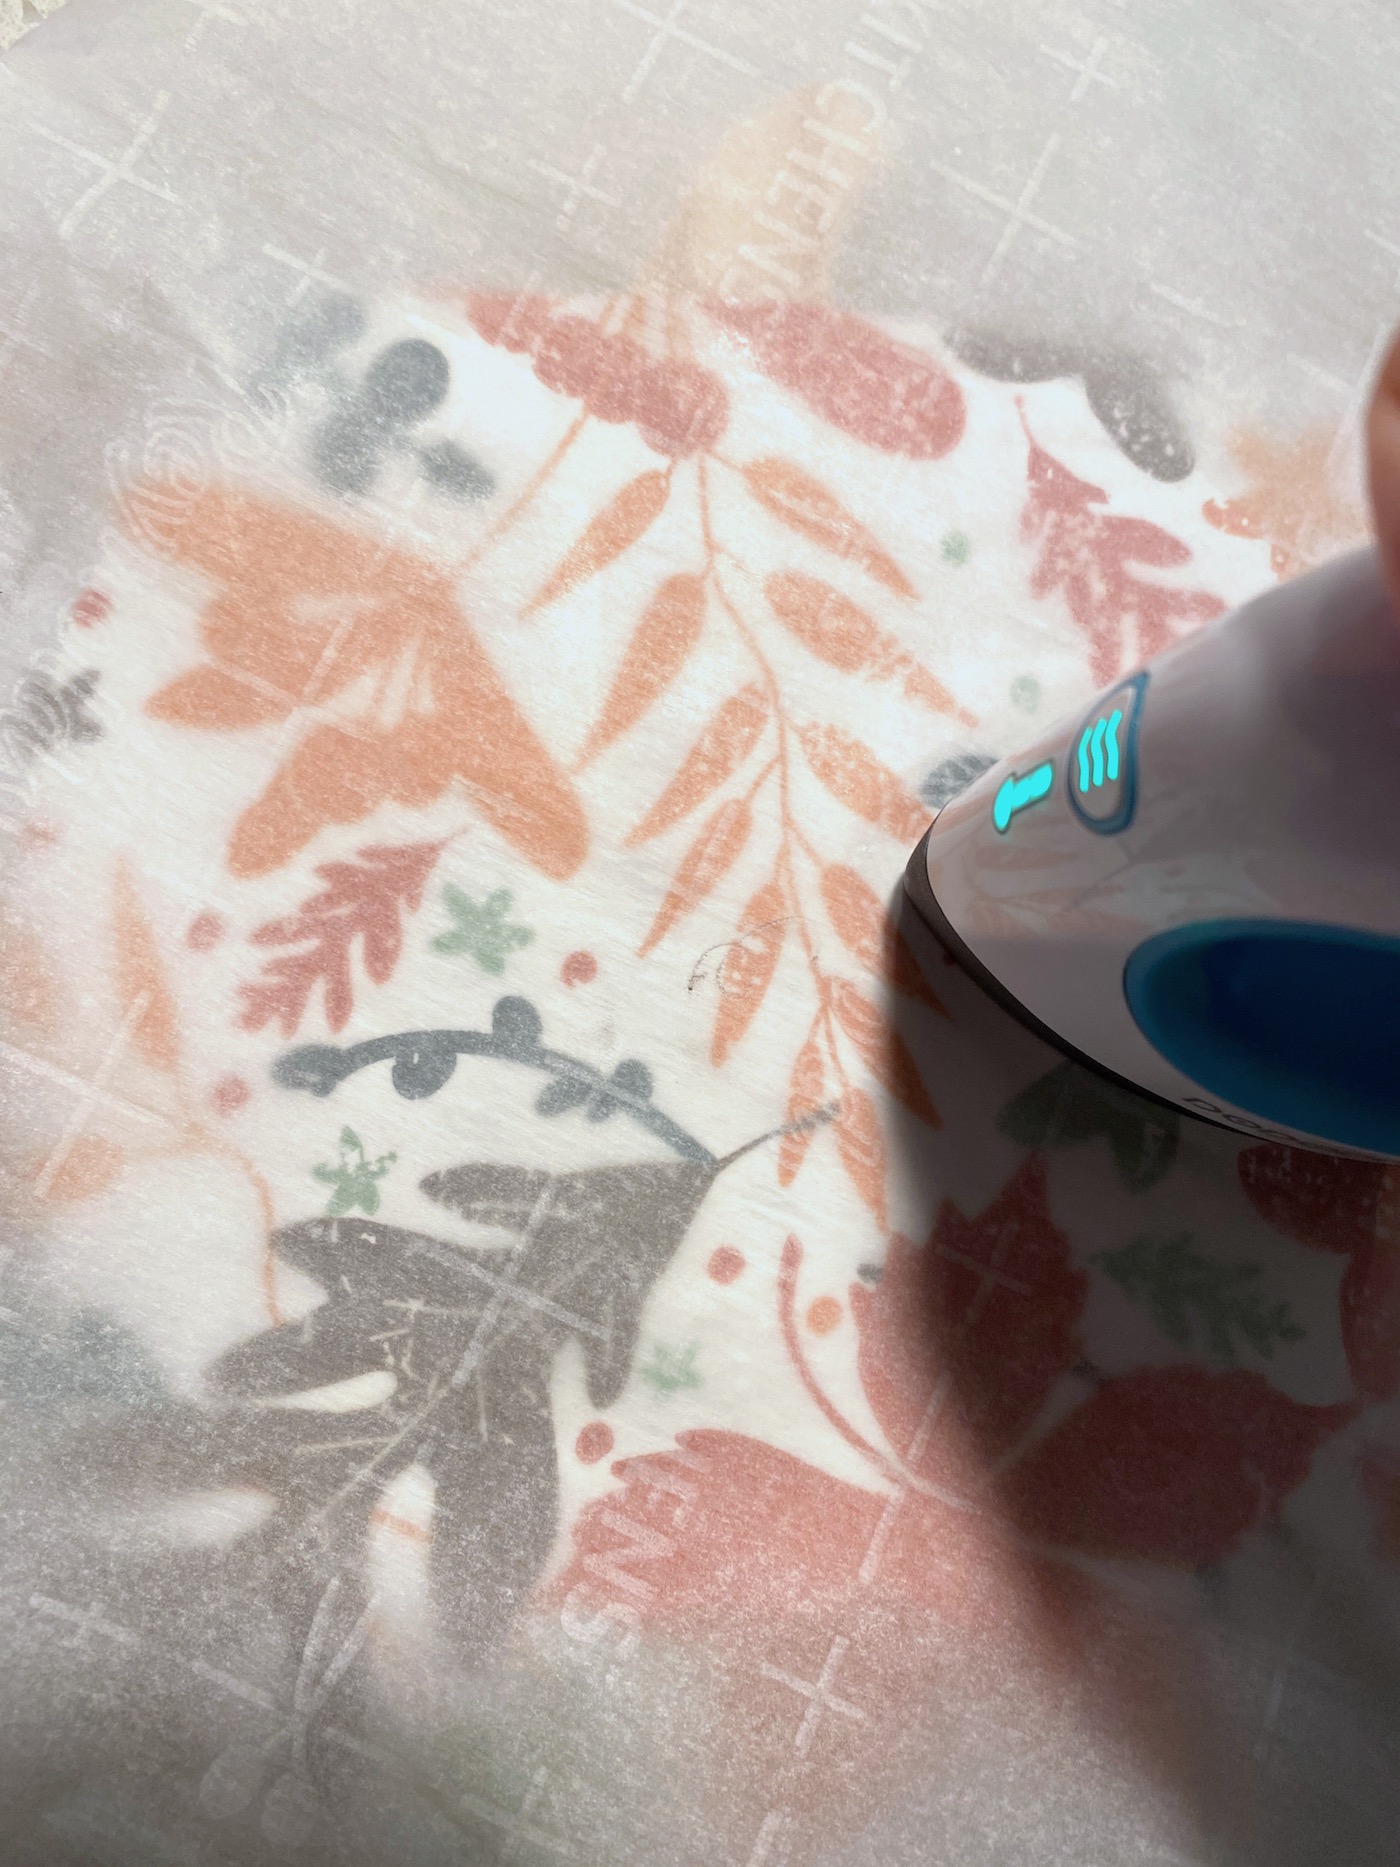
Once you’re done, remove the parchment paper and let cool. It should be pretty smooth.
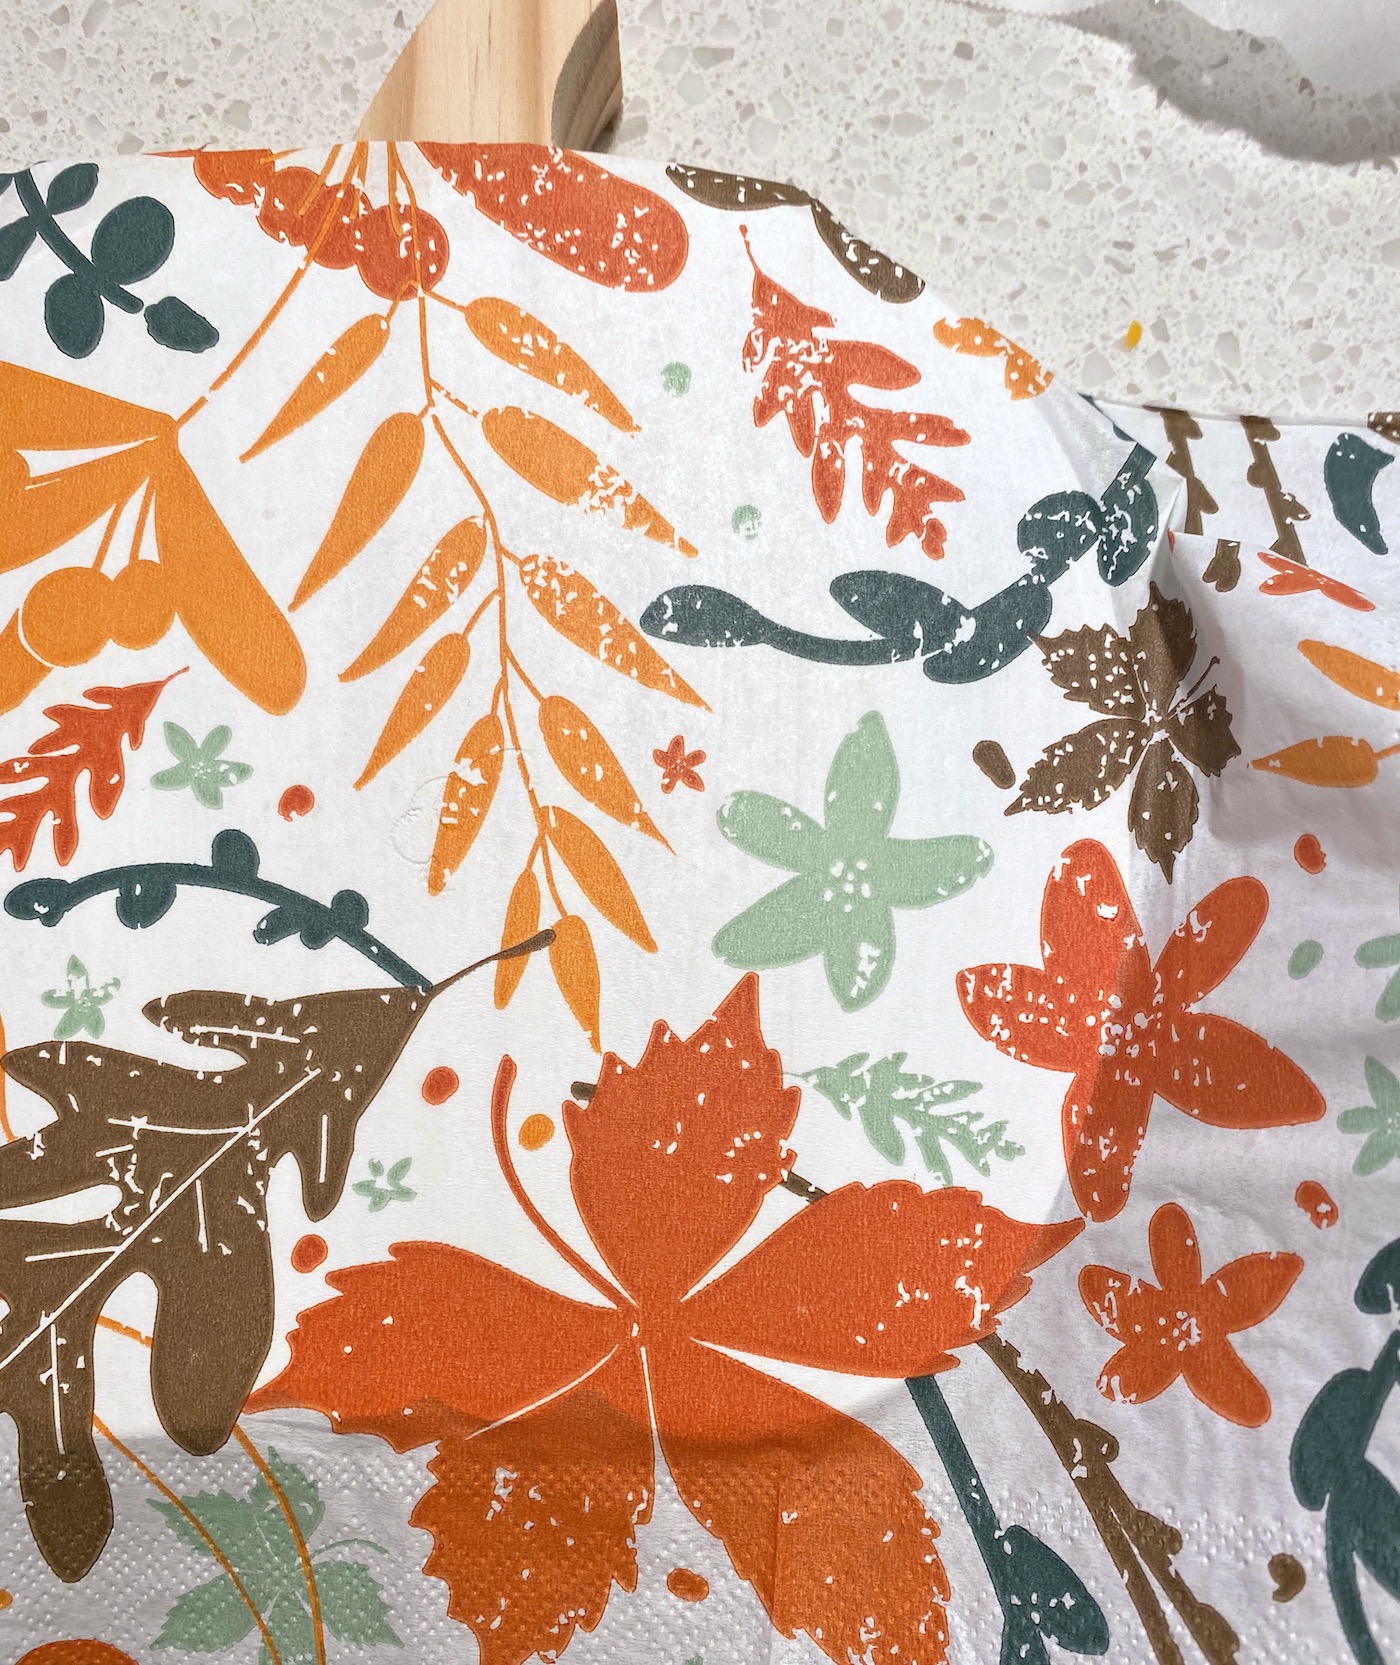
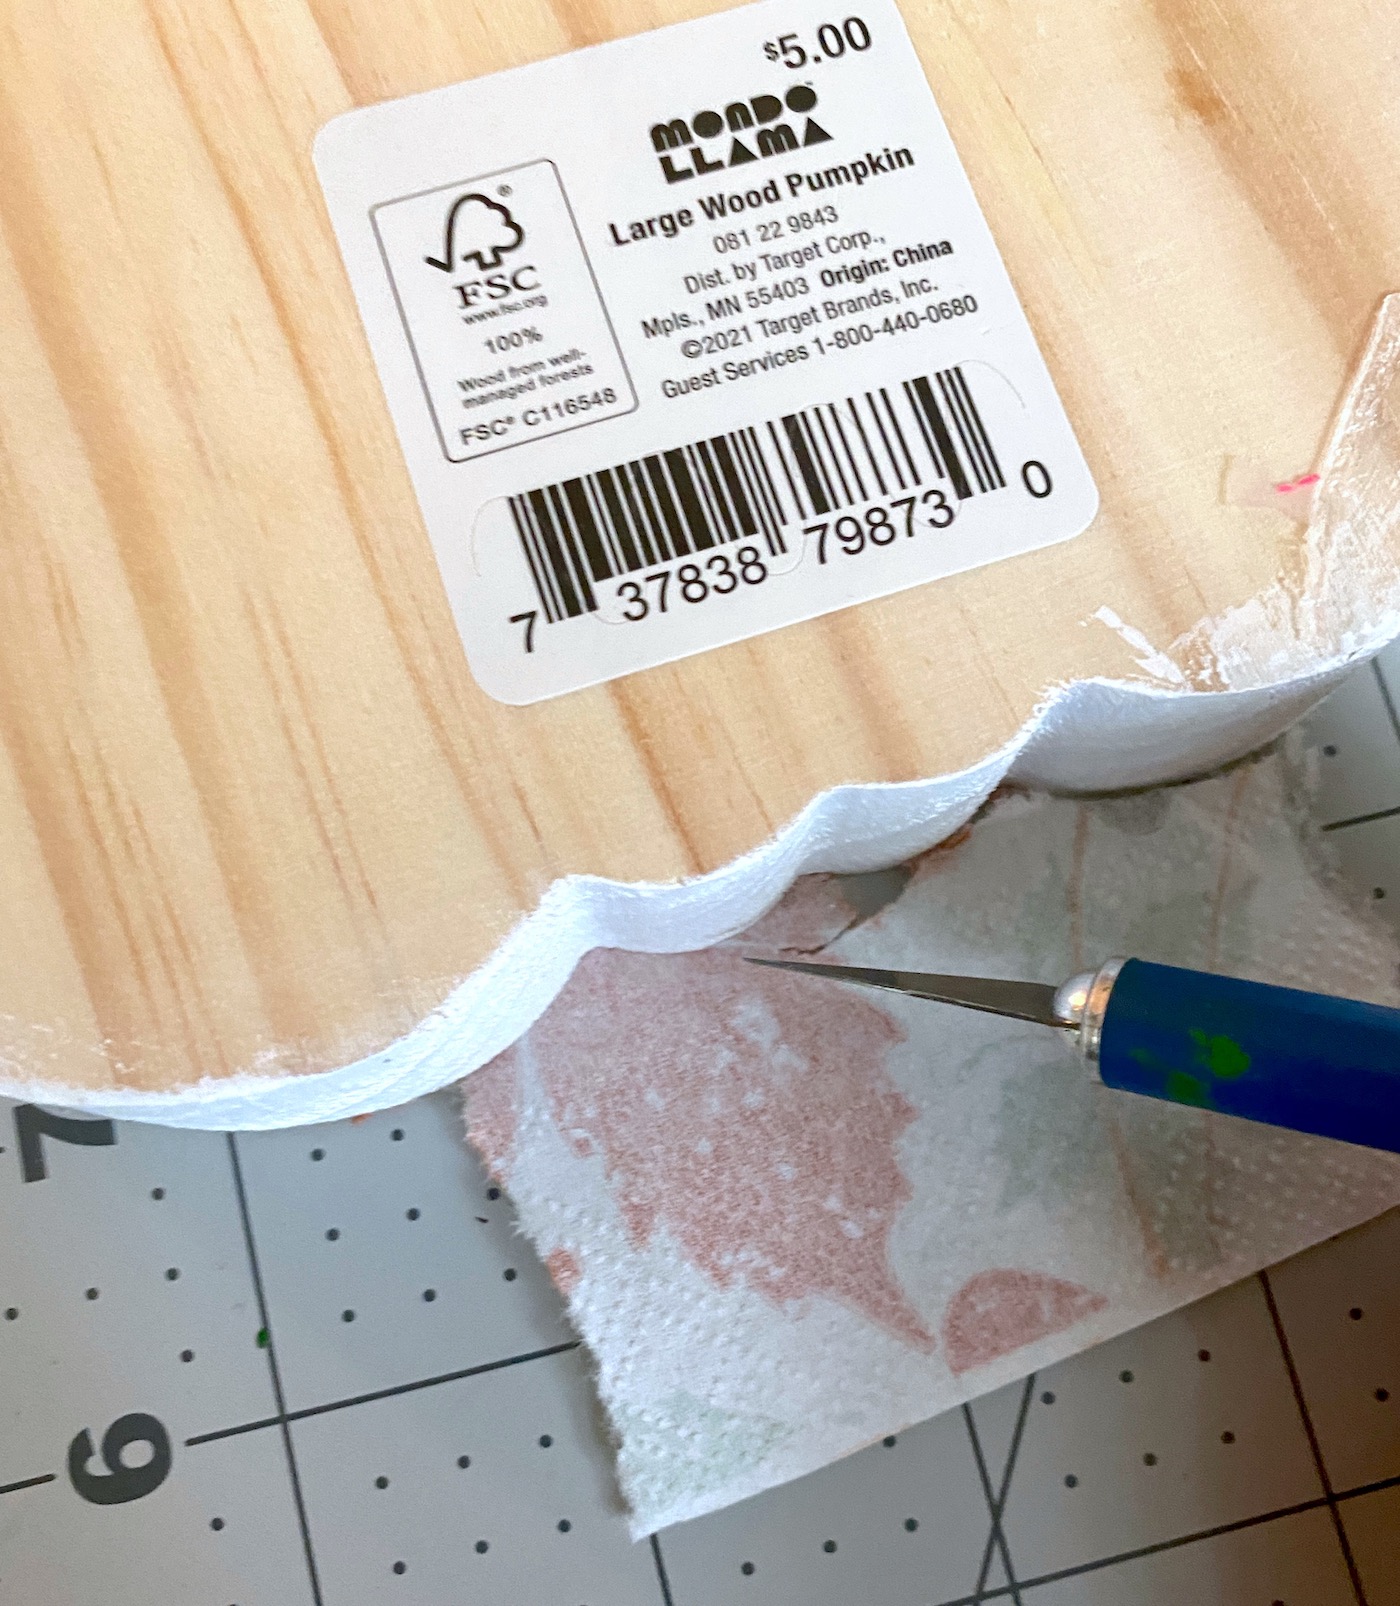
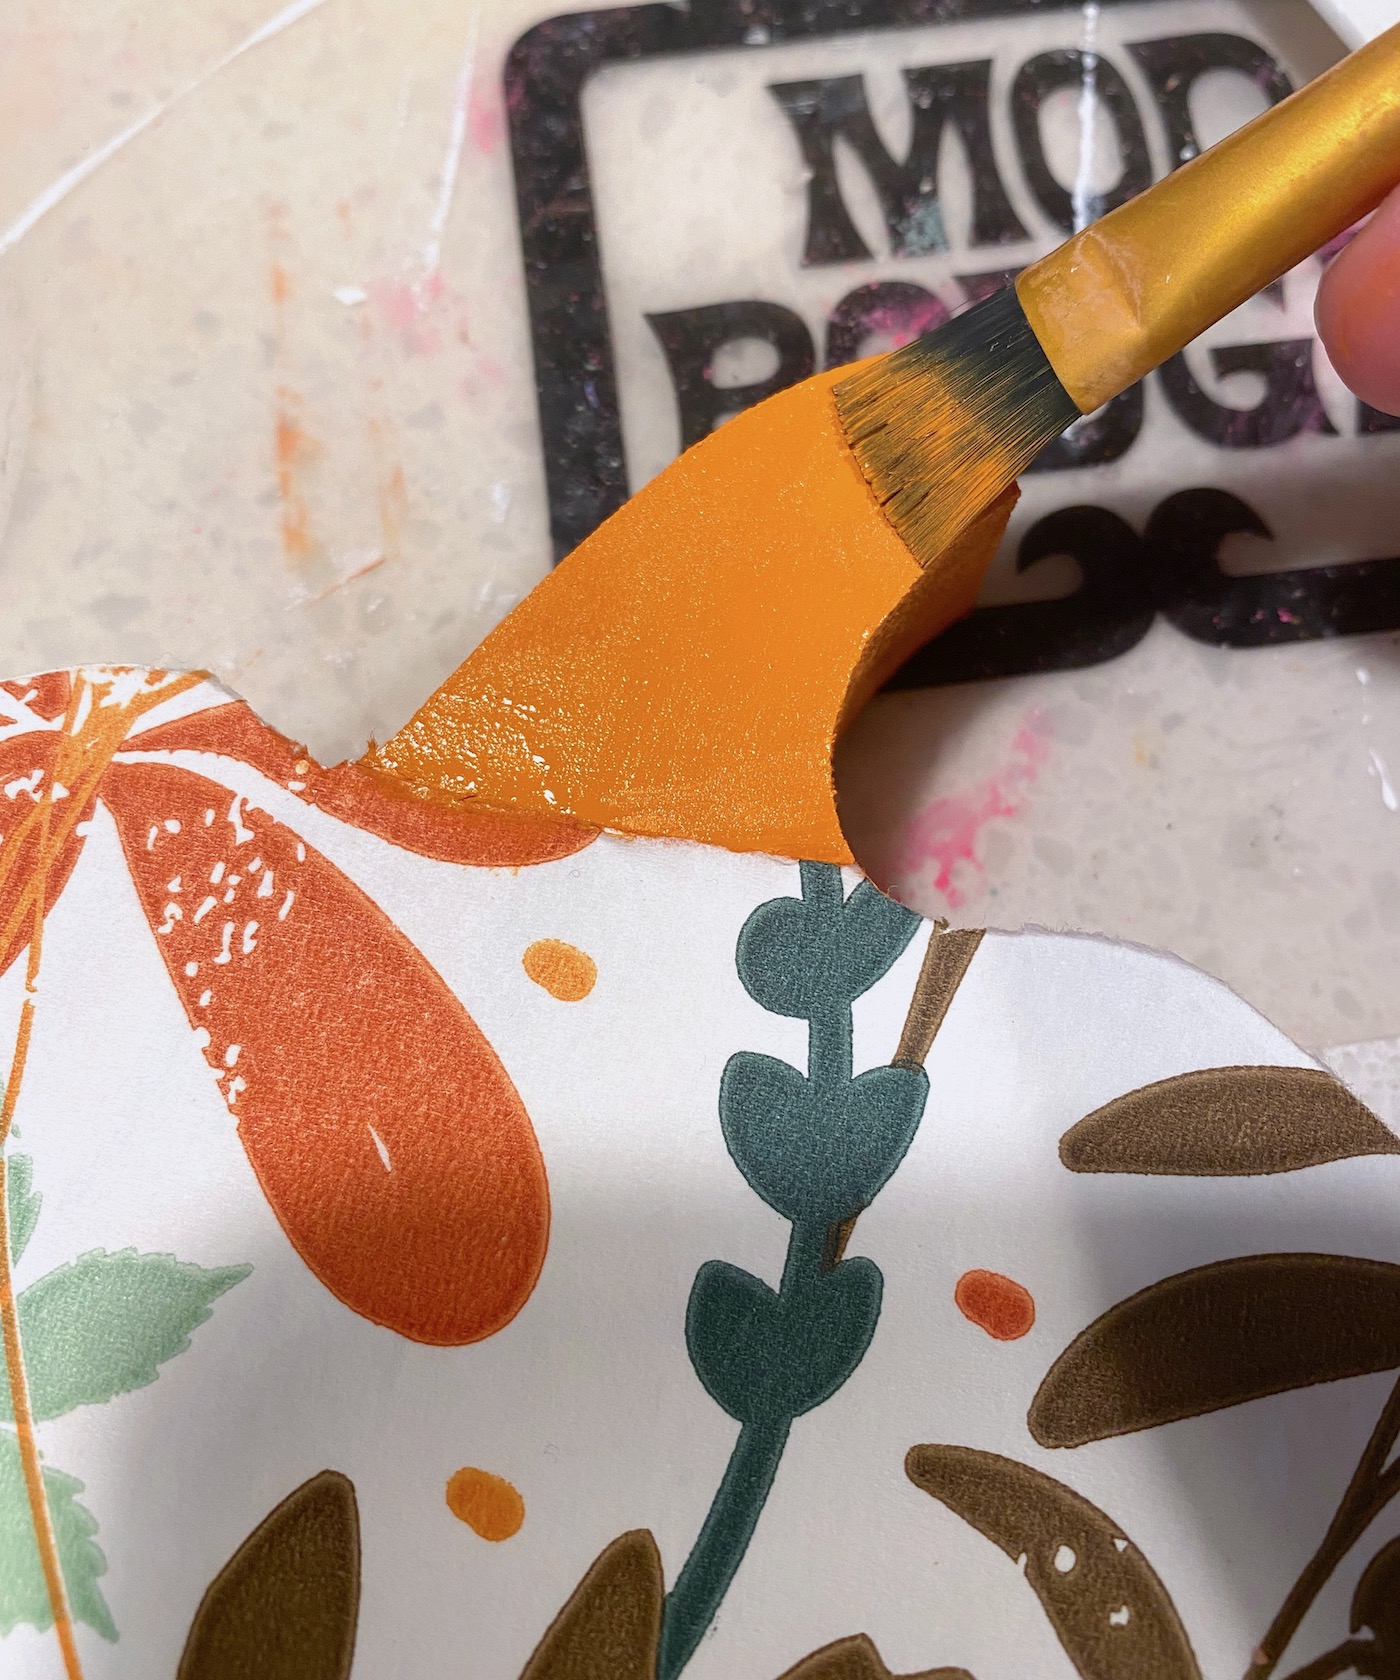
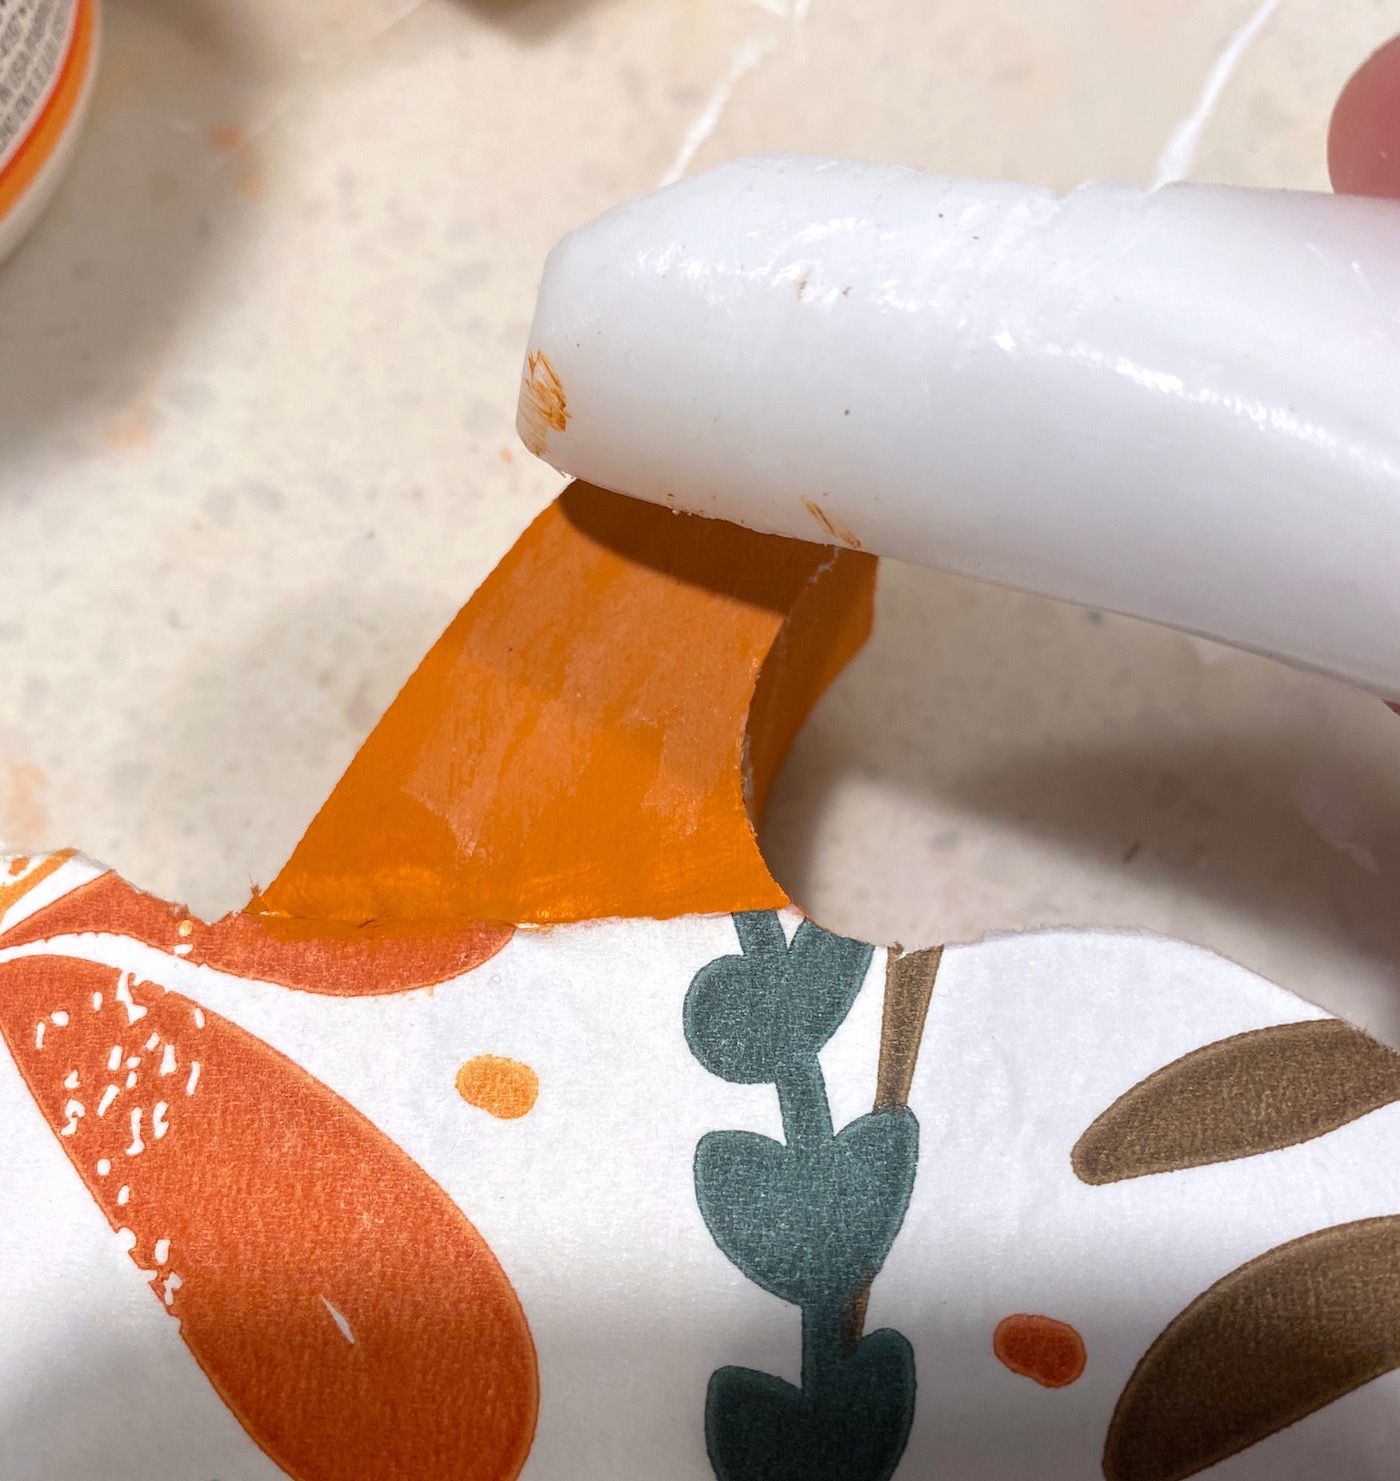
Turn the wood shapes over and use a craft knife to remove the excess napkin around the edges. You’ll want to trim the portion on the stem too. I forgot to take off a price tag (oopsie)!
Paint the Stems
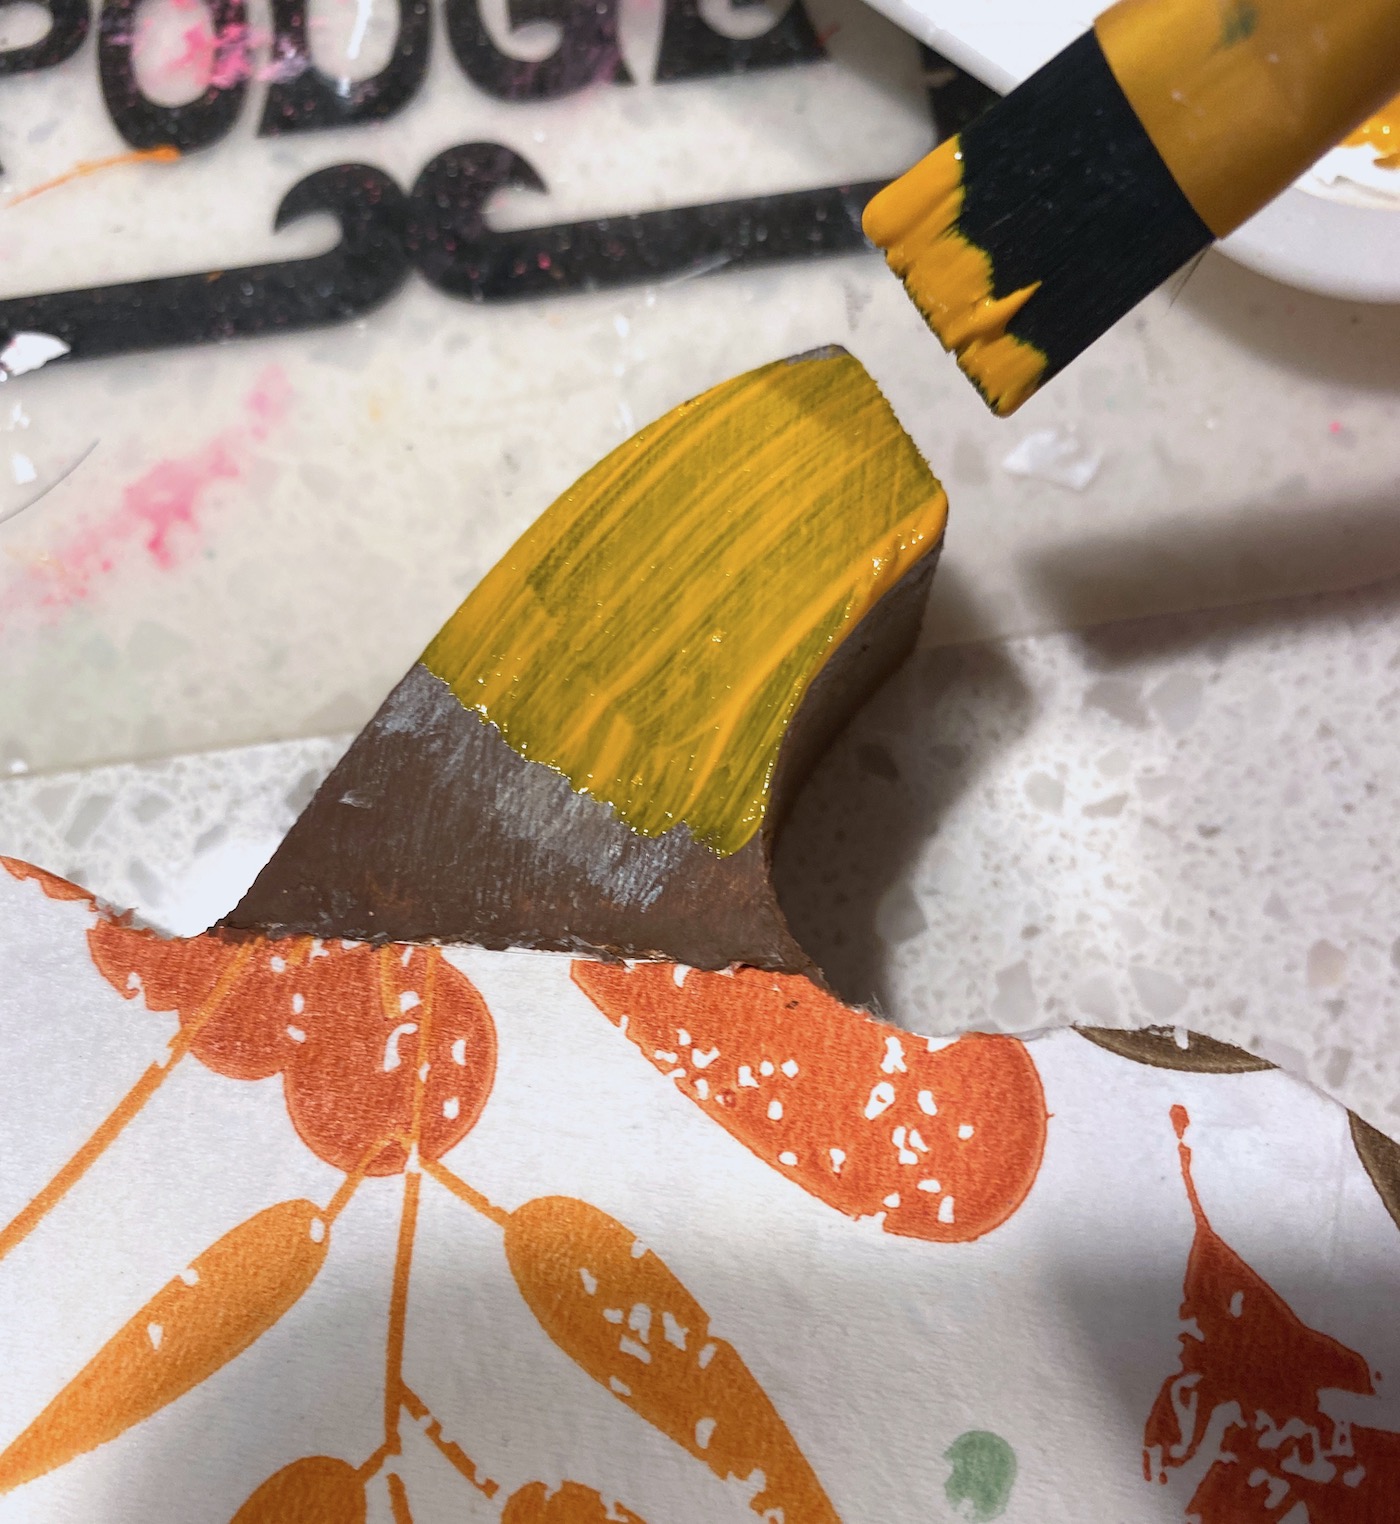
This is the fun part! You’ll paint the stems of your wood pumpkins. Start with one color of paint as a base layer – in this case, orange. Let dry.
Rub a piece of wax on the stem, all over the front and sides. Use white or lighter wax.
Once you’re done with that, you will paint over the stem and the wax with a second color. Let dry.
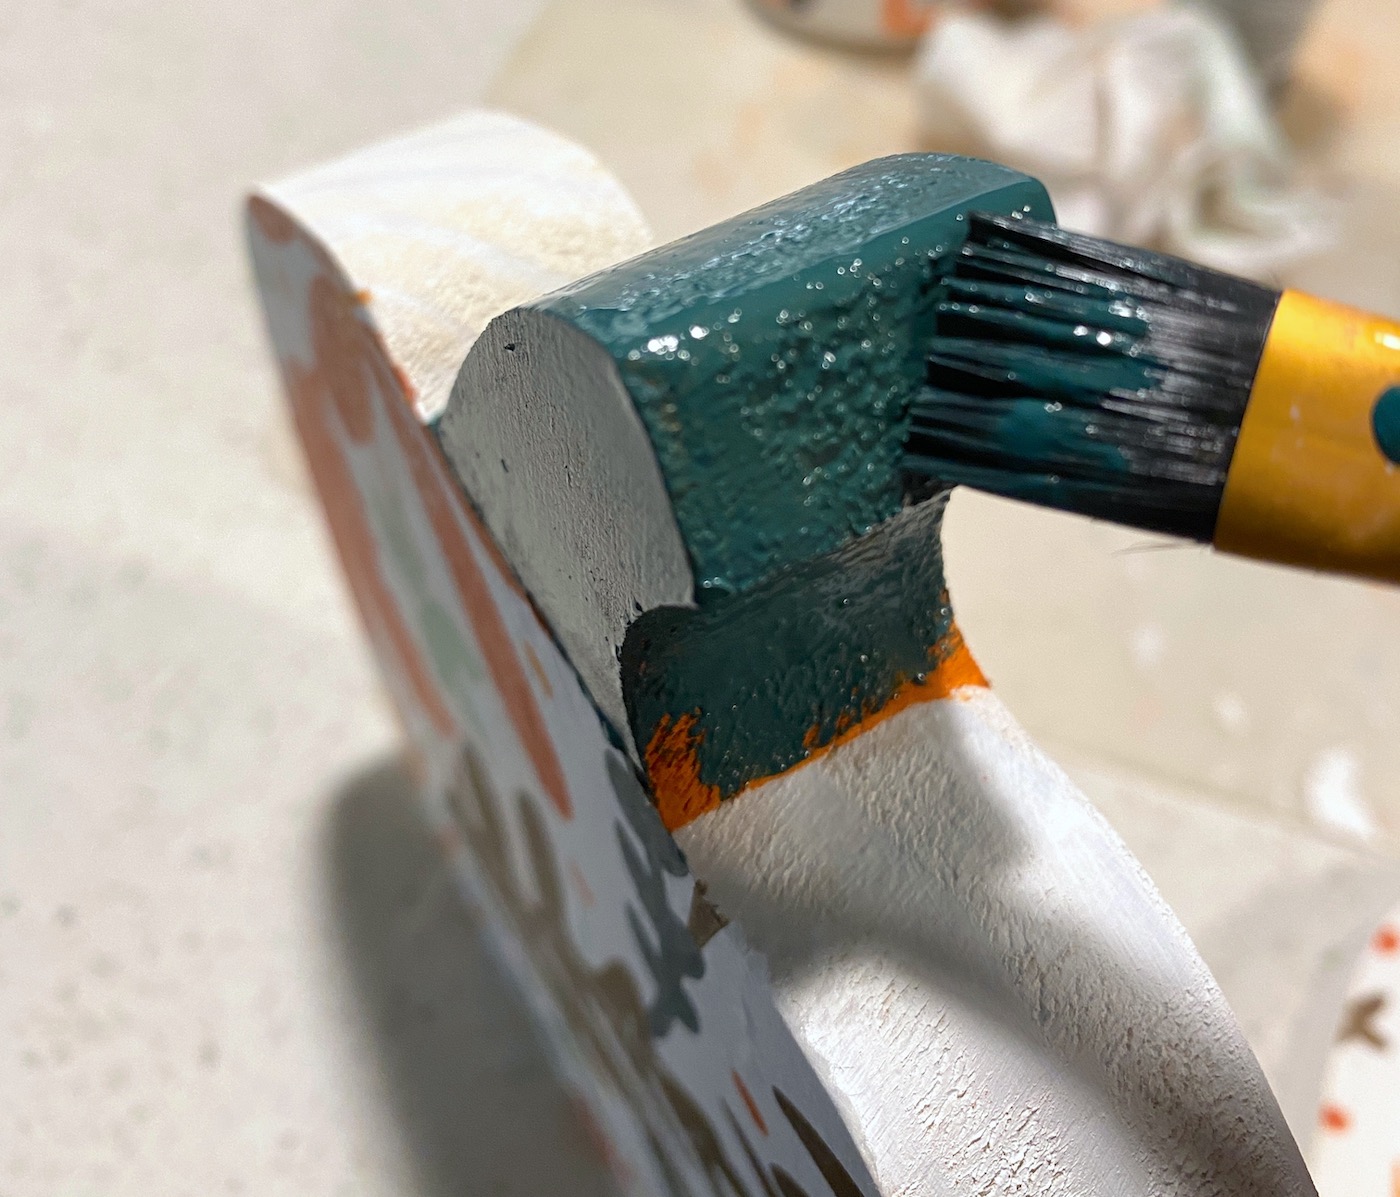
I used orange and teal with one stem, and then brown and goldenrod with the other. Choose whatever colors coordinate with your napkins.
Let dry and then lightly sand the stem in areas, on the edges and front and sides, with the sandpaper. This will reveal some of the paint below (the wax acts as a resist).
Seal Your Project
You don’t have to do this step, but I chose to. I painted two coats of Mod Podge over the front of the napkins, and let dry between coats. There is a con to sealing.
If you seal the pumpkins, you might get a few bubbles or wrinkles popping up in the napkins. It doesn’t bother me. And it protects the front of the project, which is just napkin at this point (and can be stained or torn).
I say embrace the couple of bubbles that might pop up. They’ll still look fabulous! You can always place the parchment on top of the napkin and iron again if you want to.
Display your pretty fall decor on a side table, mantel, or anywhere you like! Aren’t they fun?
Let me know if you would try this wood pumpkin craft in the comments! I’d also love for you to visit these other fabulous posts:
Confetti Pumpkins • Decorate Paper Craft Pumpkins • DIY Fall Sign • DIY Glitter Pumpkins • DIY Leaf Bowl • DIY Nautical Pumpkin • DIY Pumpkin Seed Art • Wood Block Pumpkins • Fall Leaves Frame • Mod Podge Map Pumpkins • Paper Mache Pumpkins • Wood Block Pumpkins • Wood Thanksgiving Decor


I’m interested in where you bought those napkins too. If you found them online or in a store, I’d love a link to them.
They were either from Joanns or Hobby Lobby. Email me your address amy @ modpodgerocksblog and I will send you some 🙂
So so cute!
Love the pattern and colors of the napkin. Are they a recent purchase?
If so where can I find them?
Thanks for sharing this project 😊