
Learn how to make easy DIY wood pumpkins to elevate your fall decor! This simple project is perfect for crafters of any skill level and brings a rustic touch to your autumn home.
Skills Required: Beginner. You’re going to be painting wood blocks, distressing them with wax from a candle, and then cutting felt and Mod Podging. All very basic skills, so if you’re a newbie you should still be fine!
Do you ever buy a craft supply or surface with no intention? Just because you think it’s cute, or because “you might need it?”
Guilty as charged.
Happens all the time, and I’m not even ashamed to admit it anymore. I am just every-so-slightly embarrassed about my wooden block purchase, though. The surface used to make these wooden pumpkins. And here’s why.
I bought a set of six square wooden blocks a few years ago for some particular reason, which at the time I must’ve been quite sure of. I mean, I bought six. There must’ve been an intention.
But soon after I purchased them, I forgot my plans (whatever they were). So they sat in a bin for years – years! – until I spotted them again during a cleaning expedition and decided to turn them into fall decor.
I don’t know where the idea came from to turn these into pumpkins, but I know that when I pulled these from my stash, I was in complete and total fall crafts mode.
And you know when a project just comes together in your mind? That happened here. I remembered I had cool felt in green, wire, and that I could pull some twigs from outside . . . it formed completely within a matter of seconds.
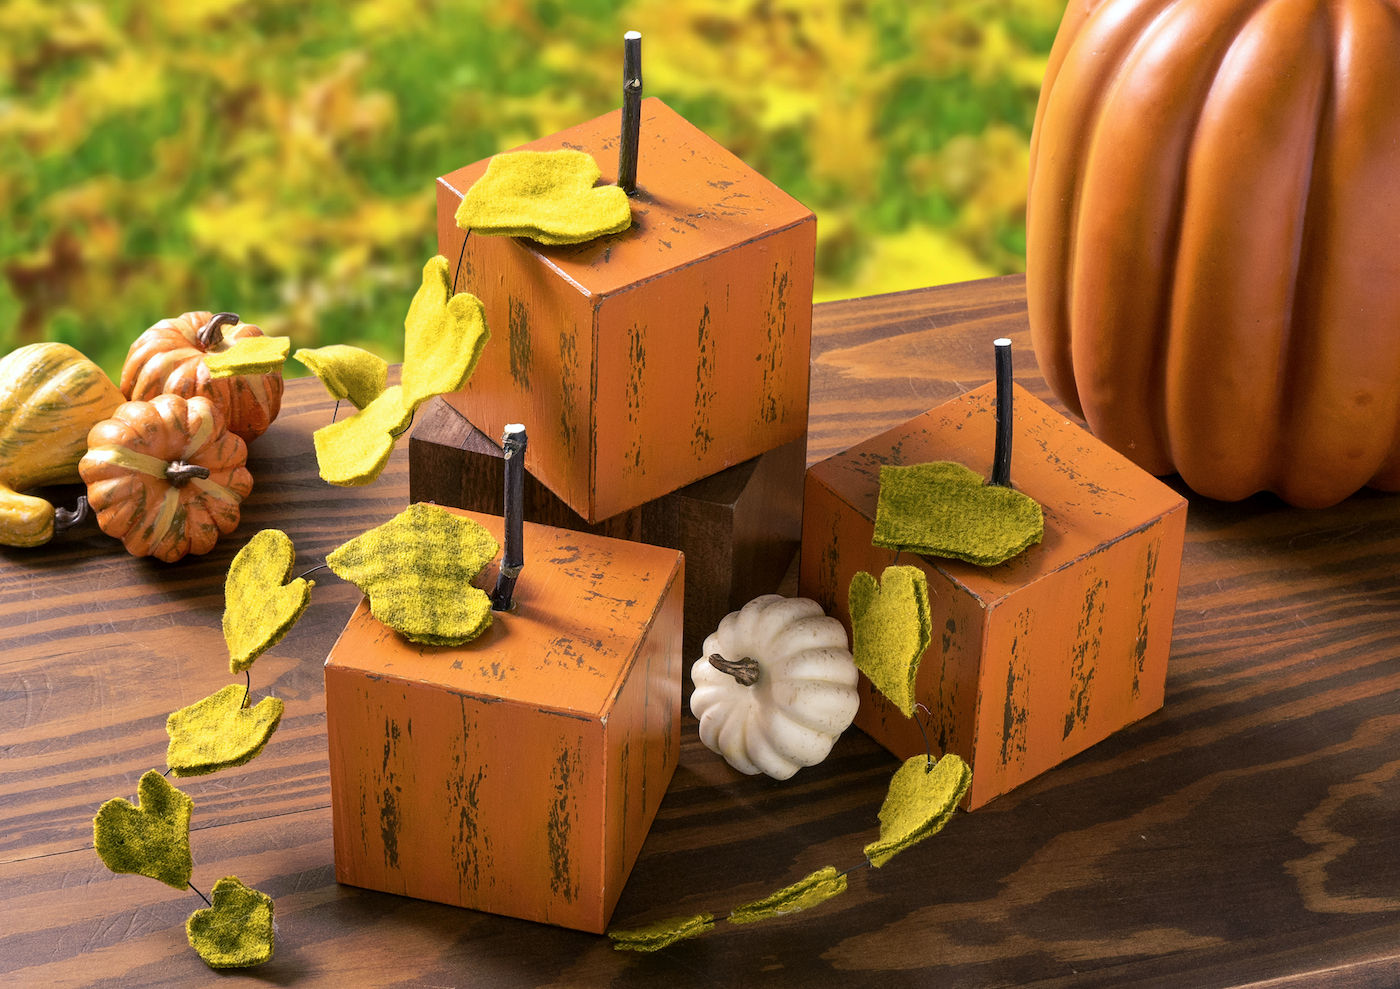
Once the project has reached the cerebral cortex, it’s go time! I had purchased a six-pack of blocks for $20, and had everything else on hand. SO, these three wooden pumpkins cost less than $10 to make for some cute autumn decorations! I’m going to show you how to make them below.
DIY Wood Block Pumpkins
Gather These Supplies
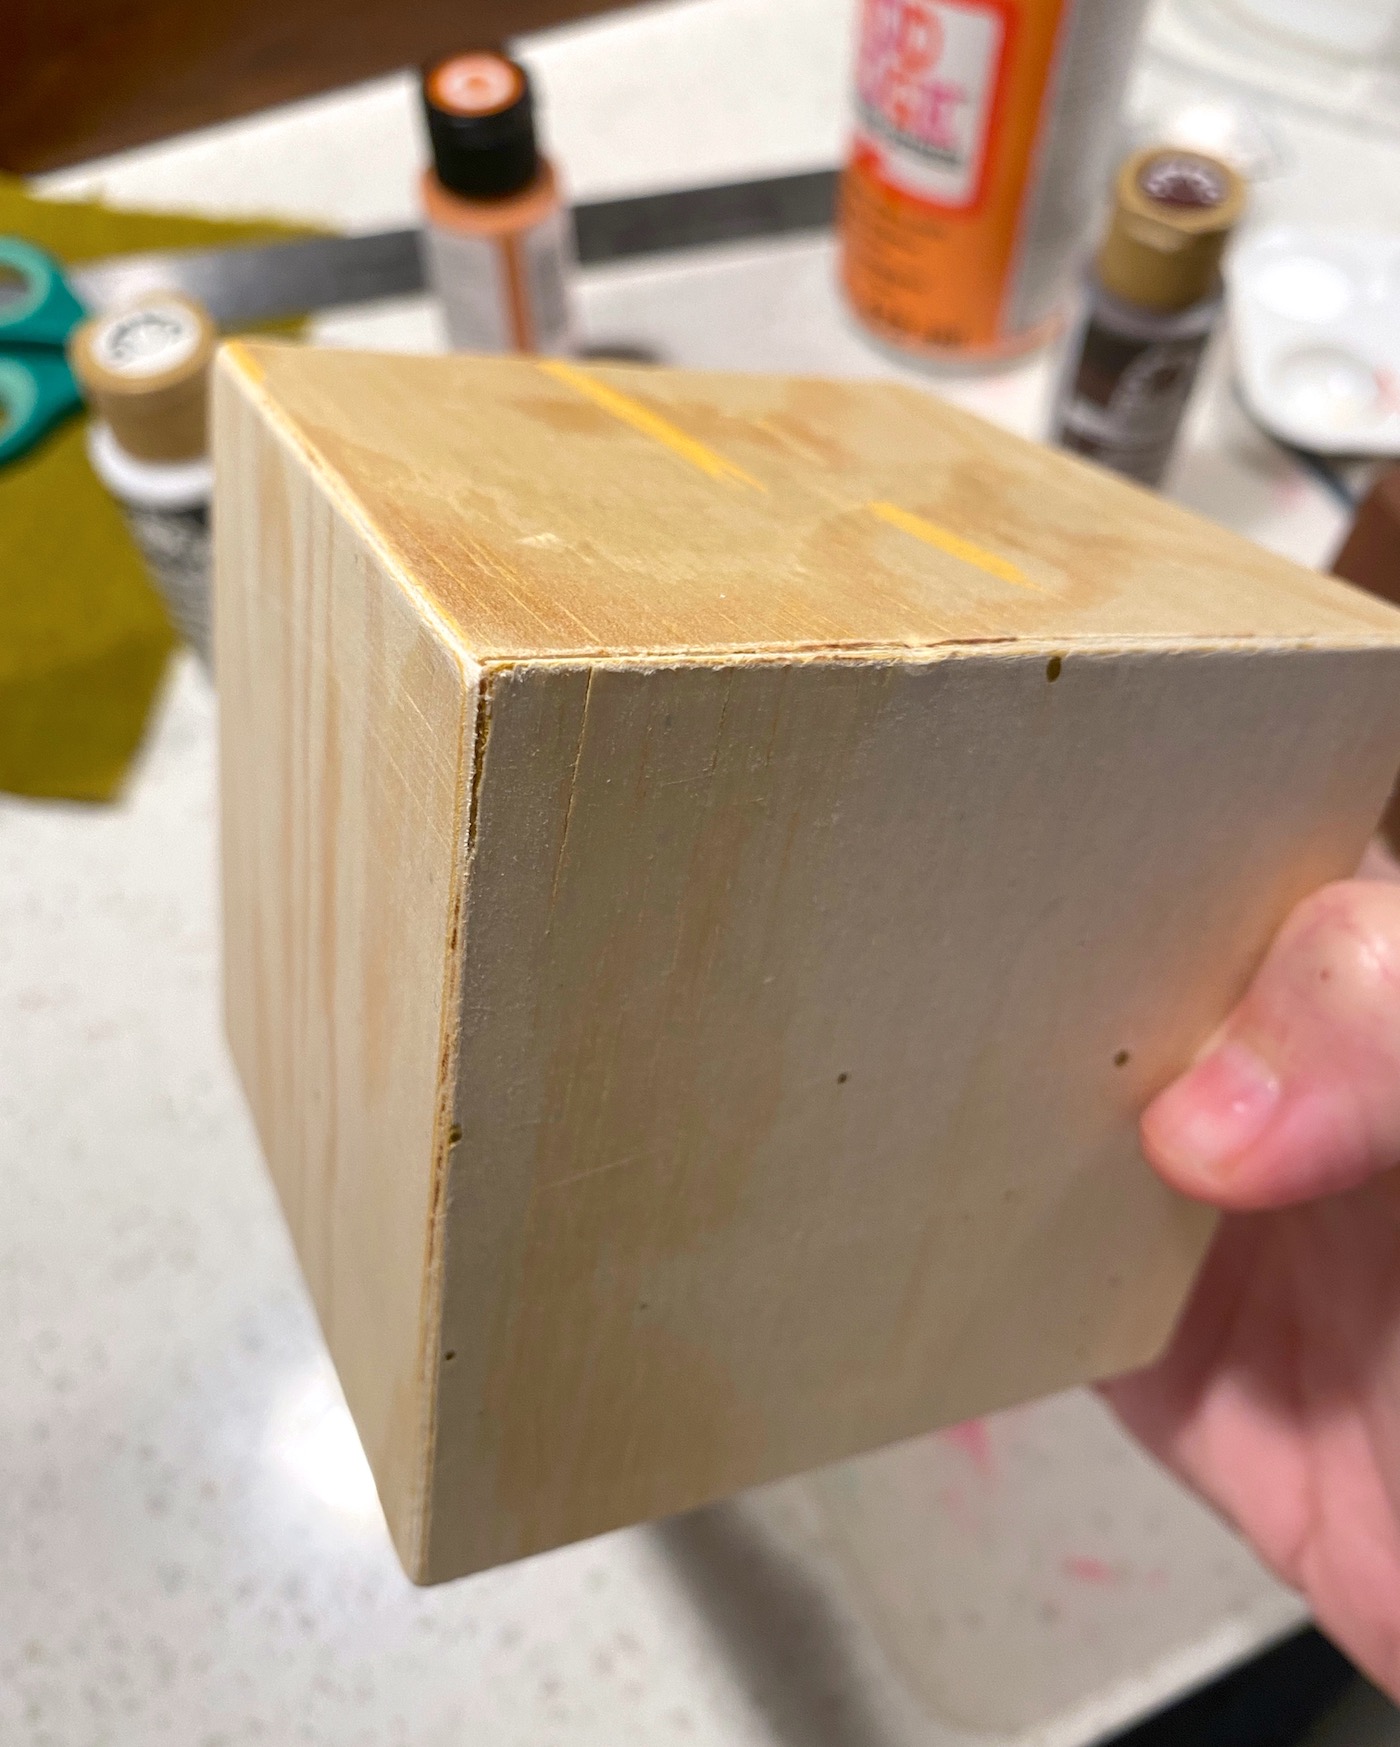
- Wood blocks – 3.5″
- Craft paint – orange and brown
- Mod Podge Satin (you can also use Gloss, Matte, or another Mod Podge formula)
- Felt
- Floral wire
- Wire cutters
- Wax candle or chunk
- Sandpaper
- Paintbrush
- Scissors
- Twigs – I just pulled some from the Japanese Maple in my yard
- Strong craft glue or wood glue – like Clear Gorilla Glue or E-6000
- Hot glue gun and glue sticks
- Drill (with a bit about the size of the twigs)
- Sandpaper (optional)
Before you begin, you may want to sand the blocks if they are rough. I didn’t because I didn’t mind the roughness! It just adds to the distressed look, and is perfect with vintage, rustic, or farmhouse autumn decorating themes.
Paint and Distress the Blocks
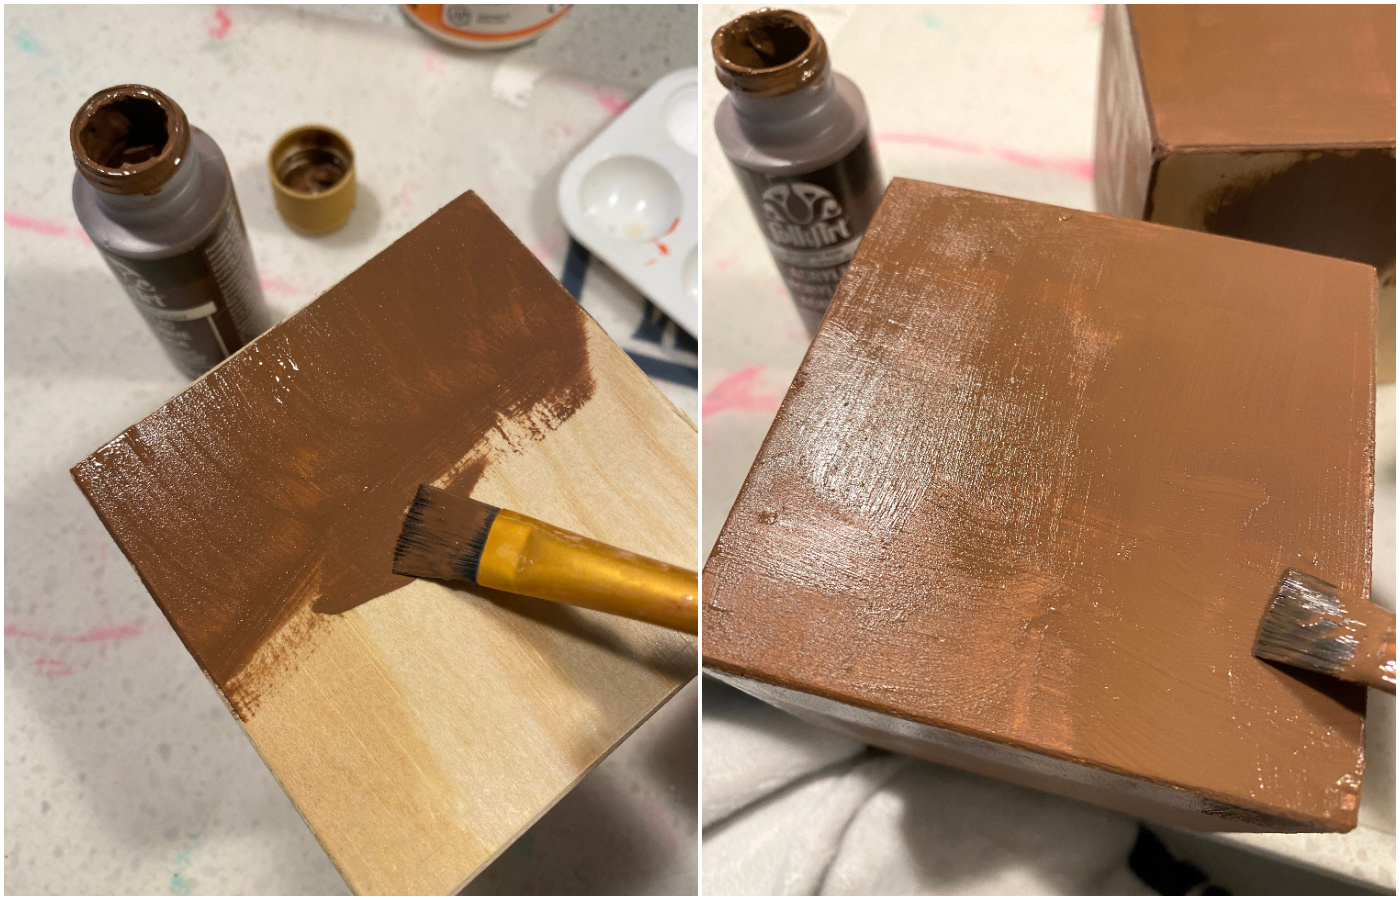
You will begin by painting the blocks with brown paint. You are welcome to use any acrylic paint whether it be regular craft paint, chalk paint, or multi surface.
Completely cover the blocks with one layer of brown and let dry. What usually works best for me is to paint a few sides on one block and then move onto another. By the time I’m done painting the third, I’m just about ready to go back to the first.
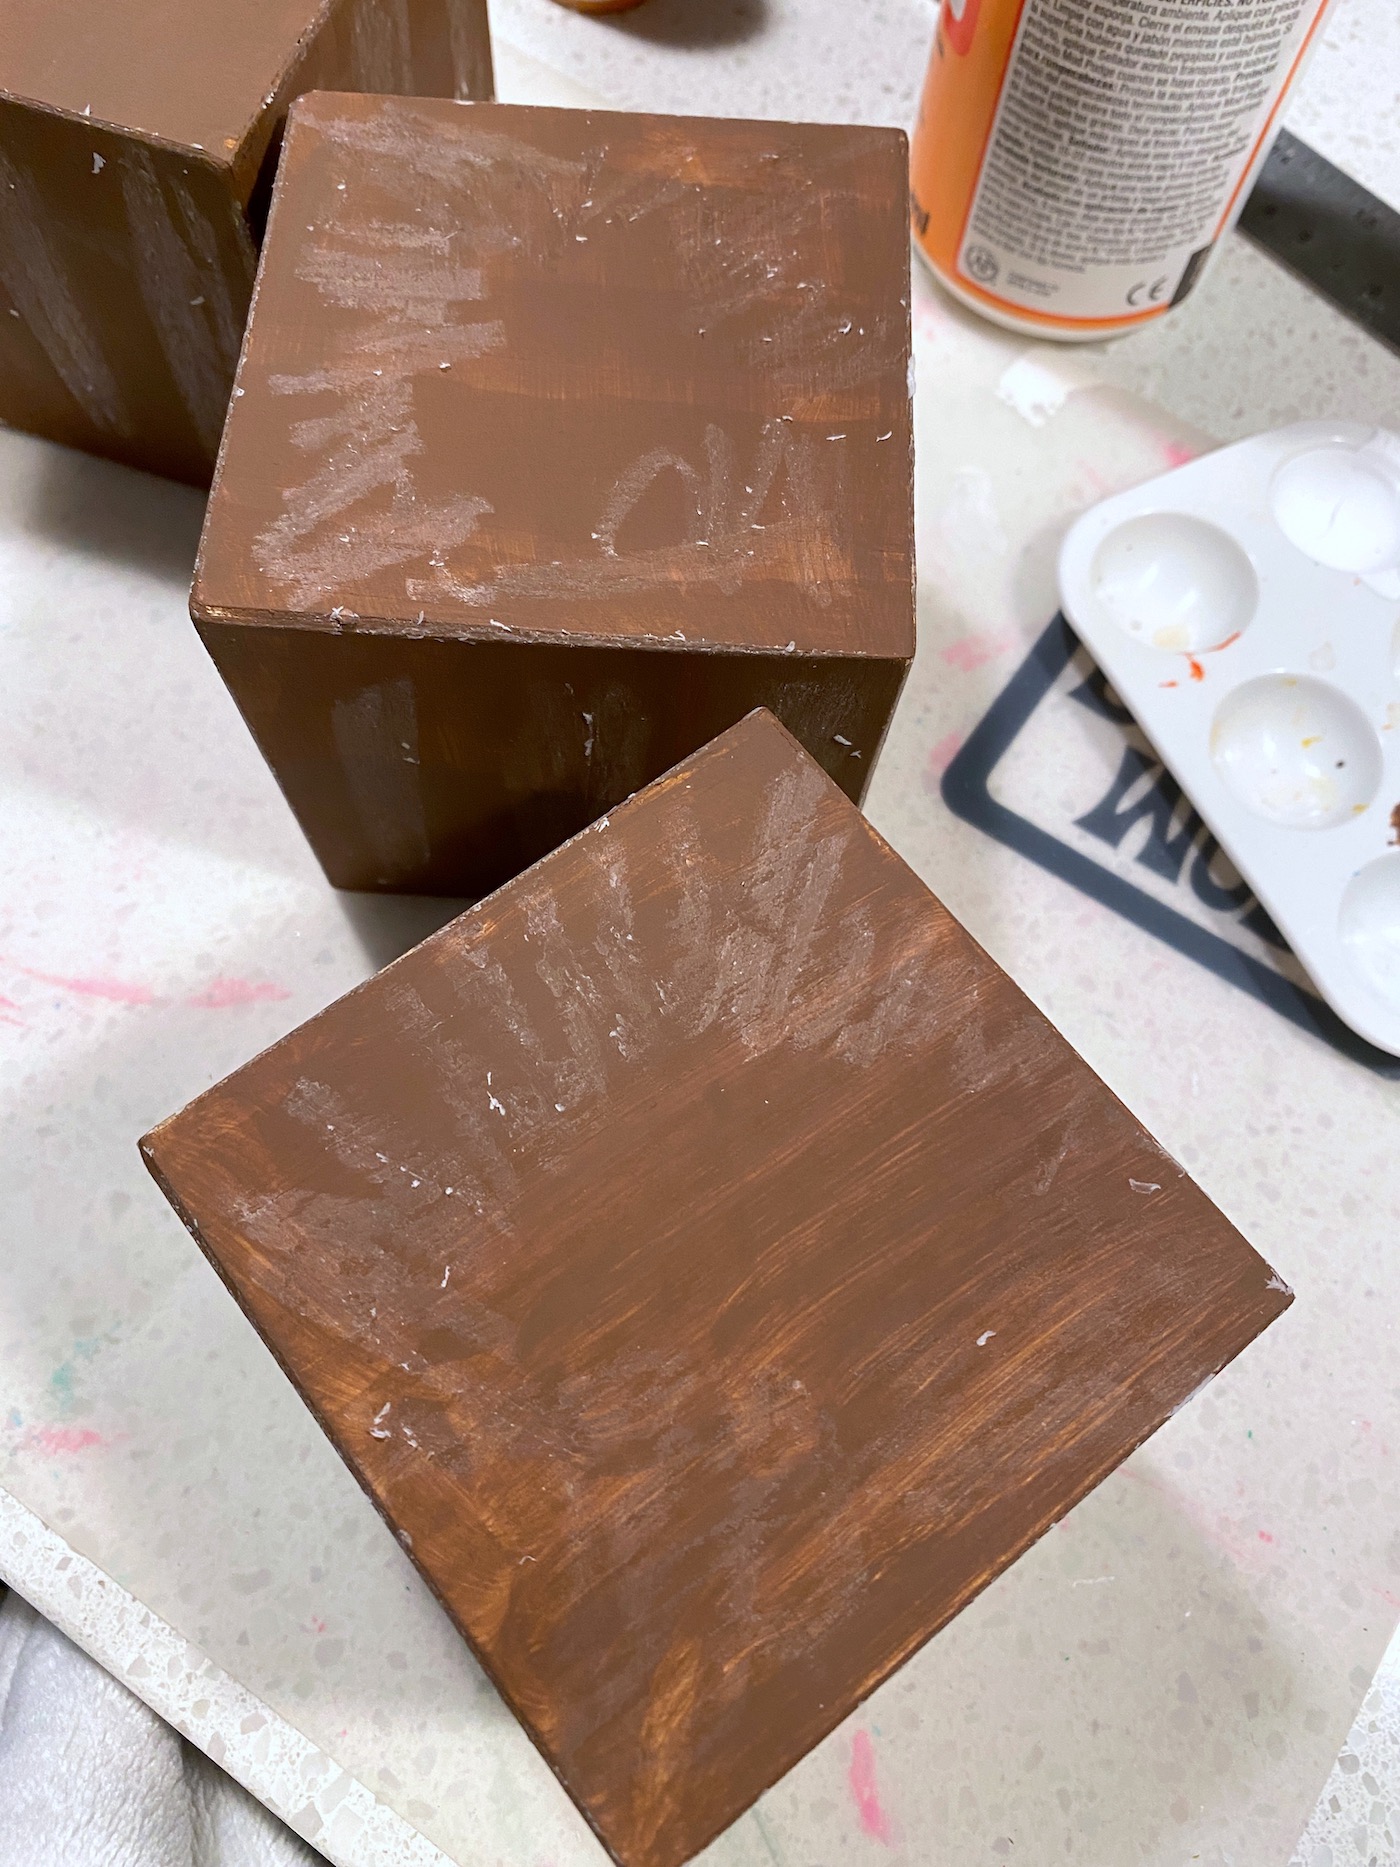
After you’ve let the blocks dry completely, you’re going to rub wax on them so you can distress them. The wax acts as a resist for the orange paint (which will be revealed when you sand).
Rub a white candle piece on the edges, the top, and then create the bands down the side that give you the “pumpkin feel.” Brush away any wax chunks.
On the bottom and top, make a squiggly pattern as seen below. The twig is going to stick up in the middle.
There’s no dry time for wax, so paint the orange over the blocks on all sides in a single layer, the way you did the brown. Let dry completely.
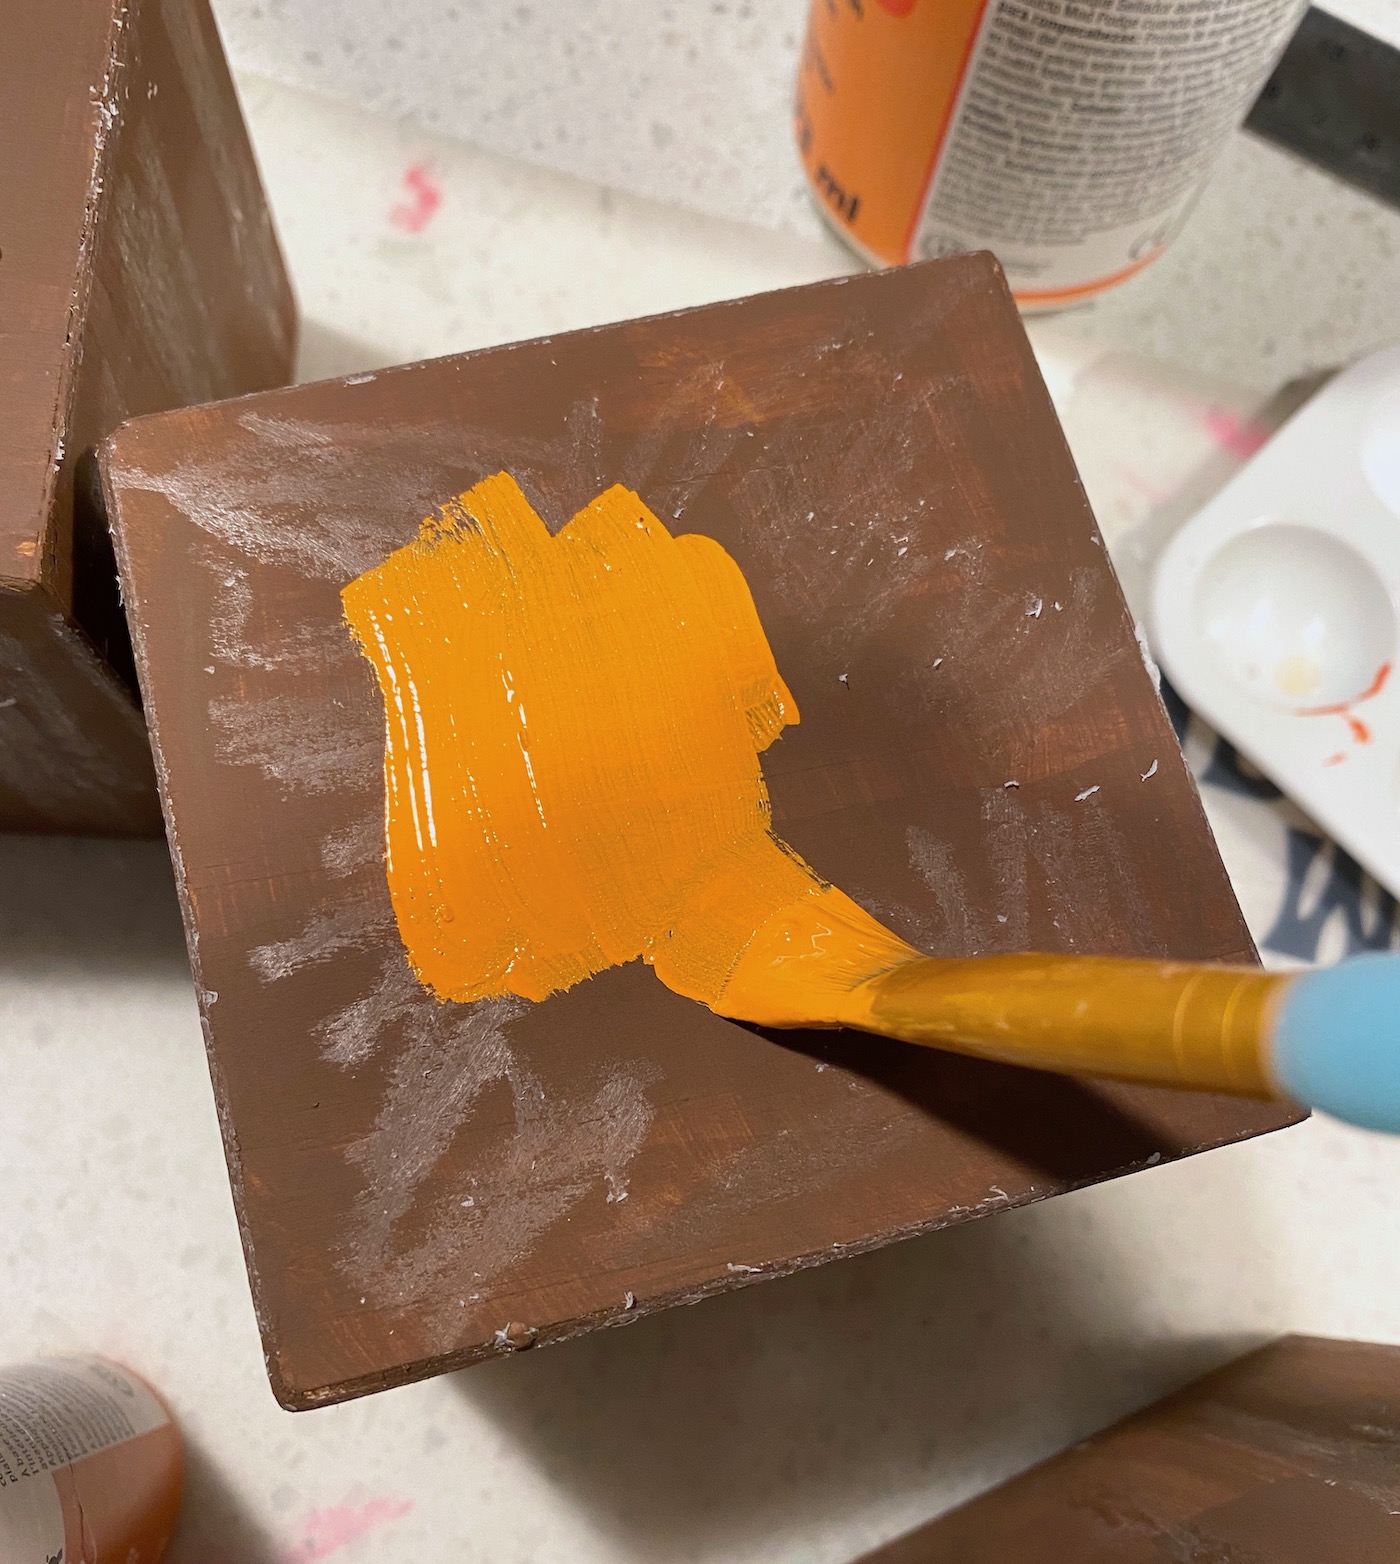
Note: I placed a finger print on the top in the wet orange paint so I would be able to identify it. You’re going to drill a hole in this spot for the stem.
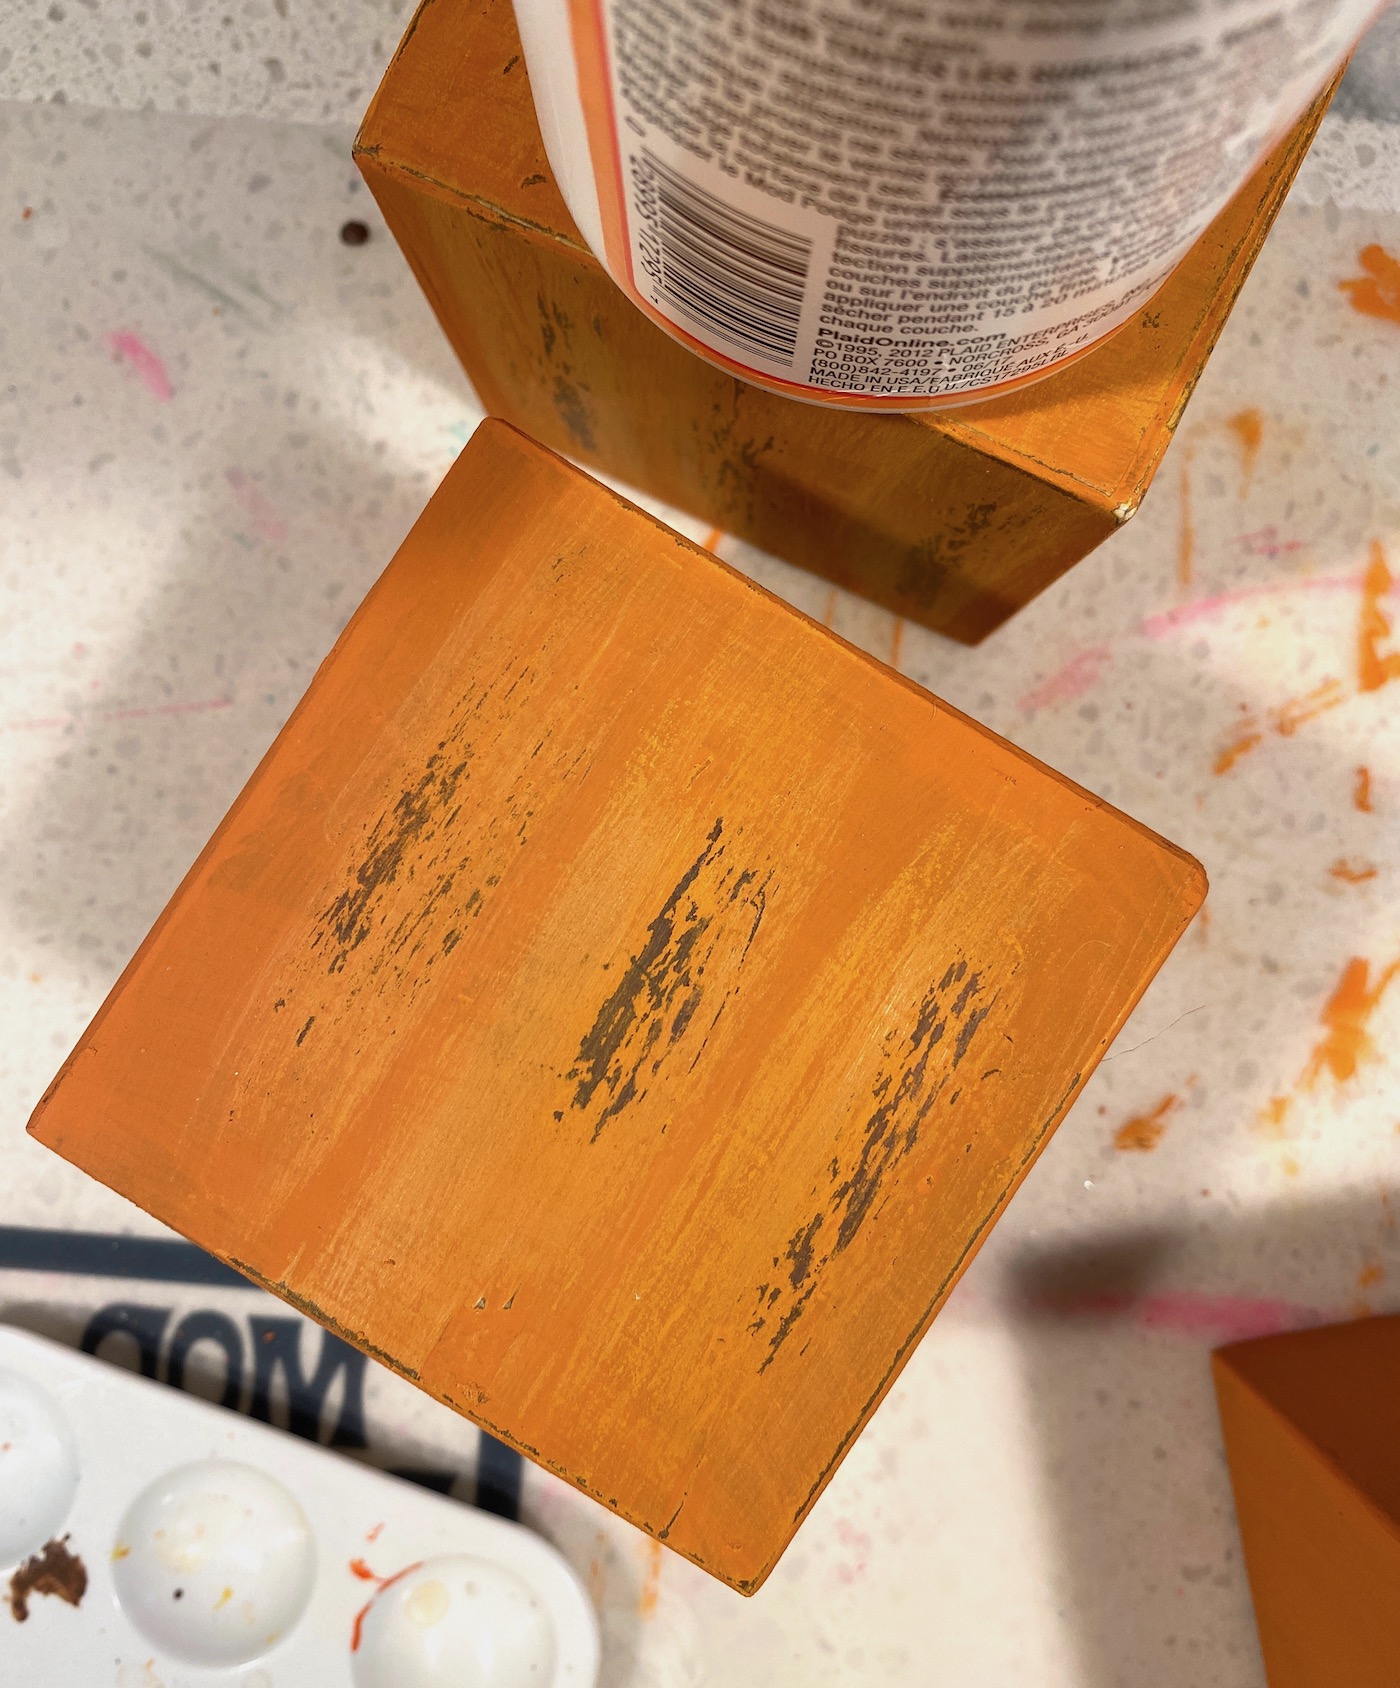
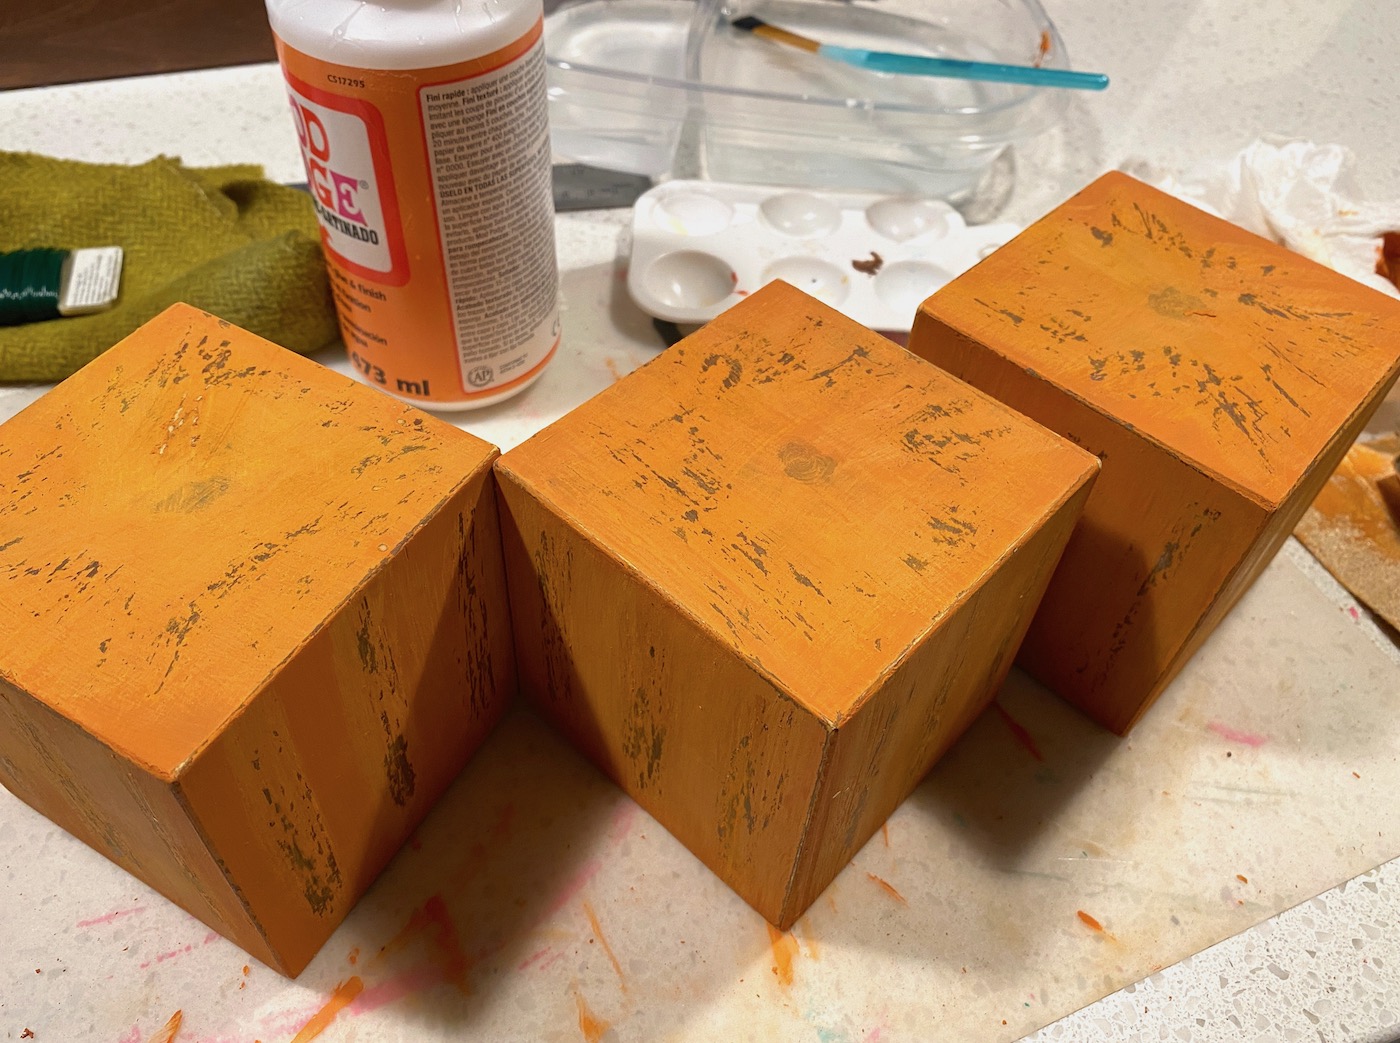
Starting with one block at a time, sand down the edges, the bands, the sides, and the top, revealing the brown paint below. You don’t have to sand too hard. The orange paint will come off relatively easy wherever the wax is. Do this to all of your wooden pumpkins.
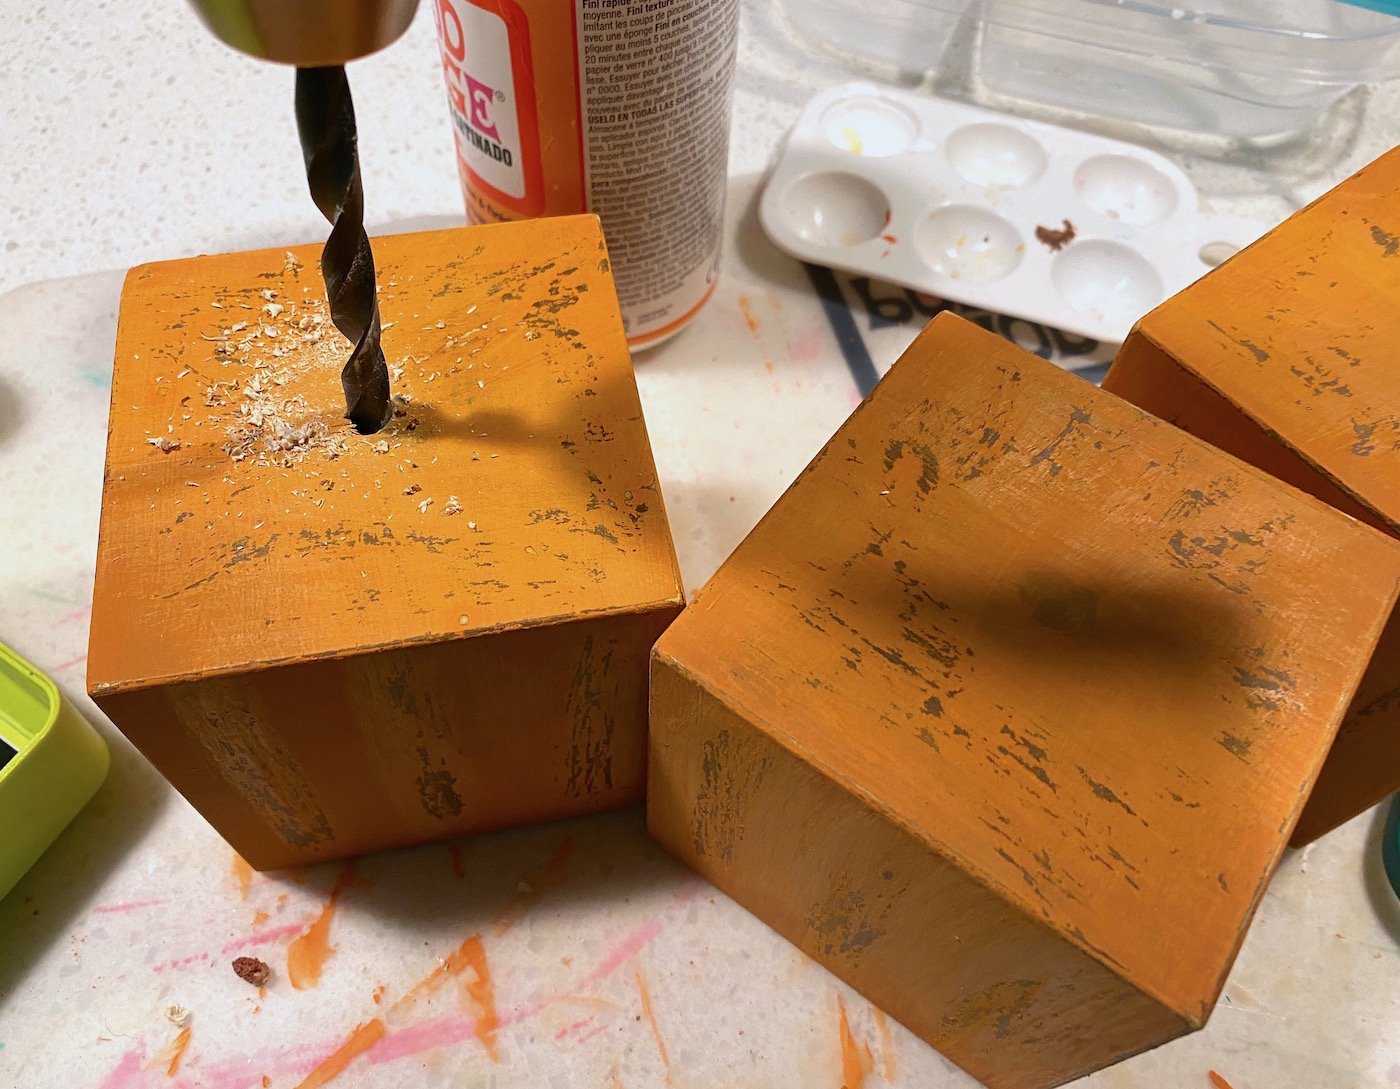
Place all your wood blocks together on your work surface because it’s drilling time!
Drill and Seal
Choose a drill bit that matches the size of the branch you selected. Gently drill into the center top of each block, holding the block so that it doesn’t spin. The center is likely hollow, so you don’t have to go very deep.
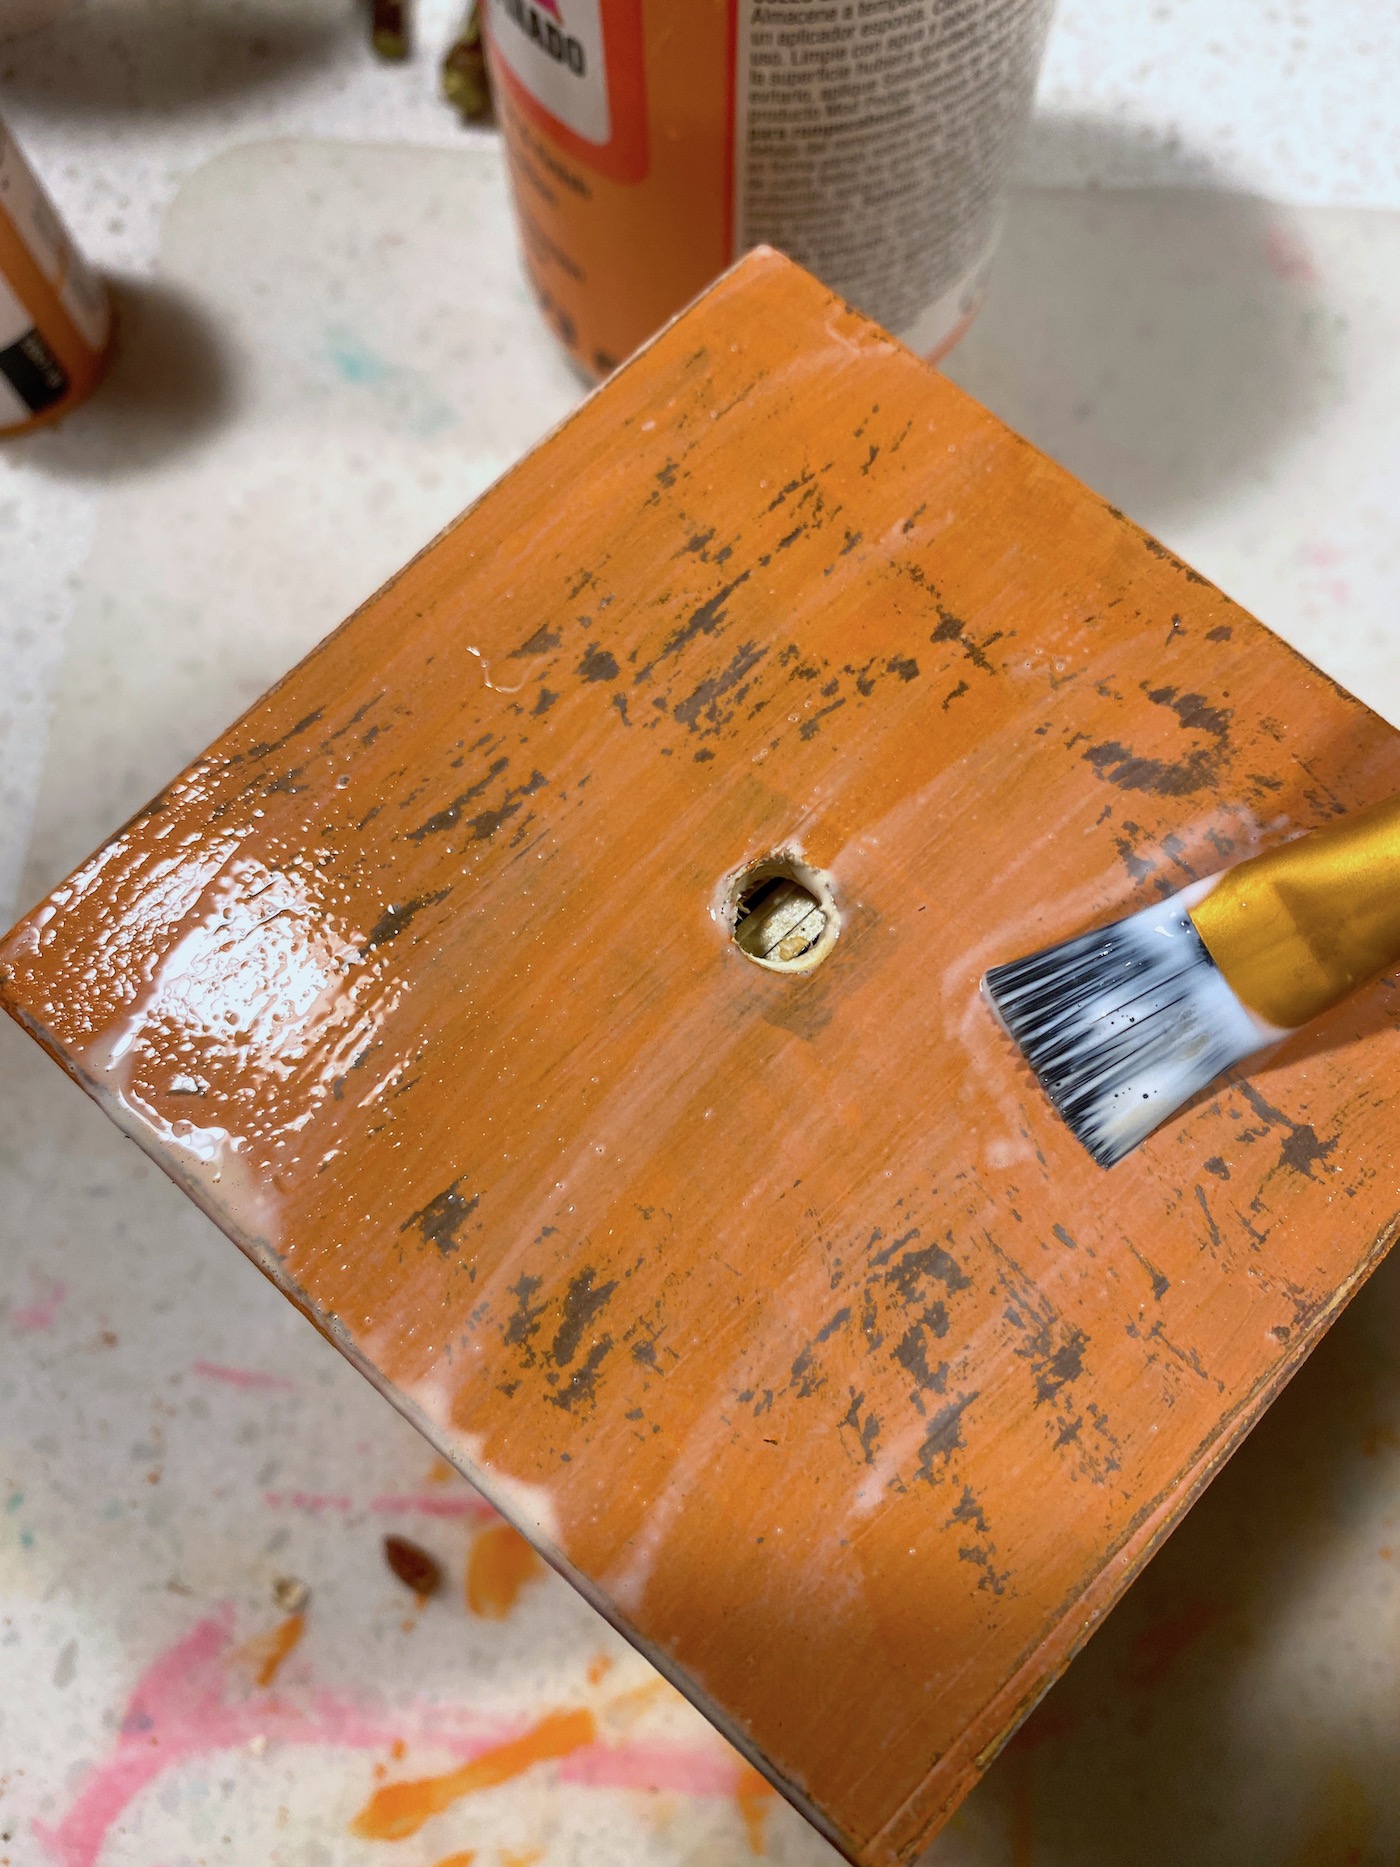
Wipe away any dust from drilling and coat all three blocks with Mod Podge. Apply to all sides and let dry. The Mod Podge is great because it gives a nice sheen to the project as well as evens out the orange paint color in the areas you sanded.
Make the Leaves and Vines
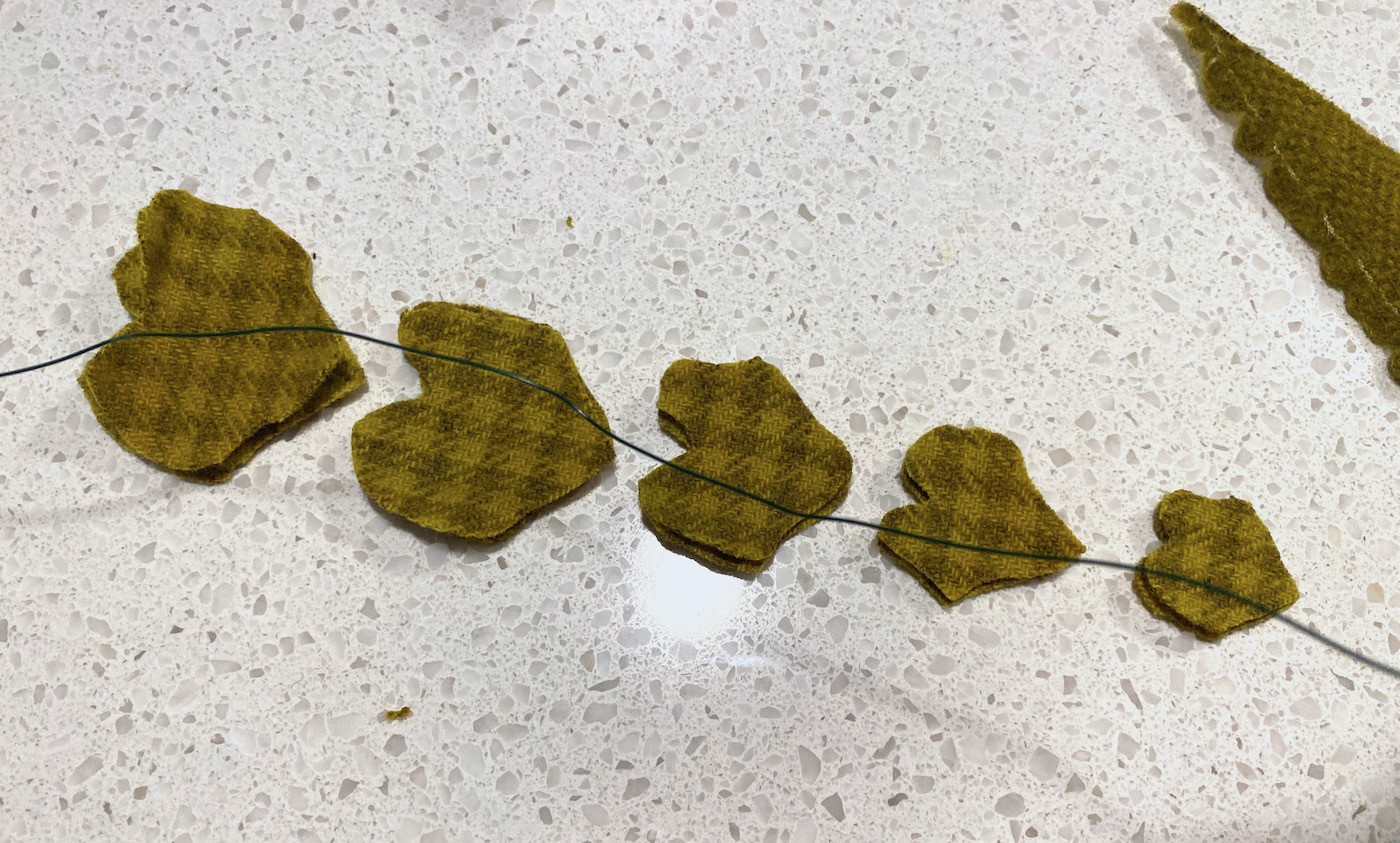
While the blocks are drying, create your pumpkin vines. I simply searched for a pumpkin leaf online and printed it out in five sizes (because I wanted five leaves): 2″, 1 7/8″, 1 3/4″, 1 5/8″, and 1 3/8″.
The above measurements are the width of the leaves from top to bottom. Honestly, you can even just draw five leaves this size. They just need to be the general shape.
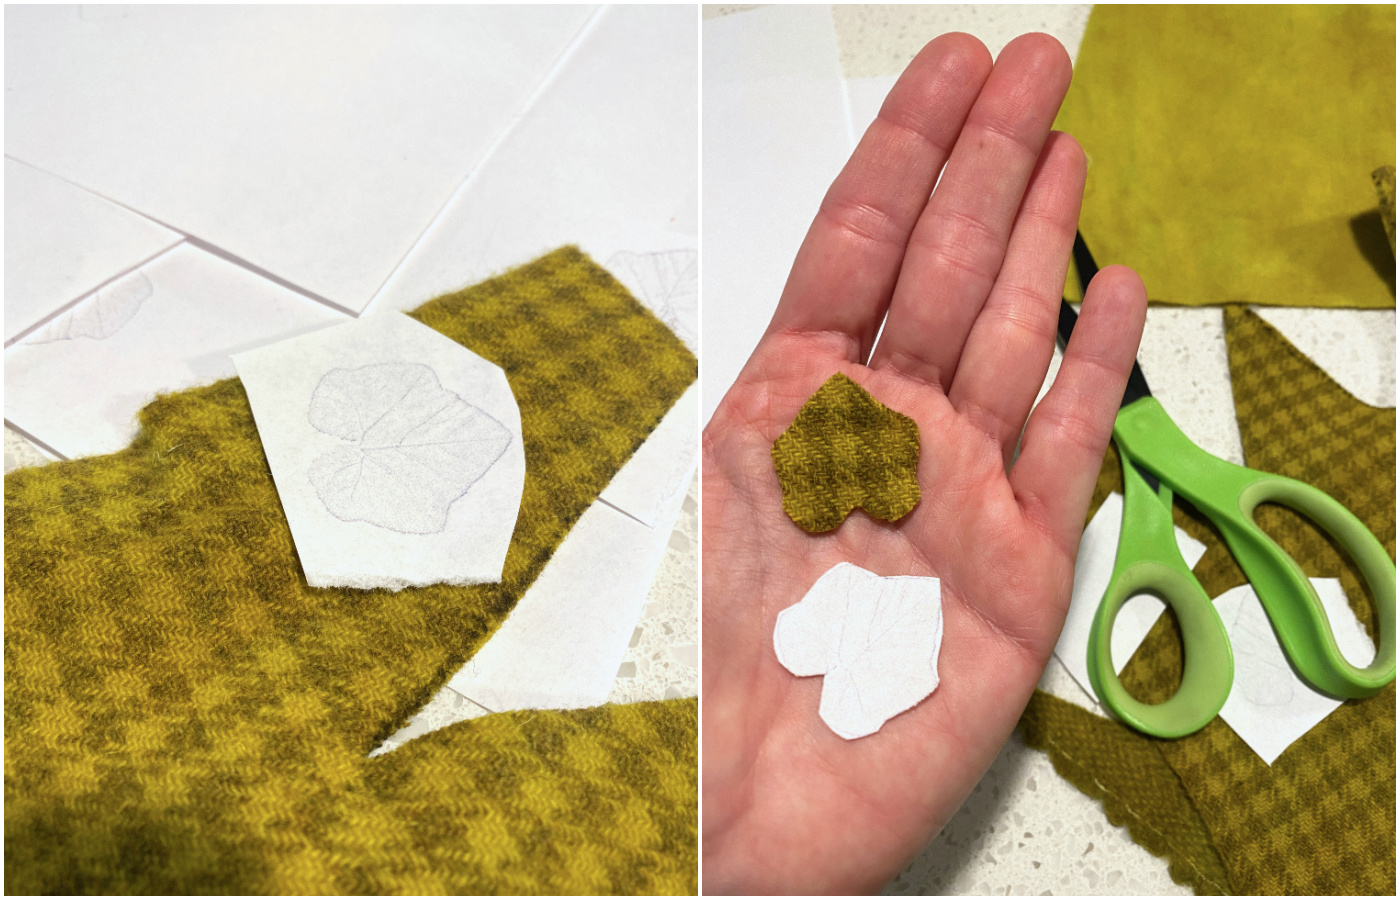
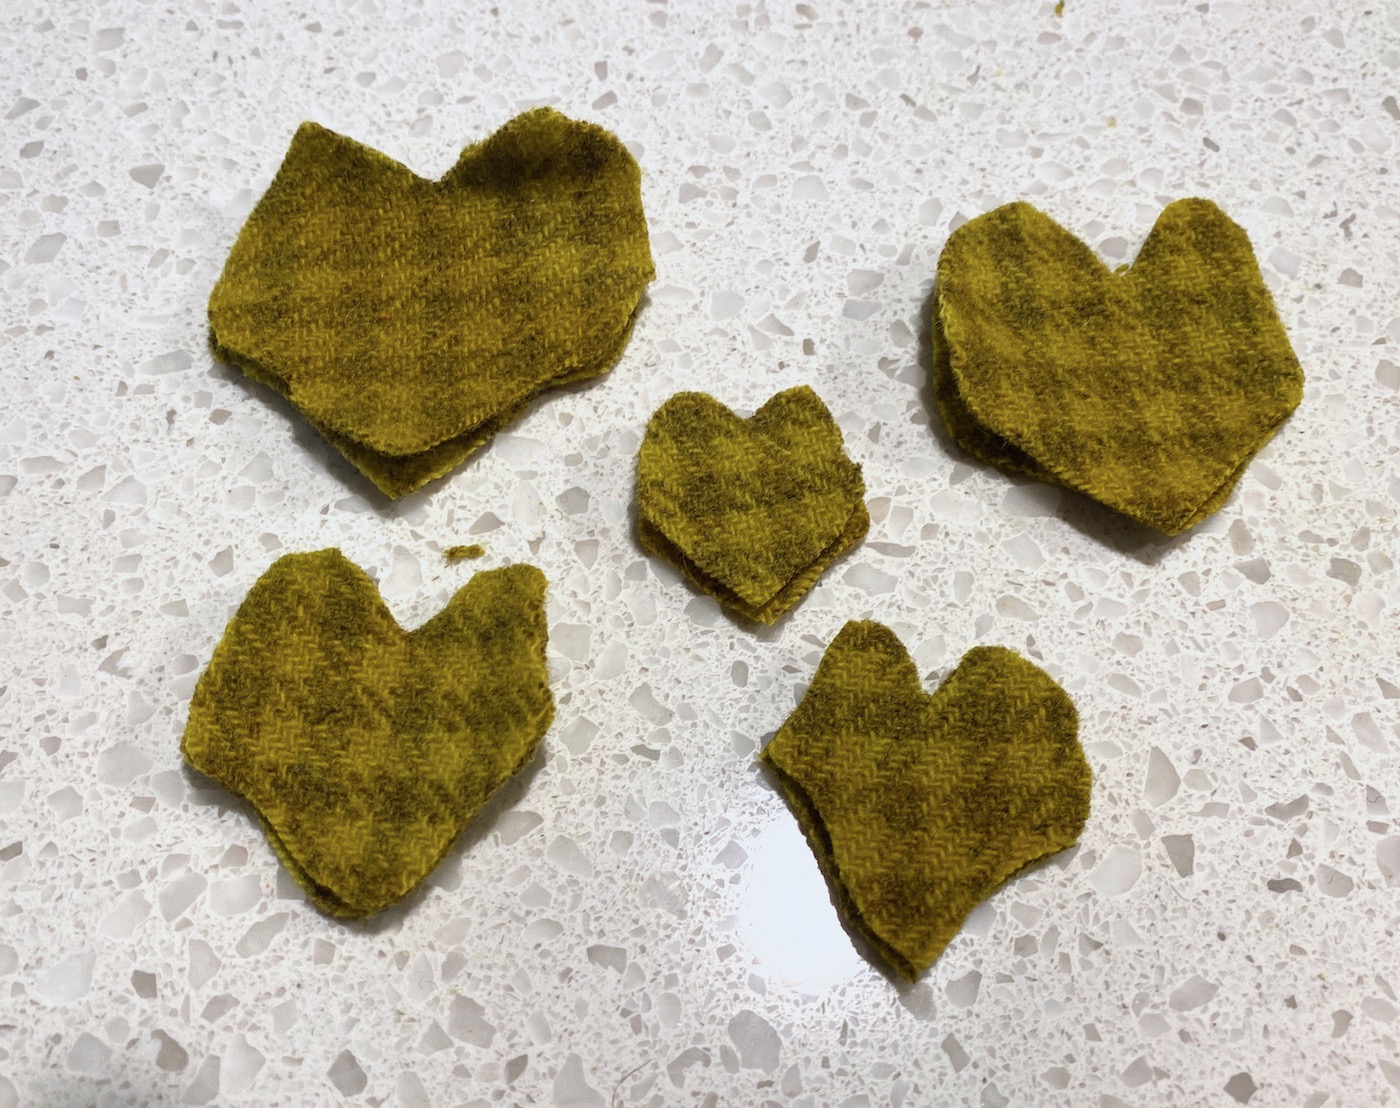
You should cut two of each size. The reason is because you will sandwich the wire between them. You need five sets of two for each wood block pumpkin. It takes a minute to cut them, but by the time you’re done, the Mod Podge will be dry.
Tip: I got this cool felt at a craft sale in a warehouse years ago. Look on Etsy for patterned felt pieces!
Cut a length of wire about 12″ long. Then lay out the leaves to plan the look of your vine. Put one layer of felt leaves on the bottom, then the wire, then the other layer.
You want to leave a little bit of wire extra on the end with the biggest leaf because that will go down into the hole on the top of the pumpkin.
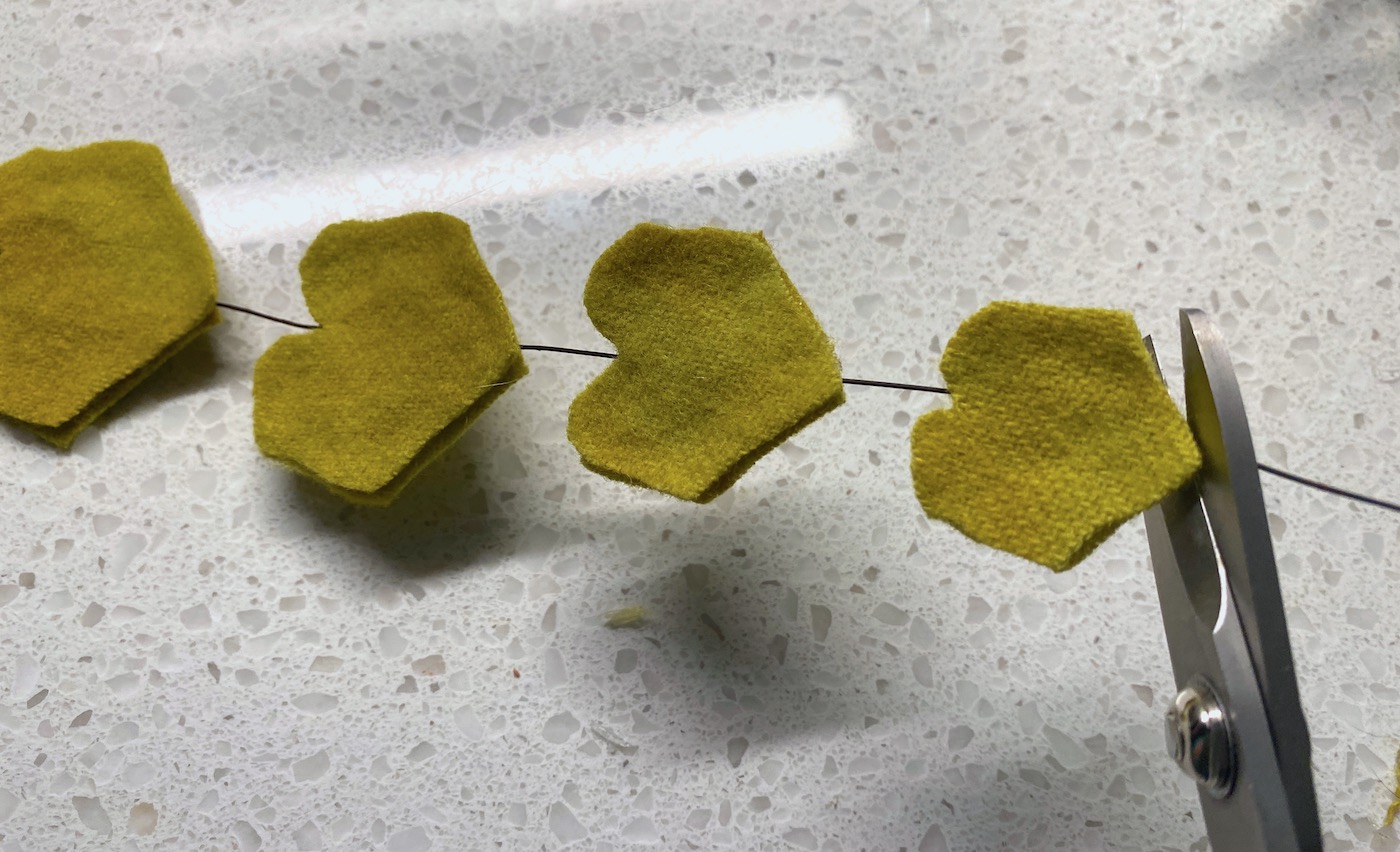
One the leaves are laid out, you can hot glue them onto the wire. Place several dots of hot glue on all parts of the leaf. Glue down the wire and sandwich the second layer on top.
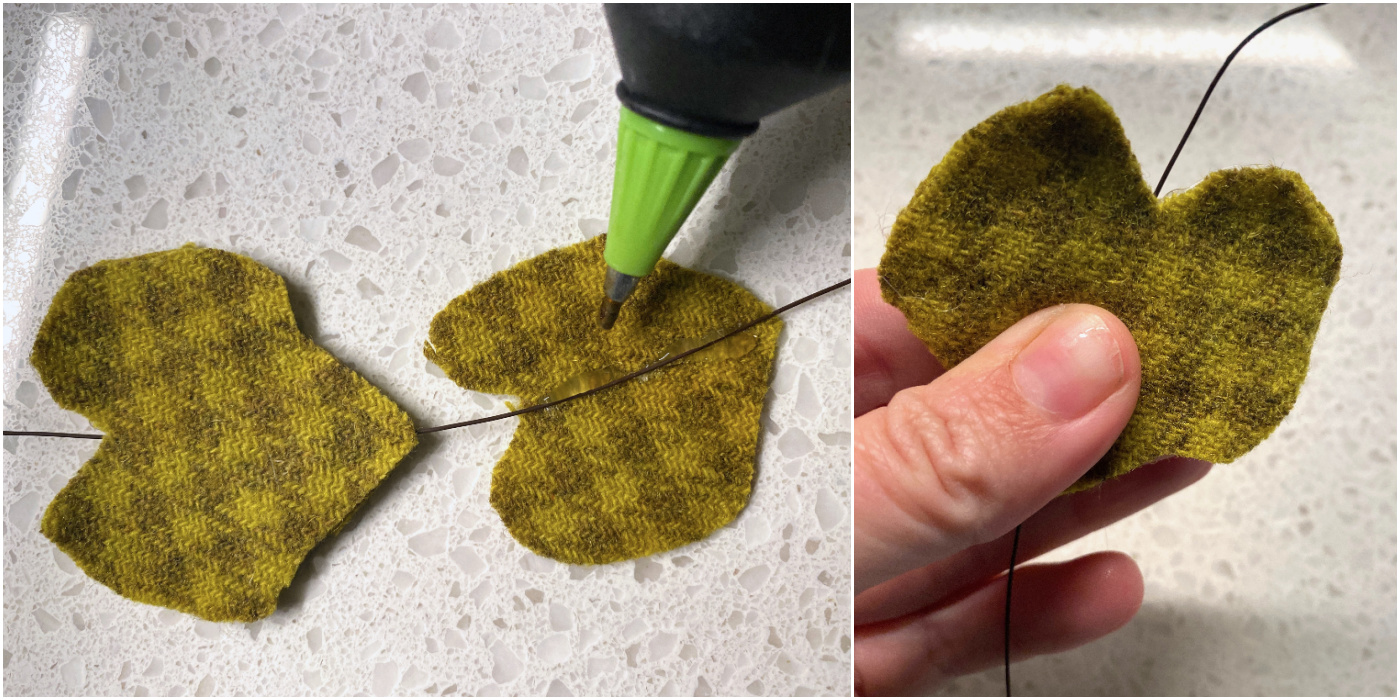
Repeat with all the leaves and wire. Then trim the wire below the last, smallest leaves. Set aside.
Cut the Stems
Trim three twigs to make stems. If you don’t have pruners, use a kitchen knife (and be careful!). My stems are approximately 2 3/4″ – 3″ long. You need a little bit of length to go down into the block.

Now you’re going to bring everything together! The base, the stem, and the vines.
Attach the Stem and Vines
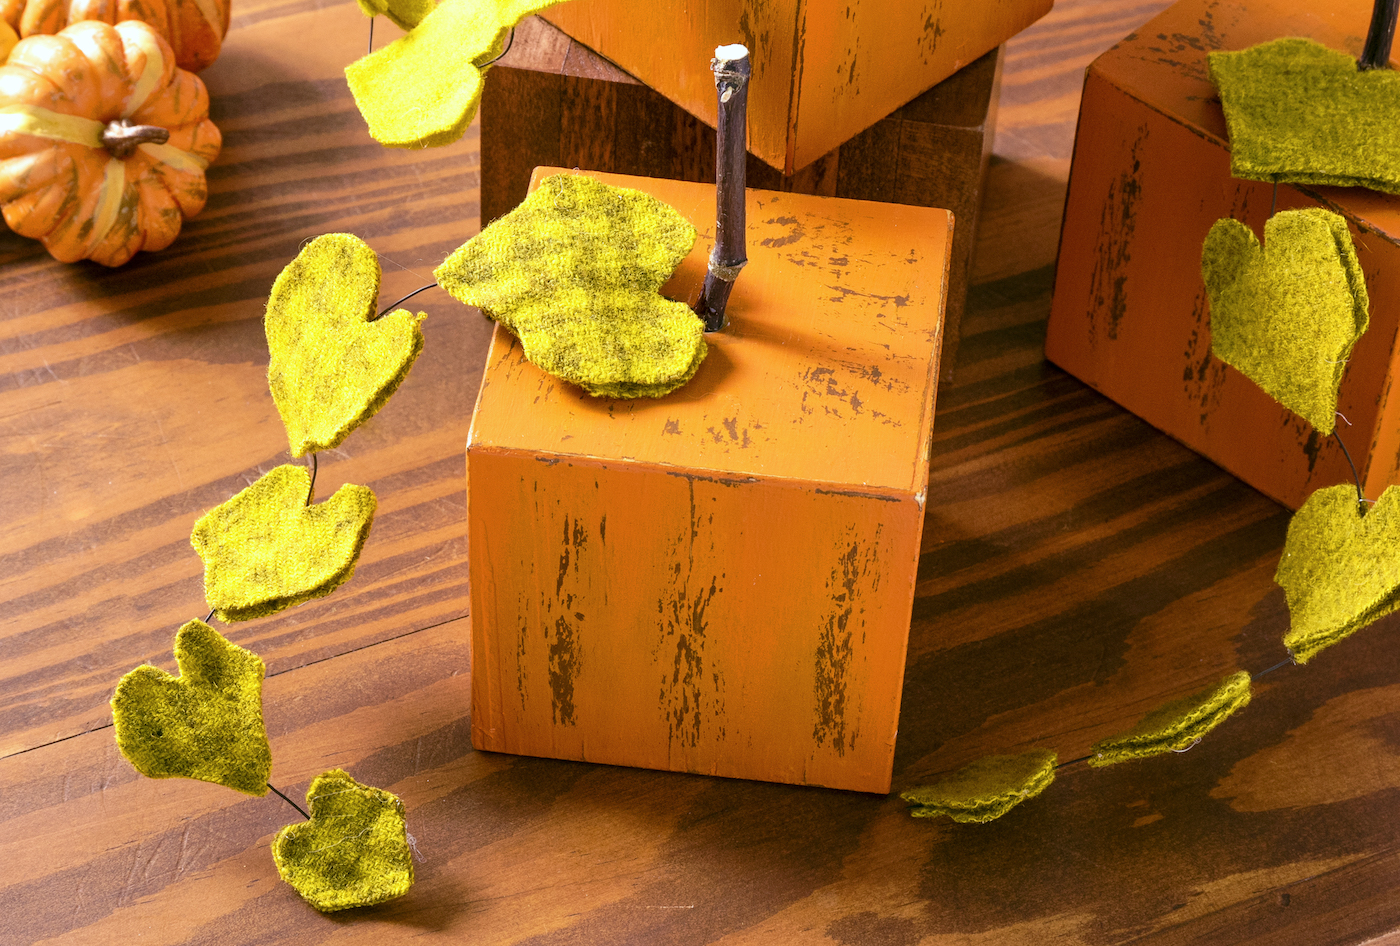
Use a clear drying, strong craft glue to attach the stems and vines. What I did was bend the wire slightly and stick down into the hole first. Then I added glue, wedged the stem down into the hole, and added a bit more glue around the stem.
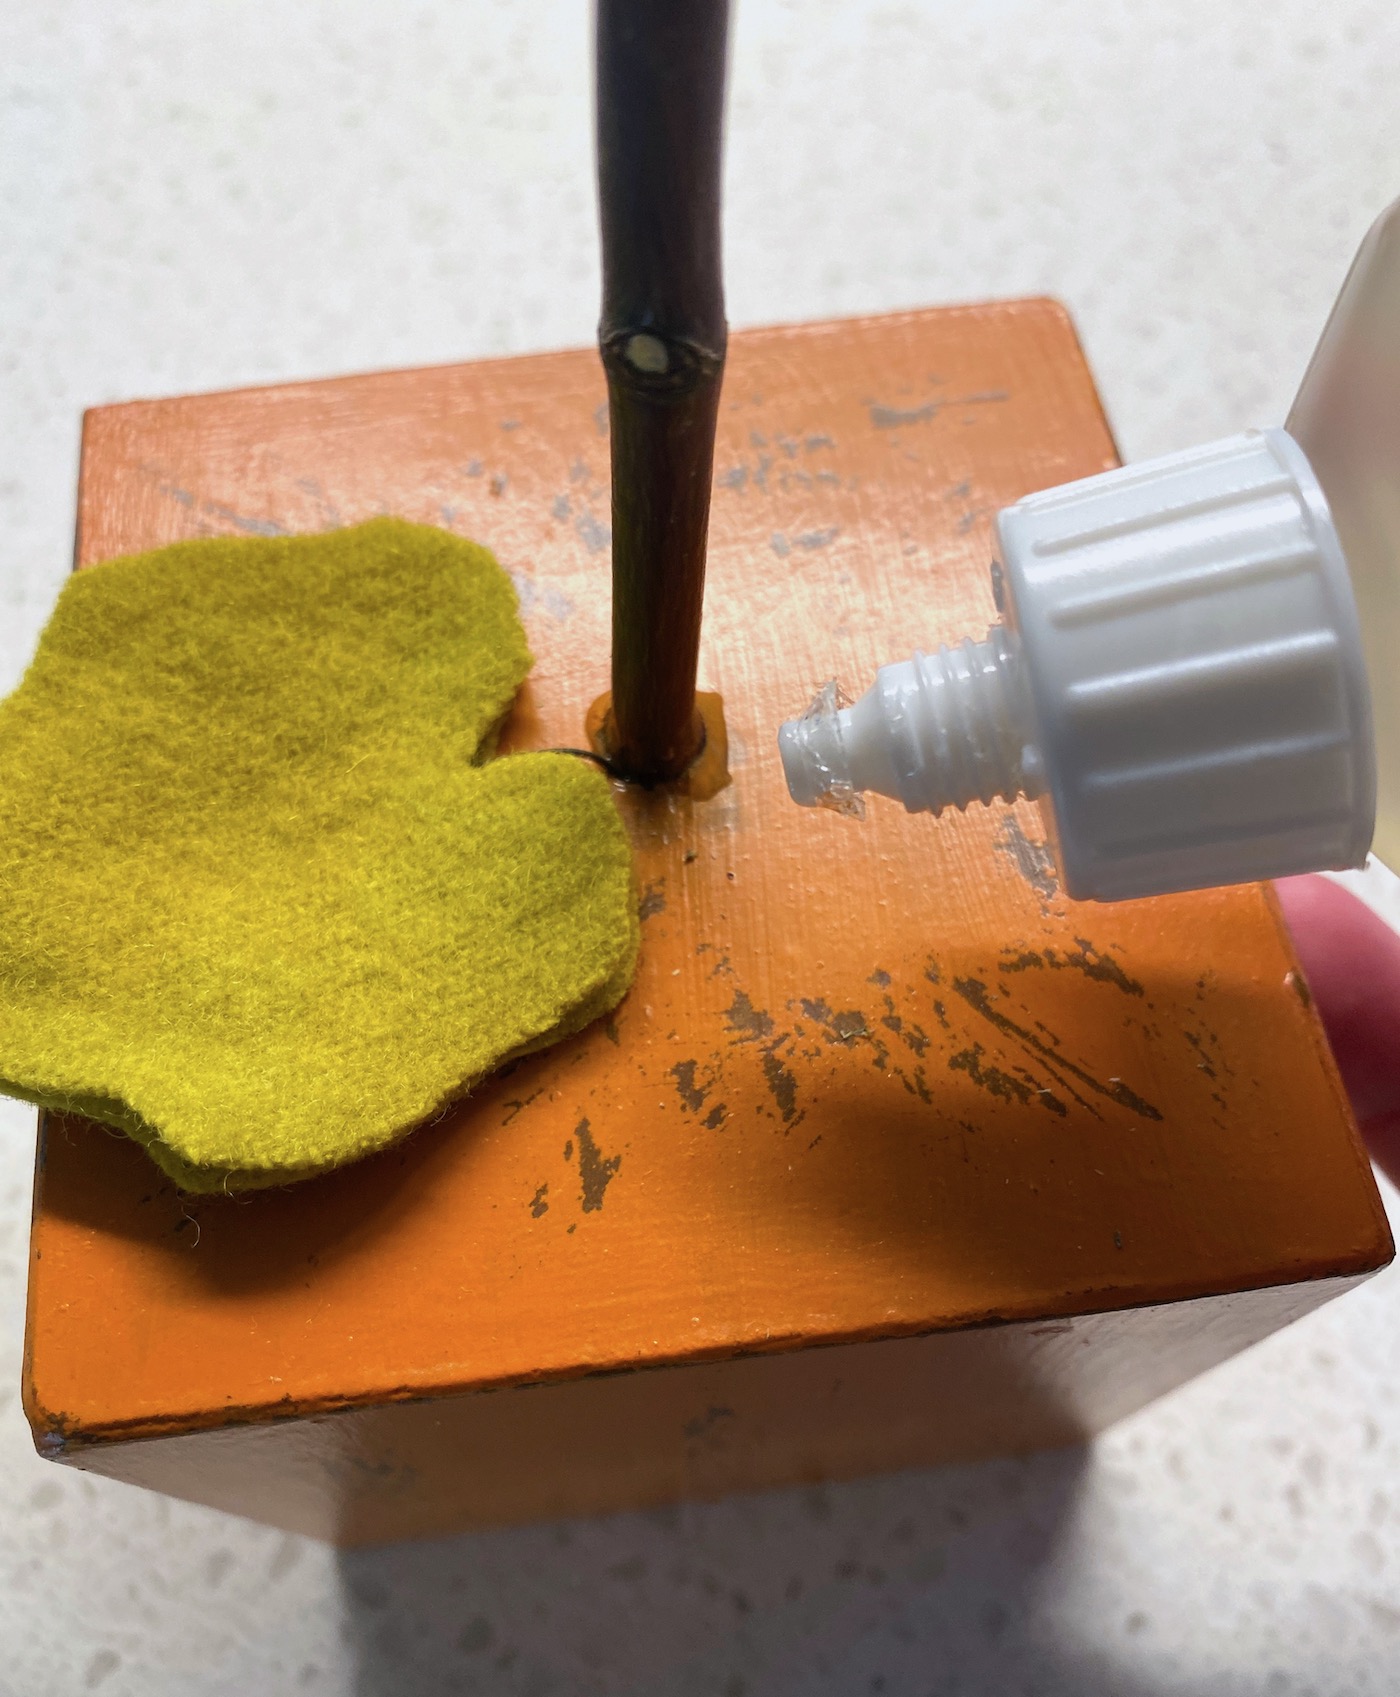
If you find the stem isn’t pushing down into the hole, you can shave just a little bit off with a knife. Shave a little, try again, and repeat.

Everything should dry, and your DIY wooden pumpkin is ready to display proudly! I hope you made several.
Note: If your stems are slipping into the hole because the hole is too large, you can lay the block on its side and prop up the stem horizontally as it dries. Make sure to use enough glue around the stem and you should be fine.
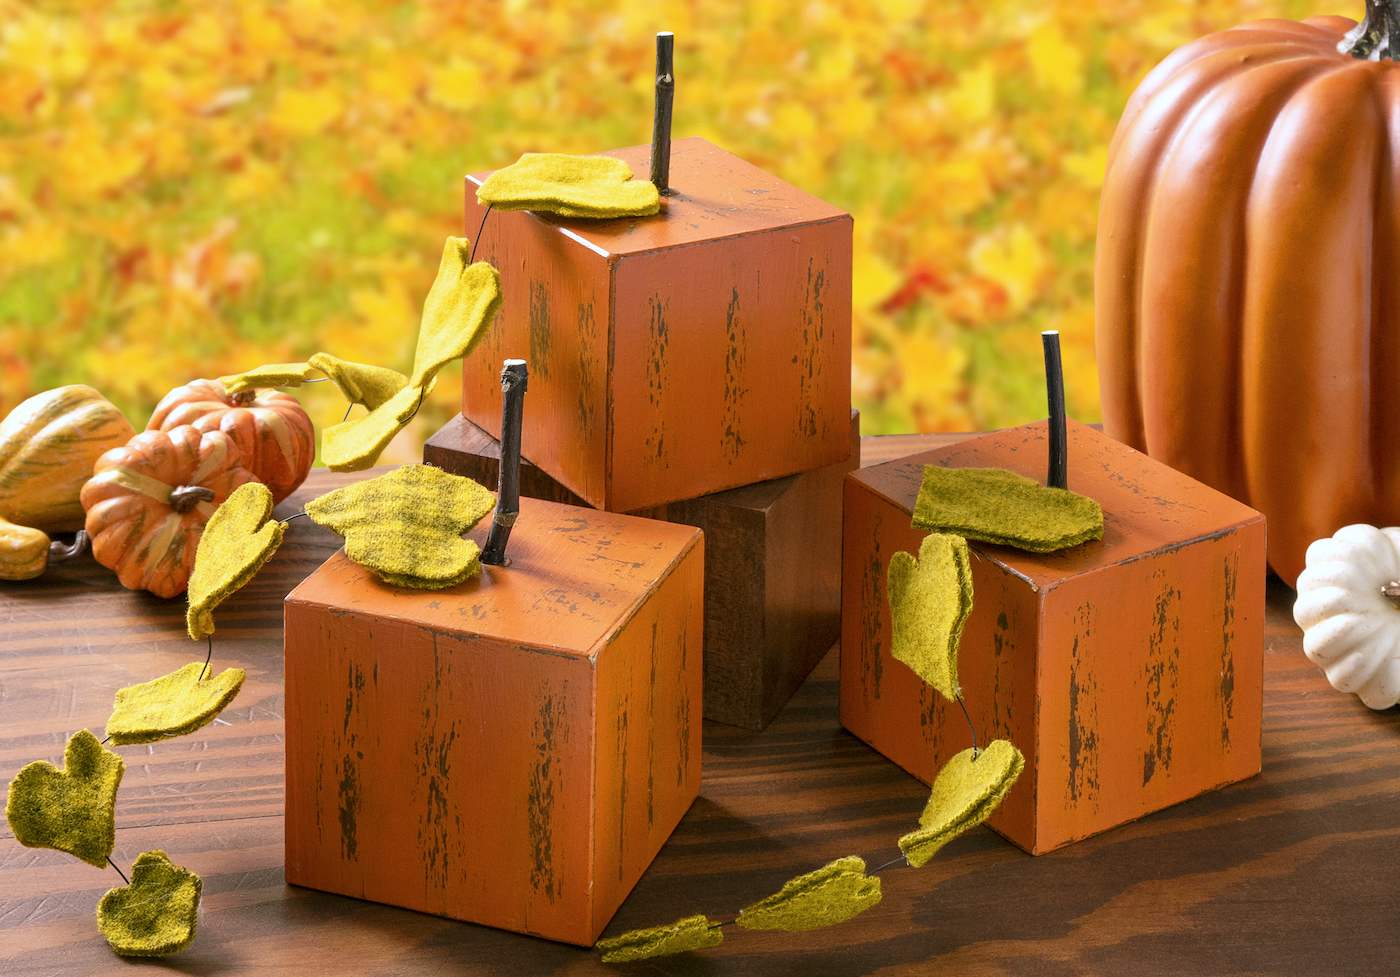
What do you think of my punkins? I hope you love them as much as I do! Oh – I might not have mentioned – the wire allows you to bend the vines any way you like.
Let me know what you think in the comments! I’d also love for you to check out these other posts as well:
Decorate Paper Craft Pumpkins • DIY Fall Napkin Rings • DIY Fall Sign • DIY Leaf Bowl • DIY Nautical Pumpkin • DIY Pumpkin Magnets • DIY Pumpkin Seed Art • Dollar Tree Fall Crafts • Fall Leaves Frame • Glitter Acorn Decor • How to Dry Acorns • How to Paint Acorns • How to Preserve Leaves • Mod Podge Map Pumpkins • Paper Mache Pumpkins • Wood Pumpkin Decor


love your page