Use Mod Podge, holiday minis, and a paper mache box to create unique Christmas shadow box ornaments. So fun and very satisfying to make!
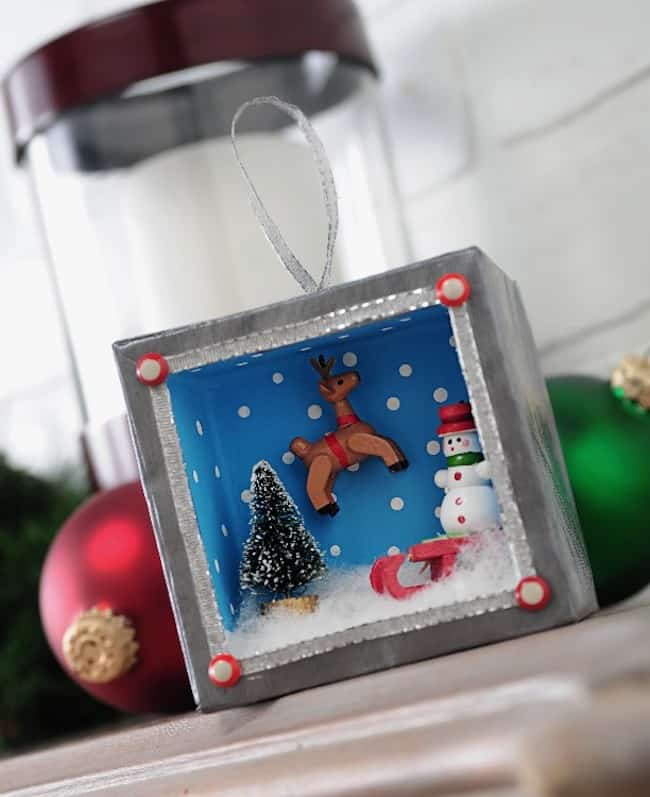
I’m so excited about this shadow box ornament project! I’ve wanted to try shadow box ornaments for my Christmas tree, so when Sizzix asked me to use their 3-D cube shape I eagerly accepted the challenge. I knew there was something wonderful that could be done with it: a Christmas ornament!
Sometimes the obvious escapes me, and it was designer (and my friend) Holli who suggested that I do holiday shadow box ornaments. Thanks Holli, for this Mod Podge ornament idea – I owe you one.
*Note: this shadowbox ornament was made with a Sizzix product that is no longer available. If you want make an ornament like this, use a square paper mache box like one of these with the lid removed. Pick one larger and deeper than the one suggested below.
DIY Shadow Box Ornament
Gather These Supplies
- Sizzix Bigz XL Die – Cube, Twist 3-D by Karen Burniston
- Sizzix Big Shot die cutter
- Black cardstock, 1 sheet
- Mod Podge Silver Shimmer (if you can’t find the Silver Shimmer, just use a sparkle version)
- FolkArt Acrylic Paint – Ocean Cruise, Winter White
- Paper Mache box, approximately 2.5 – 2.75″ square
- Mini Christmas ornaments – I bought mine in a set at Michaels
- Silver Ribbon, 1 yard
- Red brads (you could use buttons too)
- White stuffing for fake snow
- Craft Glue
- Craft Knife
- Scissors
- Paintbrush
- Toothpick

Assemble the cube according to the instructions. Karen Burniston, who designed the die, is very kind and made a video that you can find here. I left the back of the cube open.
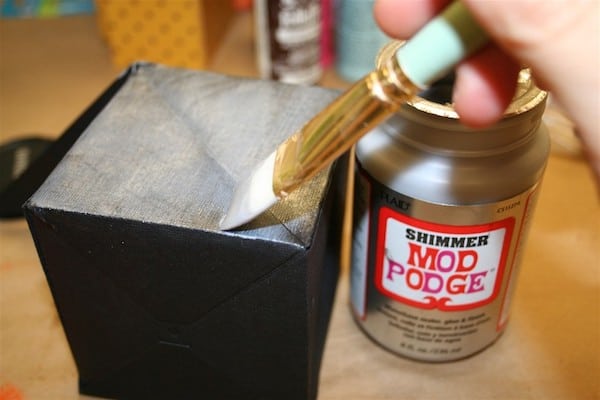
Completely coat the outside of the cube with Mod Podge Silver Shimmer. I put on about three coats so that it would be very shimmer-y. I’m all about bling these days. What’s come over me?
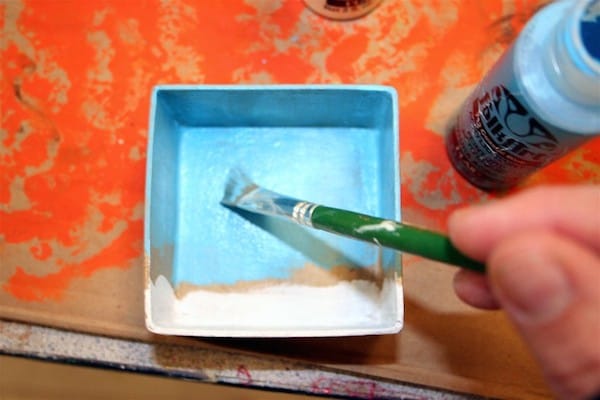
Take the lid off of the paper mache box – you won’t need it for this project (but save it for another). The inside of the box is going to hold everything, so paint it with a winter scene.
I used both FolkArt colors to make my sky and snow for my shadow box ornaments. Allow to dry.
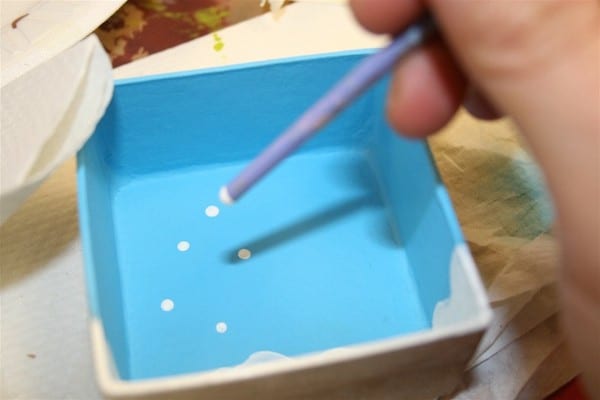
Use the end of your paintbrush to make dots for falling snow. Allow to dry.
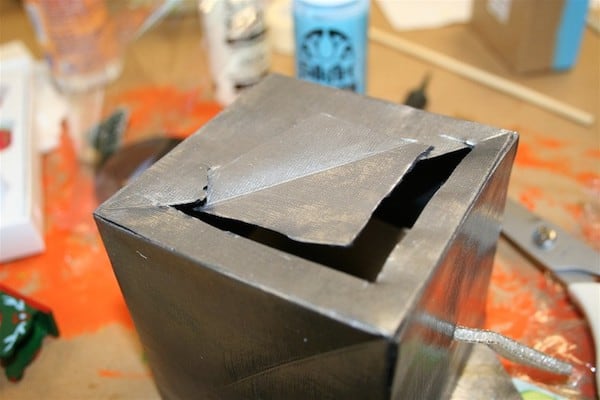
Choose which side of the cube is going to be the front. If you use Karen’s die it includes a pre-cut hole, so that needs to be on the top.
Use your craft knife to cut out a window in the front. Cut carefully and slowly; use scissors to trim up if necessary.

Time to go glue crazy, which is the best kind of crazy to be! Insert the box into the back of the ornament and glue to the front. Glue the snow into your scene, and then use the silver ribbon to outline the “window.”
You’ll see I used a toothpick to apply the glue because I needed such a thin strip.
After you are done gluing, make sure that you have inserted some silver ribbon through the hole in the top of the cube so that it will hang like an ornament. Glue to secure.
You are done working inside the cube, so you can now glue the back flaps closed. Don’t you feel like you just completed major surgery?

Here’s my cute little ornament tray (along with a paint mess and my camera lens cover). I chose a few characters and a tree and snipped off the hangers.

Glue your miniatures into the shadowbox. I used a toothpick again. Suddenly I love gluing with toothpicks.

To finish, add either brads or buttons to the corners with craft glue. You don’t need a toothpick this time, but you are welcome to use one if you would like.
Thanks for swinging by and seeing my shadow box ornament. I had a blast. I hope you’ll try some shadow box ornaments in the future! I also hope you’ll check out these other ornament tutorials:
Confetti • Crystal Photos • Decoupage Fabric • Glass Balls • Kids’ Handprints • Letters • Mason Jar Lids • Mod Podge Glitter • Night Light Bulbs • Painted Wood • Paper Bags • Paper Balls • Photo Blocks • Rhinestones • Rustic Glitter • Salt Dough • Seashells • Sugar





Unbelievable! This is amazing, Amy! I would LOVE to hang this on my tree. Thanks to Holli for giving you an idea that you could expand into this work of art. Brilliant!
This is adorable!! I want to make one. Or 6.
Love this shadow box ornament Amy, looks very vintage but modern at the same time!
This is super cute! I love the concept and it would be so fun to create one. Thanks for sharing this!
ooooooh! you are my hero! I LOVE stuff like this!
What a neat idea. You did a lovely job. I like the background.
I adore this one Amy…! I am so gonna have to try this!
As for my project… I actually did not READ which die I was supposed to use and ended up using the wrong one.
Do I get a prize for that brilliant move????
Cute and unusual. You don’t see a lot of this look right now. Current but retro at the same time. Sweet.
Thanks for visiting me at beColorful and leaving such a kind comment.
Pam
Omg, this is so cool! Really great idea!!!
What a fun idea!
Soooo adorable & clever!
So unique! I love the shadowbox concept!
Very cute! This looks like a fun project to do with family. There are lots of little ornaments in that tray. Now… I need to check out Mod Podge Silver Shimmer…
Love the reindeer aloft! Mahalo for your holiday scene box.
So very creative, love it!
What a nifty idea!
Thanks to you, Holli and Karen for such a wonderfully idea. This is so cute.
oh so cute, just perfect for the holidays!
I love the shadowbox concept
Rebecca Minor
buzzybeedesignsATyahooDOTcom
How cute is that……I love it….it would also be a great project for kids…thank you so much for sharing…..
Beautifully IN the box!
Amy, This is just brilliant! Holly’s suggestion and your exectution- AMAZINGLY CUTE!!!!
xxxooo
This is wonderful! What a terrific little shadowbox and a clever design.
What a clever idea. This is wonderful, I love all the detail. Fab project!
Super Like! Great job Amy!
So cute! I love the idea of using those miniature ornaments as props for mini-scenes like this. It’s a great use for them.
Amy- as a Number one fan of all things shadow box I can say that this is simple adorable!
http://www.mel-designs.typepad.com
I did a snowman post today and wanted to let you know I featured this project. Thank you for sharing. =)
It’s going to be my daughter’s 2nd christmas (this one she might be able to remember) and we will have fun putting up decorations. Baby’s first DIY ornament. Thanks Amy.
omg so easy!!!VERY AWESOME COOL OMGGGGGGGGGGGGGGGGGGGGGGGGGGGGGGGGGGGGGGGGGGGGGGGGGGG!!!!!!!!!!!!!!!!!!!!!!!!!!!!!!! 🙂 :):):):)
Lovely and simple, thanks for sharing such a fun project 🙂
Where did you get those cute ornaments??
Hi Jessica – Michaels!