
Learn how to use resin in crafts! Resin makes the coolest projects; get tips and tricks as well as frequently asked questions for beginners. This is your complete guide.
I don’t know if you’ve heard all about resin, but it’s all the rage these days! I’m really excited to share my knowledge of this product with you, because you can make some of the coolest crafts ever with resin.
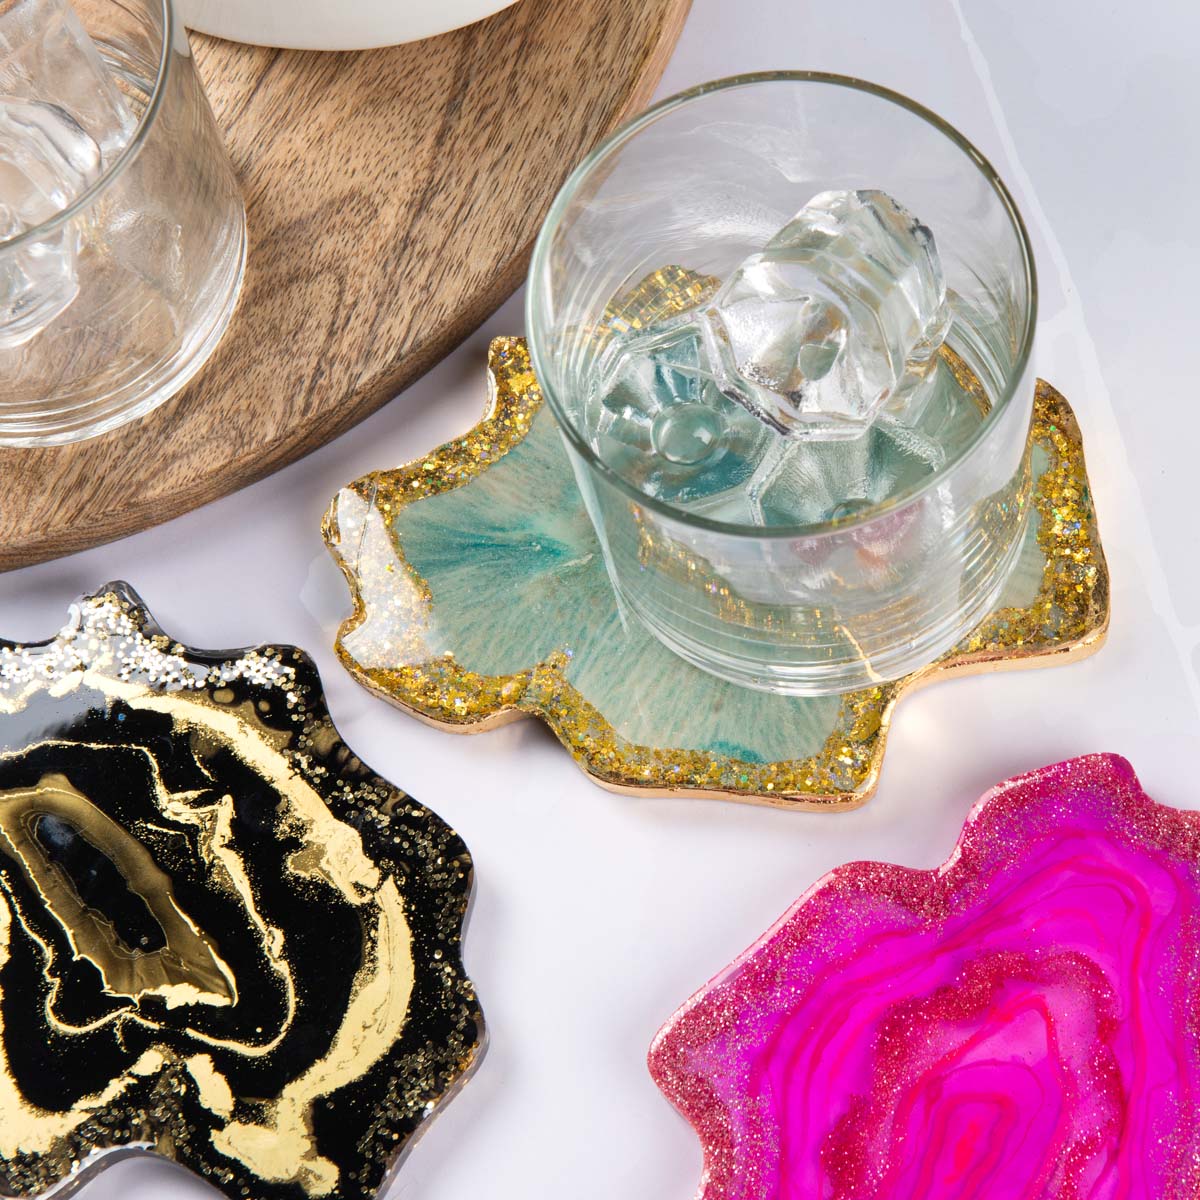
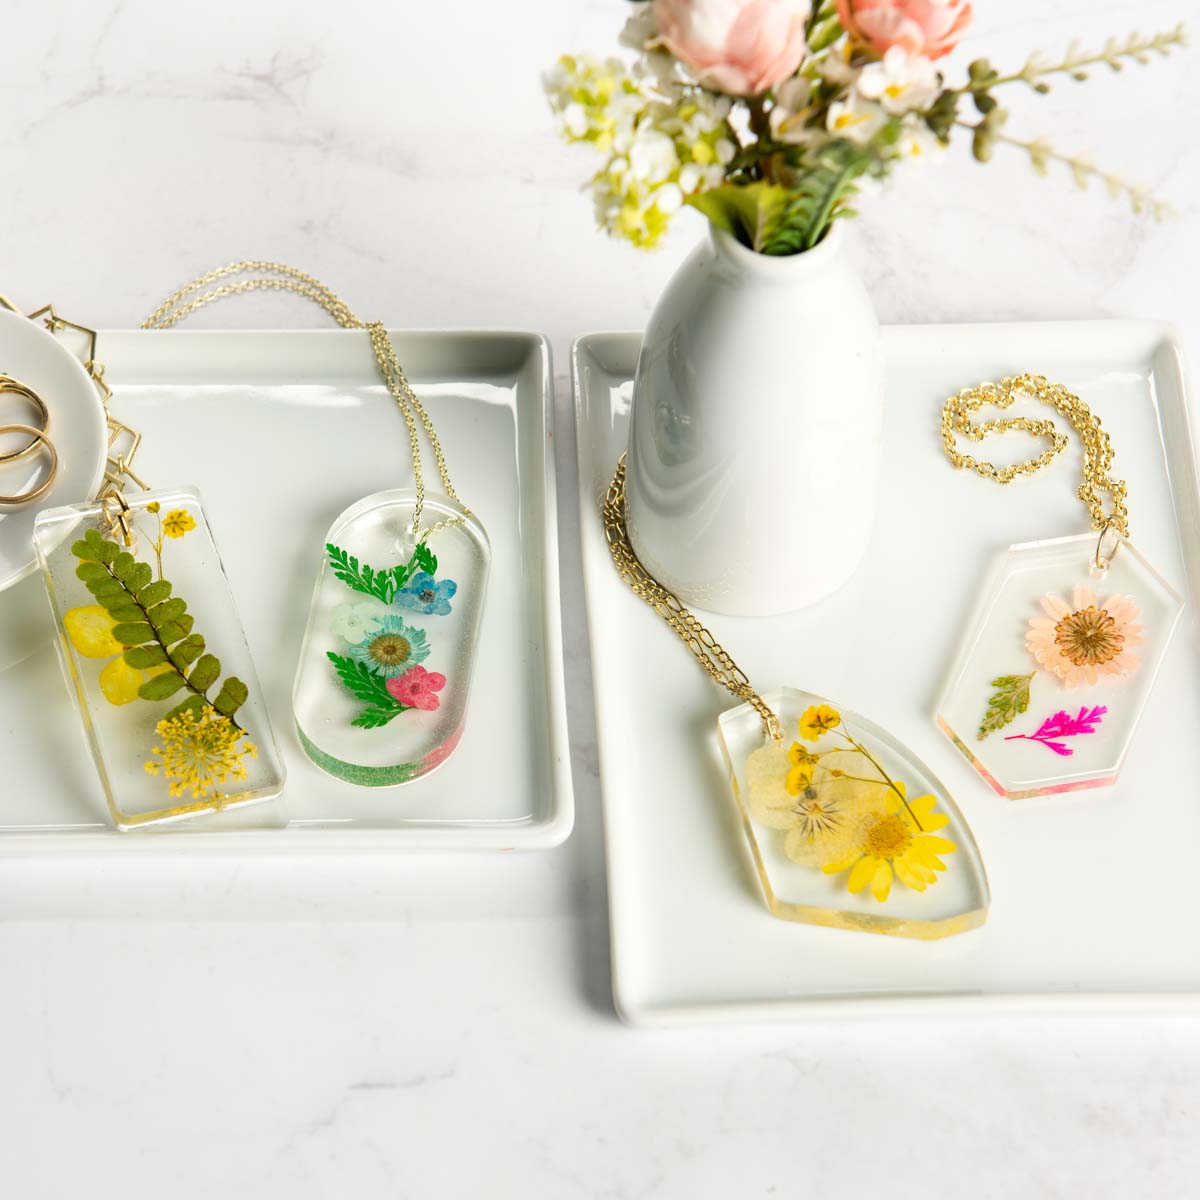
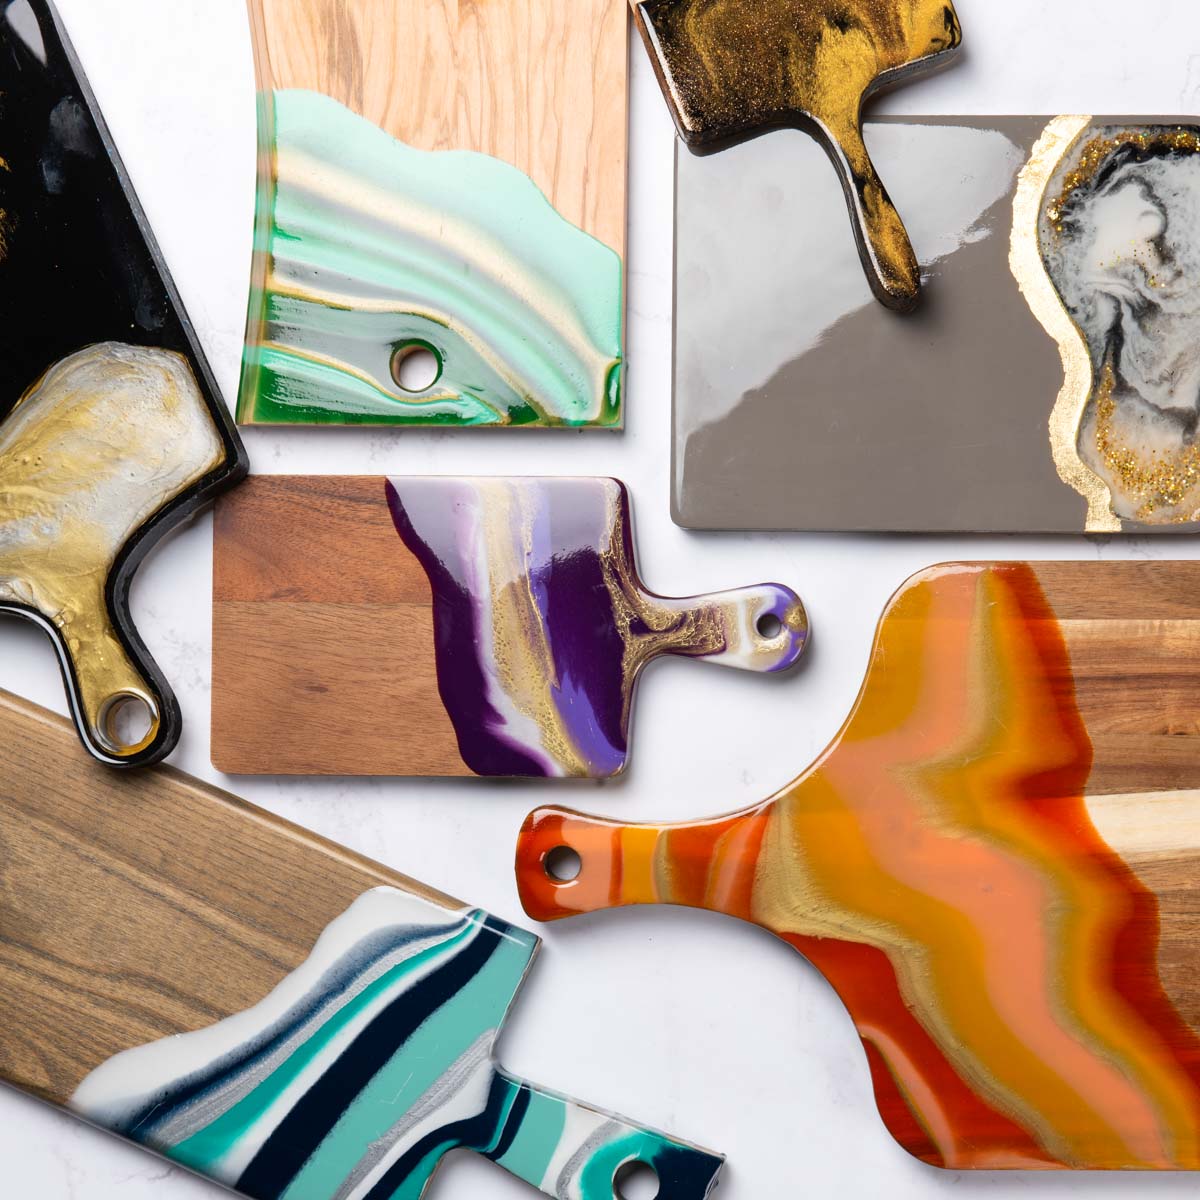
Crafts like these keychains, coasters, and wall art.
You can use this clear, dries-hard product to make home decor, gifts, jewelry, and more. If you visit our resin crafts, you’ll see exactly the type of projects you can make.
I don’t know about you, but when I’m starting any new craft I like to know what I can make. I need something to aspire to!
Once you decide that you’re in love and you want to try this craft, it’s time to learn how to do it. Before we start, I want you to take a peek at this video to get an idea of how to use resin. After that, we’ll dive into the details.
Resin for Beginners
This is the part I’m most excited about sharing – the FAQ! This is the “meat” of this post: everything about resin and what you need to know about being successful.
If you have a question, be sure to leave it in the comments. I’d also like to know about your experience with this craft. Let’s dive in!
What is Resin?
You’re probably wondering “what the heck is this stuff?” Well, resin is actually an adhesive in liquid form that also be used as a coating.
Technically you could use it to glue things, but you are going to enjoy it in its cured form, which is a hard and clear coating. And that’s how you will use it in resin crafts.
Epoxy vs. Casting Resin
You’ll hear both of these terms used so I’m going to explain the difference.
Epoxy resins are more viscous and dry/cure faster than casting resins. They are meant for coating applications.
Casting resins are typically used to create dimensional objects such as paperweights, molds, figurines, and also jewelry.
The terms are often used interchangeably as well as the products. You can learn more about the differences between epoxy resin and casting resin here.
Is it easy to work with resin?
That’s actually what I love about it. It’s VERY easy to work with! In essence you are mixing and pouring. You might add a few things. Think about the process as making a very simple recipe using an equal amount of two ingredients.
The biggest “concern” is that resin experiences a chemical reaction, very different from a decoupage medium.
It is non-toxic when cured, but you need to take the proper safety precautions just as if you were dying clothing. Better safe than sorry.
PS: it might sound scary, but it’s not. I feel very safe when using resin!
Supplies You’ll Need
Here’s what you’ll typically want to have on hand when making resin art:
- Measuring cups and mixing cups
- Craft sticks or small dowel rods
- Butane torch, heat gun, hair dryer, or 91% rubbing alcohol
- Silicone mat, wax paper, or plastic sheeting to cover your work space
- Silicone molds
- Embellishments (optional): dried flowers, alcohol ink, glitter, gold leaf, and lots of other goodies
- Personal protective equipment – respirator, goggles or glasses, gloves, and clothing to cover your arms. Whether or not you wear this stuff is up to you, but it’s suggested, especially if you have a sensitive respiratory system.
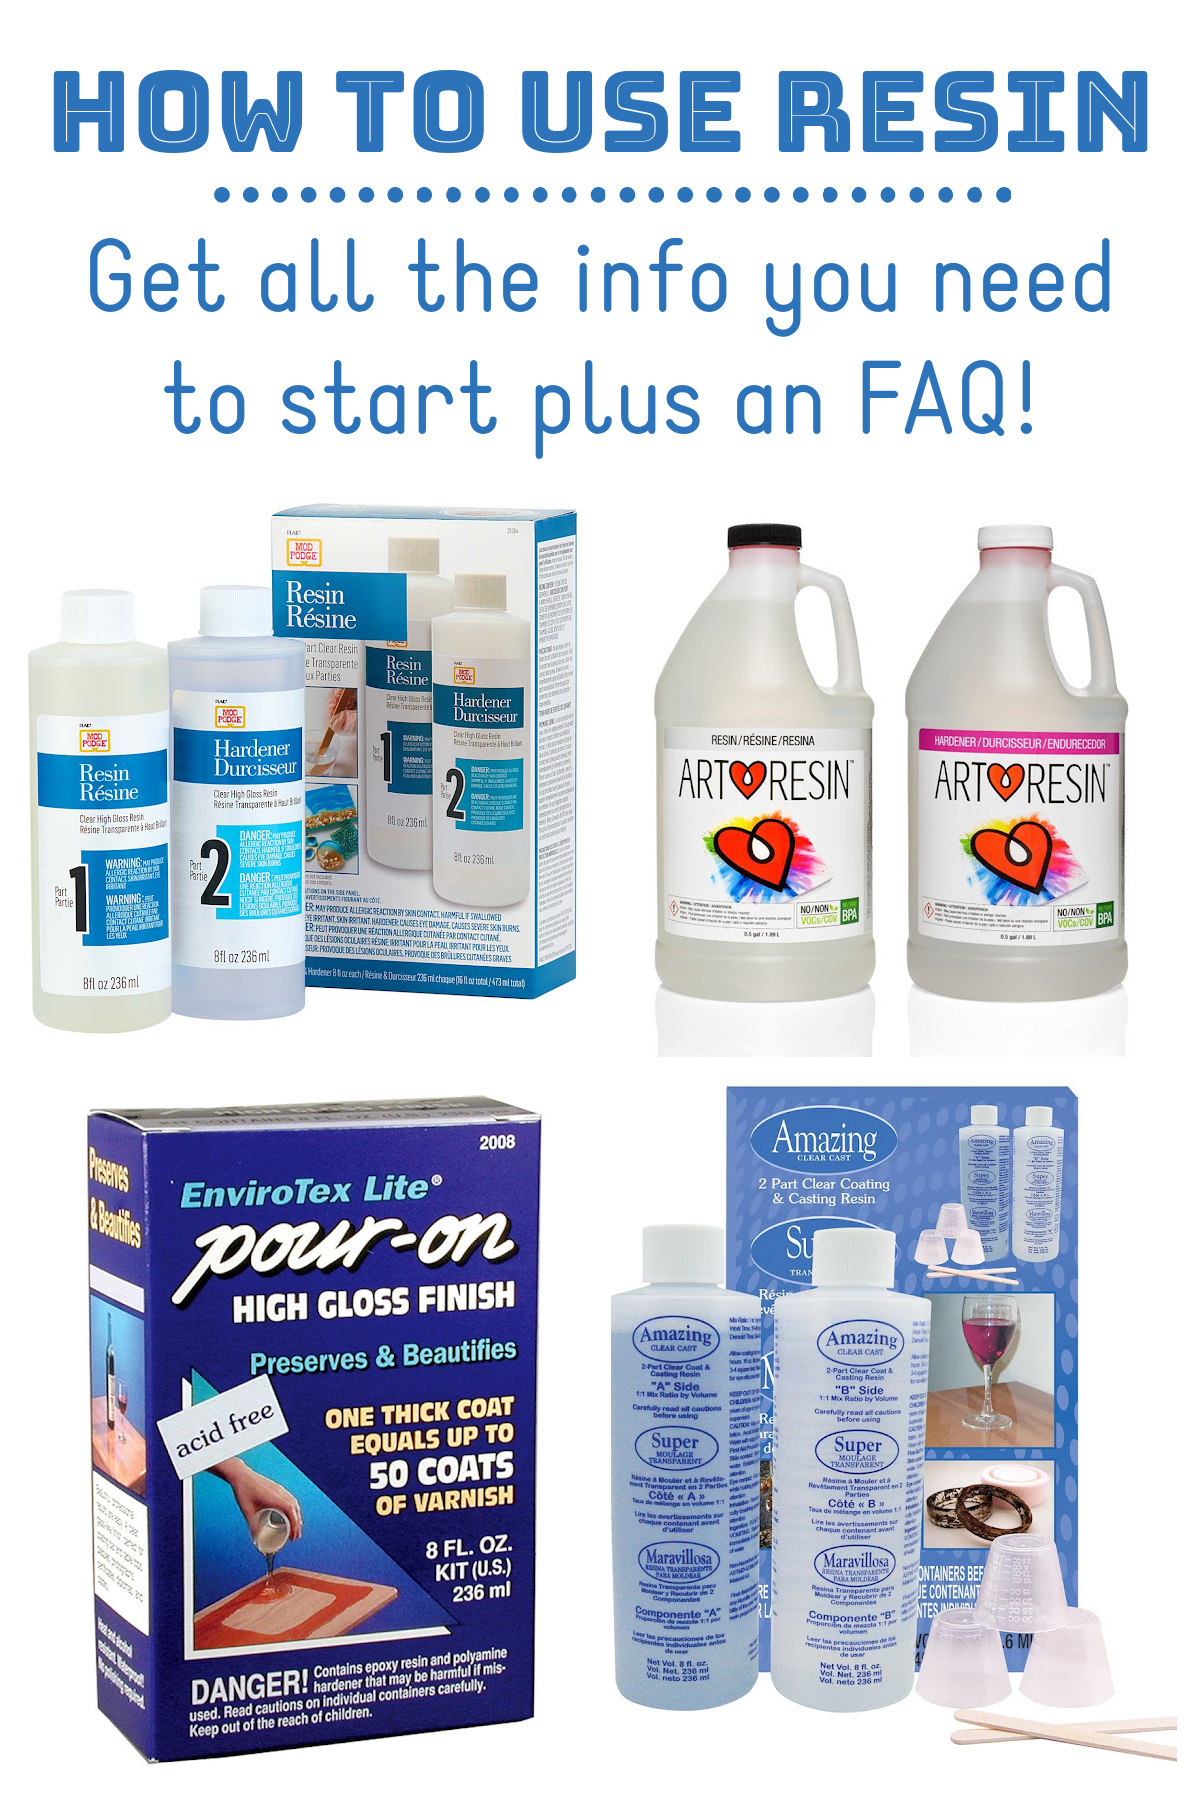
What is the best resin for beginners?
Plaid Crafts has released Mod Podge Resin, and I find it really easy to use. It has a superior lightfastness quality and dries to a hard, clear gloss finish that the leading products do not have.
Mod Podge Resin is also FDA certified food safe, has low VOCs, and is made in the USA.
The craft stores have quite a few brands, so be sure to read the packaging to find out what is best for your needs. I’ve made a lot of things with the Mod Podge brand and always had success, so I can definitely recommend it.
How do you use resin step by step?
- Get your supplies ready and put on your personal protective equipment if you’re using it.
- Mix a 1:1 ratio of Resin (1) and Hardener (2). Be mindful of the amount of resin you need to mix to fill your mold or to cover your project.
- Mix slowly for 3 minutes. Be sure to scrape the sides of your cup for equal mixing.
- Let your mixture rest for 2 minutes.
- Remove any air bubbles with a torch. Keep the torch moving.
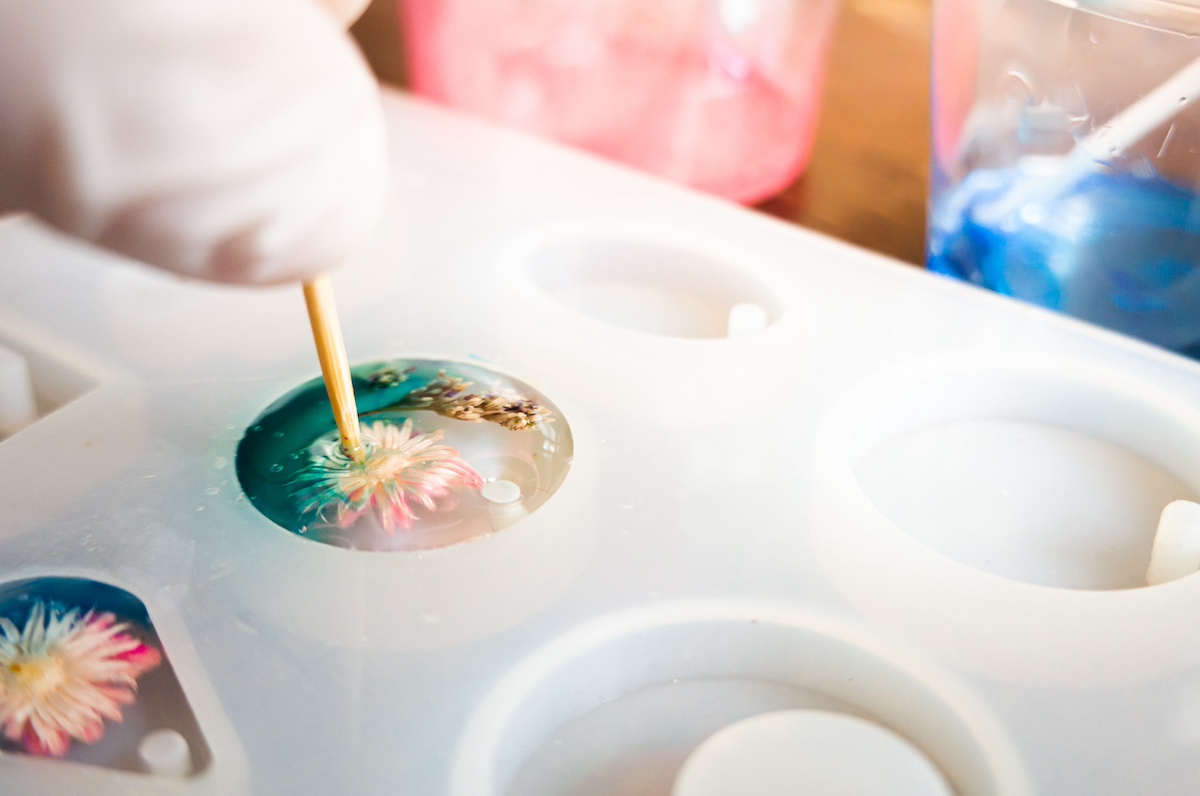
- Personalize your project by adding alcohol ink, paint, glitter, flowers, and more.
- Pour the resin into the silicone mold and let rest. Remove any air bubbles again with your torch. Repeat again if you see any additional bubbles.
- Let your project cure for 24 hours before removing from the mold.
Do you really need a torch? If you’re going to do several projects, I’d say yes. You can also exhale on the project (!) or use a lighter to remove bubbles. But honestly, the torch is easiest.
Where do I get the molds?
The silicone molds are the coolest! They determine the shape of your finished project. In fact, you need a mold for a project! You can purchase molds at craft stores like Michaels, Jo-Ann, Hobby Lobby, and then also on Amazon.
I’ll be honest, I had no idea there were so many options out there until I saw some crazy stuff on a craft store run. You can make dominoes or a license plate frame for example . . . so cool!
How long after mixing resin will it then begin to harden?
It typically has a working time of 20 – 30 minutes. During this time, you can mix in additives such as alcohol inks or glitters.
However, be sure to read the instructions for whatever brand and type of resin you buy. If the instructions don’t say, assume the low end of 20 minutes working time.
How long does it take to cure?
About 7 days to fully cure, but you can pop your resin pieces out of the mold after 24 hours. They will feel hard. Then the remainder of the time your project will just continue to strengthen.
Can I apply resin in layers?
Yes. The second layer can be applied once the first layer has set. This could be one to two hours, depending upon the humidity level and temperature in the room.
How do I remove the bubbles?
You can stir slowly or heat up the resin before stirring to help with bubbles – but I find that no matter what, I get bubbles. You should expect them, and don’t worry, because you can get rid of them.
A lot of people use a blow torch, food torch, lighter, or heat gun. That is the preferred method. You hold it over the surface of the project, right above it, and watch the bubbles come to the surface and pop.
If you don’t have access to a torch, you can exhale on your resin project. Yep – it works! I’ve done it. Don’t blow, just get close and gently exhale. The heat pops the bubbles.
Give yourself two rounds of bubble popping to make sure they are gone. Heat the surface and pop the bubbles, wait five minutes and then do it again.
Is cured resin waterproof, food safe, and heat resistant?
Yes it’s waterproof. Resin is typically FDA certified food safe when properly mixed following the instructions provided with the product (be sure to double check the instructions or website for whatever brand you buy to confirm).
Resin is typically heat resistant up to 110° F. If exposed to higher temperatures, a project may yellow. Note: resin is NOT recommended for decorative hot plates. There are high heat resins, which is what I would look for specifically if you need that “feature.”
Should I expect shrinkage?
Is it wrong that I laughed at this question? No, you shouldn’t expect much shrinkage. Maybe a little bit, but not much at all. Unless it goes into cold water (sorry I had to!).
What can I add to resin?
Really anything! My favorite mix ins (to use a frozen yogurt term) are glitter, alcohol inks, paint, dried flowers, charms, clay beads, gold leaf, and flecks . . . and more. People encase some strange things in resin. No judgements here!
Additional Tips
These are my tips for using this product that I would like to leave you with. Please always remember these:
- Work on a level surface area at a warm temp of 70 degrees or higher.
- Open time for working with resin is 20 – 30 minutes.
- You can demold your project in 24 hours.
- The full cure time for your project is 3 – 7 days.
- The shelf life of the product if unopened is 1 year. If it has been opened it is 6 months.
- Make sure to store your bottles in a warm environment, somewhere between 60 – 70 degrees. Also, be sure to store in original packaging.
Now that you know how to use resin, are you ready to get started? I’d love to hear your thoughts and experience in the comments. Talk to me!
Plus here are all of the projects you should try to get going:
Cutting Board • Geode Coasters • Gold Leaf • Ocean Resin Art • Preserve Flowers • Resin Frame • Wood Slice Coasters


Did you use a respirator when working with epoxy resin? Would you consider it safe to use indoors? And with other family members around?
How do you clean out the containers used to mix resin in once your project is complete? Or do you have to use disposable ones- u was just thinking that if using a heat gun you would not want it to be in a plastic cup that would melt?
I’ve made a wooden communion cup out of Olivewood from Bethlehem. I am trying to discern how best to finish it so that wine and or grape juice when poured into it wouldn’t penetrate and stain the wood and perhaps cause a bacteria problem. Do any of your products work on the inside of a wooden cup for those purposes.
Thanks
Rich