Learn how to decoupage wood slice coasters with napkins, then seal with resin to make them waterproof! This is a fun home decor project.
Skills Required: Intermediate. You’re going to be doing a little painting, then ironing a napkin onto Mod Podge. You’ll also be mixing and pouring epoxy resin. It helps to have crafting experience for this project.
I’ve talked about going to the wood section of the craft store before. You know, the aisle that includes boxes, photo frames, crates, wood blocks, letters, trays, and much, much more.
The aisle that I can never resist.
It always gets me into trouble by adding more surfaces to my stash. But I just can’t help it – I get plans in my mind for everything. Whether or not they’re executed in a prompt manner is another thing. . .
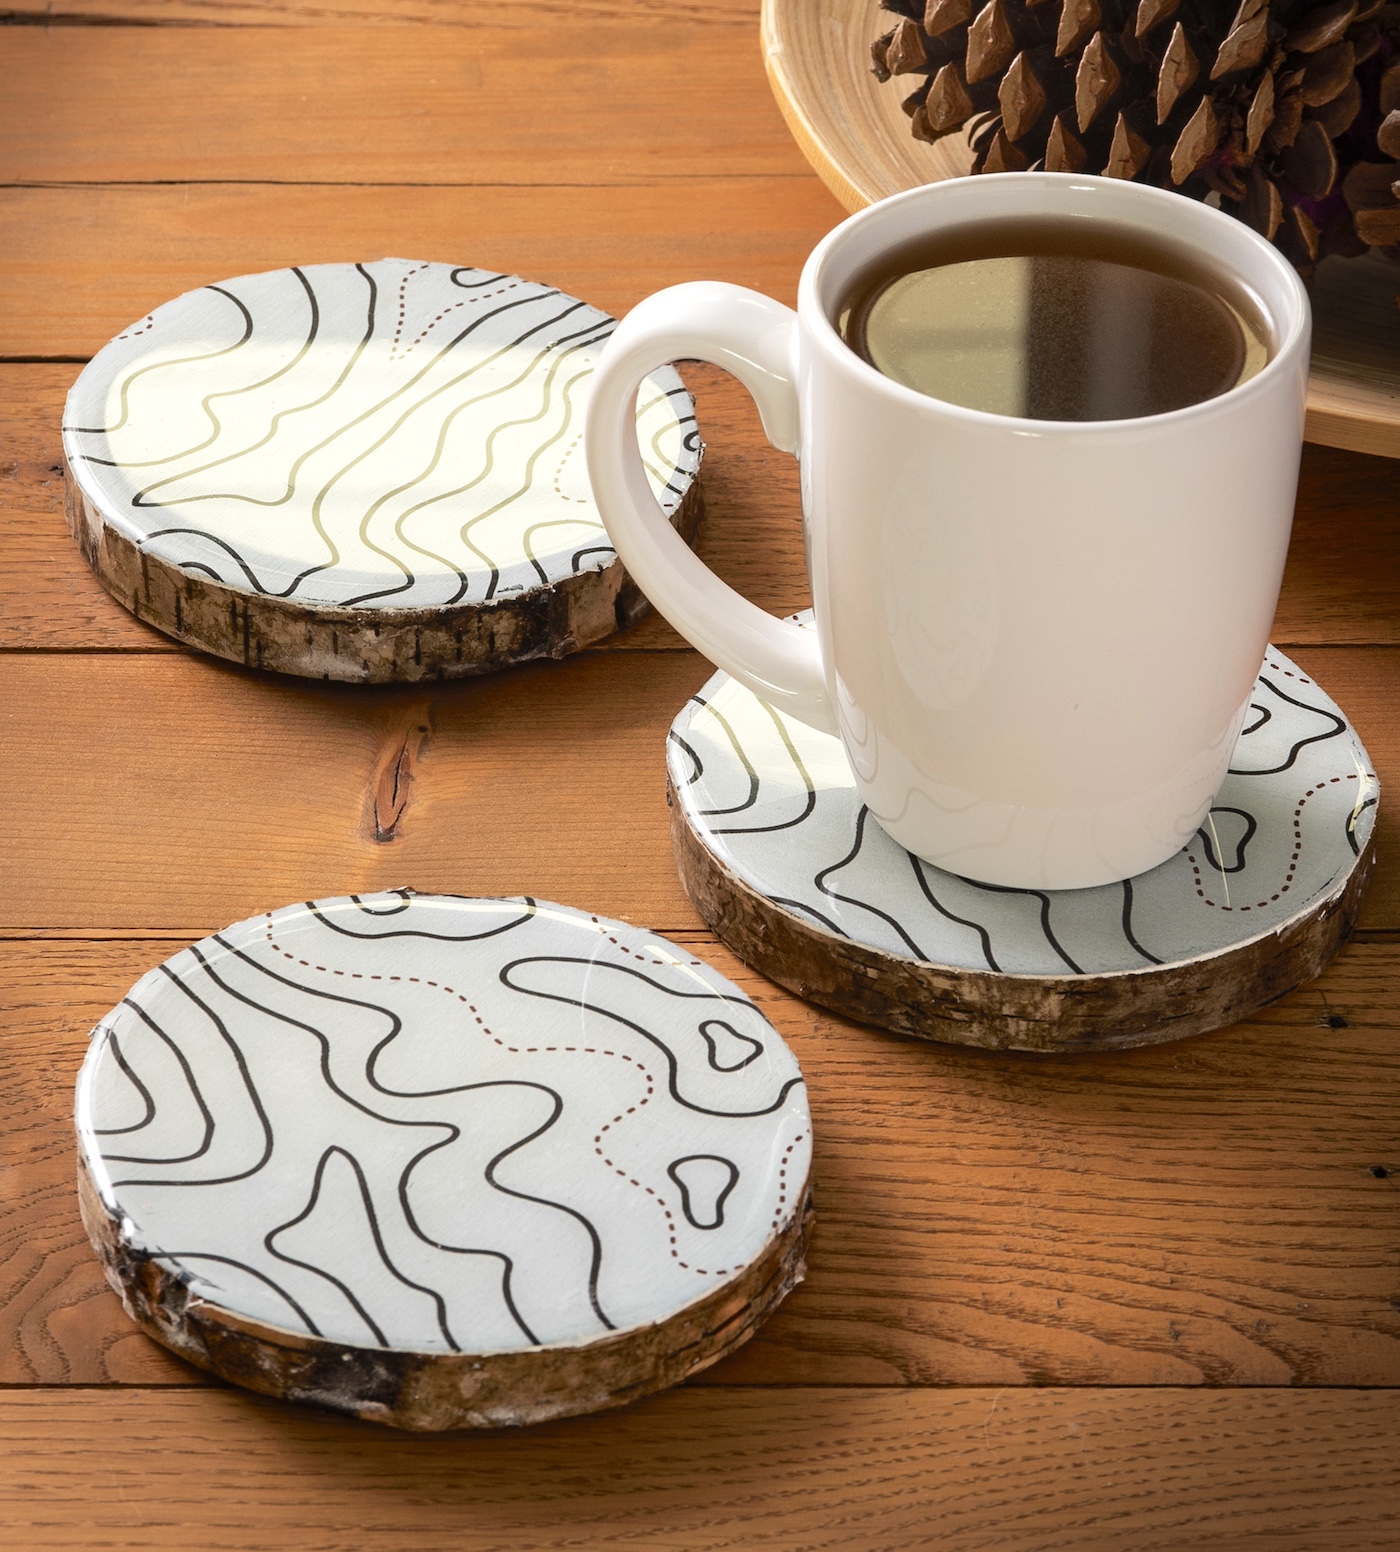
But recently I acquired some wood slices, and I knew exactly what I wanted to do with them. I wanted to attach napkins to the tops and turn them into coasters with resin.
That’s how these wood slice coasters were born! I love it when a plan comes together, don’t you?
To make these, I used a Mod Podge technique called paper napkin decoupage. If you haven’t heard of it, it’s also called the “iron on method.”
This method, which allows the Mod Podge to dry BEFORE applying the napkin, is a great solution for applying thin items to surfaces.
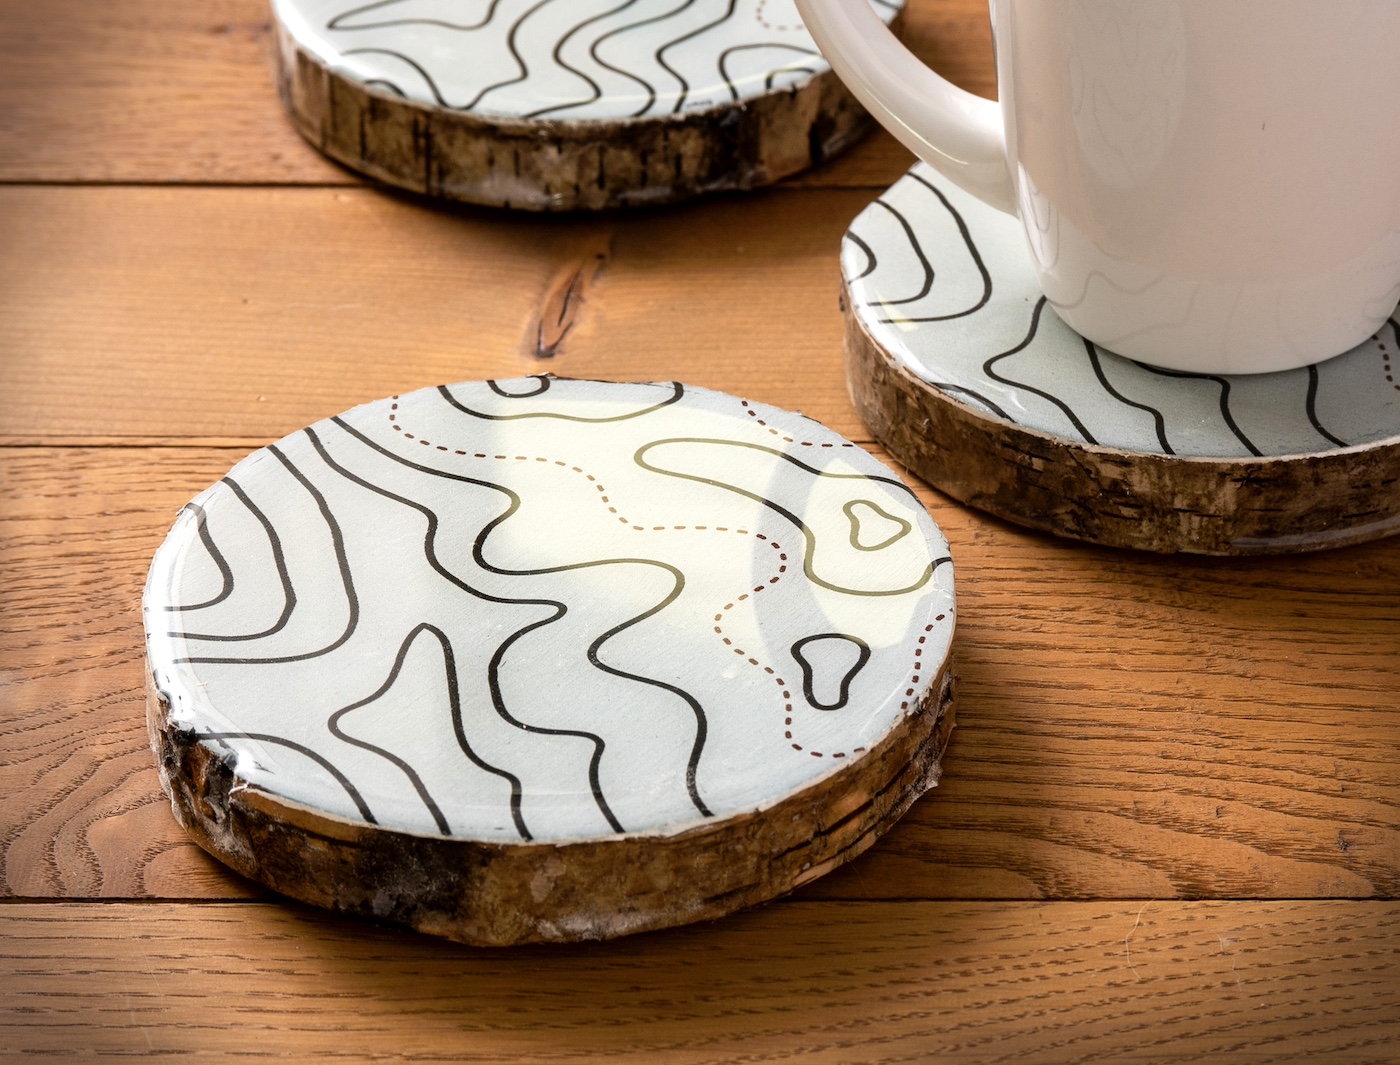
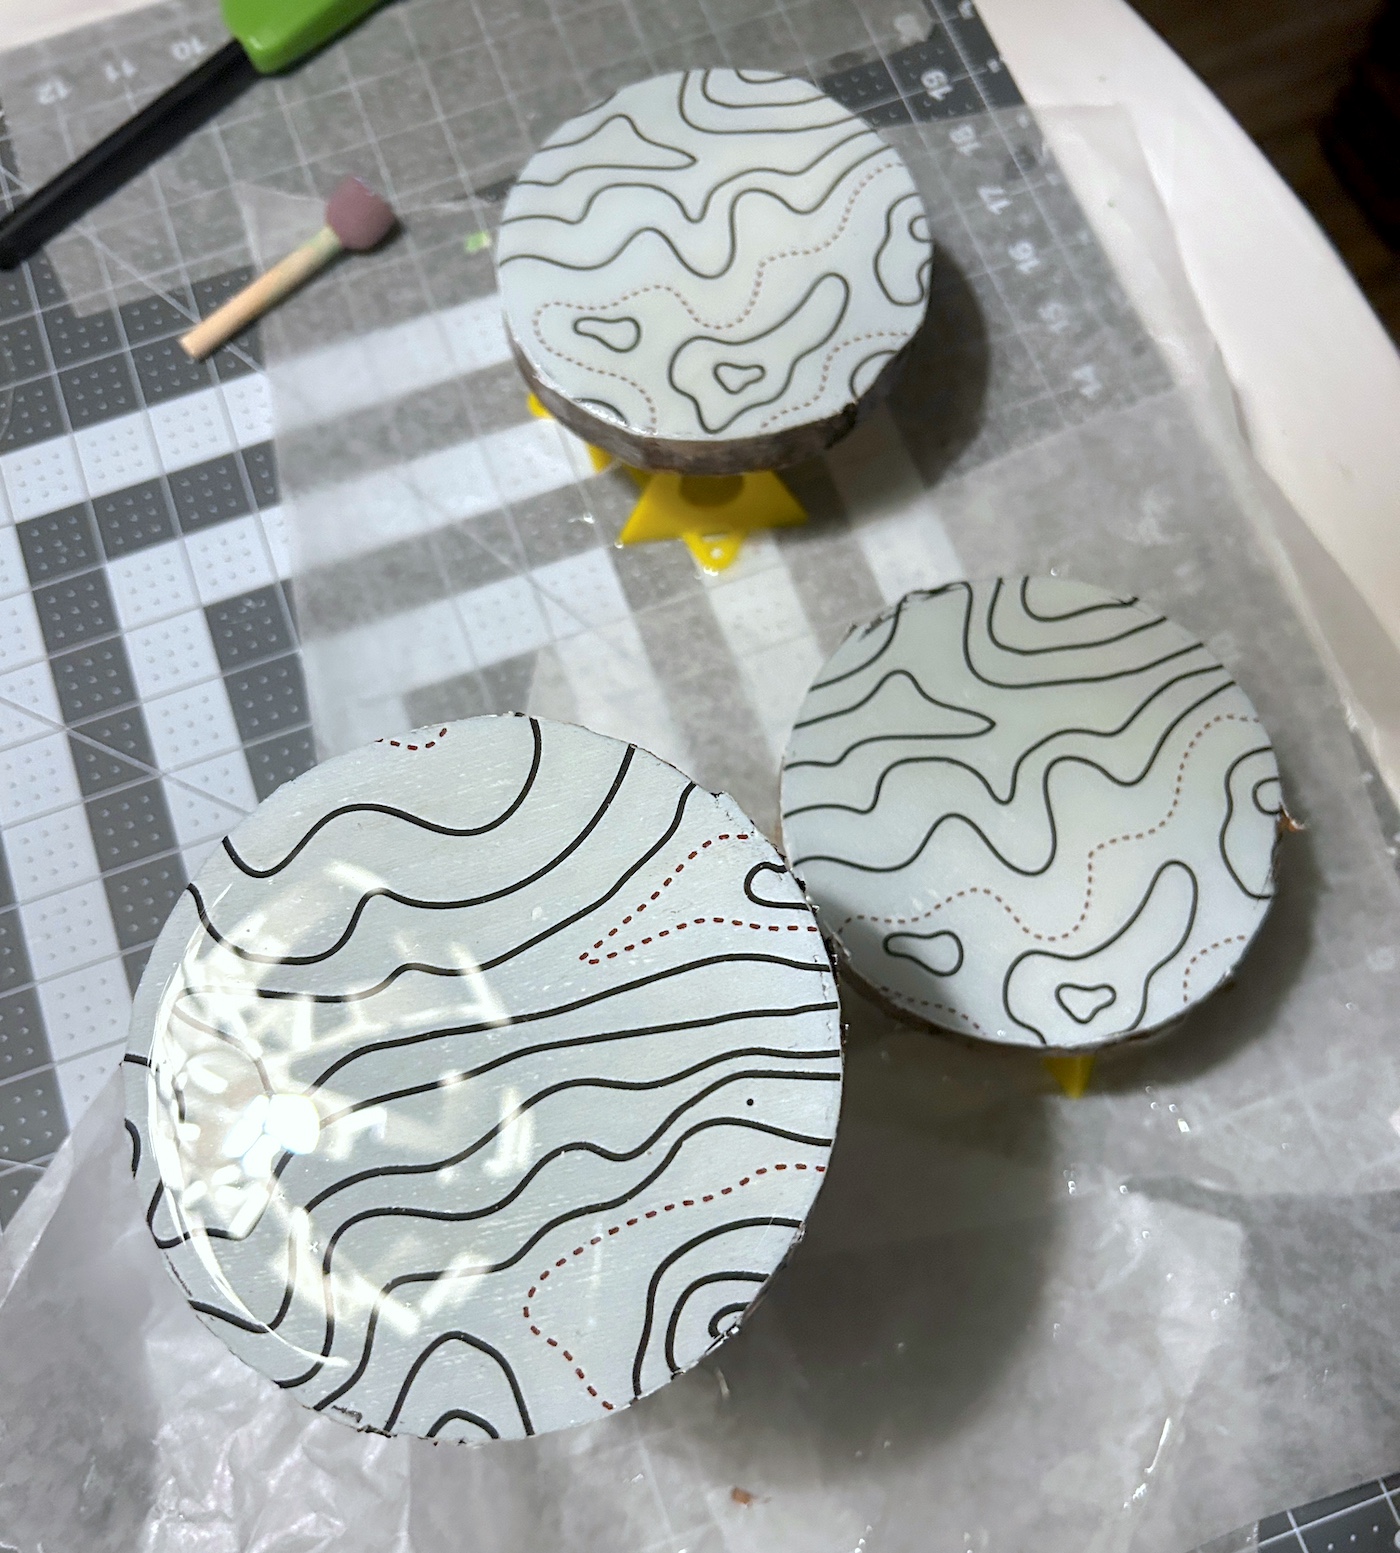
It allow me to apply these topography map themed napkins to the top of the wood slices with no wrinkles or tears. Then I applied resin on top, making everything waterproof.
And heat resistant, so you can put hot mugs directly on top of these coasters. They make great home decor or handmade gifts, don’t you think?
Learn how to make this resin craft below – first, here’s what you’re going to need.
Gather These Supplies
- Wood slice coasters
- Napkins of your choice
- White craft paint
- Mod Podge Satin
- Epoxy resin
- Mixing supplies (cups, stir sticks)
- Safety equipment
- Paintbrushes and/or foam roller
- Sandpaper
- Parchment paper
- Mini craft iron
- Mini felt feet
- Lighter (optional)
- Pyramid stands – for propping up the wood slices (optional)
Tips and Thoughts for This Project
Use a basic formula of Mod Podge. The finish is below the napkin, so it doesn’t matter which one because you won’t see it. I recommend Gloss, Matte, or Satin.
I didn’t seal the top of the napkins with Mod Podge. There’s no need since the resin is going on top.
OBSERVE SAFETY PRECAUTIONS: Epoxy and resin can be poisonous if swallowed or fumes are breathed in. Wear goggles, safety glasses, gloves, a respirator, and protective clothing as required for the project you’re doing.
Get the printable how to card for this project below:

Wood Slice Coasters
Equipment
- Mixing supplies (cups, stir sticks)
- Safety equipment
- Paintbrushes and/or a roller
- Lighter (optional)
- Pyramid stands for propping up the wood slices (optional)
Materials
- Wood slice coasters
- Decorative paper napkin(s)
- Craft paint white
- Mod Podge Satin
- Epoxy resin
- Sandpaper
- Parchment paper
- Mini felt feet
Instructions
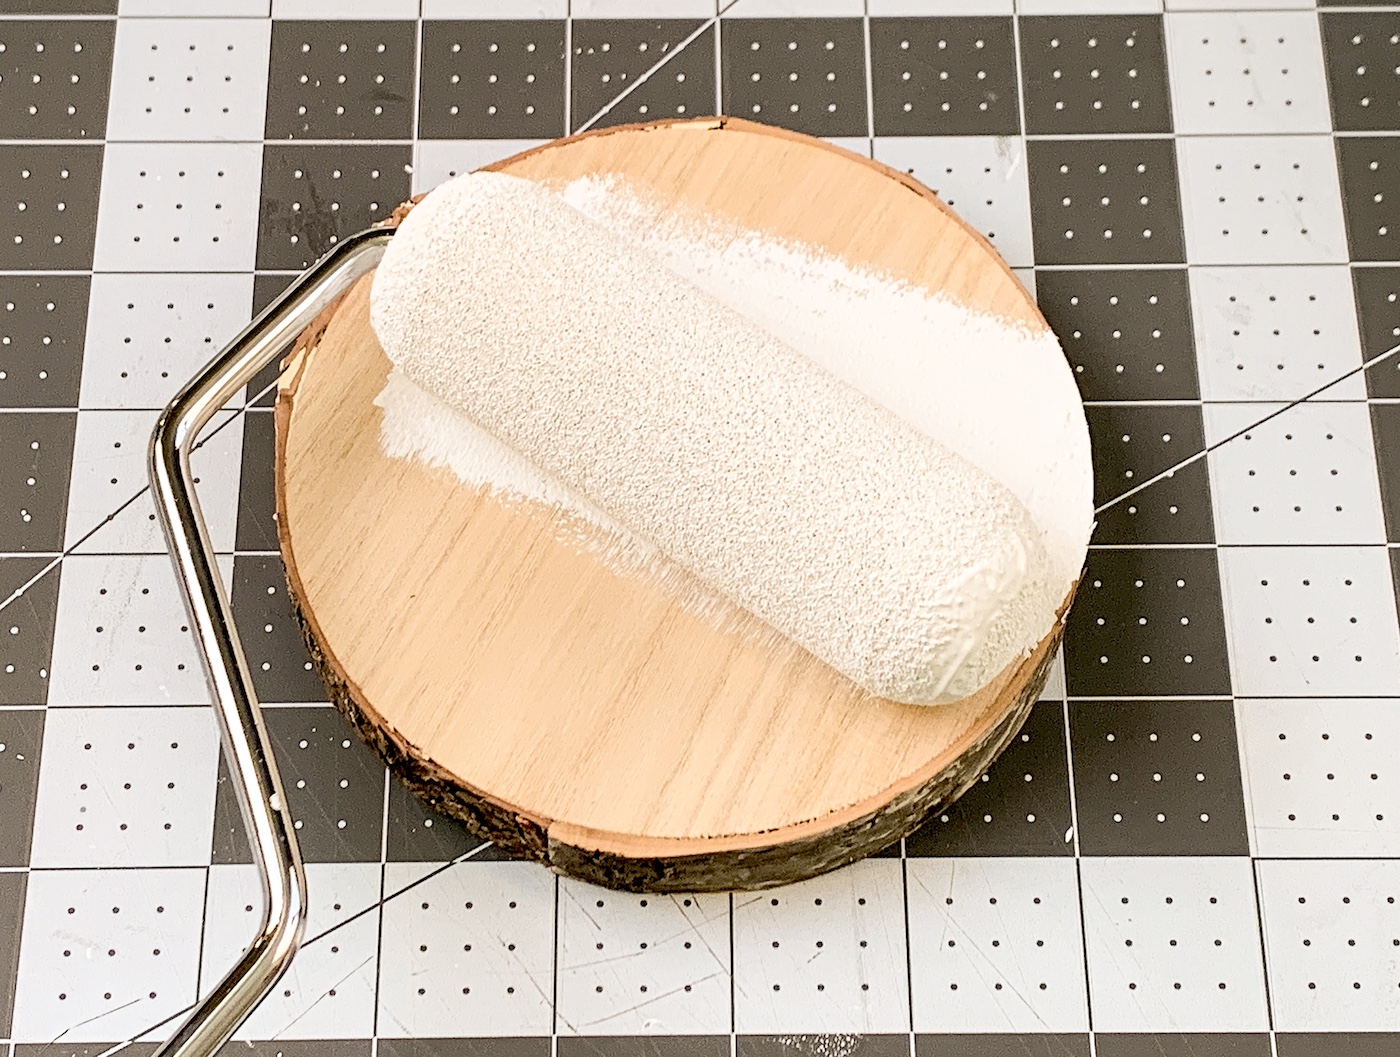
- Use a paintbrush or roller to add white paint to the top of the wood slices. Let dry.
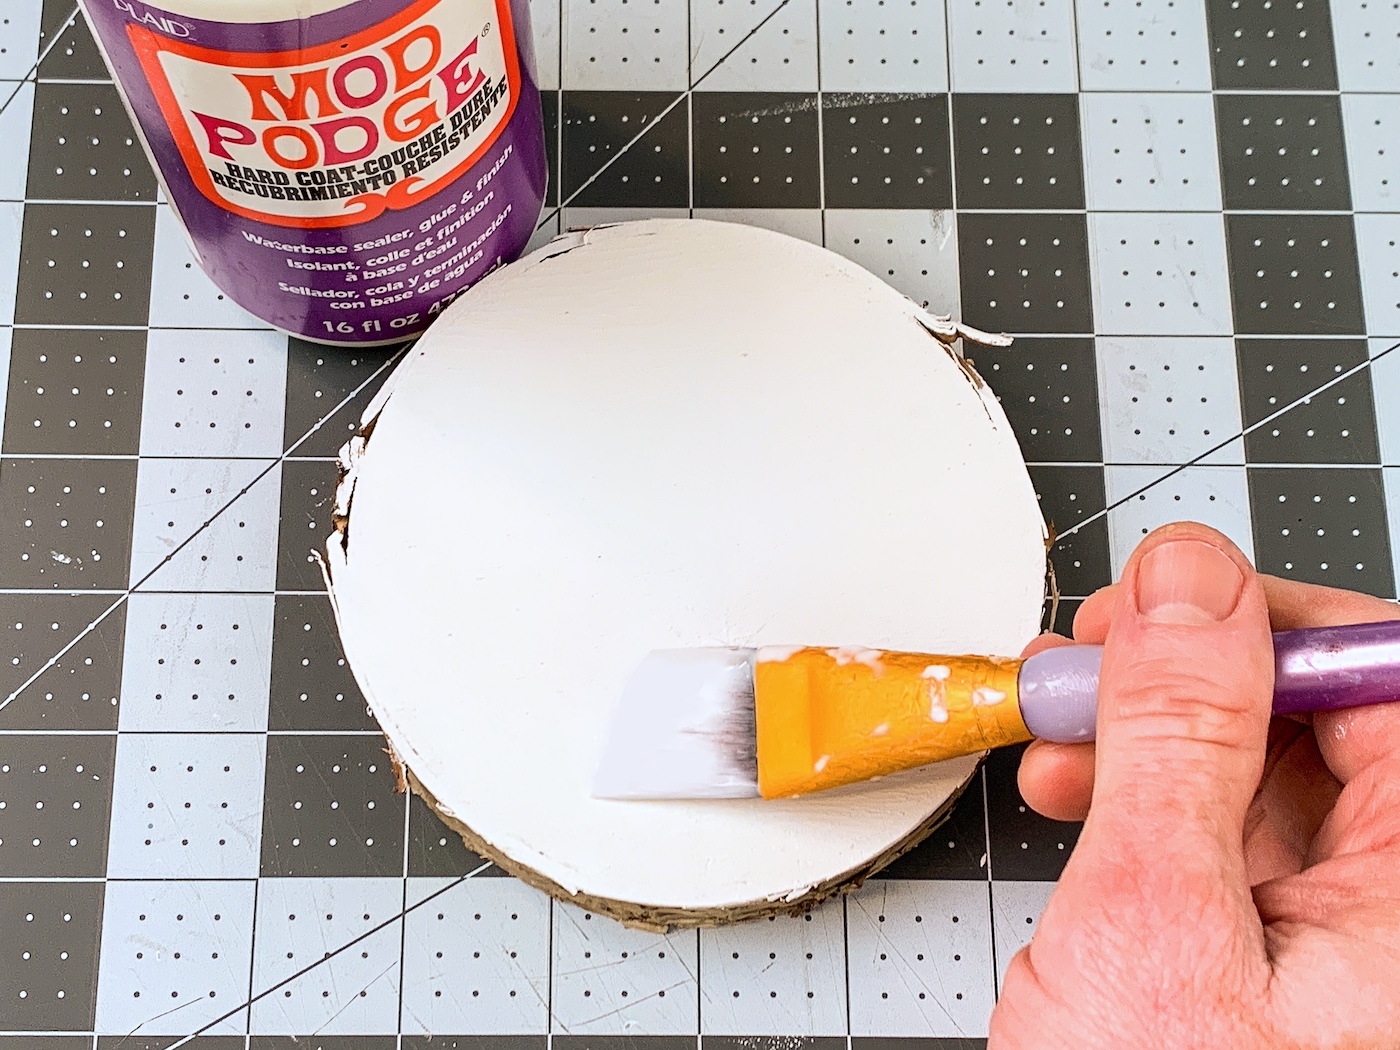
- Apply a medium coat of Mod Podge to the top of the word. Let dry and repeat. Wipe away any Mod Podge that dripped over the edges. Let the two coats dry completely.
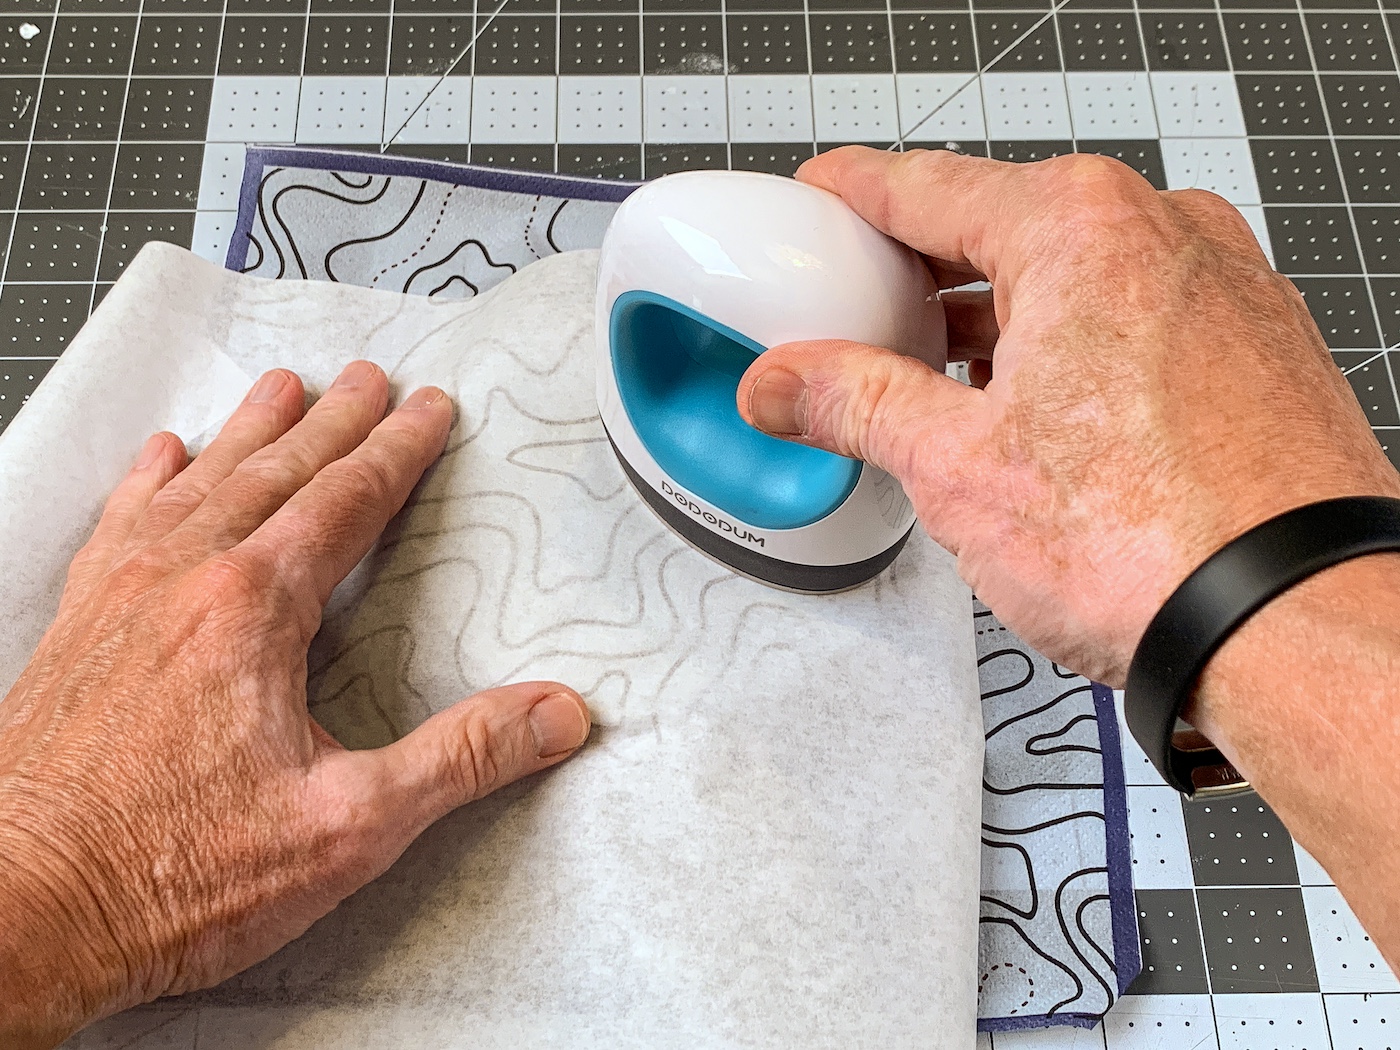
- While the Mod Podge is drying, separate the napkin from the bottom layers. You can use tape to help. You just want the top layer with the design.

- Place the napkin down onto the word. Place a piece of parchment paper on top of the napkin, and run the craft iron across the top several times. While you are doing this, the Mod Podge is melting below the napkin, and the napkin is adhering. Keep going until the napkin is fully adhered, including the edges.
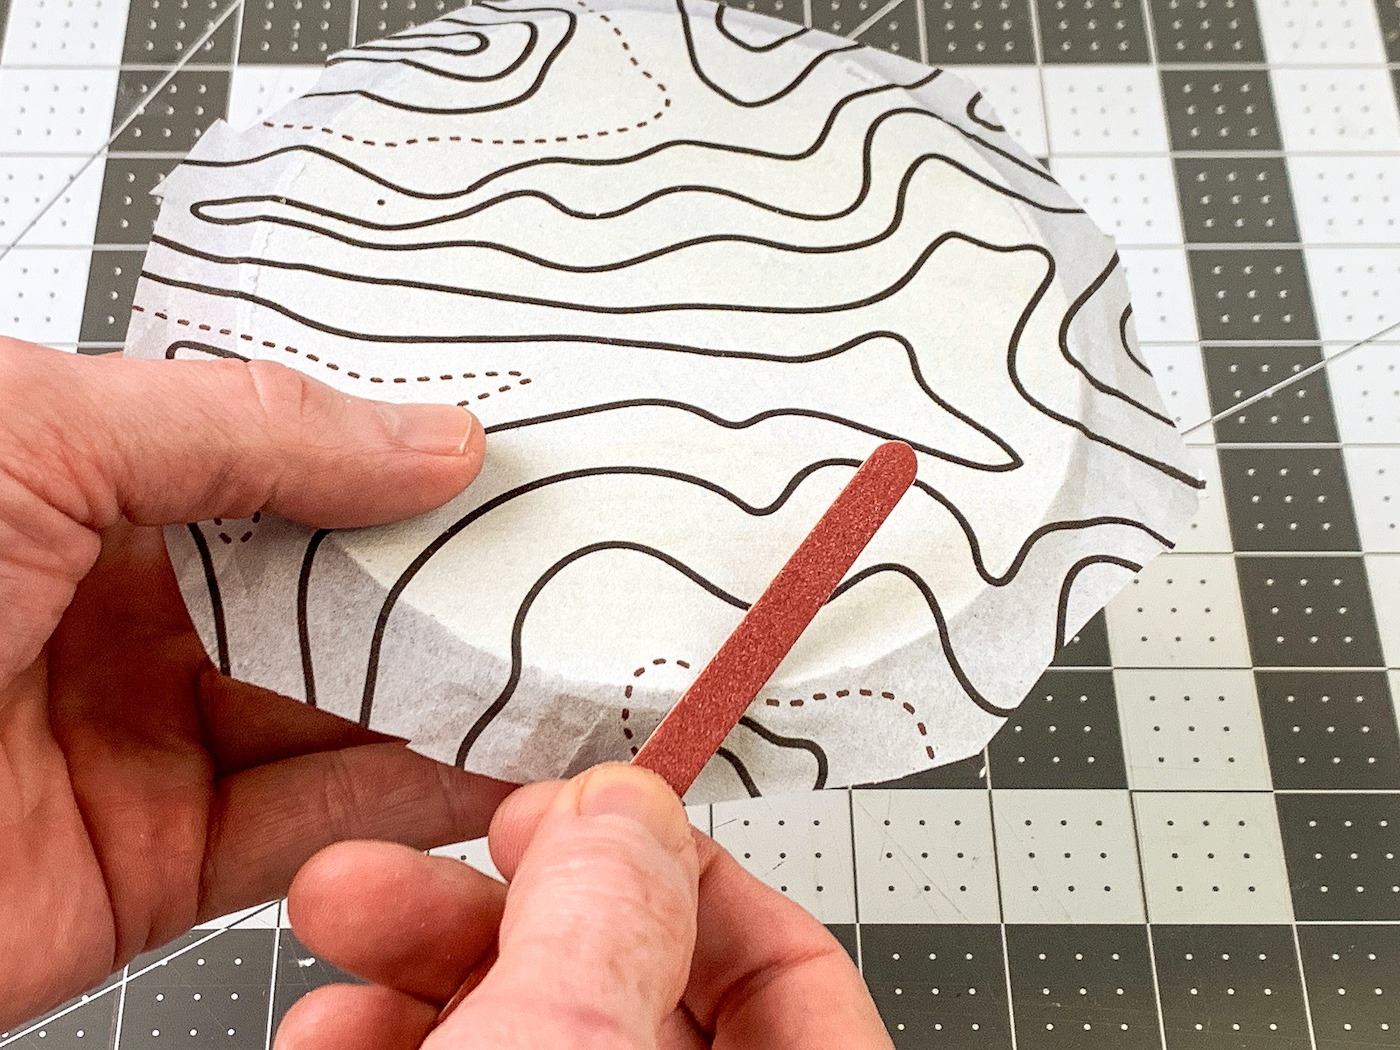
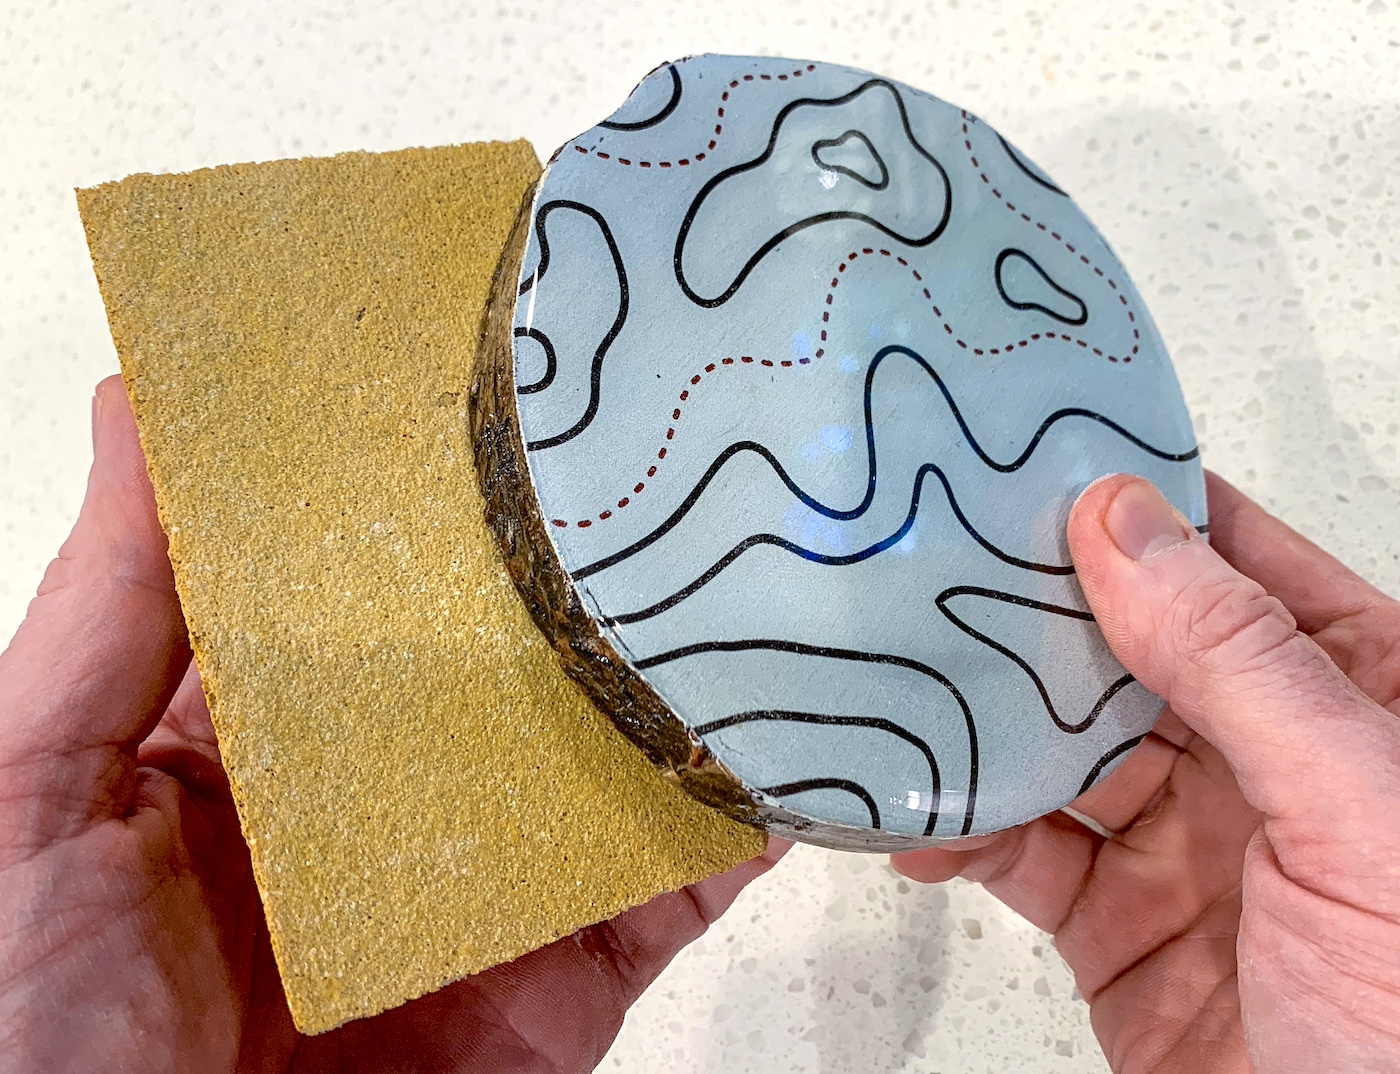
- Let the wood cool after ironing. Use an emery board to gently sand away the excess napkin. Sanding at an angle works very well. Continue until all the extra napkin is removed.
- Following the instructions on your resin to mix. I used a small cup and spatula to mix. Prop up the coasters on stands.
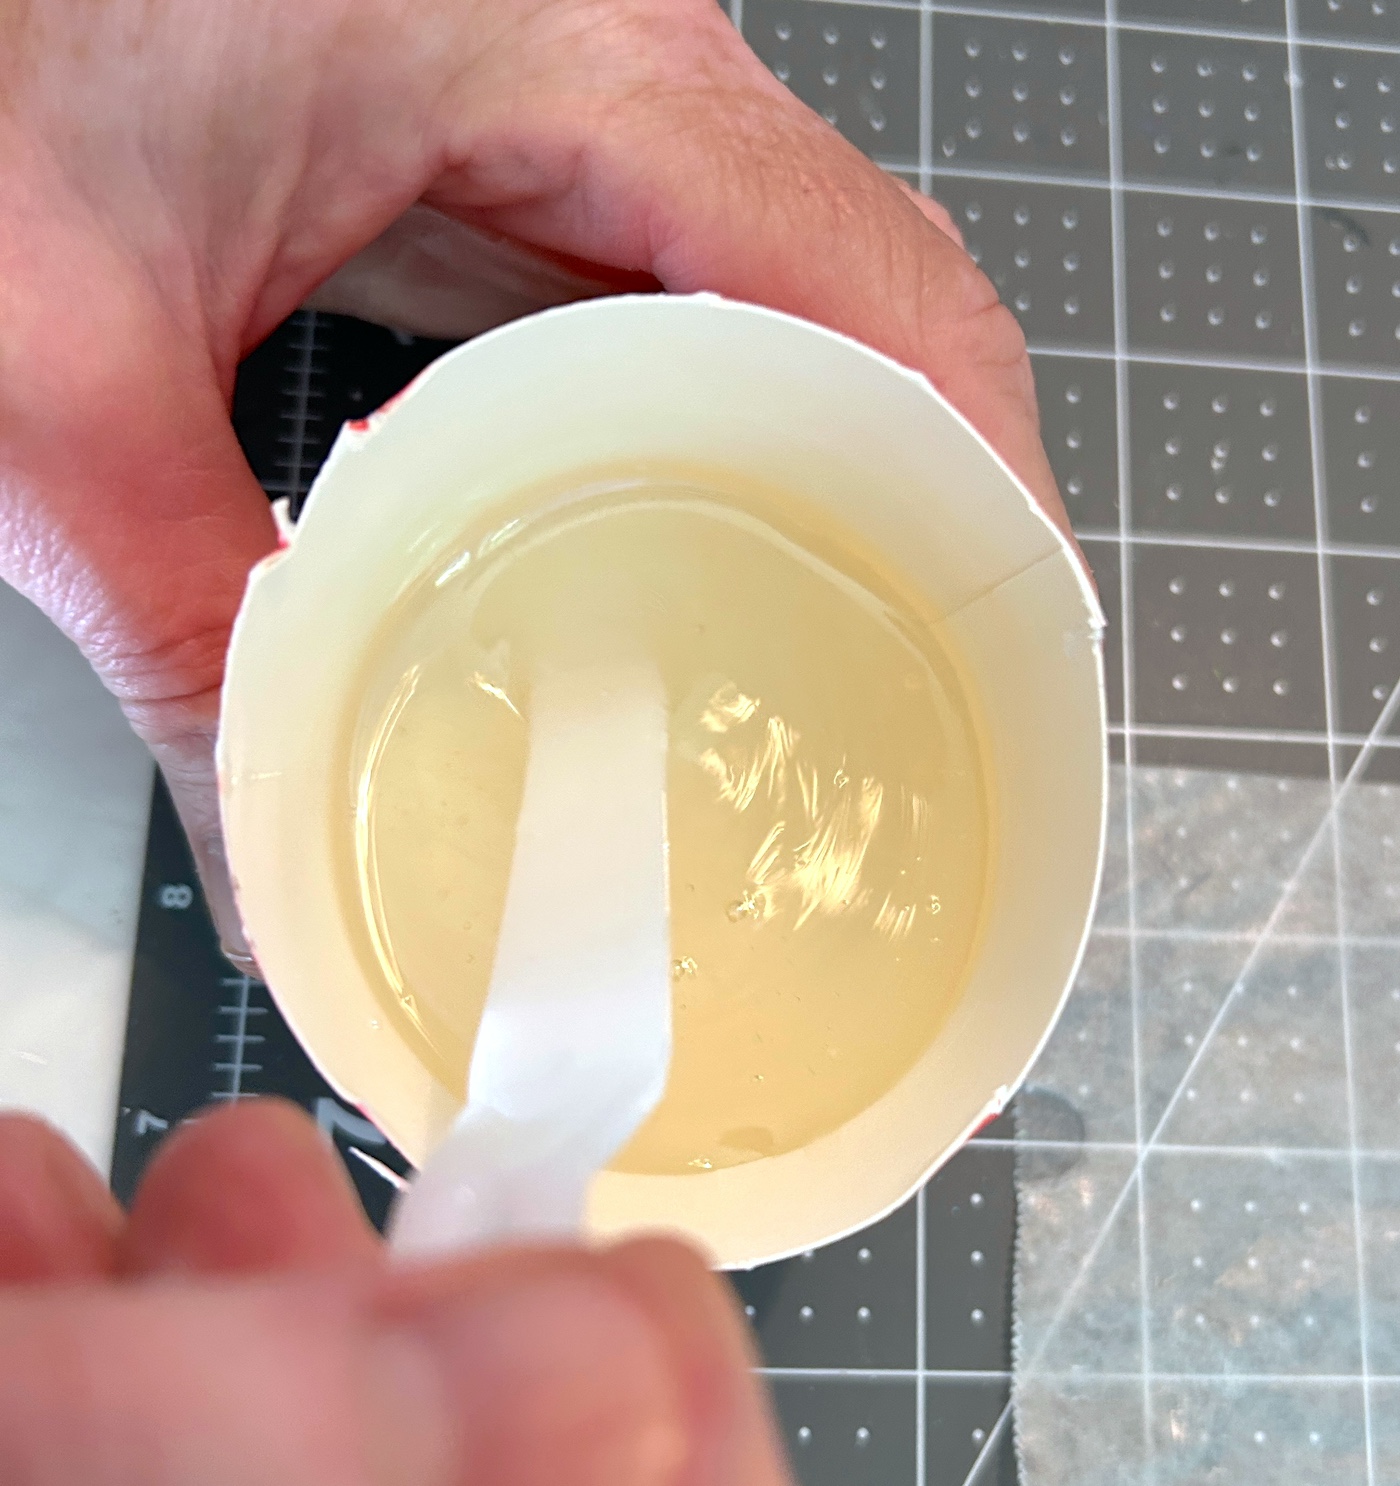
- Pour the resin over the top of one of the coasters. Start with a little and wait a minute to see how it spreads.
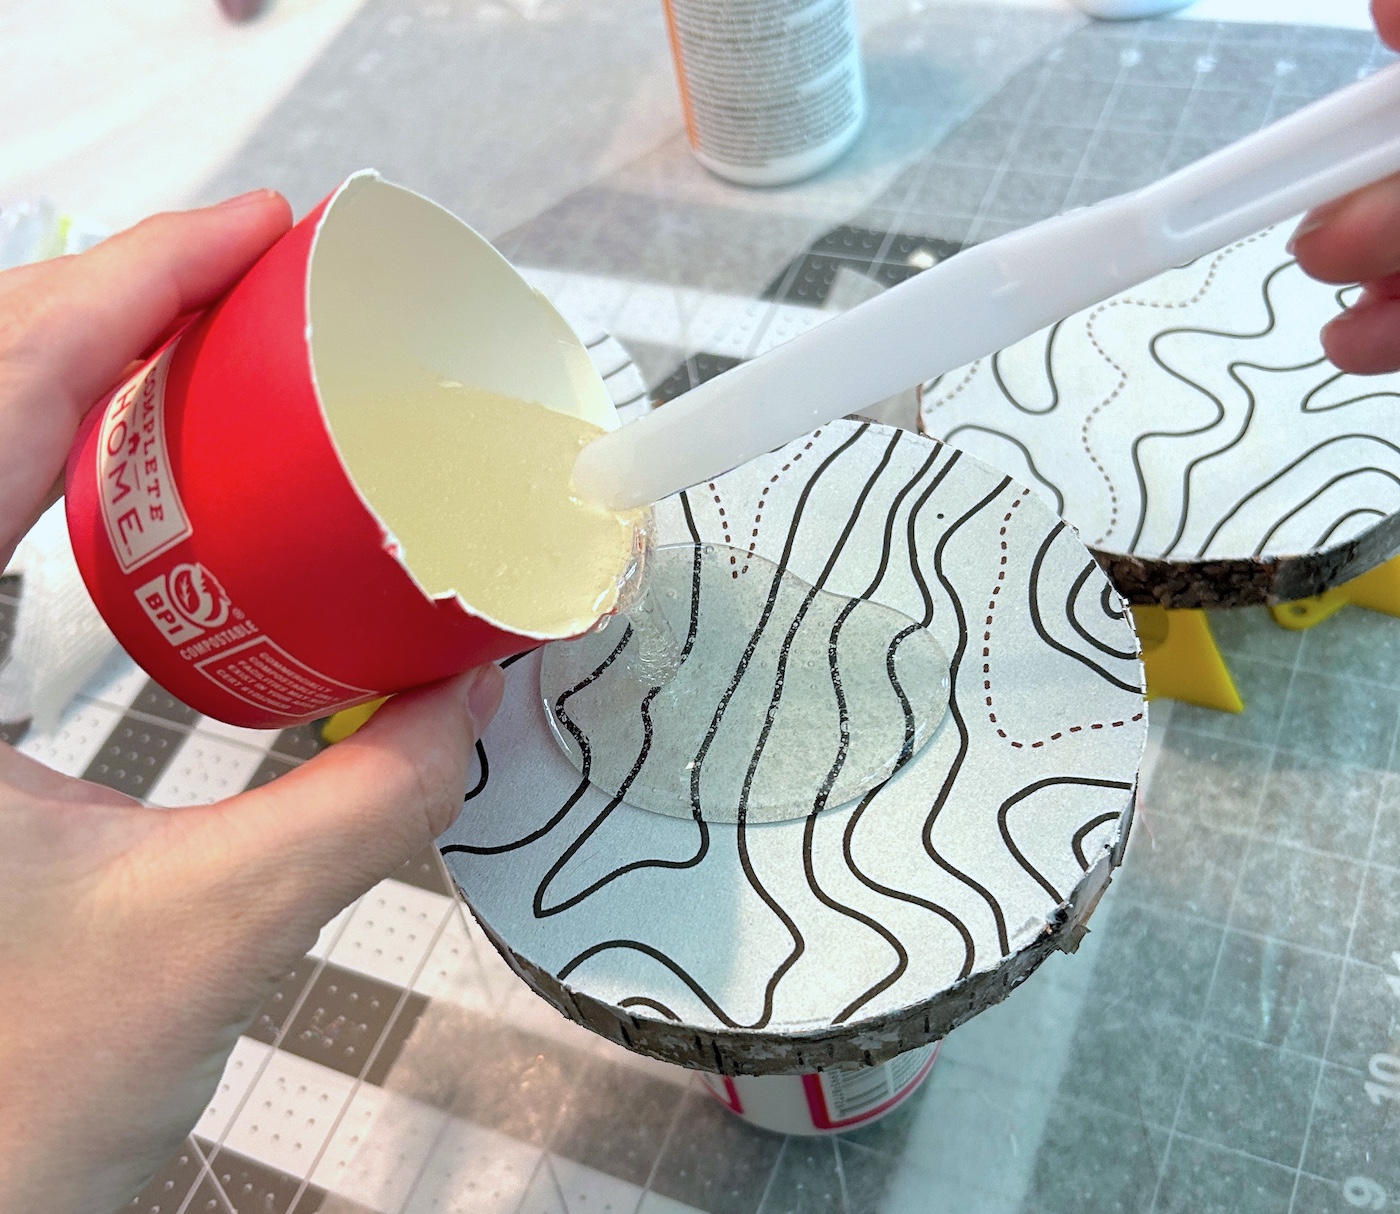
- Smooth out the resin a bit with the stir stick. If you see that you need more resin, add it. It's okay if some of the resin flows over the edges.
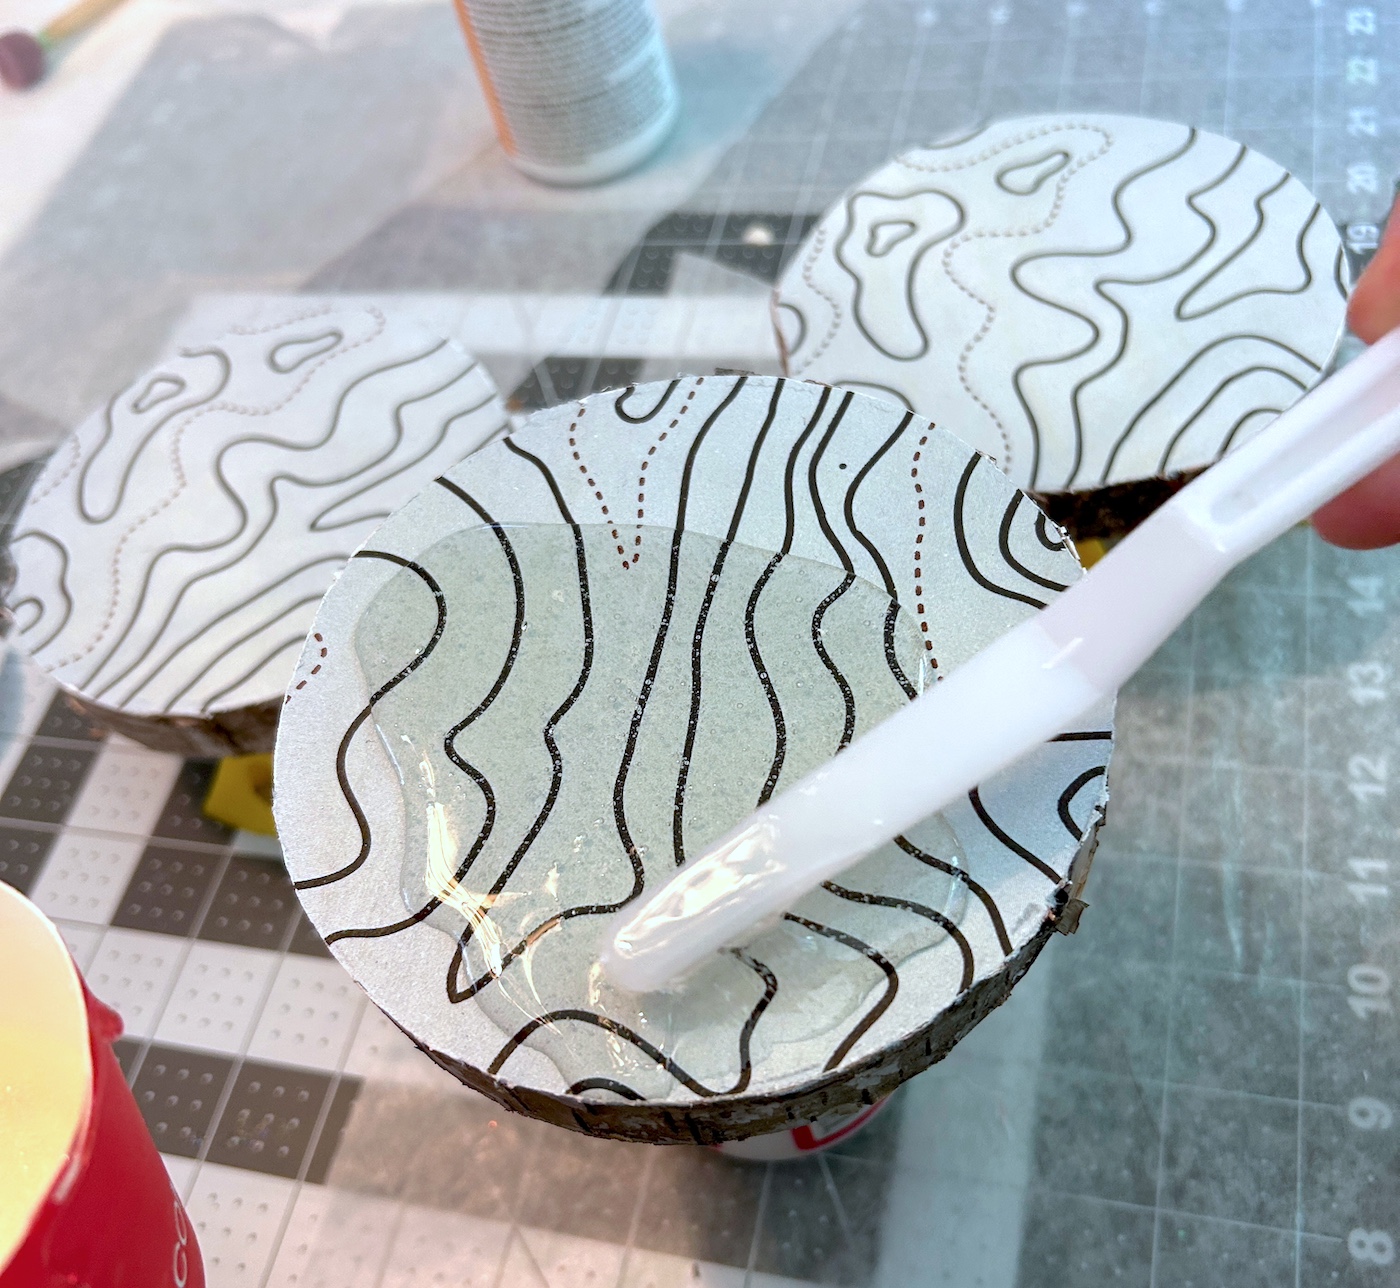
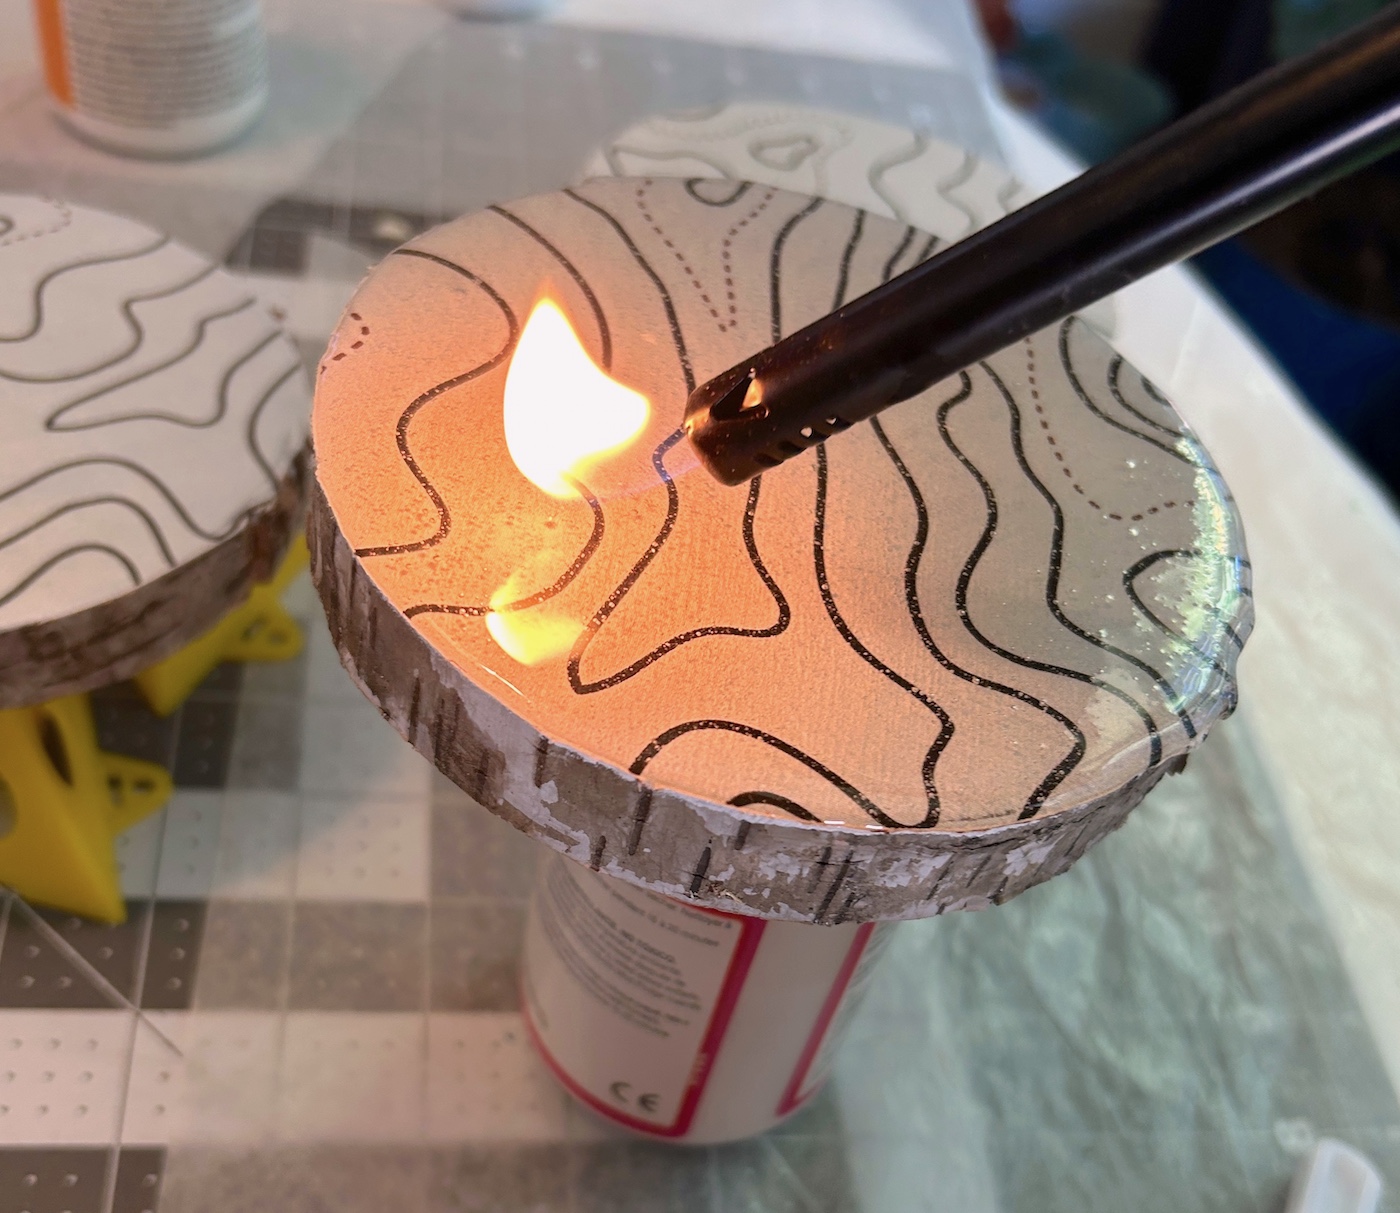
- Let the coasters sit for a few minutes, then remove bubbles by exhaling on the surface, or using a torch close to the surface as I did. Wait five minutes and repeat.
- Repeat with the remaining coasters. Leave them to dry overnight.
- If any resin came over the edges of the coasters and drips dried on the bottom, you can remove them with sandpaper.
- Add several adhesive felt feet to the bottom of each wood slice to protect your surfaces and finish the coasters.

Did you enjoy making these coasters? Let me know if you have questions in the comments! I’d also love for you to check out these other resin projects:
Cutting Board • DIY Coasters • Geode Coasters • Gold Leaf • Keychains • Ocean Resin Art • Preserve Flowers • Resin Frame • Resin Jewelry Making