
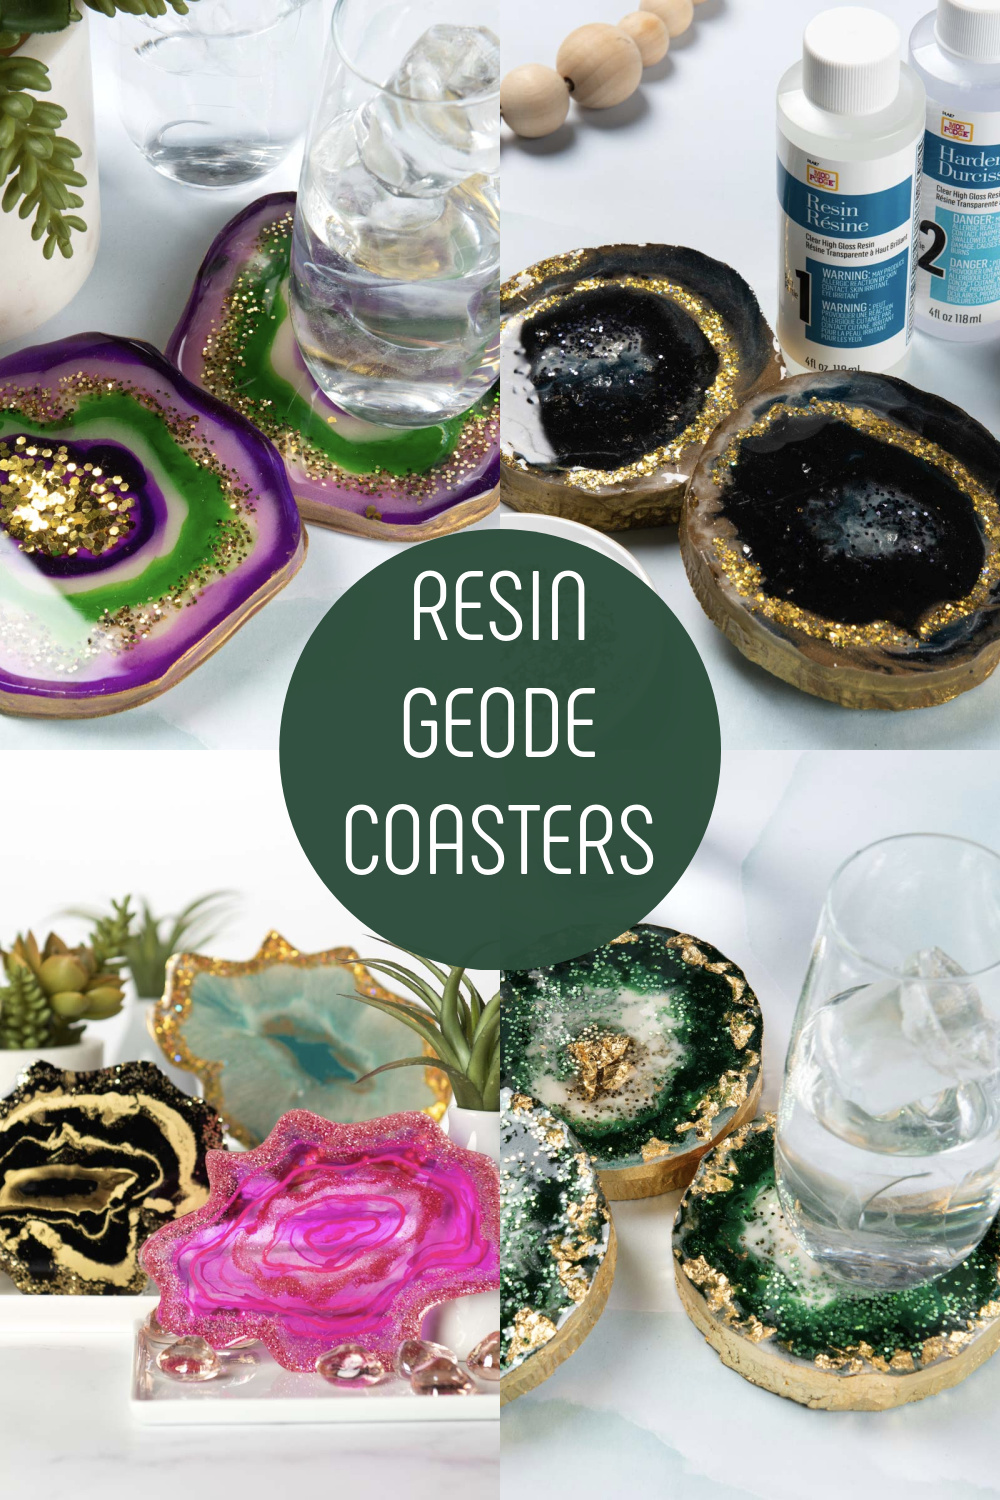
Learn how to make beautiful geode coasters with resin, alcohol ink, glitter, and paint. This tutorial walks you through the process. Doesn’t take long before you have beautiful faux agate coasters that are perfect for home decor or gifts!
Skills Required: Intermediate. I recommend having some experience with resin if you’re going to attempt these coasters. At least try one sample project or small piece before attempting a final piece.
I’ve always been interested in resin coasters, and recently I tried them. I’ve made crafts with resin before, but I’ll be honest . . . I never made coasters with it. I’ve primarily used it to finish off trays or make jewelry. Recently I wrote a post on how to use resin, and then I realized it was time . . . time to go big or go home.
So not only did I try it, but I tried resin geode coasters. You know the kind that look like agate? That are expensive in some of the stores? I’ve seen prices ranging from $15 for one coaster to $50 for an entire set.
Depending on what type of resin you use and what supplies you have on hand, you can make a set of coasters for as little as $10. My suggestion to you if you’re going to make these, consider making some extra sets as gifts. OR make modifications based on what you have on hand.
I’m going to walk you through the process of making these geode coasters and show you a few variations.
To star, you’re going to have to start with either 1) a base, like a wood slice; or 2) a silicone mold with an agate shape. Here’s the skinny on each.
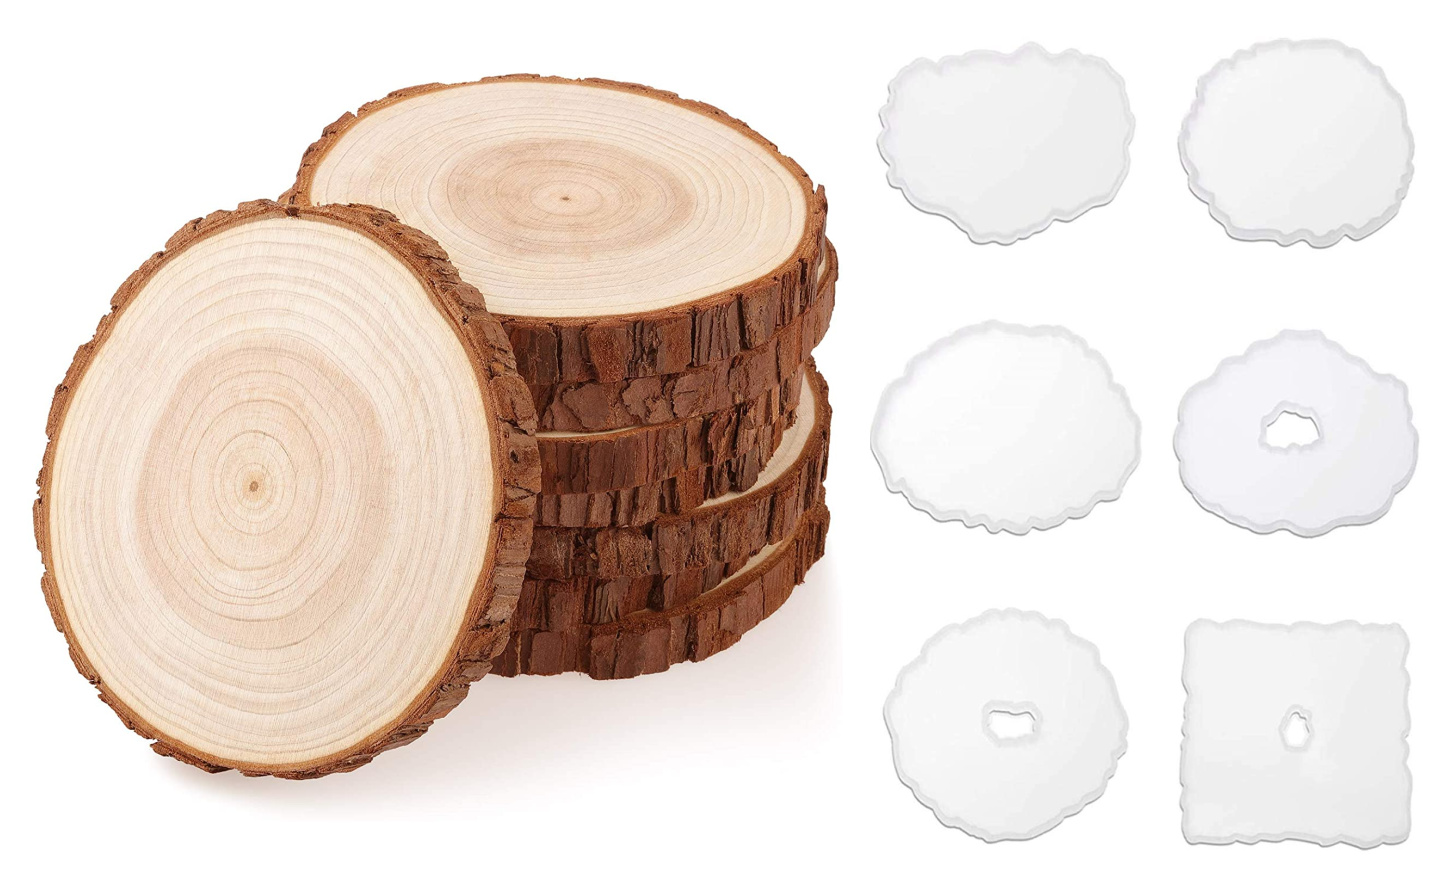
WOOD CIRCLES – the resin sticks to the wood, it becomes part of the coaster (making the overall project thicker). You’ll need painter’s tape so the resin doesn’t leak over the sides. You’ll also want to paint over the wood edges that are visible. However, these are less expensive if you are only making one set.
SILICONE MOLDS – what I like about these is that the detail of the edges are much more “agate like.” The geode coasters also come out thinner, and if you want to make them somewhat transparent, you can. Obviously you can also reuse these if you intend to make multiple sets or gifts.
Which do I prefer? I like them both. They each give the resin geode coasters their own unique style. The pictures below may help you decide which you will choose!
In addition to the epoxy resin, there are supplies you’ll want to have if you’re planning on going “all in”:
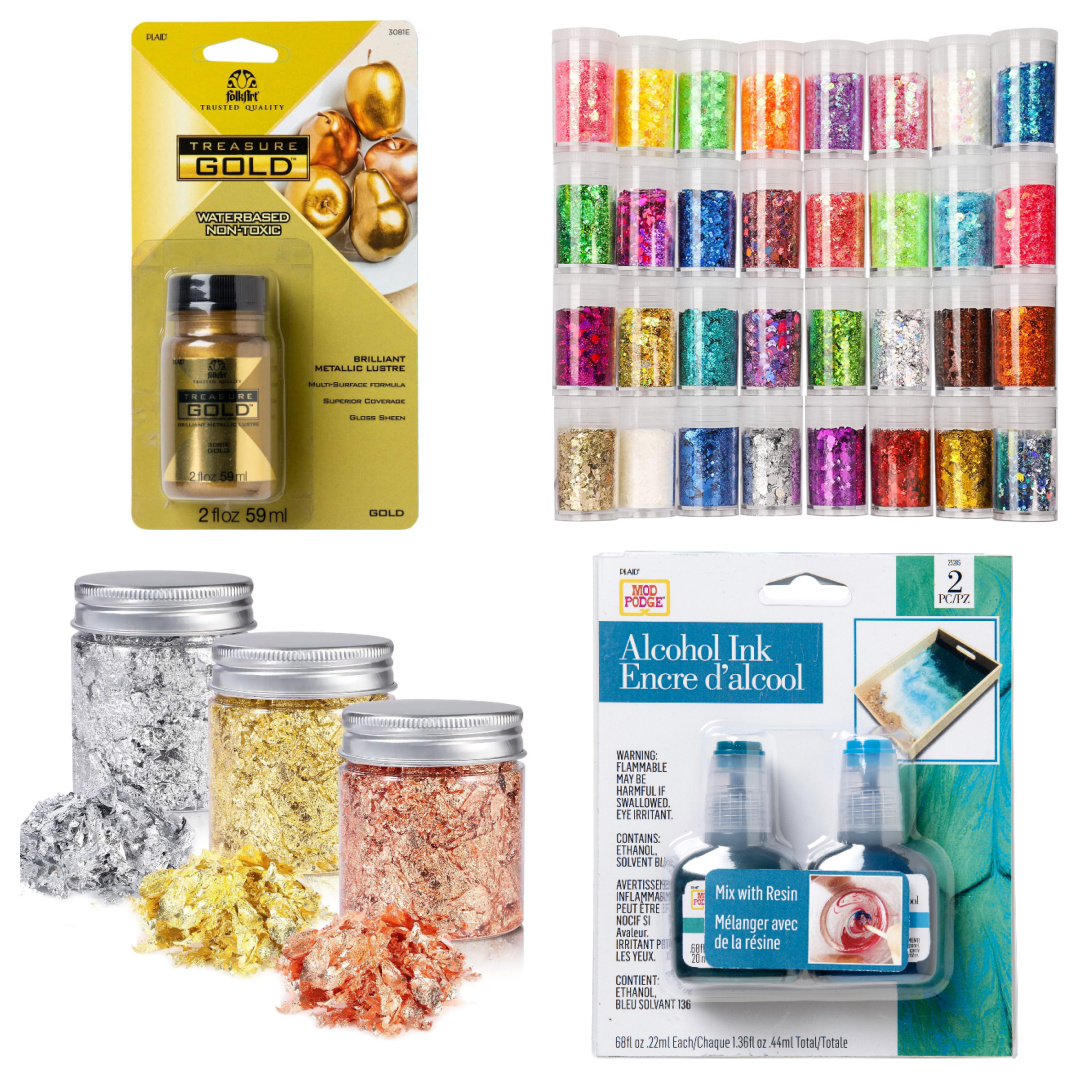
FolkArt Treasure Gold – this product has amazing coverage and is perfect for painting the sides of your wood slices (if you use them) and putting into the resin. It’s WAY more pigmented than acrylic paint, so if you’re making several sets of coasters you might want to consider it.
Glitter – for combining with the colored resin to give that agate sparkle.
Metal Flakes – yet another way to add that colorful sparkling stone effect. They are great for the inside circle of your geodes, as well as the outside edge.
Alcohol Inks – Great for tinting your resin, and if you use the silicone molds, the coasters will stay slightly transparent (yet with color). They create beautiful patterns and movement especially with a toothpick.
Acrylic Paint – not pictured, but a great way to dye your resin. The paint should be not more than 5% of the volume of your mixture.
Are you ready to dive in and make some geode coasters? Check the tutorials out below!
Note: Keep in mind that one coaster uses about 2 oz. of resin.
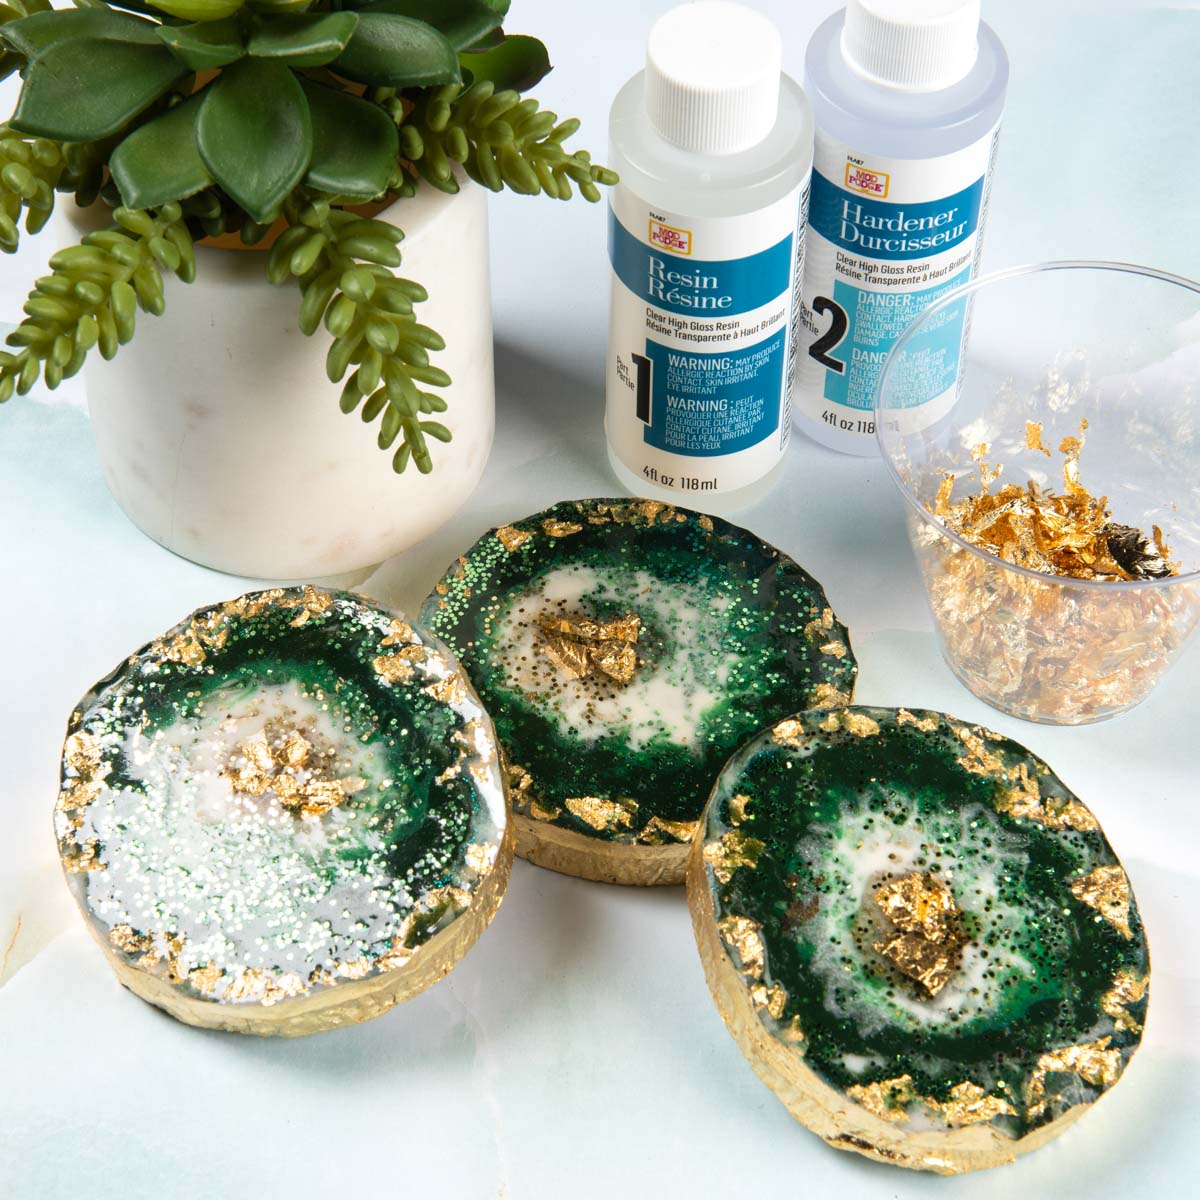
Green Geode Coasters
Gather These Supplies
- Epoxy resin, such as Mod Podge Resin
- Acrylic paint – Green Forest, White
- FolkArt Treasure Gold
- Wood slices, 4″ – 4
- Glitter – gold and green
- Gold flakes
- Painter’s tape
- Paintbrush
- Sandpaper
- Respirator and gloves
- Butane torch
- Cups and craft sticks
1. Using painter’s tape, tape around the edge of the wood cookie so that the tape extends at least 1/2” above the surface of the wood – this will create a “wall” for the resin. Run your finger all around the sides of the wood slice to make sure the tape is as flush to the sides of the wood slice as possible.
2. Mix resin according to instructions on packaging.
3. Pour 1/4 of the resin into a separate cup. In that cup, mix in a very small dollop of White paint.
4. Do the same with 1/4 more of the resin and the Green Forest paint. Leave the remainder of the resin (1/2) clear.
5. Starting with the white resin, pour into the center of the wood slice. Then make a green ring around it. Repeat – you should have white-green-white-green.
6. Sprinkle some gold flakes in the center of the wood slice(s) and around the outside edge. You can use tweezers to place if needed.
7. Finally sprinkle loose green glitter over the green resin areas and loose gold glitter in the white areas.
8. Let sit for about 15 minutes and then add the remainder of the resin on top. Allow the resin to cure and remove bubbles as instructed.
9. When the resin is cured, remove the tape from the wood slice. Using sandpaper, remove any inconsistencies (where the tape may have folded, or of the resin overflowed in spots, etc.).
10. Using a flat brush, paint Treasure Gold around the edges of the wood slice/resin. This will cause the two different materials to look like one and create a “geode” effect. Let dry.
Check out the video below to see the process in action:
Now that you’ve learned how to make basic geode coasters, I’ve got some variations for you! Check out these additional projects below with the variations listed. Keep in mind, they still all require protective equipment and mixing cups, a butane torch, etc. I’ve only listed the additional ingredients you’ll need.
Aqua and Gold Geode Coasters
For this project, you’ll need a silicone mold, aqua alcohol ink, gold alcohol ink, and gold glitter.
1. Mix the resin according to package instructions. Split the resin into two cups. In one cup, mix in two drops of aqua alcohol ink. In the second cup, mix in two drops of gold alcohol Ink.
2. Pour the Aqua resin into the silicone mold in a circular motion, following the shape of the mold. Then, pour the Gold resin in the same way. Continue this, alternating colors, until the mild is filled.
3. Using a craft stick, blend the resin together in a “zig zag” motion all around the perimeter of the mold.
4. Add gold glitter where desired. See project photo for reference.
5. Remove bubbles with the torch. Allow to cure fully according to package instructions.
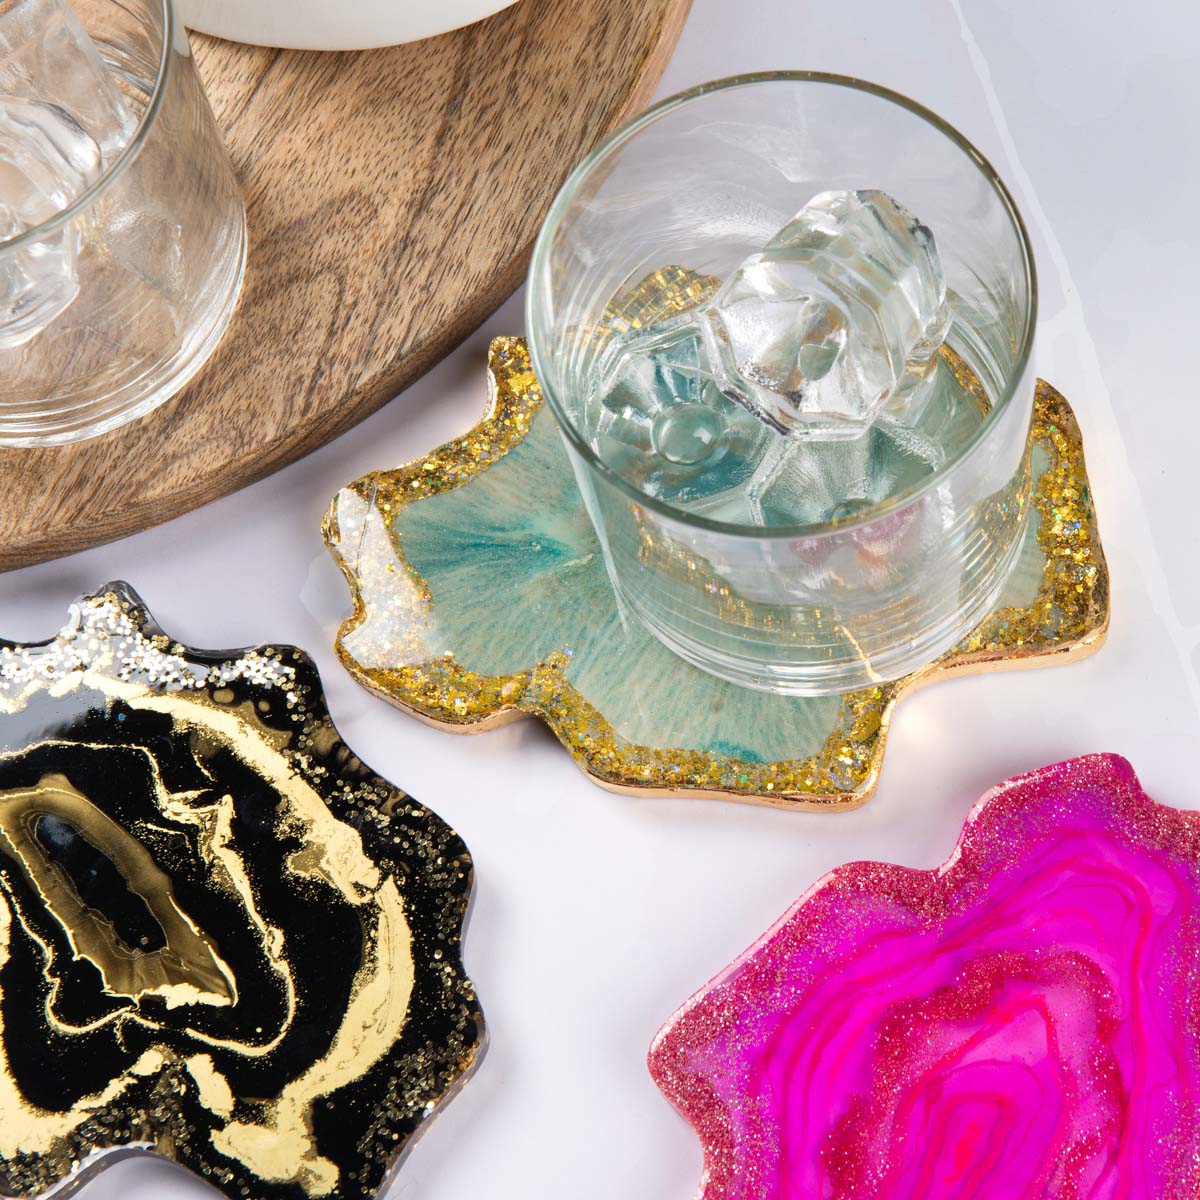
Black and Gold Geode Coasters
For this project, you’ll need four wood slices, black alcohol ink, gold glitter, and iridescent glitter.
1. Using painter’s tape, tape around the edge of the wood cookie so that the tape extends at least 1/2” above the surface of the wood- this will create a “wall” for the resin. Run your finger all around the sides of the wood slice to make sure the tape is as flush to the sides of the wood slice as possible.
2. Mix the resin according to package instructions. Pour 1/4 of the resin into a separate cup. In that cup, mix in 1 tablespoon of gold glitter.
3. In the cup with the larger amount of resin, mix in two drops of black alcohol ink.
4. Poor a thin layer of black resin inside the tape on the wood slice(s). Start pouring around the edges and continue inward.
7. Sprinkle some iridescent glitter in the center of the wood slice(s).
8. Using the gold glitter resin, pour a ring of resin around the iridescent glitter in the center. Continue adding black resin, gold glitter resin and loose iridescent glitter to the wood slice (in a circle motion) until you achieve the desired look. See project photo for reference.
9. Remove bubbles. Allow the resin to cure according to package instructions.
10. When the epoxy resin is cured, remove the tape from the wood slice. Using sandpaper, remove any inconsistencies (where the tape may have folded, or of the resin overflowed in spots, etc.).
11. Using a flat brush, paint Treasure Gold around the edges of the wood slice/resin. This will cause the two different materials to look like one and create a “geode” effect. Let dry.
Pink Resin Geode Coasters
For this project, you’ll need light pink alcohol ink, dark pink alcohol ink, and pink glitter.
1. Mix the resin according to instructions on packaging. Pour a small thin layer of clear resin into the mold. Allow to set for 25 minutes.
2. Divide the remaining resin into two parts; mix light pink alcohol ink into one and dark pink into the other.
3. Pour the dark pink into the center of the mold, and then pour light pink around it. Alternate pouring the two different pinks until you reach the edge.
4. Place pink glitter around the outside edge and on one of the rings as show in the photo.
5. Remove bubbles. Allow the epoxy resin to cure according to package instructions.
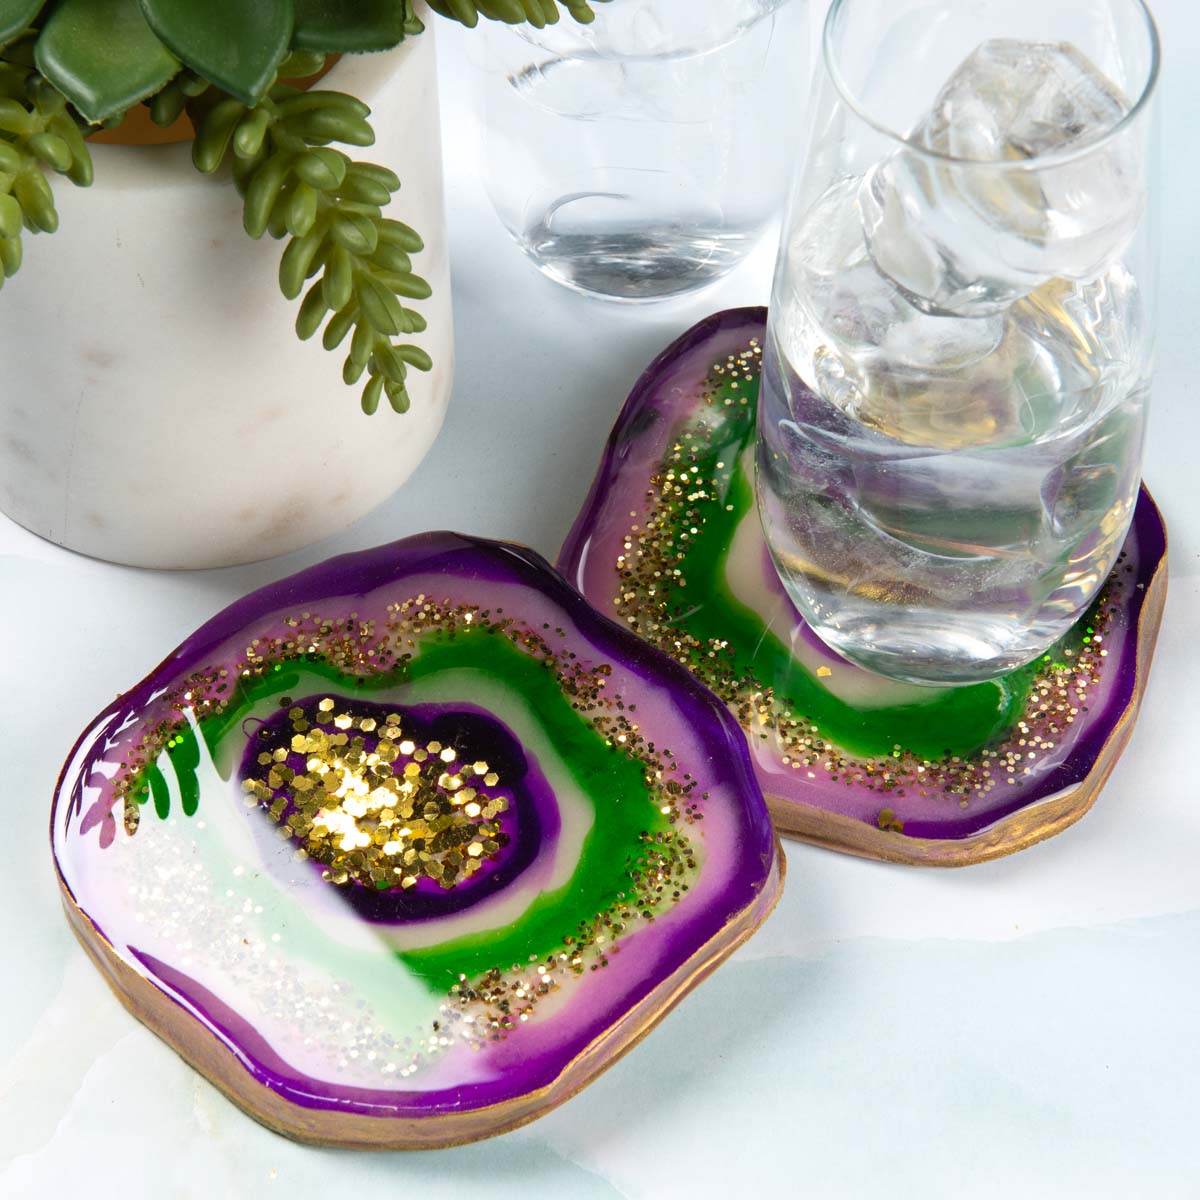
Purple Geode Coasters
For this project, you’ll need geode shaped wooden discs, Treasure Gold, white acrylic paint, green alcohol ink, purple alcohol ink, and gold glitter (small and large).
1. Mix resin according to instructions on packaging. Wrap the disc in painter’s tape. Pour a thin layer of clear resin over disc. Allow to set up for about 25 minutes.
2. Divide the remaining resin into five cups. Mix a drop of white into one, a drop of green ink into one, a drop of purple ink into one, and the glitters into the remaining two (about a teaspoon or so).
3. Begin to pour the large gold glitter mixture into the middle of geode followed by purple, white, green, then white again – and lastly purple.
4. Add the small glitter mixture on top of the white as shown in the photo.
5. Remove bubbles. Allow the resin to cure according to package instructions.
6. When the epoxy resin is cured, remove the tape from the wood slice. Using sandpaper, remove any inconsistencies (where the tape may have folded, or of the resin overflowed in spots, etc.).
7. Using a flat brush, paint Treasure Gold around the edges of the wood slice.
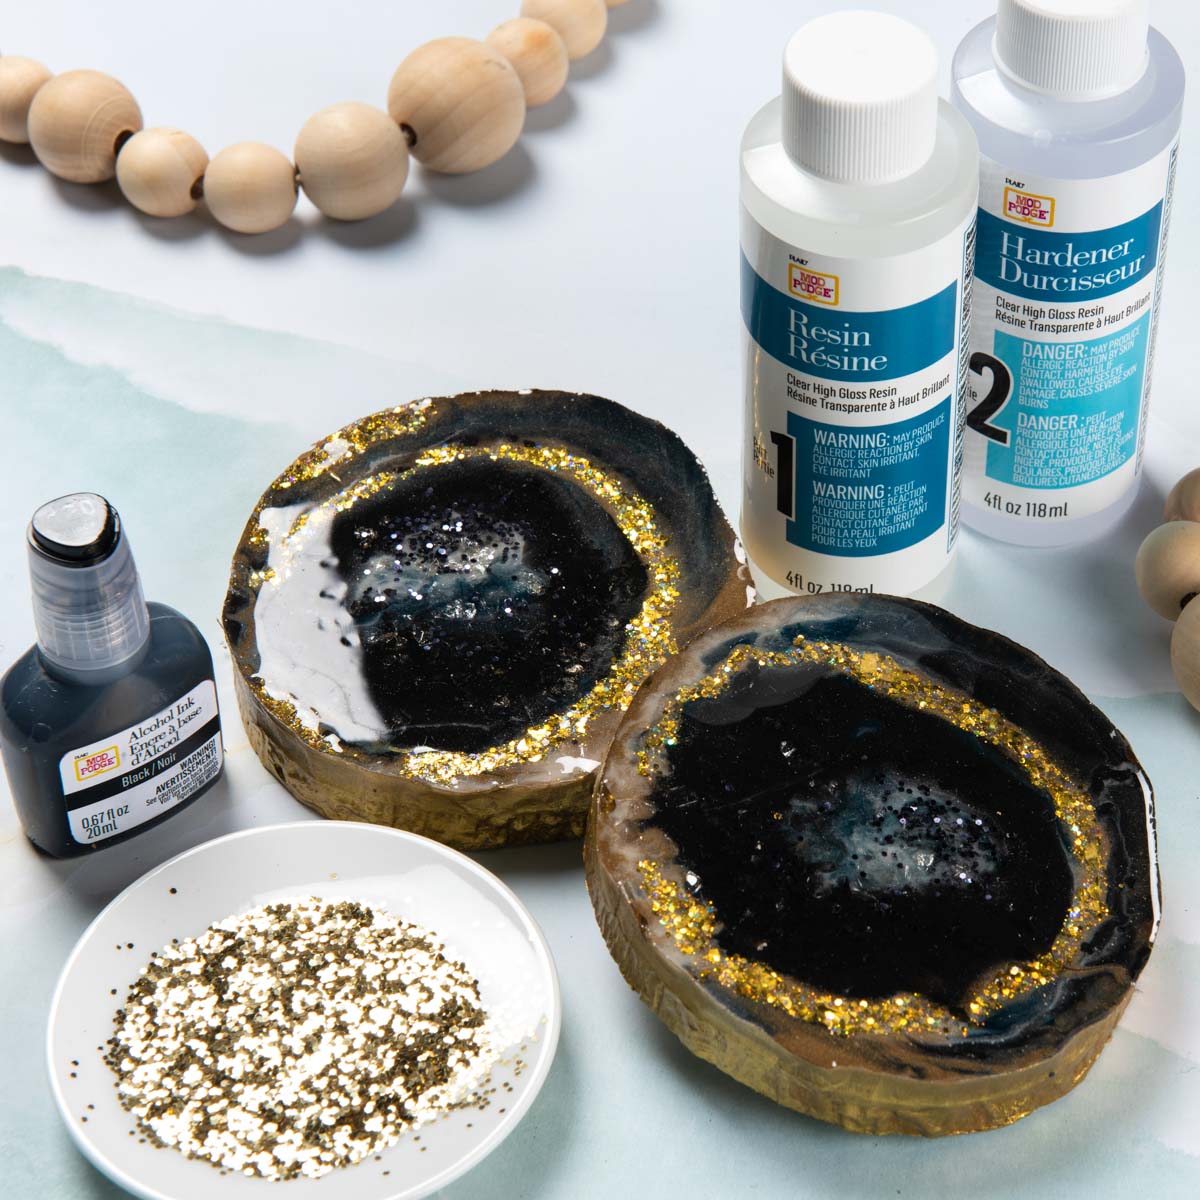
Black Glitter Geode Coasters
For this project you’ll need black alcohol ink, Treasure Gold, wood slices, and both black and gold glitter.
1. Using painter’s tape, tape around the edge of the wood cookie so that the tape extends at least 1/2” above the surface of the wood. Run your finger all around the sides of the wood slice to make sure the tape is as flush to the sides of the wood slice as possible.
2. Mix resin according to instructions on packaging. Pour 1/4 of the resin into a separate cup. In that cup, mix in 1 tablespoon of gold glitter. In the cup with the larger amount of resin, mix in two drops of black alcohol ink.
3. Poor a thin layer of black resin inside the tape on the wood slice(s). Start pouring around the edges and continue inward.
4. Sprinkle some black glitter in the center of the wood slice(s).
6. Using the gold glitter resin, pour a ring of resin around the iridescent glitter in the center. Continue adding black resin, gold glitter resin, and loose black glitter to the wood slice (in a circle motion) until you achieve the desired look. Pour black resin in the center to finish. See project photo for reference.
7. Remove bubbles. Allow the resin to cure according to package instructions.
8. When the resin is cured, remove the tape from the wood slice. Using sandpaper, remove any inconsistencies (where the tape may have folded, or if the resin overflowed in spots, etc.).
9. Using a flat brush, paint Treasure Gold around the edges of the wood slice/resin.
Let me know if you enjoyed this project in the comments! I’d also love for you to let me know what colors you would use for yours. Talk to me! Also don’t forget to visit our geode canvases or wood slice coasters. They are pretty cool too.


Could I use a heat gun (for paint stripping, works well with embossing powder) instead of a torch to get rid of bubbles?
You can! Just practice the distance you have to hold it to pop the bubbles and you should be good 😀
Are these now heatproof by adding the resin? TIA 🌹
Mod Podge Resin is heat resistant up to 110° F. If exposed to higher temperatures, a project may yellow. You can put a hot mug on them, just not a scorching hot mug. I’d let it cool a little bit or use a heat safe tumbler.