Learn how to make a resin frame using epoxy and Legos! This resin picture frame is so easy – what will you put in your creation?
Skills Required: Intermediate. I recommend having some experience with resin so that you’re easily able to organize the Legos and get the results you want.
Embarking on a DIY adventure is like dipping your toes into a sea of creativity and surprise. And oh, have we been swimming in some fantastic waters lately! And by that I mean, resin crafts.
From the mesmerizing swirls of ocean resin art to the sparkling allure of geode coasters, our journey has been nothing short of magical.
We’ve even dabbled in preserving the delicate beauty of dried flowers within the glossy embrace of resin, transforming them into timeless pieces of jewelry.
Now, as we venture further into this world of resin, I’m thrilled to show you a new, exciting project: crafting a DIY resin frame.
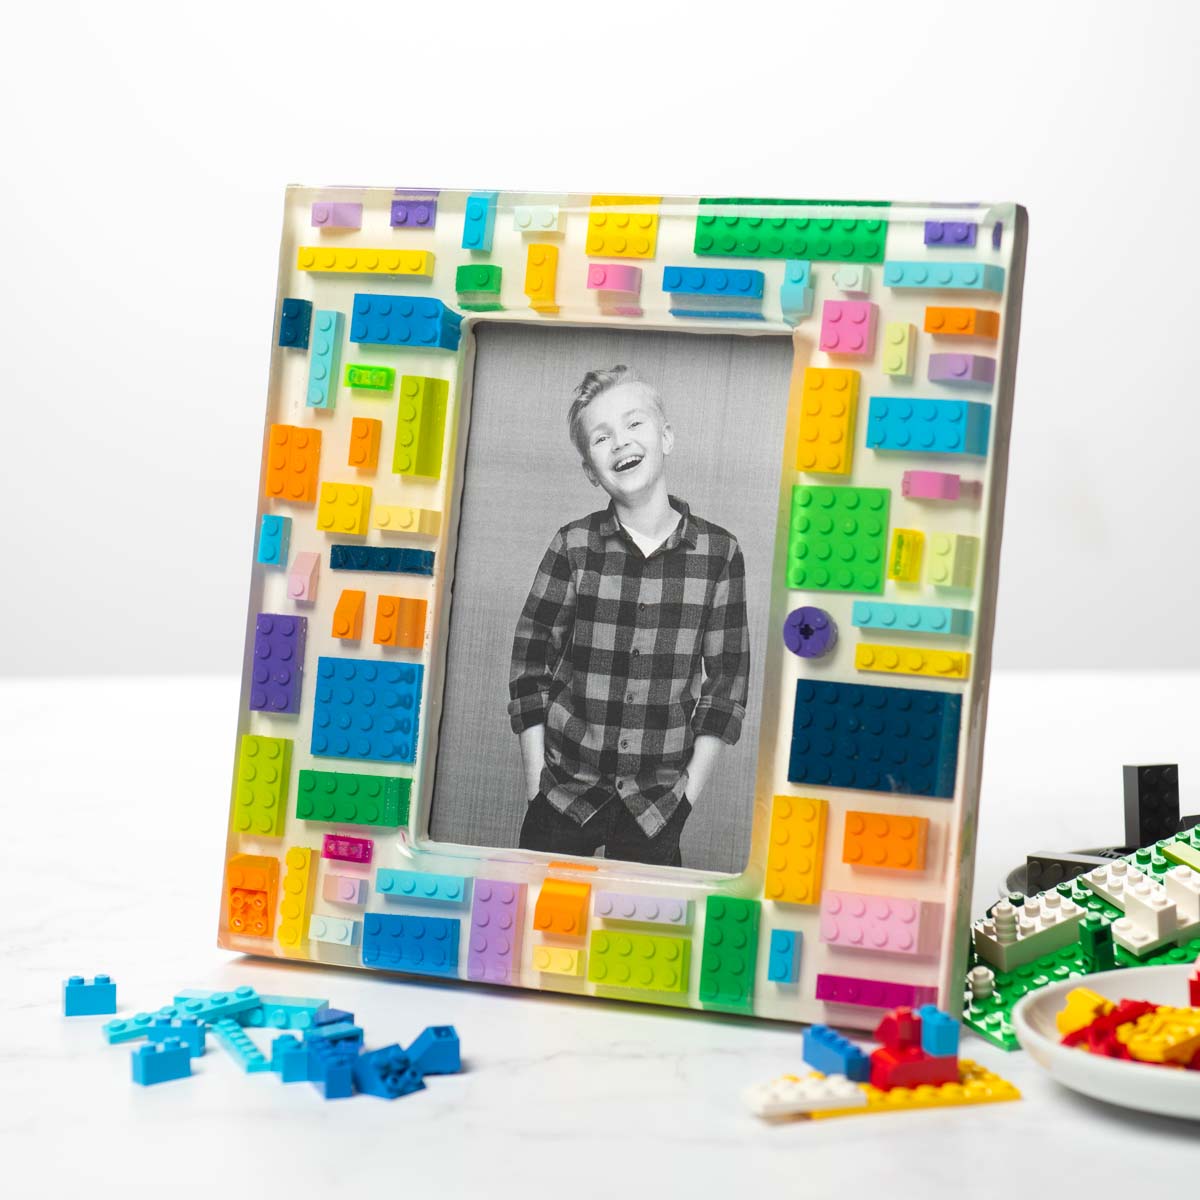
But not just any frame—it’s a picture frame with a playful twist, where colorful Legos seem to float magically within its borders.
Our next creative endeavor involves embedding Legos into a resin picture frame, making it a unique piece that’s sure to capture hearts and spark conversations.
As it turns out there are TWO ways to make an epoxy resin frame. In both scenarios, you can embed objects in the resin:
- Make it entirely of resin using a silicone mold like this one
- Use a wood frame (or similar) as a base, tape the frame, and pour the resin on top
This picture frame uses the second method. The difference between the two is that the first method uses the mold only, and the resin is poured in and hardened.
In the second method, you’ll need to tape around the frame to create a cavity for pouring. As I said, in both methods you can embed objects. The video in this post shows you how.
Here’s how you’re going to make a resin frame . . . it’s easier than you think!
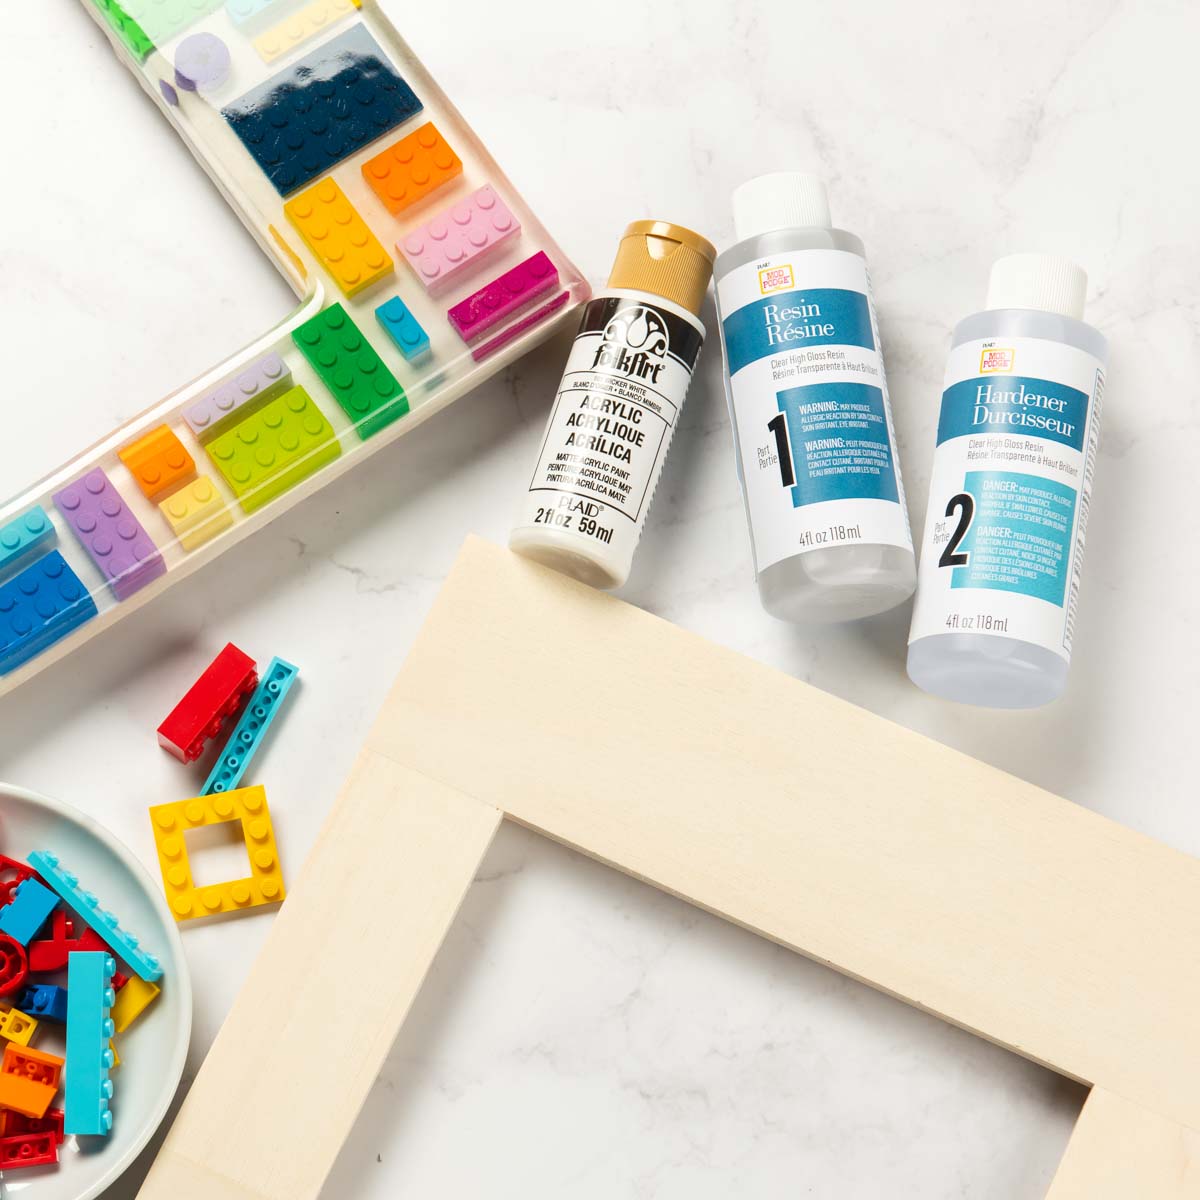
- Mod Podge Resin or similar
- Wooden frame
- Legos
- FolkArt paint – Wicker White
- Respirator
- Gloves
- Cups
- Craft sticks for stirring
- Torch
- Painter’s tape – 1 1/2”
- Sandpaper
- Paintbrushes
If you desire, you can sand and polish the resin frame using the instructions here.
Get the printable how to card for this project below:

DIY Resin Frame
Equipment
- Respirator
- Gloves
- Cups
- Craft sticks for stirring
- Torch
- Sandpaper
Materials
- Epoxy resin
- Unfinished wood frame
- Legos
- Craft paint white
- Painter's tape 1 1/2”
Video
Instructions
- Paint your frame with Wicker White and let dry.
- Follow instructions on resin packaging for mixing. You'll want to mix 4 oz. of resin. Use a separate measuring cup for each part. Once equal amounts of both parts are measured, pour them into a mixing cup. Gently stir the two parts together for 3 minutes. When you start to stir, cloudy swirls will appear.
- Attach the Legos to the frame, brushing a little bit of resin on the bottom of each Lego and securing to the frame. Let set for 20 minutes. Leave the rest of the resin in the cup, as you have about 30 minutes working time.
- Toward the end of the 20 minutes, make a wall around the frame with painter's tape. Press it all the way around the frame, as closely and tightly as possible so none of the resin leaks.
- Pour a layer of resin onto the frame. Use the torch to remove any bubbles. Allow 24 hours for the resin to harden.
- Remove the tape. Round the edges with sandpaper. Remove any dust. Tape off the back of the frame to keep the resin from running over onto the back.
- Mix the remainder of the resin, about 4 oz., according to the instructions you used the first time. Pour resin over the entire frame again and let the resin go over the edges to cover the sides. Let set for several hours.
- Remove tape from the back of frame. Let the resin completely set overnight.
Notes
Did you enjoy learning how to make this DIY resin frame? I’d love for you to check out these other resin project posts too:
Cutting Board • DIY Coasters • Gold Leaf • Keychains • Preserve Flowers• Wood Slice Coasters