
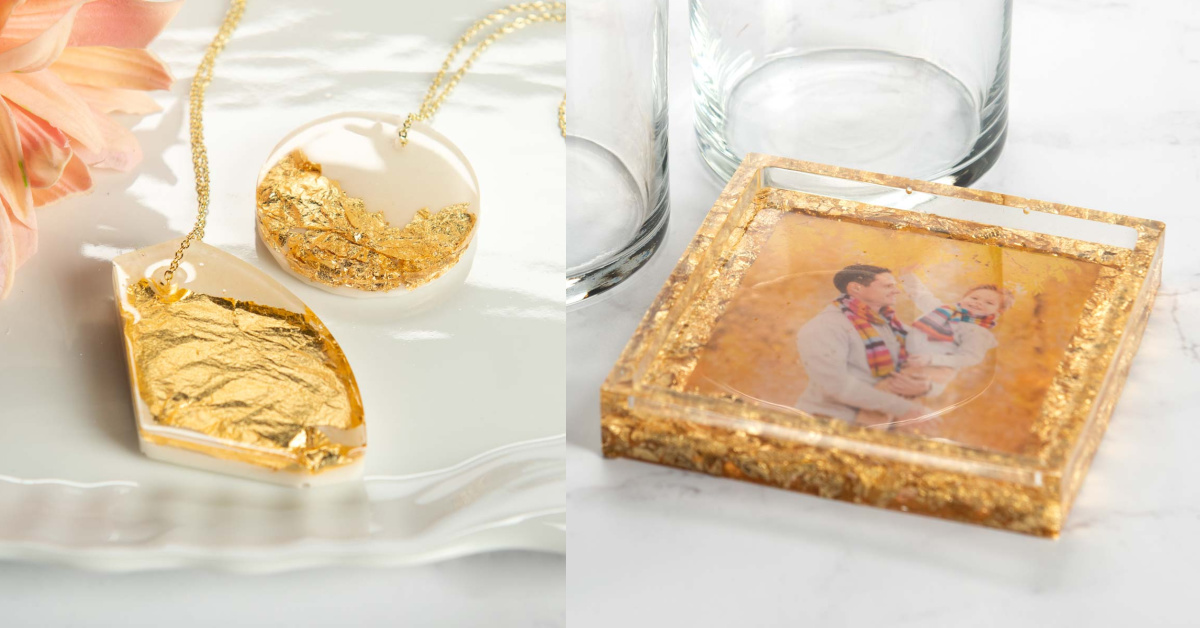
Learn how to gold leaf resin with these two simple projects! You can make either a coaster or a necklace in minutes. The results are beautiful!
Skills Required: Advanced Beginner. I recommend having some experience with resin if you’re going to try it with gold leaf. At least try one sample project or small piece before attempting a final piece.
Have you ever worked with casting resin before? If you don’t know how to use resin, it’s not as hard as you might think. And once you get the groove? You’re going to be an old pro!
I’m excited to show you how to make two gold leaf resin projects today: coasters and a necklace. Both relatively easy. Once you get started crafting with resin, you’ll never want to stop making. Trust me.
Using Gold Leaf with Resin
Before we get into the projects, I wanted to share some things you should know if this is your first time. Generally speaking, this is the four step process that you’ll go through to make them.
- Prepare Your Supplies – this includes any taping if necessary, laying out everything you need, and organizing your protective equipment.
- Mix the Resin – always observe packaging instructions and mixing amounts (which are usually 1:1). You may want to mix in things like glitter, alcohol inks, and paint at this time.
- Pour the Resin – pour the resin into the molds. For things like dried flowers and other larger objects that you want to place into your project, do that at this time.
- Remove Bubbles – let the project sit for a few minutes, then remove bubbles by blowing through a straw, exhaling on the surface, or using a torch.
Once you’re done with these steps, you’ll let the project set for 24 hours and then de-mold. It’s that easy!
How do I mix the resin?
Always read and follow the instructions of your specific resin. Having said that, (generally speaking) this is the process.
To mix resin, begin by measuring out equal amounts of resin and hardener – (measure by volume not weight). Use a separate measuring cup for each part. Once equal amounts of both parts are measured, pour them into a mixing cup. Gently stir the two parts together for 3 minutes. When you start to stir, cloudy swirls will appear.
While mixing, make sure to scrape the sides and bottom of the mixing cup to fully incorporate the two parts. Continue to mix until the cloudy swirls no longer appear and the mixture is clear. NOTE: it is best to only mix the amount that will be needed for each project, one project at a time.
How long after mixing the resin will it then begin to harden?
Mod Podge Resin has a working time of 20 – 30 minutes. During this time, you can mix in additives such as alcohol inks or glitters.
Can a resin project be decorated with paint?
Once the resin has been completely cured, it can be decorated or embellished with paint, markers, ink, and more. Once decorated, it is recommended that the surface be protected by pouring a thin top coat of clear resin over the decorated surface.
Can I apply resin in layers, and how long should I wait between applying each layer?
Yes, it can be applied to a surface in layers. The second layer can be applied once the first layer has set. This could be one to two hours, depending upon the humidity level and temperature in the room.
Can I use a mold? And what types of molds work best?
Resin works best with all types of molds. Some molds like a silicone mold will not require a mold release agent, while other types of molds made of plastic polypropylene or polyethylene sheet plastic will require a mold release agent.
How should I prepare my work space?
When working with resin, it is best to work in a room that is well ventilated with fresh air and work in temperate 70°F. Make sure your work table is level and is covered with wax paper or a large plastic sheet. This will make it easier to wipe away resin and hardener spills.
Note: Mixed resin spills, once cured, will peel off the wax or plastic covered work surface easily. Gather all the necessary supplies such as: paper towels, plastic measuring cups, plastic mixing cups, plastic or wooden mixing stick, disposable brush, toothpicks, and a butane torch. And always wear your personal protective equipment.
Are you ready to try a project? Dig in below!
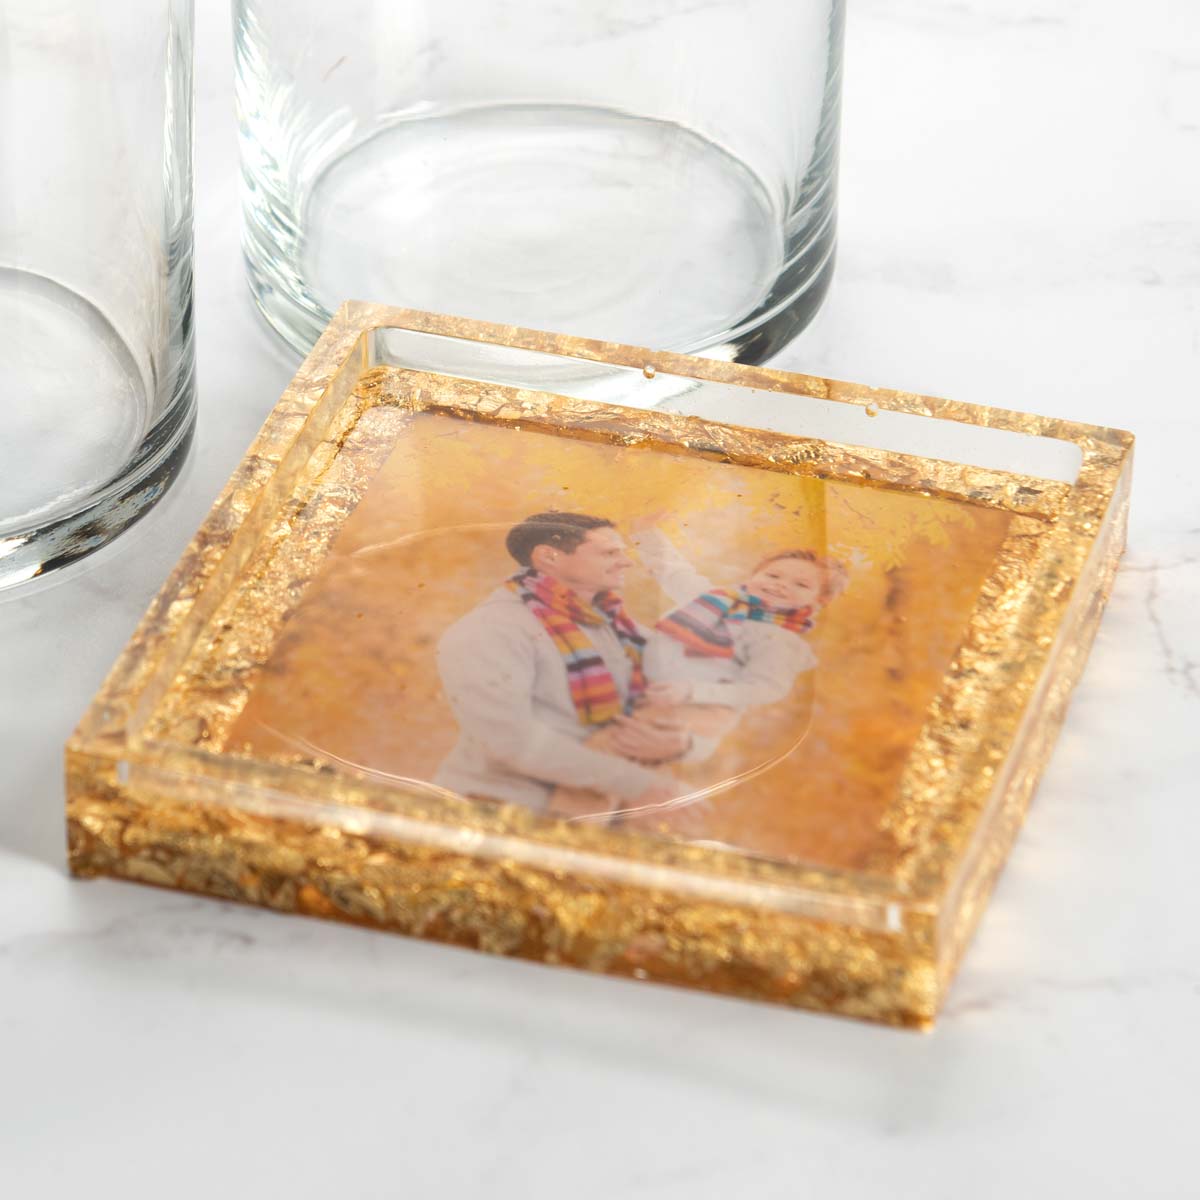
Gold Resin Photo Coasters
Embed your favorite family photo in a coaster mold, then pour on resin to preserve your memories and make a personal decor piece. Add gold leaf to your coasters for additional flair and charm. This project makes for a great gift!
Gather These Supplies
- Clear epoxy casting resin, like Mod Podge Resin
- Small family photo
- Gold leaf/gold flakes
- Silicone coaster mold(s)
- Cups for pouring and cups for mixing (if they don’t come with your kit)
- Craft sticks or other stir sticks
- Gloves
- Respirator
- Timer
- Butane torch for popping bubbles
- Drop cloth (or something else to protect your surface)
- Clear bumper feet (optional)
Mix the resin according to the package instructions.
Pour a small amount of clear resin into the coaster mold.
Carefully place the family photo, face down, in the center of the silicone mold.
Sprinkle gold flakes around the edges of the photo.
Pour more clear resin to fill the entire mold, without overflowing.
Remove bubbles using a butane torch. Let set for five minutes and then repeat to remove additional bubbles if needed. Allow resin to cure fully according to package instructions (likely 24 hours).
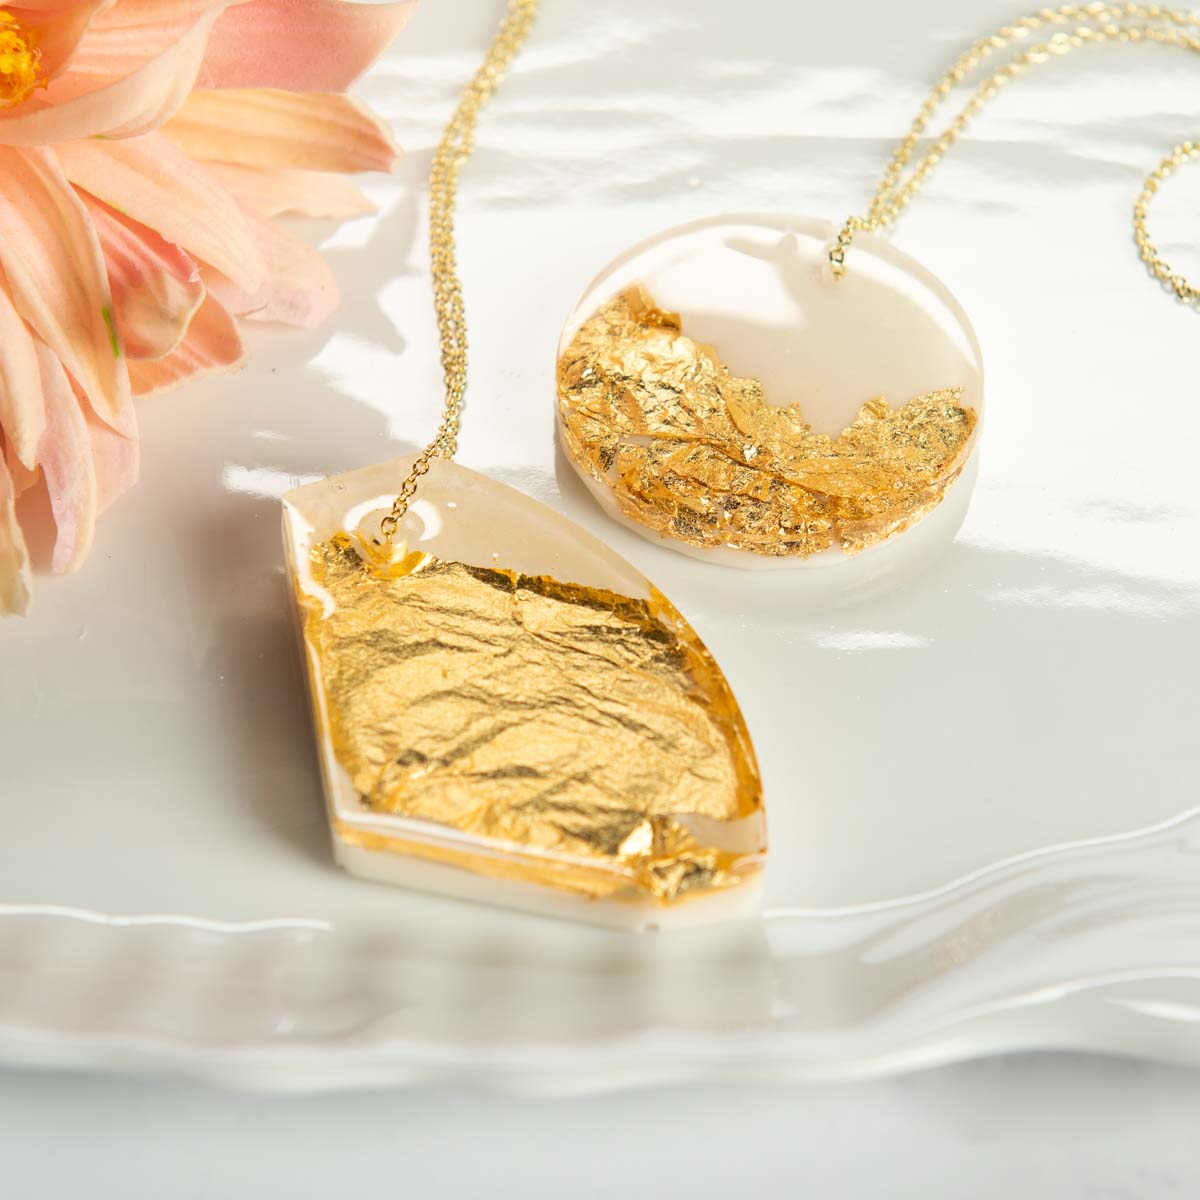
Gold Gilded Pendants
Add a little glitz to your wardrobe with these beautiful handmade gold leaf pendants. These necklaces make great gifts and are perfect for customizing to fit your style.
Gather These Supplies
- Clear epoxy casting resin
- Gold leaf/gold flakes
- Craft paint – white
- Pendant silicone mold(s)
- Gold chain
- Cups for pouring and cups for mixing (if they don’t come with your kit)
- Craft sticks or other stir sticks
- Gloves
- Respirator
- Timer
- Butane torch for popping bubbles
- Drop cloth (or something else to protect your surface)
Mix the resin according to the package instructions. Divide the resin into two cups.
Mix two drops of white paint into one of the cups and mix thoroughly.
Pour the white paint and resin mixture into the mold halfway. Use the torch to remove any bubbles. Let set for 4 hours.
Add gold flakes on top of the white, the pour clear resin directly on top to fill the mold (without overflowing).
Remove bubbles using a butane torch. Let set for five minutes and then repeat to remove additional bubbles if needed. Allow resin to cure fully according to package instructions (likely 24 hours).
Did you enjoy these gold leaf resin projects? Do you have any other questions? Let me know in the comments! I’d also love for you to check out these other resin projects:
Cutting Board • Geode Coasters • Keychains • Ocean Resin Art • Resin Frame • Resin Jewelry Making • Wood Slice Coasters


I really love the Photo & Gold Leaf/Flakes idea. I’ve been wanting to make homemade coasters using resin to get rid of the paper napkin lined snack glass plates that I’m presently using. If i made these in my garage which isn’t heated by the way, would i still need to use a respirator and does the temp have to be 70 degrees?? If so, i guess I’ll just have to wait till Spring comes around again.
Hi Kimi! I can’t tell you not to use a respirator just based on the instructions, but if you’re in a ventilated area, that might be something you can do if you aren’t sensitive to the fumes. Is your garage freezing? I would feel comfortable pouring in my 50 degree garage and then moving it into the hallway when it sets a little bit. I wouldn’t pour it in freezing temperatures, or leave it in temps that are too cold because it will crack as it dries. So it really depends on *how cold* we’re talking. I wouldn’t go into the 30s or 40s.