
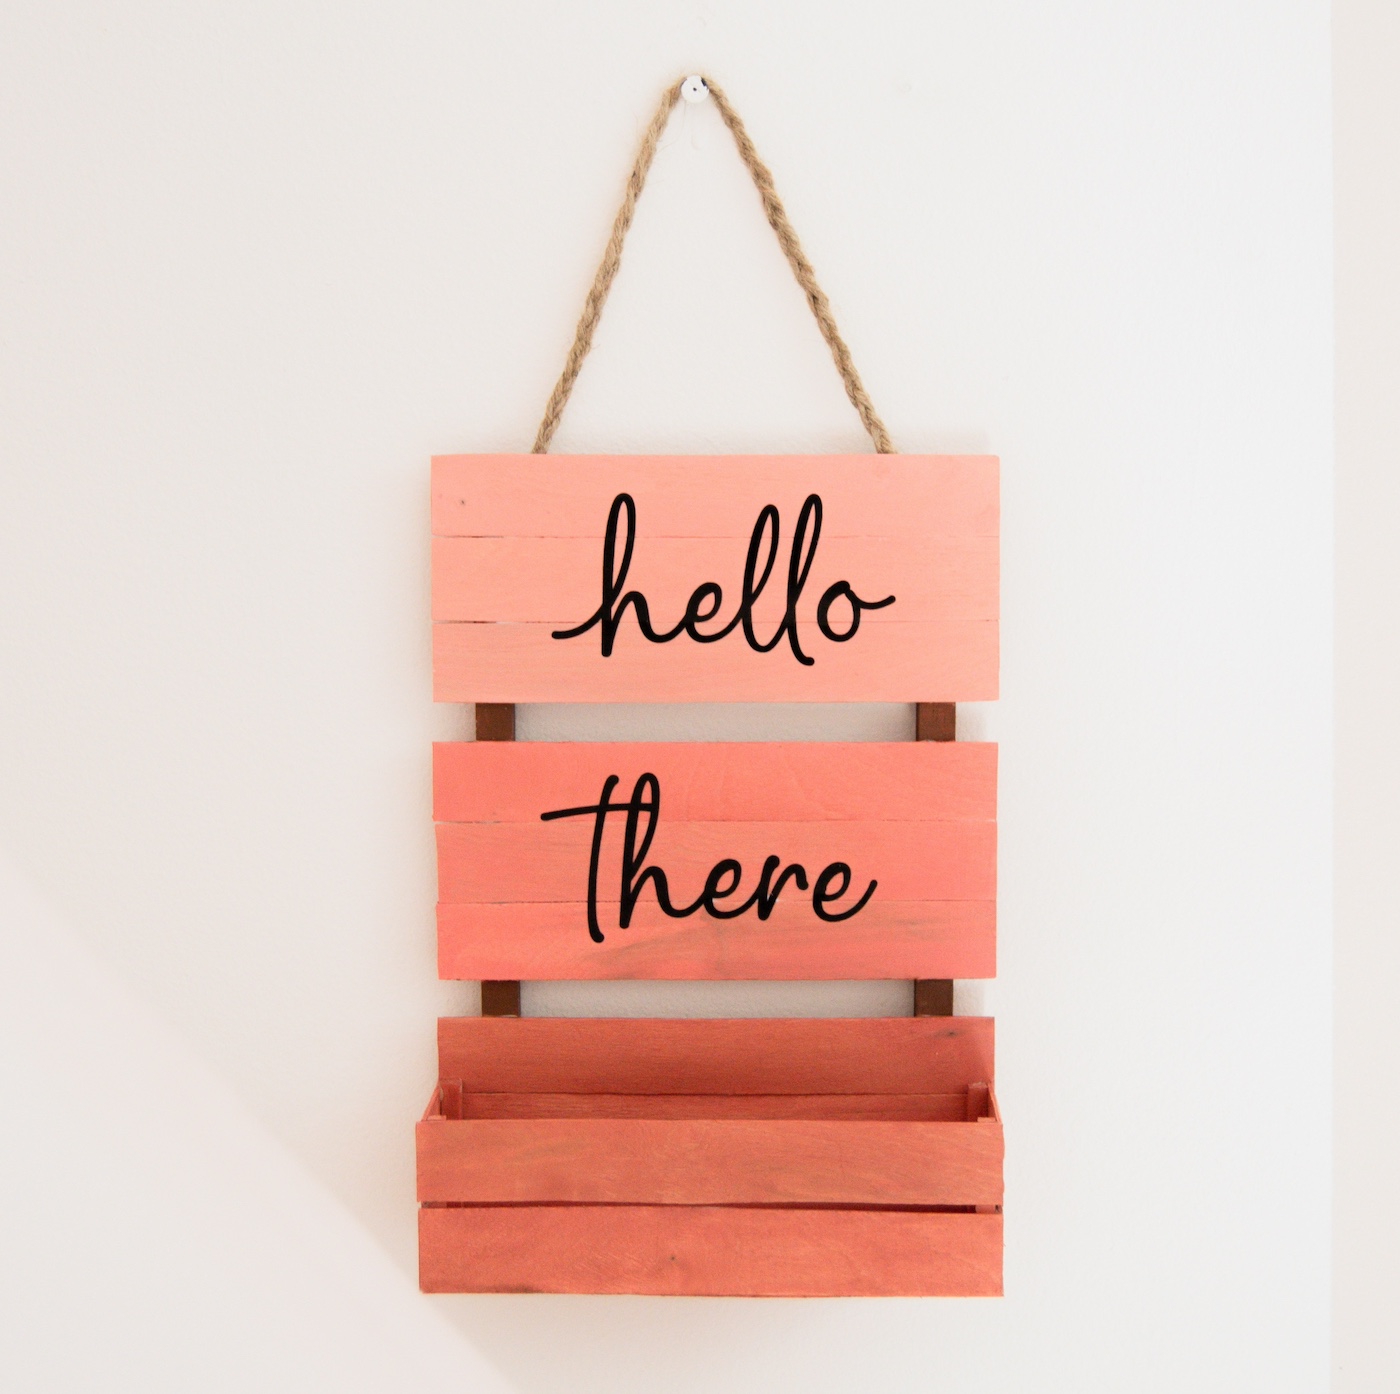
Create a stylish and versatile decor piece with this ice cream stick wall hanging! it’s a fun and easy project with a container to hold plants, trinkets, and more.
Skills Required: Intermediate. You will be cutting, gluing and painting popsicle sticks to make a hanging container. But don’t let this stop you – it’s a fun and super cute project that you can customize to your style!
Hello there! I’m generally excited about all crafts, but let’s be honest – some I’m more excited about than others. Lately the projects that have “floated my boat” are the ones using everyday items.
I’m looking for budget friendly, yet cute.
And today, we’re dipping into the world of DIY with a project that’s as fun as it is functional. Get ready to turn popsicle sticks into a masterpiece of home decor with our latest creation: the ice cream stick wall hanging!
Who would’ve thought that the same sticks that once held your favorite summer treats could transform into a chic, versatile wall hanging?
With a handful of popsicle sticks, some paint, a splash of creativity, and your bottle o’ Mod Podge, we’re about to take a creative journey from simplicity to elegance.
Whether you’re a fan of the rustic, scalloped edges or you’re going for a sleek, clean-lined look, this project is all about making it your own.
Cut, shape, and style these sticks into a wall hanging that’s not just a decoration, but a conversation starter.
But what’s a Mod Podge Rocks project without a twist? This wall hanging isn’t just for show; it’s a practical addition to your home.
With a built-in container, it’s ready to hold anything from your favorite succulents to your keys and knick-knacks. Say goodbye to clutter and hello to style!
The thing I love about this project the most is it shows that popsicle sticks can be for adults, too. And now I’m excited to use sticks in additional “adult crafts.” Because why not?
So, now I’m going to walk you through each step, ensuring that by the end of this post you’ll have a new piece of decor you’re in love with.
It will be a testament to the fact that in the world of DIY and Mod Podge Rocks, the possibilities are endless. Let’s get crafting! Here’s what you’re going to need.
Gather These Supplies
- Popsicle sticks (jumbo, extra large – approximately 8″ long and 3/4″ wide)
- Square dowel rods – the ones for this project are 7.75″ long
- Craft paint
- Vinyl lettering – purchase or cut your own with this cut file
- Mod Podge (any formula)
- Paintbrushes
- Hot glue gun
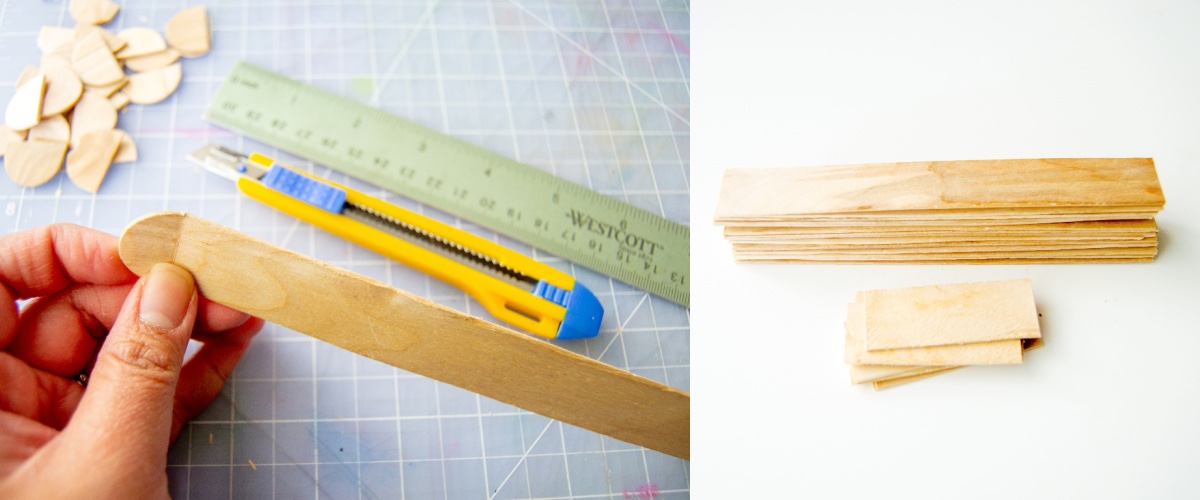
- Box cutter – make sure it’s sharp
- Steel ruler
- Cutting mat
- Pencil
Tips and Thoughts for This Project
I used jumbo popsicle sticks, but you can use large or even normal-sized sticks; just make sure to adjust the number that you use. For example, you would probably need 4-5 per rectangle if you are using the large popsicle sticks, and more if you are using the smaller ones.
Cutting the ends of the sticks is the most time consuming part of the project. Of course, you can skip this step if you want the cute, scalloped edge from multiple popsicle sticks together!
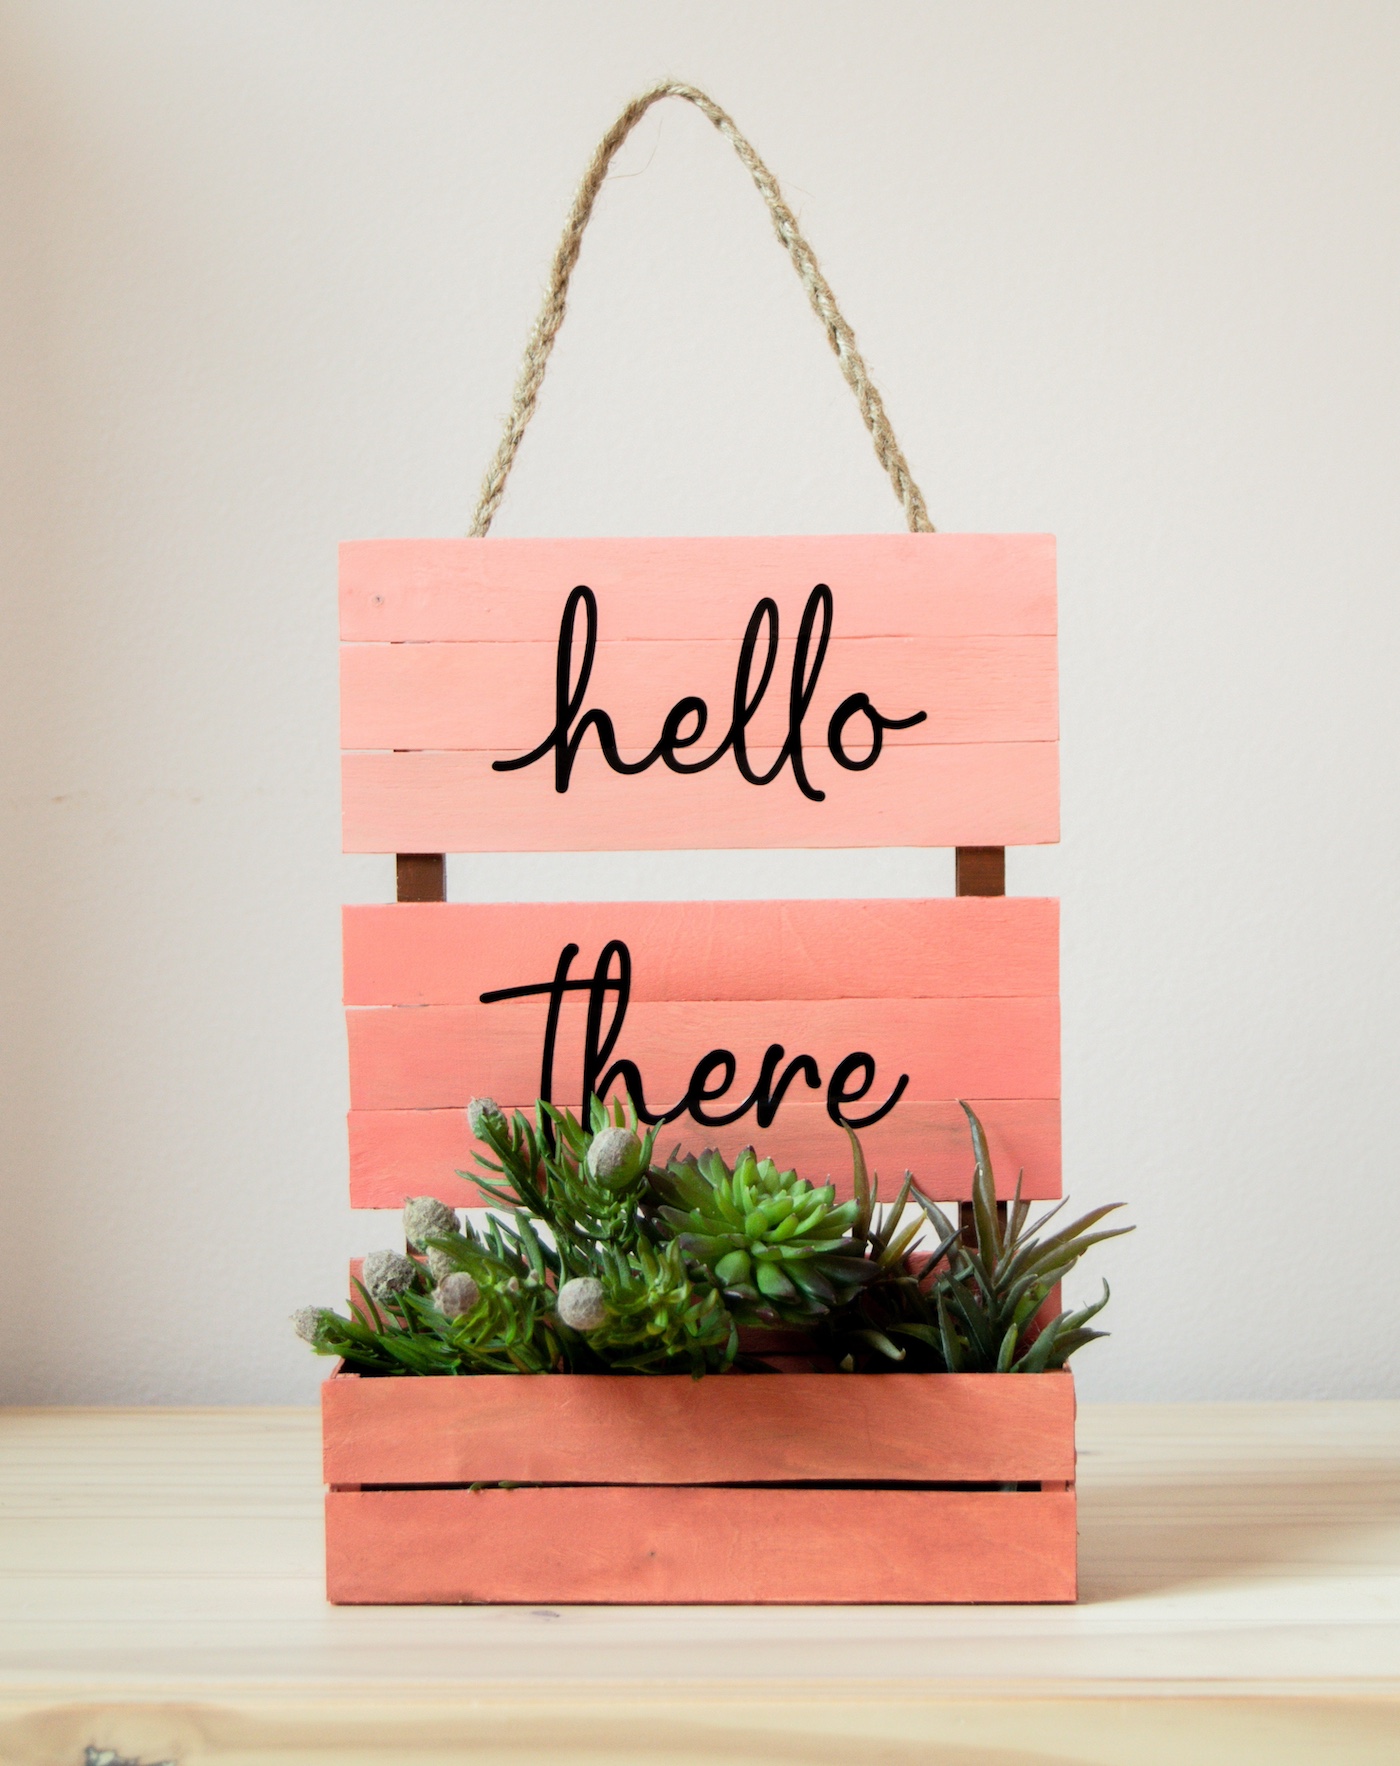
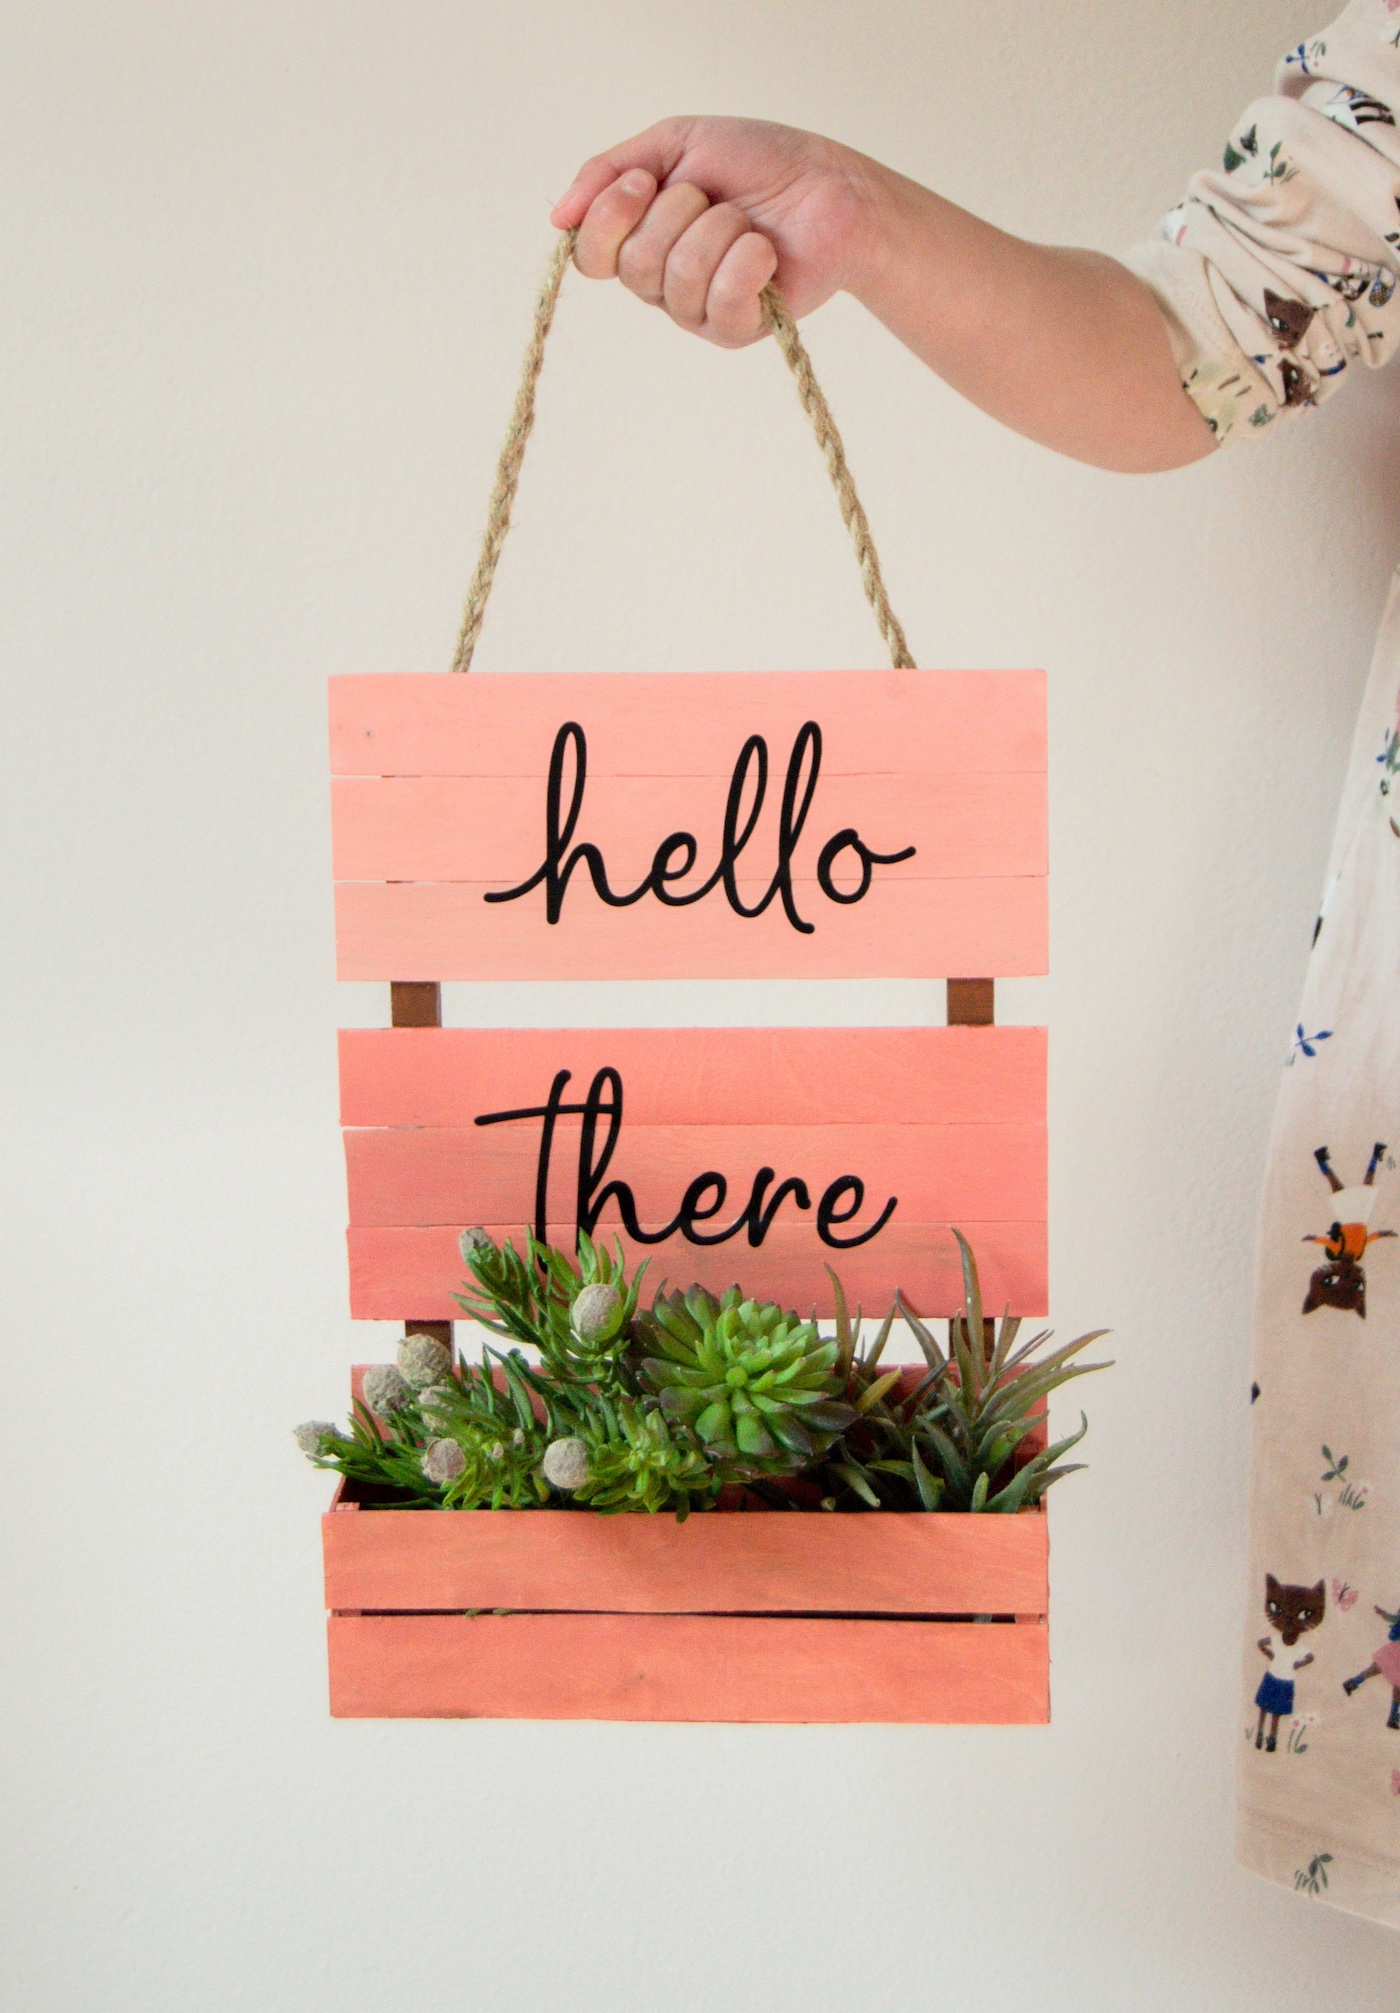
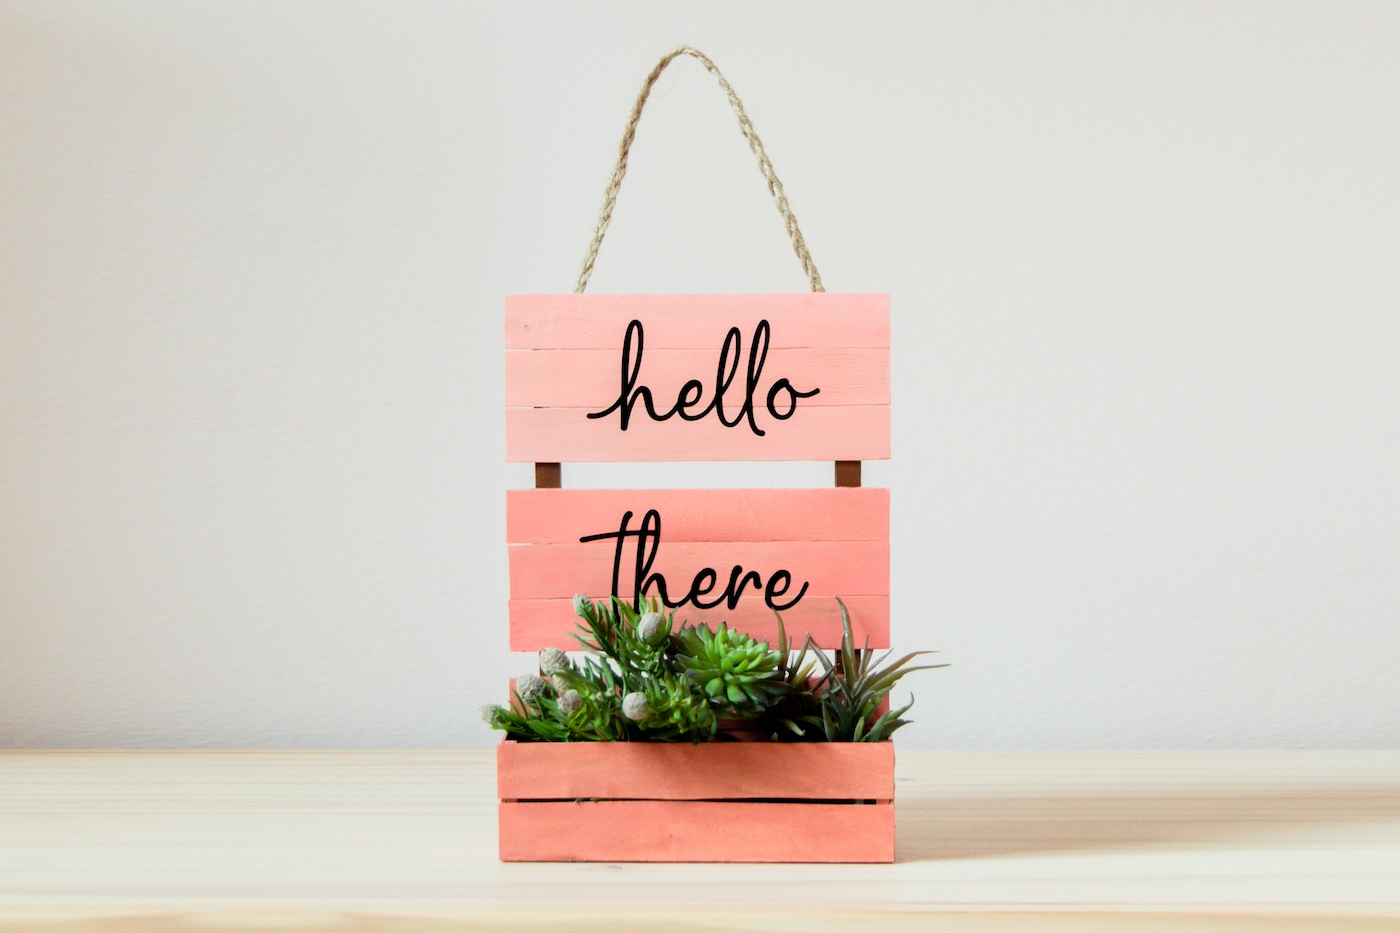
Add succulents, air plants or little trinkets and hang or display it wherever you’d like. It’s such a fun wood project that doesn’t need any power tools at all. Have fun making your own wall hanging! What color would you paint it?
Get the printable how to card for this ice cream stick craft wall hanging below:

Ice Cream Stick Wall Hanging
Equipment
- Box cutter
- Steel ruler
- Cutting mat
Materials
- 15 Popsicle sticks – 8″ I used 15 sticks total for this project
- Square dowel rods
- Craft paint
- Vinyl lettering
- Mod Podge
Instructions
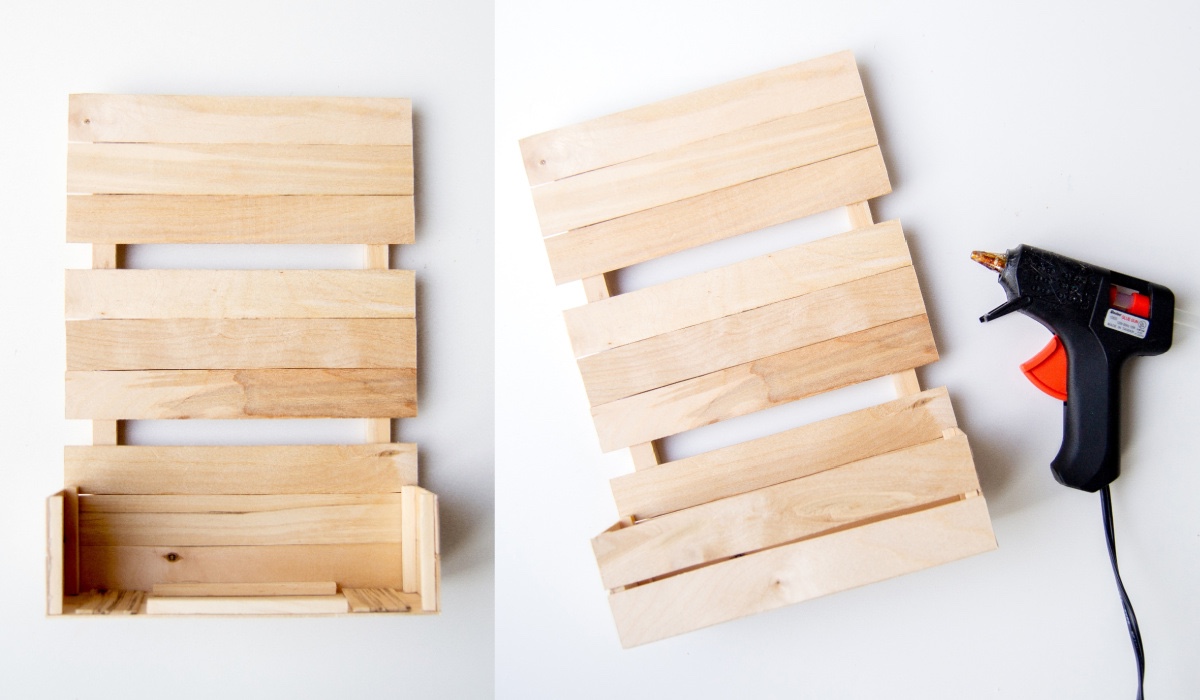
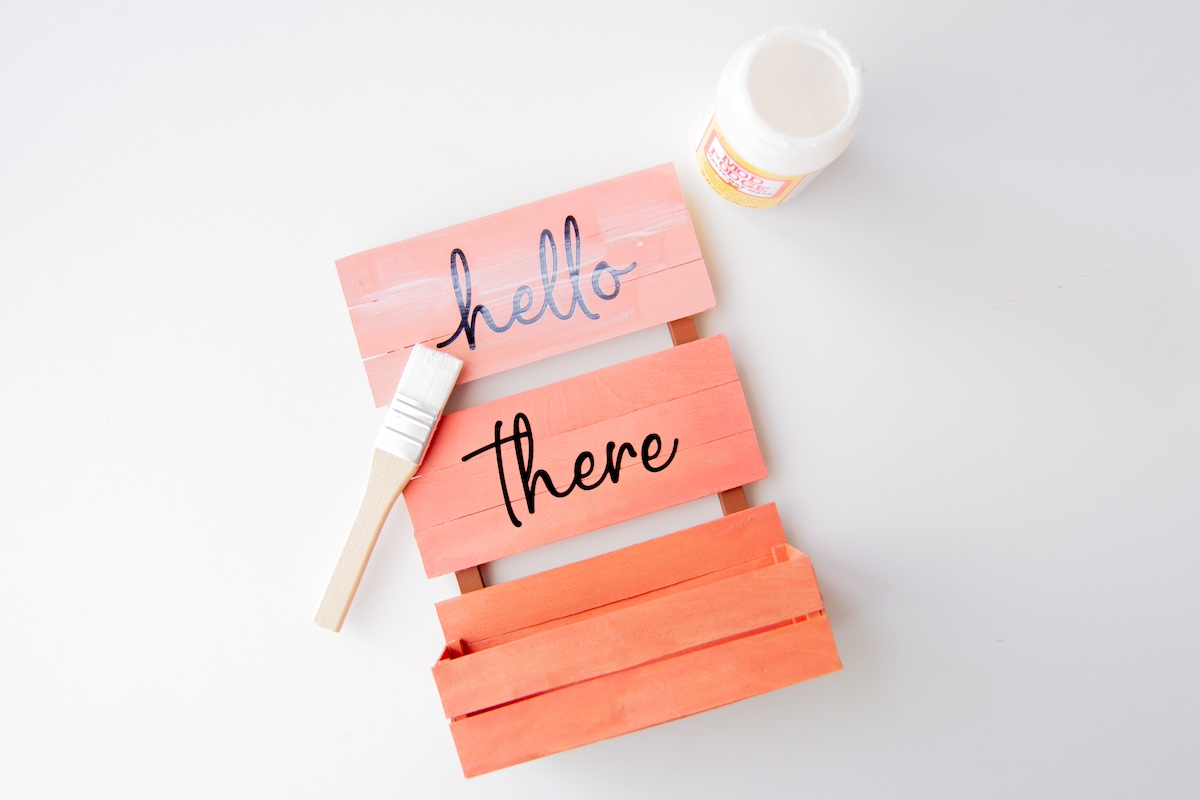
- Cut the round ends of the popsicle sticks. I used a box cutter and steel ruler with a cutting mat to do this step quickly.
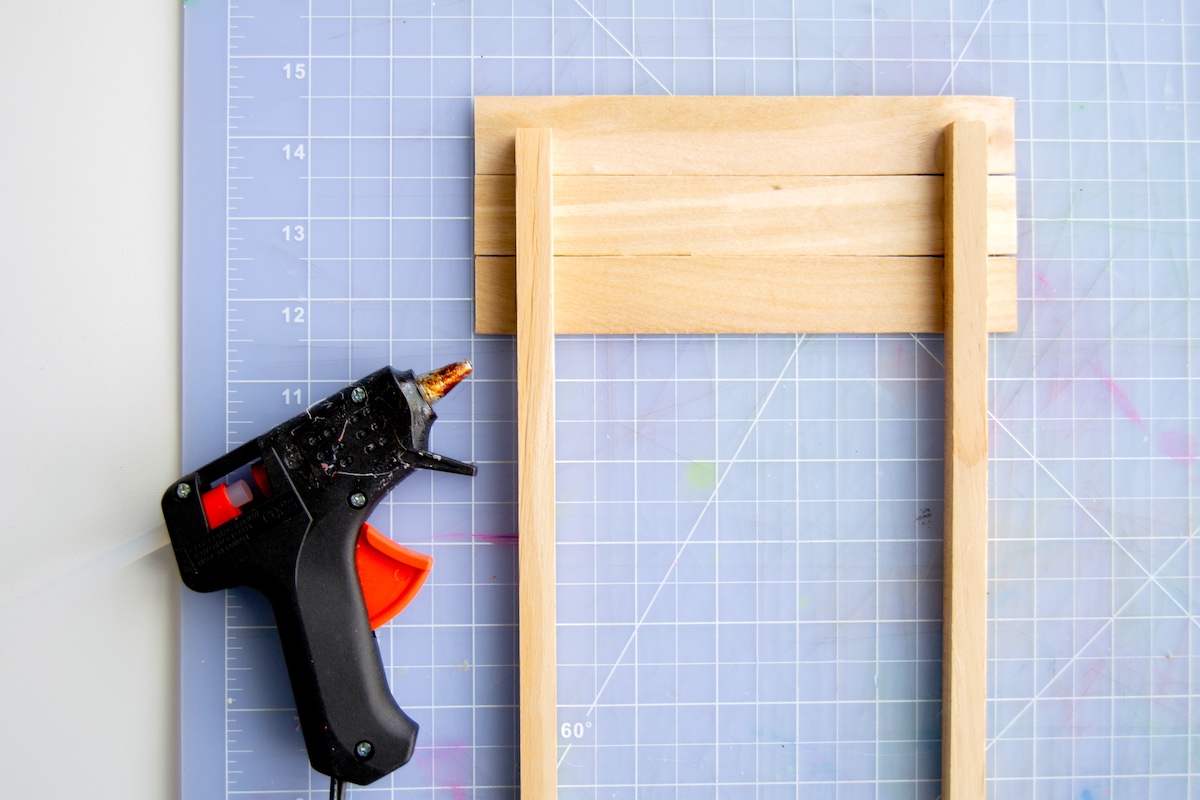
- Glue nine popsicle sticks to the square dowel rods. Glue three at the top, add 1/2", three more, add 1/2", then three more. Let set.
- Cut six pieces of popsicle stick that are 1 1/2" long to make the sides and reinforcement pieces for the bottom. Cut four dowel pieces that are 1 1/2" long for the sides, and two that are about 5" long to reinforce the bottom.
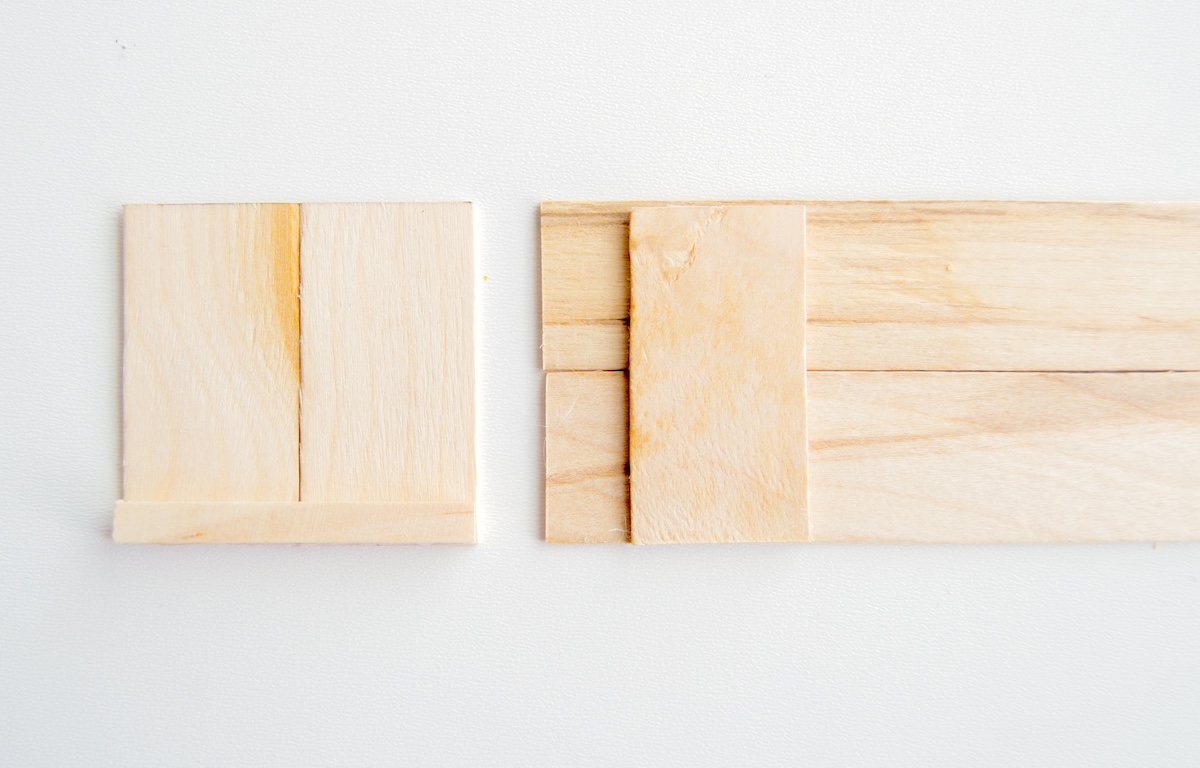
- Using popsicle sticks and dowels, make a box and assemble the bottom container. Glue two small pieces together with dowels for both sides, then make the bottom with the dowels and remaining two small pieces. Glue the sides to the bottom. Let set.
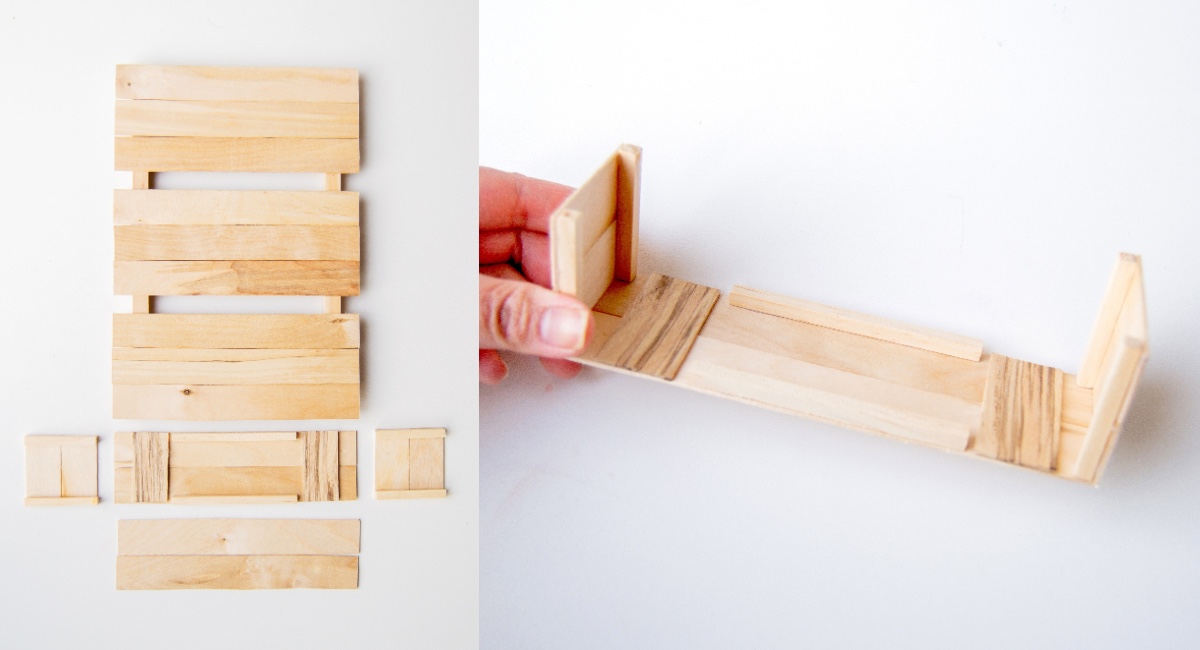
- Once dry and stable, glue the bottom and side pieces to the wall hanging as shown. Finally, glue the fronts of the container to finish assembly.
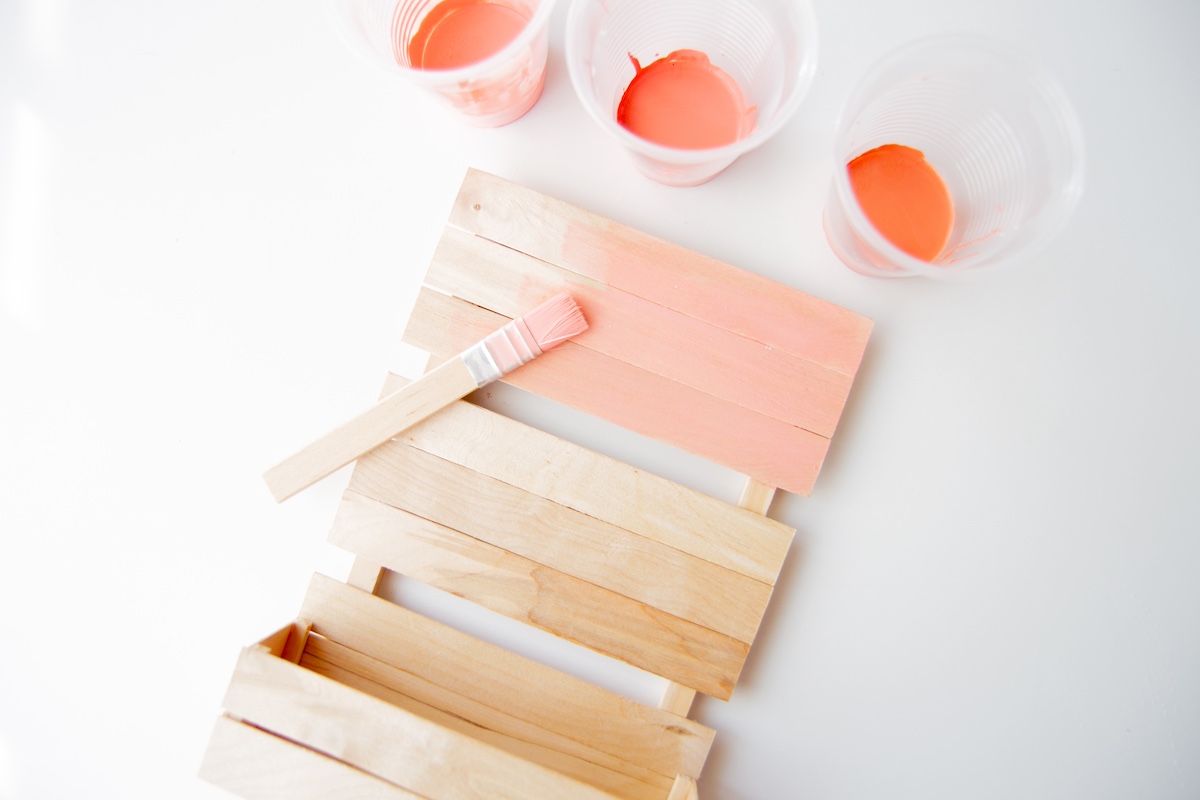
- Make your own gradient paints by using a lighter color to mix in with the original paint color to create a lighter hue, and a dark color (such as brown or a small amount of black) to create a darker hue.
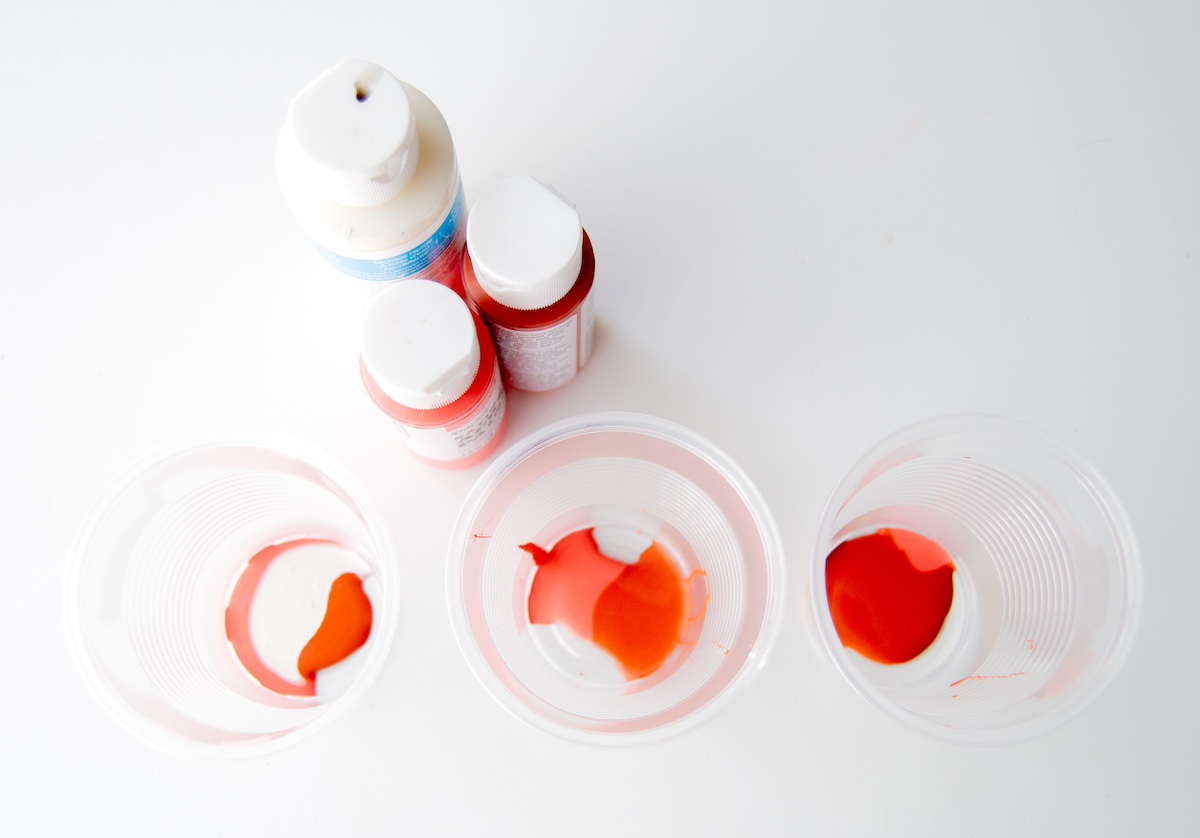
- Paint the wood with your choice of colors and let dry. I used a gradient of coral and terra cotta for my wall hanging and brown for the dowel backing.
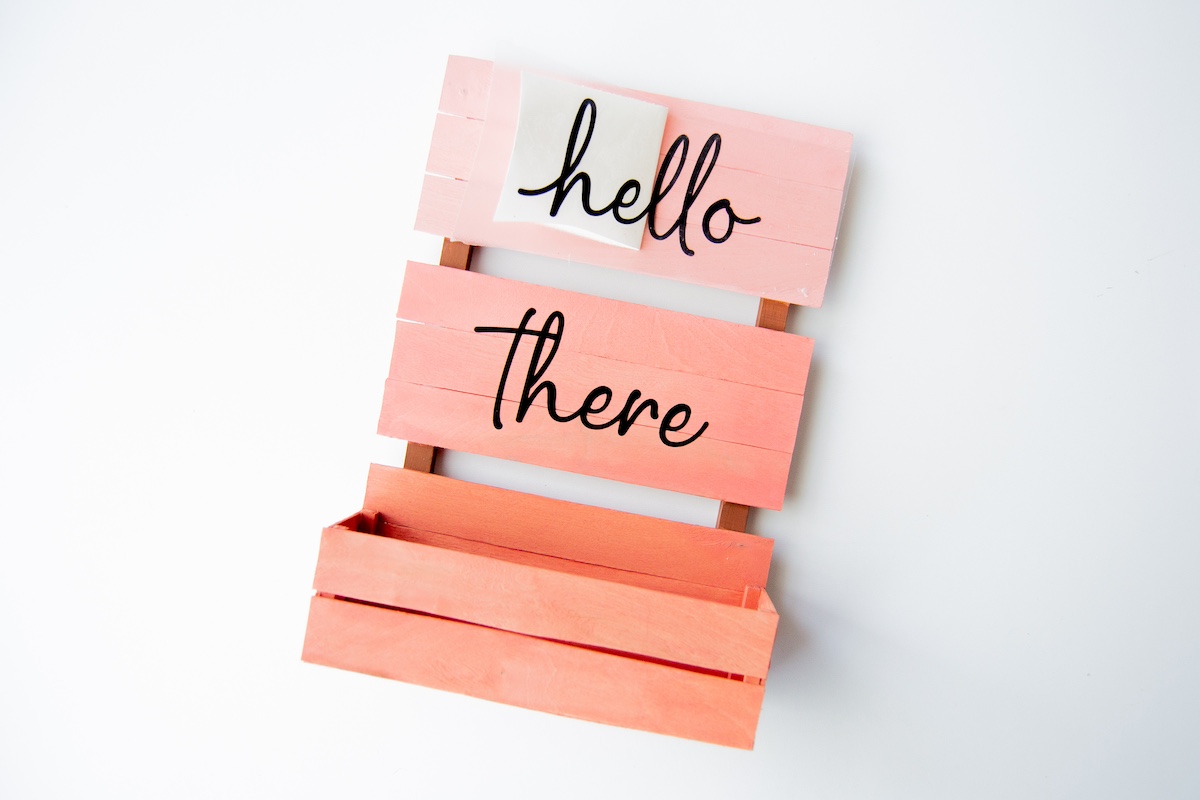
- Once the paint is dry, add your vinyl wording. I used ‘Hello There’ – which I cut on my cutting machine. You can also add adhesive or wood letters, or write something with a paint pen.
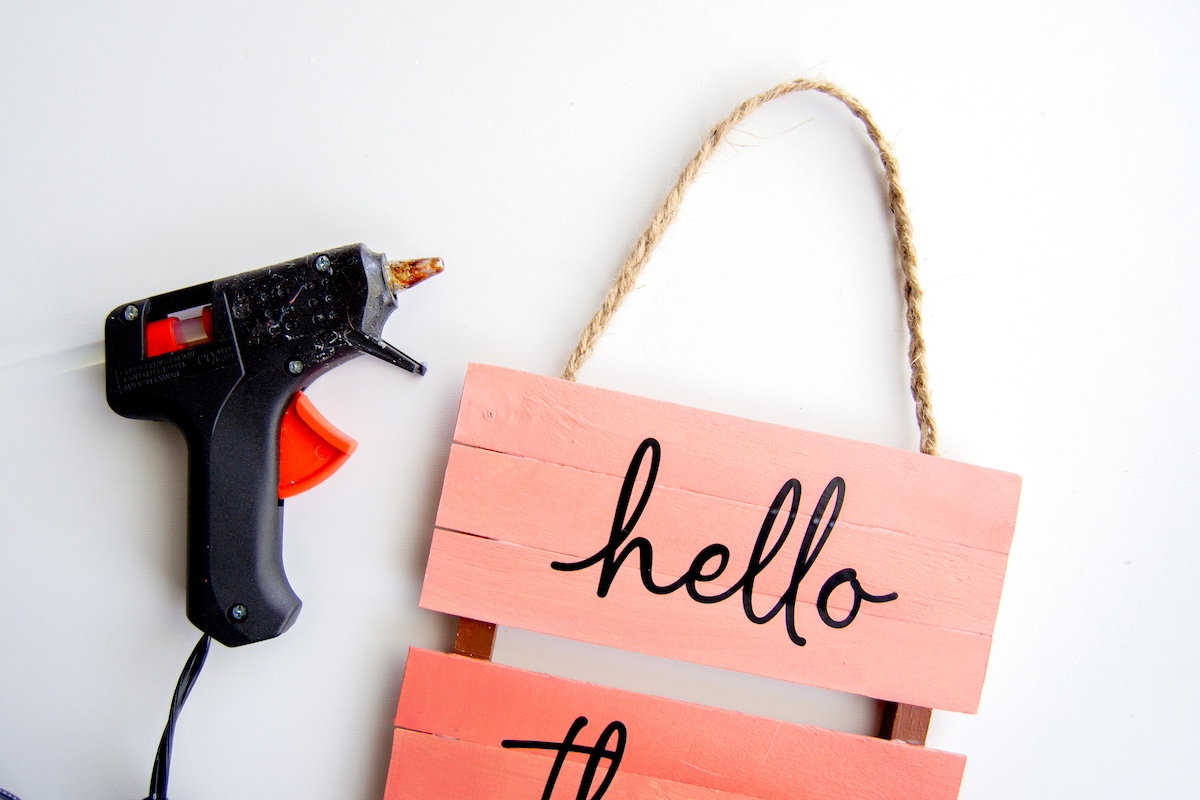
- Seal your wall hanging with Mod Podge or a clear acrylic spray. Let dry.
- Once dry, add a hanger (I used a braided jute cord) to the back. Let set before hanging.
Notes
If you enjoyed this project, please let me know in the comments! I’d also love for you to check out these other unique ideas:


Hi, I have a decopaged box I purchased about 20-25 years ago that I love. The problem is that the finish is cracking and flaking off. I’m not sure but I think it has varnish on it. I would love to get the varnish or whatever finish there is removed without hurting the lovely images that are glued on it and then modpodge it. What do you suggest? Thank you, Pat Roberts at cewoolwine@gmail.com