
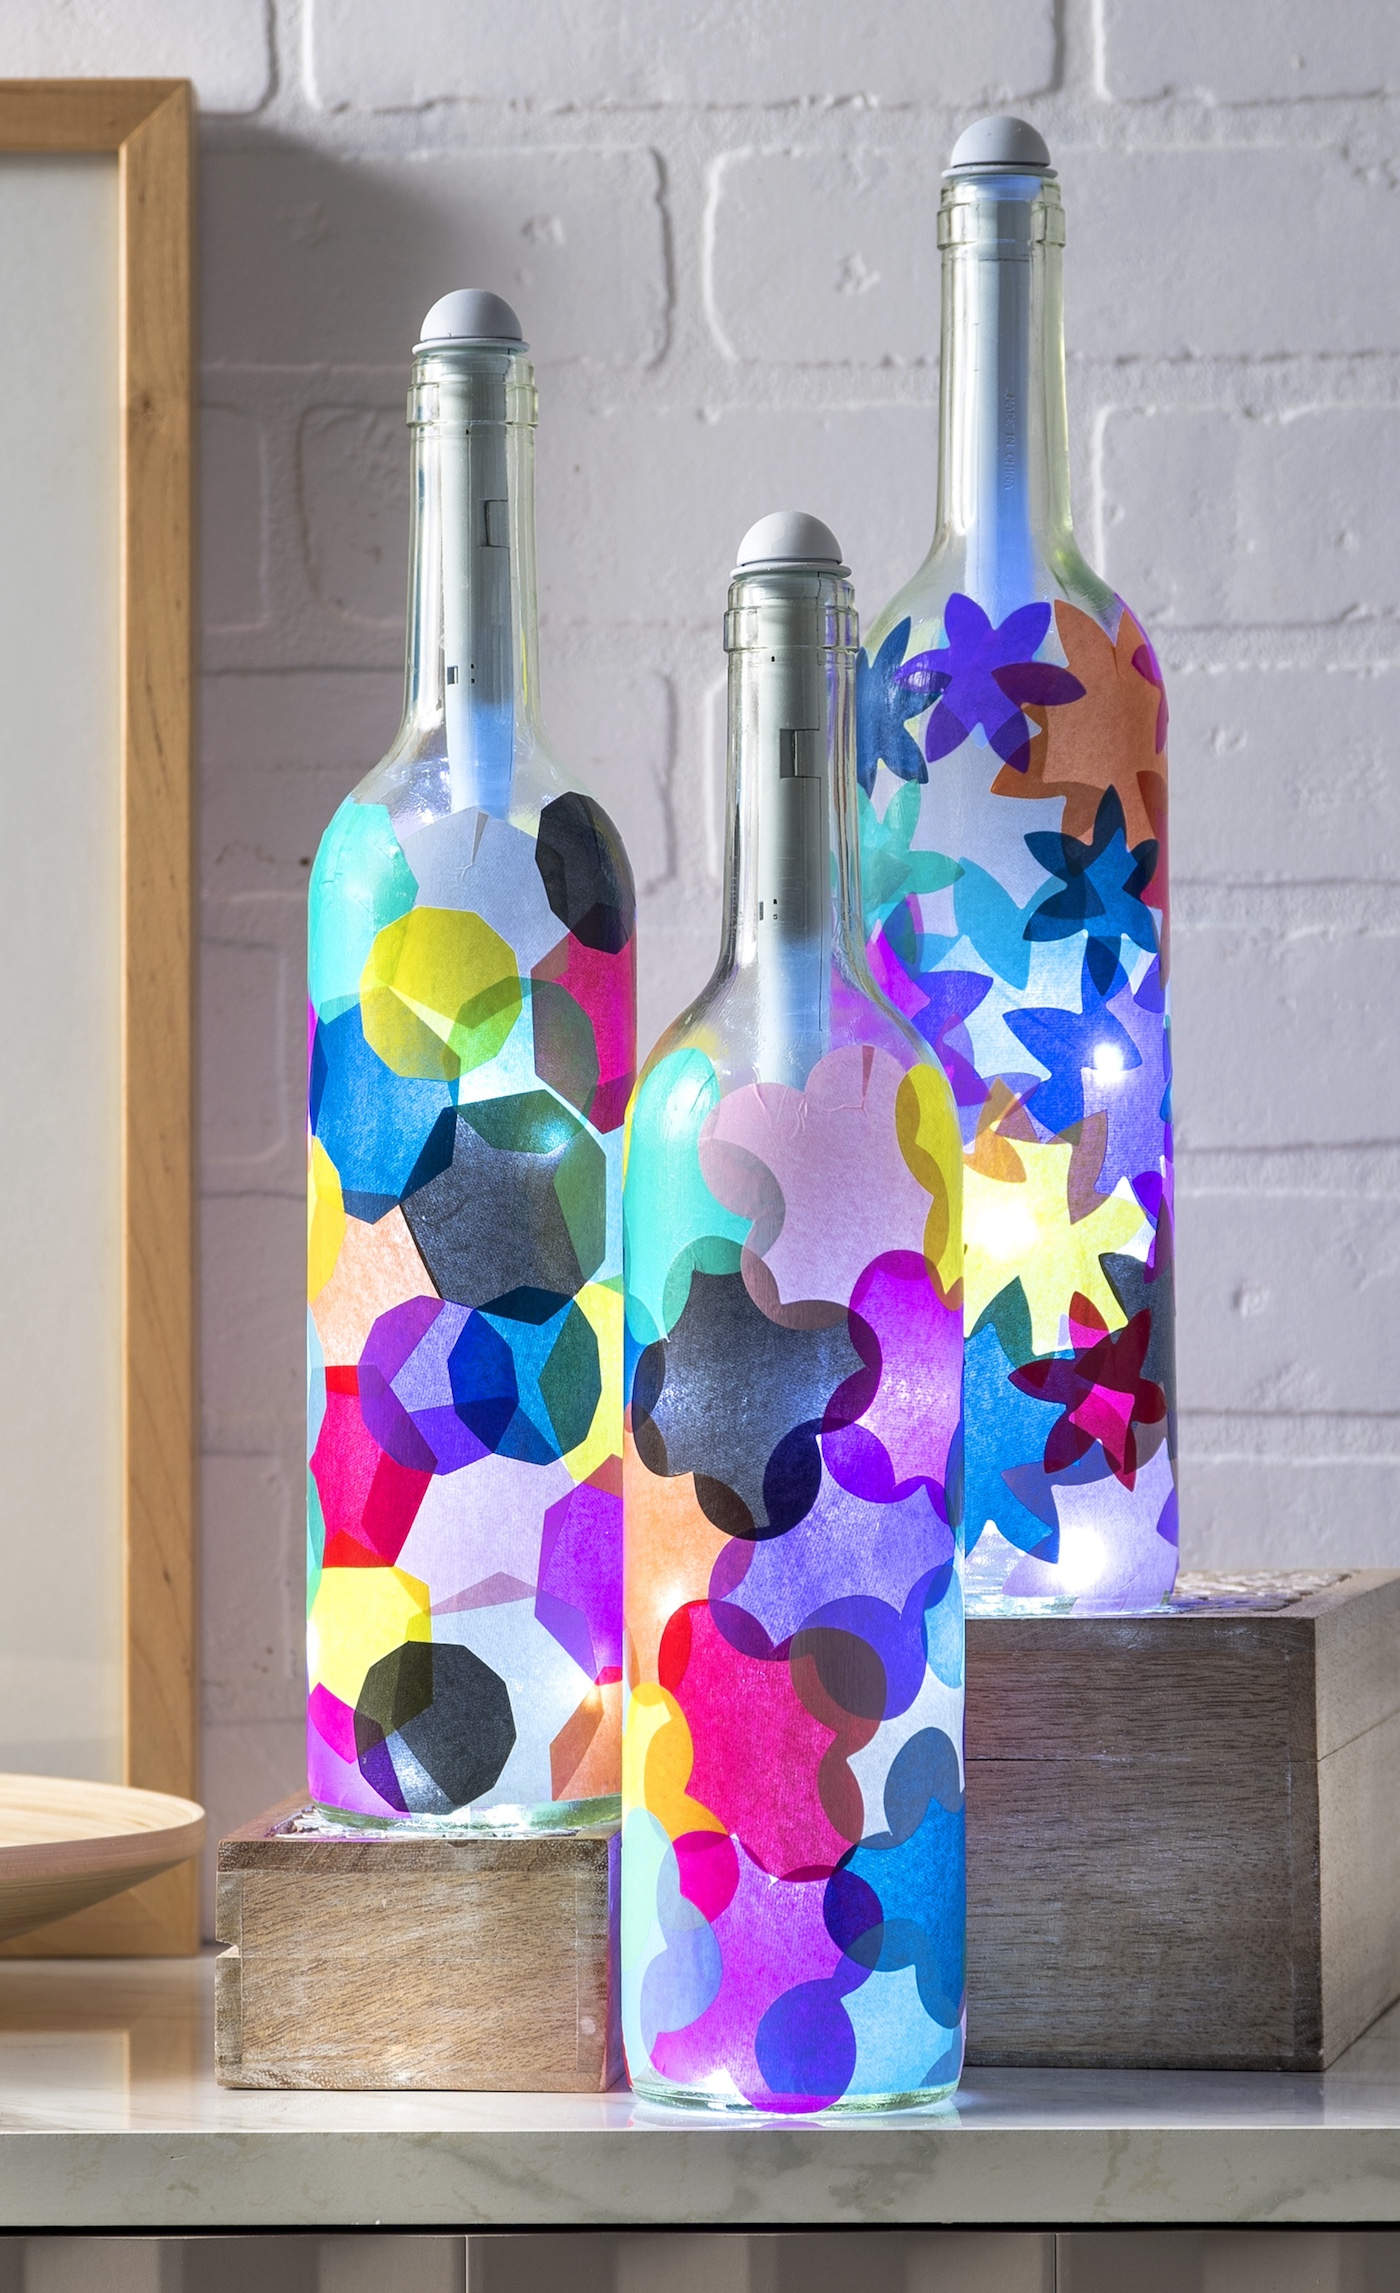
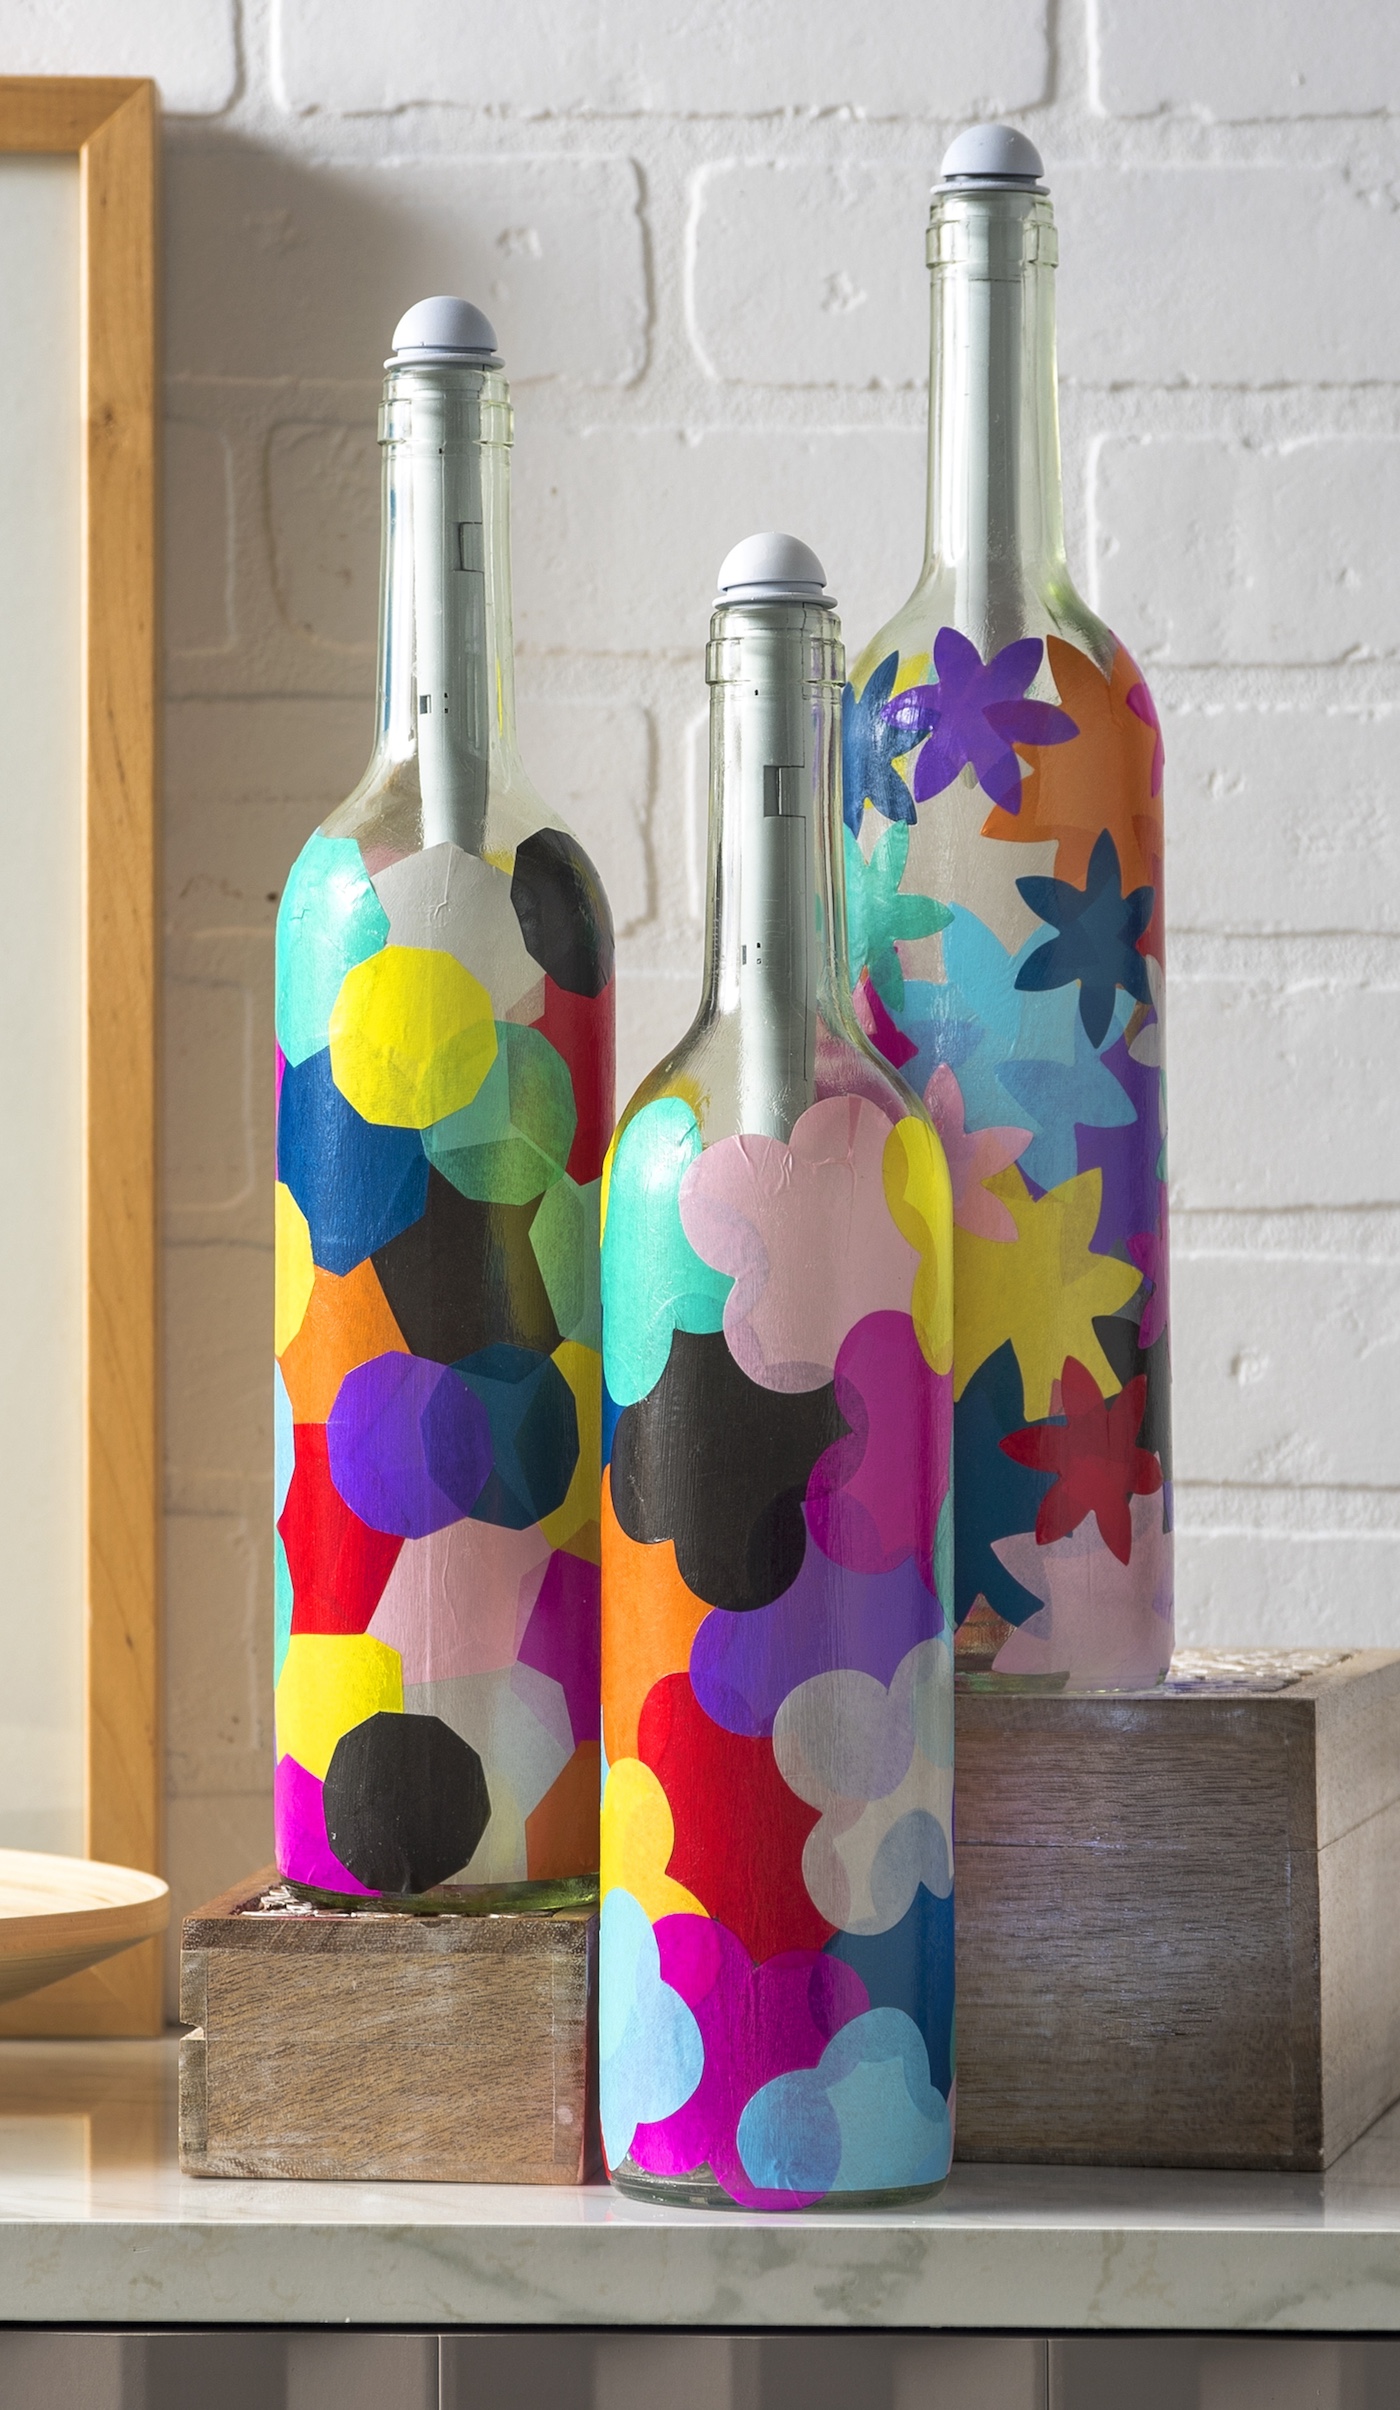
If you love wine bottle crafts, these lanterns are easy to make with tissue paper and Mod Podge. The bottle lights are easy to install and make the project!
As we inch closer to those warm summer nights, I find myself looking forward to unwinding on my covered porch, basking in the gentle evening breeze.
However, there’s a little snag in my ideal summer scenario – my condo rules strictly prohibit the use of open flames, which means my dreams of ambient candlelit evenings are a no-go.
Plus, with wooden columns around, I wouldn’t want to flirt with danger anyway. But who says you need candles to create a cozy, inviting atmosphere?
What I decided to do instead was transform ordinary wine bottles into stunning decorative pieces with just Mod Podge, tissue paper, and some cleverly chosen wine bottle lights.
It’s a simple idea, but the results are anything but. If you haven’t ventured into the world of Mod Podge wine bottles before, especially ones that light up your space without a flame in sight, you’re in for a delightful surprise.
This project is my workaround to the no-candle rule, and honestly, it’s turned out to be a blessing in disguise. It’s given me the chance to explore the joys of Mod Podging on glass, a technique that’s as fun as it sounds.
With a few basic supplies and a bit of creativity, I’ve managed to create a lighting scheme that’s both safe for my porch and incredibly charming.
If you’re curious about how to make these illuminated wonders for yourself, I’m excited to share the process with you. It’s a fantastic way to recycle those empty wine bottles into something beautiful and functional, lighting up your evenings with a soft, ambient glow.
So, if you’re ready to turn those forgotten bottles into eye-catching lanterns without worrying about flames or condo rules, stick around.
I’ll show you step by step how to achieve this with Mod Podge and tissue paper, creating something truly special. Let’s embark on this creative journey together and light up our summer nights in style.
Gather These Supplies
- Clear wine bottles – you can recycle your own or get them here
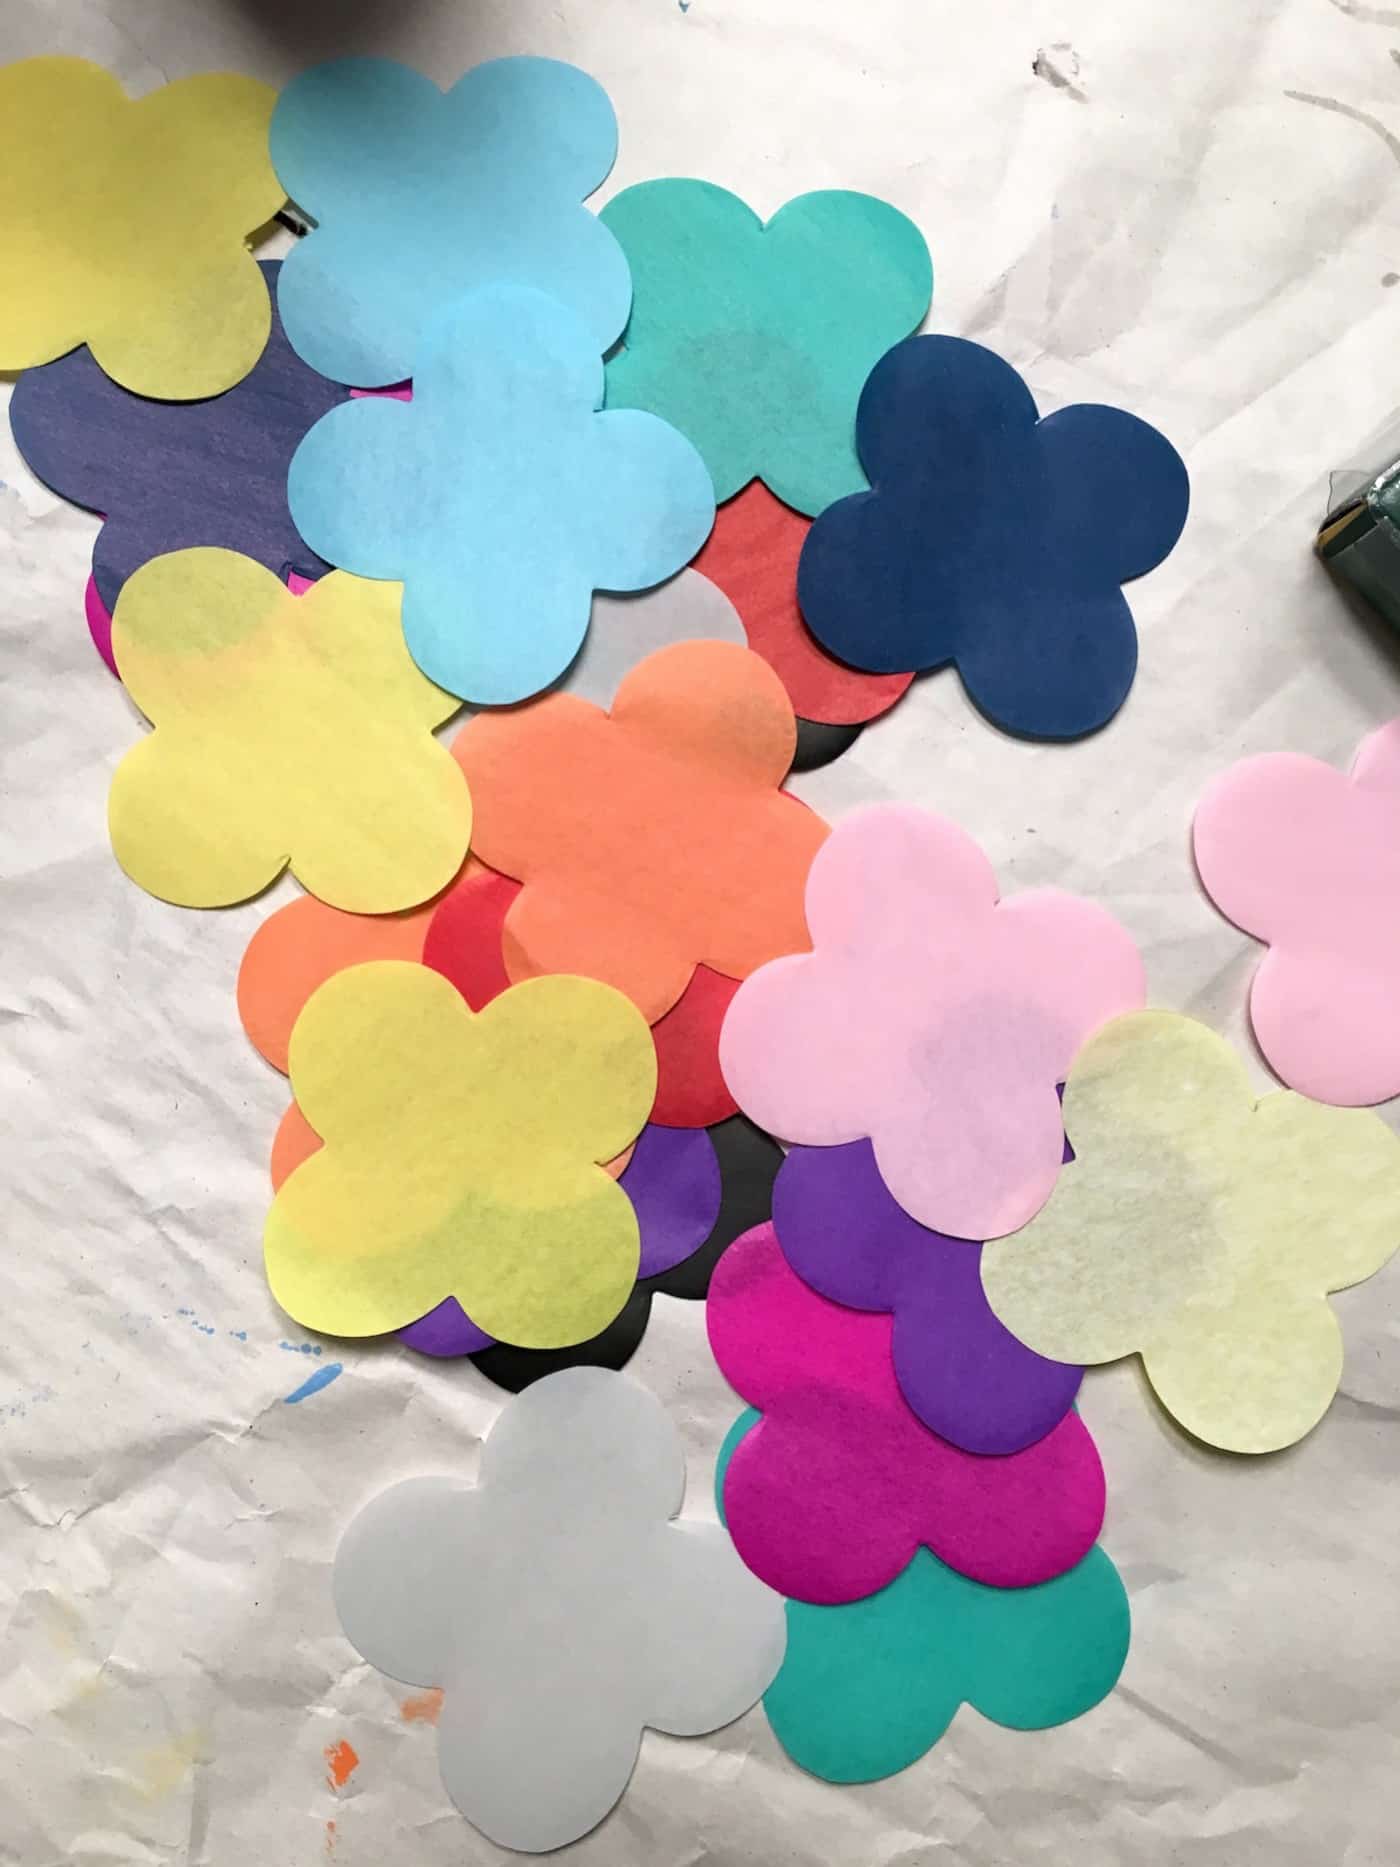
- Tissue paper – you can purchase the tissue paper and cut into shapes; I used these pre-cut ones
- Mod Podge Gloss
- Light My Bottle Light – one per bottle
- White spray primer
- Scissors
- Paintbrush
Tips and Thoughts for This Project
Before you begin, you’re going to wash the outside of the bottles with mild soap and then let them dry. We have a post about sticker adhesive removers also.
If you want to punch out tissue paper shapes, you’ll want to stack them up and punch several at once. Tissue paper is hard to punch.
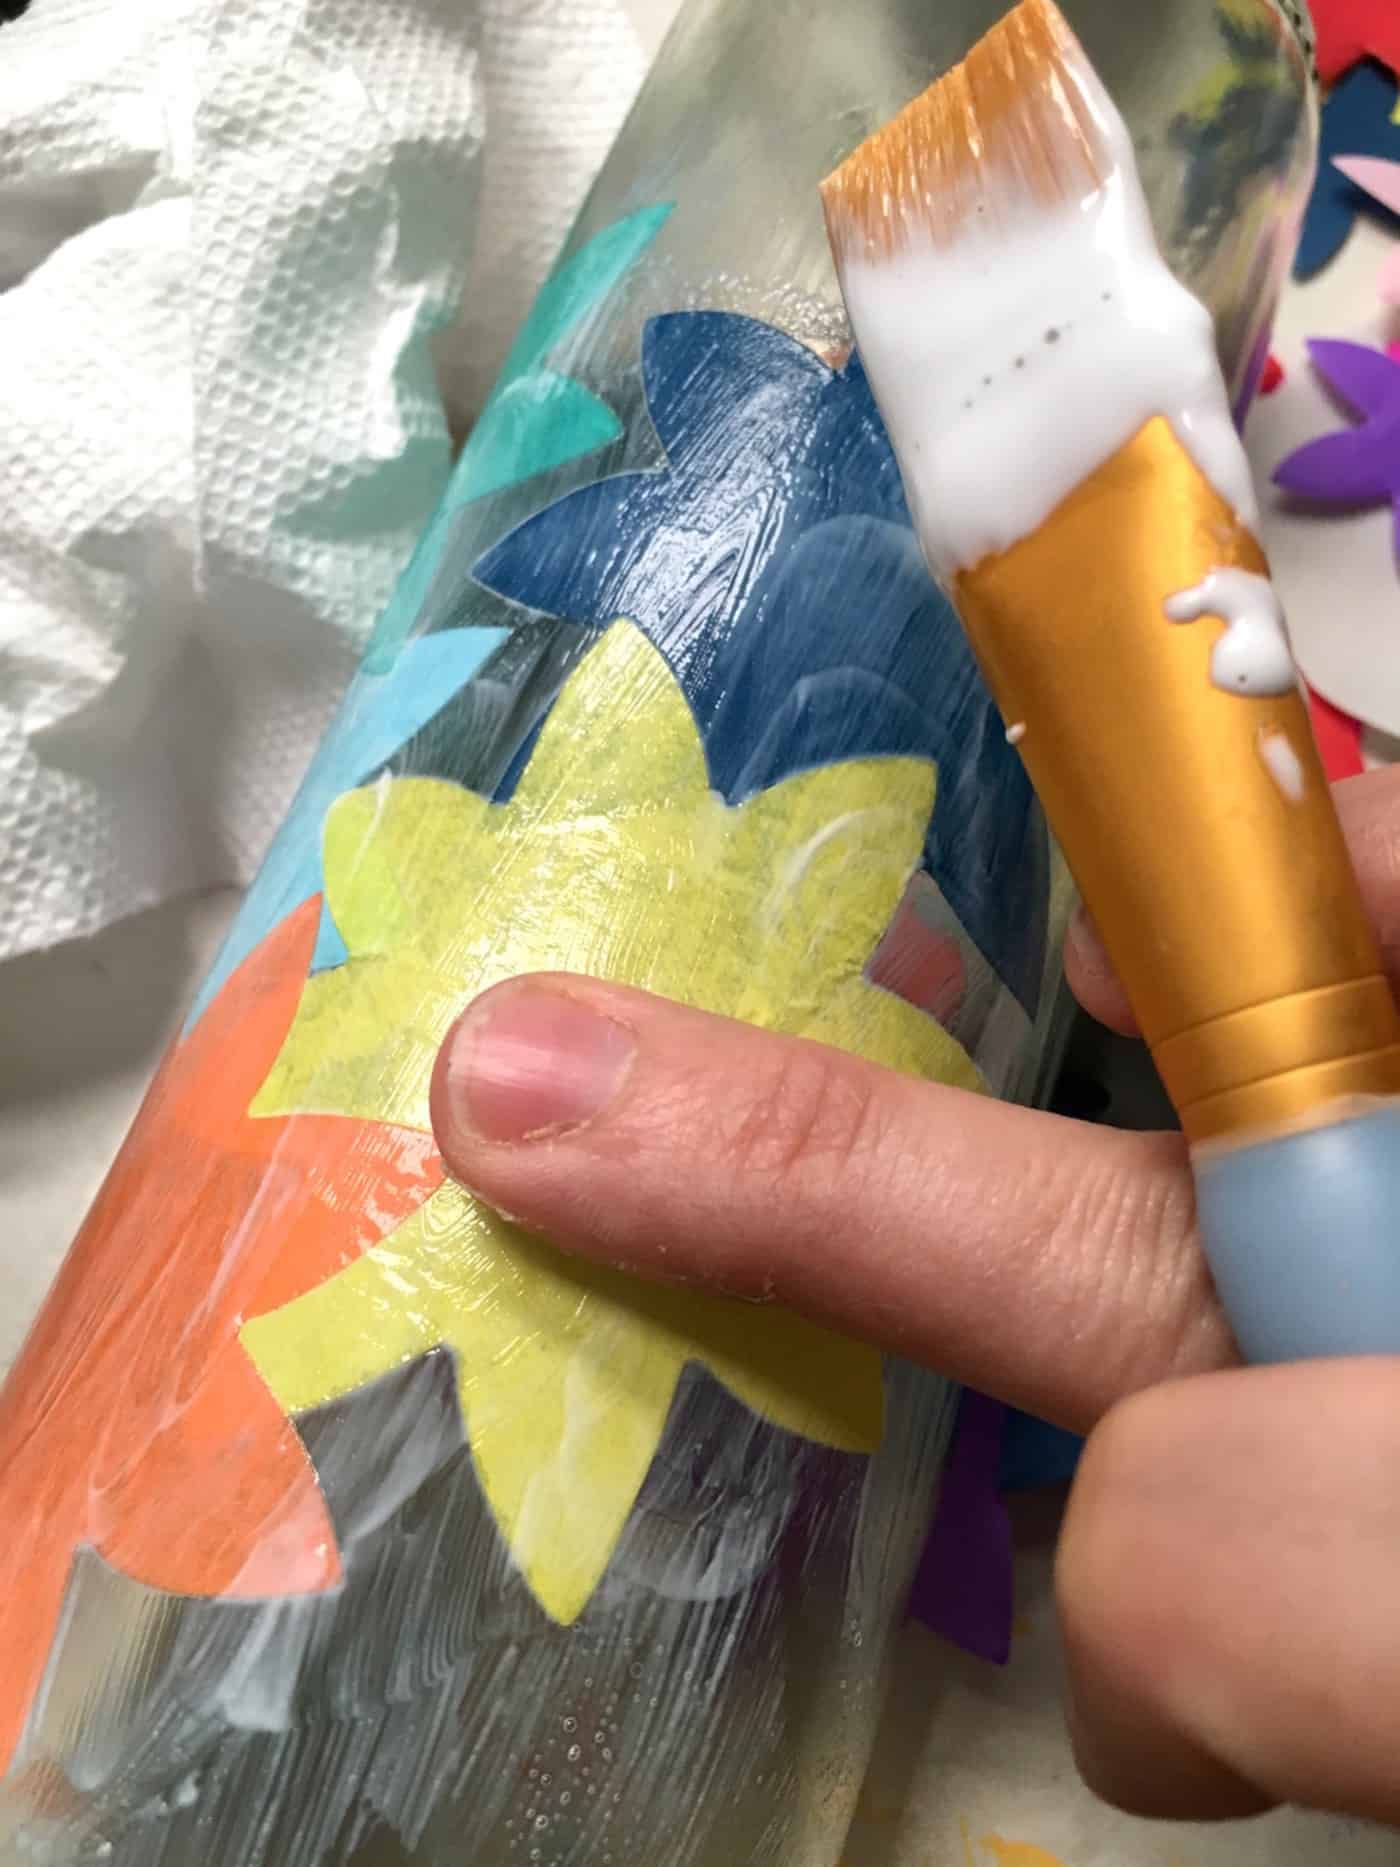
When applying the tissue, it actually works better in this case to put the decoupage medium down, place the shape on top, smooth with your fingers, and then just go right over the top.
Get my guide to buying wine bottle lights here. There are lots of lights out there, so you don’t have to use what I use. The craft store has them, Dollar Tree, etc. You can also get them online which is what my post discusses.
I squealed when I turned on the lights to see the glow! Aren’t these wine bottles perfect for your porch? Or for parties? Or just regular home decor? Get the printable how to card below.

Mod Podge Wine Bottles
Materials
- Clear wine bottles
- Tissue paper cut into shapes
- Mod Podge Gloss
Video
Instructions
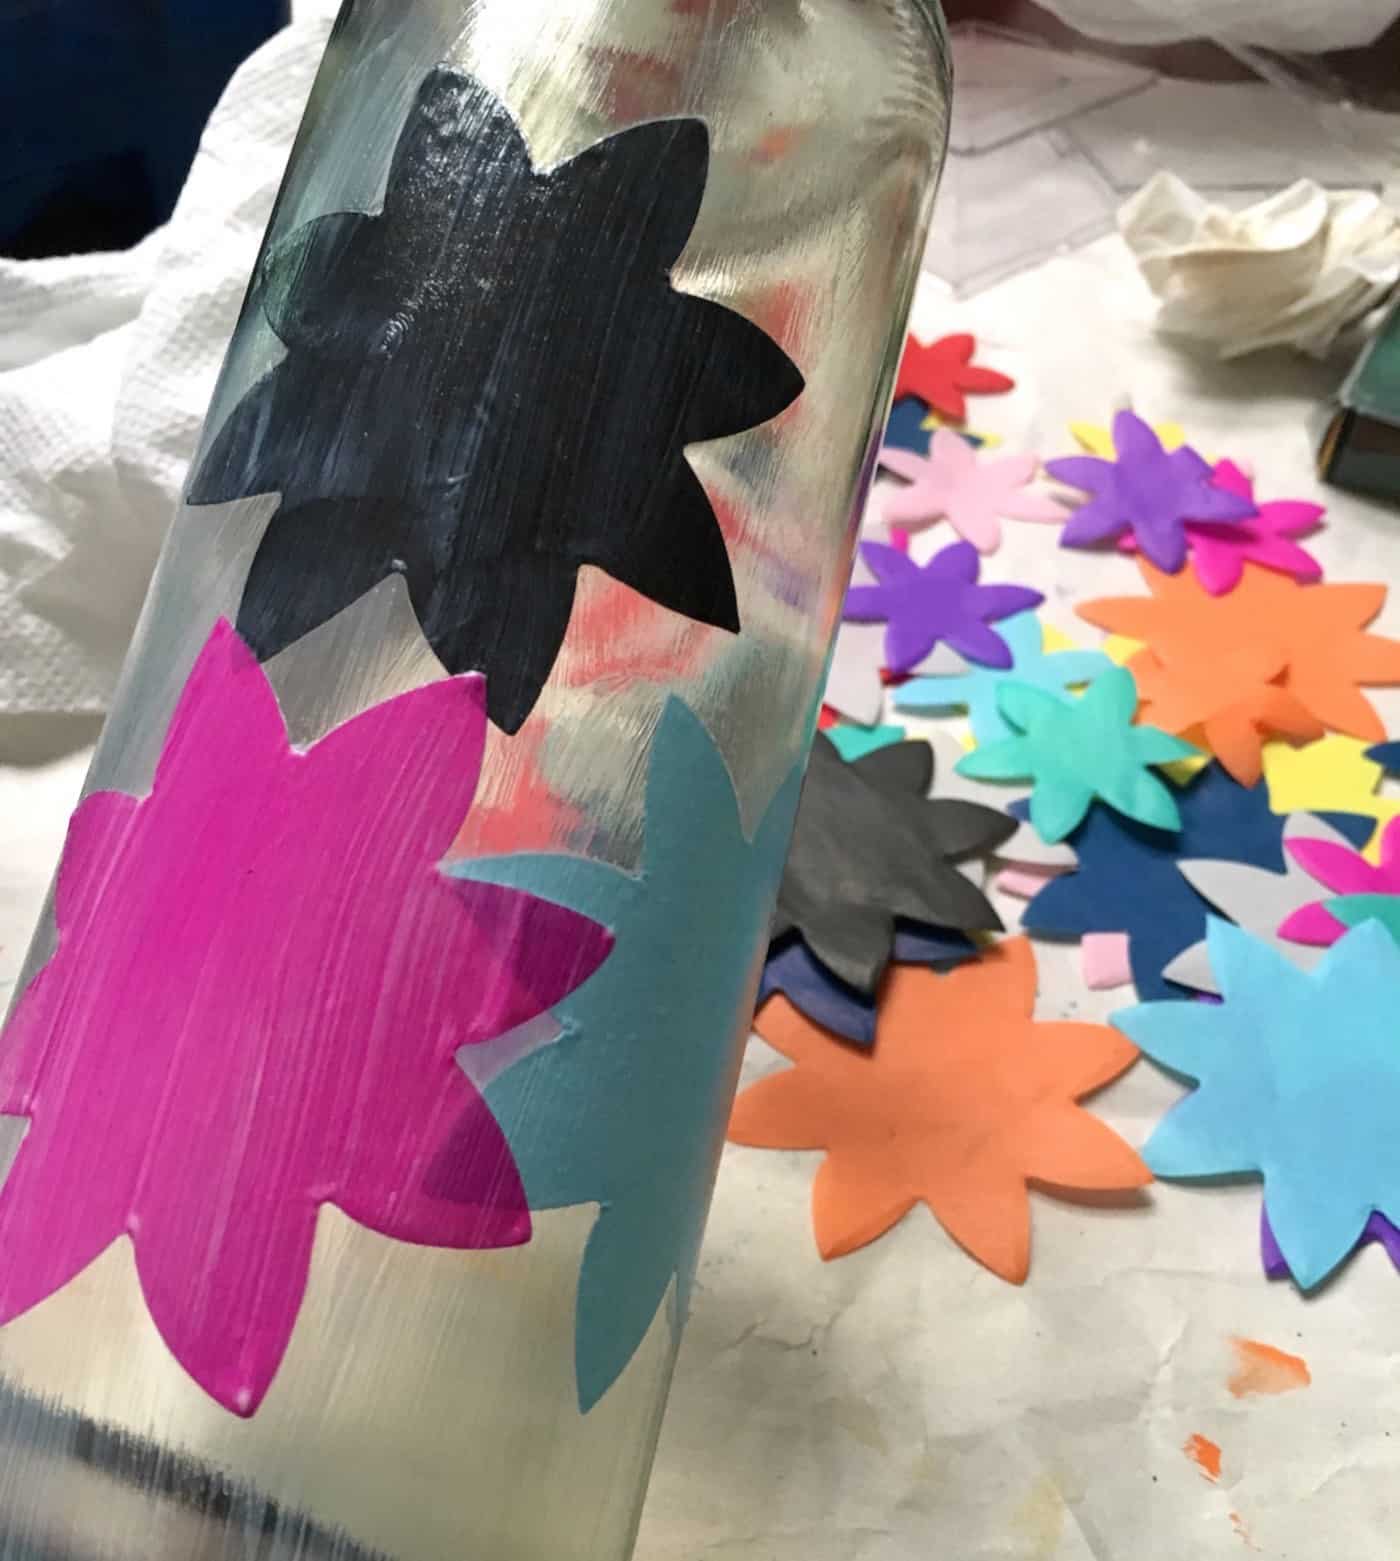
- Either punch out or cut out shapes from the various colors of tissue paper.
- Brush a layer of Mod Podge onto the bottle, press down the shape, smooth, and brush over the top.
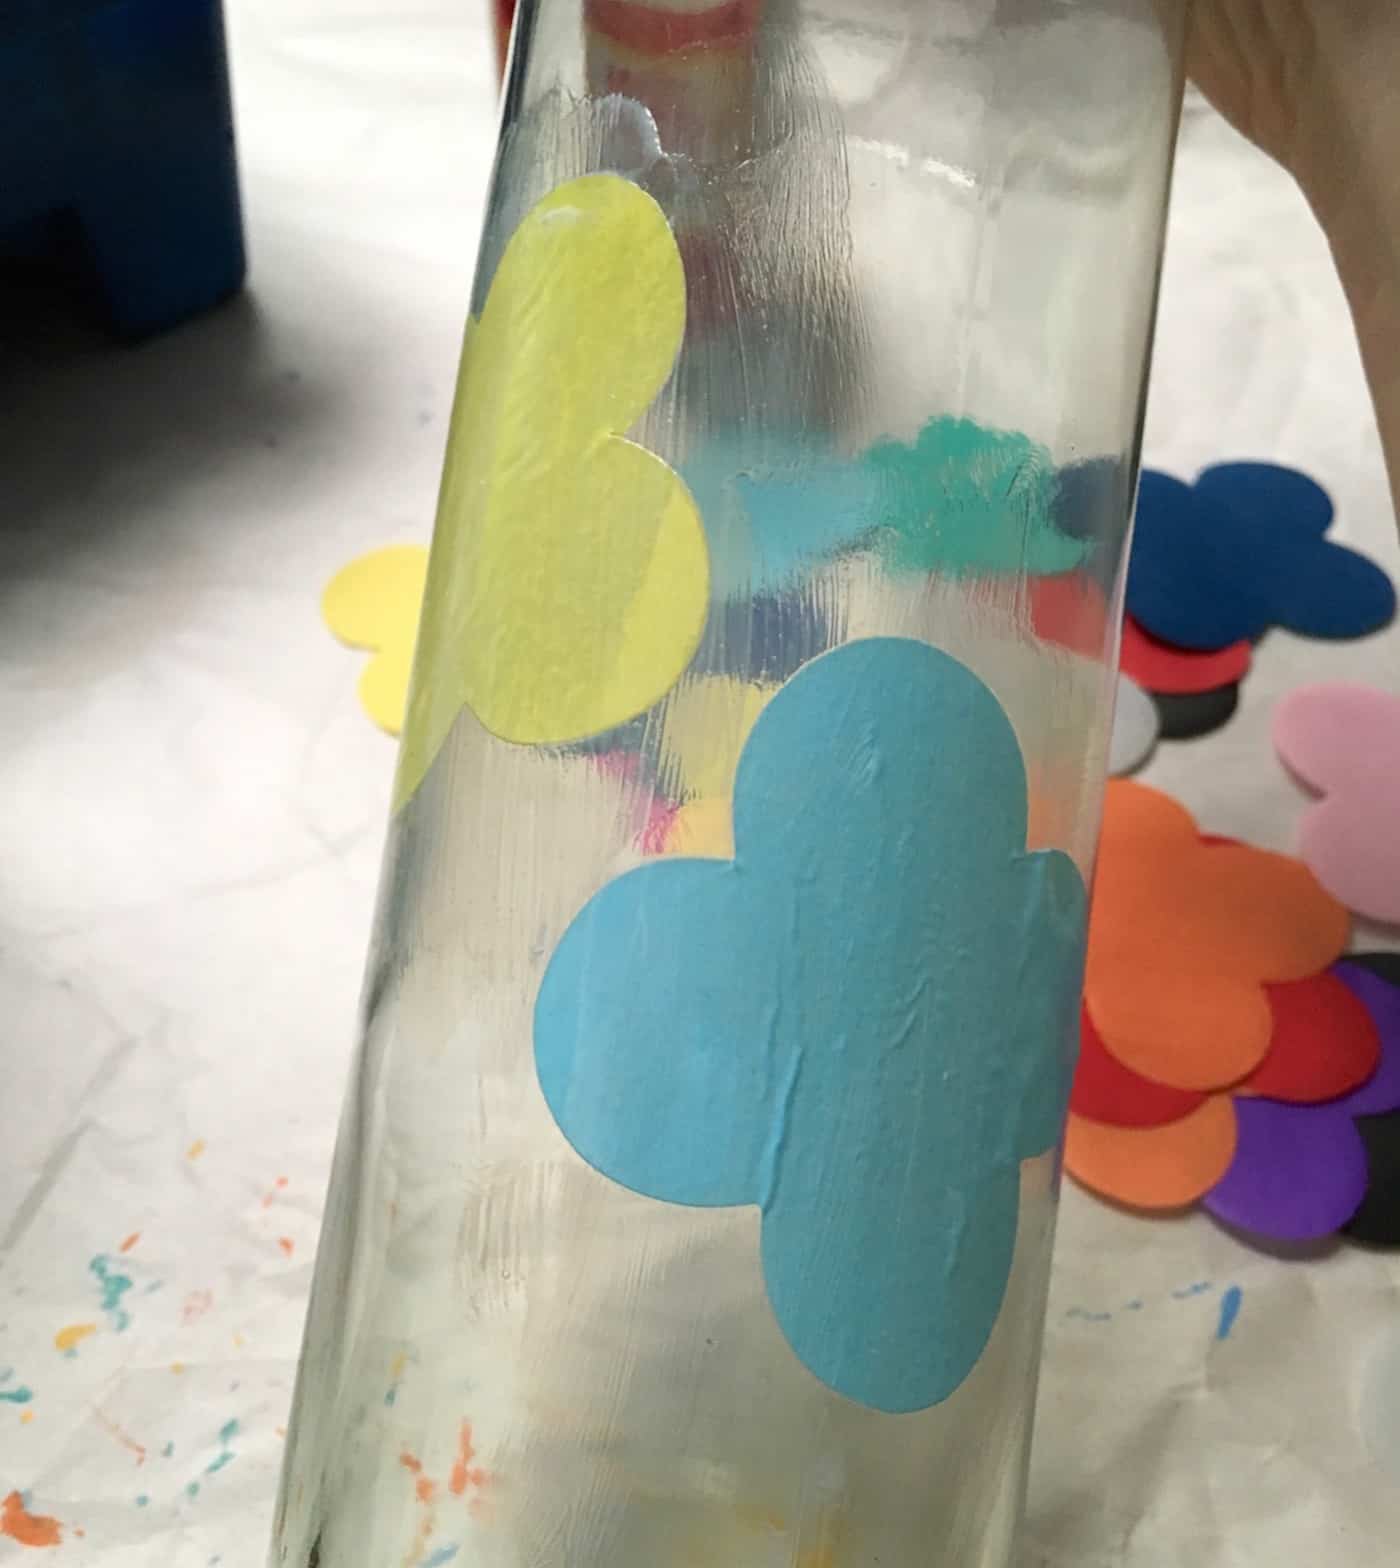
- Keep going, overlapping shapes and working your way around the bottle. It works best to put the decoupage medium down, place the shape on top, smooth with your fingers, and then just go right over the top.
- Finish your bottle by trimming shapes to cover the bottom edge. Let completely dry.
- Add wine bottle lights and display.
If you love Mod Podge wine bottles, let me know in the comments! I also think you’ll be interested in the following posts:


What size shapes did you use? 1in or 2in?
Mine were 1.5 – 2″ but you could use 1″!
I heard you can make homemade modpodge by diluting regular Elmer’s glue. Should I try this or buy modpodge?
Hi Natalie! I wrote about that here: https://modpodgerocksblog.com/you-shouldnt-make-mod-podge/
Where do you get the lights from
Hi Marie! I got them here: http://amzn.to/1WKNB29
These are so cute!! I happen to have a couple wine bottles lying around so I’ll definitely be giving this a try. Thanks for the awesome idea!
These are darling, I ordered the lights and tried making them, I can see the lines of my modpodge and my tissue paper doesn’t look as vibrant as yours, will try another but any suggestions on how to NOT have the modpodge marks on the glass.
These would beautiful on my mantle.
I love this project.
The light my bottle is interesting but where would I find them?
Brenda they are on Amazon: http://amzn.to/1T3yVZ7 but also at Walmart! https://www.walmart.com/blocked?url=L2lwL0ZPUlRVTkUtUFJPRFVDVFMtTkVXLVdoaXRlLUxpZ2h0LU15LUJvdHRsZS1XaW5lLUxpcXVvci1GYWlyeS1TdHJpbmctTEVELUxpZ2h0cy80NDY2MjU3NA==&uuid=54c15a5c-fc9a-11ed-970a-4a71556f6151&vid=&g=b
They are available at Amazon.com…$9.61 each. They come in black and white.
I am trying to transfer scrapbook paper to wine bottles/ glass! How would I be able to do that?