Learn how to make a DIY wood welcome sign with a decorative napkin and other dollar store supplies! This is a cute and easy home decor craft that you can personalize.
Skills Required: Beginner. It helps to have experience with Mod Podge to do this project. You’ll be applying it to a wood arrow sign, then ironing a napkin down. I’ll walk you through the process.
Do you decorate the front of your house? I have a little covered area in the front of mine. And even though it rains a lot here in the Pacific Northwest USA, it’s covered enough by the front door that I get the opportunity to have some decor out there that doesn’t get saturated with water.
Because if you’ve ever lived in or been to Washington State, you understand that we get some rain. Not only that, but we like outdoorsy type decor that tells our mossy, pinecone-y story. And that brings me to today’s project!
I’m going to show you how to make a DIY wood welcome sign.
And it all started with a napkin! If you haven’t done paper napkin decoupage yet, you’re in for a real treat. This method is also called the “iron on method” and it’s a really easy way to apply napkins to surfaces without wrinkles.
I’m going to show you all the details! And like I said – it started with a napkin. This cute pinecone napkin that someone sent me, and I absolutely had to use it in a project.
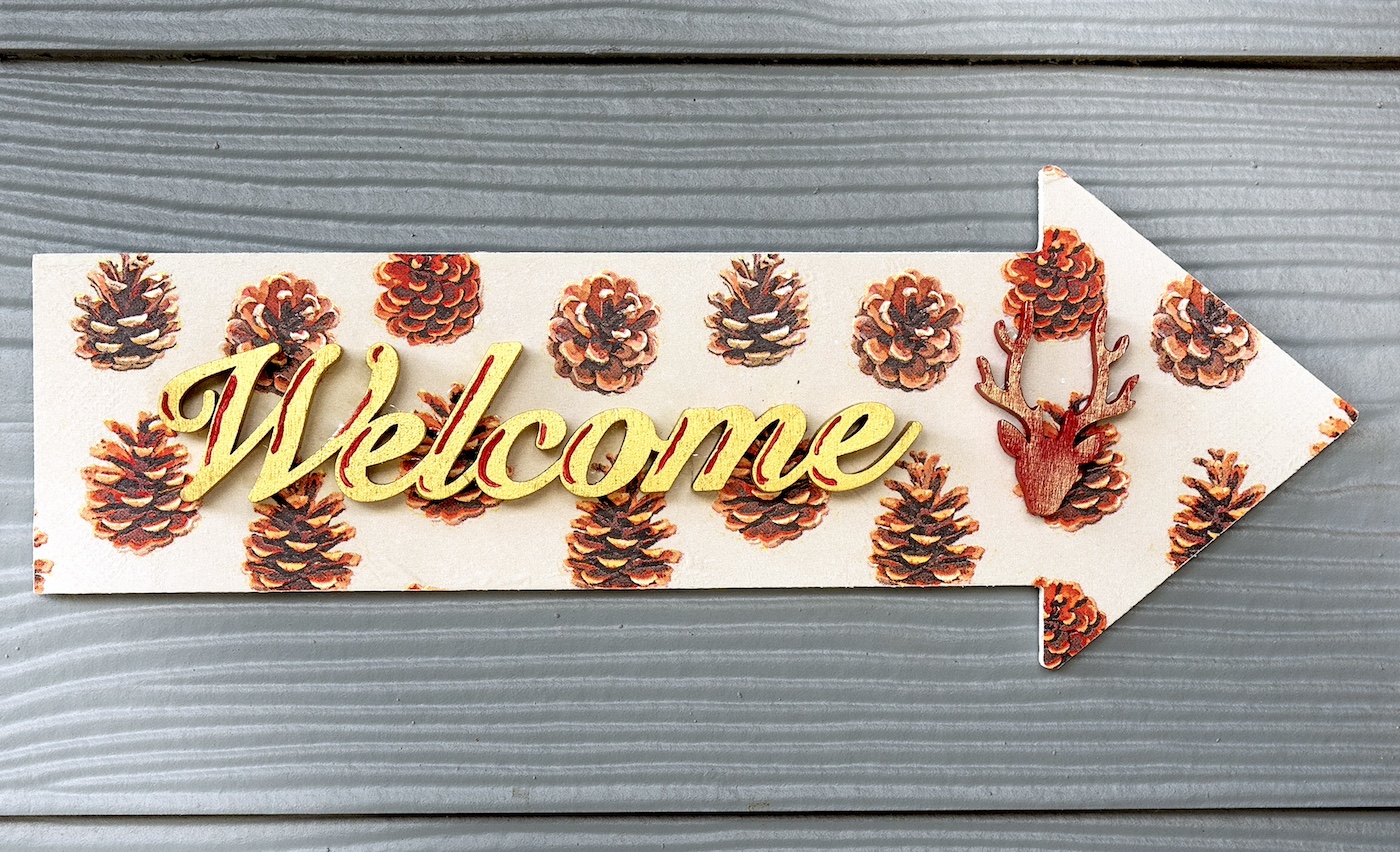
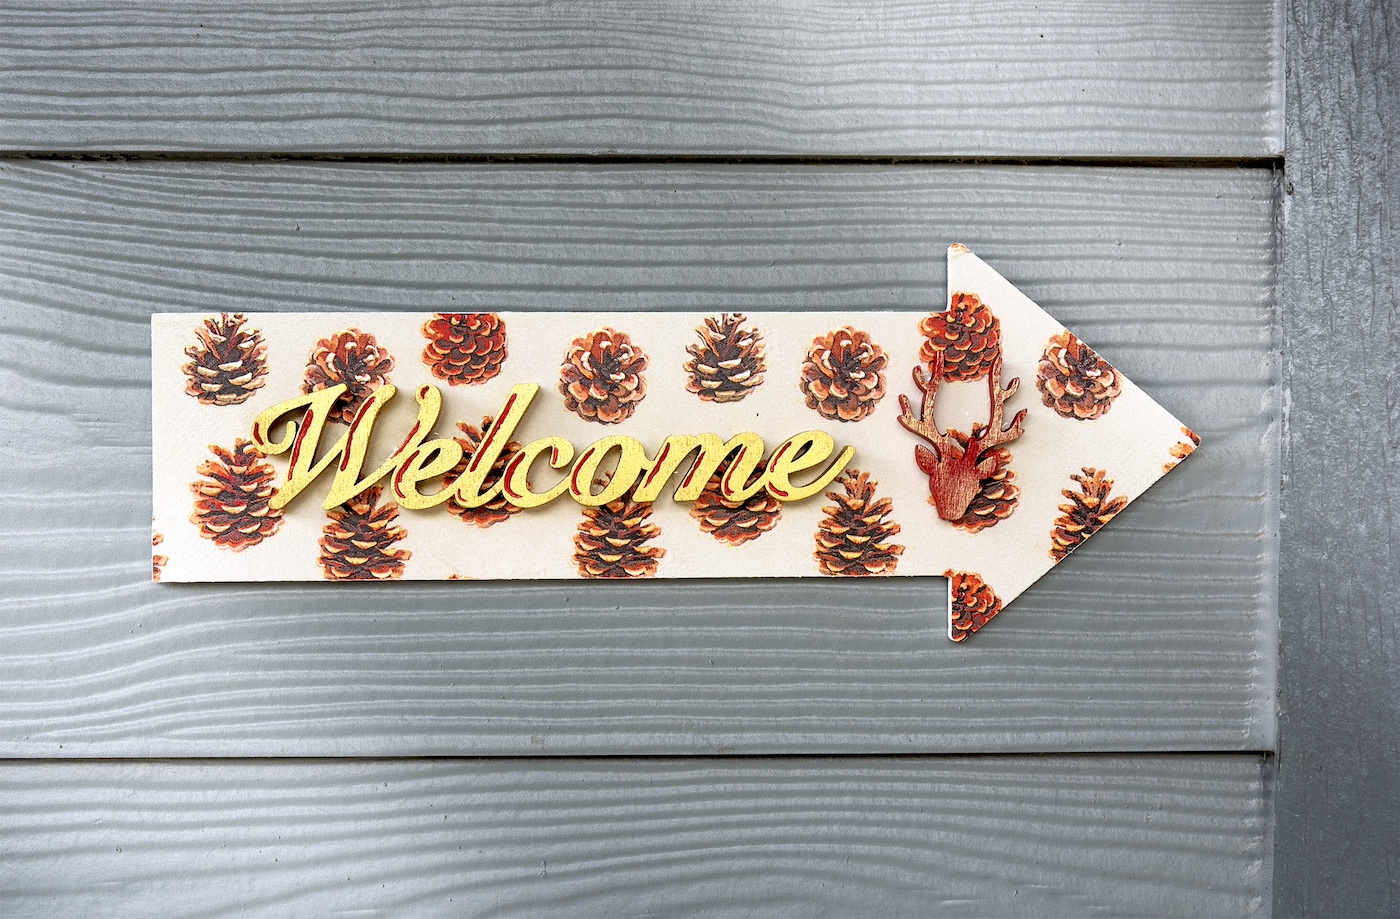
I combined it with a Dollar Tree arrow sign and some other wood items – as well as paint and Mod Podge – to make a cute lil’ wooden sign to go on my porch.
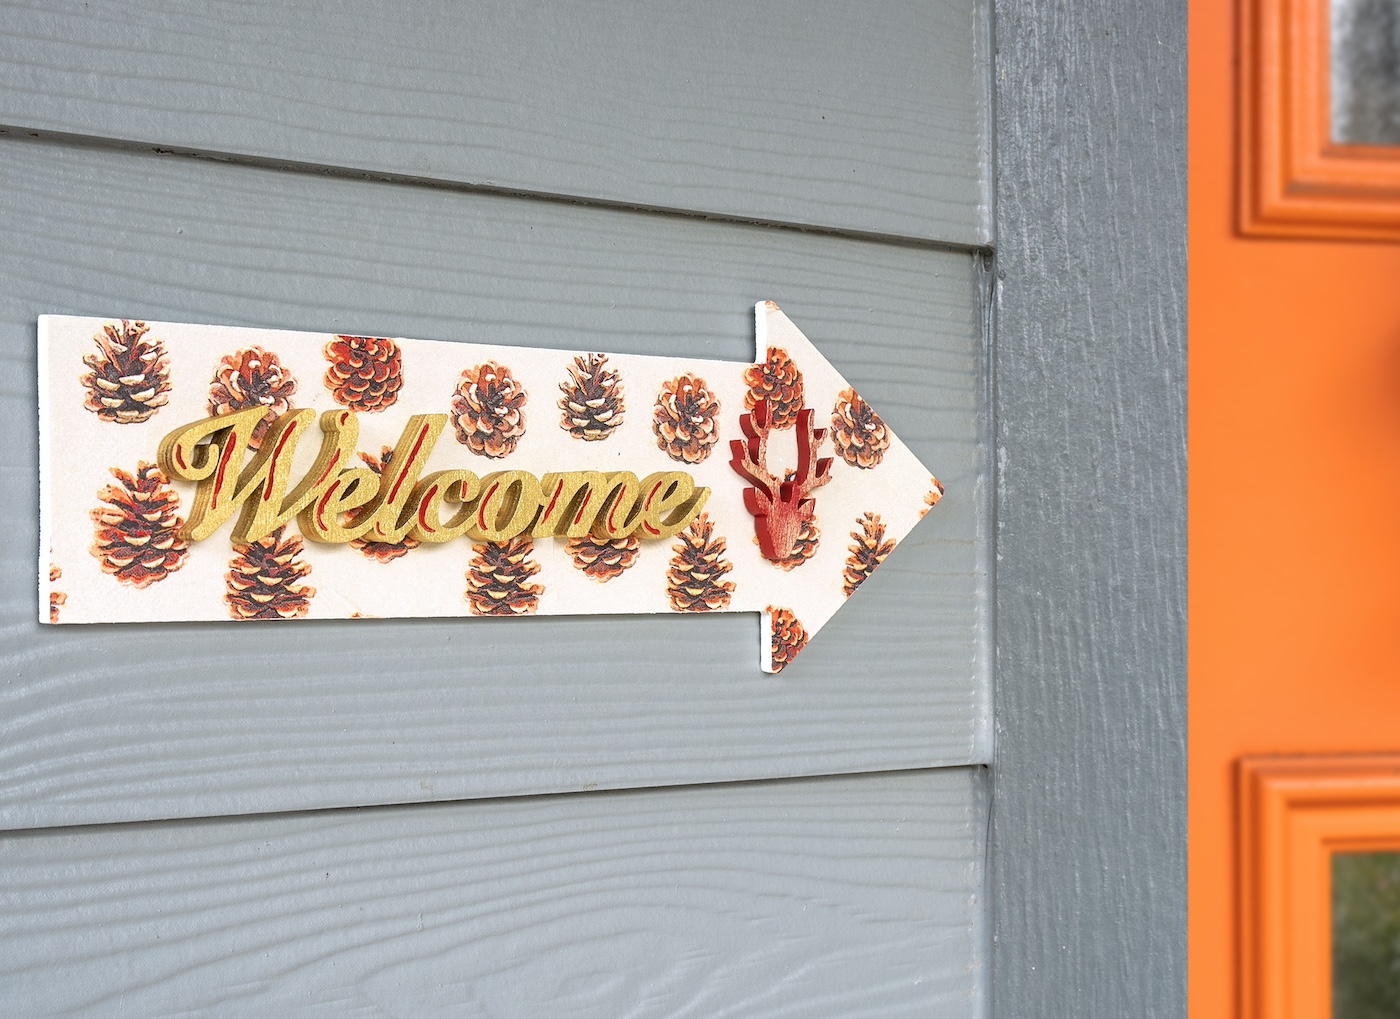
The wooden welcome sign gives me fall feels but also PNW vibes – which is exactly what I was looking for! I also wanted something that contrasted with the no soliciting sign on the other side of the door. Ha!
This welcomes people just as I wanted it to, with cute little pinecones and a mini deer. I have it hung temporarily with Command Strips so that when I want it to come down after winter, it can.
Once you learn this technique, you’re going to be ironing napkins on everything – trust me. You’ll see cute designs and need them on some decor. But start with this easy craft first, and then let me know how it goes.
Here’s what you’re going to need. Then you can jump right in and get crafting!
Gather These Supplies
- Wood arrow
- Craft paint – white, red, gold
- Spray paint – gold
- Wood word – “welcome”
- Wood shape – small deer with antlers
- Mod Podge – any formula
- Decorative paper napkin
- Craft glue or hot glue
- Mini craft iron
- Parchment paper
- Emery board
- Paintbrushes
- Command Strips (or something for hanging)
Tips and Thoughts for This Project
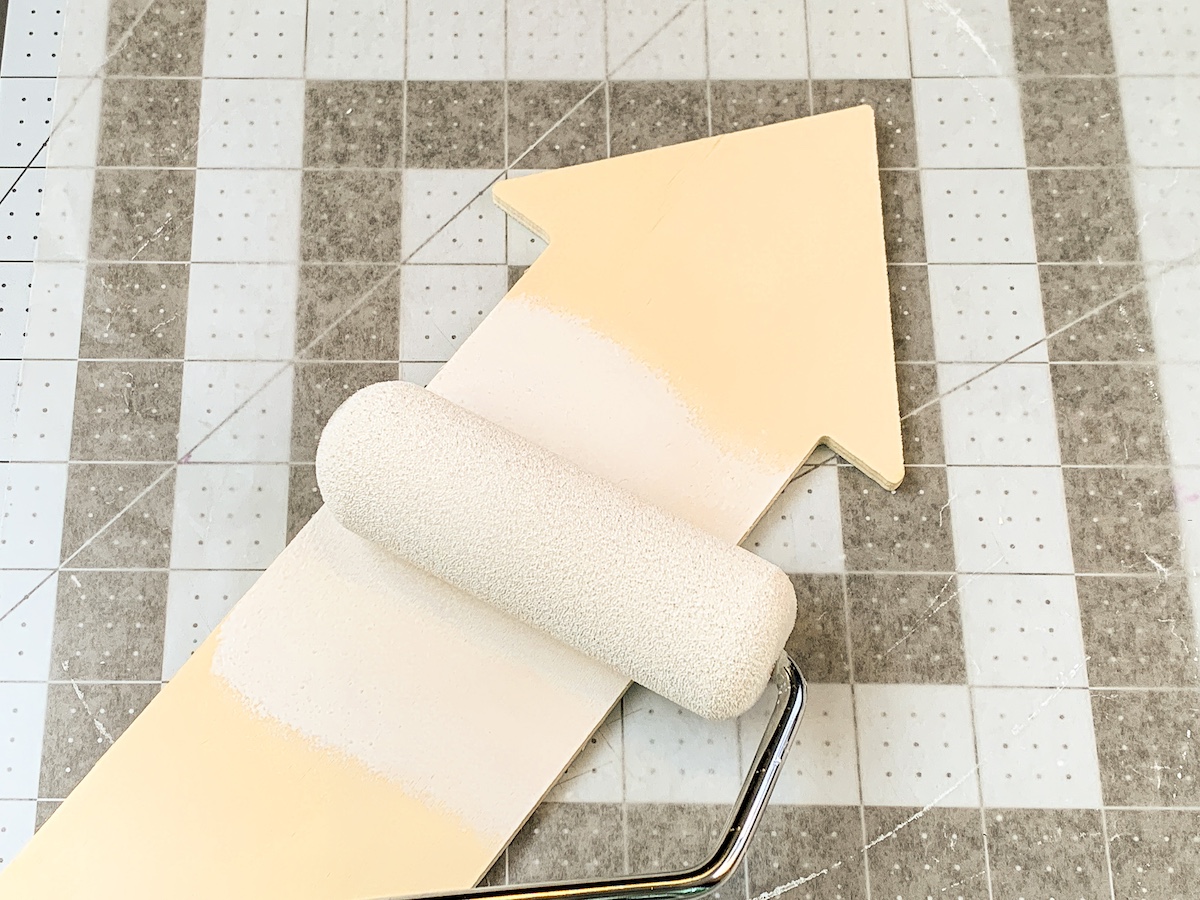
You don’t *have* to paint the arrow white, however, it makes the colors of the napkin pop. It’s also easy to do, so I always do it. You can use spray paint, but craft paint is cheaper and just as fast with a roller.
I didn’t seal the top of the napkins with Mod Podge – it tends to make them wrinkle. If you do seal with Mod Podge and the napkins wrinkle, you can place parchment down and iron over the top again.
Get the printable how to card with instructions for this project below:

DIY Wood Welcome Sign
Equipment
- Parchment paper
Materials
- 1 Wood arrow
- Craft paint white, red, gold
- Spray paint gold
- 1 Wood word "welcome"
- 1 Wood shape(s) small deer with antlers
- Mod Podge any formula
- 1 Decorative paper napkin(s)
- Craft glue or hot glue
- Command Strips (or something for hanging)
Instructions
- Paint the frame using white craft paint. Roll on one side, let dry, and flip over. Paint other side and let dry.
- Apply a coat of Mod Podge to the wood; don't do the edges. Let dry 15-20 minutes and repeat.
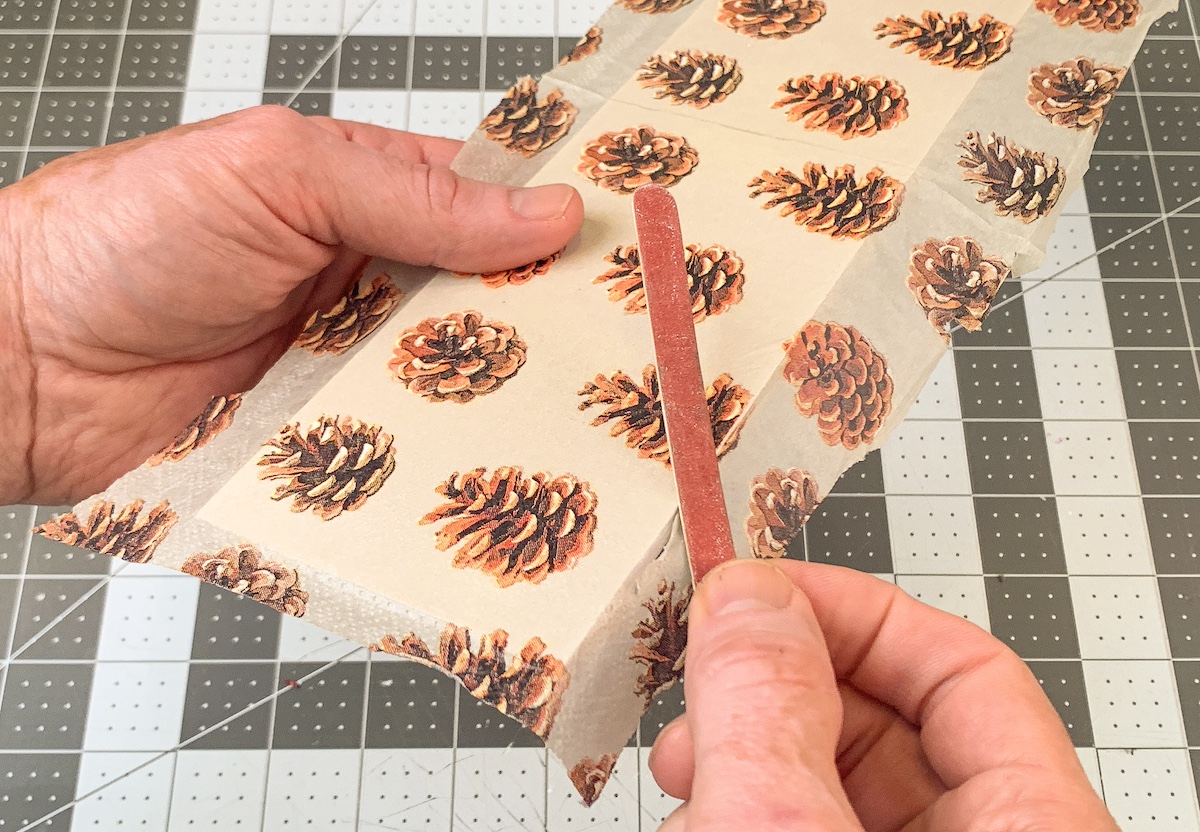
- While the Mod Podge is drying, separate the napkin from the bottom layers. You can use tape to help. You just want the top layer with the design.

- Place the napkin down onto the arrow. Place a piece of parchment paper on top of the napkin, and run the craft iron across the top several times. While you are doing this, the Mod Podge is melting below the napkin, and the napkin is adhering. Keep going until the napkin is fully adhered, including the edges.

- Let the arrow cool after ironing. Use an emery board to gently sand away the excess napkin. Sanding at an angle works very well. Continue until all the extra napkin is removed and set aside.
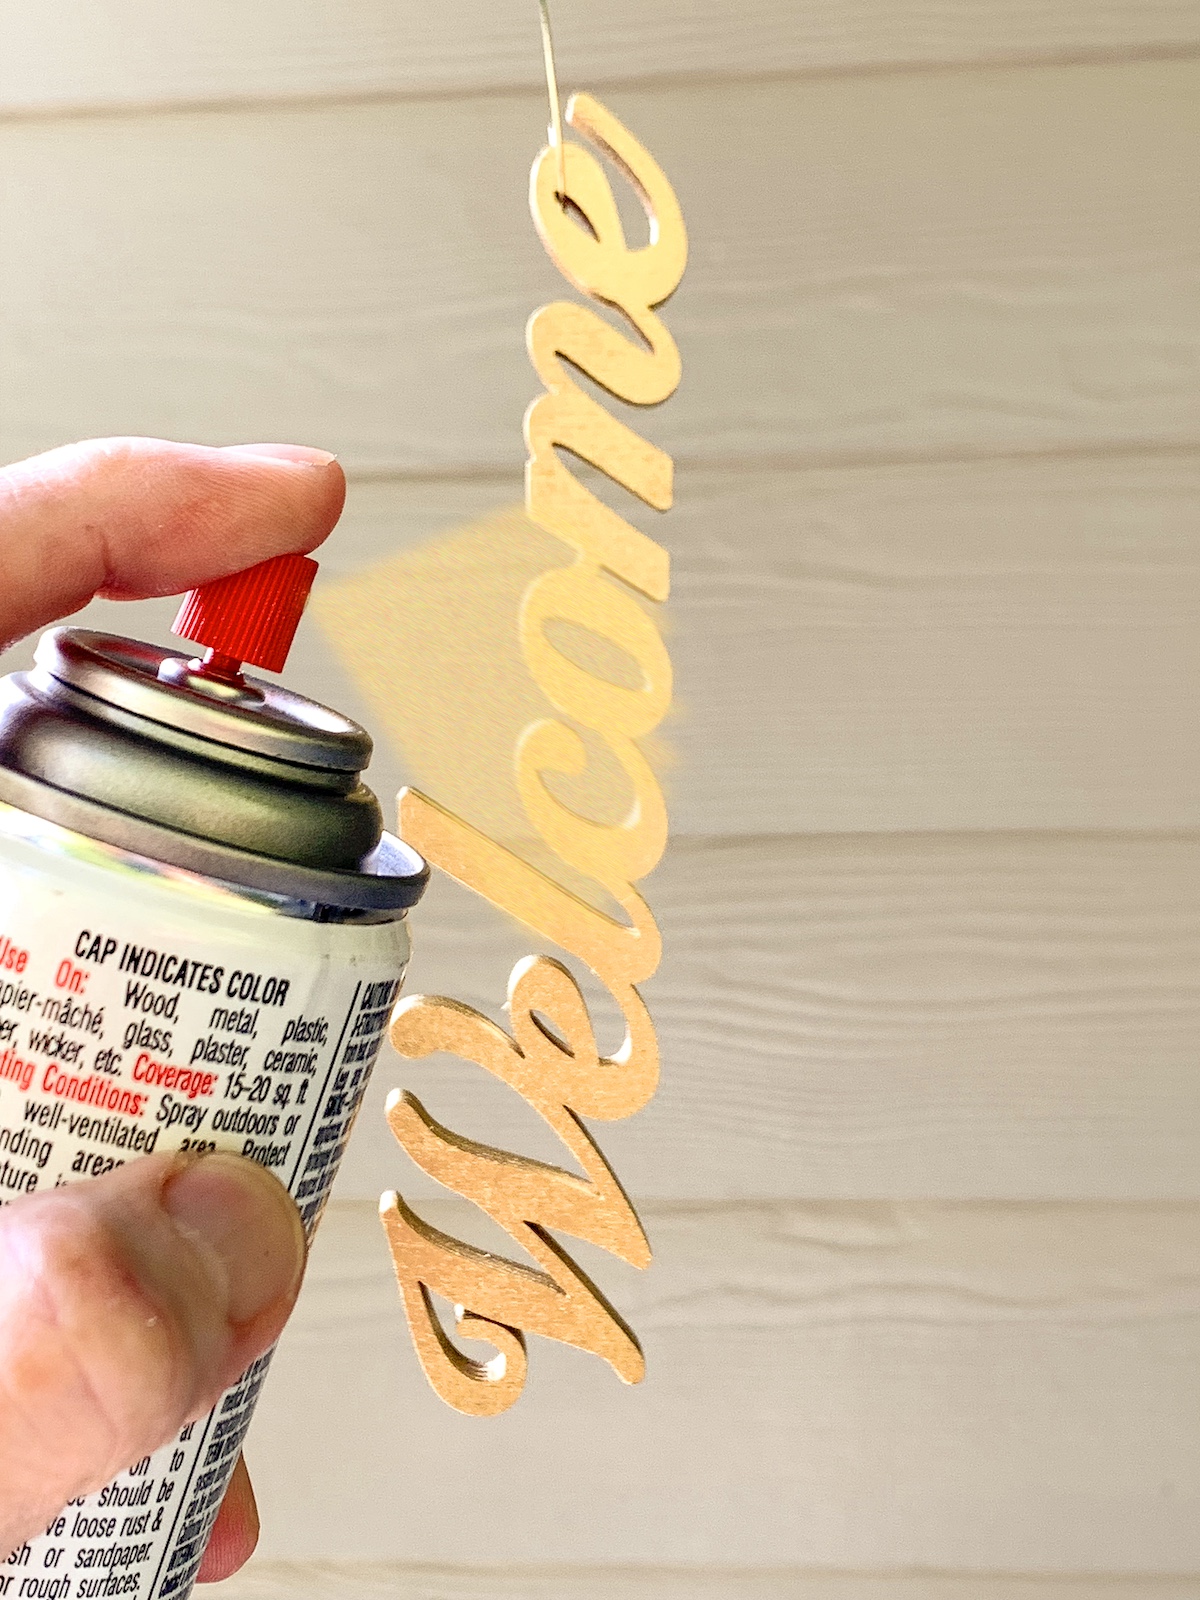
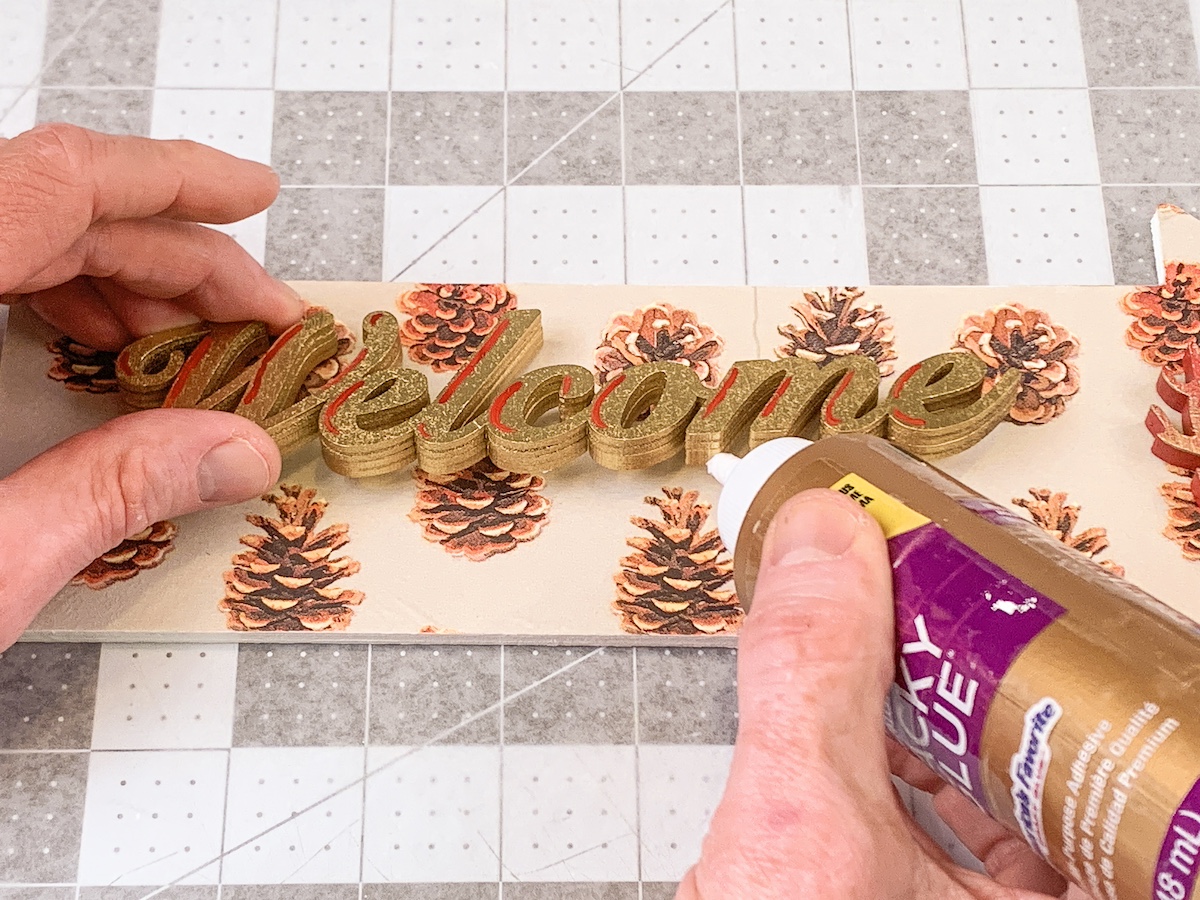
- Use gold spray paint to spray paint the wood word, making sure to get all of the crevices. Let dry.
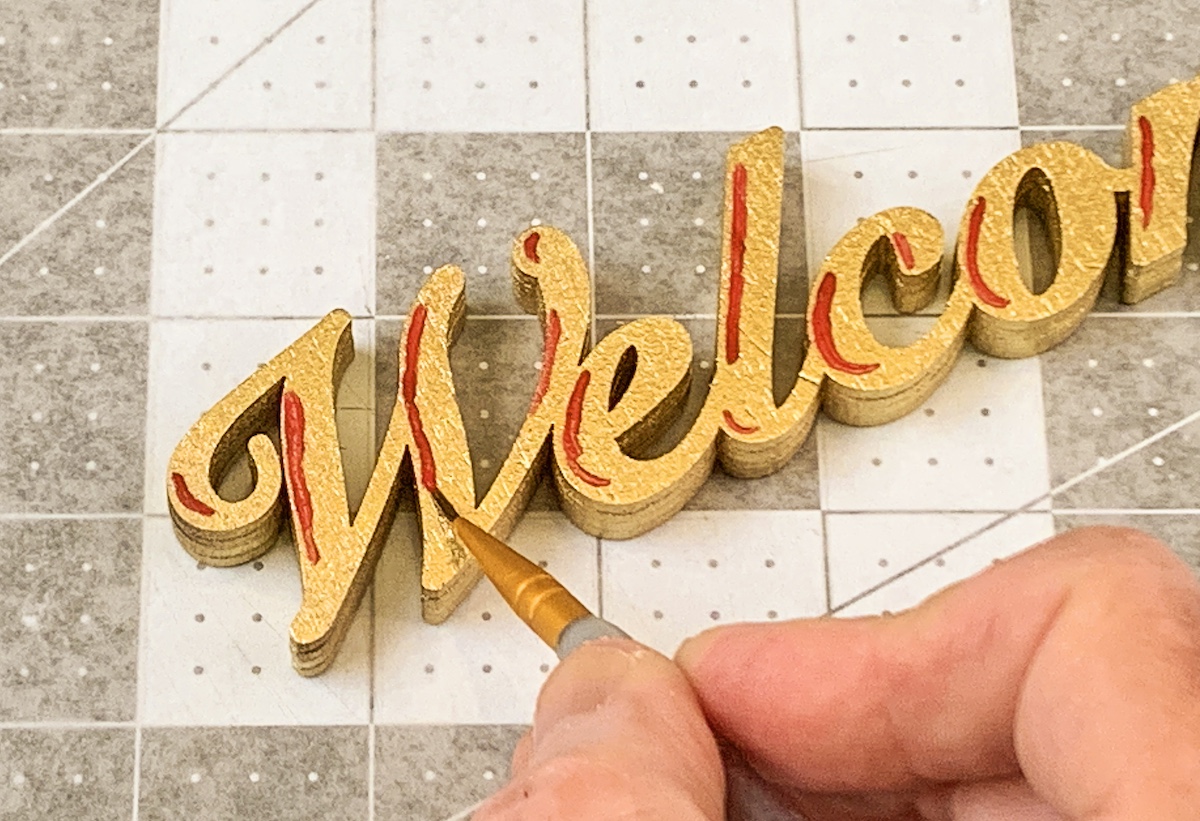
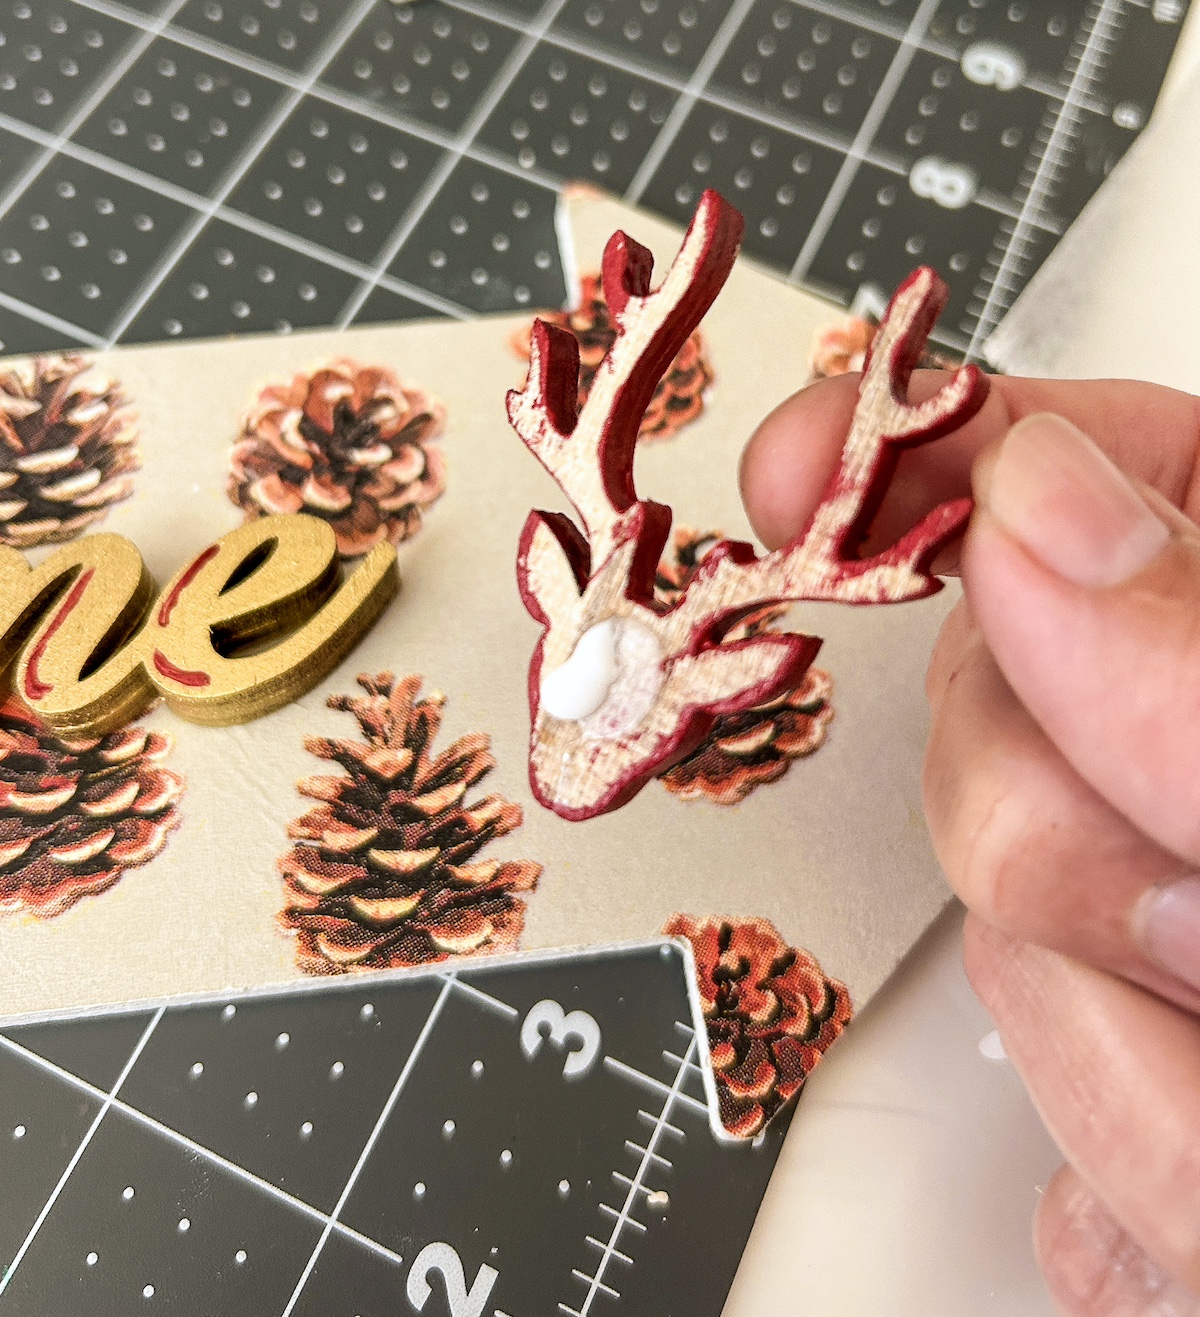
- Use red paint to paint the deer head, as well as to add red accents to the word (use a thin paintbrush). Let dry, then add gold accents to the deer head with gold paint. Let dry.
- Use craft glue or hot glue to attach the word to the front of the arrow in the desired position. Let dry.
- Attach the deer with glue as well. Let dry before hanging.
If you enjoyed this DIY welcome wood sign, let me know in the comments! I’d also love for you to check out these other projects: