
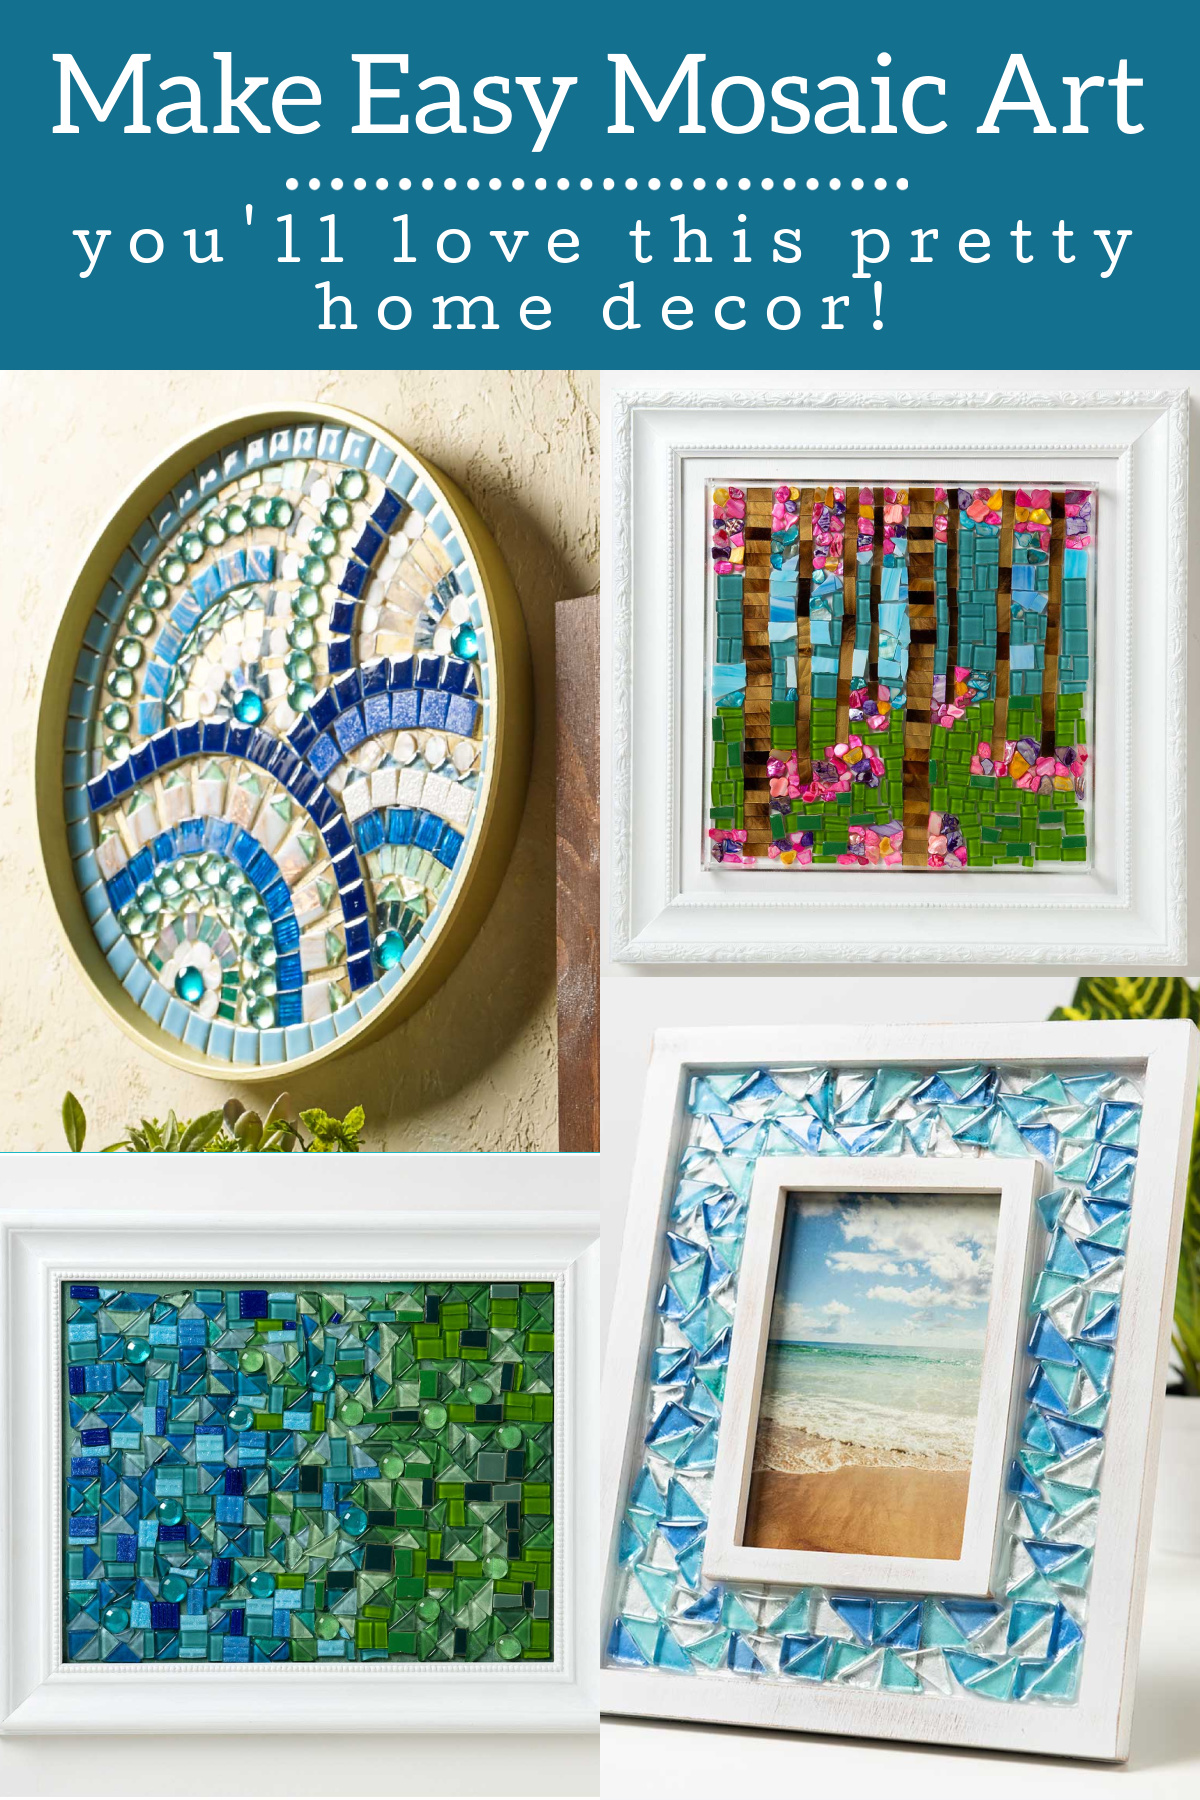
Learn how to make mosaic art the easy way! You can make DIY mosaic wall art on a budget, and it’s simple enough for beginners to try. No grout is used in this project.
Skills Required: Intermediate. You’re going to be potentially cutting glass or ceramic pieces and then attaching them to a substrate with Mod Podge Ultra. Be sure to check out the video in this post.
Do you love creating beautiful mosaics? Supposedly there are no dumb questions, but that might be one. Of course you do! That’s why you’re here. Or at least, you want to try making one.
There’s something about the texture and colors of a mosaic that inspires me.
I recently found out that back in the day, mosaics were used for a few things: company advertising, strength in floors, and even to show that you were rich and important (via a mosaic entryway, for instance).
And today I’m going to show you how to make mosaic art. With Mod Podge. Because maybe you aren’t rich, but you’re definitely important. And that means you need this art.
Easy DIY Mosaic Wall Art
This is a different way of creating a mosaic than you’ve probably seen before. In a typical mosaic project, you’ll place the tiles down and then apply grout to fill in the areas in between. You’ve probably seen this on outdoor stepping stones, etc.
This project doesn’t include grout. You’re going to apply the Mod Podge product as an adhesive, and then use it to seal.
What is a mosaic?
In simple terms, it’s a pattern that you make on a surface with pieces of glass, stone, or ceramic. They are typically used for decorating purposes, from floors to walls to ceilings.
How do you make a mosaic pattern?
The easiest way possible is to do one of two things: 1) either draw a simple design directly on the surface with a pencil or 2) print out a simple line design and transfer it to the surface.
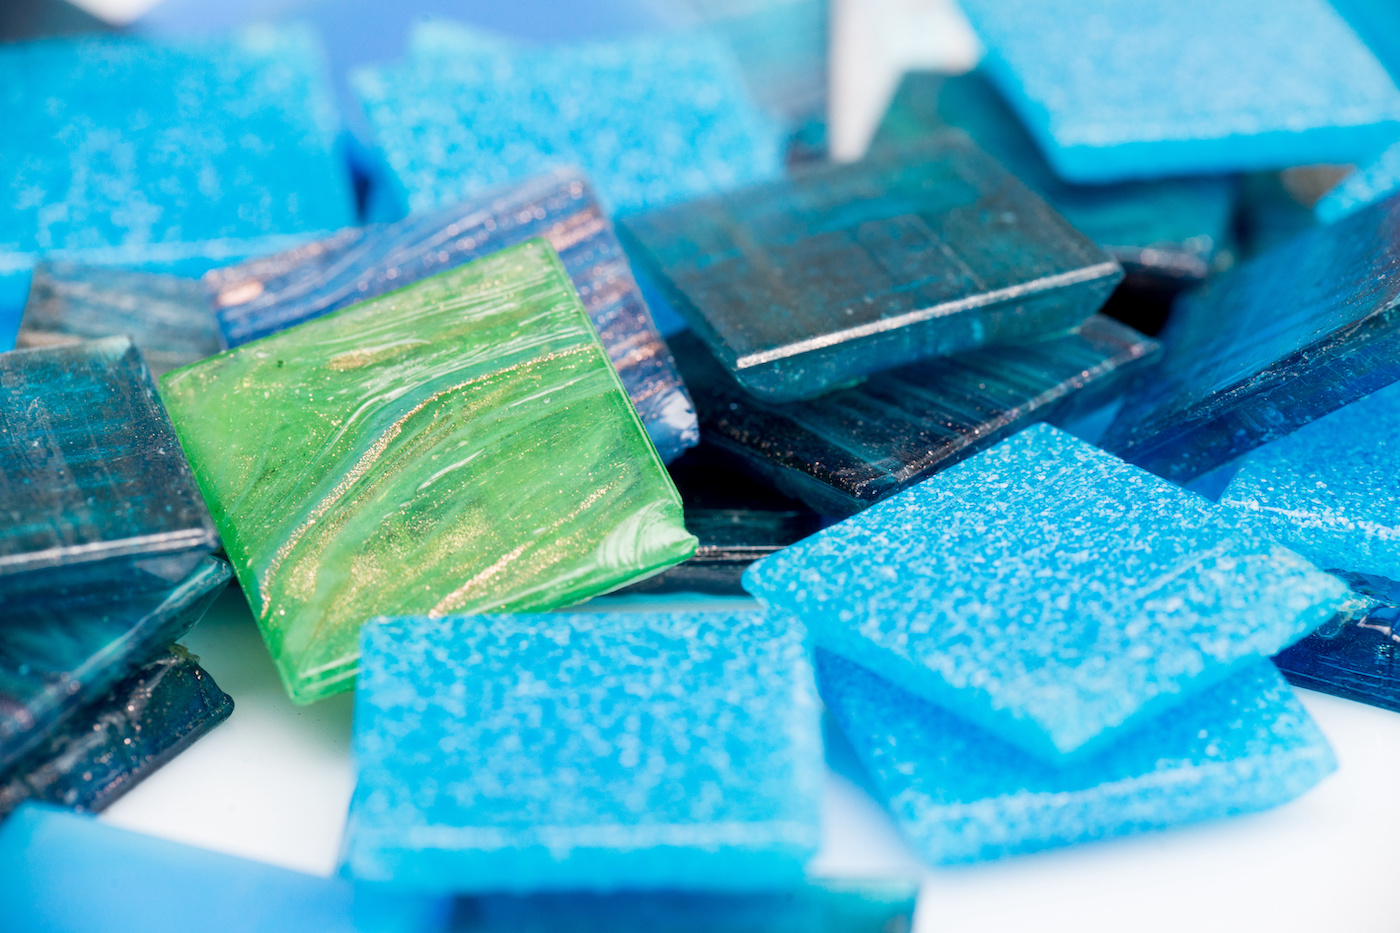
What type of tiles can I use?
For your mosaic art, you’ll want to use either ceramic or glass tile bits. You can make them yourself by breaking surfaces, or you can purchase them.
Where do I get tiles?
In these projects, the tiles were purchased pre-cut (you can see what I mean here). You can cut ceramic or glass into your own tiles using nippers. The rounded wheel tool help you score and break the tiles while the nippers cut them into pieces.
For me personally? I don’t do enough mosaics to buy the tools. I like buying the variety packs of the glass pieces (they come in different shapes too). Then they can be used in other projects (like jewelry making) as well.
You’ll see in the video below that you can also make your own tiles with a hammer and plate:
Whether you buy the tiles or cut them yourself, you can fill in the areas around your glass or ceramic pieces with beads and other glass or ceramic embellishments. Check your craft supplies or the jewelry section of the craft store for goodies to tuck around the tiles.
Are you ready to check out the projects? Learn how to make them below!
Flowery Forest Mosaic Art
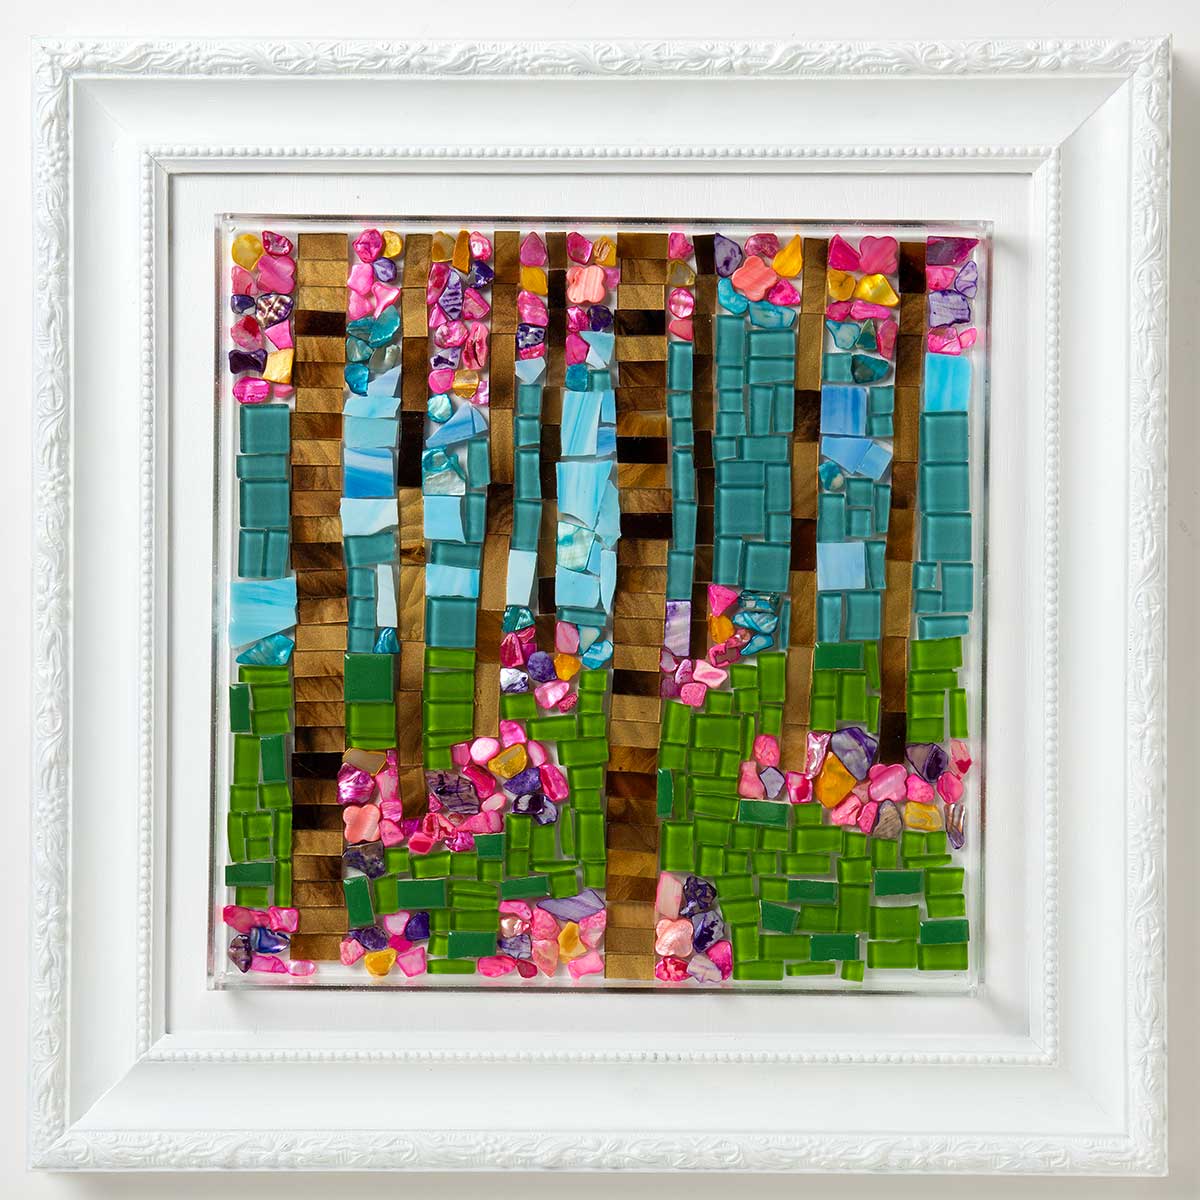
Gather These Supplies
- Mod Podge Ultra Matte
- 12” x 12” Clear acrylic tray
- Small glass pieces (brown, green, blue, and multi-colored)
- Large paper (at least 12” x 12”)
- Pencil
- Paper towels
Instructions
- Using a pencil, trace the acrylic tray onto a piece of paper so you have a 12” x 12” template.
- Arrange your glass pieces on the paper to create a forest scene.
- Beginning at top of the acrylic tray, apply some Mod Podge Ultra Gloss and move the arranged glass pieces from the paper to the tray a few at a time until all of the pieces have been transferred. Let dry.
- Apply an even coat of Mod Podge Ultra Gloss to the mosaic to seal.
Boho Tiled Mosaic
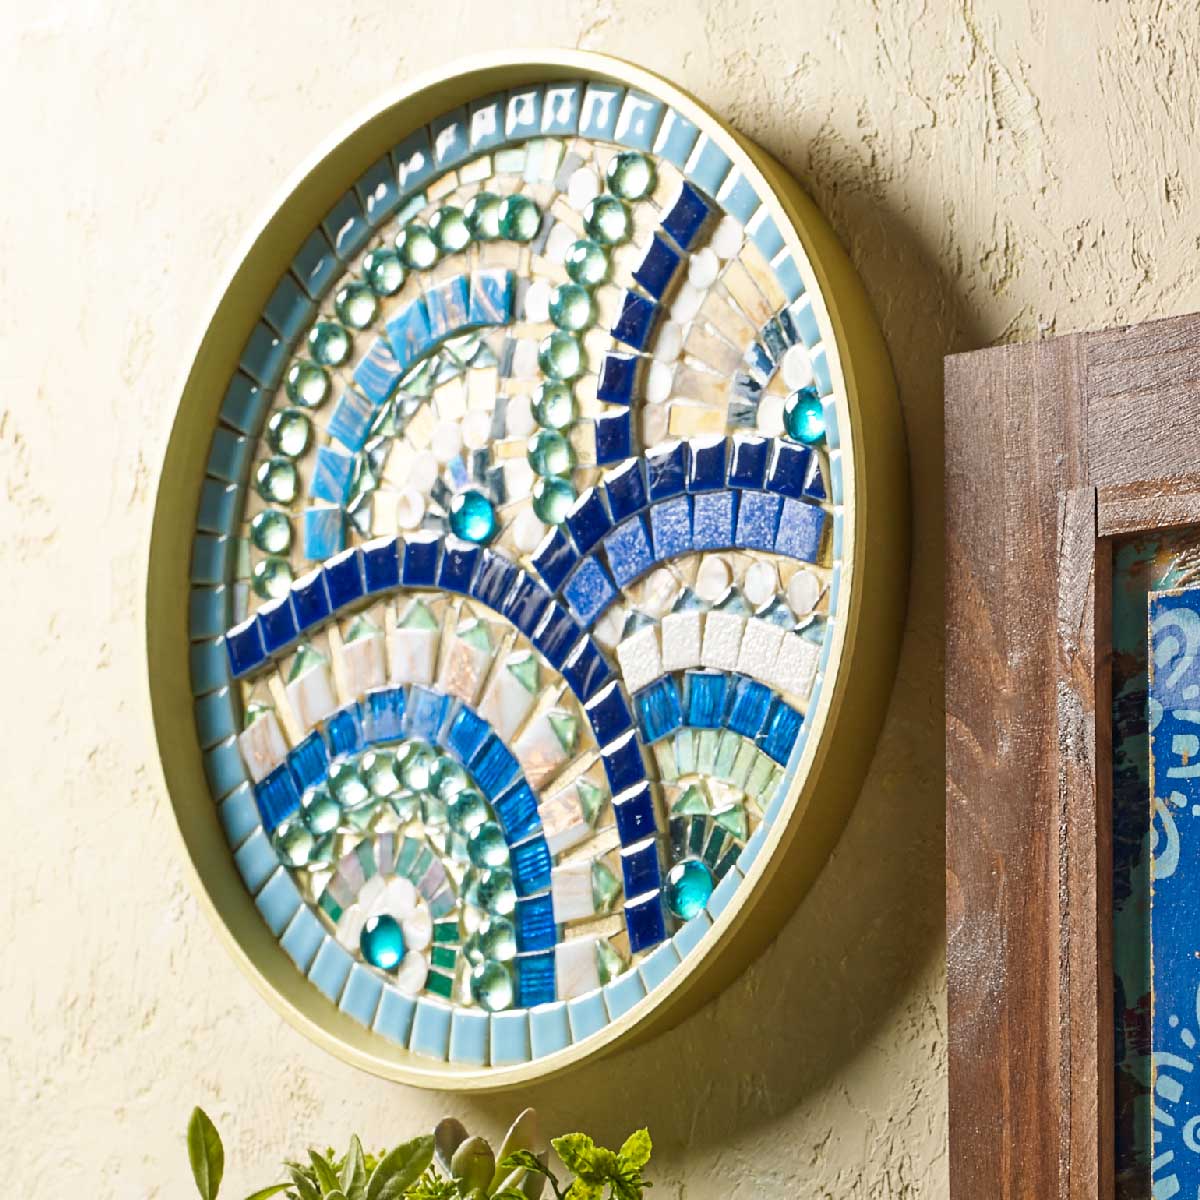
Gather These Supplies
- Mod Podge Ultra Gloss
- FolkArt Brushed Metal Paint – Antique Gold
- Paintbrushes
- Small glass mosaic pieces
- Round pizza pan
- Isopropyl alcohol
- Tacky glue
- Paper towels
Instructions
1. Clean the pizza pan with isopropyl alcohol to remove any oils from the surface.
2. Using a flat brush, basecoat the pizza pan with Antique Gold. Let dry and apply another coat if necessary.
3. Arrange the glass mosaic pieces in a pattern inside of the painted pan. When you are pleased with the arrangement, glue each piece down with a small dab of tacky glue (just enough so that the pieces will not slide around). Let dry.
4. Pour Ultra into the pizza pan. You should pour just enough so that it evenly coats the areas between the glass pieces. Don’t cover the glass pieces completely. If you have poured too much, pour some back into the bottle. Let dry on a level surface, in an undisturbed area overnight.
5. When the Ultra is dry, spray a coat on the entire project to create a glossy finish. Let dry.
Ombre Mosaic
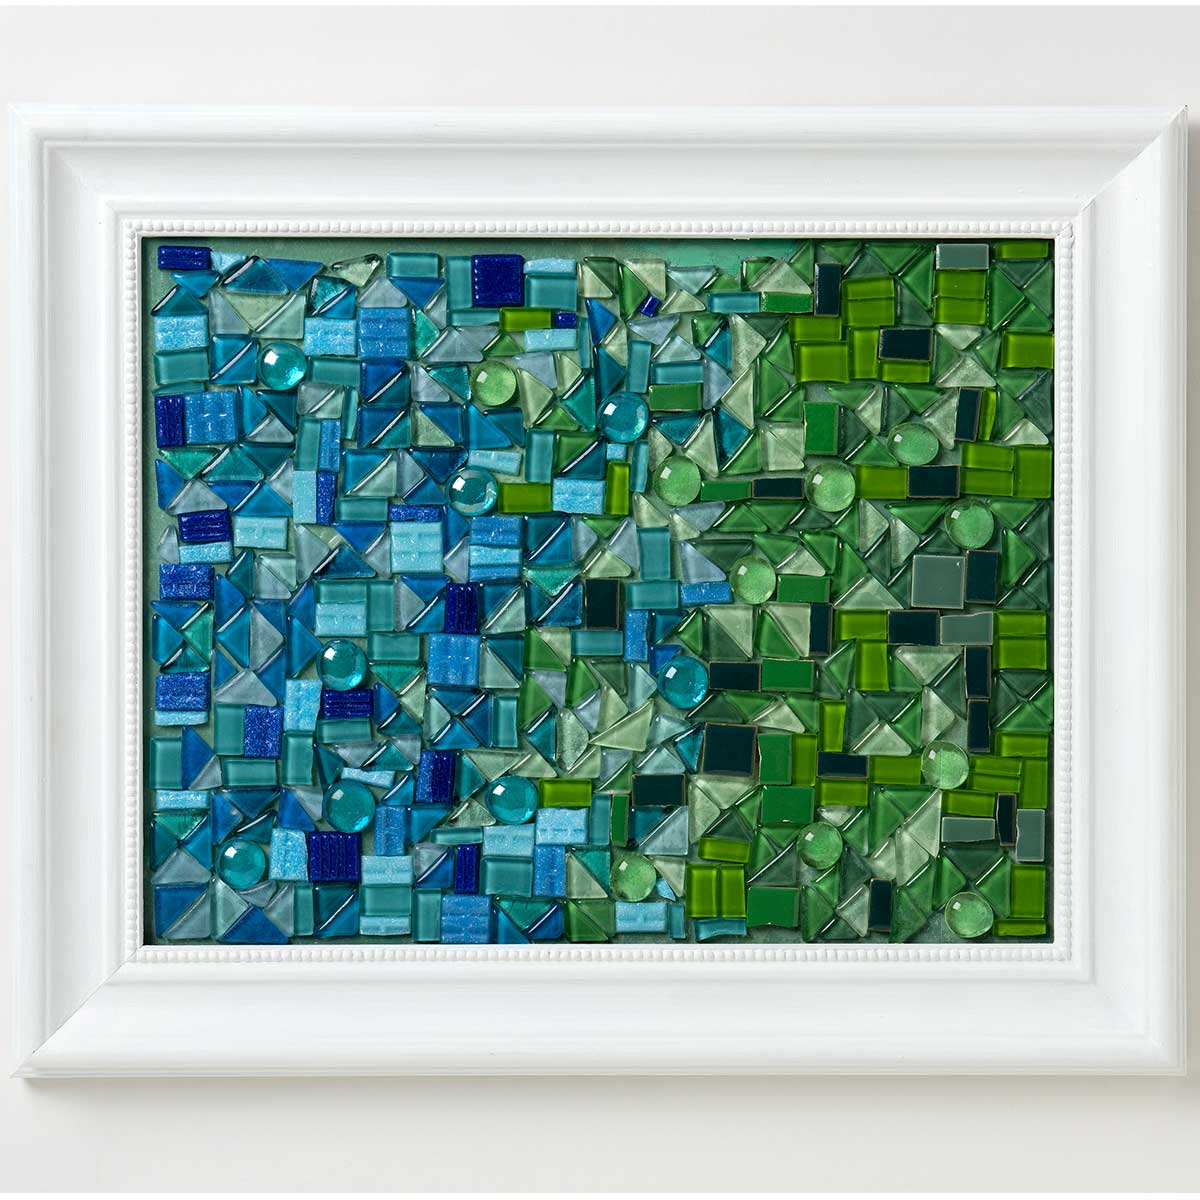
Gather These Supplies
- Mod Podge Ultra
- Small glass pieces – green and blue
- Turquoise scrapbooking paper
- Rectangular wooden canvas
Instructions
1. Cut the scrapbooking paper to fit the size of the wooden canvas.
2. Spray the Ultra onto a paper towel to prime the pump, then spray a generous amount on the wood. Also, spray an even coat onto the back of the scrapbooking paper.
3. Apply the scrapbooking paper to the wood and adjust the positioning if necessary. Let dry according to the instructions on the bottle.
4. Starting on the left side of the wood, spray a generous amount of Ultra and apply blue glass pieces, arranging them so that they fit snugly into place. Continue this on the left side so that about 1/3 of the wood is covered in glass pieces.
5. Starting on the right side, apply a generous amount of Ultra and apply green glass pieces, arranging them so that they fit snugly into place. Again, continue this until the right 1/3 of the wood is covered in green pieces.
6. In the center of the wood, repeat the same process, but use both blue and green pieces. This will create an ombre effect. Let dry.
7. Apply an even coat of Ultra to the entire mosaic area of the project to seal. Let dry.
Mosaic Picture Frame
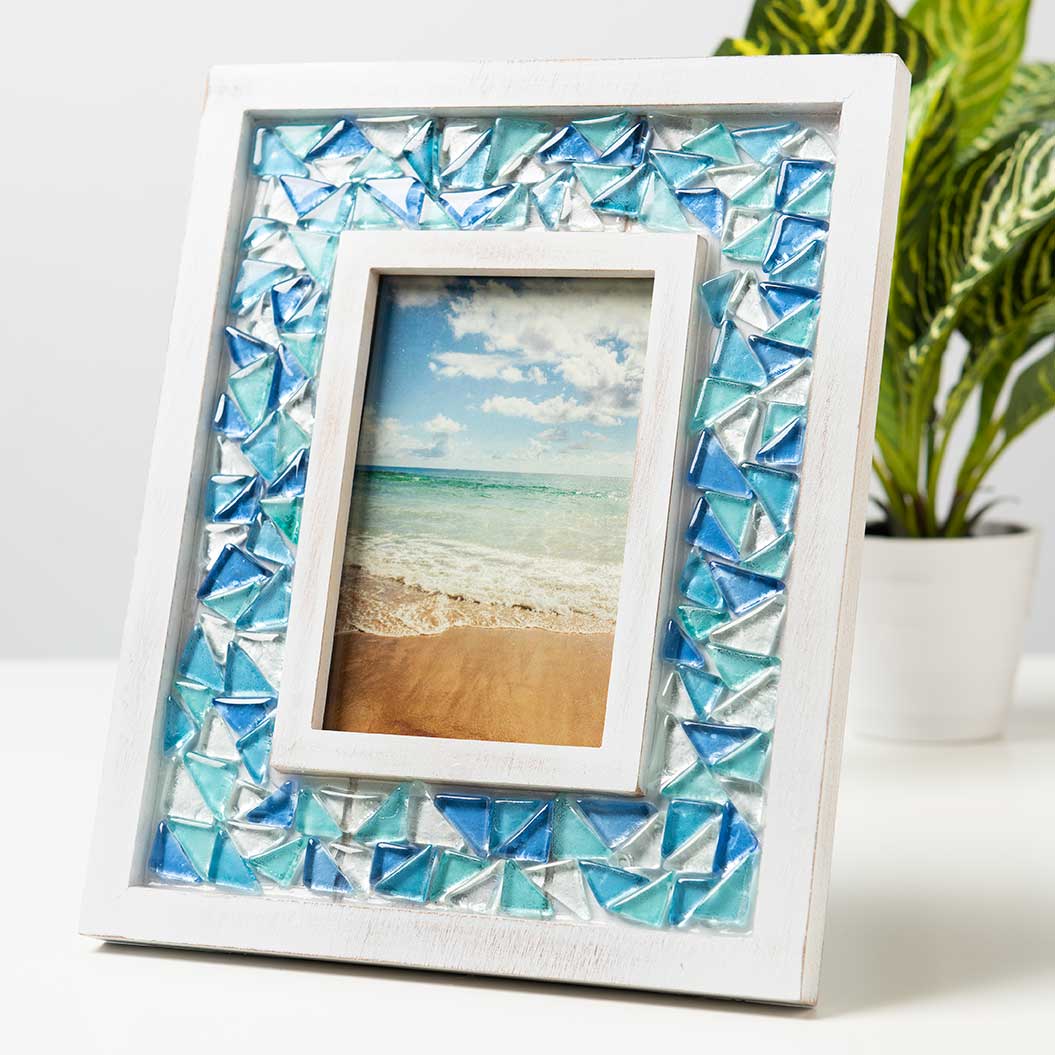
Gather These Supplies
- Mod Podge Ultra
- FolkArt Home Decor Chalk – Cottage White
- Wood frame with recessed area like shown
- Sandpaper
- #12 Flat brush
- Assorted glass tiles
Instructions
1. Paint frame as shown with Cottage White and let dry. Sand to create distressed finish.
2. Spray a generous amount of Mod Podge Ultra onto frame in areas you will be creating the mosaic pattern.
3. Place glass pieces immediately while Ultra is wet. Let dry completely.
4. Spray a second coat of Ultra over entire frame and let dry.
Did you enjoy these mosaic projects? If so, let me know in the comments! I’d also love for you to check out the following posts:


Thank you