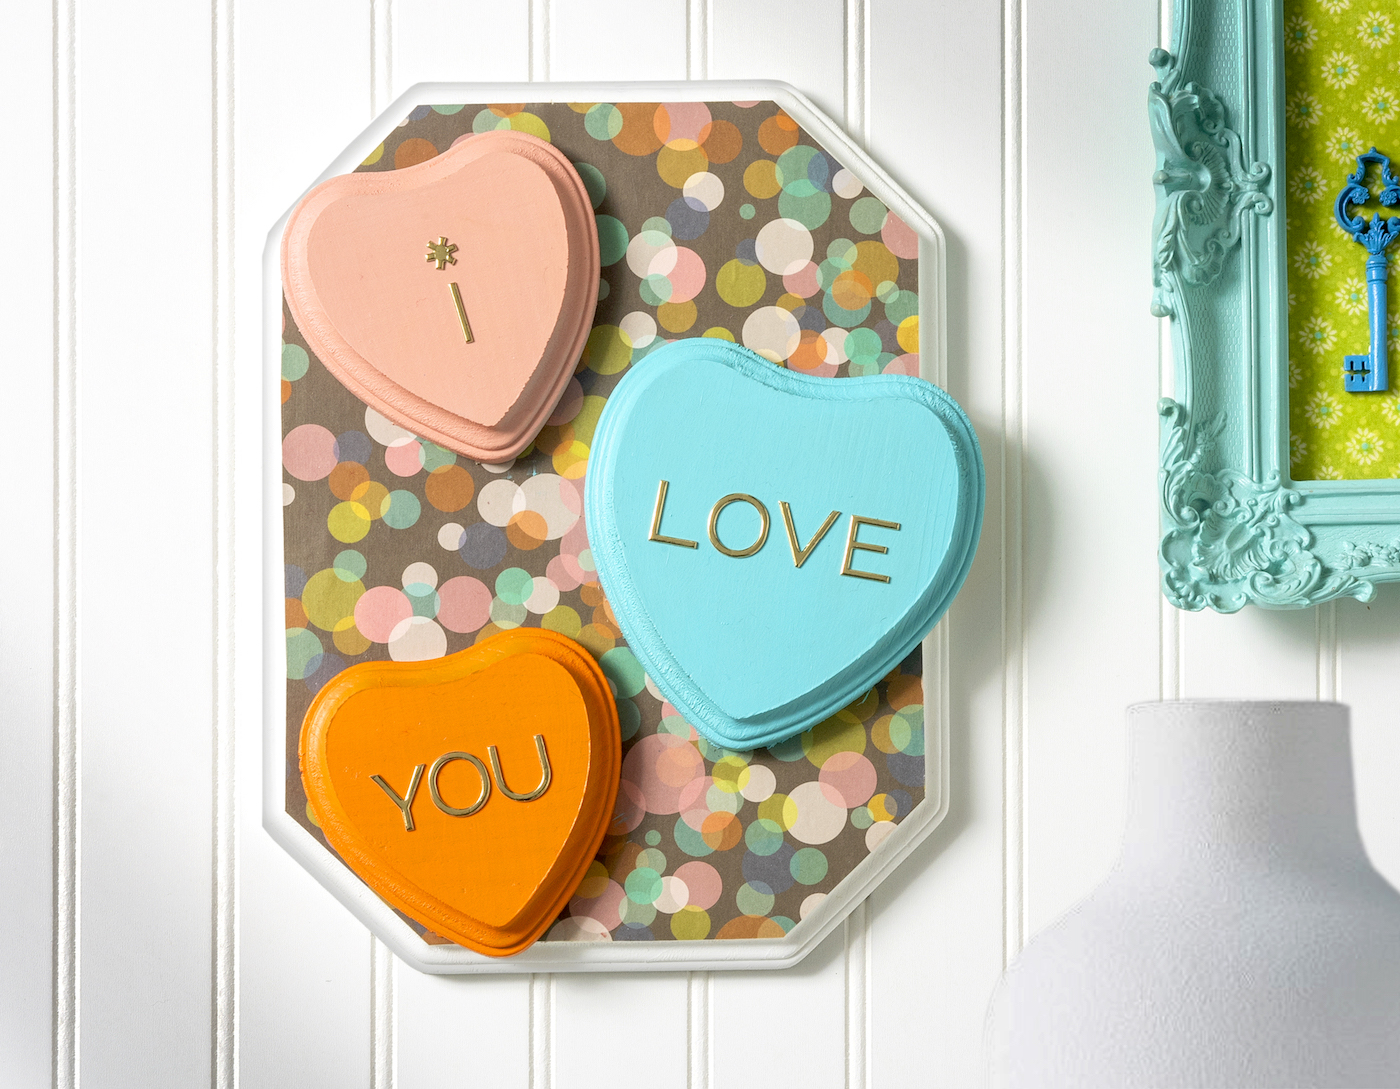
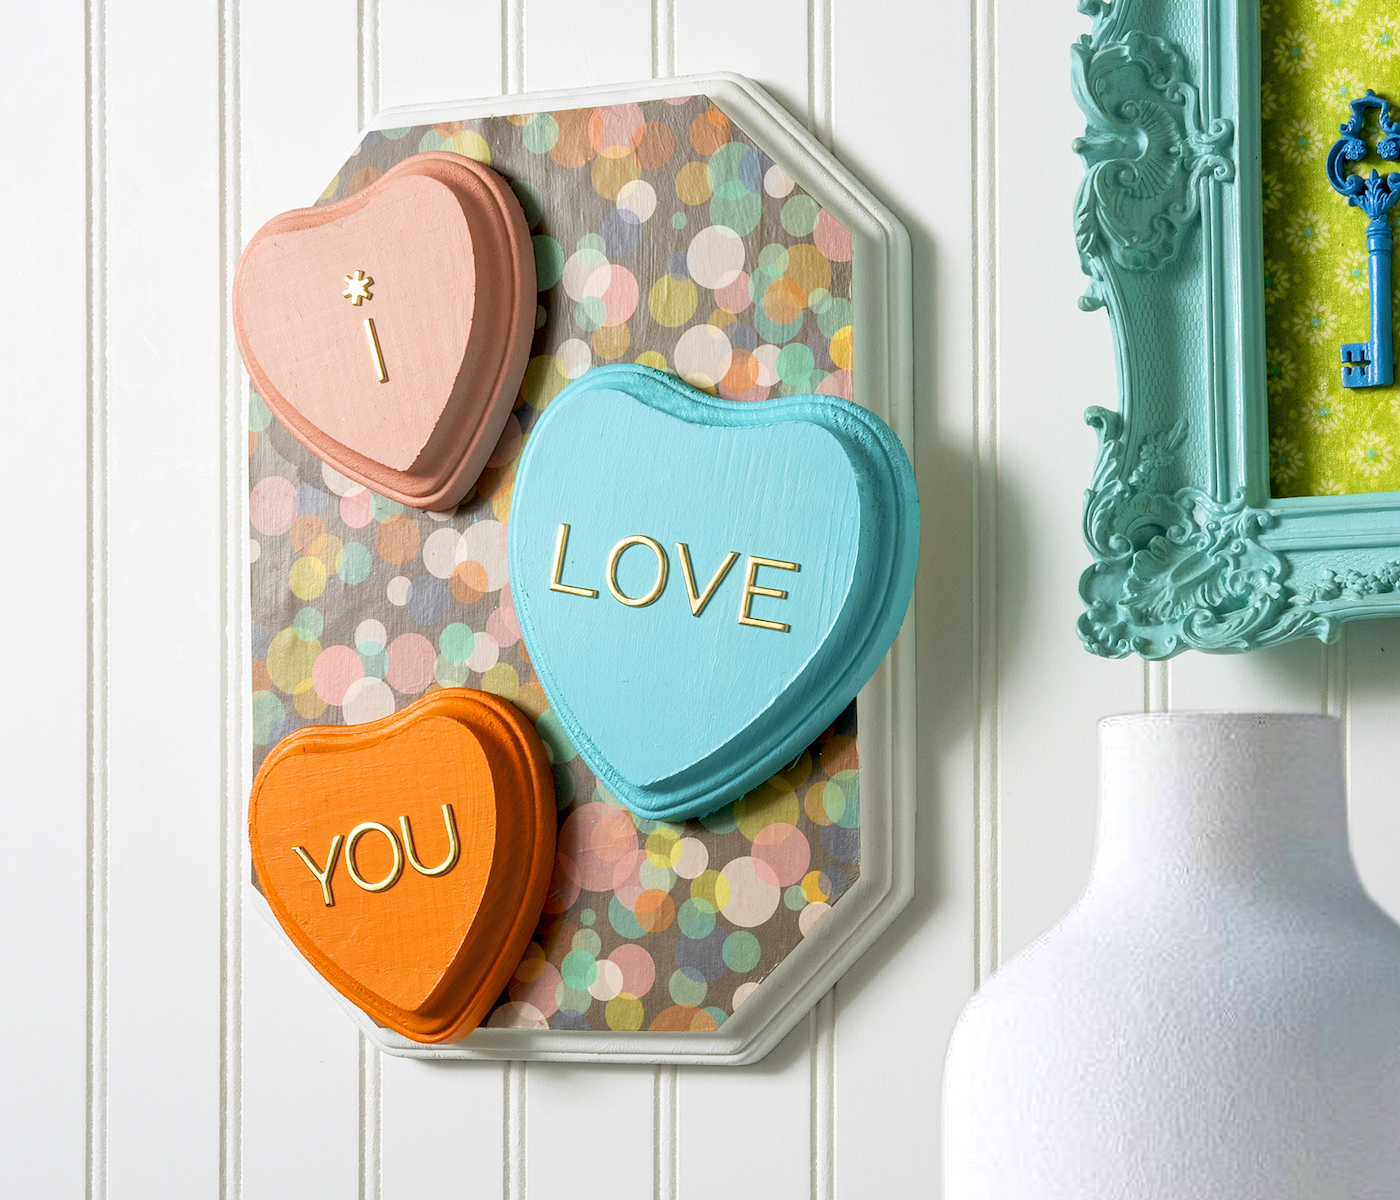
Make this I Love You decor for Valentine’s Day! It’s easy to do with wood shapes, paper, and Mod Podge. Perfect for holiday decorating.
Skills Required: Beginner. You’ll be painting wood plaques, adding scrapbook paper with decoupage medium, then gluing and adding stickers.
I’m not sure how you feel, bout for the last few years I feel like Valentine crafts have gotten a back seat. The year ends, and January takes forever (my birthday month!).
Then after the 45th day of the first month, it turns to February. Fast forward and we’re already into spring! Isn’t it funny (or not so much) how that works?
This year I decided that I was going to do some Valentine decor projects no matter what. Nothing would stop me from celebrating love, no matter the speed of the beginning of the year.
It started with the wood pallet heart and then I did the Be Mine wood decor. I wasn’t done though – I wanted to do a project that was a bit more colorful. With a piece of scrapbook paper.
So that’s how this I Love You decor was born!
It’s a simple Valentine’s Day project that you can easily customize to whatever papers you have, and the paint as well. I fully encourage you to make this idea your own!
It doesn’t require that many supplies or any advanced decoupage knowledge. I will walk you through the process below.
I Love You Wood Decor for Valentine’s Day
Gather These Supplies
- Wood plaque
- Wood hearts – 3
- Scrapbook paper – 1 sheet
- Craft paint – I used four colors
- Mod Podge Gloss
- Adhesive letters
- Sheet of paper
- Scissors
- Pencil
- Painter’s tape or washi tape
- Paintbrushes
- Craft glue
Cut Out the Scrapbook Paper
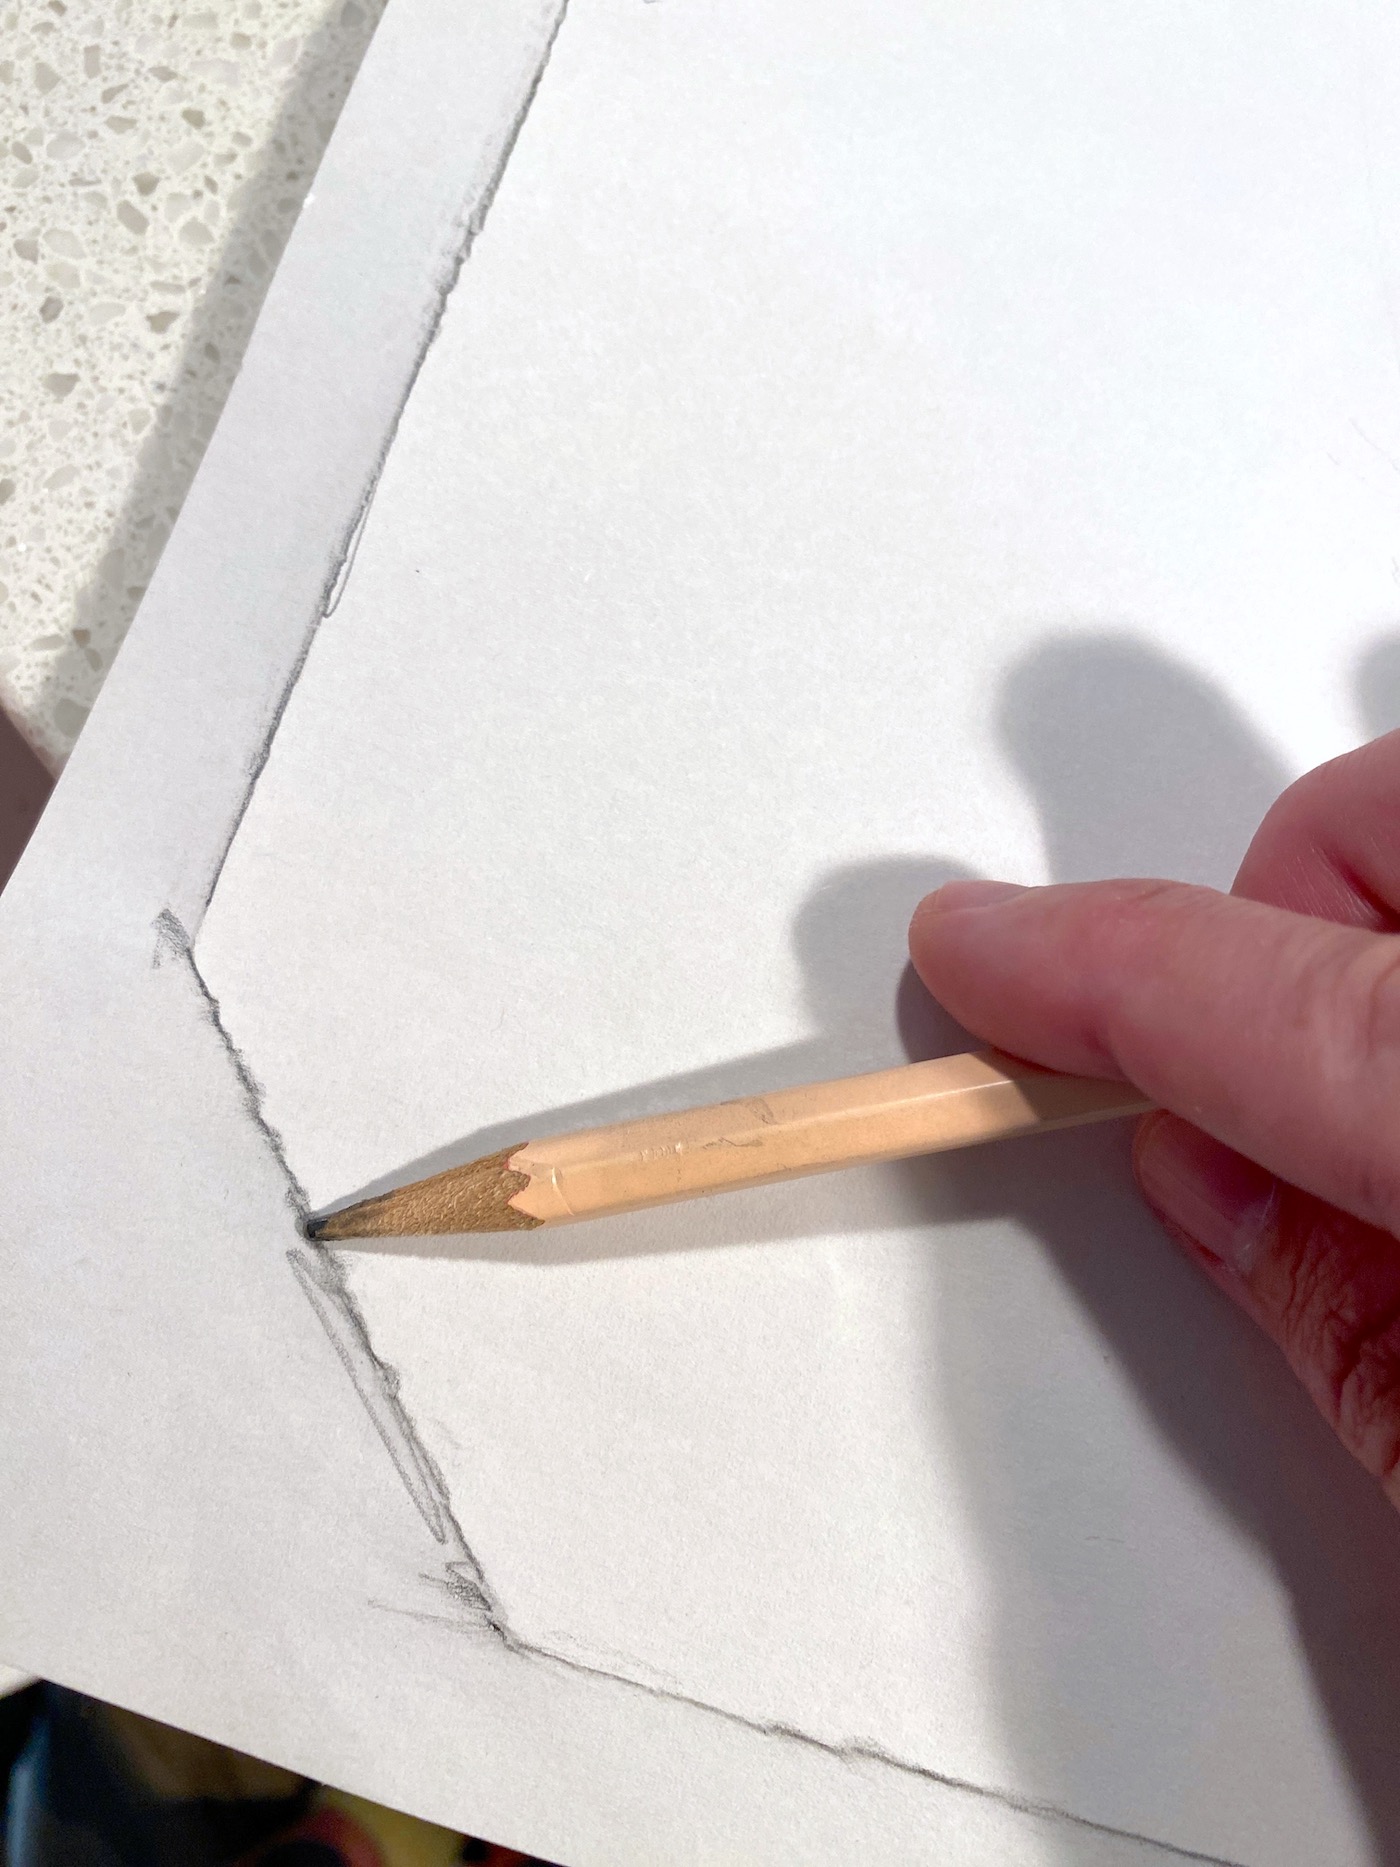
The first thing to do is make a template of your plaque with a sheet of paper and a pencil. It’s really easy. You will just hold the piece of paper down and rub the pencil led on the edges of the plaque.
The lead will make a line that you can cut on, making your paper the same size as the plaque!
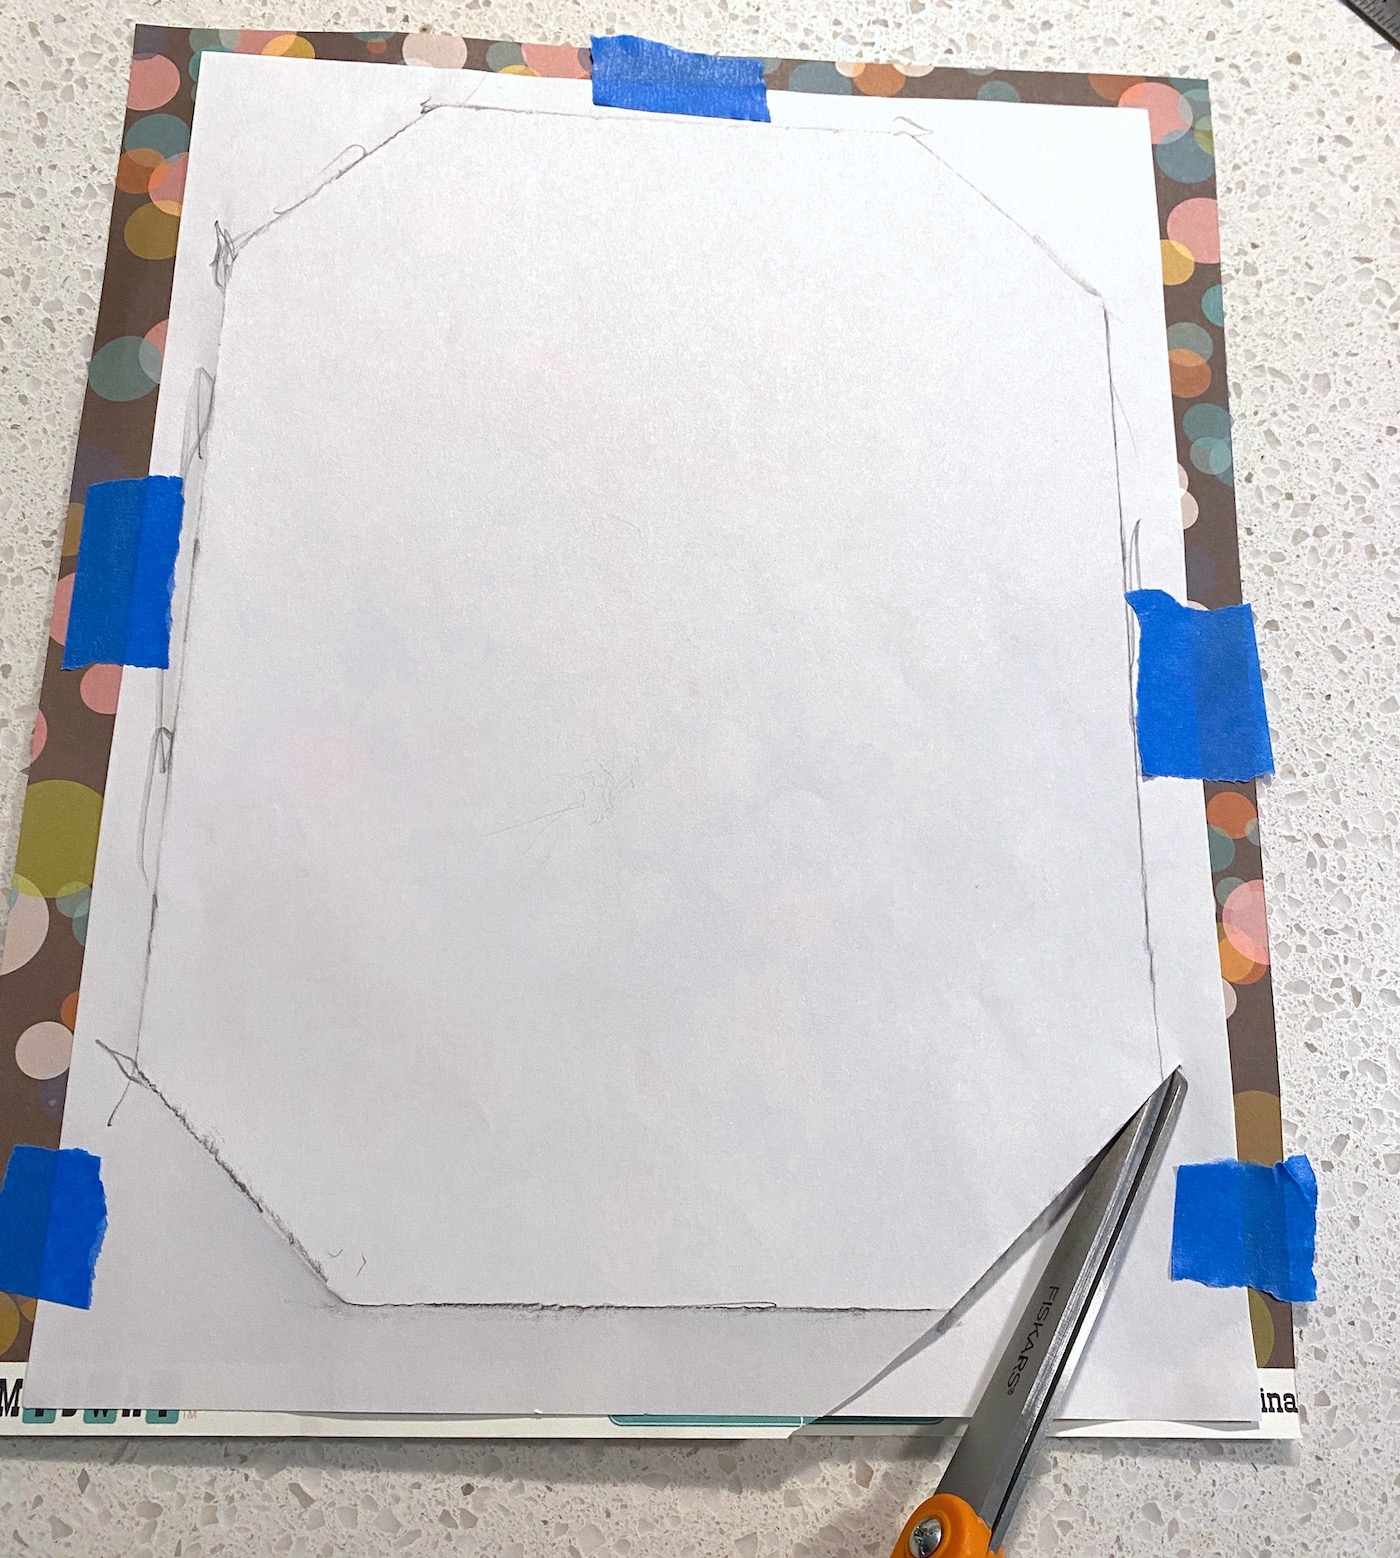
To cut the scrapbook paper, tape the template to the top of it with removable tape (like stencil, painter’s, or washi tape).
Then use the scissors to cut on the lines. Check the fit of the paper on the top of the plaque and do any gentle trimming as needed.
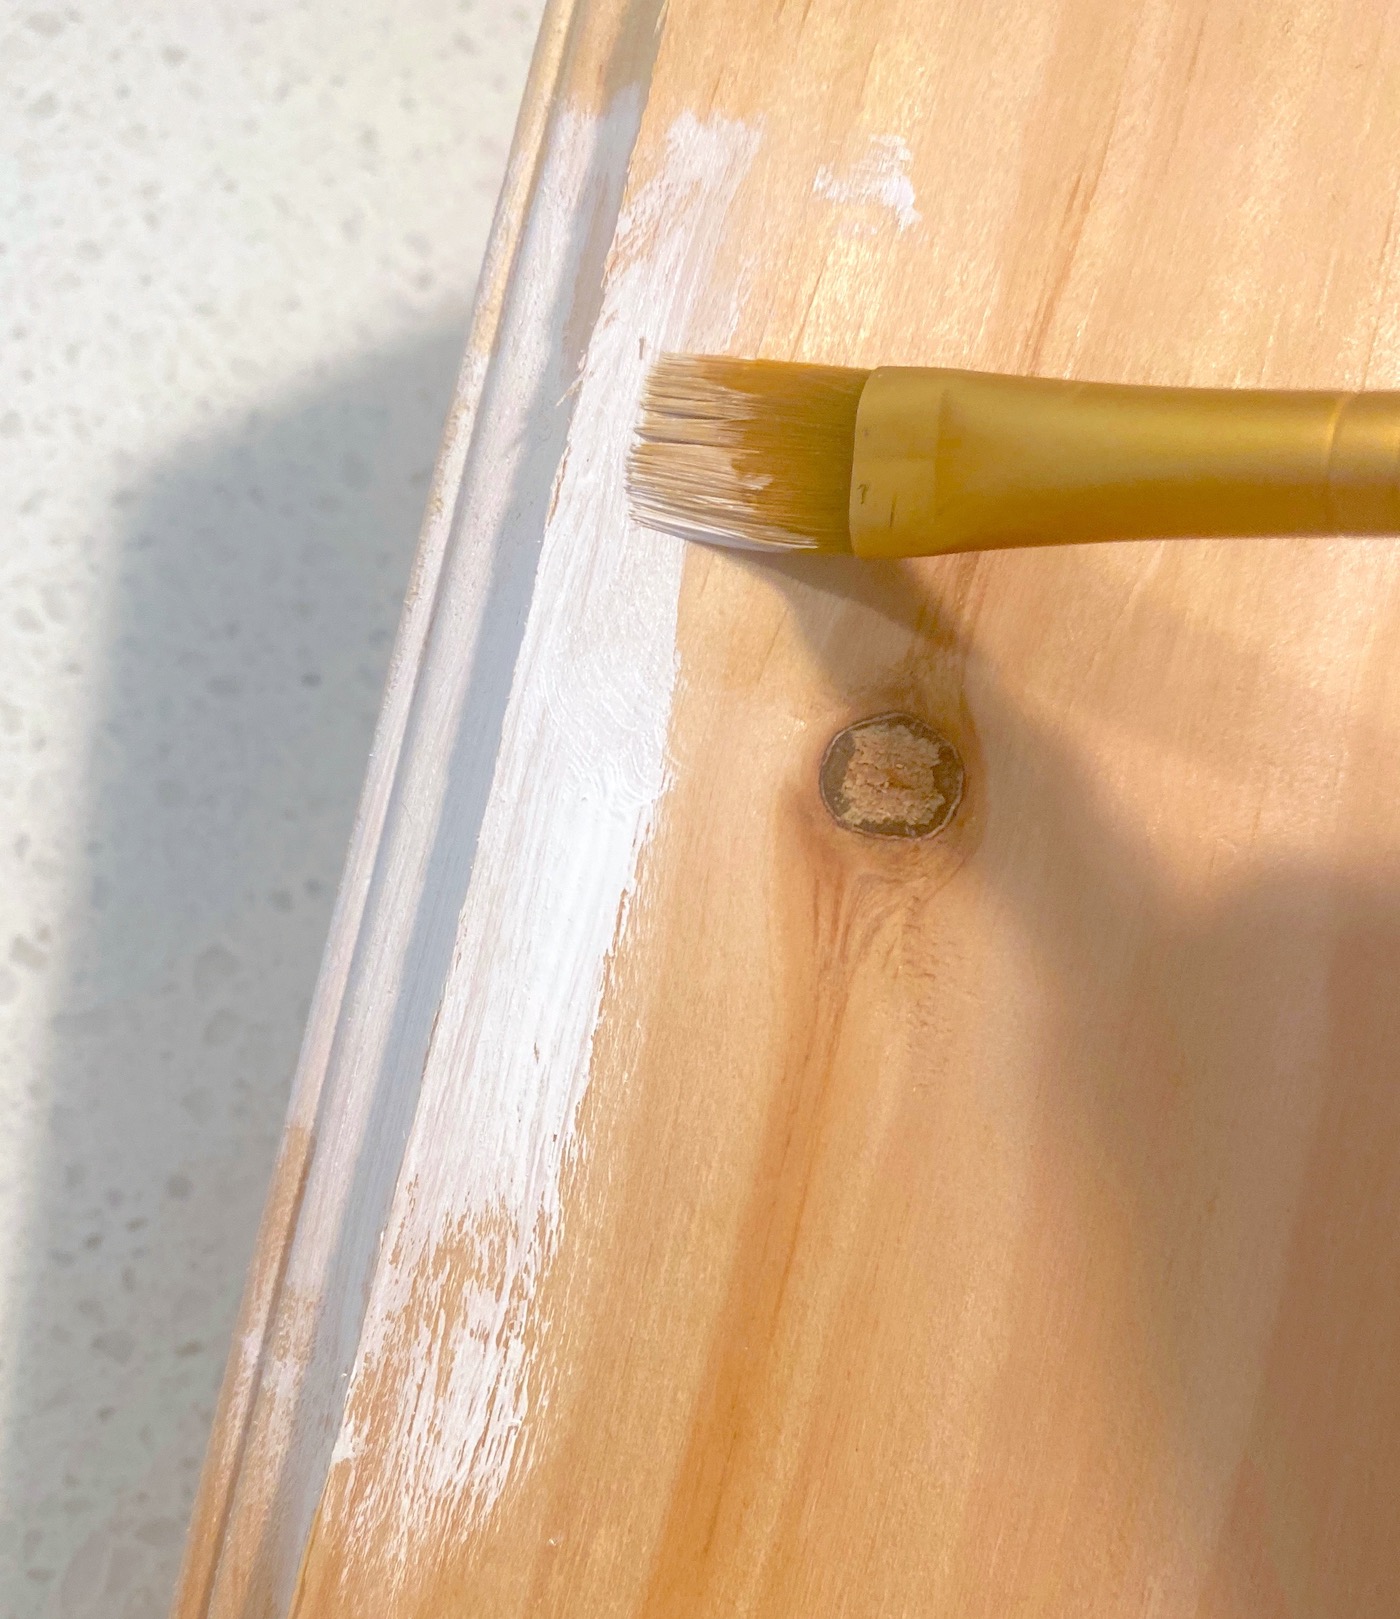
Paint the Wood Shapes
Time to paint all the wood. For the large wood plaque, you’ll only need to paint the edges with the paint color of your choice. I used white for the main plaque. Add two coats (or as much as you need to cover) and let dry.
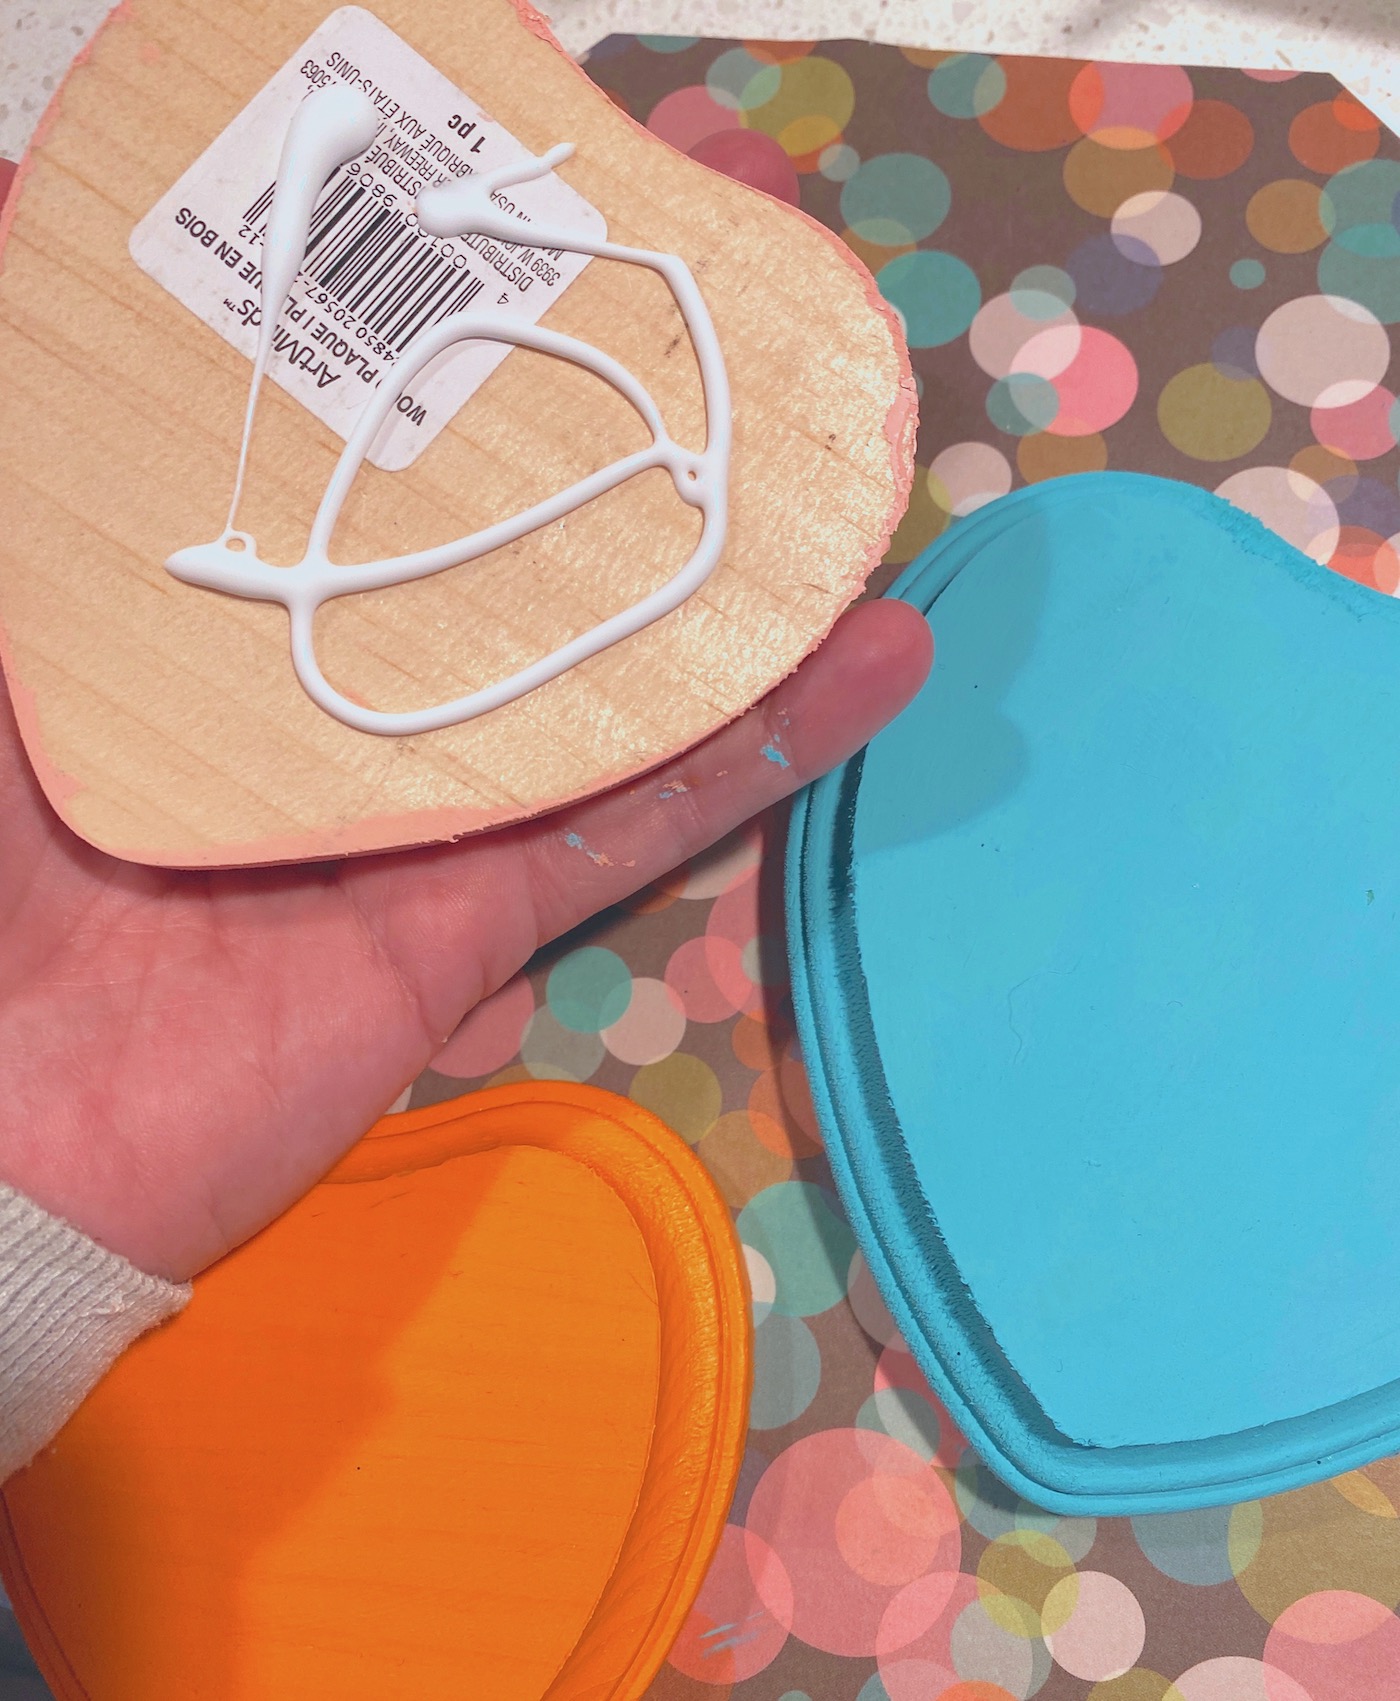
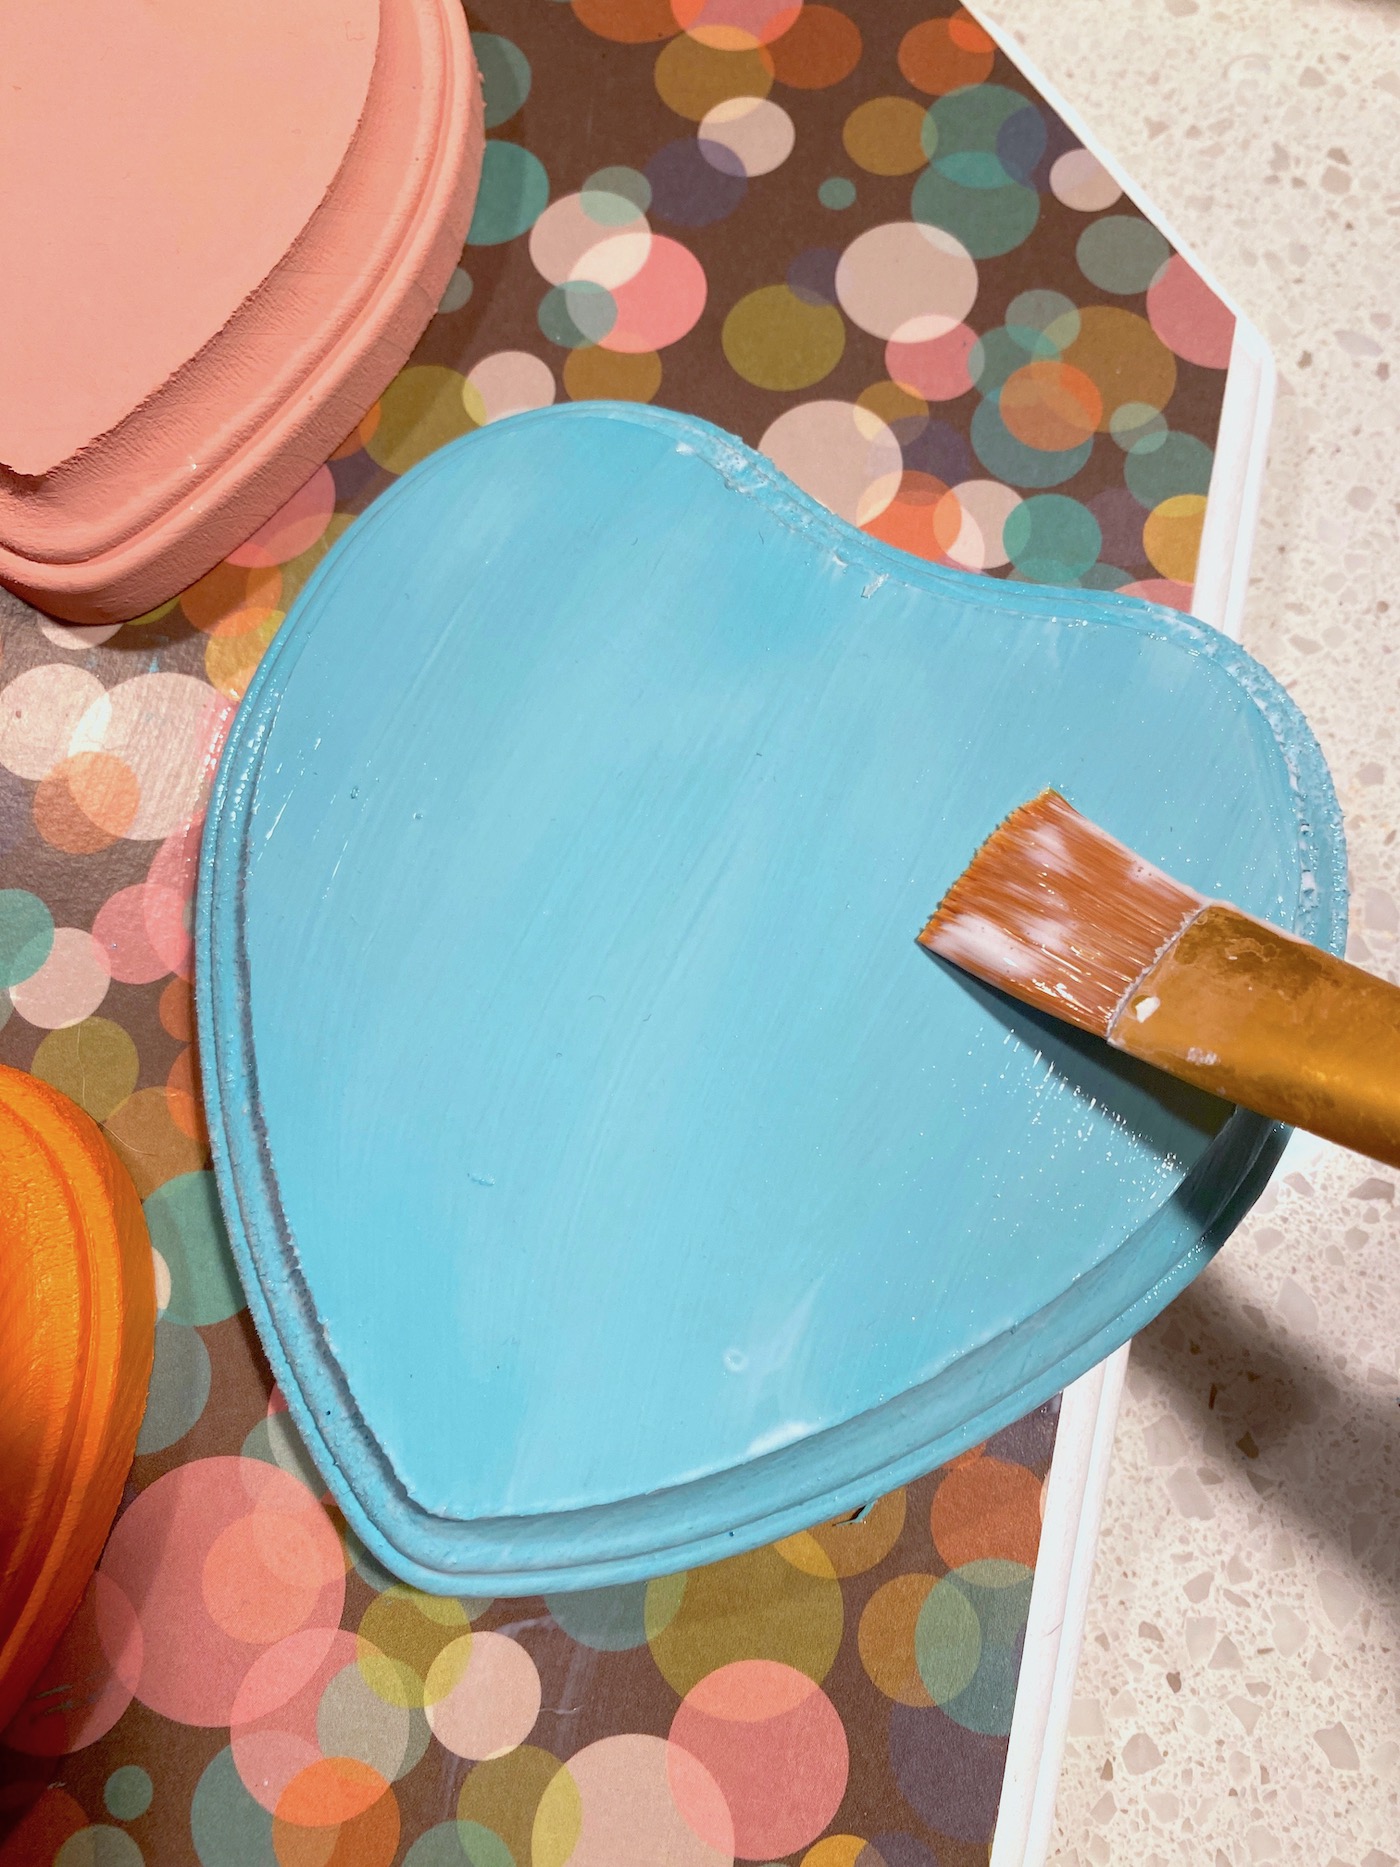
For the wood hearts, you’ll want to pick some colors out of the scrapbook paper and paint them. I chose a pink, an orange, and a blue.
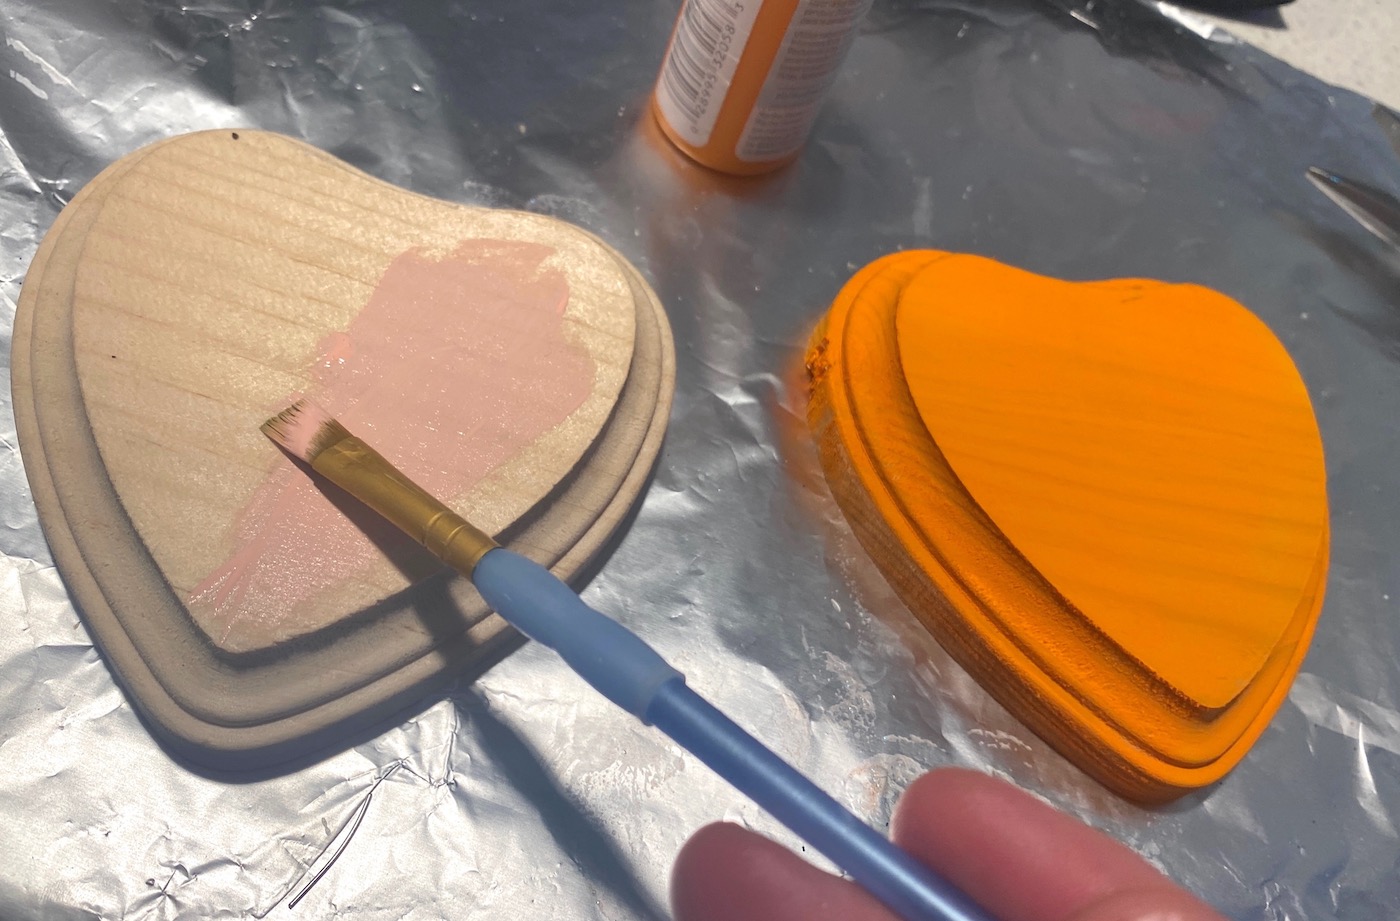
Paint the hearts with the three colors and let dry. I used several coats of paint to cover.

Apply the Paper to the Wood
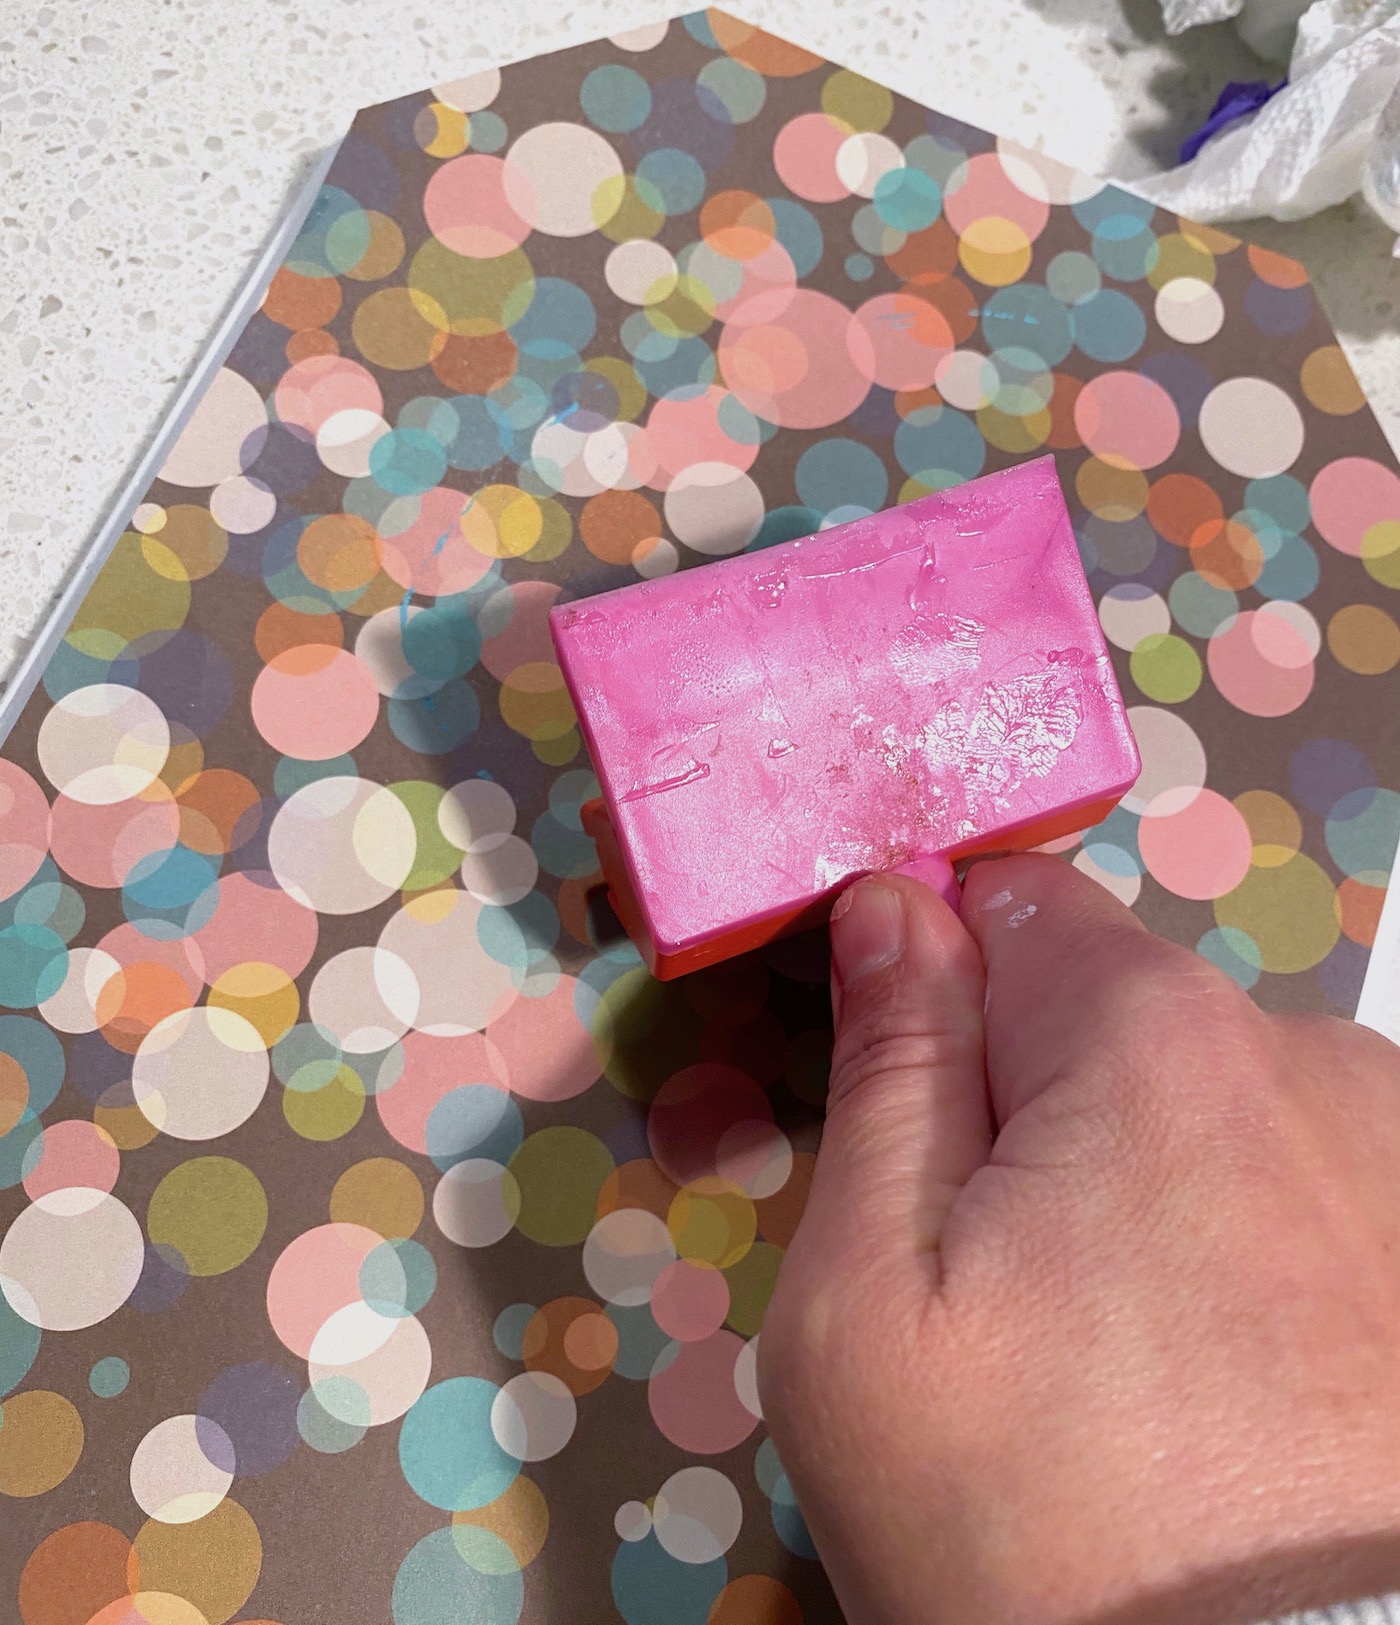
Now you’ll get to use the Mod Podge! Apply a medium layer of Mod Podge to the top of the plaque with a brush. You’ll immediately want to place the paper down on top and adjust it into place.
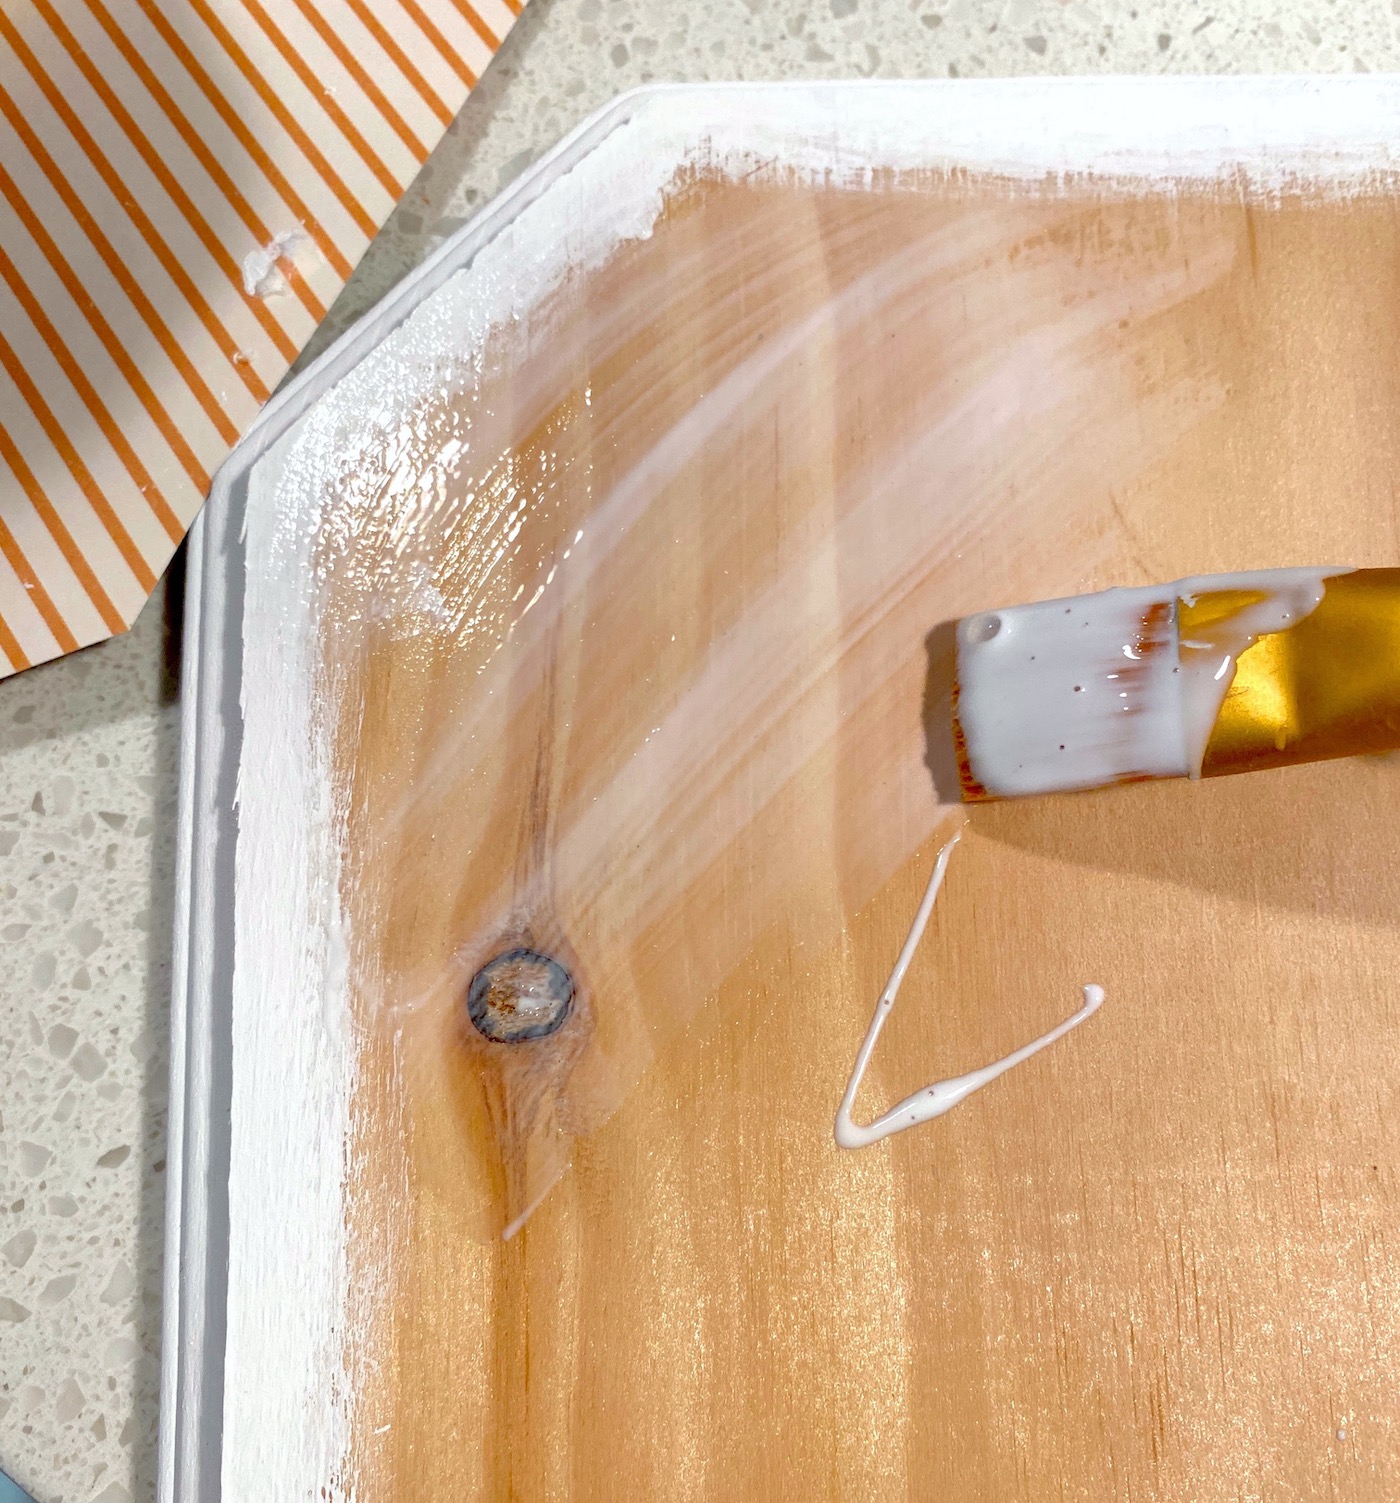
Use your hands to smooth OR a brayer (like you see below). The brayer rolls the paper out smooth. Once you’re done rolling, wipe away the excess Mod Podge that came out the sides (if any).
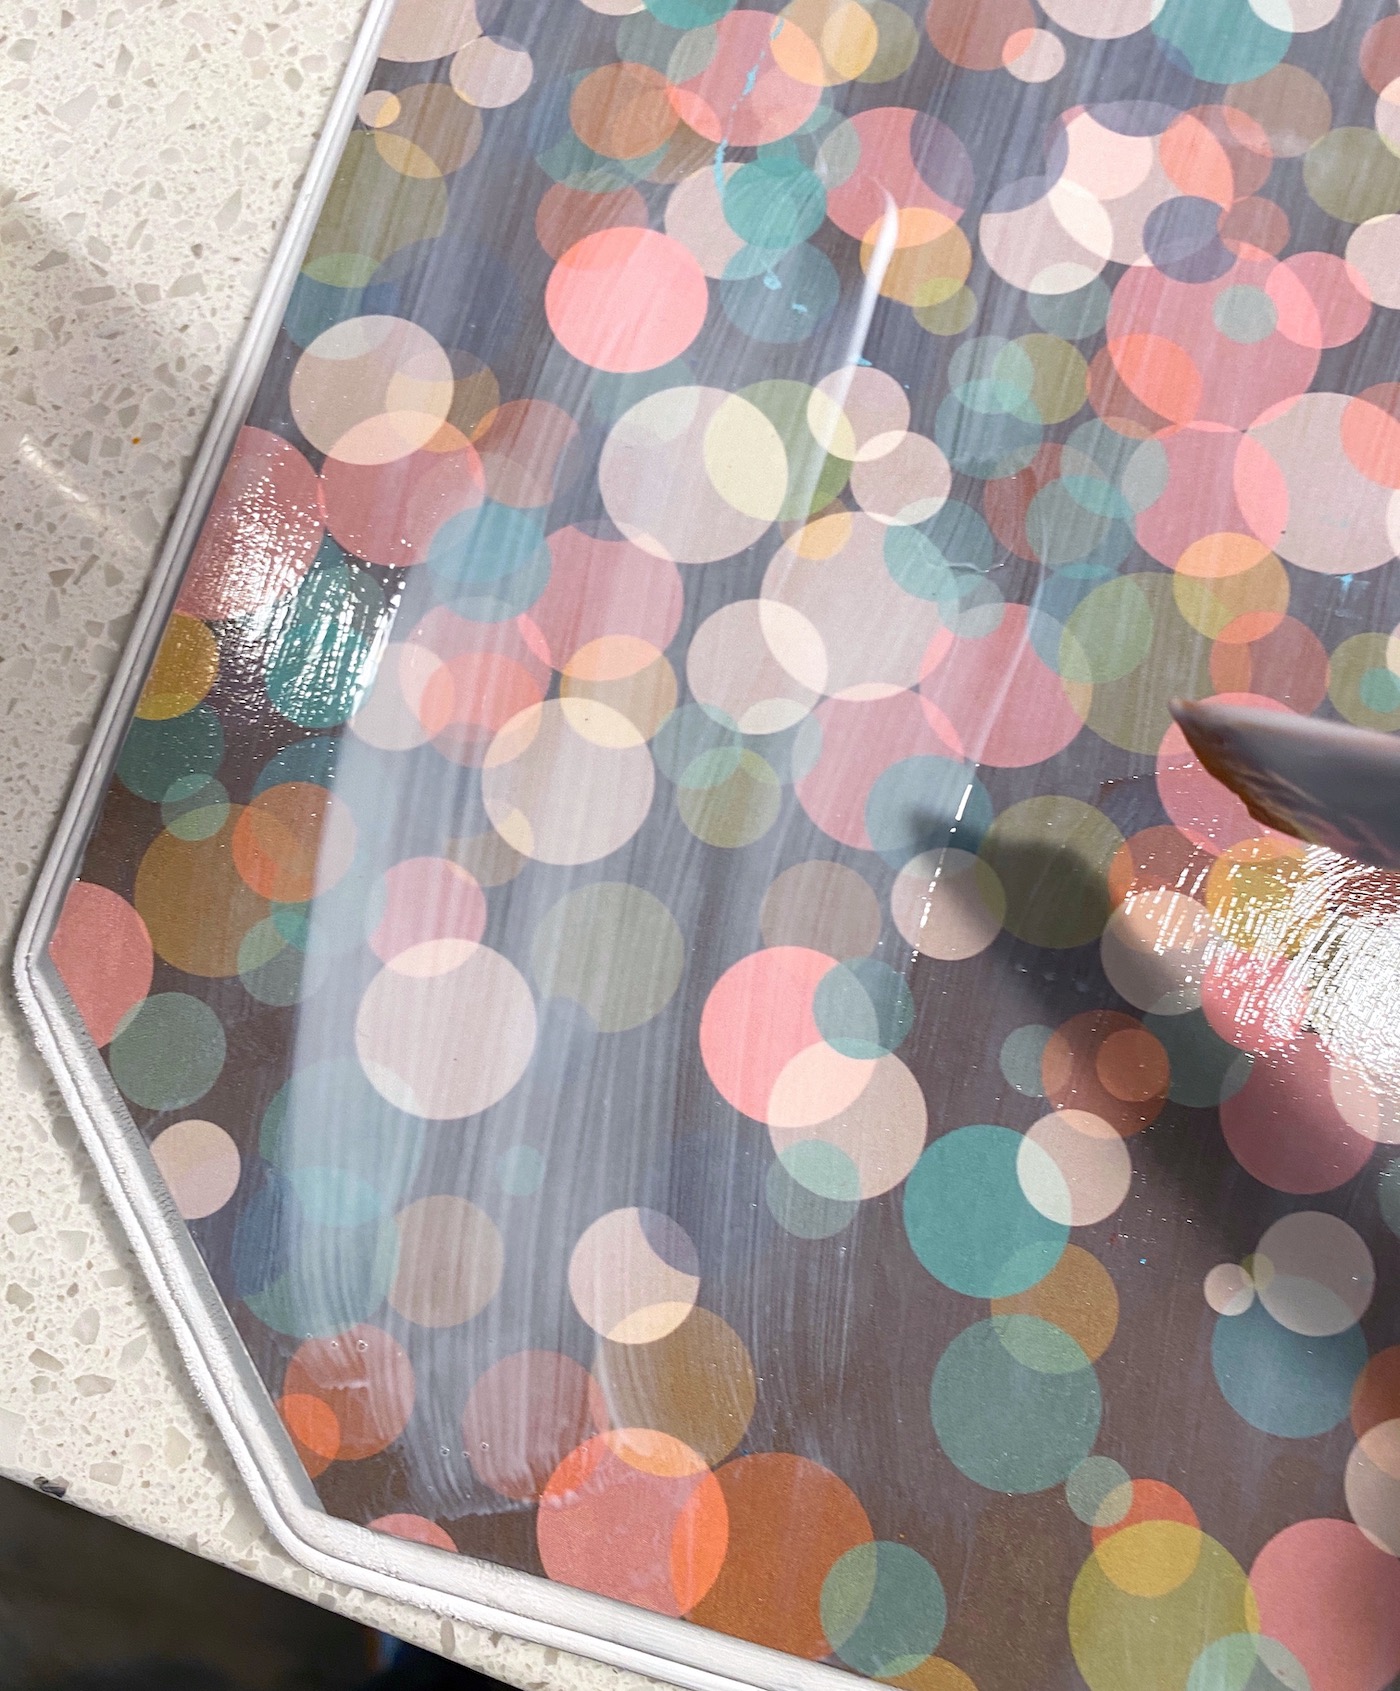
Don’t apply Mod Podge over the top yet. Just let the scrapbook paper dry for about 15 – 20 minutes.
After the scrapbook paper has dried to the top of the plaque, then you can paint the Mod Podge over the top. Let that dry.
Glue Down the Hearts and Letters
At this point you are in the home stretch with your I Love You decor! You just need to glue down the wood hearts to the main plaque with craft glue. Let dry.
My next step was to paint the Mod Podge on top of the hearts. You don’t have to do this, but I happen to like the sheen of the Mod Podge. Plus it’s just another layer on top of the paint for durability.
Not required, but I do it!
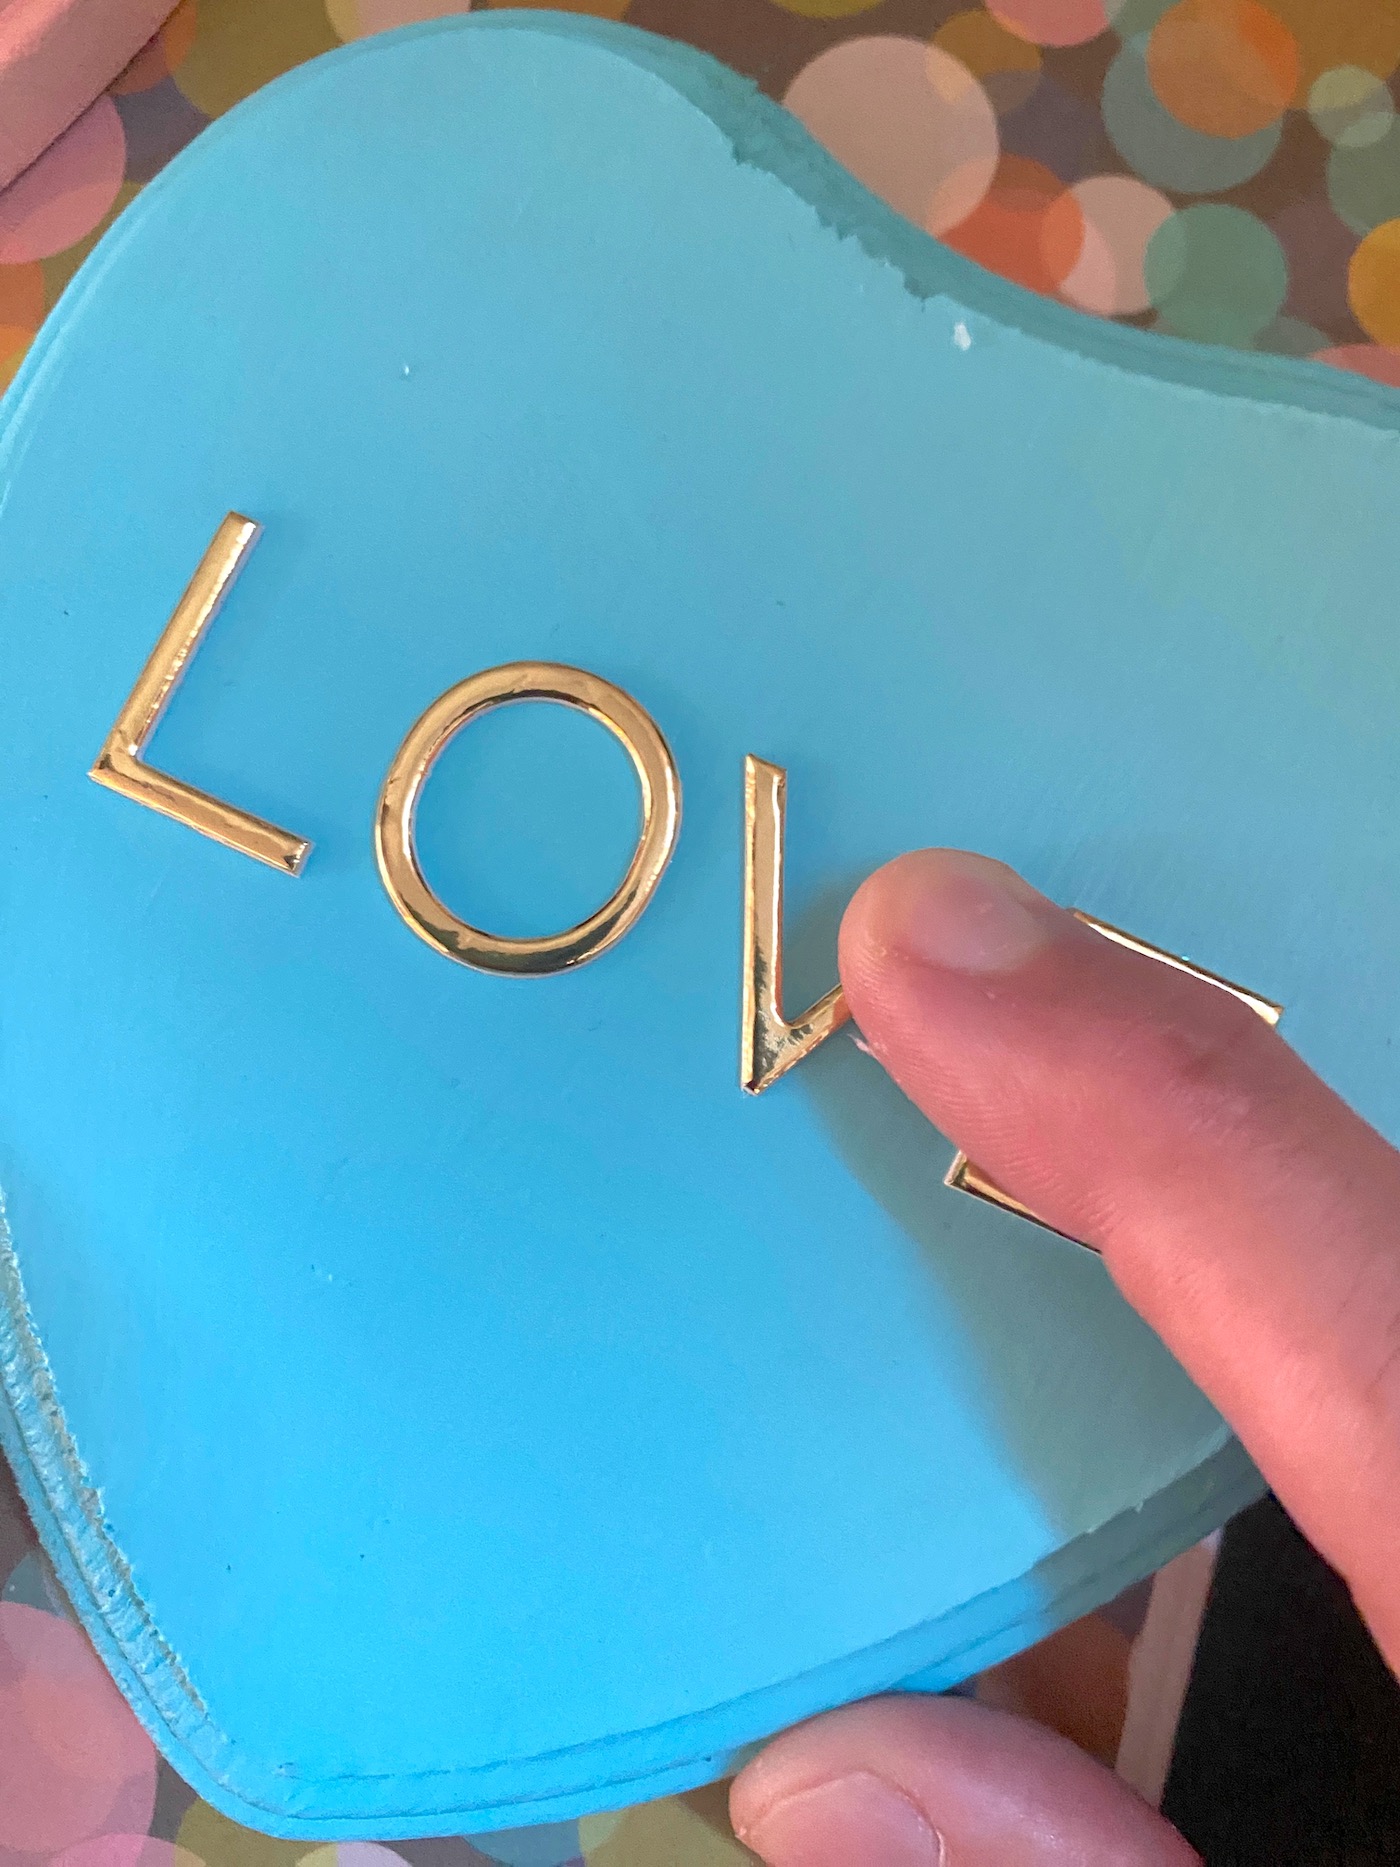
After everything was dry, I attached the adhesive letter stickers to the top. They didn’t need any additional glue. It depends on the strength of the adhesive of your letters as to how well they will stick. You might need to add a little glue.
Hang your plaque anywhere you like with a Command Strip!
OR you can hot glue ribbon on the back, or just prop up against the mantel. There are a lot of options with this Valentine’s Day project!
Now that I’m done with this project for the holidays, it’s onto the next! I’m not done until Valentine’s Day get the appreciation it deserves. What do you think? Let me know in the comments!
I’d also love for you to visit the following crafts and posts: