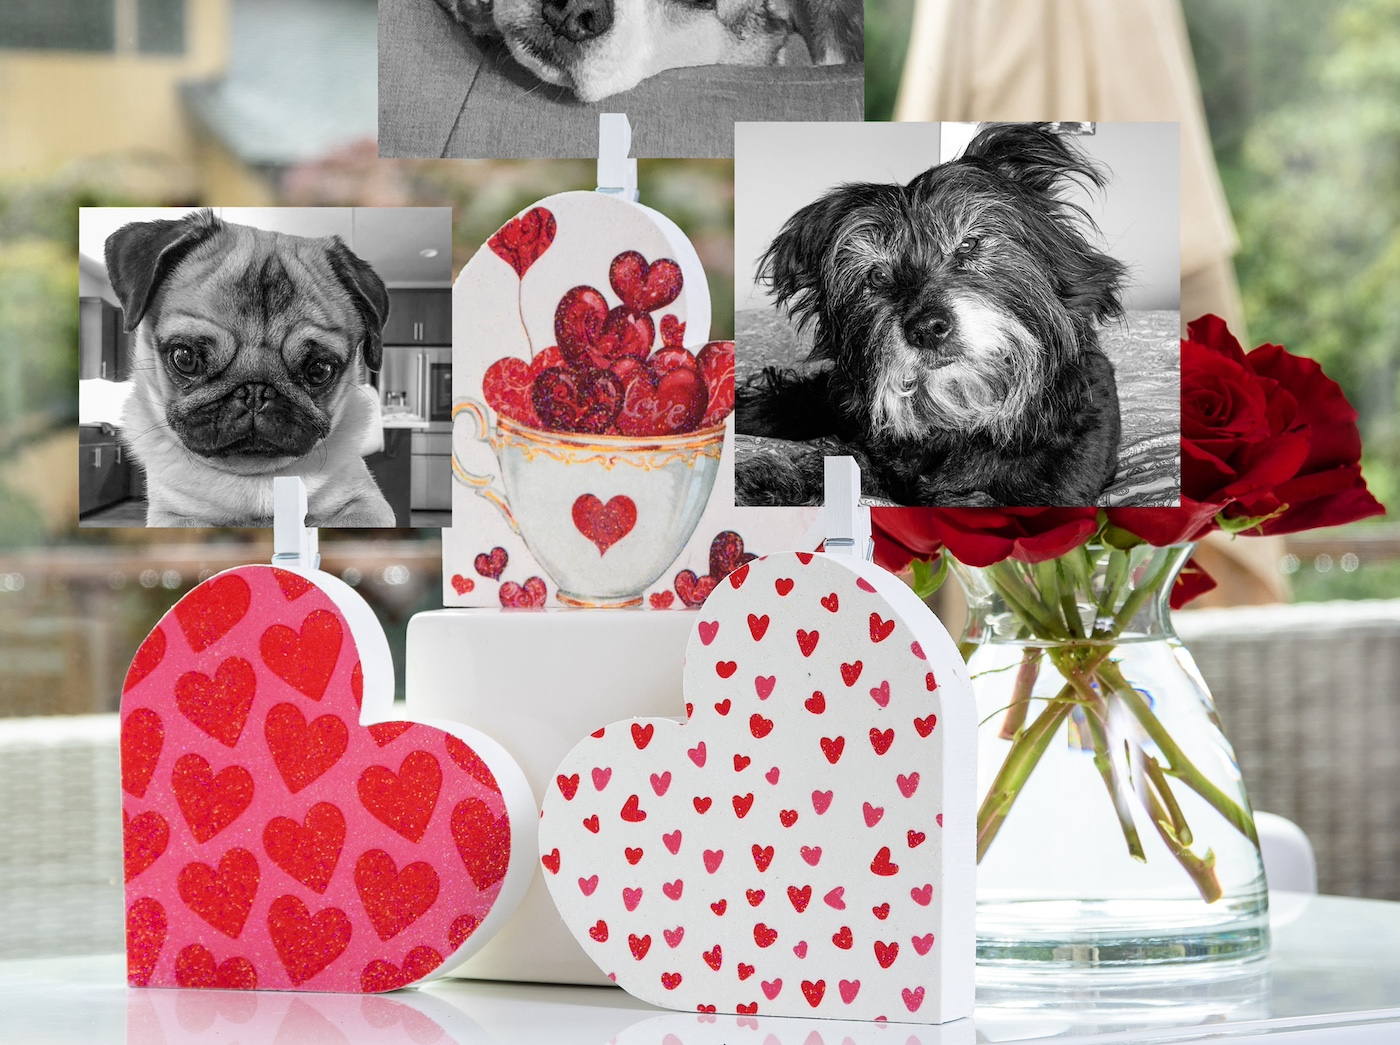
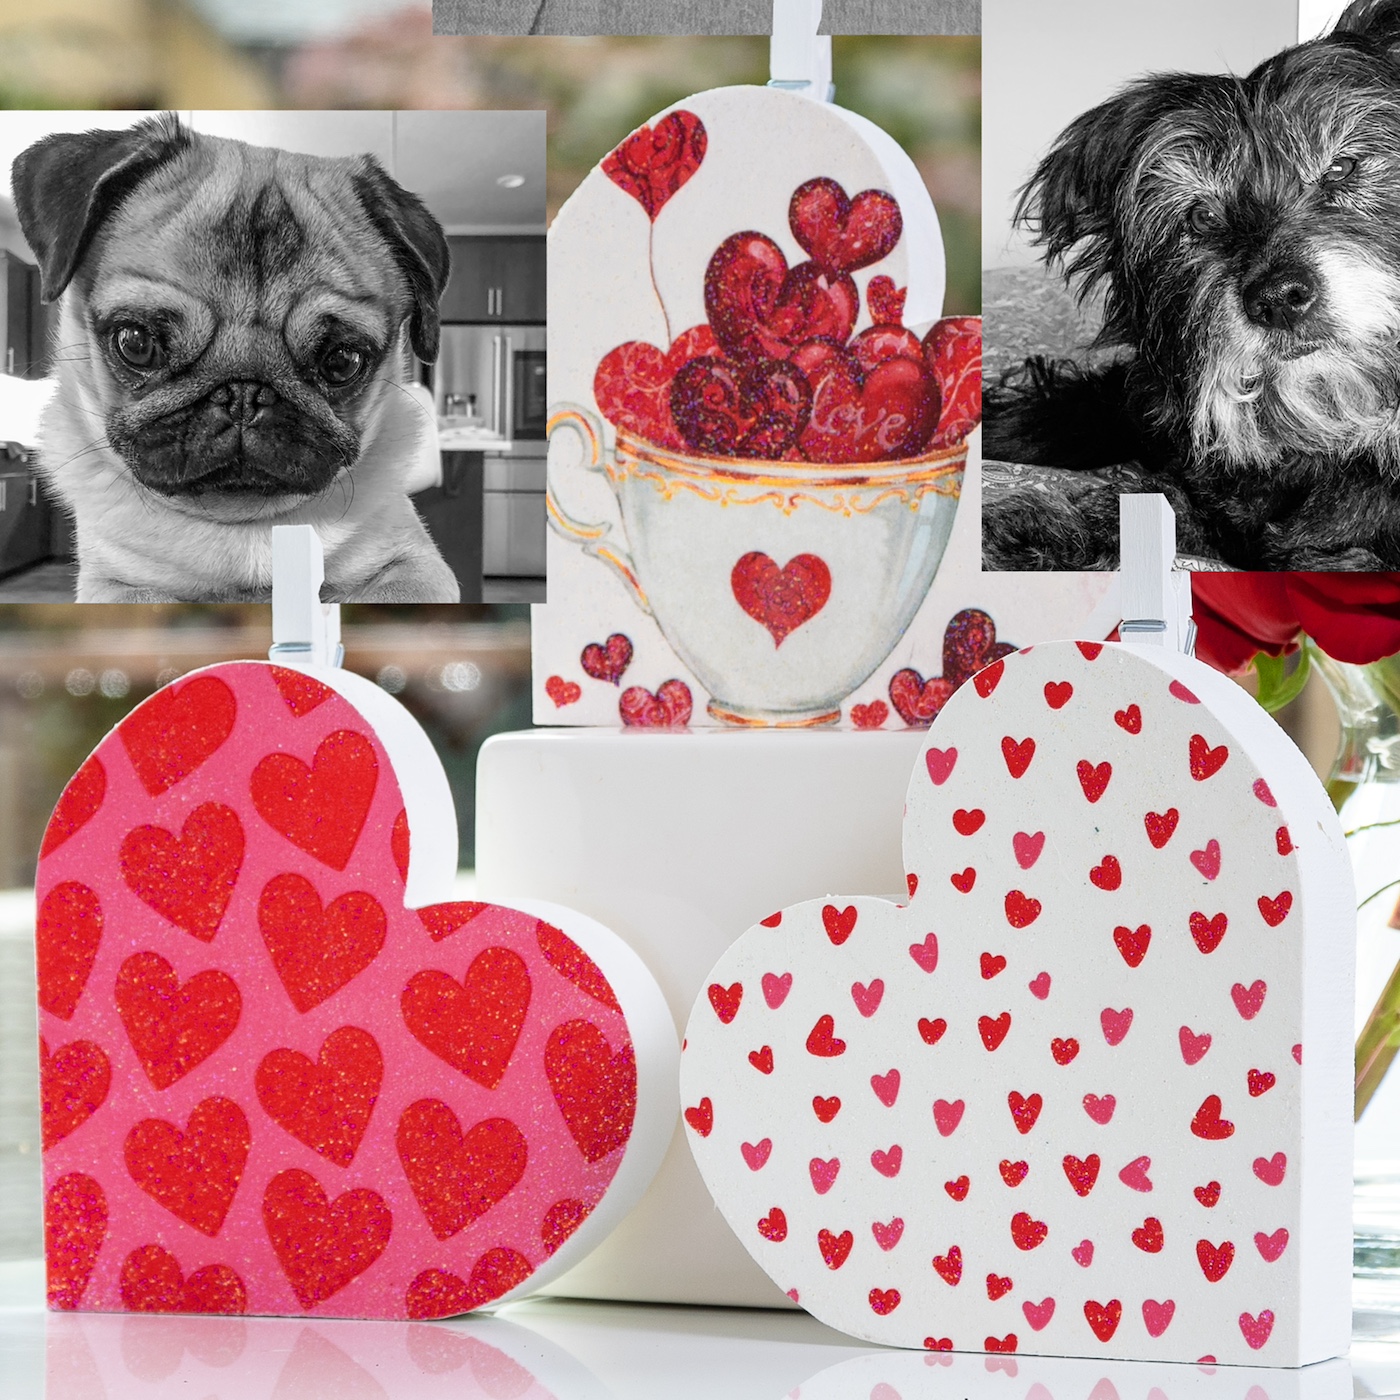
It’s easy to turn chunky wood shapes into DIY heart photo holders! I used napkins to decorate this cute craft for Valentine’s Day decor.
Skills Required: Advanced Beginner. To make this project, it helps to have experience with paint and Mod Podge. You’ll be applying both, ironing napkins onto surfaces, then gluing.
In the spirit of cherishing memories and celebrating love, there’s something incredibly special about crafting your own Valentine’s Day decor that not only adds a personal touch to your space but also holds the dear faces of your loved ones close.
As we approach the season of love, I’m thrilled to share a heartwarming project that combines simplicity, creativity, and a whole lot of love: making your very own heart photo holders.
This DIY project is not just about creating another piece of decor; it’s about weaving memories into your Valentine’s Day and remembering what the holiday is truly about.
In this post, I’ll guide you step-by-step on how to bring these Valentine’s Day photo holders to life. I’m also going to show you how to decorate the wooden hearts using paper napkin decoupage.

This method, which allows the Mod Podge to dry BEFORE applying the napkin, is a great solution when you just can’t decoupage your items without wrinkles. When the items are thinner – this is super easy.
The choice of napkins is where your personality shines through, allowing you to tailor each photo holder to the display. You’re going to have fun with this part.
They are perfect for displaying Polaroids of special moments, love notes that have stood the test of time, or even the little scribbles from a child’s hand, making them versatile additions to any corner of your home.
I can’t wait to show you how to make this simple craft. Join me in a world where DIY meets heartfelt emotion, and let’s make this Valentine’s Day unforgettable with our very own handmade heart photo holders!
Gather These Supplies
- Chunky wood hearts – 3
- Wood clothespins – 3
- Craft paint – white
- Valentine’s themed napkins
- Mod Podge Satin
- Mod Podge Sparkle
- Craft glue
- Parchment paper
- Mini craft iron
- Emery board
- Scissors
- Paintbrush
Tips and Thoughts for This Project
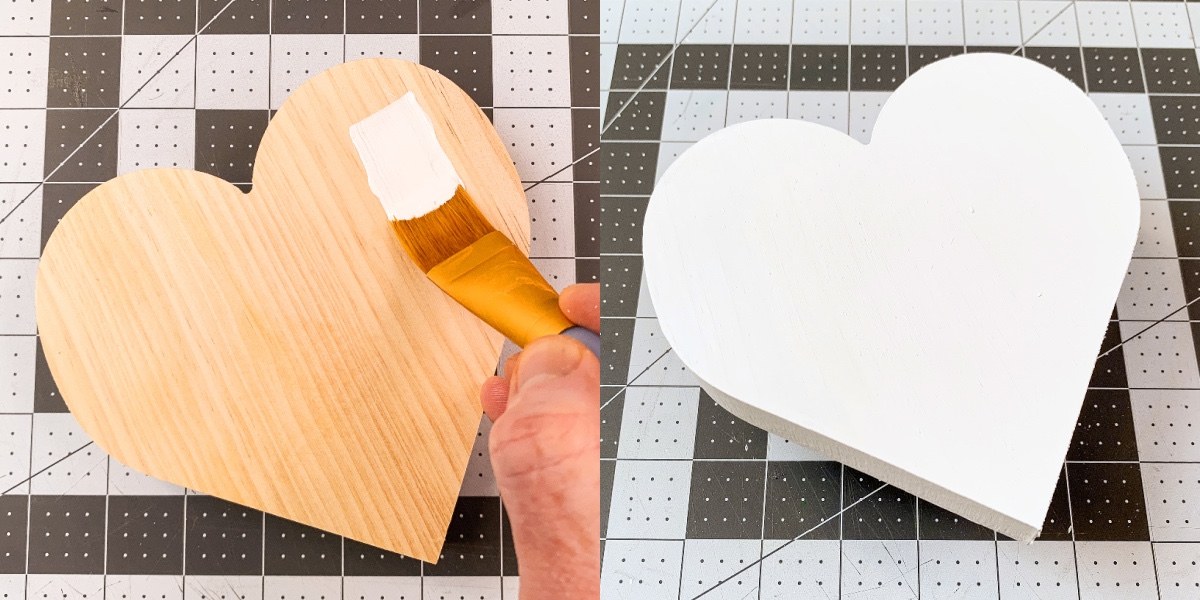
You don’t *have* to paint the frame white, however, it makes the colors of the napkin pop. It’s also easy to do, so I always do it. You can use spray paint, but craft paint is cheaper and just as fast with a roller.
The reason I used Mod Podge Satin to iron down the napkin is because if you use the Sparkle, you’ll see the particles through the napkin (it’s very thin). So use Satin to apply (or Gloss or Matte) and save your Sparkle for just the top.
Get the printable how to for this project below:

Heart Photo Holders
Equipment
- 1 Scissors
Materials
- 3 Chunky wood hearts
- 3 Wood clothespins
- Craft paint white
- Valentine’s themed napkins
- Mod Podge Satin
- Mod Podge Sparkle
- Craft glue
- Parchment paper
Instructions
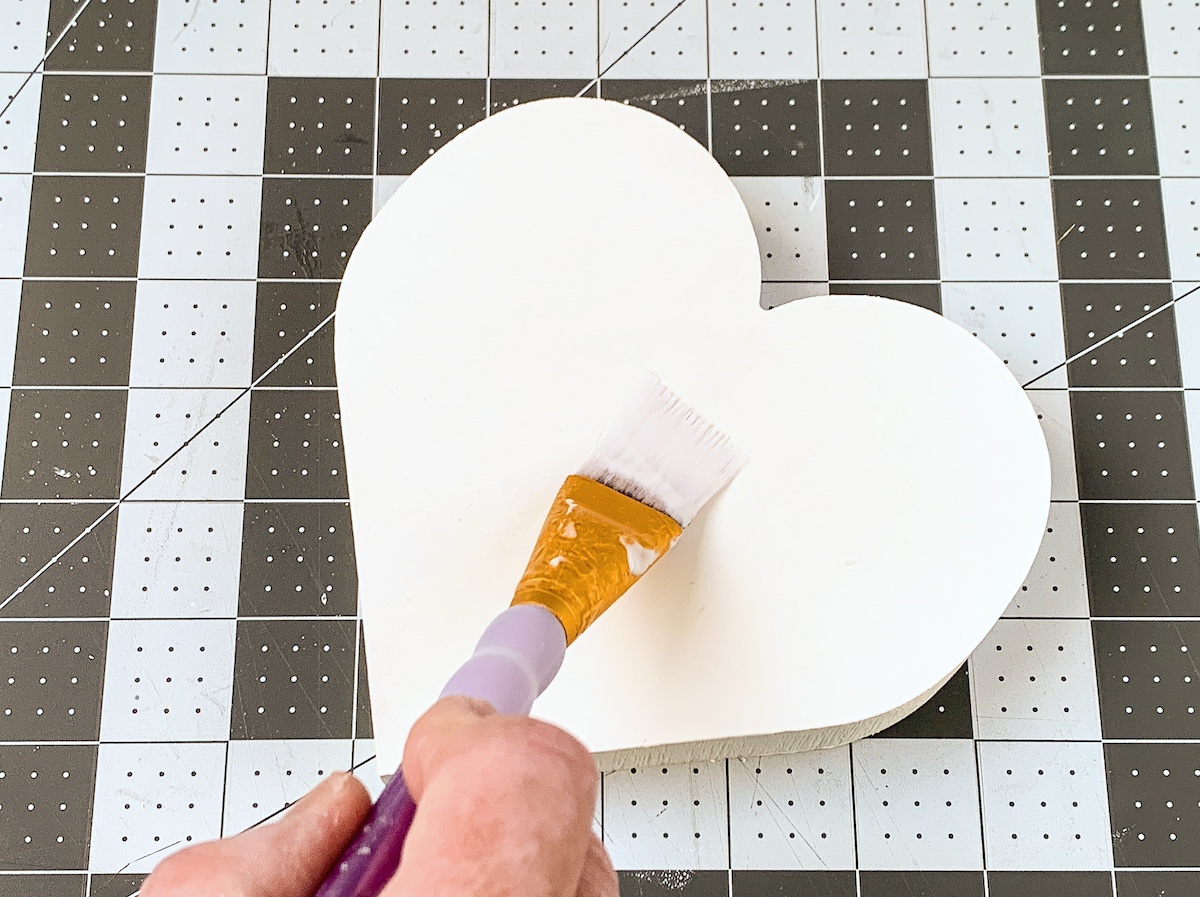
- Paint the hearts and clothespins using white craft paint. Roll on one side, let dry, and flip over. Paint the edges and let dry.
- Apply a coat of Mod Podge to the three hearts; don't do the edges. Let dry 15-20 minutes and repeat.
- While the Mod Podge is drying, separate the napkins from the bottom layers. You can use tape to help. You just want the top layers with the designs.
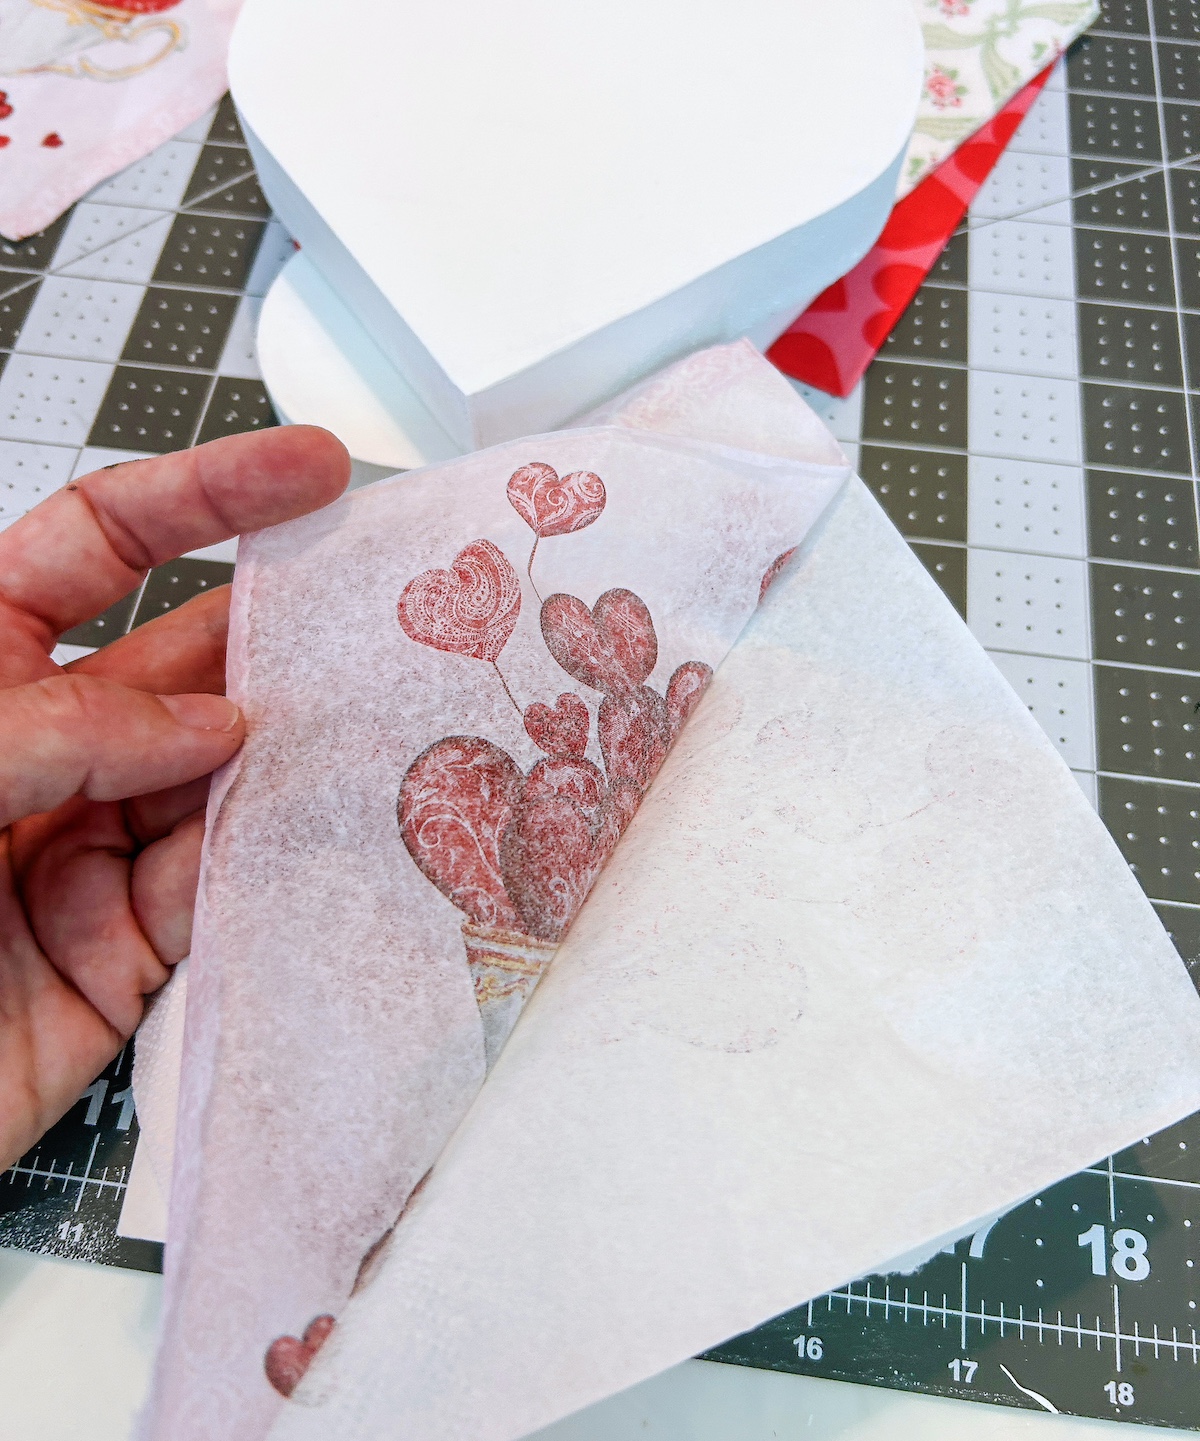
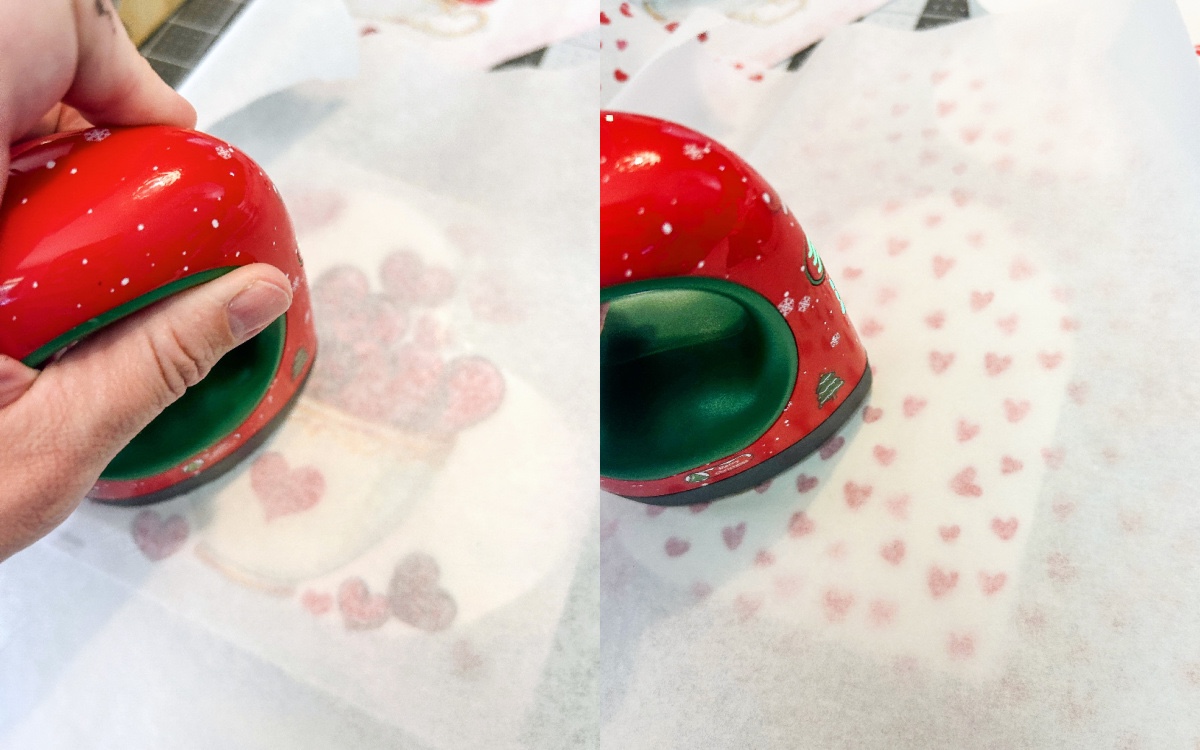
- Place the napkin down onto the arrow. Place a piece of parchment paper on top of the napkin, and run the craft iron across the top several times. While you are doing this, the Mod Podge is melting below the napkin, and the napkin is adhering. Keep going until the napkin is fully adhered, including the edges. Repeat with the other hearts.
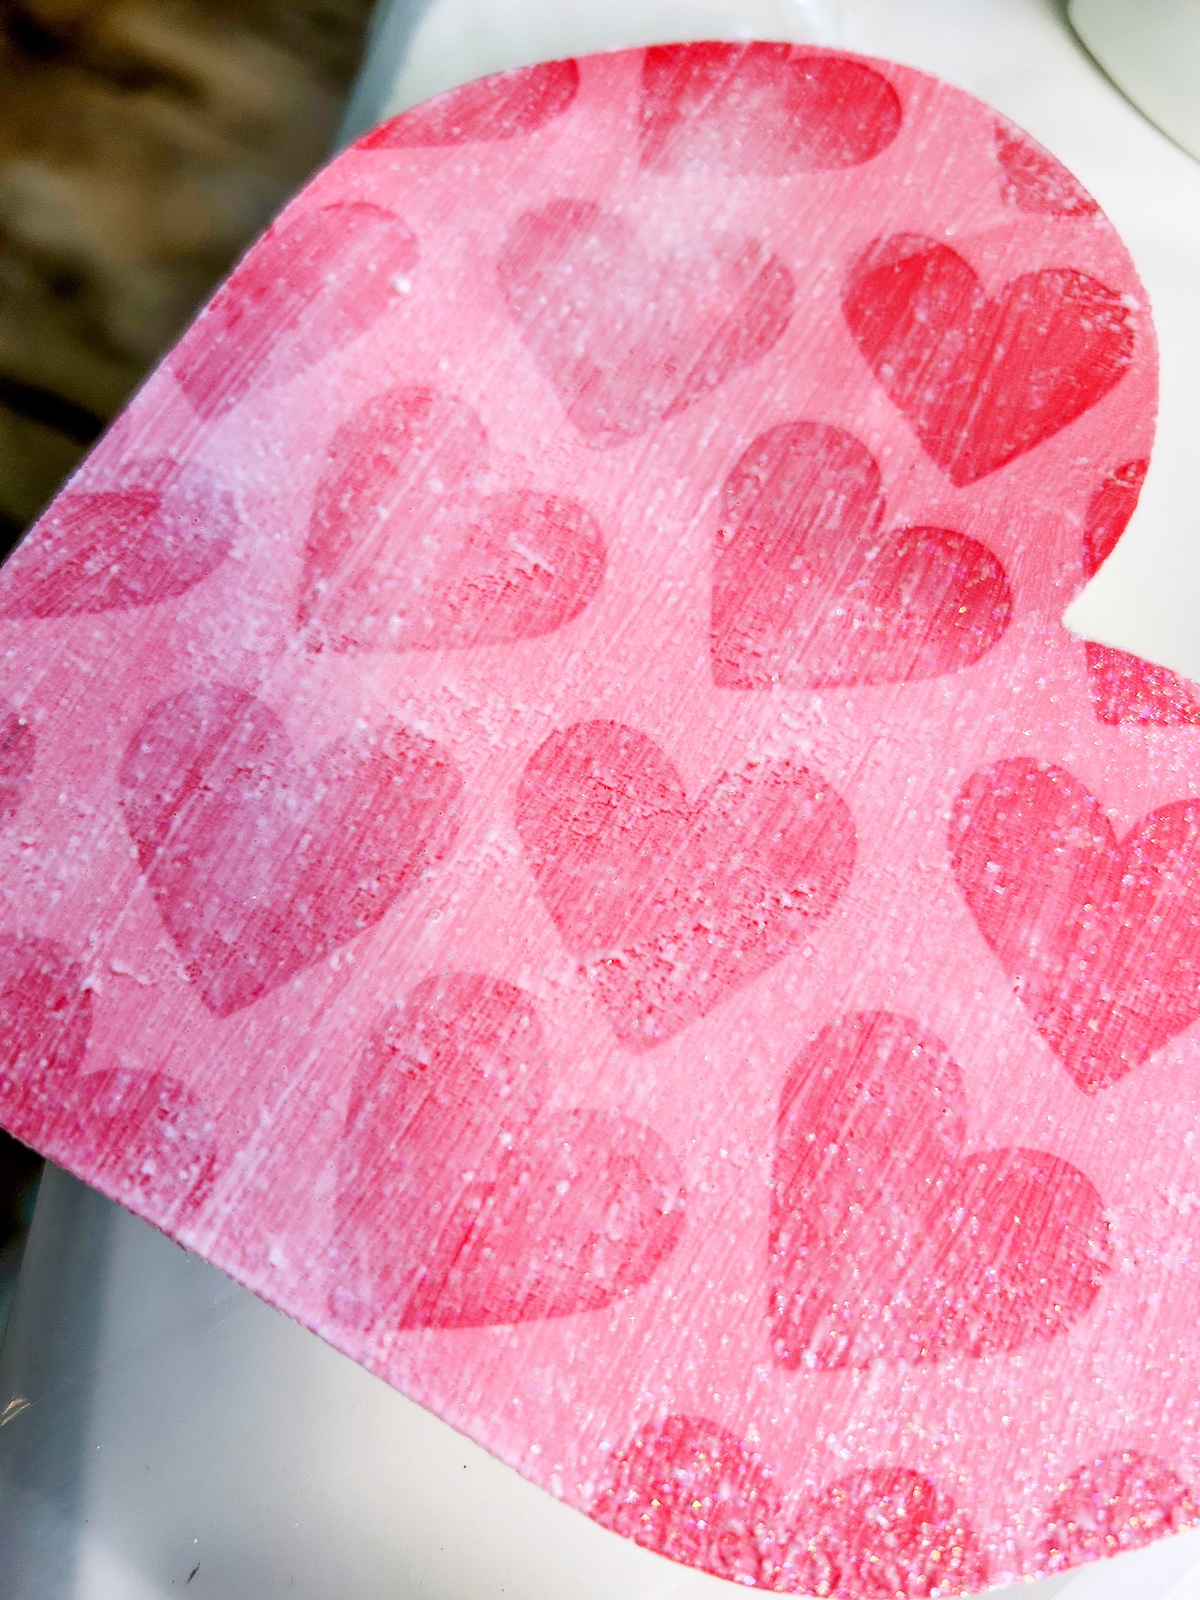
- Let the wood cool after ironing. Use an emery board to gently sand away the excess napkin. Sanding at an angle works very well. Continue until all the extra napkin is removed and set aside.
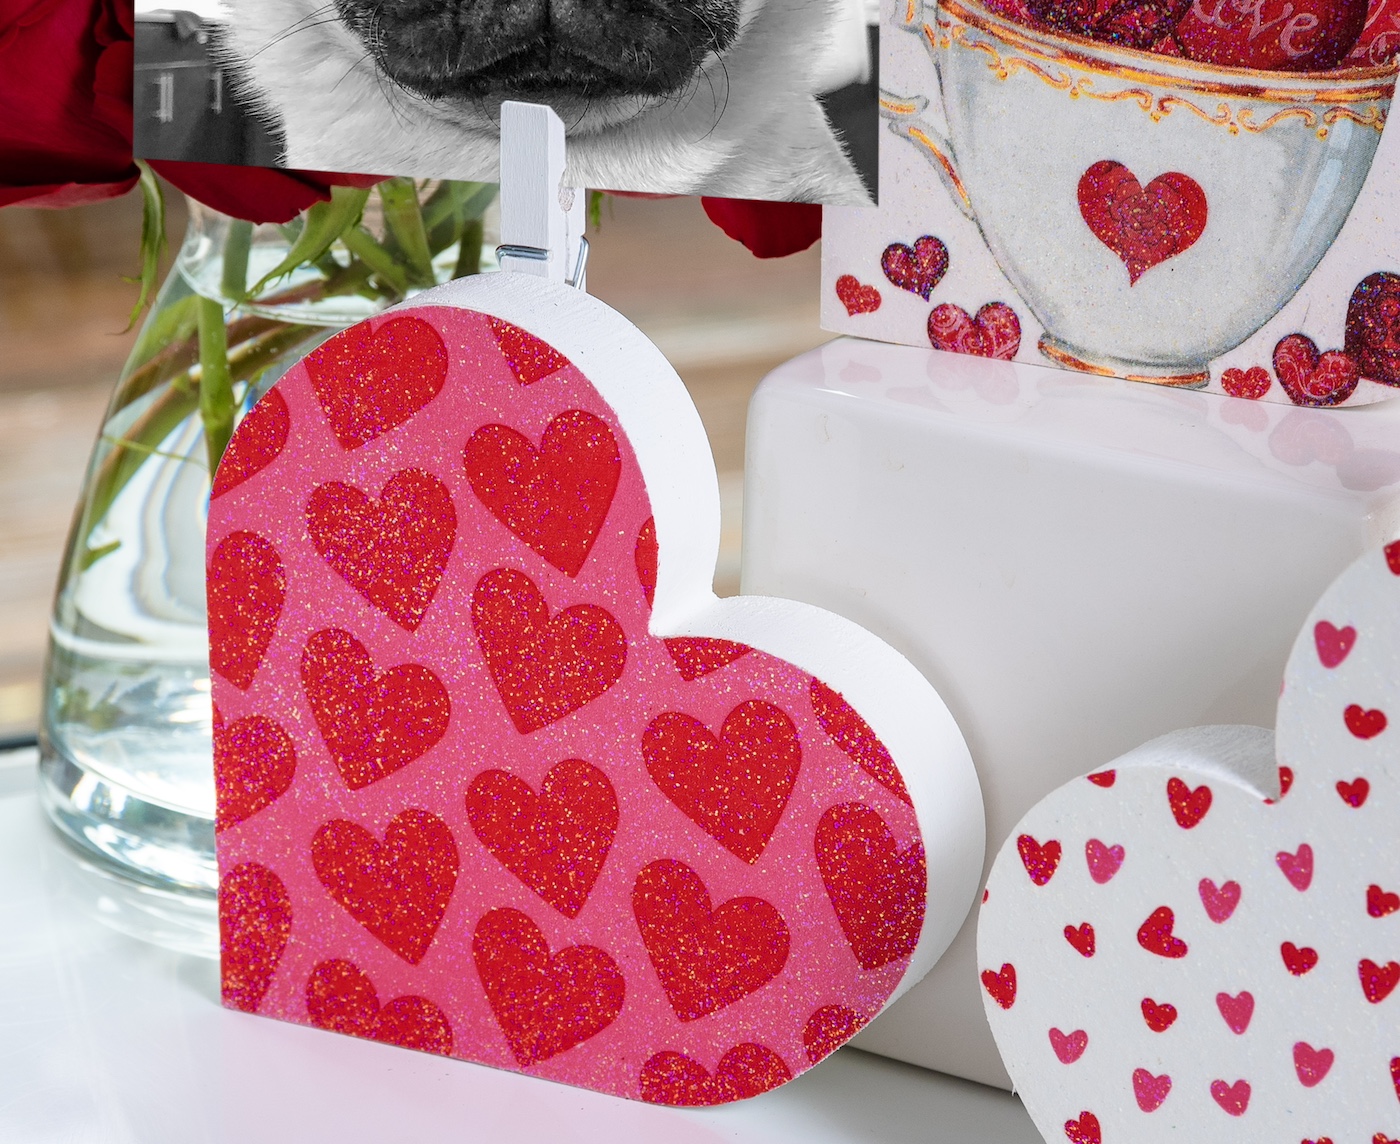
- Coat the tops of all the napkins with Sparkle Mod Podge and let dry. Repeat if you want more glitter.
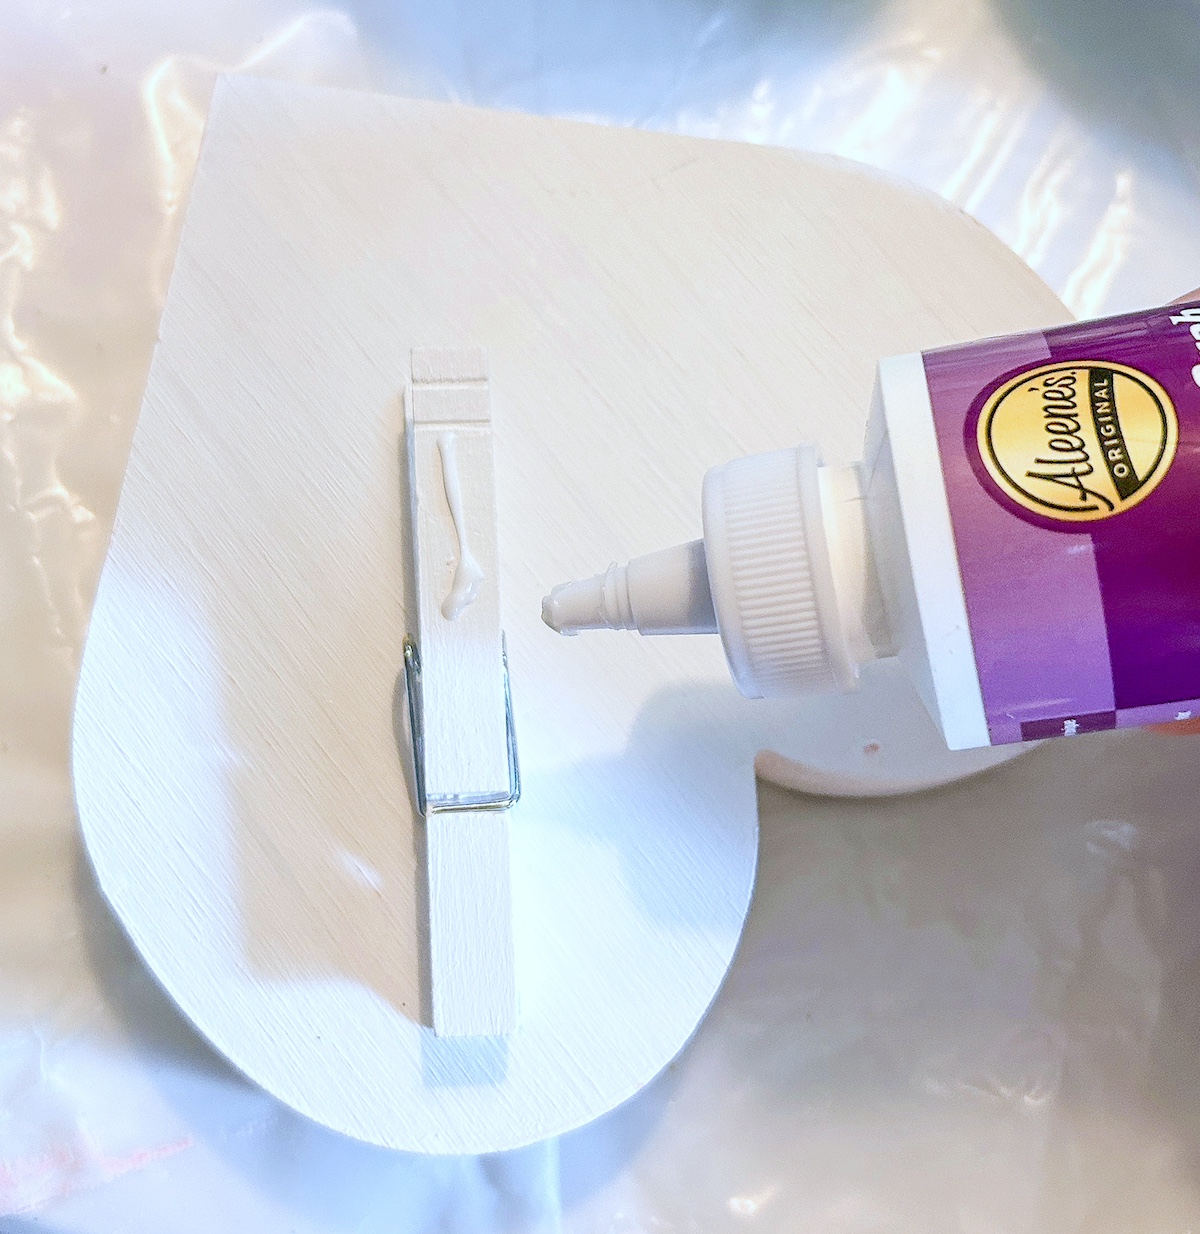
- Place the hearts down on their faces and glue the clothespins so that they stick straight up with the clip part at the top. Let dry completely before displaying.
If you enjoyed this valentine craft, please let me know in the comments! I’d also love for you to check out these other cute ideas:
Be Mine Wood Decor • Button Art • DIY Love Canvas • Heart Card • Heart Frame • I Love You Decor • Love Note Decor • Pug Valentine Box • Tissue Paper Hearts • Wood Pallet Heart