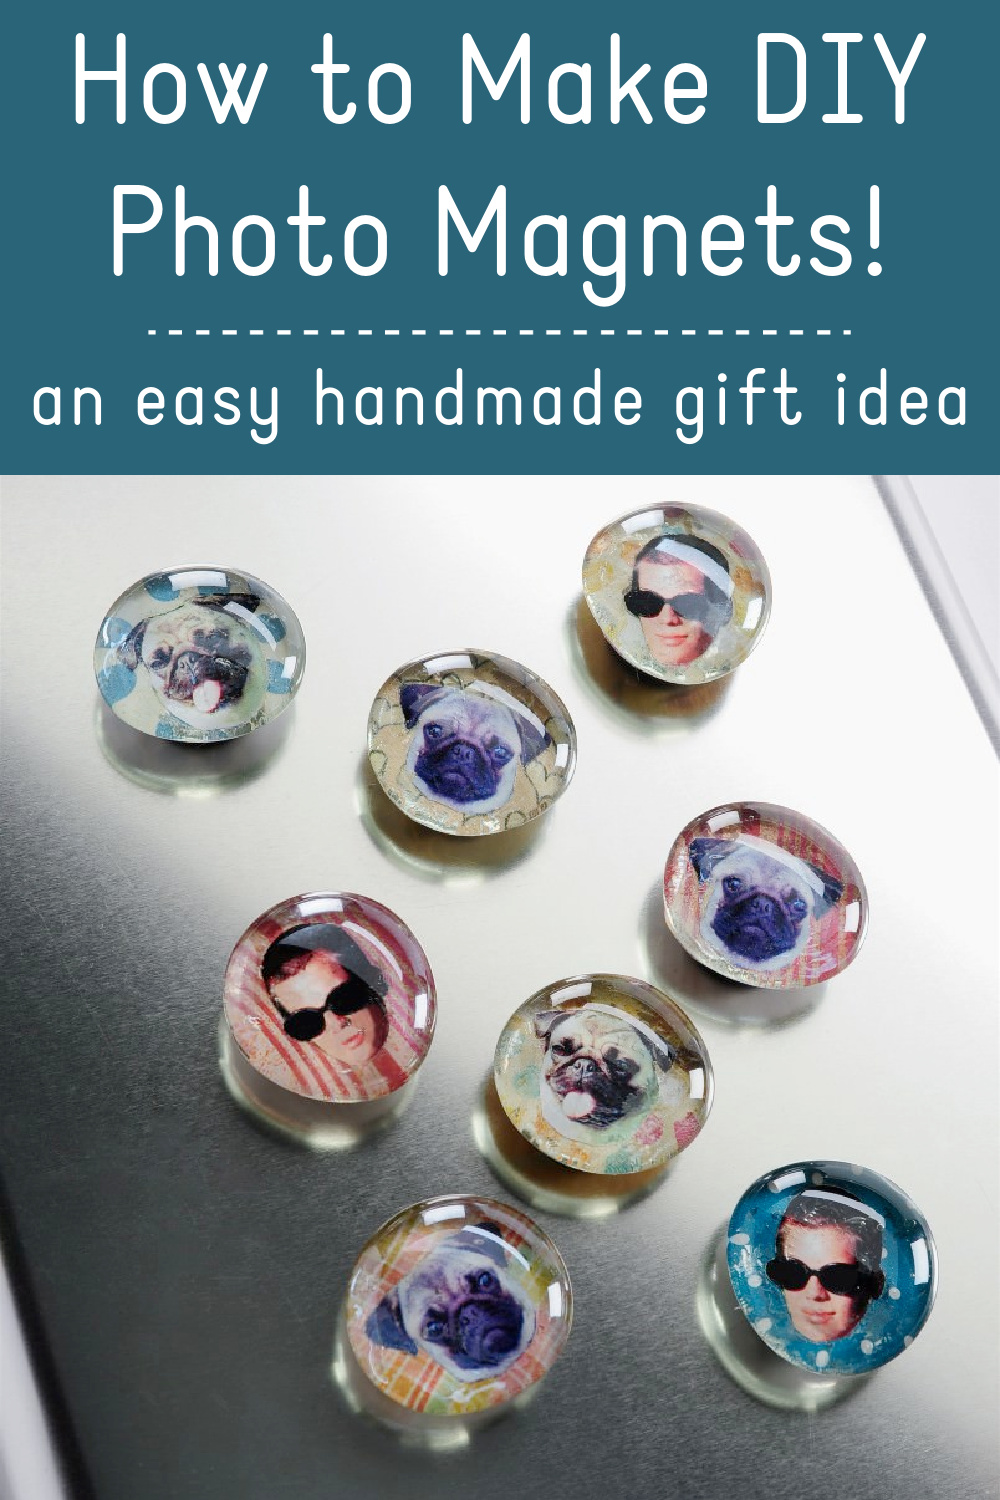
These EASY DIY photo magnets are so simple that even a kid can make them! Give these glass magnets as photo gifts, use them as party favors, or keep the kids busy during summer break.
Skills Required: Beginner. If you can cut out paper with scissors, you can make these photo magnets! The time required to make these is minimal, and you can make a lot of these picture magnets at once. You don’t have to worry about any wrinkles in this project.
Are you ready, my friends, to make the easiest craft project you’ve ever made in your life? Then you’re ready for these DIY picture magnets! I’ve made clothespin magnets and bottlecap magnets, but not the glass marble type.
It took me forever to finally try making DIY glass magnets like these, and I thought it would be the perfect time to try while looking for a quick craft idea. Making fridge magnets is pretty quick and I can’t believe I haven’t tried the glass version before.
The analogy is living in Seattle and never going to the Space Needle. It’s always seemed too obvious, so I’ve never done it.
I hope you will forgive me, because I think the picture I’m about to show you of myself will make up for everything. It’s a picture I used it in this photo craft:
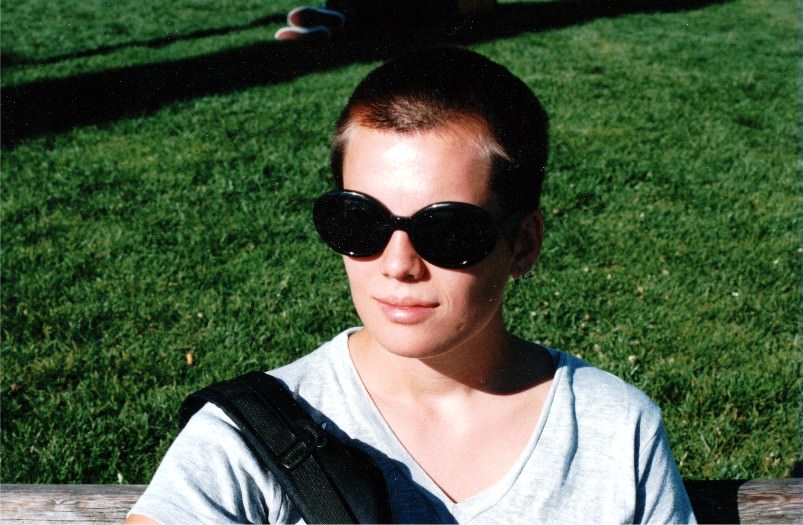
Yep, it’s me. I shaved my head when I was 22 years old. My hair was long, past my shoulders, and I had a boyfriend at that time who didn’t know I shaved my head until he came over to my house and saw it. Yipes (he didn’t mind).
Why did I do it, you ask? After having long hair for my whole (adult) life, I wanted to know what it felt like to have short hair.
I wasn’t sure how to cut it, so I shaved it off – and didn’t fully realize what happened until the hair was on the ground. I guess doing wild stuff is the fun part of being a young girl. But I digress . . .
DIY Photo Magnets
These photo magnets are easy to make (they’re a great craft for teens or adults), but I do have a few tips and commonly asked questions I wanted to address before we jump into the tutorial.
I originally published this tutorial in 2011 and since then, this is what people want to know. You can read this section or continue to scroll for the how-to.
Type of Beads/Marbles
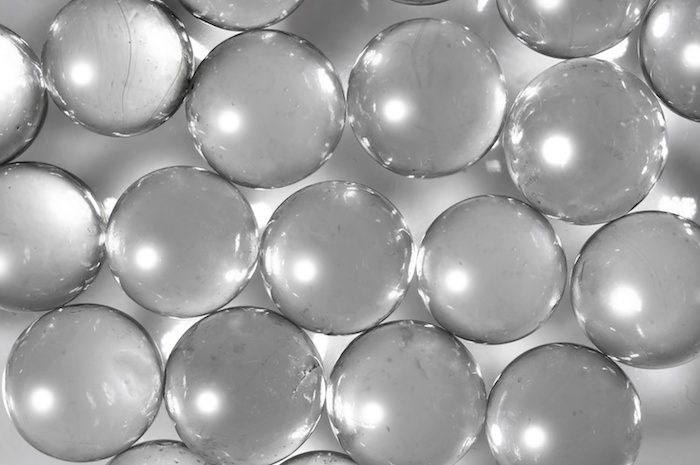
For these picture magnets you’re going to be looking for “flat backed” beads or marbles (they might also be called glass gems or accent pebbles). They are commonly used in floral displays I’ve found.
The flat back is so that you can glue a magnet to the back, so that part is important! Also you want something that you can see through (even if it’s not clear). The marbles you select for your glass bead magnets should be transparent.
Where to Buy Them
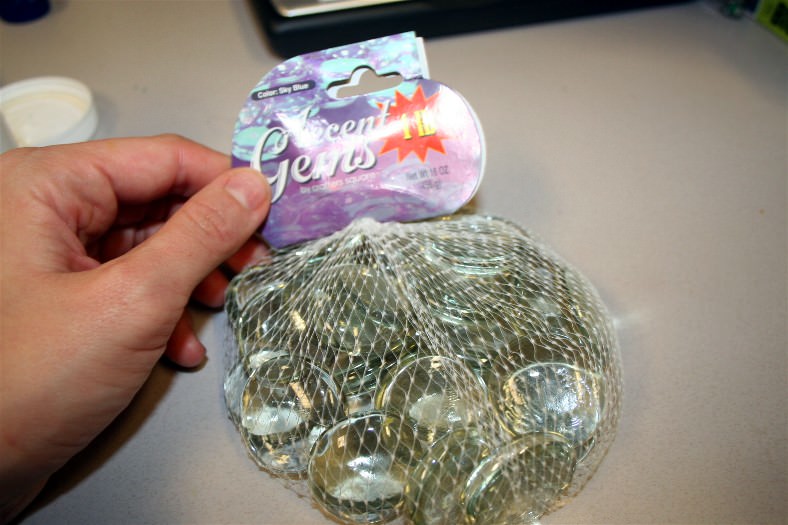
For these picture magnets, I got a 1-lb. bag of glass beads at Dollar Tree. I don’t know if they are always there – but I know that the craft store has them in the floral section.
In addition, I found them on Amazon and also on Wish (which is good if you want a large quantity for favors). MAKE SURE they have flat backs on one side!
Personalization Ideas
You can use photos to personalize your DIY glass magnets, however, I do recommend making laserjet copies of the real photos so you don’t get any bleed.
Photos are cute for handmade gifts or wedding favors. But you don’t *have* to use photos; you can use anything. The idea is to pick a scrap of something (the magnets will end up being about 1″ or so) that has meaning to you or to the recipient.
Paper, Fabric, and More
You can use a variety of materials on the back of the magnets: scrapbook paper, tissue paper, printed patterns (go for laserjet), fabric, wrapping paper, foil, maps, cardstock, rice paper, and more.
You can paint on the back too. For example, you could put some Sparkle Mod Podge on the back of the marble, let dry, and then paint. Your DIY glass magnets can be anything you want them to be!
Mod Podge Formula to Use with Glass Magnets
Because glass is shiny, I pretty much always use Mod Podge Gloss when glass is my surface. It’s just a personal preference, and you can use any formula you like to be honest.
The only formula I wouldn’t recommend using is Dimensional Magic. Dimensional Magic is meant to provide a 3-D effect on top of surfaces, not to adhere. Stick with Gloss, Matte, or Satin (but other formulas work too).
Are you ready to see how the glass magnets were made?? Keep reading!
Gather These Supplies
- Computer and printer/scanner
- Photos to scan
- Mod Podge Gloss
- Scrapbook paper scraps
- Glass beads – my 1 lb. bag is from Dollar Tree
- Magnets
- Hot glue gun
- Pencil or pen
- Paintbrush
I wanted to commemorate the shaved head times as well as my pug Roxie, both when she was young and now. Here are the pictures I chose:
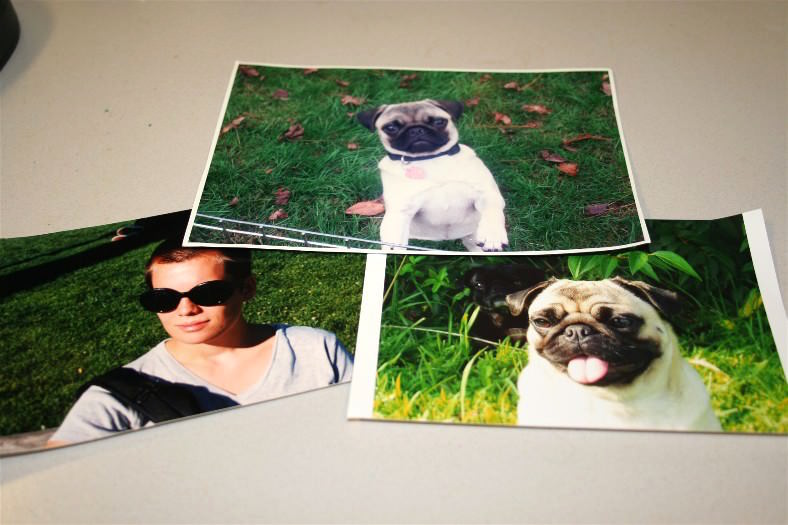
If you use regular photos, scan them in and print them out (preferably on laserjet). I will say that if you have an HP printer, it uses a dry ink, so you’re probably safe. You can also let the print outs dry overnight and then seal them with hair spray both sides. This prevents ink from bleeding.
Use photo software (like PicMonkey) to crop out part of the photo (a simple circle shaped crop), then I printed a few copies in different sizes to see what would work for my glass marbles.
You can cut out just the head shapes – I wanted floating heads on the back of the glass magnets, because that is more funny. Set the heads aside.
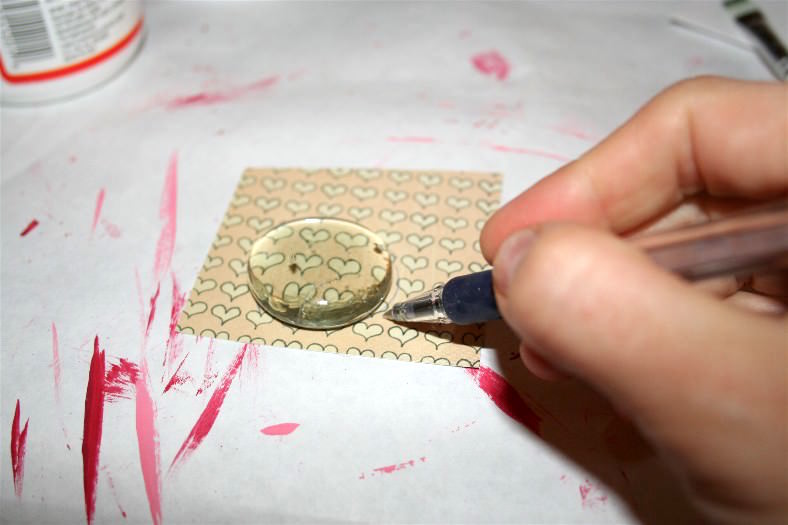
The glass marbles are not completely round, so trace them onto your scrapbook paper pieces and then cut out the shapes just inside the lines.
This is a great scrap buster project, by the way – it takes just a small amount of excess paper to make them!
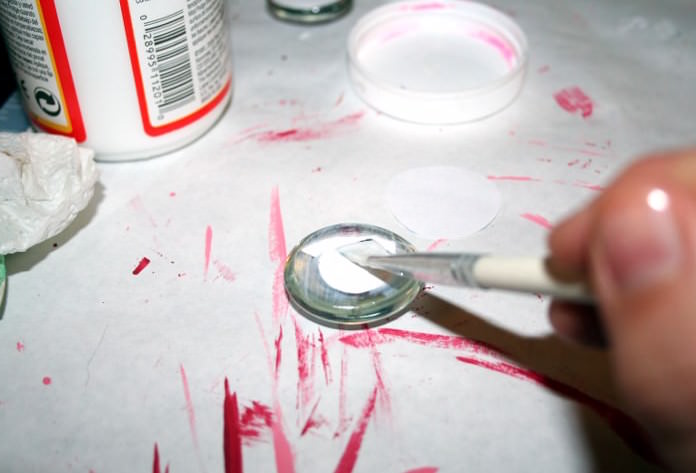
Use your Mod Podge to adhere the face (right side down on the flat side of the marble); use a thin layer or it’s never going to dry. Smooth it with your fingers and allow to dry for 15 – 20 minutes.
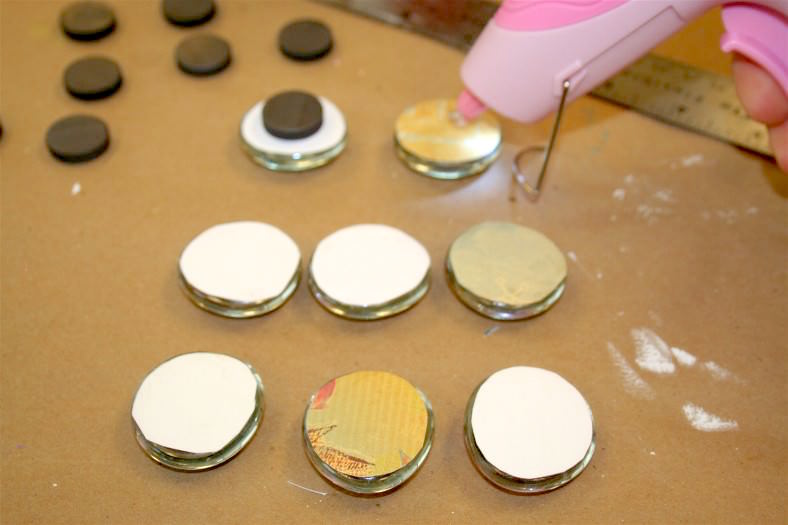
Adhere the scrapbook paper (right side down) on to the marble, allow to dry overnight and then hot glue to the magnets to the back. Don’t you love my cordless hot glue gun with a headlight?
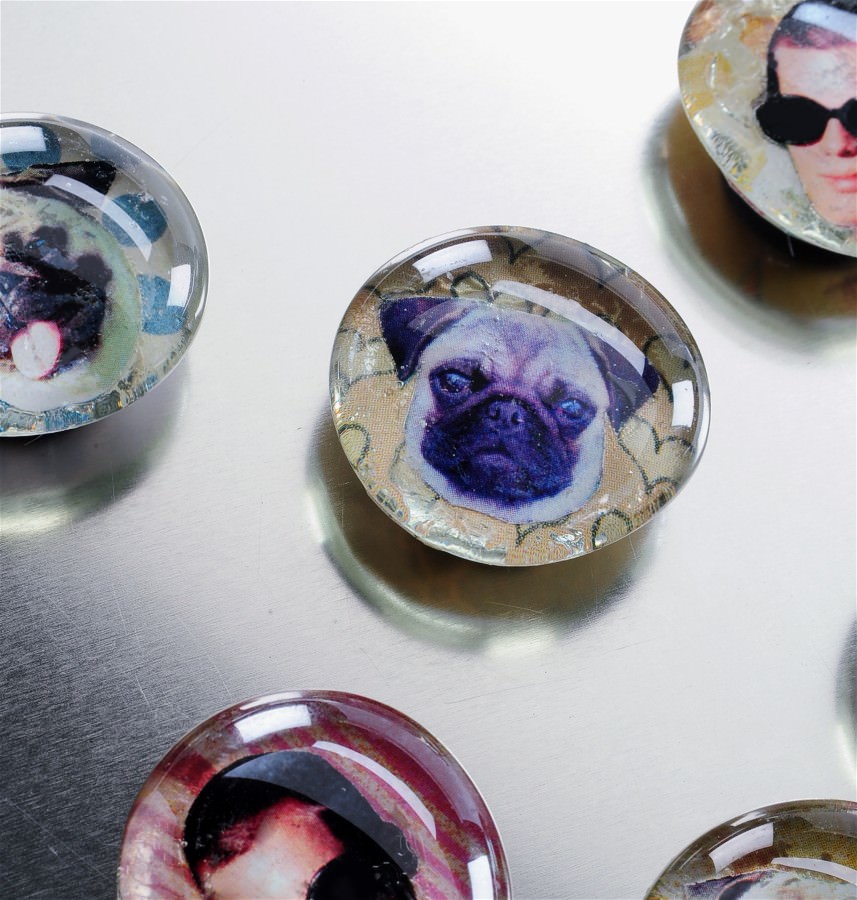
Here are the finished custom photo magnets. They make such a great end of summer craft to capture summer memories or fun photos. What about a teacher gift idea or back to school? The possibilities are endless.
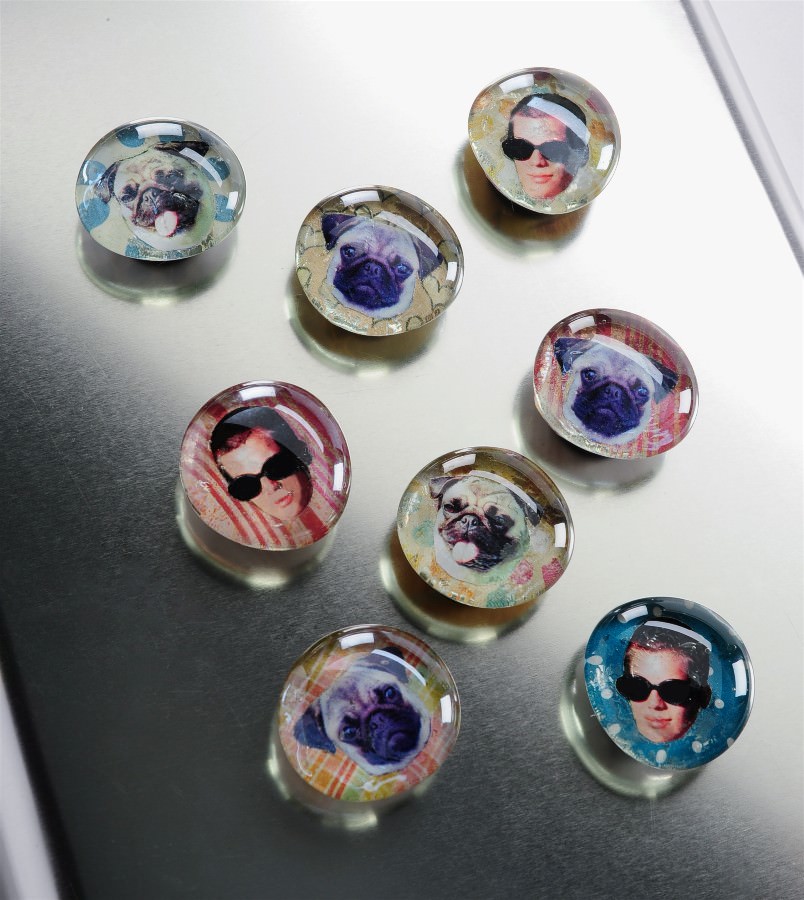
I’d love to see you try these DIY picture magnets and let me know how they turn out in the comments!
Photo Magnets
Equipment
- Computer and printer/scanner
- Pen or pencil
Materials
- Photos to scan
- Mod Podge Gloss
- Scrapbook paper scraps
- 12 Flat glass beads also called marbles
- Magnets
Video
Instructions
- Use photo editing software to size your images to fit your glass marbles; print out using a laserjet or dry ink printer.
- Cut out your photo shapes and set aside.
- The glass marbles are not completely round, so trace them onto your scrapbook paper pieces and then cut out the shapes just inside the lines.
- Use Mod Podge to adhere the face (right side down on the marble). Smooth and allow to dry for 15 – 20 minutes.
- Adhere the scrapbook paper (right side down) on to the marble, allow to dry overnight.
- Hot glue to the magnets to the back to finish.
Want some additional easy budget project ideas? Check out these other posts:




I love how the little magnets came out.. great job…love what you can do with the scanner. Thanks for sharing
That scanner is great … so want one.
oh I need to do this!! ADORABLE!
A 1″ wholepuncher is perfect for those gems! That’s what I use for mine!
I’ve been wanting to try my hand at making these glass magnets. It looks so easy.
I LOVE Roxie!! We have a black pug, Lucy…she is such a doll baby!! (Her picture is hanging out at the top of my blog at the moment while we are doing some work on it…it’s really out of place. LOL)
I love this. Personalized magnets. But where do you find the magnets to glue to the back? Thanks
Funny you should mention cutting all your hair off. I did that several years ago. And have kept it fairly short since then. And again with this last hair cut, my hair is between 1/8″ and an inch long.. I really prefer it this way except for winter and I know what you mean about the looks. I am 58. lol. I recently did make magnets like the ones you showed us. I may have used too much Mod Podge though. I first put a layer of it on the glass stone and then put the picture on the stone. Then I proceeded to use 6 coats of Mod Podge over the paper I was using. I used larger glass stones than what you did and I used Scrap book paper that had old world maps on it. I made them for my son. He pinned them onto one of his Pinterest boards. So I decided to make them for him for his Birthday in Sept. After seeing your tutorial, I know I didn’t goof up too badly. I made mine with no instructions….just by looking at the picture.
That is awesome that you have such short hair! I love it! And I’m glad you were able to use the picture to make your magnets. I’m glad he liked them – sounds like you had a great time!
Ha ha! You sound like me. I dyed my blonde hair black for a school play in high school, but I secretly just wanted to dye my hair black.
Isn’t it amazing how clear the scans come out on the Flip-Pal? Have you used the software on the SD card to enhance, size, etc. Thanks for joining me on the blog hop….love your project.
Kathy Peterson
I’ve done these with e600…..does the modge podge hold the picture on even after pulling the marble to move the magnet around on your board? I did some with glue that was too weak and when i went to pull the magnet off the fridge…it pulled the marble off the picture.
Great call Yvonne! That’s the perfect suggestion.
Hey! I shaved my head too! Well, because I didn’t want the cancer to take ti away..but it gave me a whole new perspective on “hair”!
Glad to have mine back..and love the puggie too!
that scanner should be renamed to something more awesome… 🙂
Piggie is a cutie! Love this easy peasy project. But I think you shoud give a way one of those rocking cordless glue guns! LOL Portable hot glue I Love IT!
Using the punch is the easiest way! How cool would it be to make some for a grandparent for Valentines. Or letters/numbers for your grandchild…
What a great idea! You could do a whole family tree to put on the fridge for your kids to become acquainted with!
Thanks for blogging about the scanner. I bought one and it is great. Light weight and easy to use. I haven’t used it for any craft projects yet, but have scanned some old photos.
Totally AWESOME! I hope one day I will have a Flip Pal!
OMG, looking through my stash this is awesome and your Roxie is so cute!
I’ll be keeping my fingers crossed on the Flip-Pal scanner, it’s on my wish list though.
My next project this weekend before this is to Mod Podge dress up my cane. It’s been here and there and needs some sprucing up!
🙂 Lori m
I love that little Flip Pal! And, I want to see the before, before picure, too–the one with the long hair! 😉
Thanks everyone!
Debbie, these are pretty strong – it’s a balance of the magnets not being to strong and the hot glue. It seems to work okay for now. But E6000 is AWESOME! That’s a great idea.
Judy G – the magnets are from Michaels. You can probably get them at nearly any craft store.
xo to all
What a fun project!
Paula
I really love your blog! It has inspired me! I’ve started my own blog and linked you as one of my inspirations. Visit me at http://corduroydreams.blogspot.com/
PERFECT gift for my MIL; she loves pictures, loves pictures of the children (we live in MT and she in NY *sad face*) and she totally Mod Podged her last fridge with photos – she has a new fridge that needs pics that aren’t glued on 😀
Thanks, Amy
PS Love the Flip!!
Those magnets are cute.I think I will make a few. Love the scanner.
Love the glass magnets! I have all of the supplies to make them—for the past year—and just haven’t done it yet…lol Ah well, best of intentions. My wild and crazy youth had me coloring my hair black and chopping it off (kind of spiky) so I could look like Joan Jett. Mom got real mad at me for doing it but my Dad laughed his butt off. It was really cool for the first couple of days but, after that, I hated it and couldn’t wait for my hair to grow out. I don’t really hear too much of Joan Jett’s music anymore but, whenever I do, it always makes me laugh.
These magnets are so cute useful the flip pal scanner would be great
for this and scrapbooking projects.
These suckers are so easy to make assembly line-style. We made them one year for teacher gifts and they were a big hit!
Thanks for more great inspiration EJ
Love the magnets – have been wanting to make some myself.Thanks for the tute!!
These little magnets rock! I can’t wait to see the rest of the projects this week!
what a cool project.. bought some magnets at michaels so i could make some, but the magnets totally suck. they can’t even hold themselves onto the fridge! so disappointed. going to look for better magnets though. i’m determined to make these!
c’est une excellente idée!!!!
bravo .
merci
Au plaisir de découvrir vos créations.
http://WWW.chantal-bonnevay.book.fr
I know this is an older post, but I have a question re: this project –
How do you get the mod podge to not show even after drying? I smoothed the mod podge out, I did it all in minimal amounts, et cetera. If you need I can e-mail you a pic of a magnet to show you specifically what I mean.
It is very frustrating because I did at least 10 magnets and all look bad because of the mod podge drying issue. 🙁
Thanks for the great step by step directions with pics. 🙂 Thinking of doing this project with my third grade students for Mother’s Day. I take lots of pics throughout the year so they have plenty to choose from. Looking for a cute poem to go with if anyone has any ideas.
Ok, I LOVE this idea. We are a poor family of 5 and I am going to make a set of magnets to give as gifts. BUT, the glass beads I got are not ultra clear! Only a handful out of the bag which was over $2 will actually work for a clear picture. Otherwise I have all the supplies and this is my very first project using Modge Podge. We do not have a scanner so I ordered wallet sized prints.
One question. Do you put mod podge on the bead then the photo, then more mp, or just mp over the back of the photo?
Hi there! I just put a little on the bead and smoothed the picture onto it. Do a test one first just to make sure you have the hang of it! Also I got my bag of beads at the dollar store, so check there if you need to. I got A LOT for $1 and they were all good to MP.
Just saw this post. Really cute. I was even thinking that if you wanted to use words or a standard image for gifts, you could design or scan a background and use imaging software to make the pictures and print, then just trace one time the shape of the bead onto the picture, cut out once, mp once, then hot glue on the magnet. (Using pictures and snapping to the picture can allow that to be cut and pasted onto a background design, also.) That may require more ink and some thought for keeping the backgrounds different, but would be another approach to try.
Fun idea for an inexpensive gift exchange. Thanks for posting.
So COOL!!! More ideas to go into those baskets for Christmas – yep – the people in my family will be getting handmade things for Christmas…A trip to the Dollar Store is in order…LOL!!!
Thanks for sharing!!! :0)
Wow! What a cool idea. I too will be making homemade gifts for my g-friends of 45 years (!) For Christmas. Needless to say I have collected tons of pix of us from our also crazy, damn the establishment days of youth. We’re all stroking 60 now, and it will be a blast to give them some of these fantastic magnets. And who doesn’t love magnets. I am also a dollar store stalker, picking up items here and there. I’ll be filling up really beautiful boxes from Michael’s (that’s also part of the gift) with stuff I’ll be making for them. I find these gifts more personal than store bought gifts, and after 45 years of gift sharing, one runs out of ideas. Who needs another pair of pajama’s or a gift card! No, really, they love the things I make and love my cards even more. Love your blog. Still crazy after all these years! 😉
Quick question, I want to make these for my wedding favors. When you reprinted the pictures of your head and of your puggy, did you just use an ink jet? Or did you use special paper or special printing? I’m hoping to make Beatles ones, and will need to print off my own photos. Thanks! Fantastic idea 🙂
Loved this until I tried it. Everything was simply enough to follow but the Mod Podge left awful gluey streaks over the faces and yes, I did a very thin layer. Very bummed this looked like a lot of fun, prob user error : (
Hi there! I’d have to know what you did and what type of paper you used to know what the issue was – if you used regular photos or anything with a coating, the Mod Podge won’t dry correctly.
I make all kinds of magnets this way but had never done pictures. For mothers day I wanted to do pictures of my students for their moms. I took great pictures of them and had them developed. Big woops!! The photo paper refused to dry. I’ll know better next time….
Hello, Where did you get your glass beads from. I bought some from Michaels, They looked great because they were slightly larger than the little ones. Unfortunately, they are very rough on the flat part and it obscures the image when looked at directly through the glass. The pictures are most visible from an angle! What a bummer. I’m looking to try again, and your glass beads look nice and clear.
Thanks for your help!
Hi Moe! I got mine at the Dollar Tree a few years ago. If you can’t find them, I’d search on Etsy or just Google “flat back glass marbles.”
If you use a different single flower for each magnet with paper that looks like grass, it looks like a flower garden. OR another thing I did was, a single flower for each one with solid colored paper. I arranged them into what looks like a bouquet and made a big bow with a magnet and stuck it underneath. These are great fun!
I love this project! When the kids were little we used to make them they are so much fun!
I just recently ran across some in my crafting room and thought I’d make some more!
Thanks for adding this to your list of quarantine projects!
I think I’ll put some butterflies on mine!
My 13 year old granddaughter is going to love making these! Thanks for sharing!!!
Did you use the Mod Podge as well to adhere the scrapbook paper to the glass? Just want to make sure I do it right. :o)
Yes I did!
Excellent. Thank you
I have bought these, but they weren’t flat and they made the picture off. I thought about sanding them. What do you think? When looking for these make sure they are flat.