Learn how to make DIY clothespin magnets the easy way! This is a great craft for kids or adults, and no crafting experience is needed.
Skills Required: None. Even if you’ve never made anything before, you’ll be able to accomplish this project. In fact, it’s perfect for kids or adults. You’ll be using Mod Podge and glitter, which is very easy.

Anyone else a magnet hoarder? No? Just me, Holly. The side of my fridge is covered with handmade magnets holding up photos, cards, my niece’s drawings, etc.
It’s where I display random items that don’t work in frames, but some of my magnets are so bulky that they cover up the items I’m hanging, so instead I made these DIY glittery clothespin magnets to hold up my photos and cards more easily!
Clothespins are useful to have around for a million reasons, and now you can add this use to the list as well. Use Mod Podge and glitter to decorate them, and glue a small but heavy-duty magnet to the back to create magnets that clip your papers in place. They’re as functional as they are cute!
This is a great craft idea for adults as well as kids – if your littles don’t have anything to do, you can give this to them as a back to school craft. But trust me, adults will enjoy making these too. Get the tutorial for this easy clothespin craft below.
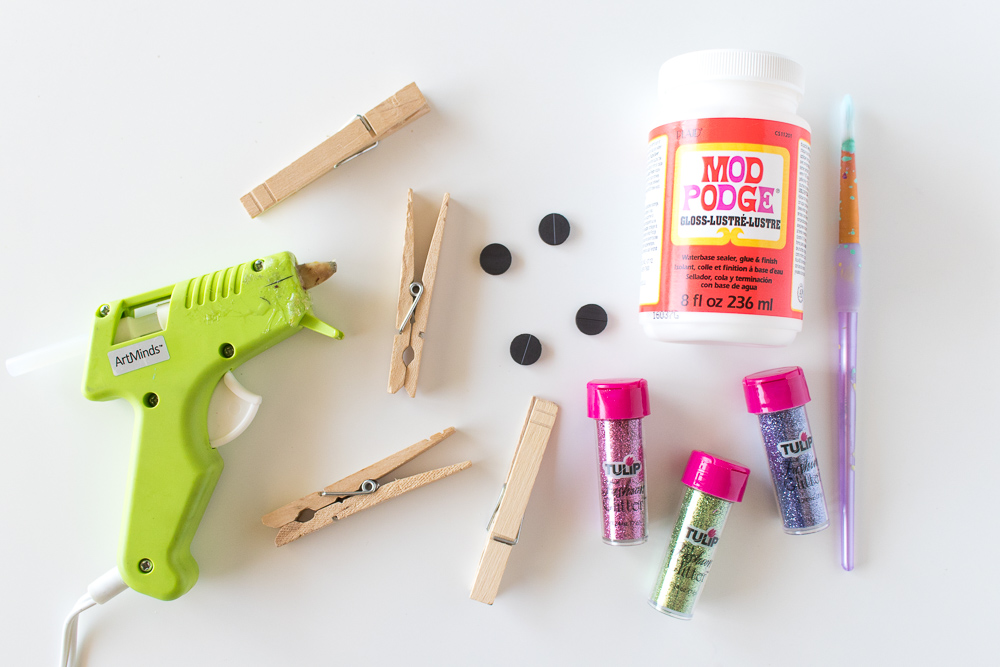
Gather These Supplies
- Clothespins
- Mod Podge Gloss
- Glitter
- Paint brush
- Small magnets
- Hot glue gun
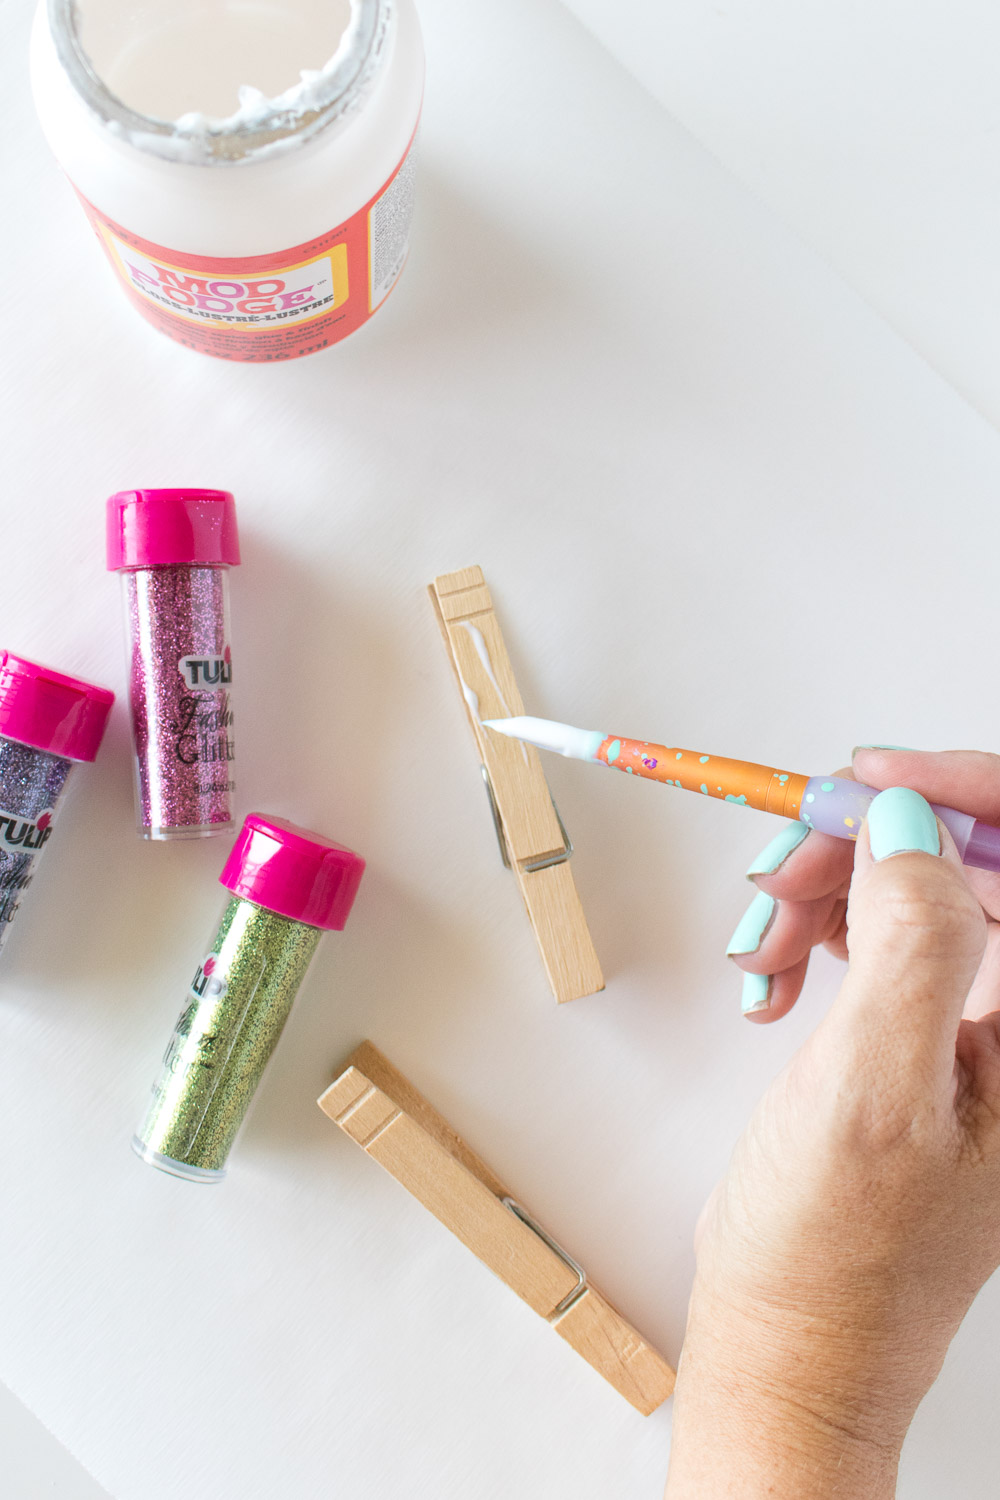
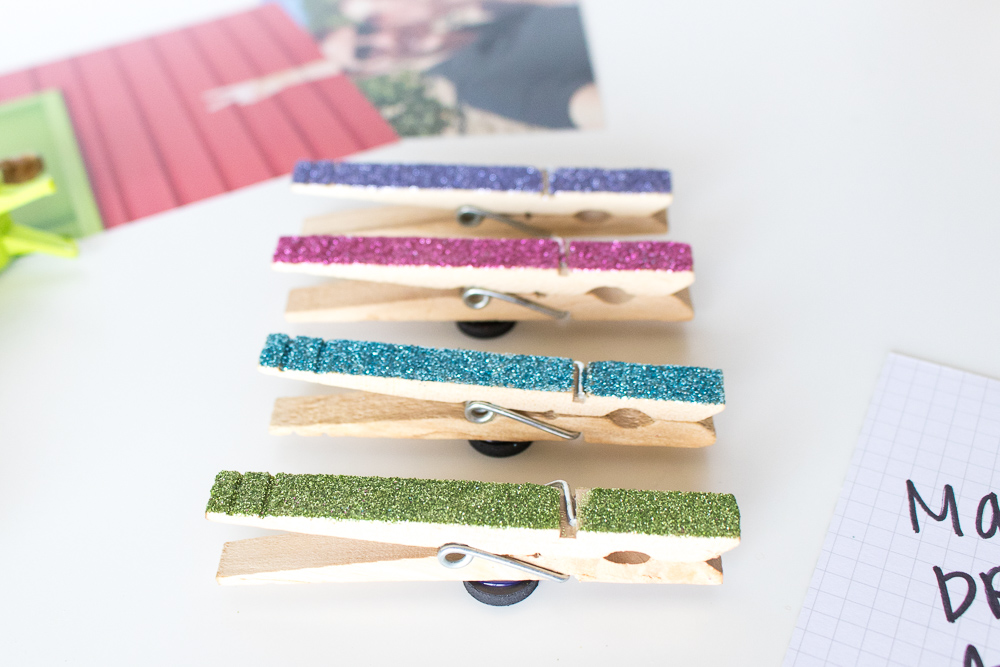
Step 1: Paint one side of each clothespin with a thin layer of Mod Podge.
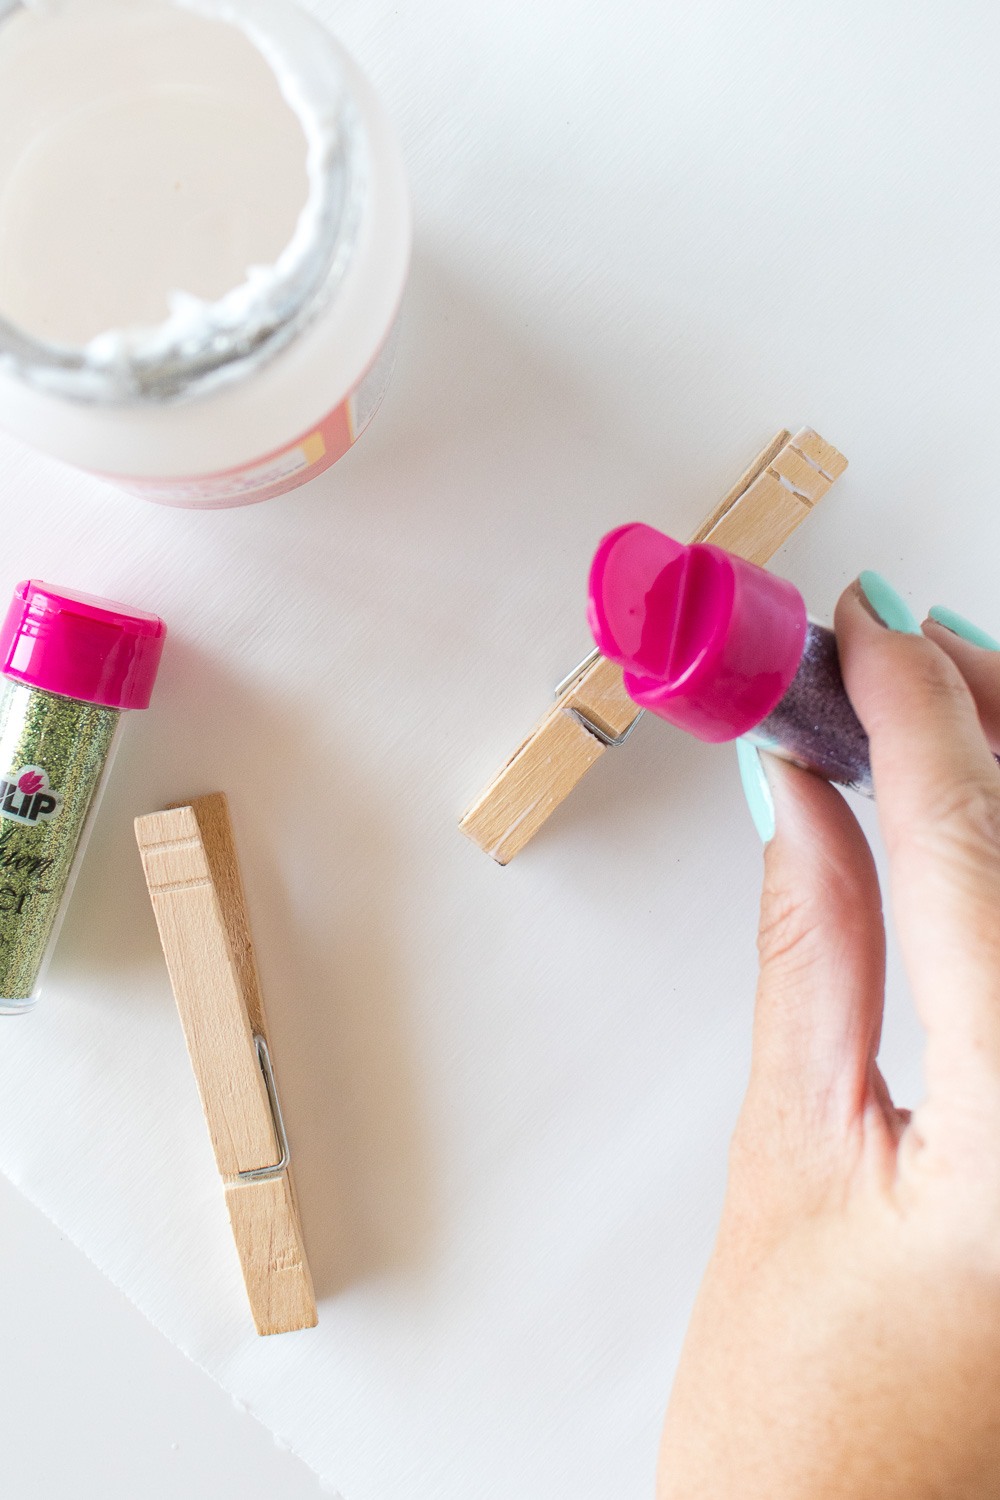
Step 2: Sprinkle the Mod Podge with glitter and then tap off excess glitter. Set aside to dry. See if there are any bare spots and repeat. Be careful not to build up too much Mod Podge and glitter, as it will clump.
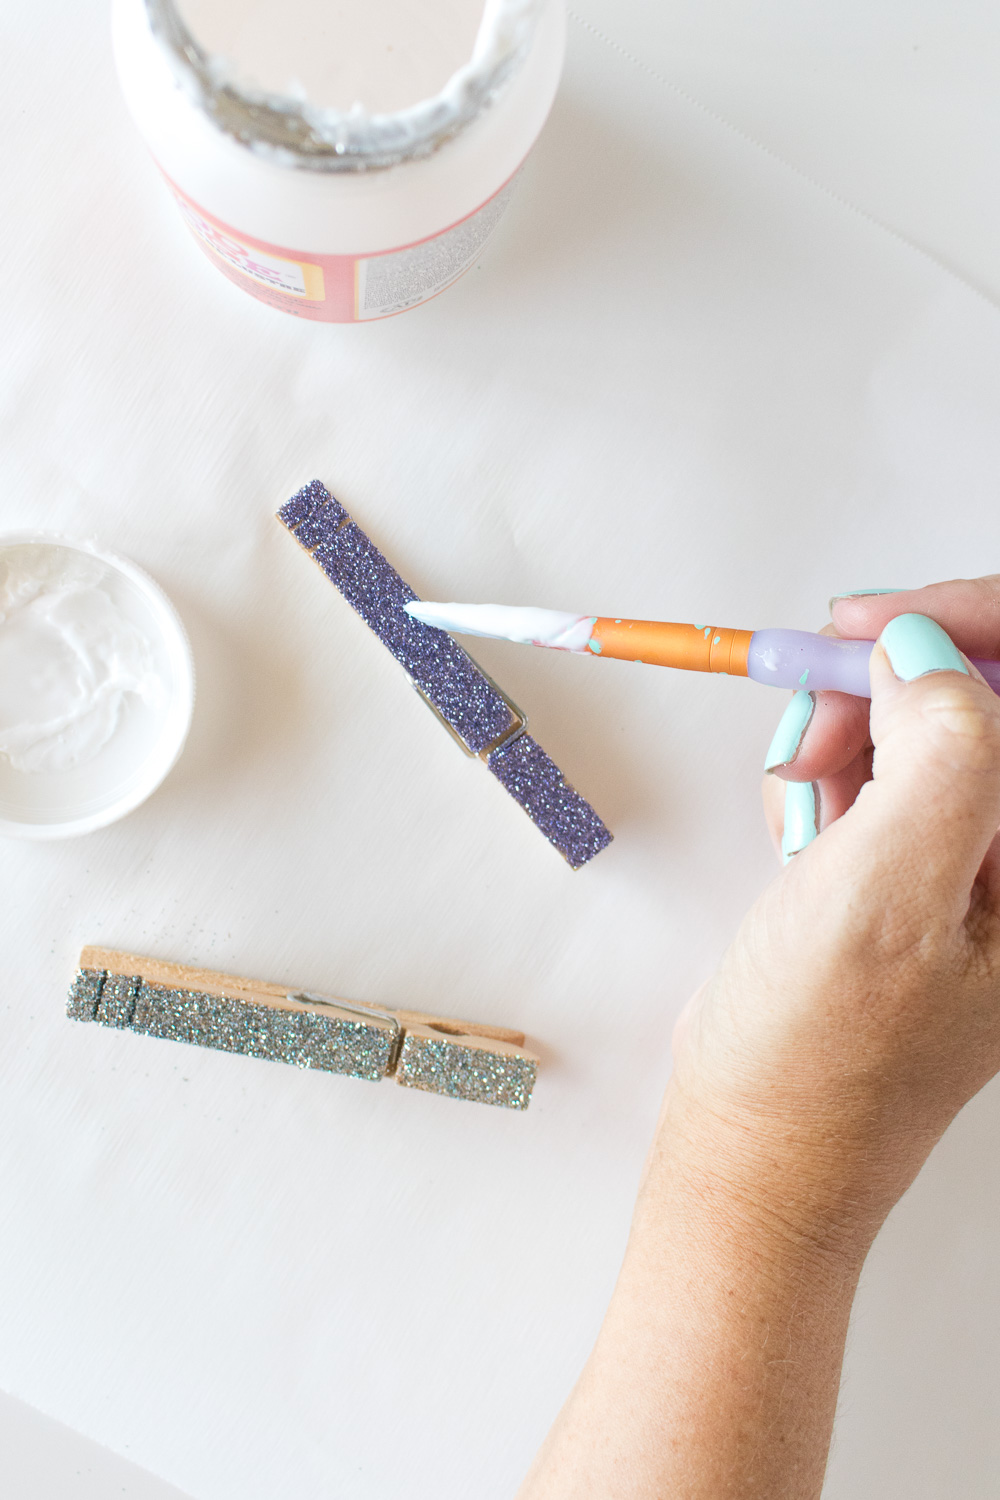
Step 3: Once it has dried, apply one more layer of Mod Podge to seal the glitter.
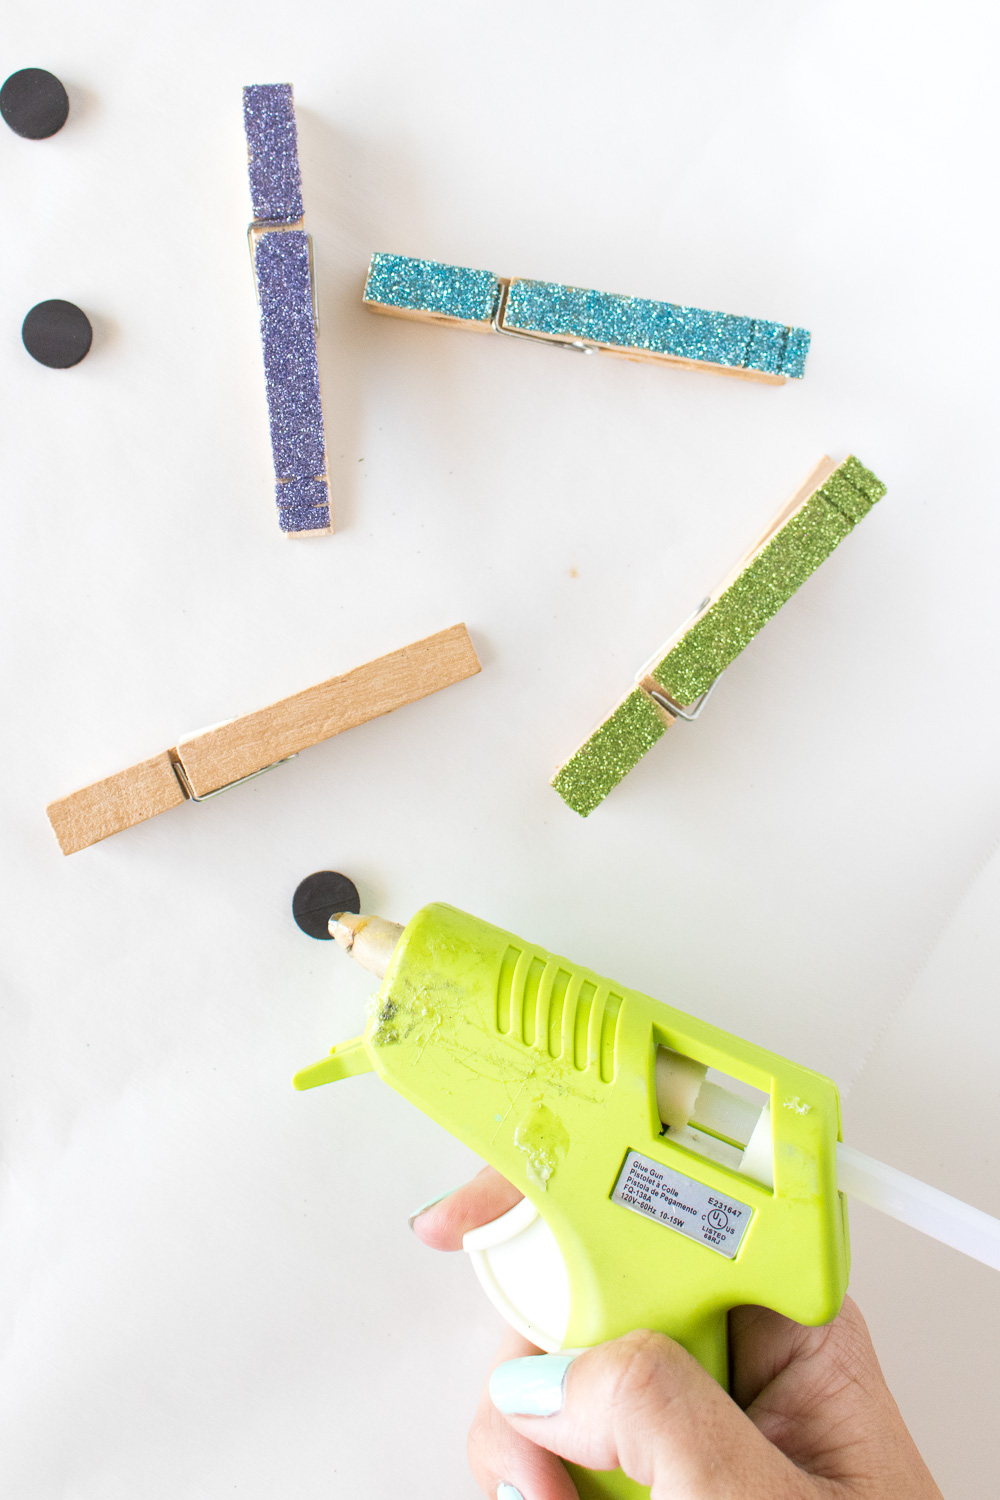
Step 4: Use a small amount of hot glue (or your Mod Melts gun) to attach a magnet to the mid-back of the clothespin and remove any glue strings.
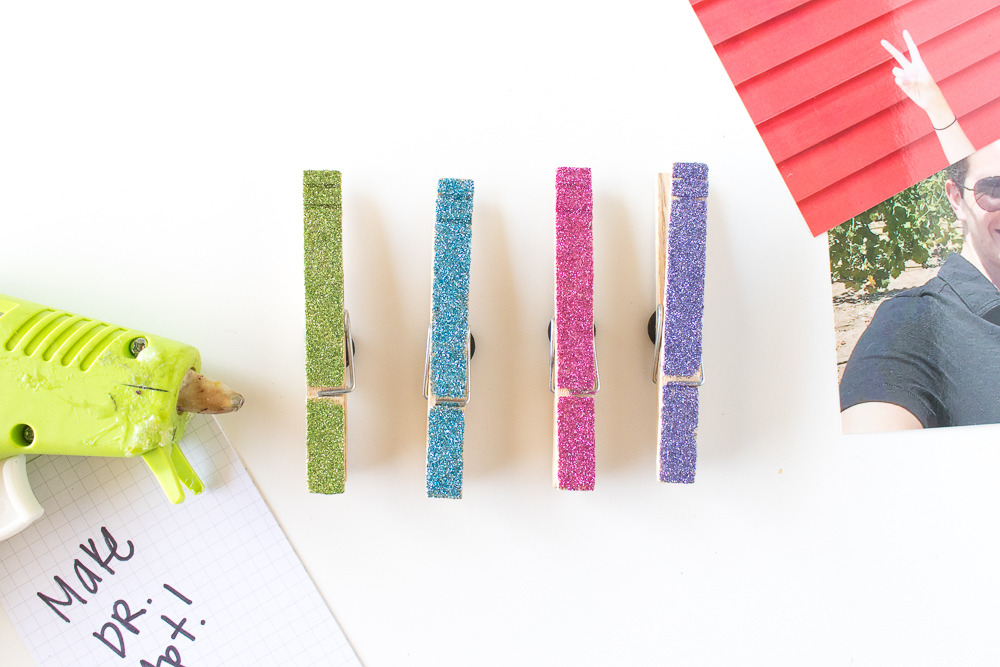
Hang your new clothespin magnets on your fridge and simply clip photos and papers in place to display in your home! I love using these to pin items in place without having bulky or unsightly magnets around.
Did you enjoy this DIY magnet craft? I’d love for you to share it – and also check out these other related ideas you can make at home: