
Learn how to make clothespin dragonflies that are colorful and sparkly! Use a clothespin dragonfly for a cute craft idea or room decor.
Skills Required: None. Even if you’ve never crafted before, you’ll be able to achieve this project. You’ll use glue to attach the clothespins, and then you’ll also be painting and using Mod Podge as a sealer. It’s easy!
I’m sure you’ve seen clothespin dragonflies before. The kids’ craft where you paint a clothespin, add googly eyes, and then some pipe cleaner wings. They are so cute and easy to make!
After making a clothespin cross, I decided it was time to take the standard clothespin dragonfly and kick it up a notch. If I can assemble a cross, then I can assemble a dragonfly.
And if I can assemble a dragonfly, what else can I assemble? Is a horse next? How about the Empire State Building? Not sure! You’ll just have to see.
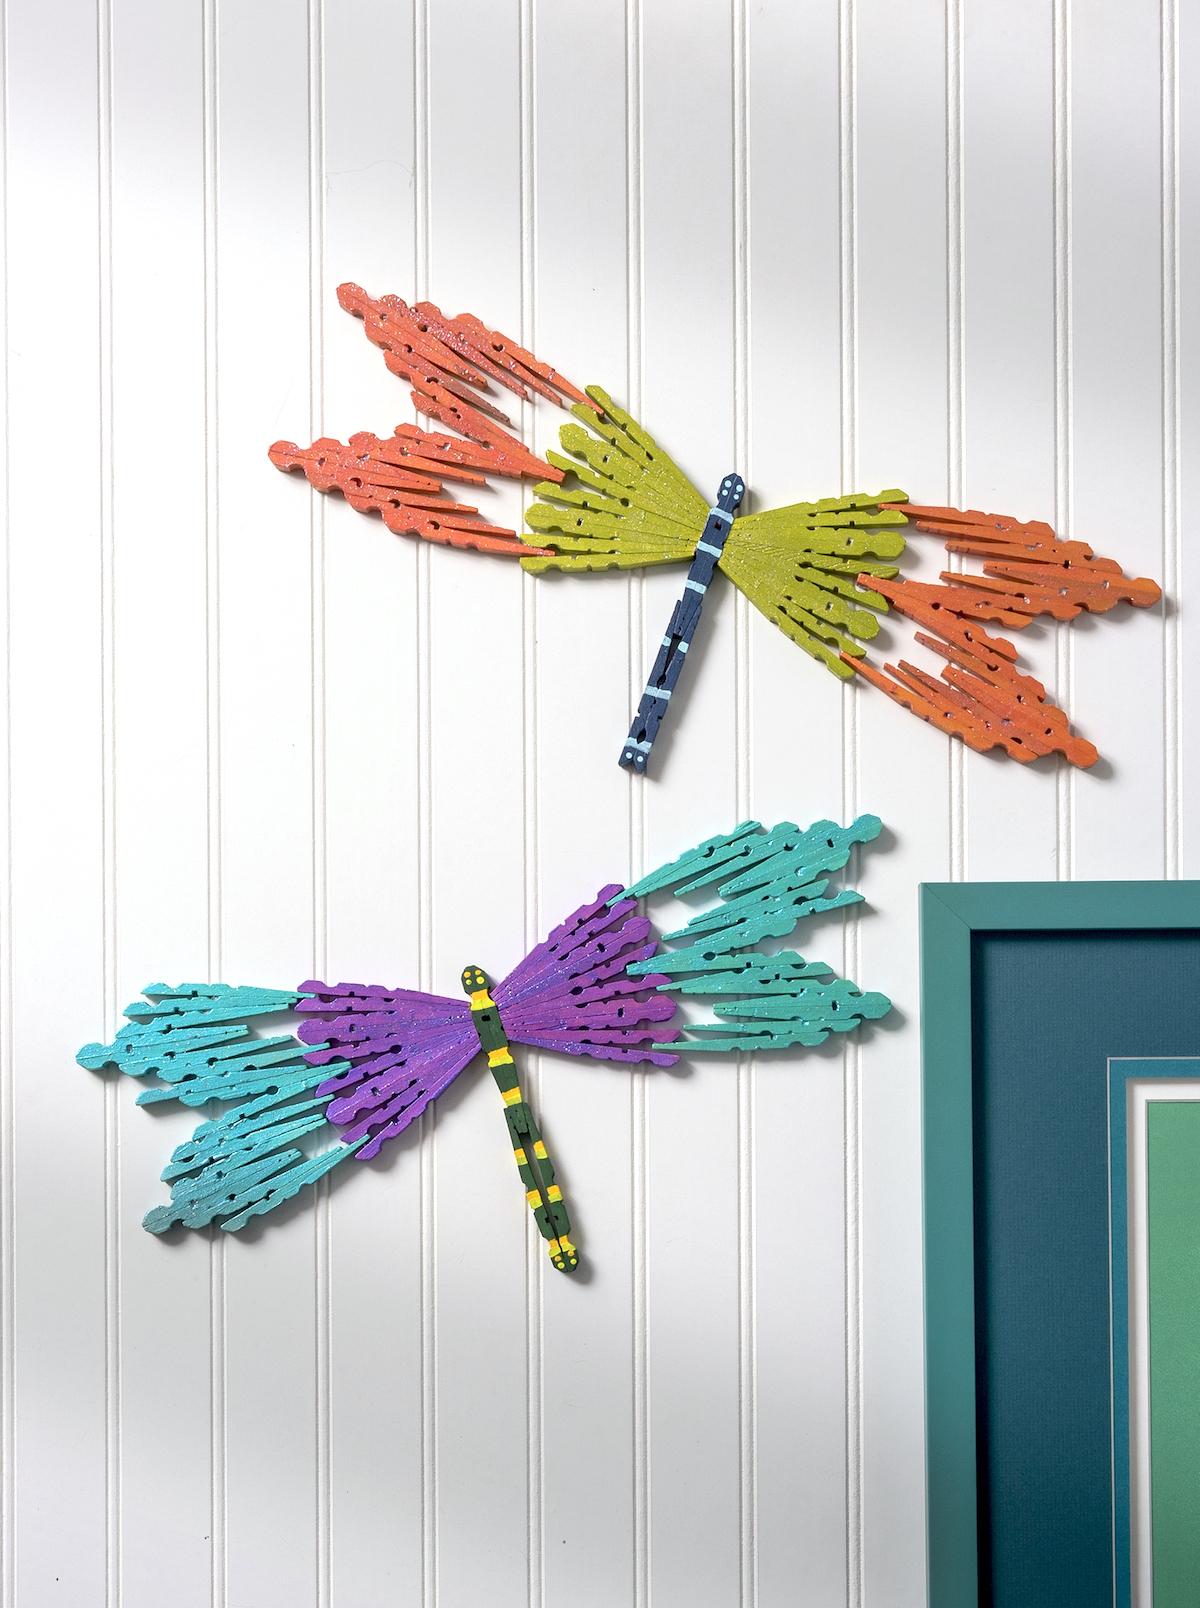
In the meantime I want to show you how to make some cool clothespin dragonflies that are 1) really easy to make and 2) perfect for decorating. You could use these inside the home (think kids’ room, craft room, or nursery) – or you could use these outside in a covered area.
Wouldn’t these sparkly, flying insects look great on your porch? I feel like they are an awesome spring craft to add to your decor.
I think you’re going to especially love the Mod Podge Extreme Glitter for this project. It adds just the bling that a lot of you are looking for!
If you want to learn how to make these, I’ve got the tutorial for you. Take a peek below and then let me know what you think in the comments.
Clothespin Dragonfly
Gather These Supplies
- Wood clothespins – 29 to 30
- Acrylic paint – I used regular craft paint as well as Color Shift paint
- Extreme Glitter Mod Podge
- Craft glue
- Paintbrushes
There are five easy steps to these clothespin dragonflies. You’re going to separate the clothespins, create the design on your work surface, paint, assemble and glue, and then seal with glittery Mod Podge to finish. Here’s how it’s done.
Separate the Clothespins
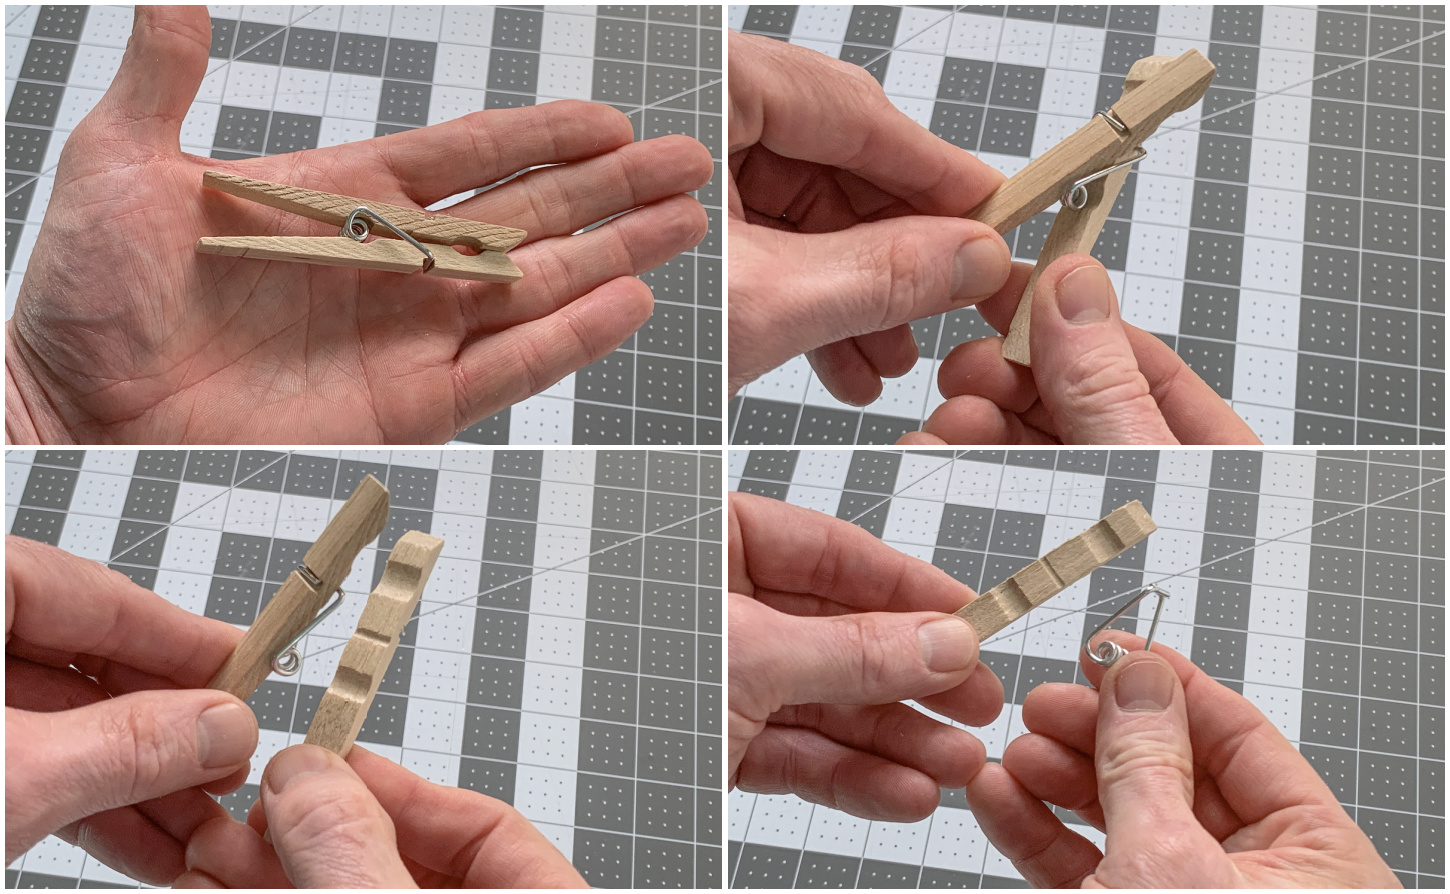
You’re going to use the clothespins without the springs – so the first thing you need to do is remove them!
Begin by twisting the two half of the clothespin and removing one side. Then you’ll easily be able to remove the clip from the other half. Do this with 30 clothespins.
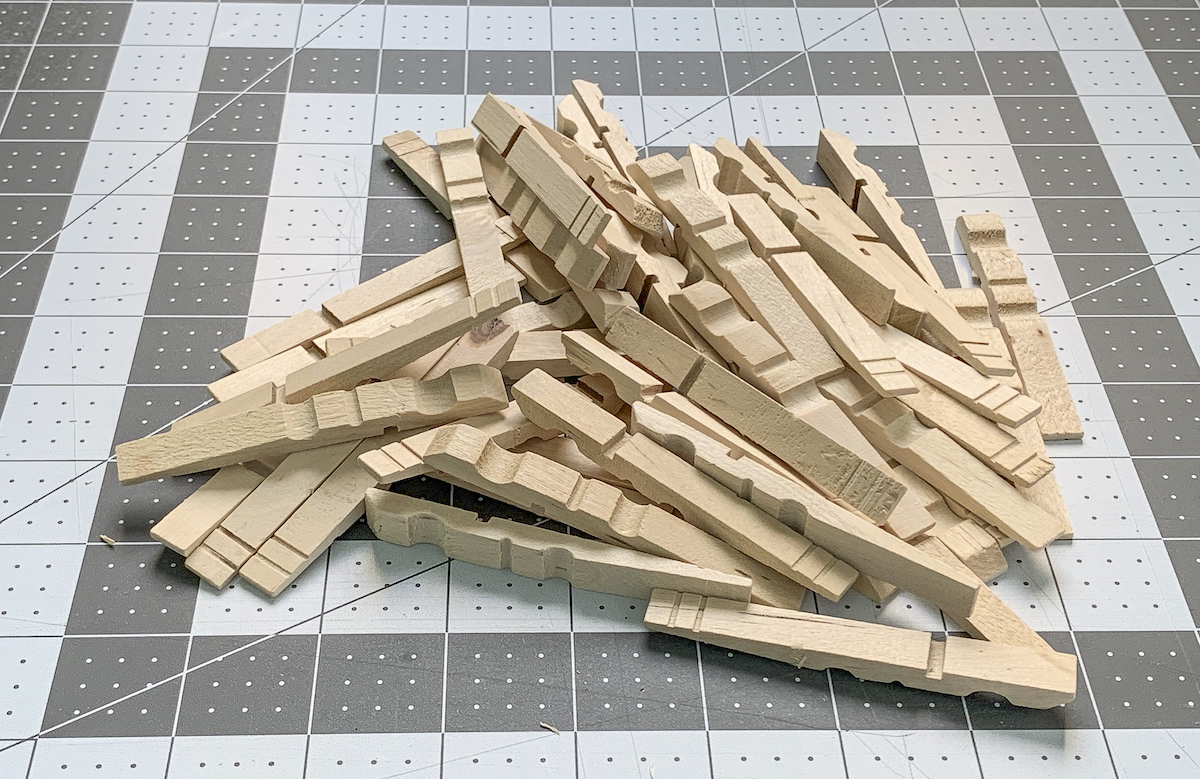
Create a pile of clothespin halves as shown. You’re going to use 58 – 60 halves for your dragonfly. The reason it’s not an exact number is because inexpensive clothespins are not completely identical to each other.
This means you might have to add one or two clothespins to adjust your project as you move along. You’ll see what I mean!
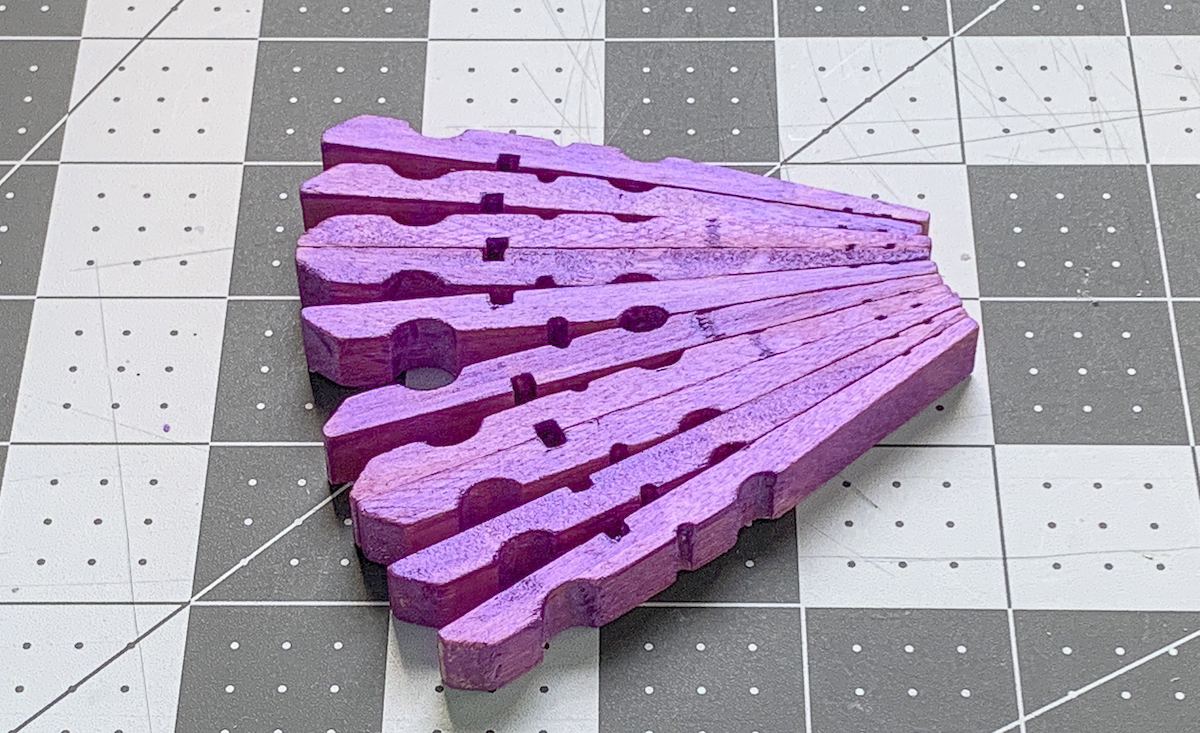
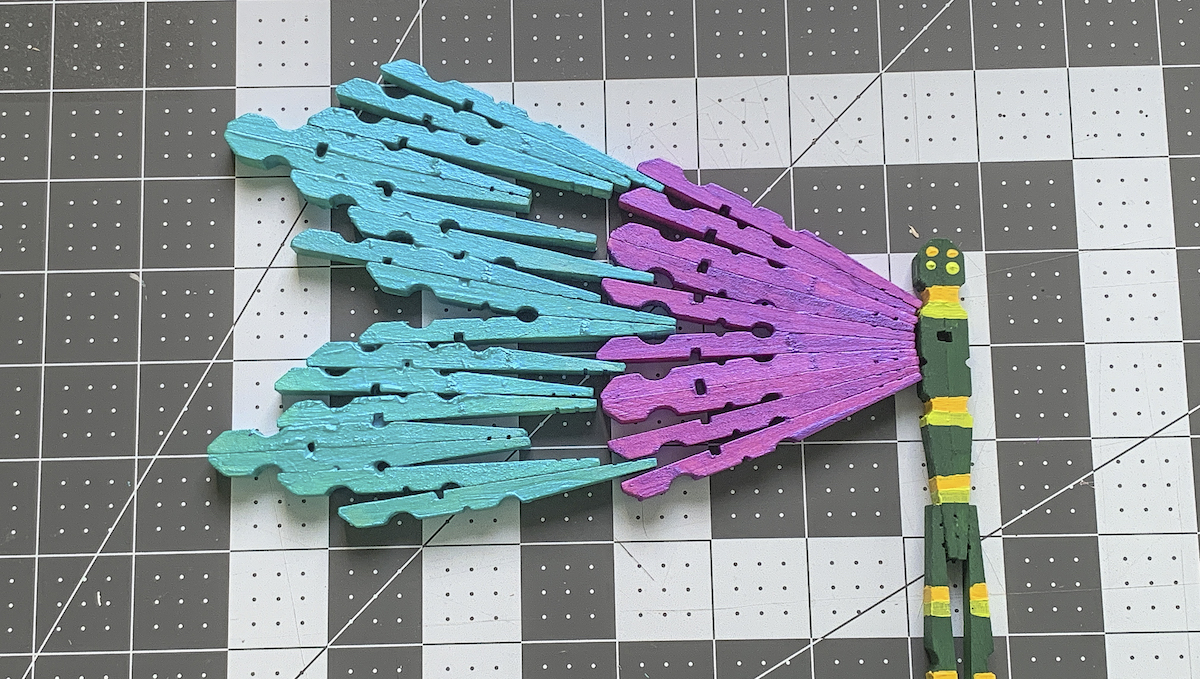
Create the Design
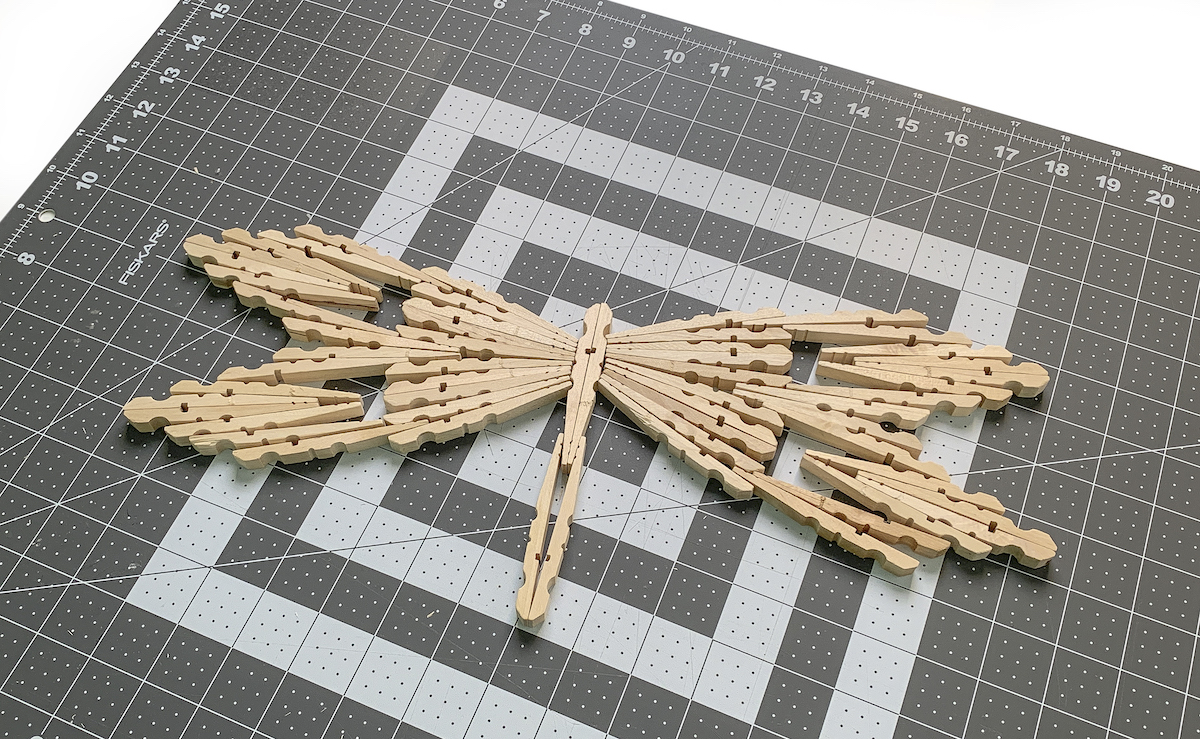
The next step in the process is to lay out your shape on your work surface. Start with the body first (made of four clothespin halves) and then work on the wings.
It might help to zoom in on the photo above to see exactly how the dragonflies come together and how each clothespin is facing.
This is where you might add in a clothespin or two to adjust for sizing. If you find that certain areas of the wings aren’t meeting, simply slide in another half.
Once you get the basic structure organized, I recommend taking a picture of it so that you can assemble it together easily.
You could go to the extent of numbering each clothespin as well if it helps keep you more organized (I will leave that up to you). Then you can begin painting.
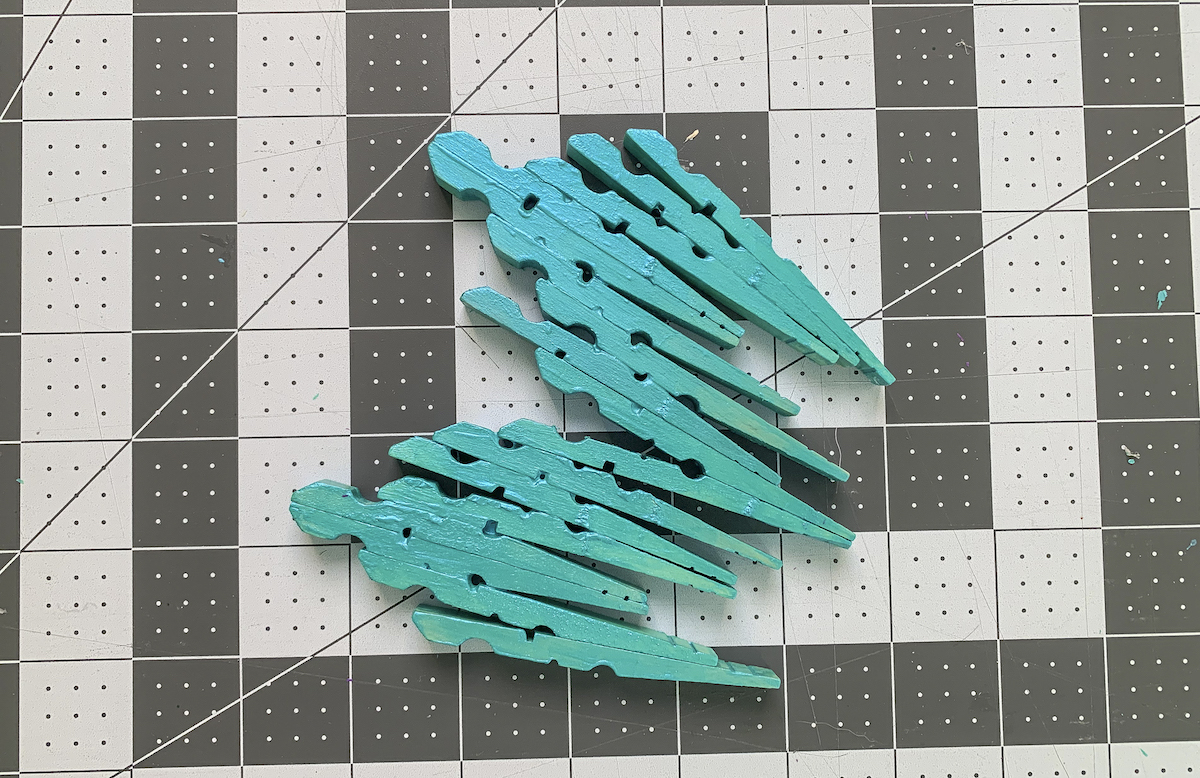
Paint the Clothespins
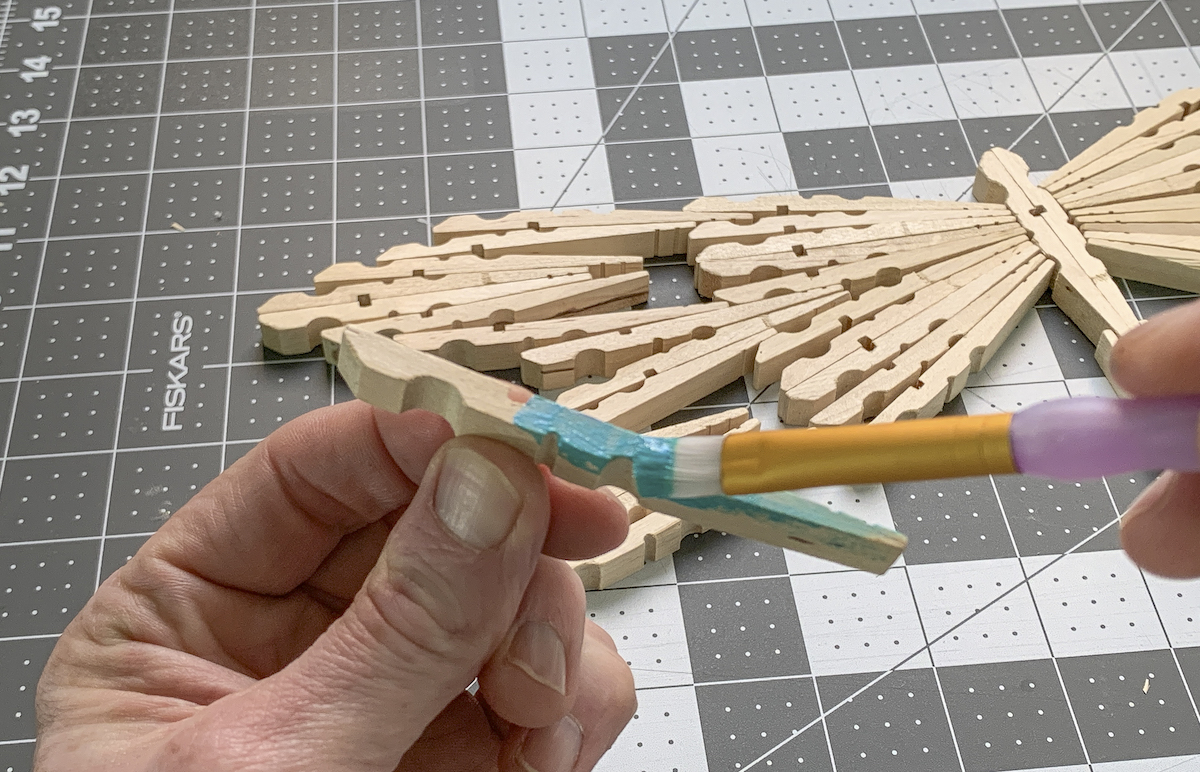
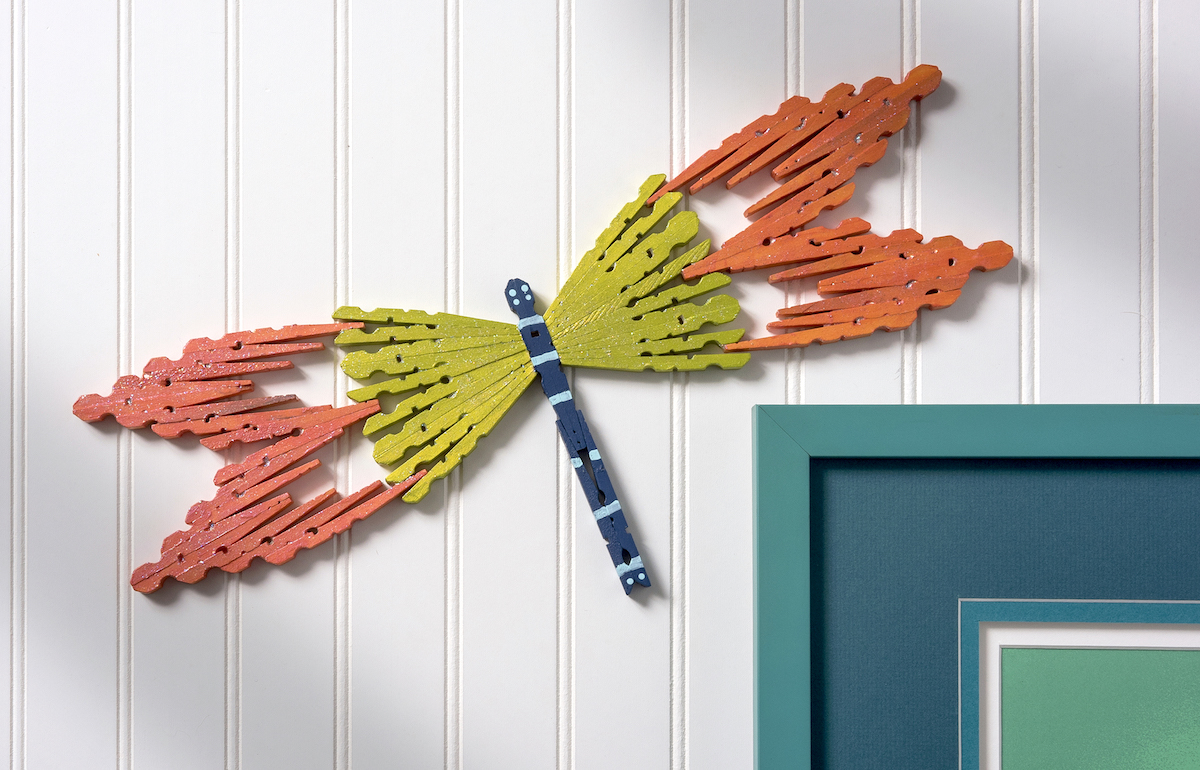
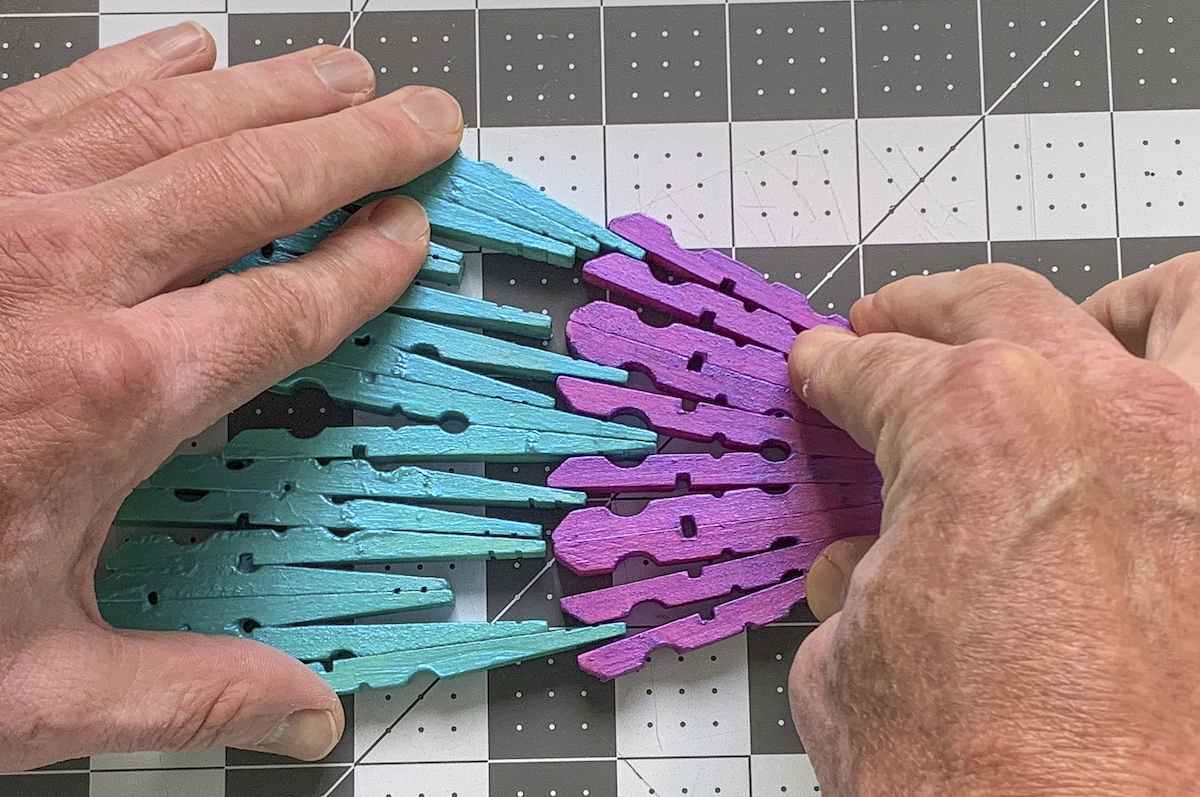
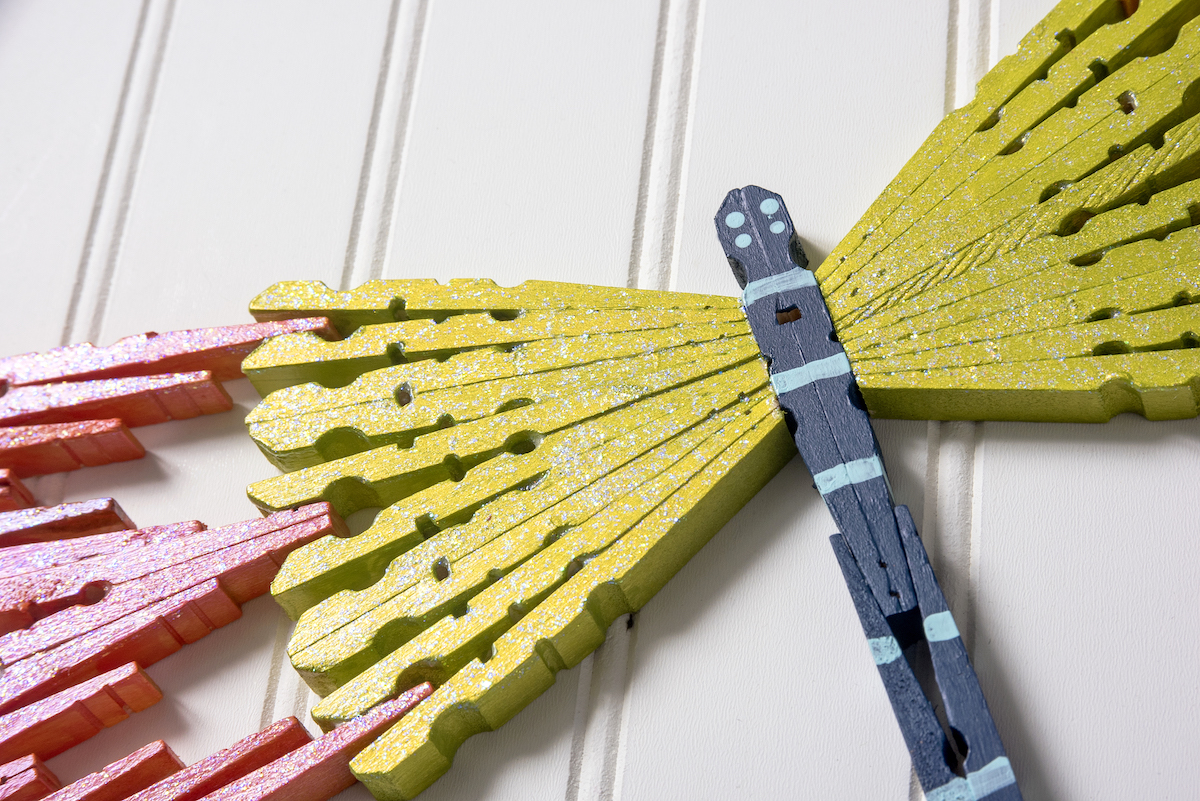
Once you know how your clothespin dragonflies are going to be laid out, begin painting. I used dark green regular acrylic paint for the body, and Color Shift paint in both blue and purple for the wings. The Color Shift has pigments that create a metallic luster with colors that shift in changing light!
You’ll need to give the wooden pins several coats and let them dry.
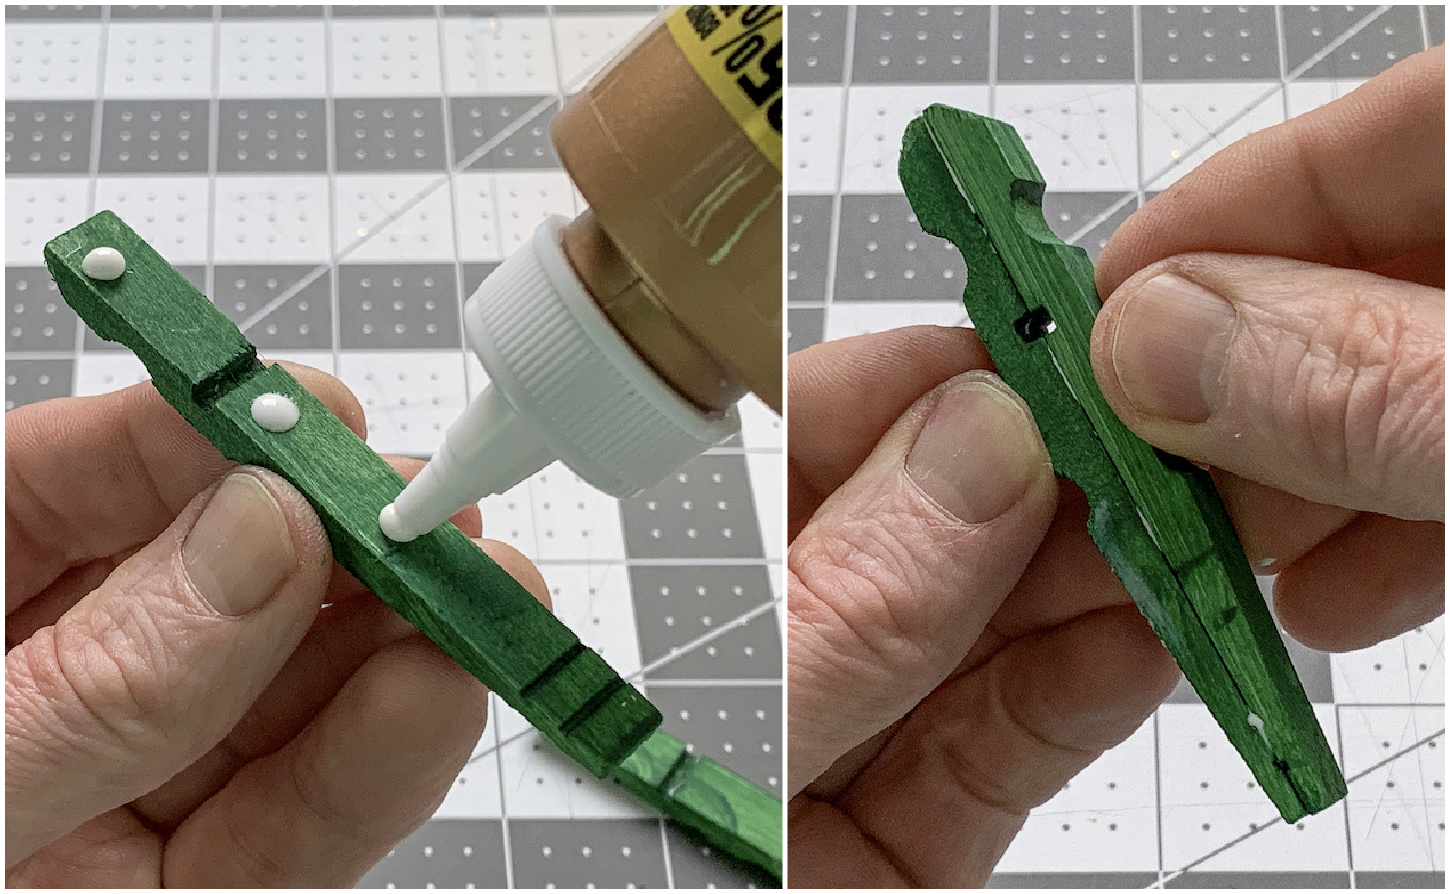
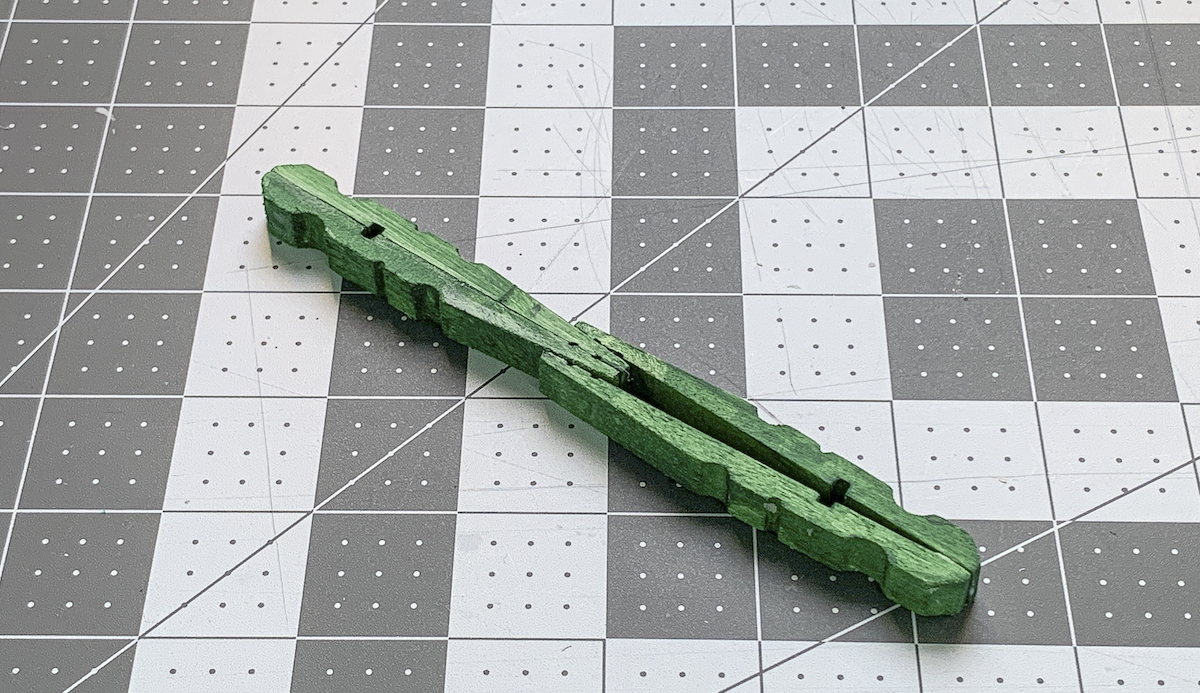
After the paint is dry, begin gluing together portions of the dragonfly. Start with the body and glue it together.
For each portion that you glue together, hold for a few seconds and then place down on the work surface to dry. It’s important that you make sure the glue holds the clothespins so that your dragonflies don’t fall apart when complete!
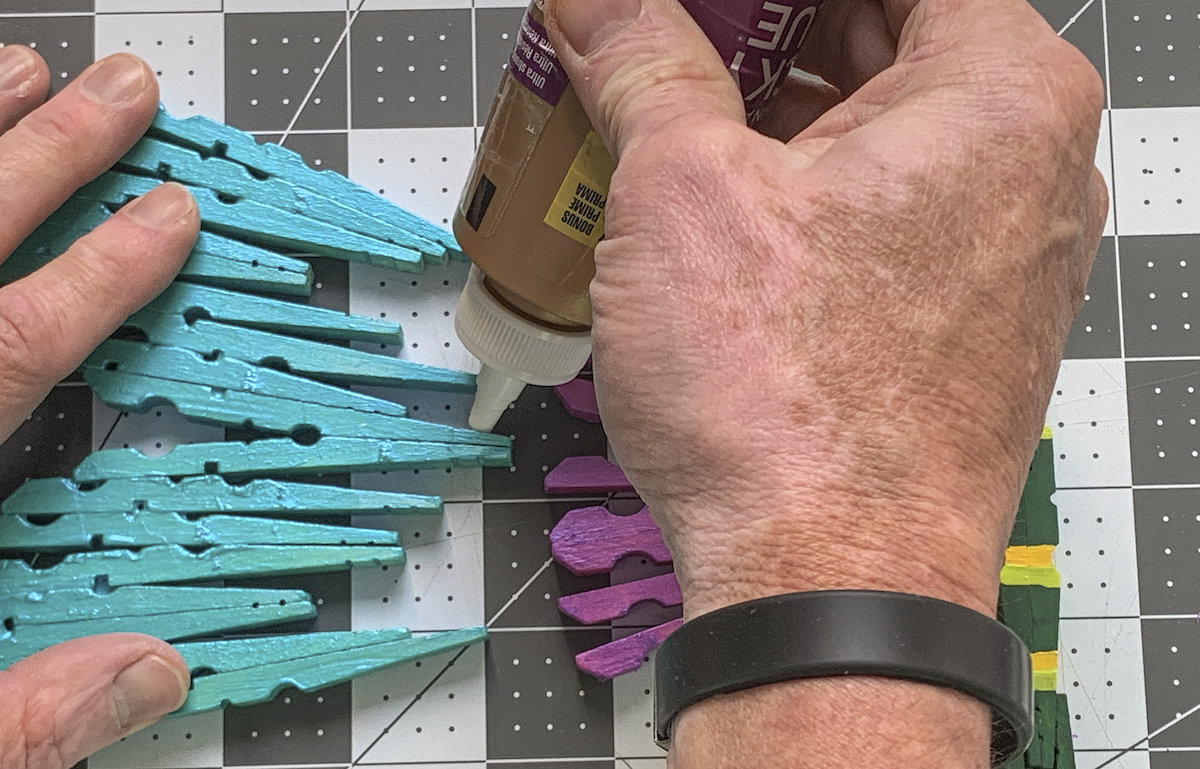
Here’s the inner portion of the dragonfly wing glued and drying . . .
And this is the outer portion of the wing.
Let everything dry and make sure it still fits together!
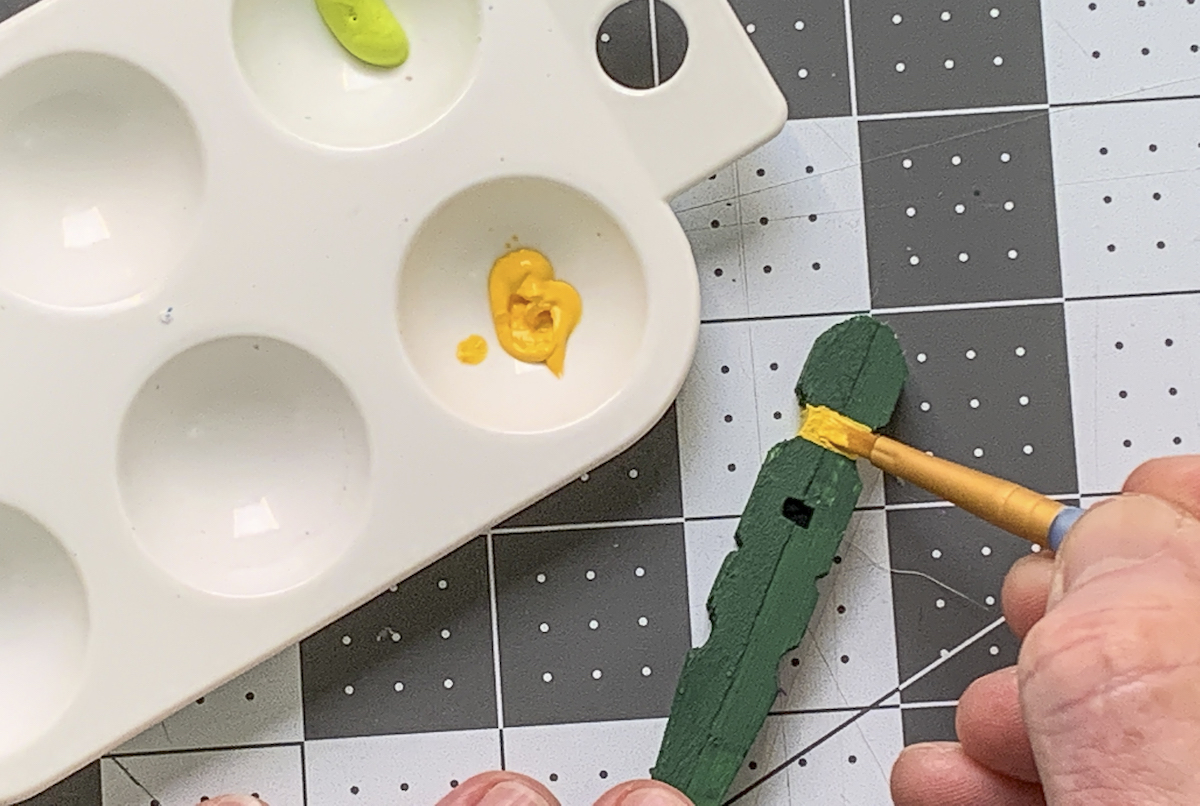
Use a few accent colors and a smaller paint brush to paint the main body of your clothespin dragonfly. I used yellow and lime green to accent the body. Let dry.
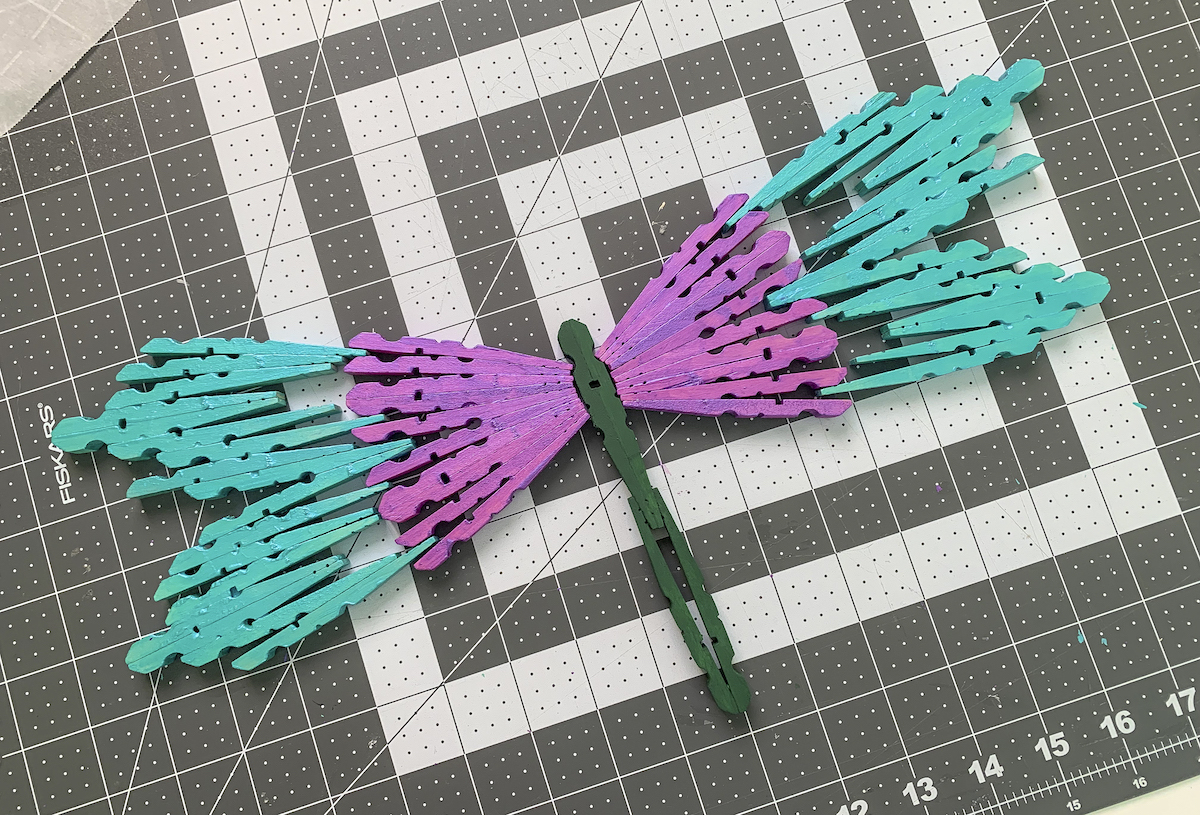
Assemble and Glue
Now that your insects are completely painted, glue your project together.
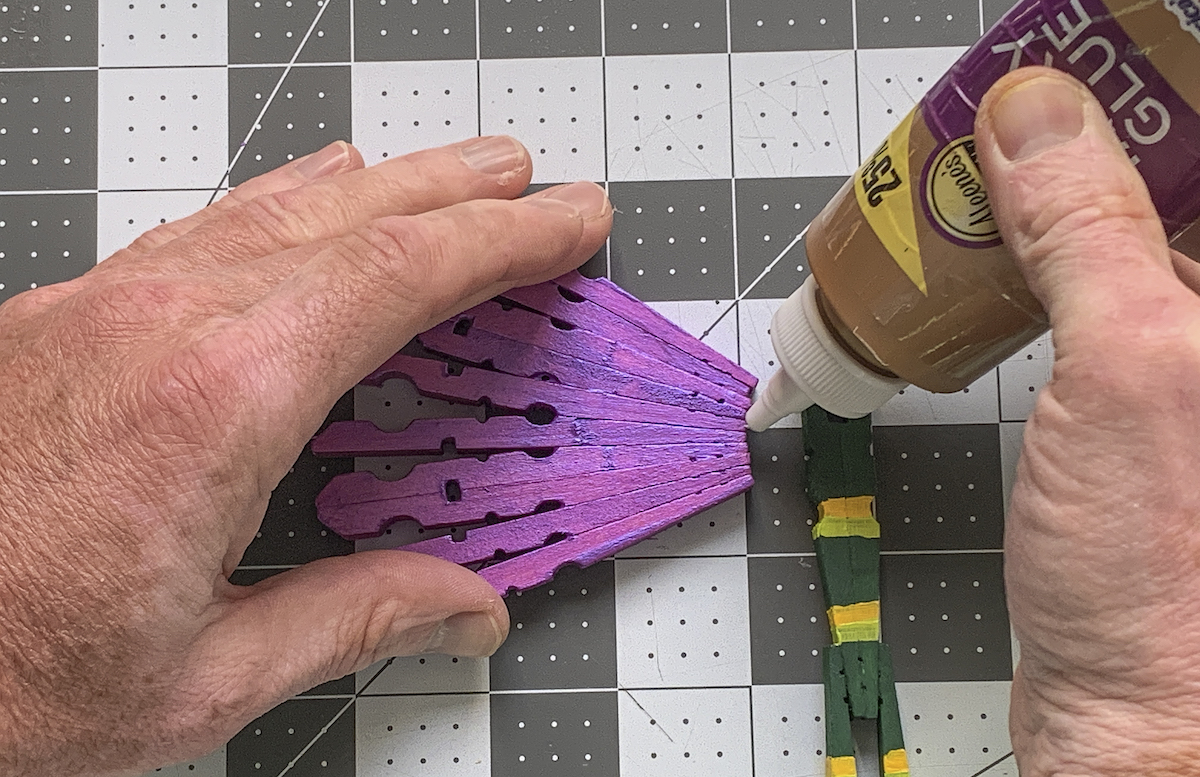
Use craft glue to adhere the inner wing to the body.
Hold for several seconds while the glue sets and let dry completely.
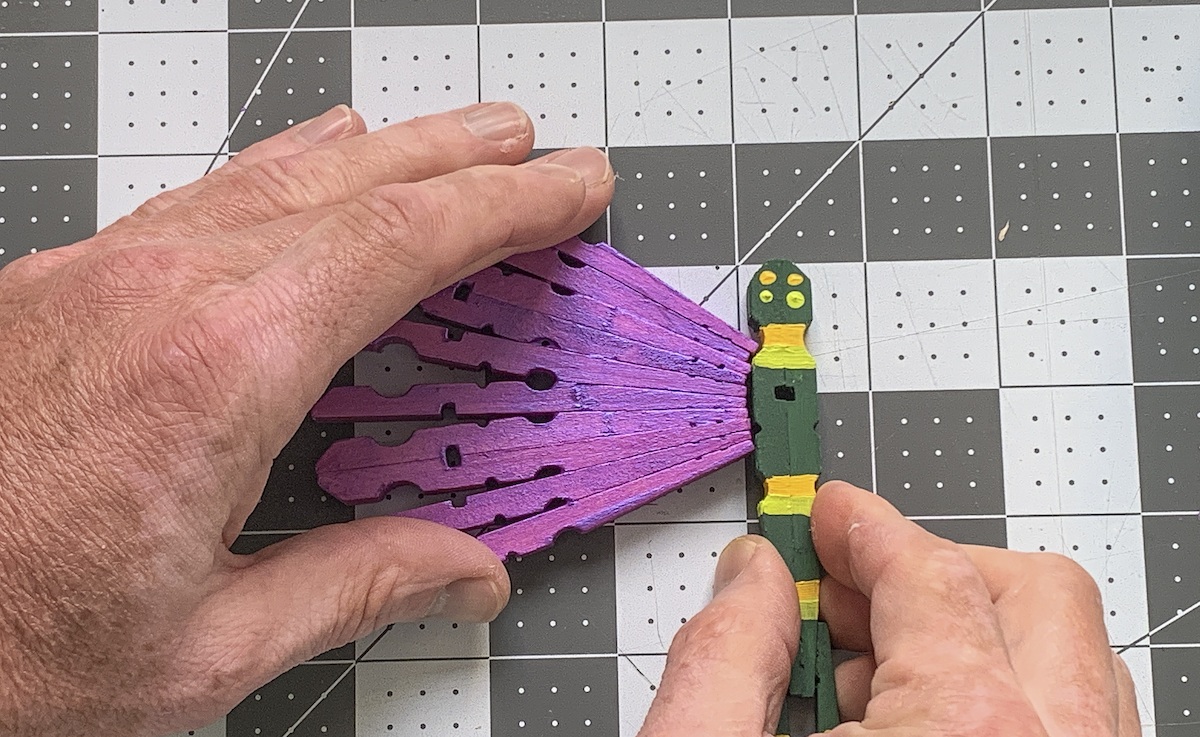
Then move onto the outer wing. You’re going to add glue on the portions of the clothespins that touch the inner wing.
Slide everything together and hold – wiping away any excess glue that comes out the top or bottom.
Let your wing dry as shown and then repeat on the other side of the body. You only have one more step and your dragonflies are done.
Seal with Mod Podge
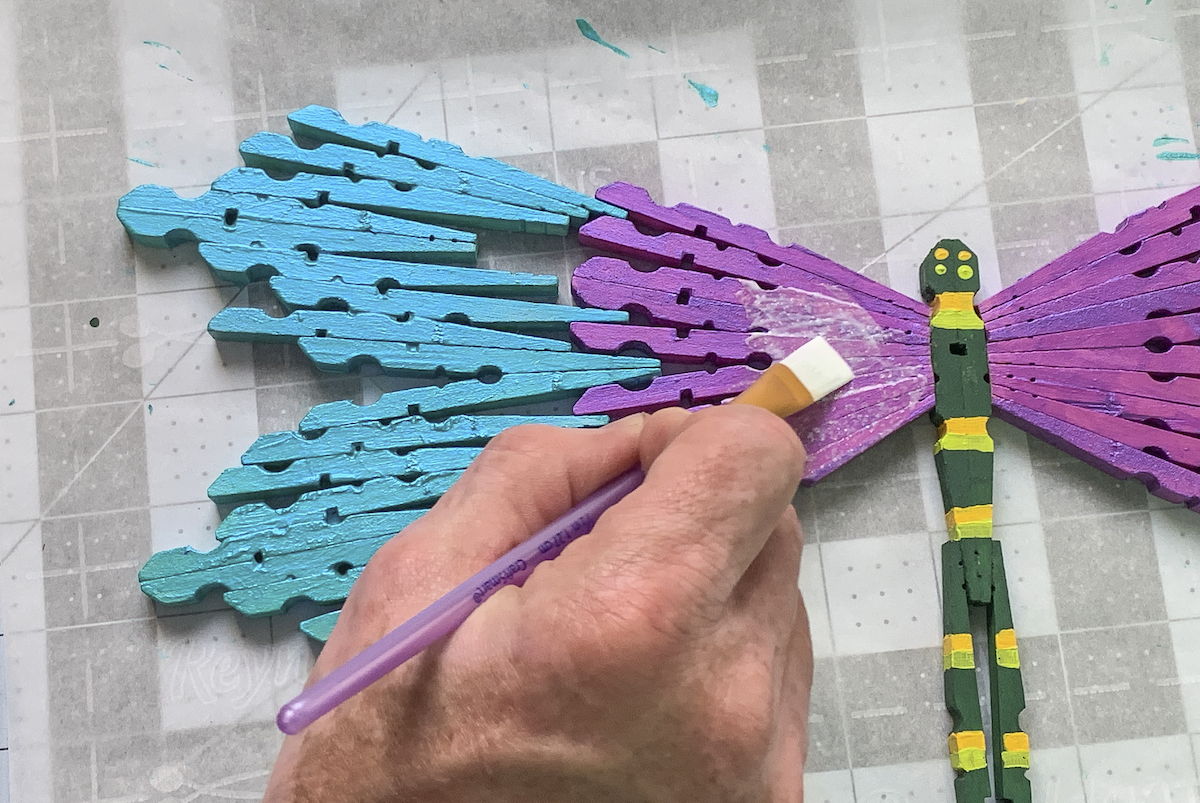
To add an amazing amount of bling to your winged creatures, use a brush to apply a coat of Extreme Glitter Mod Podge to the wings only. Dragonflies have such shimmery wings . . . we’re trying to mimic that effect with Mod Podge!
Once you’ve coated both wings, let dry.
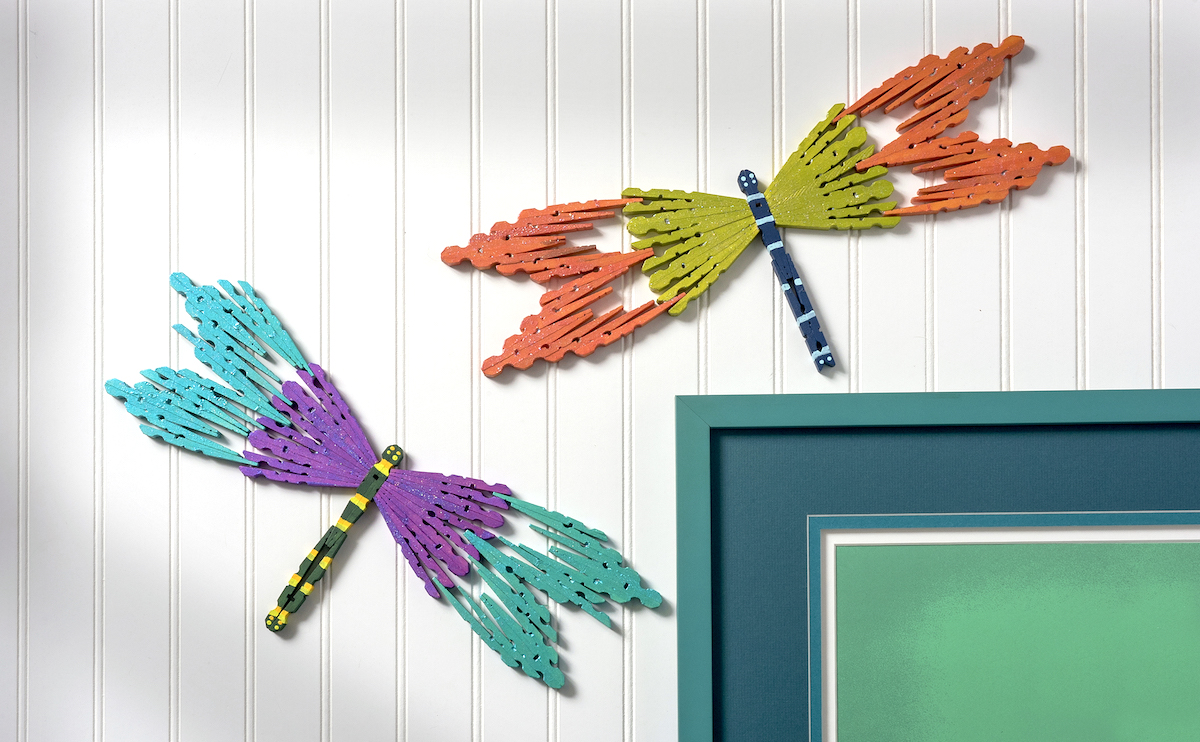
Now you’re ready to hang your clothespin dragonflies! You can do this with Command Strips or with small nails (one on each wing). Once you hang them, you won’t be able to see the nails.
Look at how shimmery the wings are. I absolutely love these and think they make the greatest decor. I hope you enjoyed this spring craft for adults!
If you had fun making these fabulous creatures out of clothespins, check out these other cute ideas:


Is there a way to print the instructions without all the ads? I’m planning to use this for an intergenerational activity for my youth group at our local senior residence. Thanks you. Also, where do you buy your clothespins i bulk?
beautiful, what is the measurements of these dragonflies. I made the angel and placed it in a shadow box gave it as gifts thank you for sharing this creation with me .
Probably about 16 inches? They are a decent size!
A New Crafter @ 63 yrs of age. Female. Need to stay busy.
Grandmother
Want to Learn.
Thank you for reading Cathy!
In my stash of craft supplies there are some mini clothes pins. Other than size, they are just like the larger clothespins. Some are already painted, some not. I wonder if I could make a mini dragonfly with these?
I made some butterflies the same way, but the lower wings were made with the smaller clothespins. They turned out great. I plan on making some of the dragonflies in the future. What’s a garden without a few butterflies and dragonflies flitting about?
@Wanda,
i need to make some butterflies. can you post a picture of yours?
Fantastic! I didn’t have any clothes pens so I used old chopsticks for the body and cut up a soda can for the wings. Thank you for the idea.
Your project sounds very cool! And thanks for the comment 🙂
BEAUTIFUL!!!! WOW!!!! I am greatly impressed!!!!
Thank you so much!
These are amazing. I love them.
Thank you so much!
I love these butterflies. Awesome job!
I love these normally I think they are ok but the colours and shine make them stand out. I’m going to make them for my porch.