Learn how to make pretty family photo ornaments using crystal pendants from a chandelier! Perfect for Christmas holiday decor, a wedding, or baby gift idea.
Skills Required: Beginner. The Mod Podging is simple enough if you don’t have any experience – the only thing that you might want to know is how to use jewelry tools.
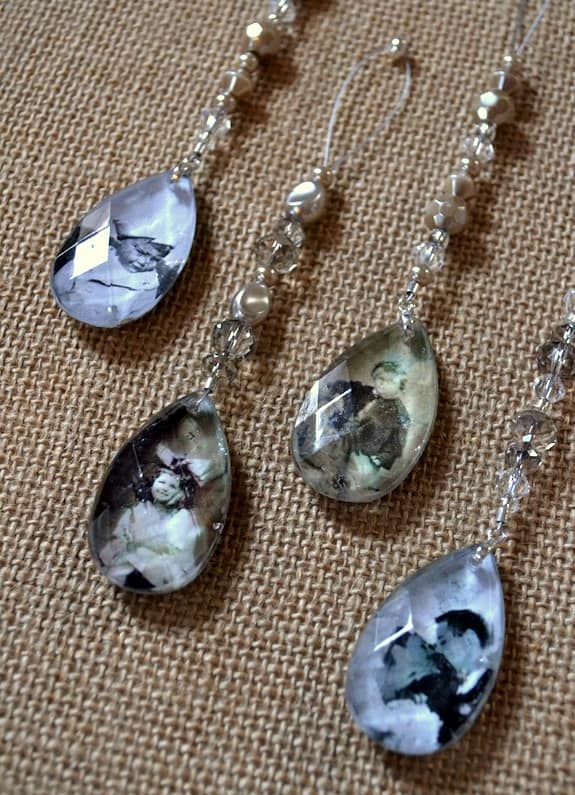
Dimensional Magic is just about the most awesome Mod Podge formula ever, at least today. It seems like every day I have a different favorite formula, and today is definitely Dimensional Magic.
These ornaments made by Jenn are great because they are not just for Christmas gifts – they can be used as home decor any time of the year. Or how about turning something like this into a bookmark? Or a piece of jewelry?
There are so many possibilities for this photo craft! I love Jenn’s personalized ornaments and I think you will, too. Continue below to learn how she made them.
I treasure my collection of family photos that have been passed down through the generations. Rather than keeping them hidden from the world in a stuffy old trunk or shoebox, I love to have them out where they can be enjoyed.
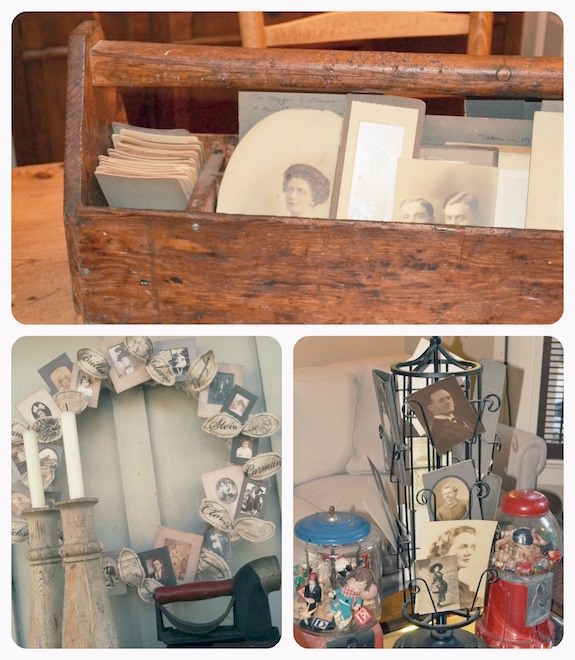
My dining table is graced by an oversized vintage wooden tool caddy that is filled with photos for the family to enjoy. In my living room, you’ll find a vintage-style postcard rack stocked with old photo cards of our ancestors.
And on the front door, guests are greeted by a wreath circled by tiny portraits, family surnames and crests. It’s part of our decor and how we remember those before us!
Crystal Photo Ornaments
I’d been dying to try Dimensional Magic, so I developed a project based around the formula using some of my favorite family photos. Using inexpensive chandelier crystals, beads, and beading supplies, I was able to create easy and elegant pendant Christmas ornaments in minutes!
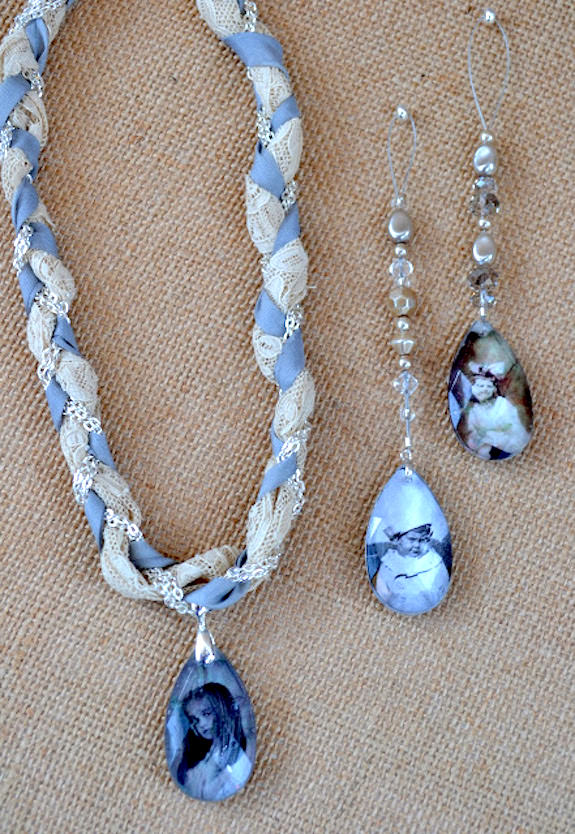
Just imagine an entire tree trimmed with these nostalgic family photo ornaments! Commemorate a wedding, baby’s first year, or pay homage to generations past. They make such a perfect photo gift for the holiday season.
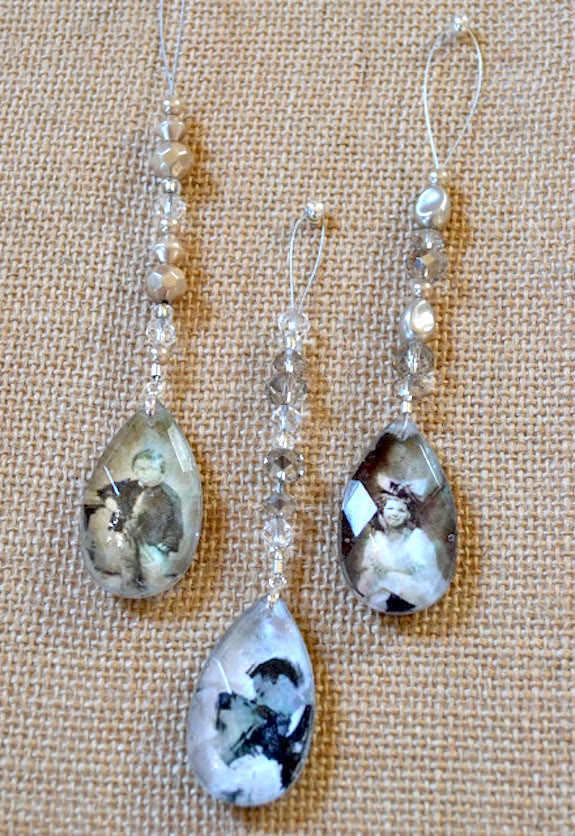
Whether shimmering from evergreen branches (they make awesome Christmas tree decor) or wrapped up in a handmade gift, these personalized Christmas ornaments are sure to sparkle with meaning for all that behold them. Learn how to make below.
Gather These Supplies
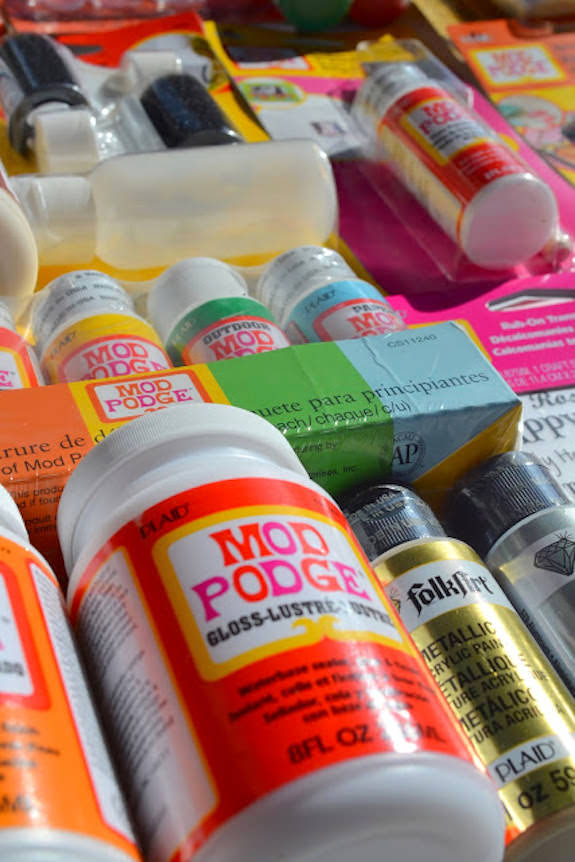
- Mod Podge Dimensional Magic
- FolkArt acrylic paint — Metallic Silver or Gold
- Chandelier crystals (from the craft store or home improvement store)
- Family photos, scanned and reduced to fit the dimensions of the crystal
- Pencil
- Scissors
- Paper towel
- Paint brush
- Pinch bails (from the beading section of the craft store — silver or gold depending on your preference)
- Beads of your choice
- Crimp tubes
- Crimp bead covers
- All-in-one jewelry pliers
- Silver or gold beading wire (thin enough to pass through the beads when doubled-up)
Print Out the Photos
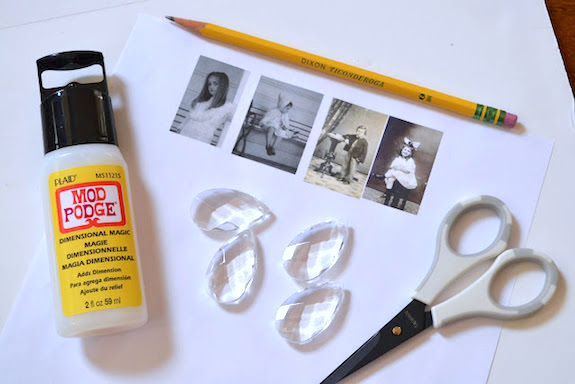
Step 1: Print out photos in high quality on regular printer paper. Lay crystal on top of photo and trace with a pencil. Cut along the inside of the pencil marks.
Note: use laserjet images if possible; if you have an inkjet printer, spray both sides with either clear acrylic spray or hair spray, and let dry 24 hours. This is so the ink doesn’t bleed.
Attach to Crystals
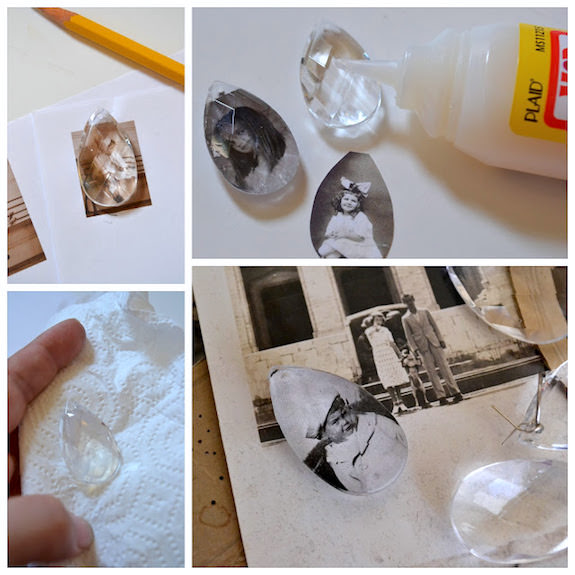
Step 2: Set crystal on piece of paper towel. Apply a thin coat of Dimensional Magic to the back of the crystal, leaving a 1/8″ border. Gently set the photo (face down) on top of the Dimensional Magic. Using a finger, press the photo into place.
The paper towel will prevent the Dimensional Magic from running to the front of the crystal. You can apply firm pressure without getting your other hand sticky. Work out any wrinkles, then set aside to dry for a few minutes.
Paint the Crystal Backs
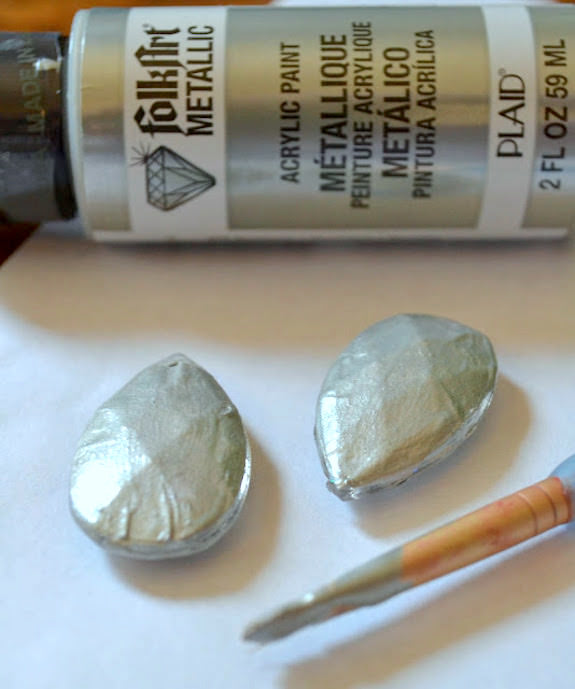
Step 3: When Dimensional Magic is dry, paint the back of the paper with the metallic paint. Allow your crystal ornament to dry for a few minutes, then brush on a second coat.
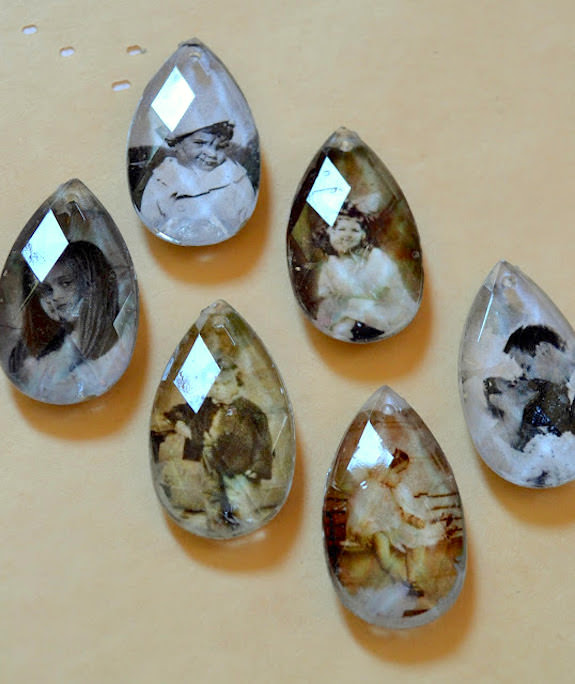
Step 4: When the second coat of paint is dry, you’re ready to start beading.
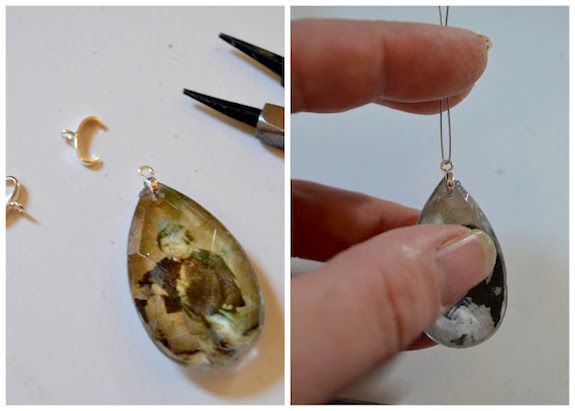
Bead Your Ornaments
Here’s how you’re going to do it:
- Pinch a bail into place with your all-in-one tool. If the hole in the crystal has been sealed by the photo, use a pin or needle to open it back up.
- Thread an 9″- 10″ piece of wire through the bail. Lock into place by threading a small bead through both ends of the wire (length will depend on how long you would like the finished ornament to be).
- Continue adding beads by threading both ends of the wire through the hole.
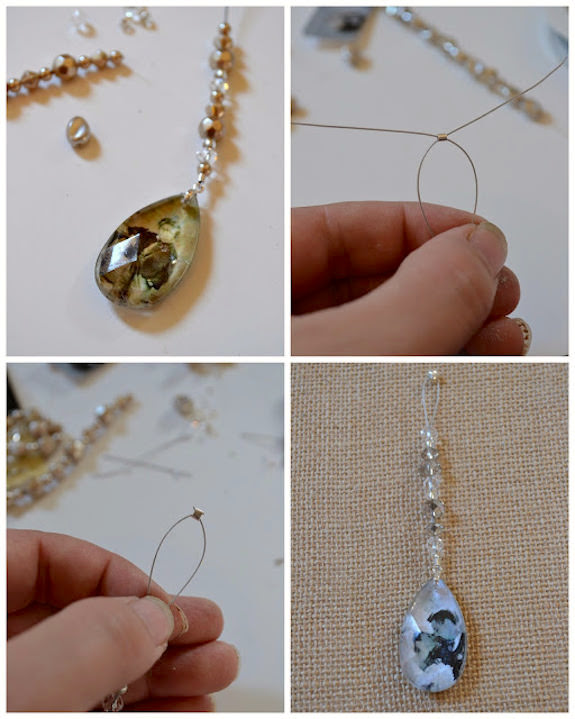
When you’ve achieved the desired length, thread the ends of the wire through a crimp tube, in opposite directions, to create a loop. Pinch crimp tube in place with your all-in-one tool. Then use the tool to trim the loose ends of the wire.
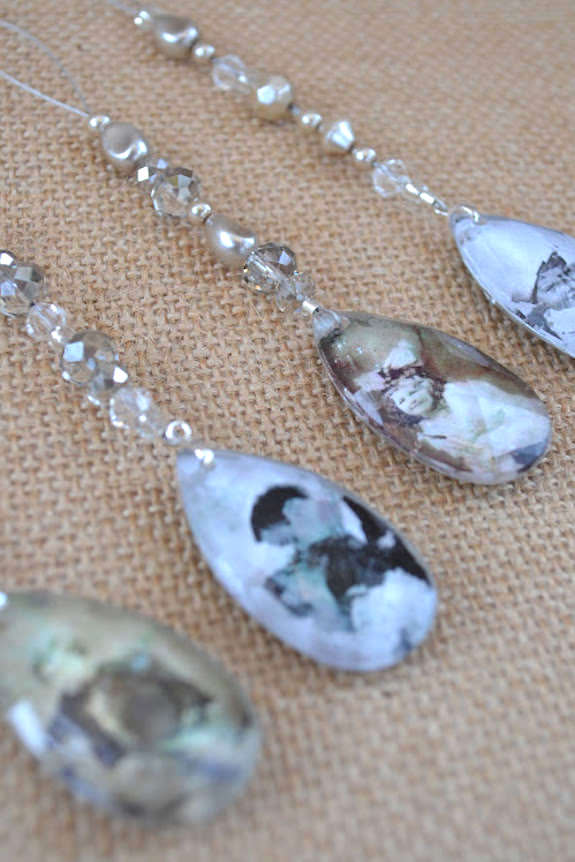
Your personalized photo ornaments are ready to hang from the tree or wrap as a gift! They are great for stocking stuffers.
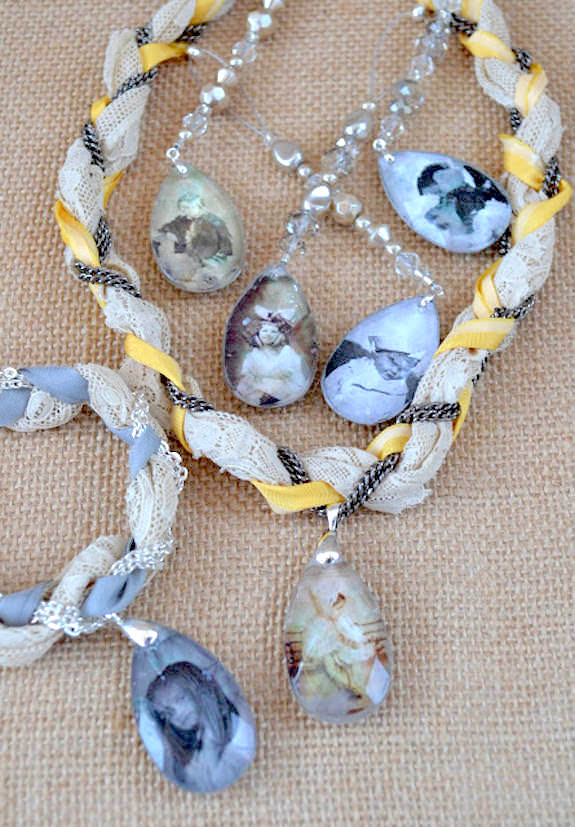
The family photo ornaments can also be attached to a larger bail and hung from a necklace. Or from a Christmas tree or on the mantel. They’re actually quite a versatile project. Let me know what you would do with this recycled Christmas decor in the comments!
If you loved this photo ornament project, I’d love for you to check out these other posts:



These are so precious!
I made these in 2018 for my wedding. We took photos of family members who passed away and made a memory tree and sign. Everyone loved the idea. Wish I could share a photo of our tree with your readers.
Hi Courtney! Do you have a Facebook account? You could join the group “Getting Crafty with Mod Podge” with 300k (almost) Mod Podgers! It sounds gorgeous and we’d all love to see it!
These are beautiful. I hope I get around to making some soon. Your directions were very clear.
Thank you Maureen! I hope you enjoy!
You specified plain paper, but your instructions don’t say what kind of printer: ink jet or laser. Can you please clarify which type? Thanks.
Good call and updated with the following:
Note: use laserjet images if possible; if you have an inkjet printer, spray both sides with either clear acrylic spray or hair spray, and let dry 24 hours. This is so the ink doesn’t bleed.
How lovely! These will be Christmas next year!
Thank you Karen, I’m glad you like them!
I was wondering what you’re thoughts were.. if I am trying this on amber colored crystals, do you think a gold metallic paint would look better since the crystals are goldish? Or does that even really matter which color you use?
Hmmm – if the crystals are gold-ish, I’m not sure it would matter!
I’m a tad confused about the crimp tube and what do I use the crimp bead covers for?
The crimp tube creates the loop at the top for hanging and the crimp bead covers are just for any knots you want to cover. 🙂
I was wondering if the same technique could be used on a clear glass paperweight putting a photo on the bottom?
Yes I think that could work well!
Sorry How do you reduce your pictures to the crystal? Do you have to set your printers?
Hi Julia! Yes you will have to adjust that in your printer settings when you print. OR you can use a graphic design program or use Word to paste and reduce the size.
I have another question. I follow your instructions which I was so proud of myself. They came out beautiful. But what I notice is when I look at the finished crystal I was see blemishes. Is that common, or am I missing a step. Thank you for your help.
Hi Julia! I’m wondering what kind of blemishes . . can you post pictures in our FB group? https://www.facebook.com/groups/530673913743641. You don’t have to stay after your project gets help. It’s just the best way to see the pics and assess what is going on!
@Amy, yes .
What size crystals worked best for you?
I did this for my best friend on her 54 anniversary . She love it. How do I post the picture 📸 So you can see it.
I just sent a picture 📸. Out. Thank you.
Do you mean to spray the inkjet copy after it’s printed?
Thanks! I’m looking forward to trying these!
@Patty, yes! You’ll do it like here: https://modpodgerocksblog.com/decoupage-onto-wood/ You’ll prepare the inkjet just as if you were putting it on wood.
@Amy,
Thanks and Merry Christmas!🎄