
Learn how to make a photo pendant the easy way! Attach to a necklace or bracelet for simple DIY jewelry that also makes a great gift idea.
Skills Required: Beginner. You don’t need much experience to make a picture pendant. The hardest thing you’ll be doing is stringing jewelry, and it’s really simple if you have the right tools.
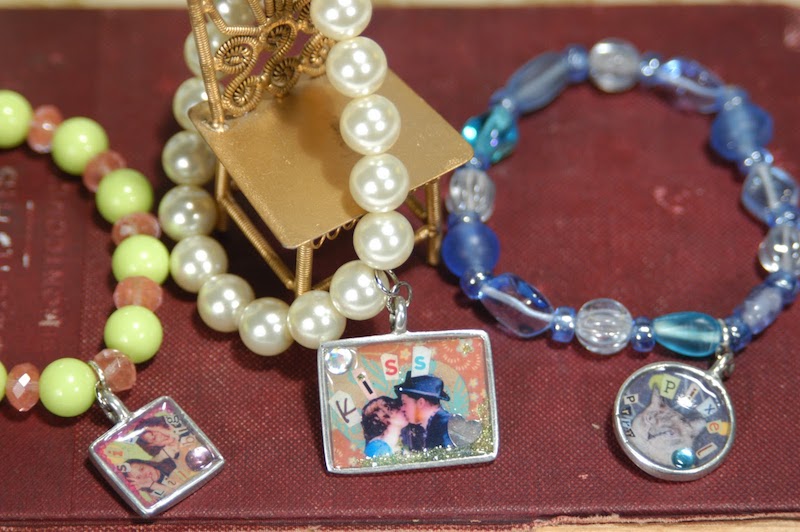
One of my favorite things to make is Mod Podge jewelry. I feel like some of my best projects have been necklaces, bracelets, or pendants all made with Mod Podge.
And honestly I think it’s because jewelry crafts are small. Right? You make a photo pendant and it just doesn’t take that long. The success rate is high . . . and the project is perfect for beginning crafters.
Also . . . I find that picture pendants make great gift ideas. Who doesn’t like their face on a bracelet or necklace? Or you can put kids or pets faces on them too . . . we wouldn’t want to forget them!
Make a Picture Pendant
So what is the best way to make a photo pendant? I’m going to show you below, plus answer some frequently asked questions about projects.
If you want to see the how-to immediately, scroll to the bottom of the post.
How can I put a picture on a necklace?
My process is simple. I print out laserjet images to fit my surface, trim them down, add them to the surface with Mod Podge, and then I add Dimensional Magic.
Once you master the process, you’ll be able to knock out a photo pendant in minutes.
So what do you need to do first? You’re going to need to choose a surface.
Surfaces to Use
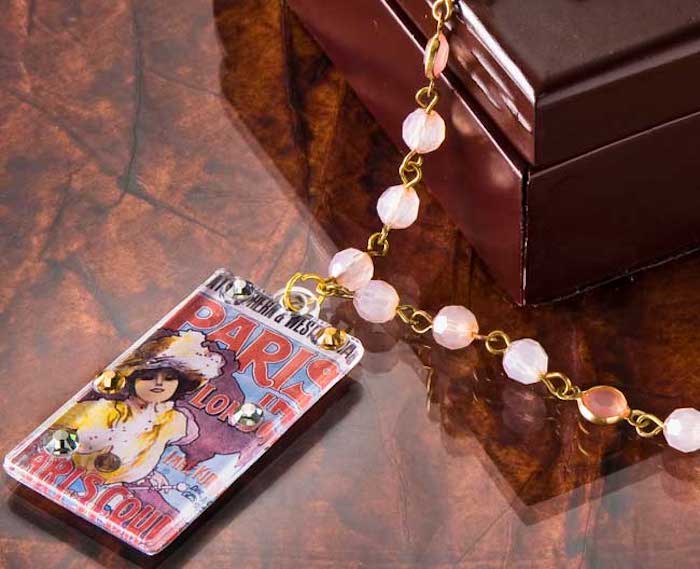
I’ve seen a wide variety of surfaces used for photo pendants. Here are just a few of my favorites below – experiment and see what you like the best! You may need a drill for some of these options, but the results could be very cool.
- Metal Pendant Blanks
- Wood Pendant Blanks
- Metal Washers
- Scrabble Tiles
- Shrinky Dinks
- Poker Chips
- Stiffened Fabric
- Bottle Caps
- Stiff Cardboard
- Chandelier Glass Drops
After your surface is selected, then you can go about printing your photos.
How do you make jewelry pictures?
My recommendation is that you use either 1) laserjet printed images or 2) images printed on thin photo paper. You can print on inkjet paper, but there’s a high of the ink bleeding especially if you use Dimensional Magic.
If you do use inkjet, spray the printed photo on both sides with clear acrylic sealer and let dry. You’re going to need to seal the photo very well to the surface or bezel so the Dimensional Magic doesn’t seep under and make the inkjet ink bleed.
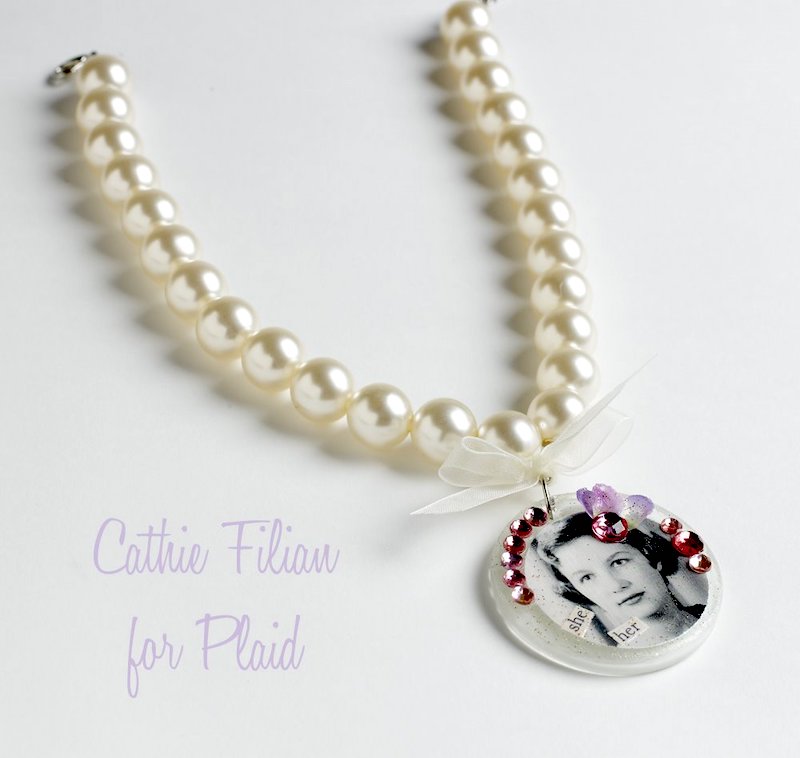
Can I use real photos?
Yes you can, but it can be harder to make a photo pendant with real pictures. This is because there is a coating almost like a lamination, which doesn’t always interact well with Mod Podge.
I definitely feel comfortable using real photos. Though since they’re thicker than regular paper, I like to use them in the bezels with Dimensional Magic. That’s just my preference!
Can I put pictures into a locket with Mod Podge?
Absolutely! There’s no difference between putting pictures onto a photo pendant or into a locket. The only thing I recommend is that you keep the locket open while everything is drying.
Can you pour resin on photos?
Yes you can. The same still applies with the ink though – see the section about making your photo pendant pictures above. If you’re going to use resin, I really recommend using photo paper or laserjet printed images.
Related: see the difference between Dimensional Magic and resin if you are trying to decide which one you would like to use in your project.
Wouldn’t this make a great Mother’s Day gift? I love it! Are you ready to learn how to make a DIY photo pendant? Check out the how-to below – there’s also a video!

Photo Pendant
Equipment
- Tweezers
- Jewelry tools
Materials
- Pendant blank
- Printed photo to fit your blank – laserjet
- Scrapbook paper or magazine cutouts optional
- Embellishments rhinestones, glitter
- Mod Podge Matte
- Mod Podge Dimensional Magic
- Beads and jewelry findings
- Craft glue optional
Video
Instructions
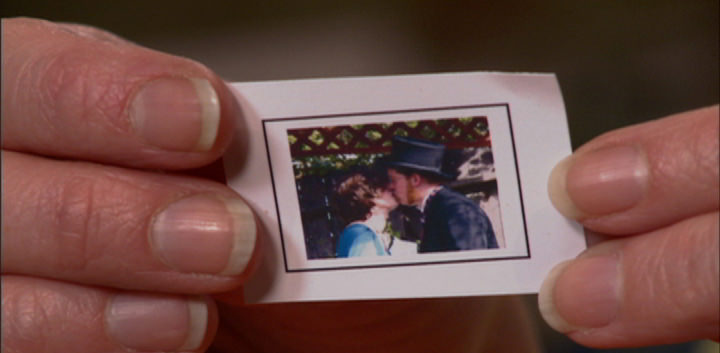
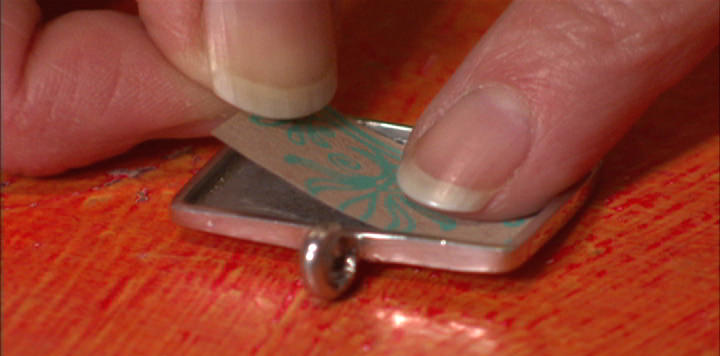
- Print out your photo on a laserjet printer and trim down to fit your bezel or surface. Trim your paper or magazine cutouts at this time also (optional).
- Add to the bezel or surface using Mod Podge. Add any embellishments you like with craft glue. Let dry for several hours.
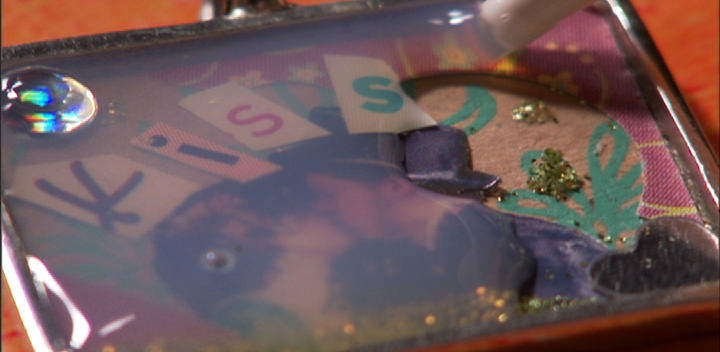
- Add Dimensional Magic to the bezel or surface, filling until you reach the sides and top. Pop all bubbles with a pin and let dry on a flat surface for 24 hours.
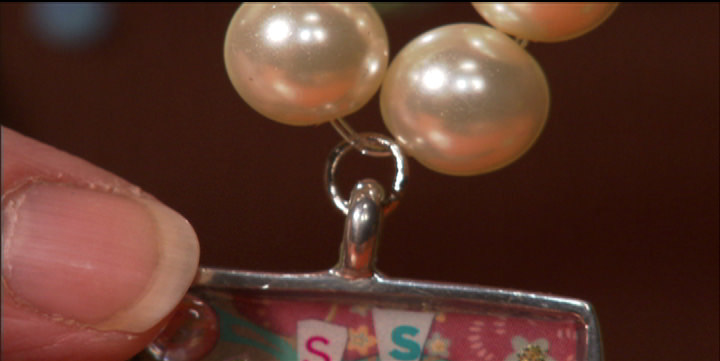
- Create a necklace or bracelet using basic jewelry tools and findings.
Notes
- Dimensional Magic can sometimes sink in the center as it dries. You can apply a second coat to fill in over the top of the first coat.
- Allow Dimensional Magic to dry in a room temperature environment or warmer. Cold weather or fans will make it crack.
If you enjoyed this easy photo craft, you’re going to love these other ideas:


i do like how you guys do this ideals.
Love this project!
I actually have some of these photo Pendant blanks in my wish list on Amazon!
You can even get different shapes!
Lots of fun!
Give it a try!
they work well for gifts!
Thanks for adding this to your list of easy crafts while in quarantine!
Got To love that Amazon can deliver almost anything to you pretty quickly these days!!