
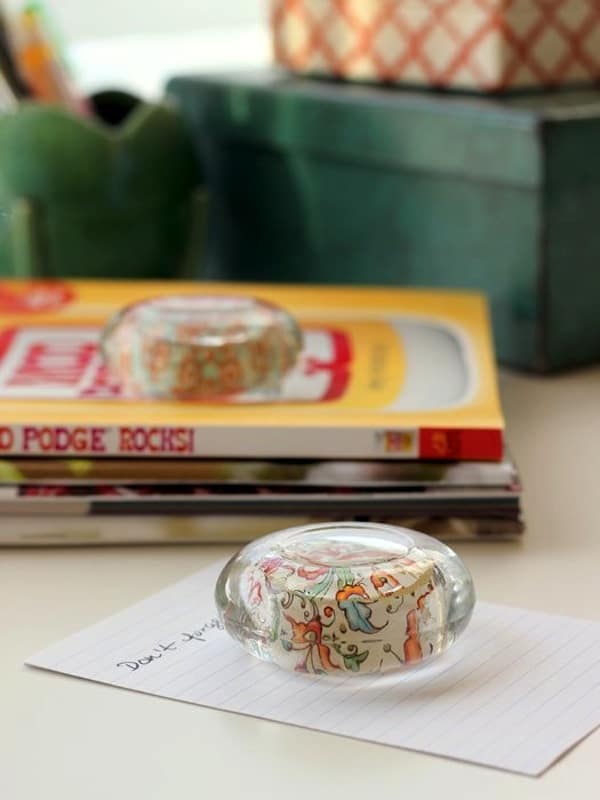
Create gorgeous, customizable DIY paperweights from dollar store glass candle holders with no mold. This easy project makes a great gift idea, and you can personalize!
Skills Required: Beginner. You’ll be using Mod Podge and mixing resin. It’s a pretty simple project, so if you’ve just done a few craft projects, you’ll be fine to try this one.
If you’re anything like me, your desk is a wild mix of creativity and chaos: notes, sketches, and to-do lists scattered everywhere. That’s why I love a good DIY project that’s not only fun to make but also functional.
Enter: DIY paperweights! Not just any paperweights, though. These are made with dollar store glass candle holders, a little Mod Podge magic, and a resin pour to give them a sleek, professional look.
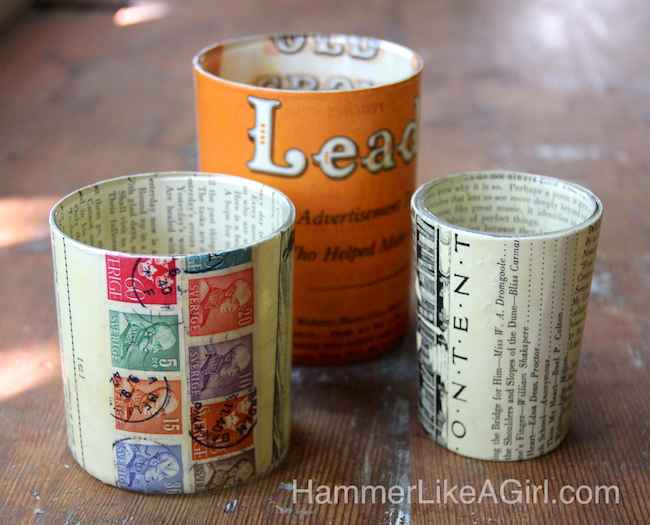
Why should you make one? First off, they’re ridiculously easy. Second, they’re customizable. Use scrapbook paper, photos, or even vintage book pages to make them match your style.
And third, they make fantastic gifts! A personalized paperweight for a teacher, coworker, or grandparent? That’s a win.
Now, I’ll be honest. When I first spotted these rounded glass votive holders, I wasn’t thinking “paperweight.” But then inspiration struck!
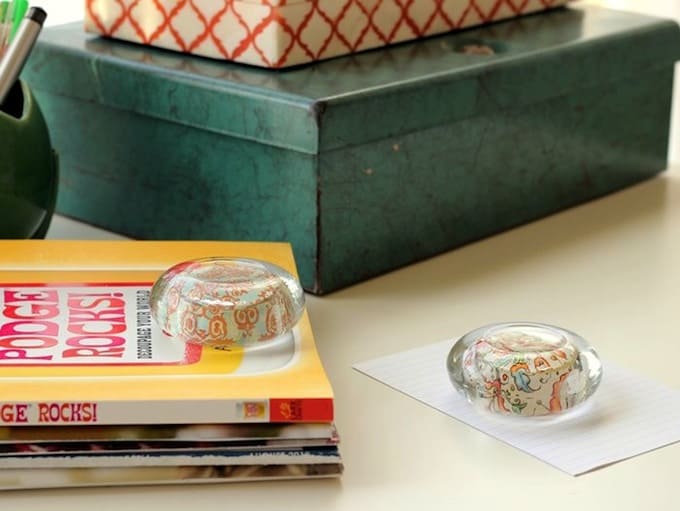
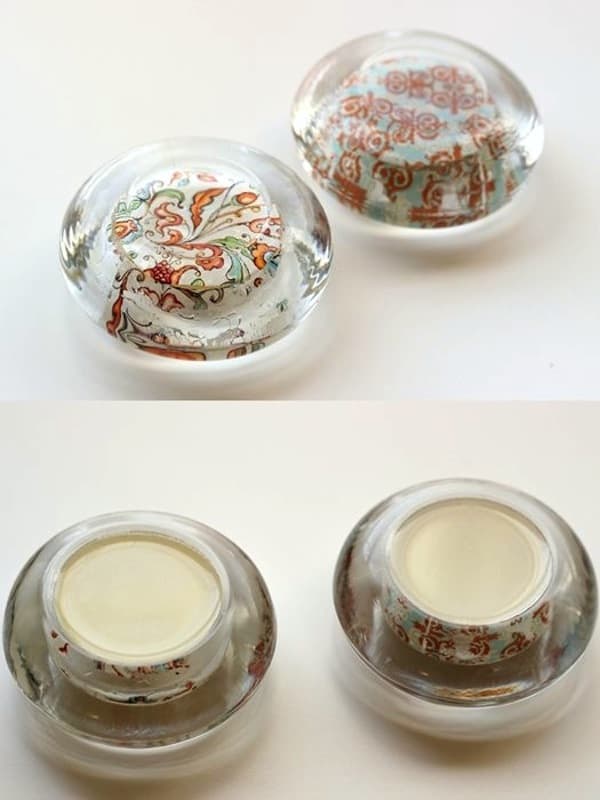
Flip them upside down, add a pop of pretty paper, and seal it all under a smooth layer of resin, and suddenly, you’ve got something chic and useful.
And the best part? You can get as creative as you want. Embed pressed flowers, add glitter, or layer different papers for a unique look.
However you design yours, one thing’s for sure – you’ll never look at a glass candle holder the same way again! Ready to make your own? Let’s do it!

Make a Paperweight
Equipment
- Protective equipment gloves, respirator, supplies for epoxy
Materials
- 2 Glass candle holders shallow
- Scrapbook paper
- Mod Podge Gloss
- Epoxy resin and any needed materials to mix like: disposable container, gloves, stick, etc.
Video
Instructions
- Find a round object that is a similar size to the circular inset of the candle. Trace a circle around the item and cut the shape to fit inside the glass candle holder. Trim a strip of paper that will line the sides for the hole in the glass.
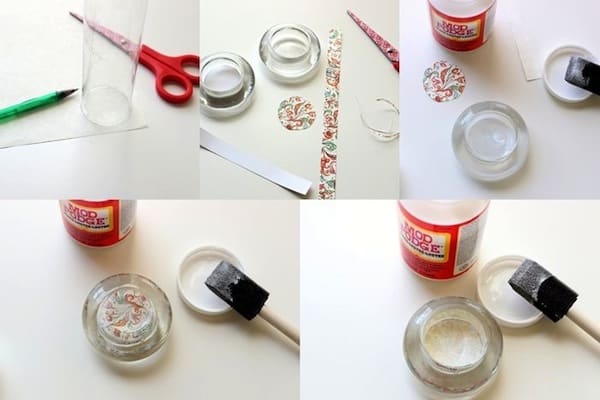
- Brush a thick layer of Mod Podge on the interior areas of the glass. Press the two pieces of paper (the circle and the strip) onto the glass, with the back of the paper facing you (the printed side should be facing outward through the glass). Smooth out any bubbles.
- Once that dries, apply another thick coat of Mod Podge on top of the paper. Allow that to dry completely.
- Mix the resin in a disposable container in a 1:1 ratio. Stir and whip the mixture thoroughly (for about 2 minutes) and pour that solution immediately into the cavities of the candle holders.
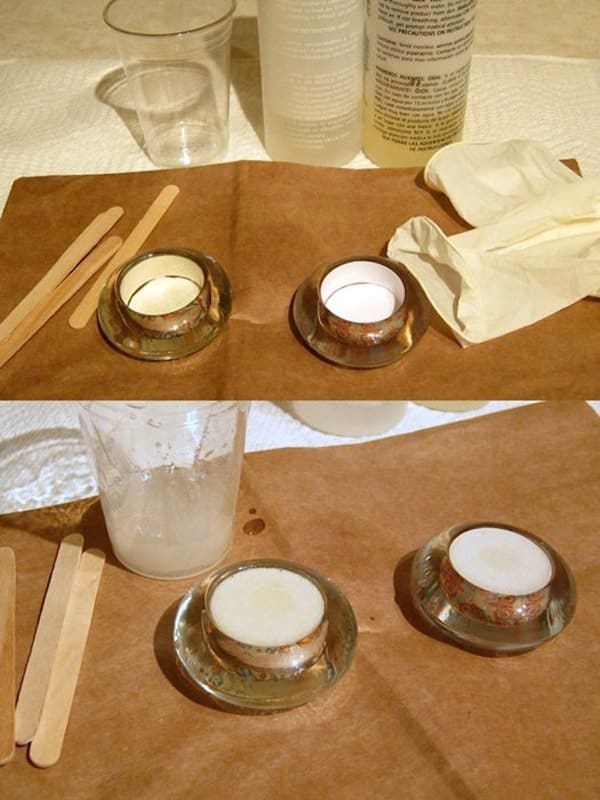
- The resin mixture is self-leveling and bubbles will rise to the top on their own. But you can help eliminate the bubbles by exhaling over the surface. Allow the resin to harden and cure for at least 24 hours.
Notes
If you loved these DIY paperweights, here are some other resin projects I think you might enjoy:
Cutting Board • Geode Coasters • Gold Leaf • Keychains • Ocean Resin Art • Preserve Flowers • Resin Coasters • Resin Frame • Resin Jewelry Making • Wood Slice Coasters

I would like a simplistic add-on suggestion- I would add a colorful piece of felt to bottom that would keep it from sliding too much.
Thank-you for this cute gifting idea.
That’s a great idea Lynette! Thanks for the suggestion and happy holidays!
What a cute idea, just one question. What type of resin did you use specifically? And where did you buy it?
This is one of those “why didn’t I think of that?” crafts. I have some heart shaped rocks that I’ve been wanting to make into paperweights. Thanks for the idea!
I’ll do this hand craft for sure!!! I’ll do many of them as a nice gift !
Brilliant! 🙂 Here’s my post from last February from The Big Book of Crafts 2! http://www.markmontano.com/2012/02/ikea-12-dome-paperweight.html
What an awesome idea! I love it!!
Love, love, LOVE this idea!!! Just a question though, will the paper fall out if I don’t have the resin??? I’m not so sure about the resin thing – especially with a 3 yr old that is literally into EVERYTHING!!!