
Make a Paperweight
Learn how to make paperweights out of dollar store supplies! This is such an easy craft idea.
Yield: 2 paperweights
Cost: $3
Equipment
- Protective equipment gloves, respirator, supplies for epoxy
Materials
- 2 Glass candle holders shallow
- Scrapbook paper
- Mod Podge Gloss
- Epoxy resin and any needed materials to mix like: disposable container, gloves, stick, etc.
Video
Instructions
- Find a round object that is a similar size to the circular inset of the candle. Trace a circle around the item and cut the shape to fit inside the glass candle holder. Trim a strip of paper that will line the sides for the hole in the glass.
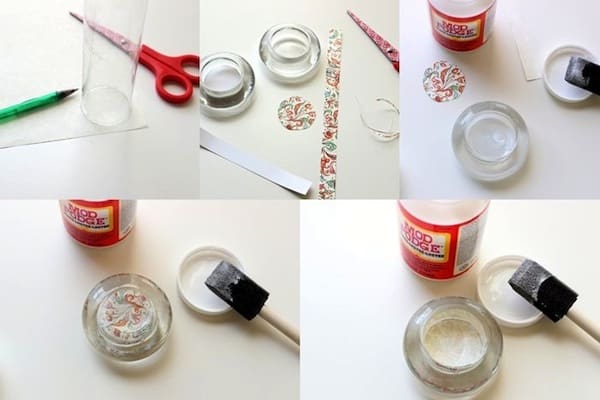
- Brush a thick layer of Mod Podge on the interior areas of the glass. Press the two pieces of paper (the circle and the strip) onto the glass, with the back of the paper facing you (the printed side should be facing outward through the glass). Smooth out any bubbles.
- Once that dries, apply another thick coat of Mod Podge on top of the paper. Allow that to dry completely.
- Mix the resin in a disposable container in a 1:1 ratio. Stir and whip the mixture thoroughly (for about 2 minutes) and pour that solution immediately into the cavities of the candle holders.

- The resin mixture is self-leveling and bubbles will rise to the top on their own. But you can help eliminate the bubbles by exhaling over the surface. Allow the resin to harden and cure for at least 24 hours.
Notes
Step 2: Smooth out any bubbles (they will be easy to see when you look through the glass).
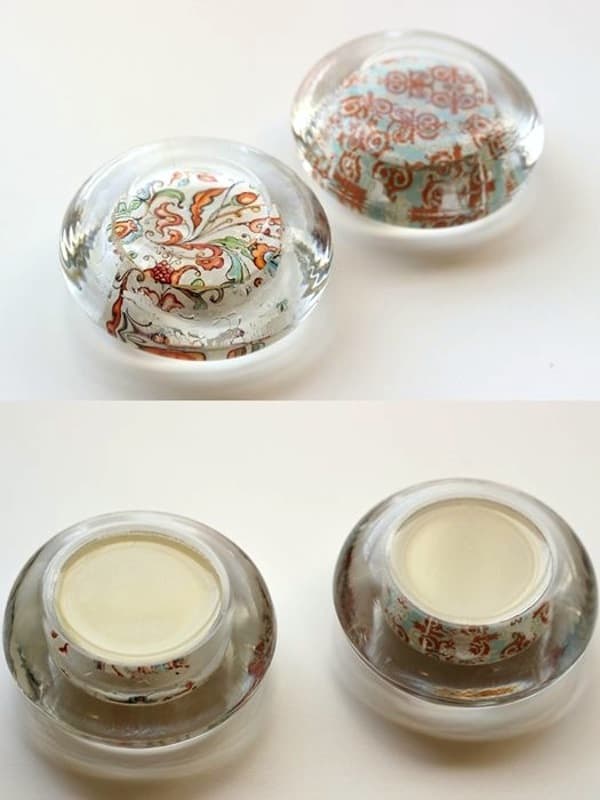
Step 3: You can technically stop at this point and you will have a pretty, decorated piece of glass that will function as a paperweight.
I chose to go a little further and fill that open cavity with resin so that the piece looked more finished. Adding the resin also added more weight to the object, making it feel like a heavy piece of glass.
Step 4: Set up an area to pour your resin that is well ventilated. Read the directions on the box carefully. Wear the proper advised protection. You'll just mix a little bit of resin for this project, so either make a bunch of them or only mix a little bit out of each bottle.
Step 5: You can also use a propane torch (the carbon dioxide, not heat, is what helps release the trapped air).