
Learn to craft a give thanks sign with simple materials! No power tools needed—perfect for beginners. Looks great with your decor.
Skills Required: Beginner. It’s relatively easy even if you’ve never crafted before. Just follow the steps closely for painting and Mod Podge and be patient and you’ll achieve success.

Thanksgiving is time of warmth, gratitude, and creative crafts! Are you ready to add a touch of handmade charm to your Thanksgiving decor this year?
Well, grab that old sign or piece of wood you were thinking about tossing out, because I’m going to show you how to transform it into a delightful Give Thanks sign that’s as easy as pie (and nearly as satisfying).
Imagine this: a cozy corner of your home adorned with a sign that not only adds to the festive atmosphere but also boasts your crafting prowess.
It’s not just any sign; it’s your creation, infused with your style and effort. Whether you’re a seasoned DIYer or a newbie looking to dip your toes into the world of crafts, this project is tailor-made for you.

This project requires just a few simple materials like fabric, wood stakes, and Mod Podge. And the best part? No power tools needed, making this craft as beginner-friendly as it gets.
You’ll cut, glue, and smooth your way to a beautiful background. Then, with a bit of painting and cutting (don’t worry, I’ll walk you through each step), you’ll frame your masterpiece in wood, giving it that farmhouse charm that screams ‘Thanksgiving’.
But what really brings this Thanksgiving sign to life is the vinyl letters – choose a heartfelt holiday message or maybe just a simple ‘Give Thanks‘. Whether you pick up some stickers or cut your own, I’ve got tips to make sure they stick and look great.

So, why not make this holiday a little more personal? Gather your supplies, clear out an afternoon, and let’s create something that’ll make your Thanksgiving not just thankful, but crafty too. Ready to get started? Read on, and let’s make some decor magic happen!
Gather These Supplies
- Seasonal sign – the dollar store is great for these if you don’t have one
- Wood stakes
- Stain or craft paint – brown
- Canvas or linen fabric
- Scissors
- Mod Podge
- Flat paintbrush
- Saw
- Miter box
- Hot glue gun and glue sticks
- Vinyl letters – buy or cut your own
Tips and Thoughts for This Project
Get a free SVG file and printable for the graphic we used here (for personal use only).
I used square wood stakes for the frame, but you can use square wood dowels as well.
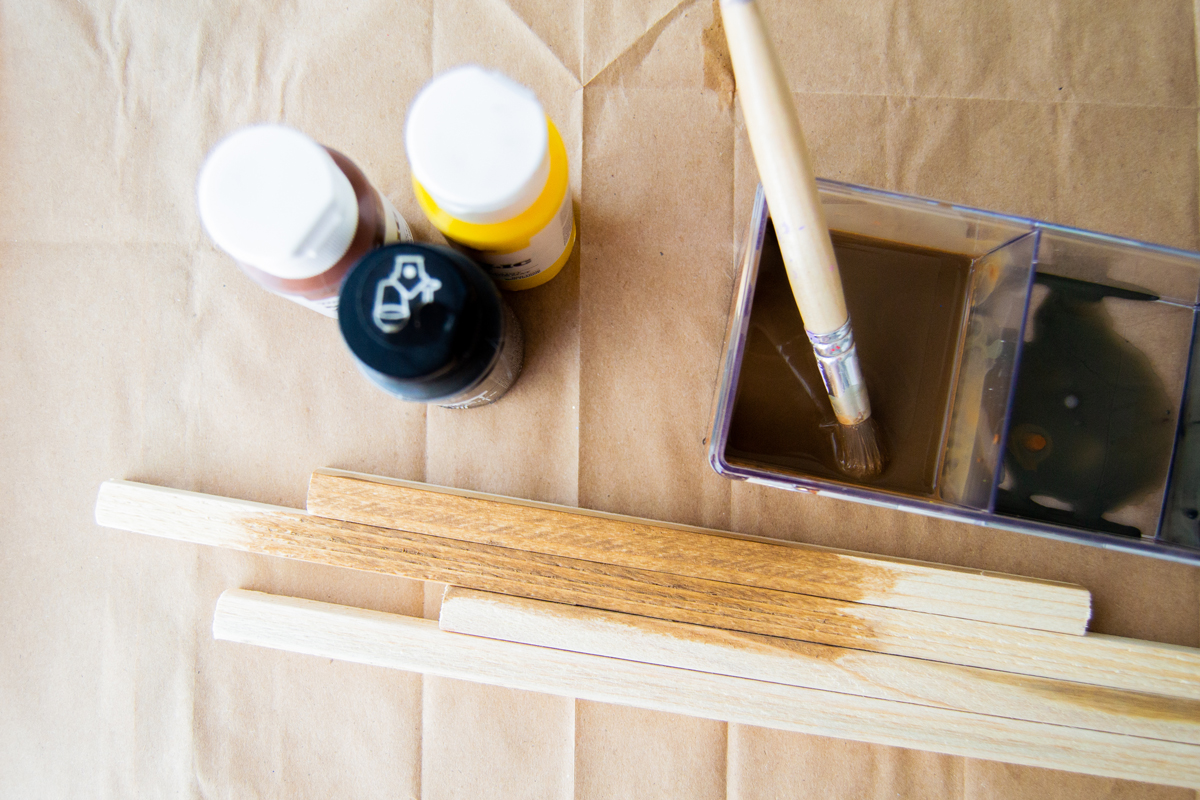
No stain? No problem! Use watered-down brown paint as a ‘stain’. I mixed my brown with some yellow and black to create the brown tone that I wanted. Brush it onto the wood pieces and don’t forget to paint the ends as well.
You can use any Mod Podge formula depending on the finish you’d like. I recommend one of the basics like, Gloss, Satin, or Matte.

This simple sign comes together quickly in an afternoon – customize it with your own wording or even add embellishments! Use it as a standing sign to add to a mantel, or add some hanging hardware to convert it into a wall hanging or even door decor. Enjoy making your own sign with the how to card below:

Give Thanks Sign
Equipment
- Saw
- Miter box
Materials
- Seasonal sign
- Wood stakes
- Stain or craft paint brown
- Canvas or linen fabric
- Mod Podge
- Vinyl letters buy or cut your own
Instructions
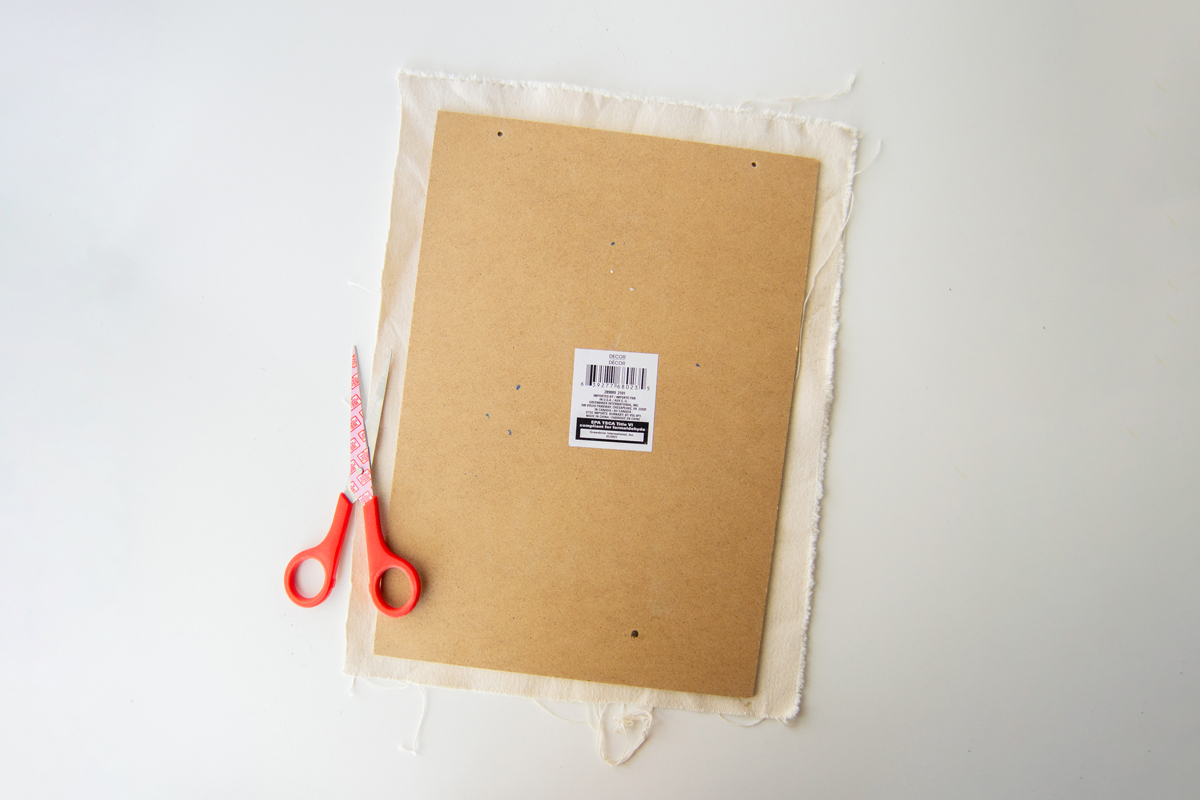
- Measure your sign and cut your fabric to size. I like leaving a bit as a border to fold back or trim as needed.
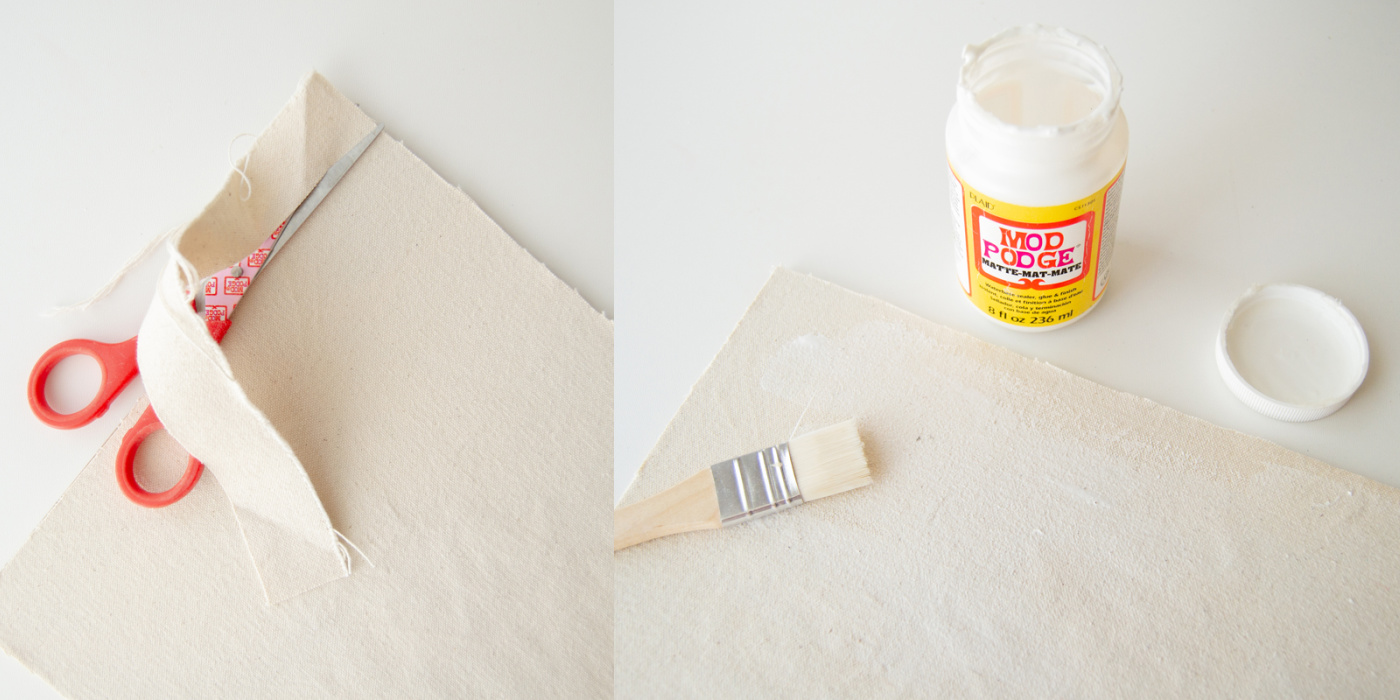
- Cover the sign with Mod Podge and attach your fabric. Use a brayer to flatten it down and ensure that there are no ripples or lifted areas. Wait for that to dry.

- Once dry, cut the excess fabric and then cover the top again with Mod Podge. Wait for that layer to dry.
- Cut the wood first. I measured the longest sides and cut that with a miter box. For the short sides, I measured and then subtracted the thickness of both the long pieces of wood to get the correct fit. Then stain all pieces with paint and let dry.
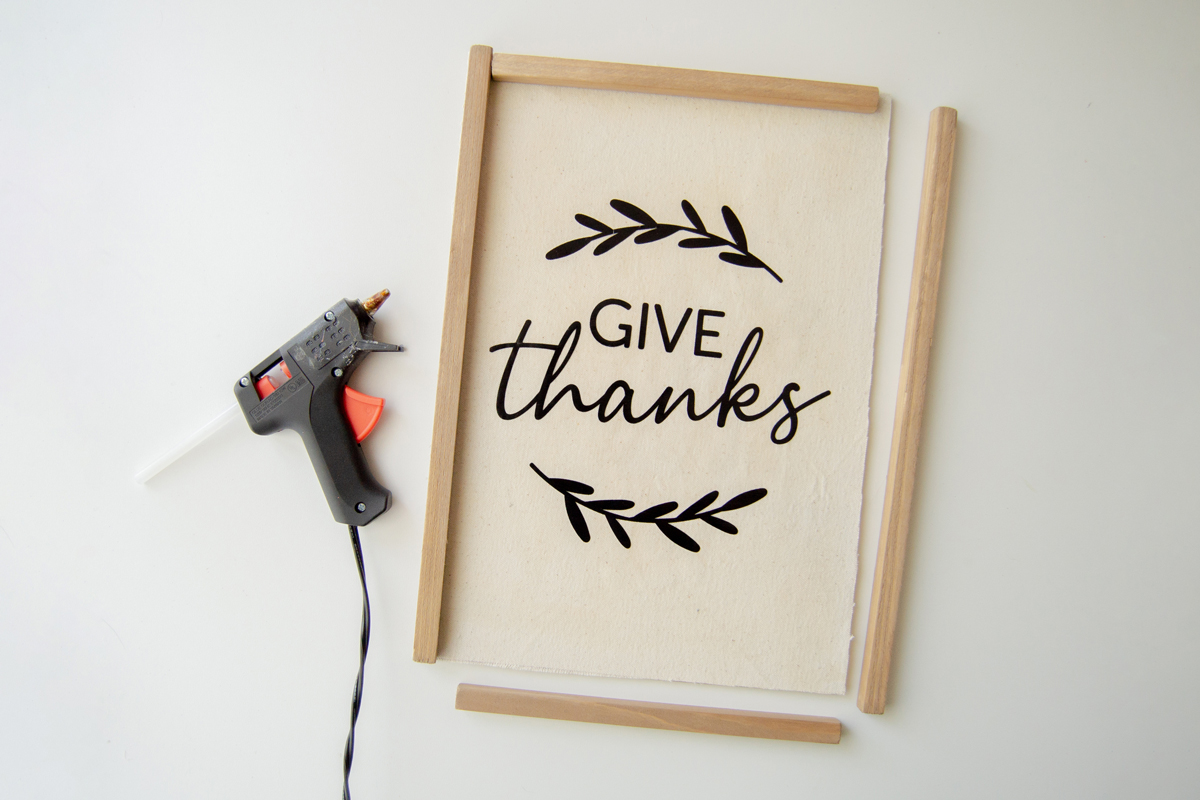
- Time to add your vinyl sentiment. Use store bought vinyl stickers or cut your own with a die-cutting machine such as a Silhouette or Cricut. Use a scraper or brayer to adhere it firmly to the fabric surface.

- If your vinyl is having problems sticking or it’s peeling off easy, add a layer of Mod Podge on top to secure it in place. Wait for that to dry before proceeding to the final step.

- Finally, attach your wood frame using hot glue, making sure everything is aligned.
If you enjoyed the sign, let me know in the comments! I’d also love for you to check out the following posts:
Chalkboard Message Board • DIY Fall Signs • Easy Fall Sign • Friendsgiving Sign • Glitter Acorns • Leaf Bowl • Paper Mache Pumpkins • Thanksgiving Napkin Rings • Wood Block Pumpkins


This is super cute! I’m a fan of washi tape but I didn’t know there was a woodgrain style… gonna have to find some!
What a great idea! Looks easy & inexpensive for an expensive designer look. I really could not figure out where the Washi tape was used. I never would have guessed the plaque was covered with Washi tape! I will be trying this craft technique out with my namesake niece.