
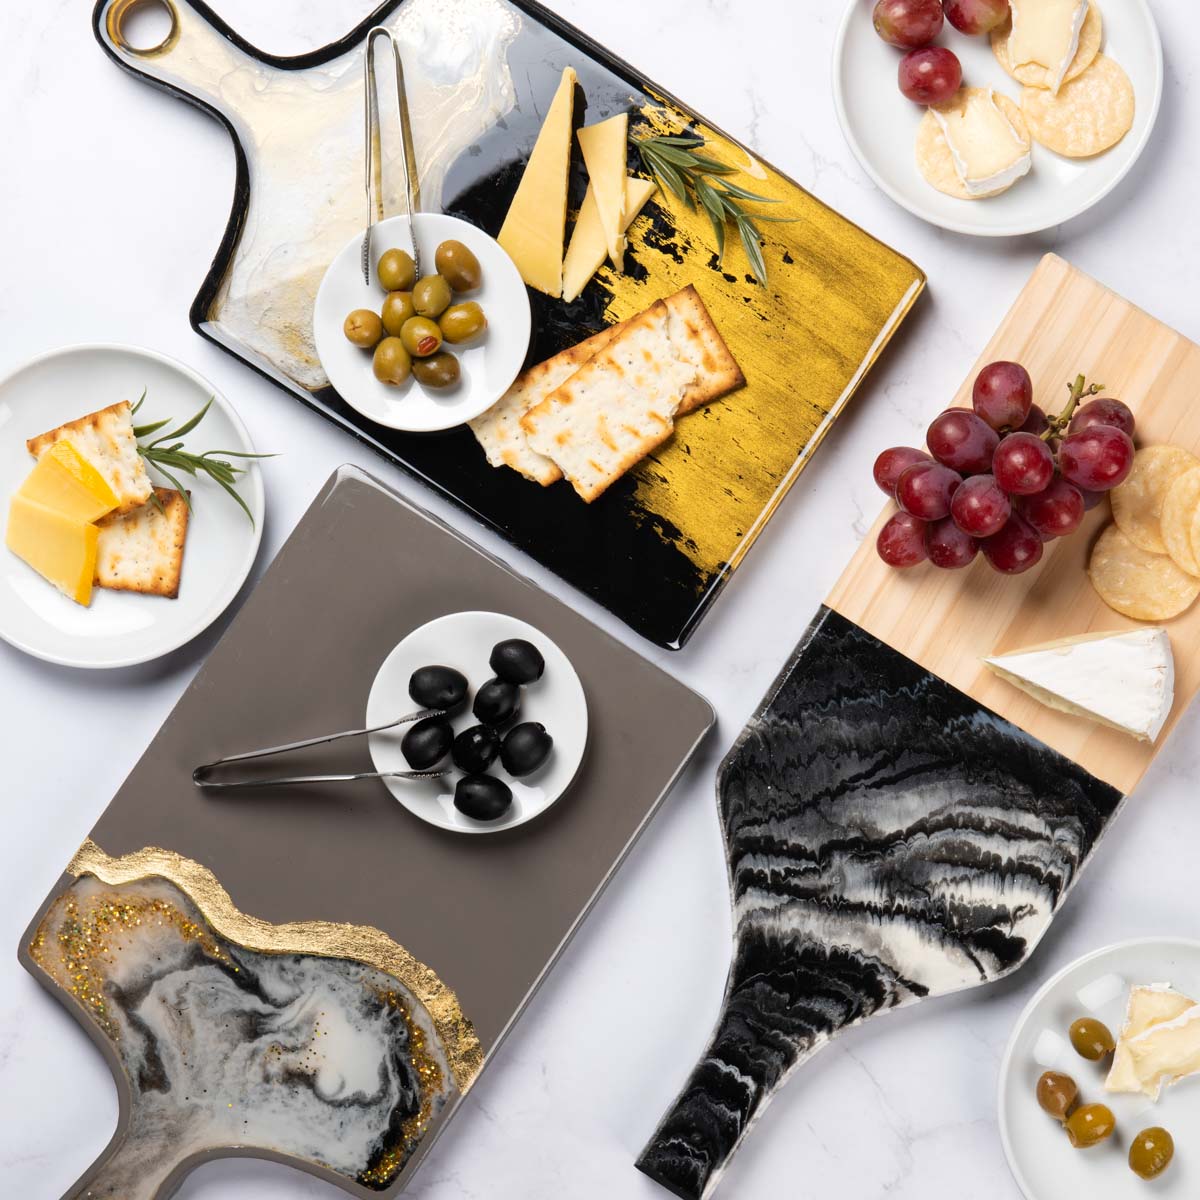
A resin cutting board functions as both a useful kitchen tool and a piece of decor! Learn how to decorate a cutting board with resin for home or a gift. You can also use this as a resin charcuterie board or use the same method on a round wood board.
Skills Required: Intermediate. I recommend having some experience with resin since you’ll be mixing colors as well as pouring in different patterns. I’d practice on a smaller surface before doing it on a cutting board just to make sure you don’t ruin your surface.
I hope no one in my family sees this post before Christmas, for very good reason – resin cutting boards are one of my top handmade gift ideas of the year! If there’s one thing I use on a regular basis, it’s a cutting board. I actually have probably 5 – 6 in different sizes.
I really love a nice cutting board, and what I really love about these is that they aren’t just useful. They are pretty enough to display in home decor. I like that you can make them colorful, metallic, or even do an ocean themed cutting board with a bit of sand.
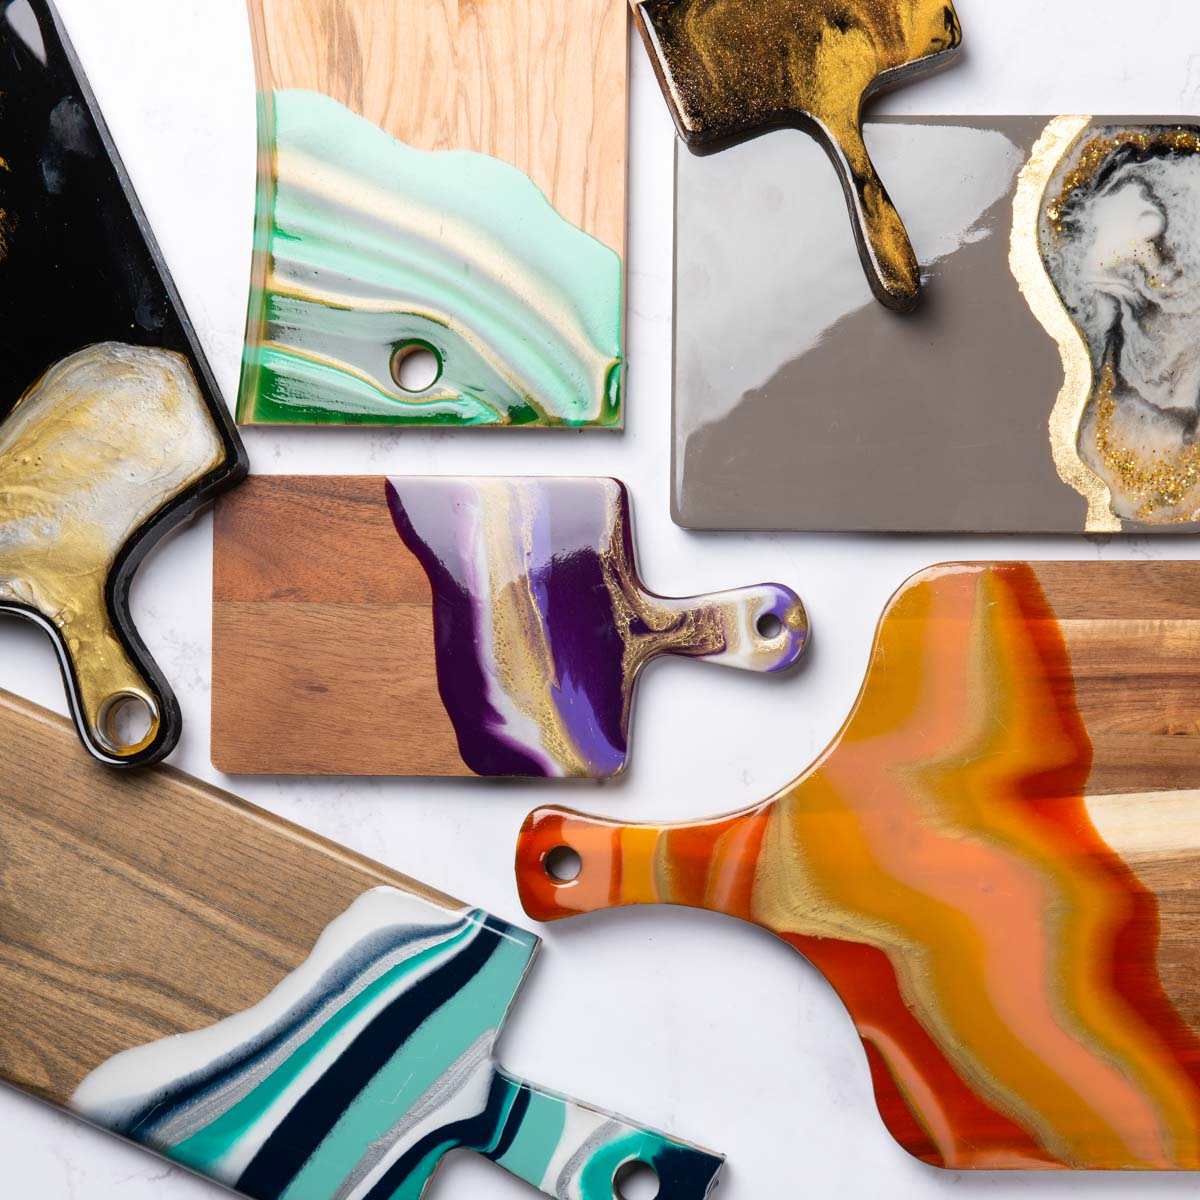
Once you start experimenting, you’re going to see all the variations! And I’m going to show you a few different resin cutting board tutorials today.
What do you need to make resin cutting boards?
You’ll need a cutting board, resin, acrylic paint, alcohol ink, and protective gear. You’ll also need mixing cups in various sizes and something to mix with like popsicle sticks. The cups should not be reused.
How much epoxy resin do I need for a cutting board?
It depends on how much of the cutting board you would like to cover. A 5″ x 7″ area (if you’re not covering the whole board) would use about 2 – 3 ounces.
My large cutting board (10″ x 13″) would take 8 – 9 ounces to cover the entire thing. Measure the area you’d like to cover and use the calculator here.
Can you use regular food coloring in resin?
Sometimes people want to reduce project costs by using food coloring. You can do that, but keep in mind the epoxy will be more transparent like stained glass.
If your background is dark (like a wood board), the resin color might not show up. That’s why I use acrylic paint.
Are you ready to dive into the tutorials? I’m going to show you how to make a few different epoxy cutting boards: blue and aqua, gold gilded, red and orange, and gold and black. The methods are the same with just a few variations. Keep reading below!
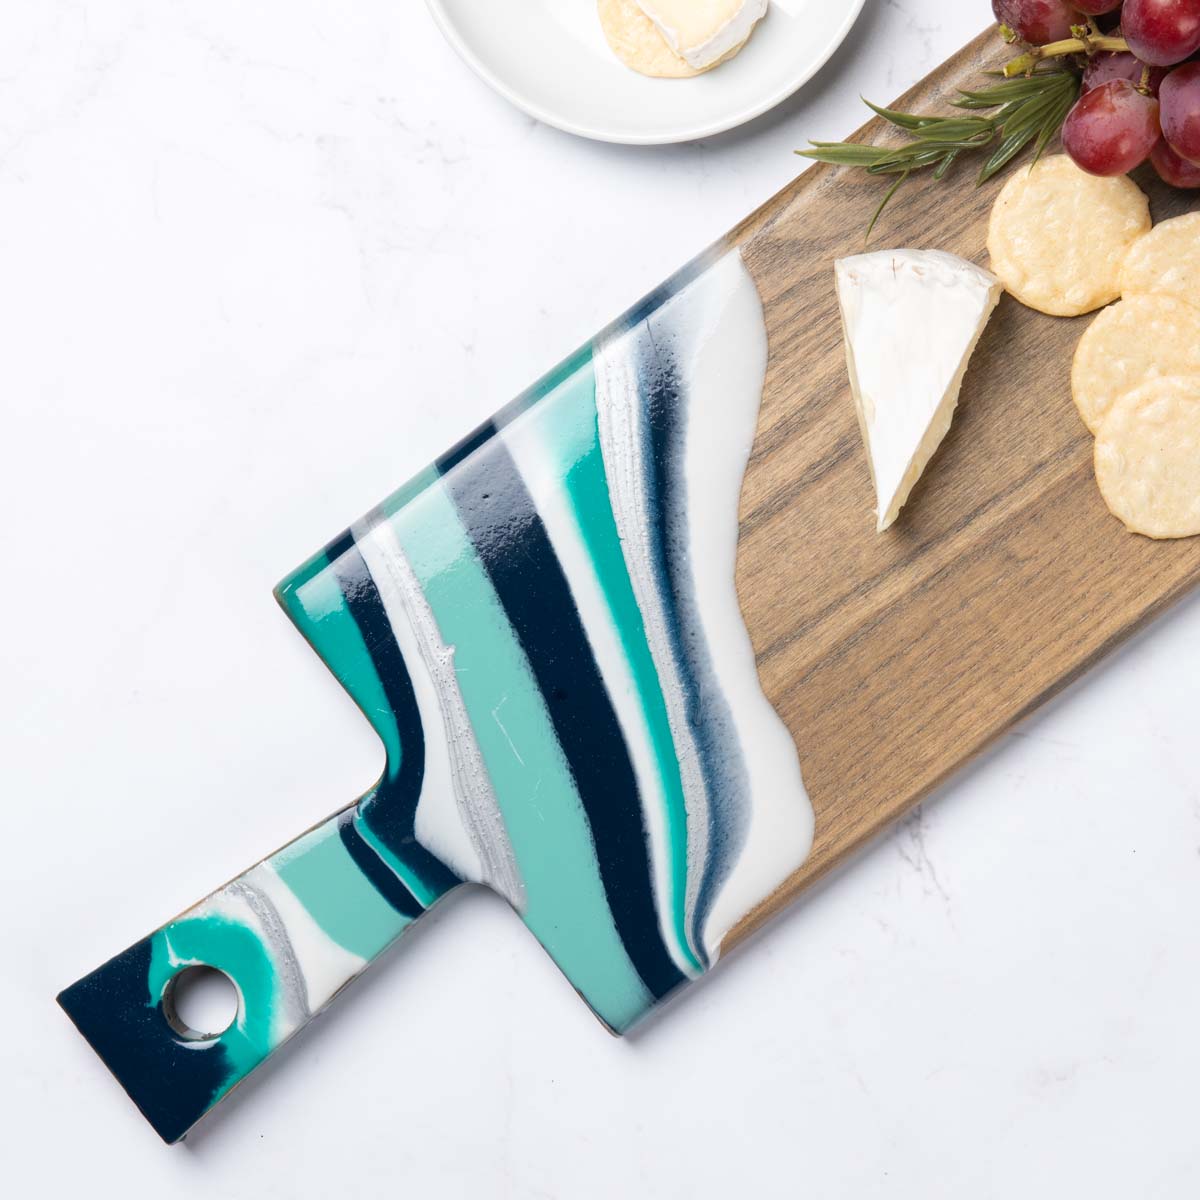
Blue and Aqua
Gather These Supplies
- Wood cutting board
- Mod Podge Resin
- Alcohol ink – silver
- Acrylic paint – aqua, navy, white
- Respirator
- Gloves
- Cups
- Torch
- Painter’s tape or thumbtacks
1. To mix Mod Podge Resin, begin by measuring out equal amounts of resin and hardener (measure by volume not weight). Use a separate measuring cup for each part. Once equal amounts of both parts are measured, pour them into a mixing cup.
2. Gently stir the two parts together for 3 minutes. When you start to stir, cloudy swirls will appear. While mixing, make sure to scrape the sides and bottom of the mixing cup to fully incorporate the two parts.
3. Continue to mix until the cloudy swirls no longer appear and the mixture is clear. NOTE: it is best to only mix the amount that will be needed for each project, one project at a time.
4. Divide the resin into four individual small cups. Mix the resin with paint in three of the cups, and silver ink in the fourth cup. Just add a few drops of paint and ink.
5. Tape off the bottom of the cutting board along the edges or raise the board.
6. Pour each color in the order shown. Continue to add stripes of various colors with the resin until you’ve covered the area desired.
7. Use a pastry torch to remove any bubbles. Wait about five minutes and repeat.
8. Allow 24 hours to harden.
Now that you know the basic idea, here are a few variations to try.
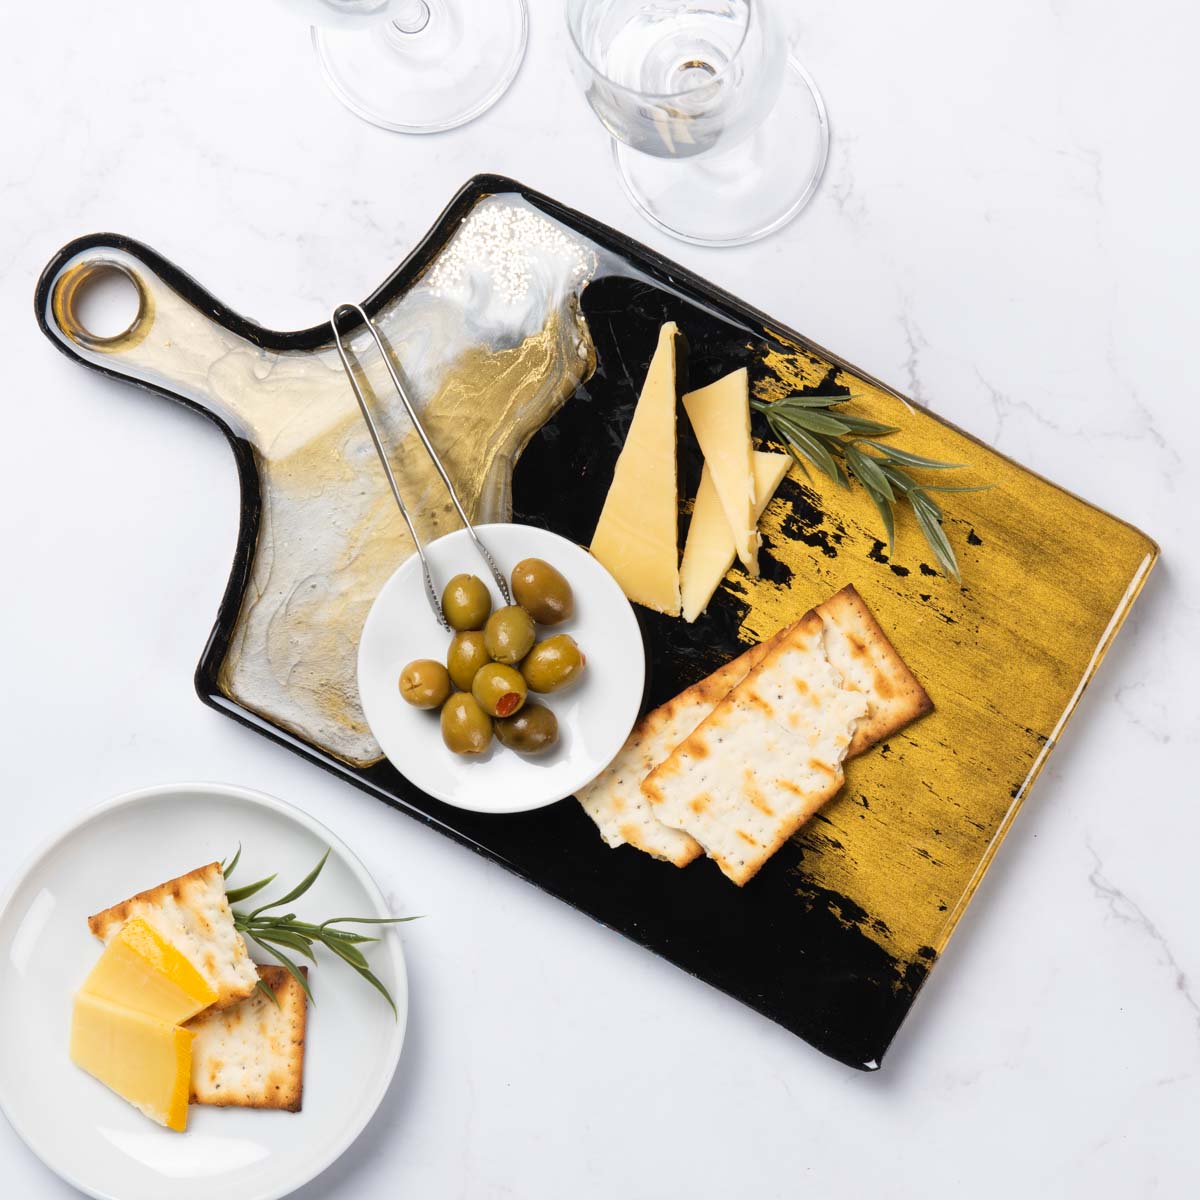
Gold and Black
Additional Supplies: gold alcohol ink, black acrylic paint, Treasure Gold, home decor layering block
1. Basecoat the cutting board black. Allow to dry.
2. Pour Treasure Gold onto your paper plate. Dip the layering block into the paint and lightly glide the treasure gold from the bottom right hand corner up towards the top. Refer to the photo for exact placement.
3. In separate cups, mix resin with gold ink and silver ink.
4. Tape off the inside of the hole.
5. Pour the two mixes onto your chosen area on top of the cutting board and move resin (using a pin or similar) around to create a marbled effect. Use the torch to remove any bubbles. Allow 24 hours for the resin to dry.
6. Build a tape wall around the entire cutting board.
7. Mix clear resin and pour onto the cutting board covering the entire top surface and make it even. Use the torch to remove any bubbles. Allow another 24 hours for the resin to dry.
8. Once dry remove the tape.
Red, Orange, and Gold
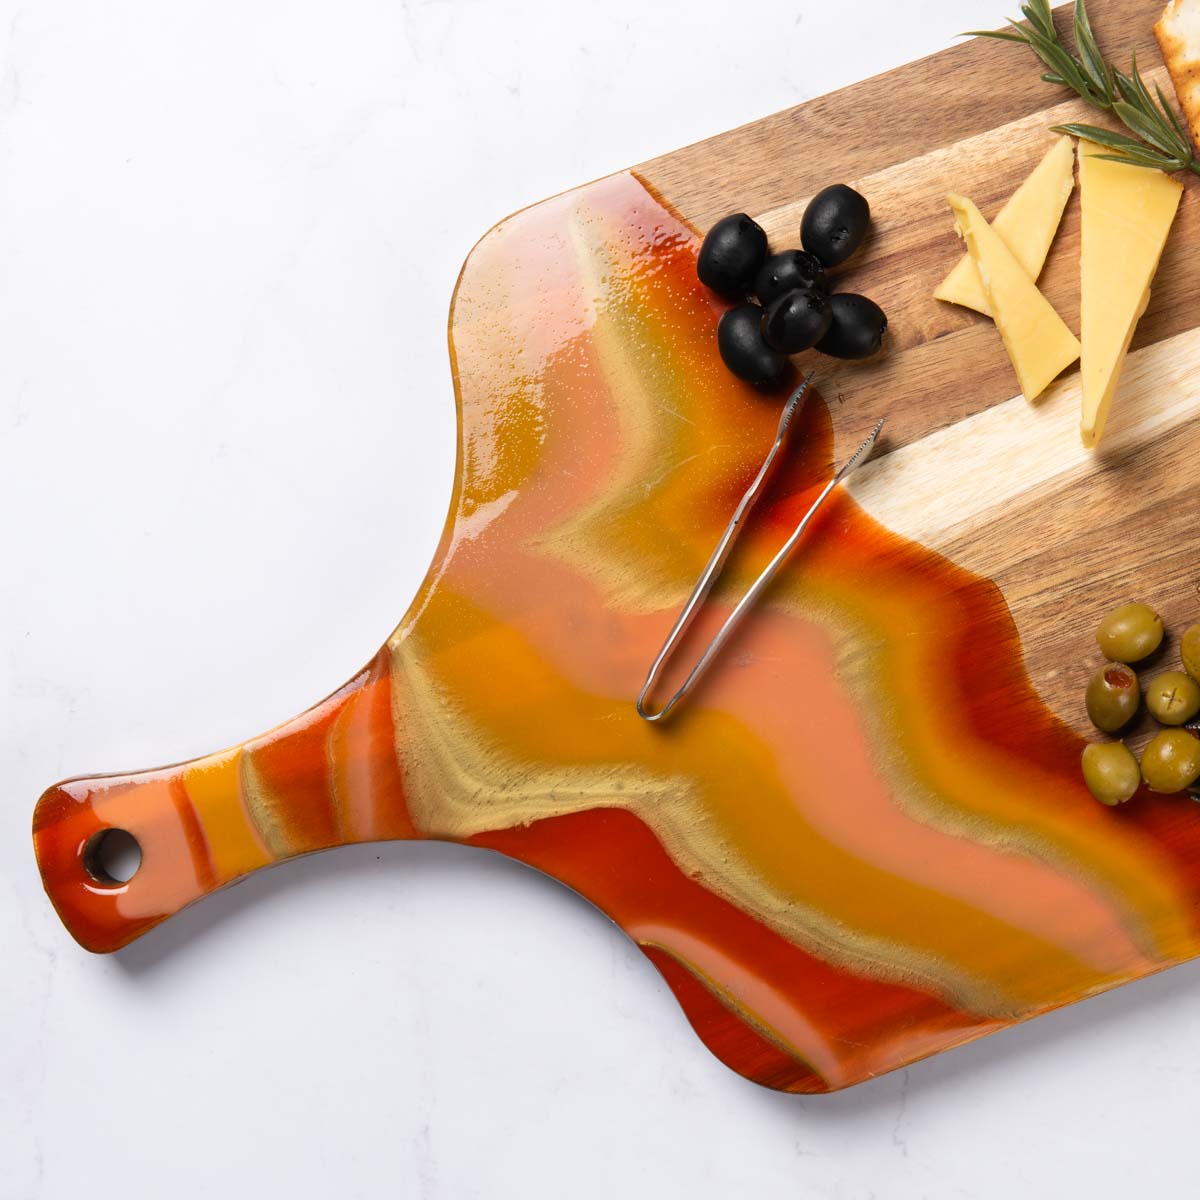
Additional Supplies: gold alcohol ink, acrylic paint – red, dijon, and peach
1. Mix resin according to instructions on packaging.
2. Mix resin with paint in individual cups (1 – 3 drops each).
3. Tape off the bottom of cutting board along the edges.
4. Pour each color in the order shown in photo. Move colors around.
5. Use the torch to remove any bubbles.
6. Allow 24 hour to harden.
Gold Gilded
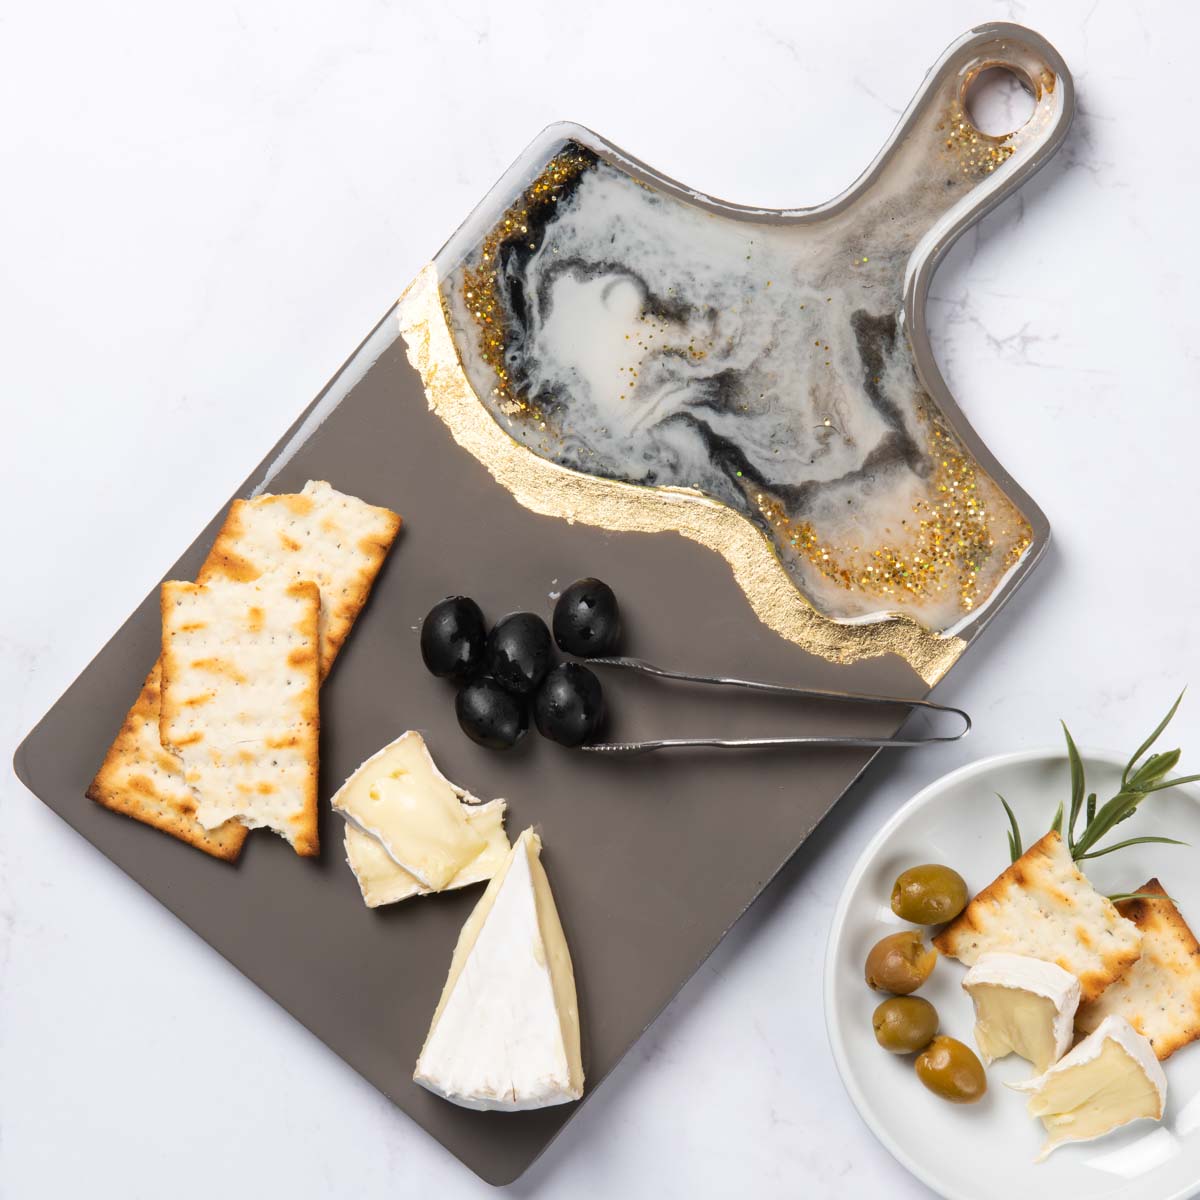
Additional Supplies: Acrylic paint – black, white, and gray, gilding sheets, gilding adhesive, gold glitter
1. Basecoat the cutting board with gray. Allow to dry.
2. Mix white paint, black paint, and gold glitter into resin in individual cups.
3. Pour the white and the black resin onto desired areas on top of the cutting board and move it around to form a marbled look. Add gold glitter as shown. Use the torch to remove any bubbles. Wait 24 hours for the resin to dry.
4. Brush the gilding adhesive along the edge of the resin, but still on the wood.
5. Allow the adhesive to dry. It will remain very sticky. Press the gilding sheet into the adhesive and allow the gold to peel off the sheet. Continue until the adhesive is covered with gold.
6. Tape the bottom of the cutting board to protect it from any runoff.
7. Mix clear resin and pour over entire cutting board. Allow to dry for 24 hours. Use the torch to remove any bubbles. Once dry remove the tape from the back.

Resin Cutting Board
Equipment
- Respirator
- Gloves
- Cups
- Pastry torch
Materials
- Wood cutting board
- Epoxy resin
- Alcohol ink silver
- Acrylic paint aqua, navy, white
- Painter's tape
Instructions
- Begin by measuring out equal amounts of resin and hardener. Use a separate measuring cup for each part. Once equal amounts of both parts are measured, pour them into a mixing cup.
- Gently stir the two parts together for 3 minutes. When you start to stir, cloudy swirls will appear. Make sure to scrape the sides and bottom of the mixing cup to fully incorporate the two parts.
- Continue to mix until the cloudy swirls no longer appear and the mixture is clear..
- Divide the resin into four individual small cups. Mix the resin with paint in three of the cups, and silver ink in the fourth cup. Just add a few drops of paint and ink.
- Tape off the bottom of the cutting board along the edges or raise the board.
- Pour each color in the order shown. Continue to add stripes of various colors with the resin until you’ve covered the area desired.
- Use a pastry torch to remove any bubbles. Wait about five minutes and repeat.
- Allow 24 hours to harden.
Video
Let me know what you think of this idea in the comments! Interested in more epoxy resin posts? Check out these other great tutorials:
DIY Coasters • Geode Coasters • Glitter Coasters • Keychains • Ocean Resin Art • Preserve Flowers • Resin Frame • Resin Jewelry Making • Wood Slice Coasters


I LOVE these resin cutting boards! I have to do one.
Can you cut on these where the resin is? They are so pretty!
Hi Edith! Yes you can – it’s food safe. Having said that, you don’t want to saw into the resin. So if you’re sawing a piece of bread, I’d stick over to the wood side . . . if you’re slicing a strawberry, you’re fine.
Awesome! I love all of them. Great job.
So I keep reading resin is contact safe only, and should not be used as a cutting board. Are you using a special epoxy that is ok for cutting?
Hi Brian! This resin is food safe, and you would really have to grind into it to make a mark. Having said that I would use this for cutting foods (like fruits, cheeses) for parties, etc. If you are sawing into a slab of meat, I’d use a meat cutting board for that. I have a few cutting boards that are nicer than others. One was a handmade gift that I cut on, but I don’t go to town on stuff. That’s how I would treat this particular item. Paring knives but not bread knives essentially.
These are great, I really like the colours you used, thanks for sharing.
Thank you for reading!
you mentioned pouring resin into the recessed area of the cutting board but no explanation on how to make that recessed area. Is there more I’m missing/
It’s hard to tell but there is a recessed area! Here is the original: https://plaidonline.com/shop-products/mod-podge-resin-pouring-surface-cutting-board-plaque-56650e
Having said that I edited the instructions for any cutting board because it is confusing! You can do it without a recessed area too 🙂
Thankyou. Very clear instructions.
Ready to try a resin cutting board
I hope it turns out great!
What if you don’t have a torch? Will it still work, and look good?
If you don’t have a torch it’s fine. You can use a lighter or exhale onto the surface to break up bubbles.
@Betty, Betty- I use a heat gun to get rid of bubbles and push the resin around. I can manipulate the resin at a slower steady pace with a H-gun. I like to think of my blow torch as the bigger paintbrushes used in the baselayers of a painting. My heat gun is my #6 or #4 size paint brushes used towards the latter half of a painting. My H-guns also have a low and high setting. You can find a heat gun on Amazon or any Hardware store.
How do you know if the resin is food safe?
It will say on the package! Some is and some isn’t. The Mod Podge brand is food safe!
I’m wanting to make a cutting board for my sister for Mother’s Day!! But I’m trying to figure out how to tape inside of the hole so resin doesn’t get in there. Is there a video to watch this?
Hi Caitlin! You’ll just tape it in a circle with the tape facing out! Keep the tape straight up!
I was reading the instructions and I found one part confusing. By the way the ideas are beautiful. But when you said to use the torch after pouring the resin and then repeat I wasn’t sure what you meant about repeating. Is this because you only do a small area at once or it needs two coats I’m just not sure? Thanks for the ideas
So for that Pamela, you are torching because there are bubbles – Then basically you do it again in five minutes because more bubbles might appear. They might not, but they might. So you don’t need two coats (although you can if necessary!).
Hi there. These are so cool. If they are given to someone as a gift, are there “care for” instructions to ho with it by chance? Thank you
Do you recommend doing both or just one side? Thank you. These look fun.
Just one side! 😀 Good luck! Let us know how it goes.
Do you have a video on how to or pictures of the “tape wall” you talked about?