This Dollar Tree wood pumpkin DIY is easy and inexpensive to do for Halloween or fall decor! I’ll show you how to decorate on a budget.
Skills Required: Beginner. To make this Halloween craft, it helps to have experience with paint and Mod Podge. You’ll be applying both and then ironing a napkin down. Finally you’ll add embellishments.

Everyone who knows me that I love a few things. I love a lot of things, but I truly love a precious few things, like most of us. Frozen yogurt. My pug Otto. Skiing. And this time of year? I really love Halloween crafting.
More specifically Halloween crafting with Dollar Tree supplies!
If you haven’t been to DT during the holidays – it’s the surfaces, my friends. I absolutely love their Halloween wood surfaces, and I pretty much grab one of everything when I’m there.
Did you see my spooky pumpkins or my wooden ghost? Dollar store, my friends!
This year was no different, and I managed to snag one of these happy jack o’ lantern faces to make this Dollar Tree wood pumpkin DIY. And I’m excited to share how I did it.
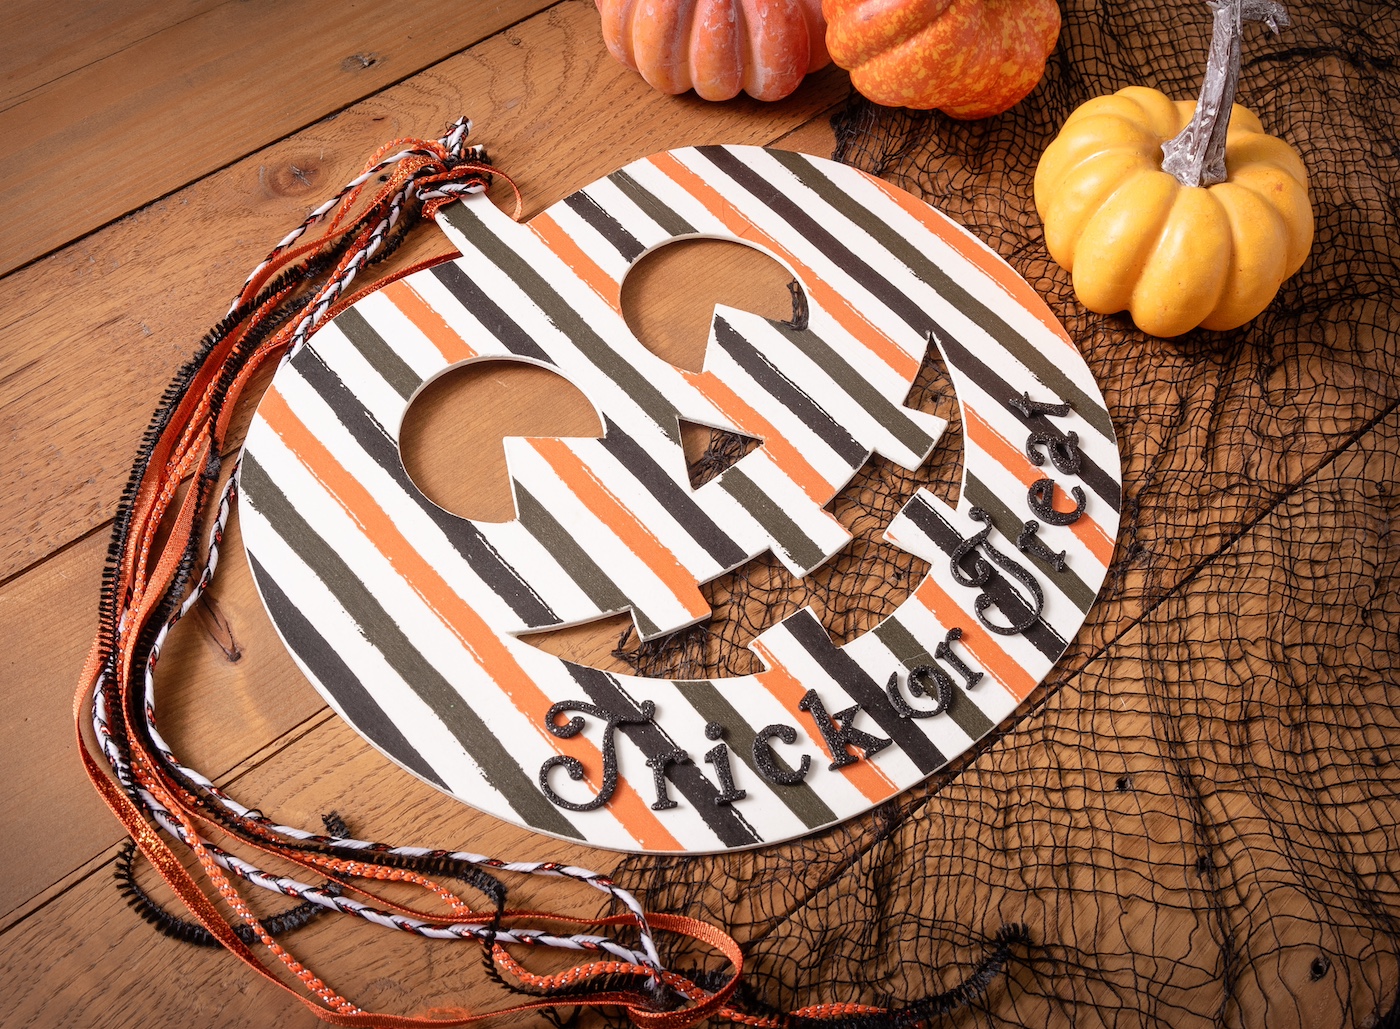
One of the other methods I’ve been using a lot is paper napkin decoupage on wood – using Mod Podge and an iron.
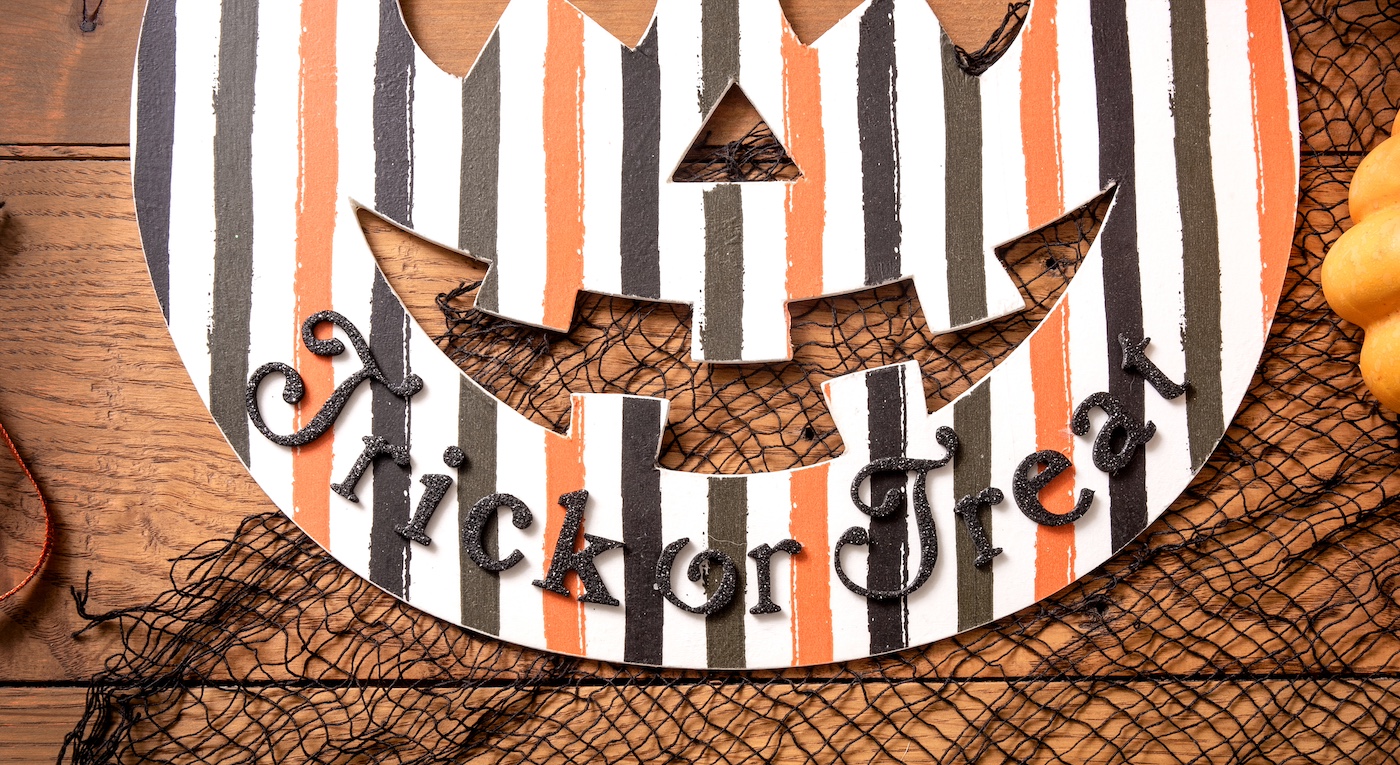
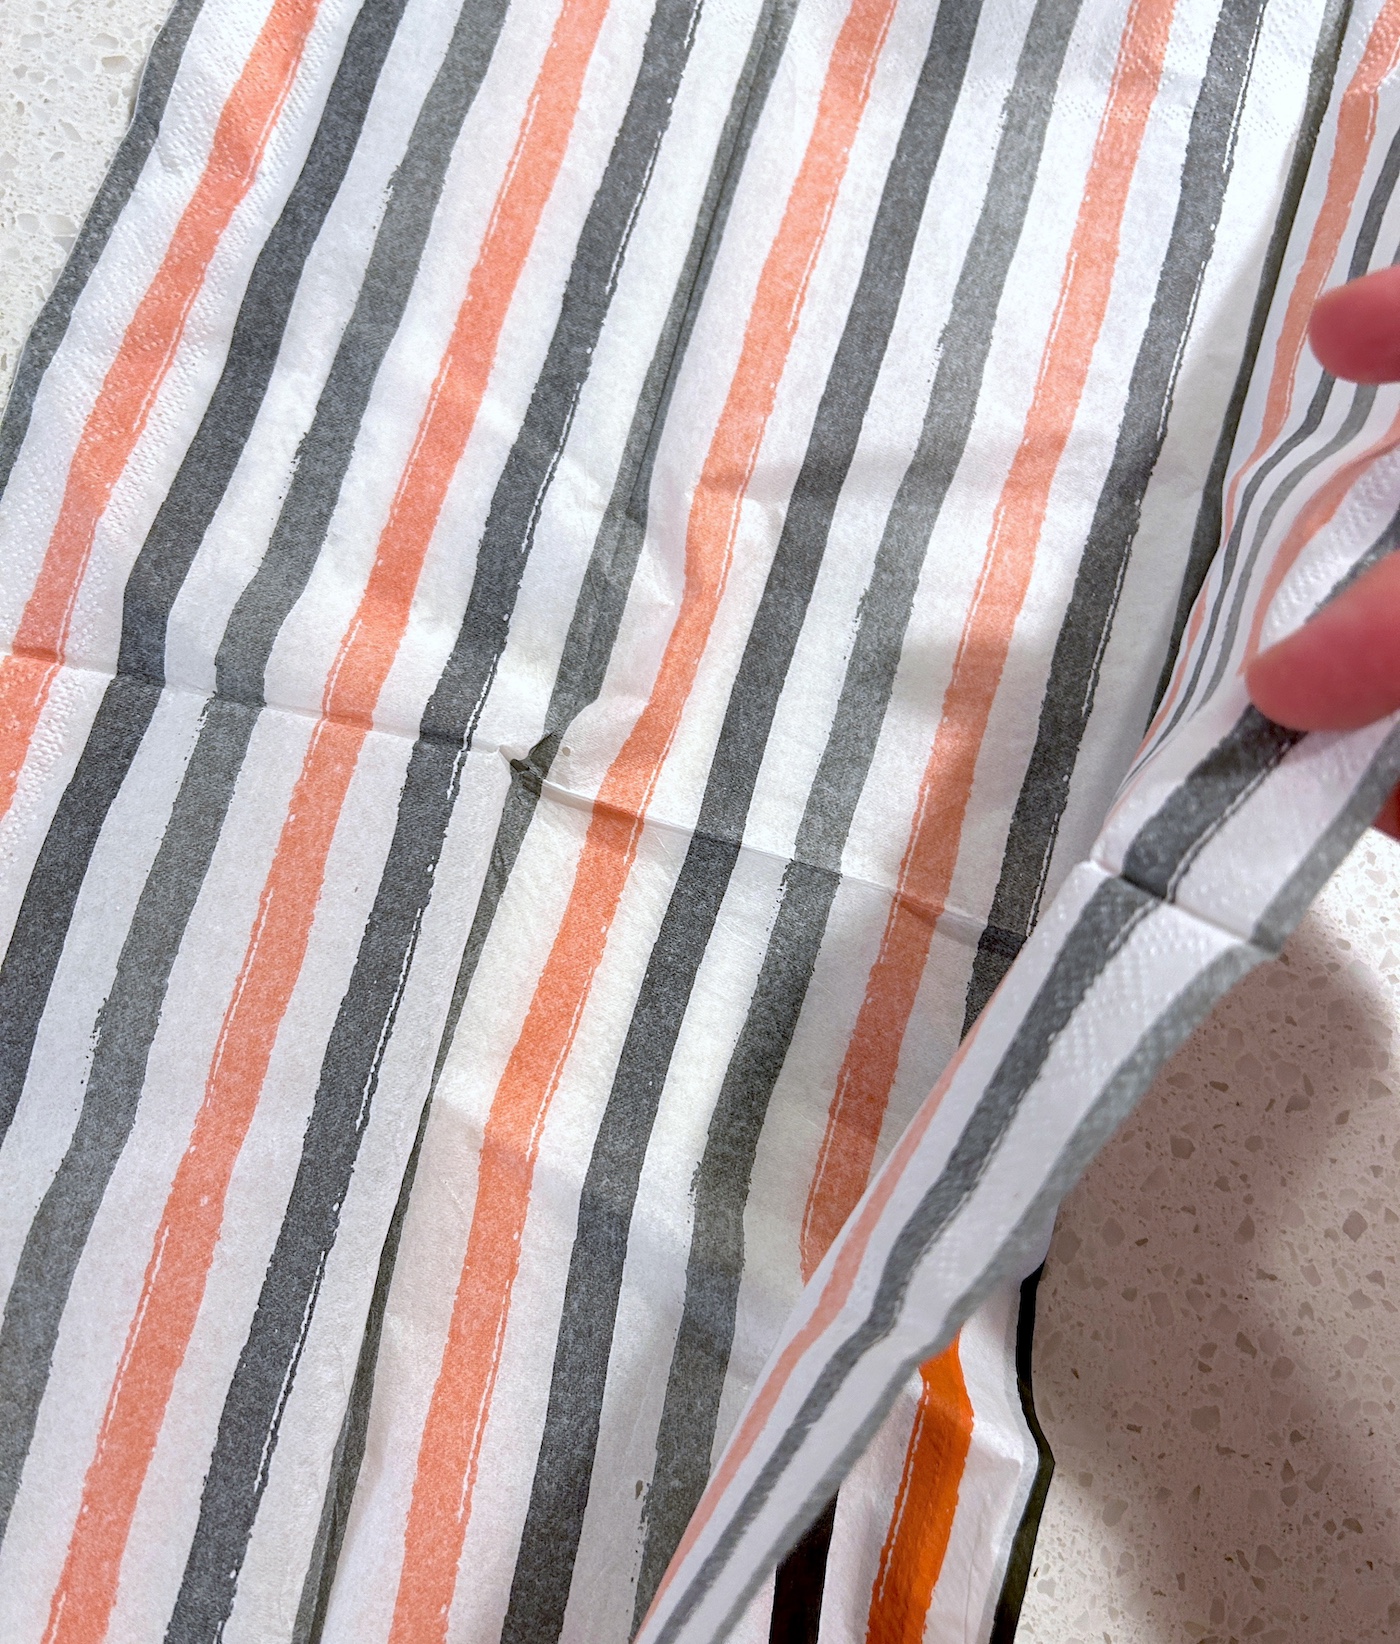
This allows me to attach my cute Halloween napkin (that’s what the stripes are – a napkin!) with zero wrinkles.
I used Halloween napkins and this same method in my wood cutouts and door hanger projects, and I’m addicted. Those turned out well, so I decided to apply a striped napkin to my pumpkin.
Here’s how I did it, starting with what you’re going to need.
Gather These Supplies
- Wood pumpkin shape – Dollar Tree
- Craft paint – white
- Mod Podge – any formula
- Halloween napkin
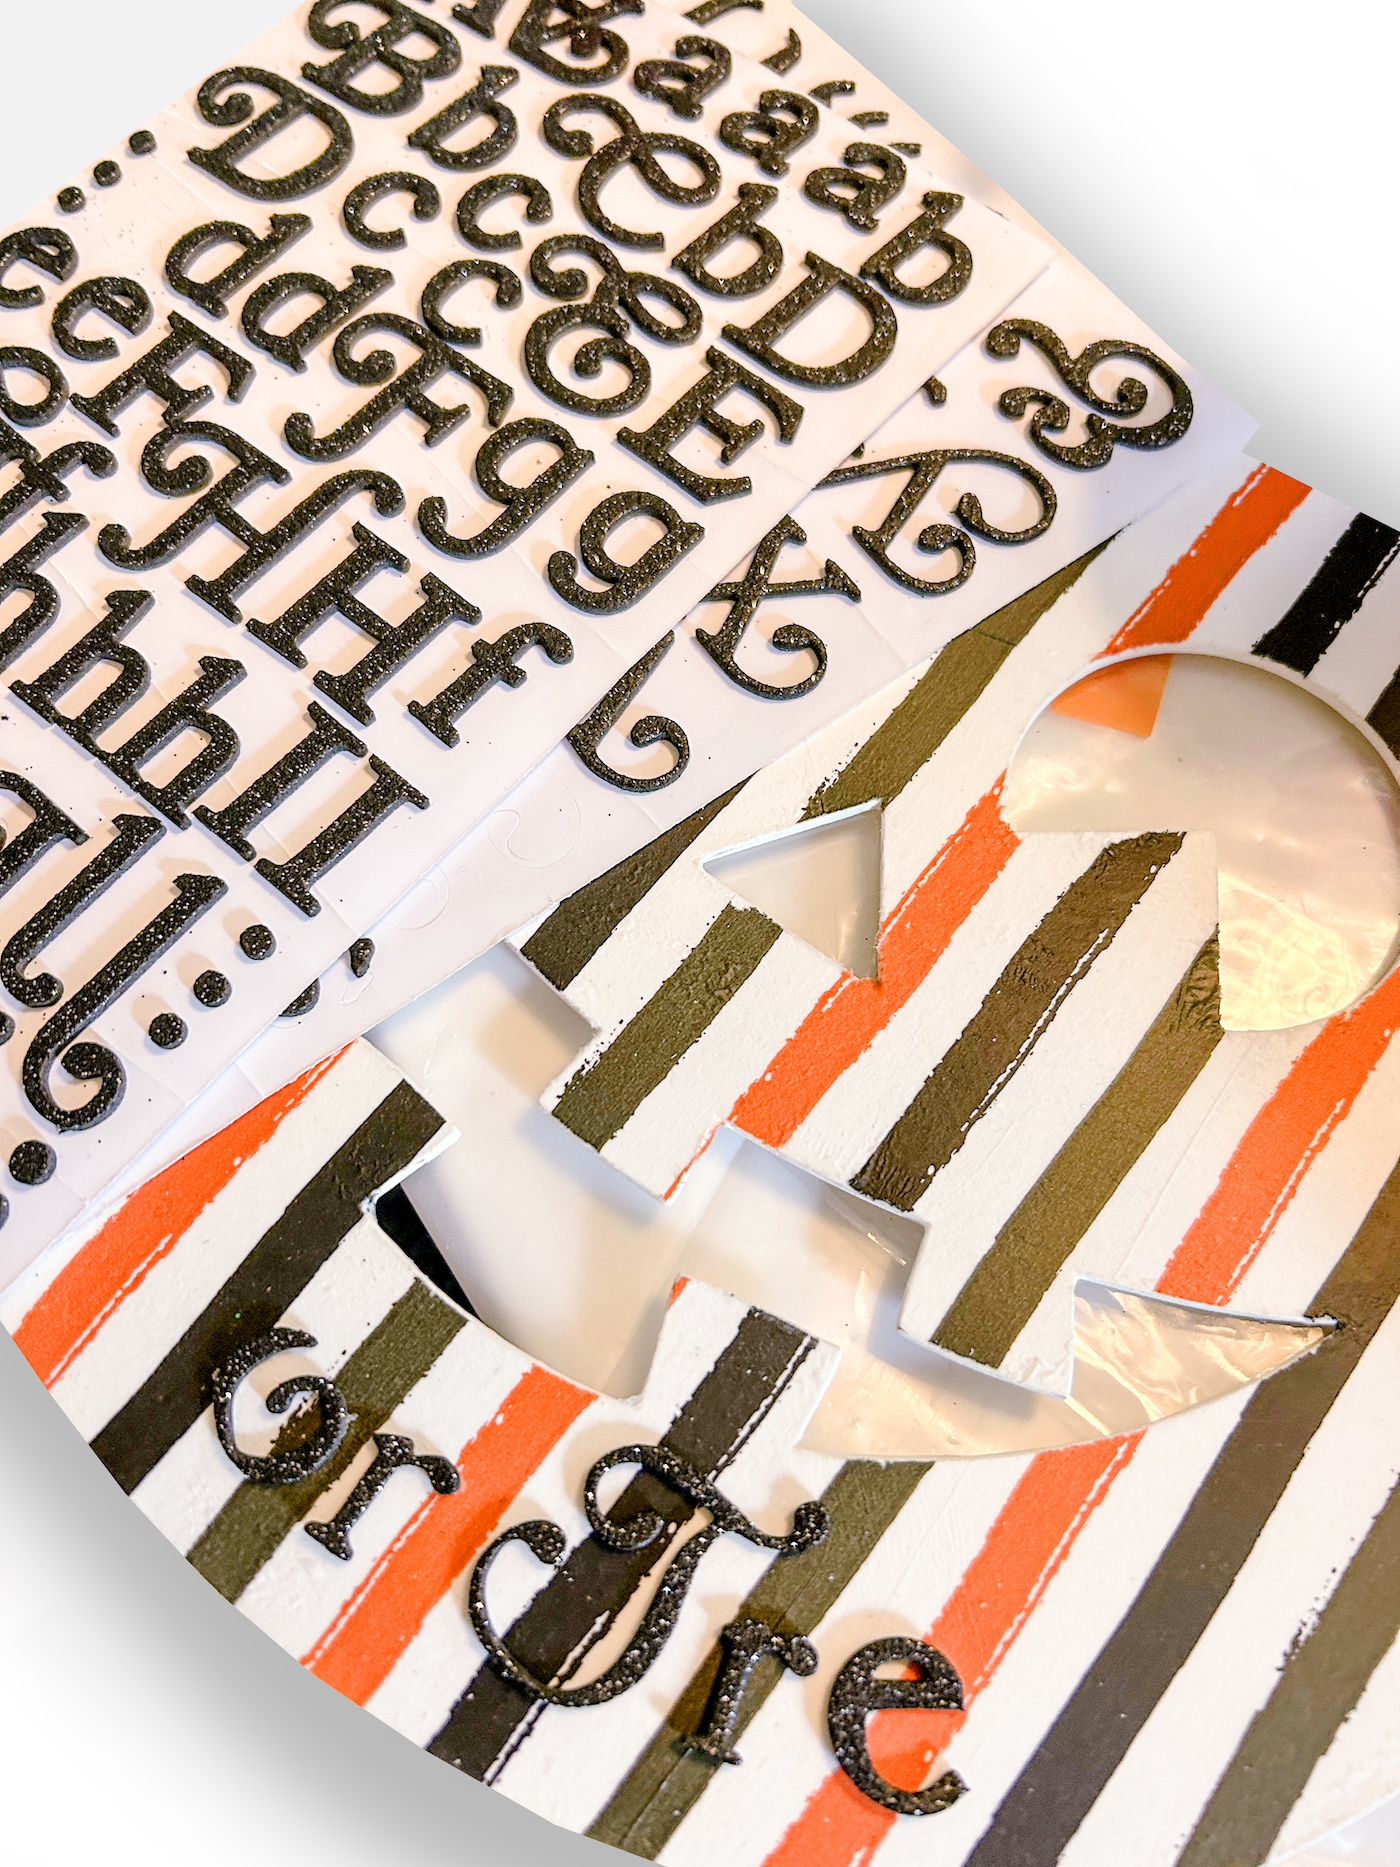
- Adhesive letters
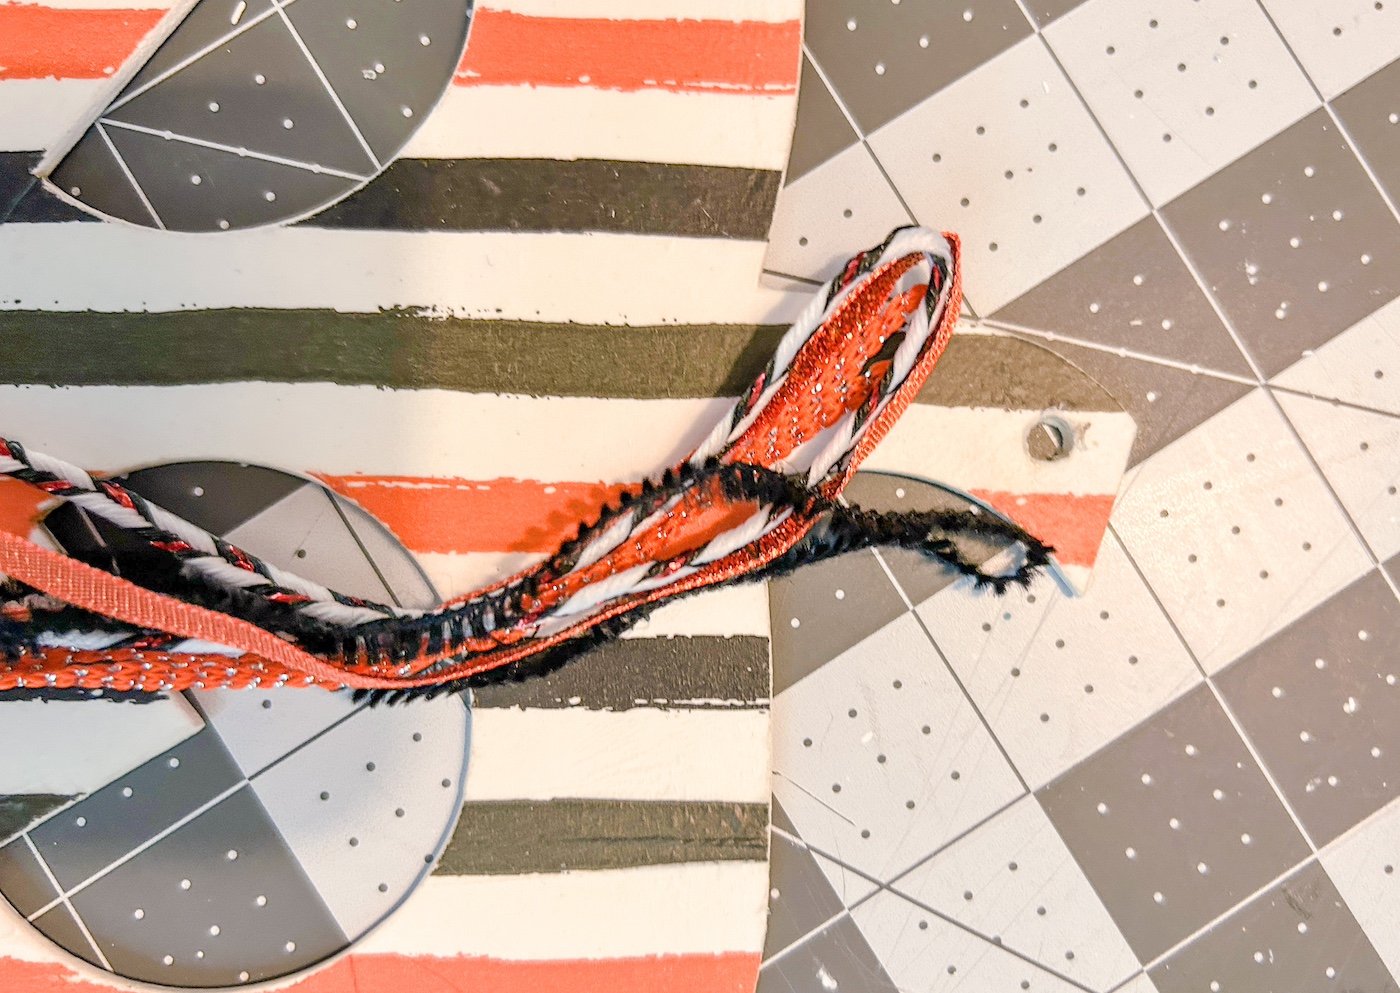
- Halloween ribbon
- Scissors
- Paintbrush
- Small craft iron
- Parchment paper
- Emery board
Tips and Thoughts for This Project
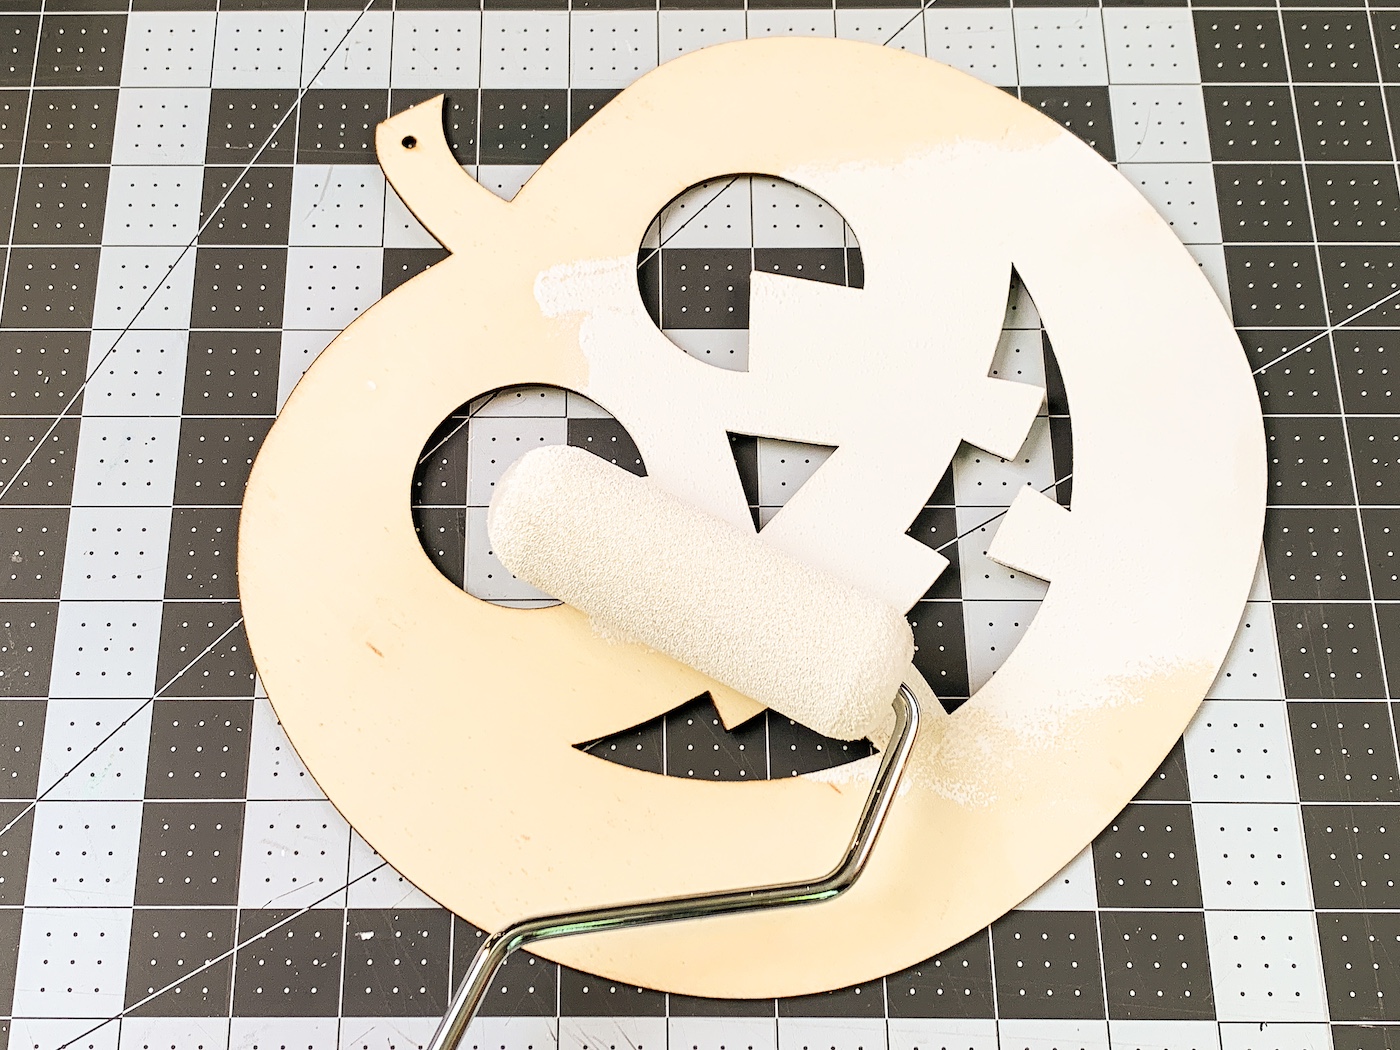
You don’t *have* to paint the pumpkin white, however, it makes the colors of the napkin pop. It’s also easy to do, so I always do it. You can use spray paint, but craft paint is cheaper and just as fast with a roller.
Be sure to iron well around the eye holes and teeth of this project. Make sure you apply enough Mod Podge in those areas also.
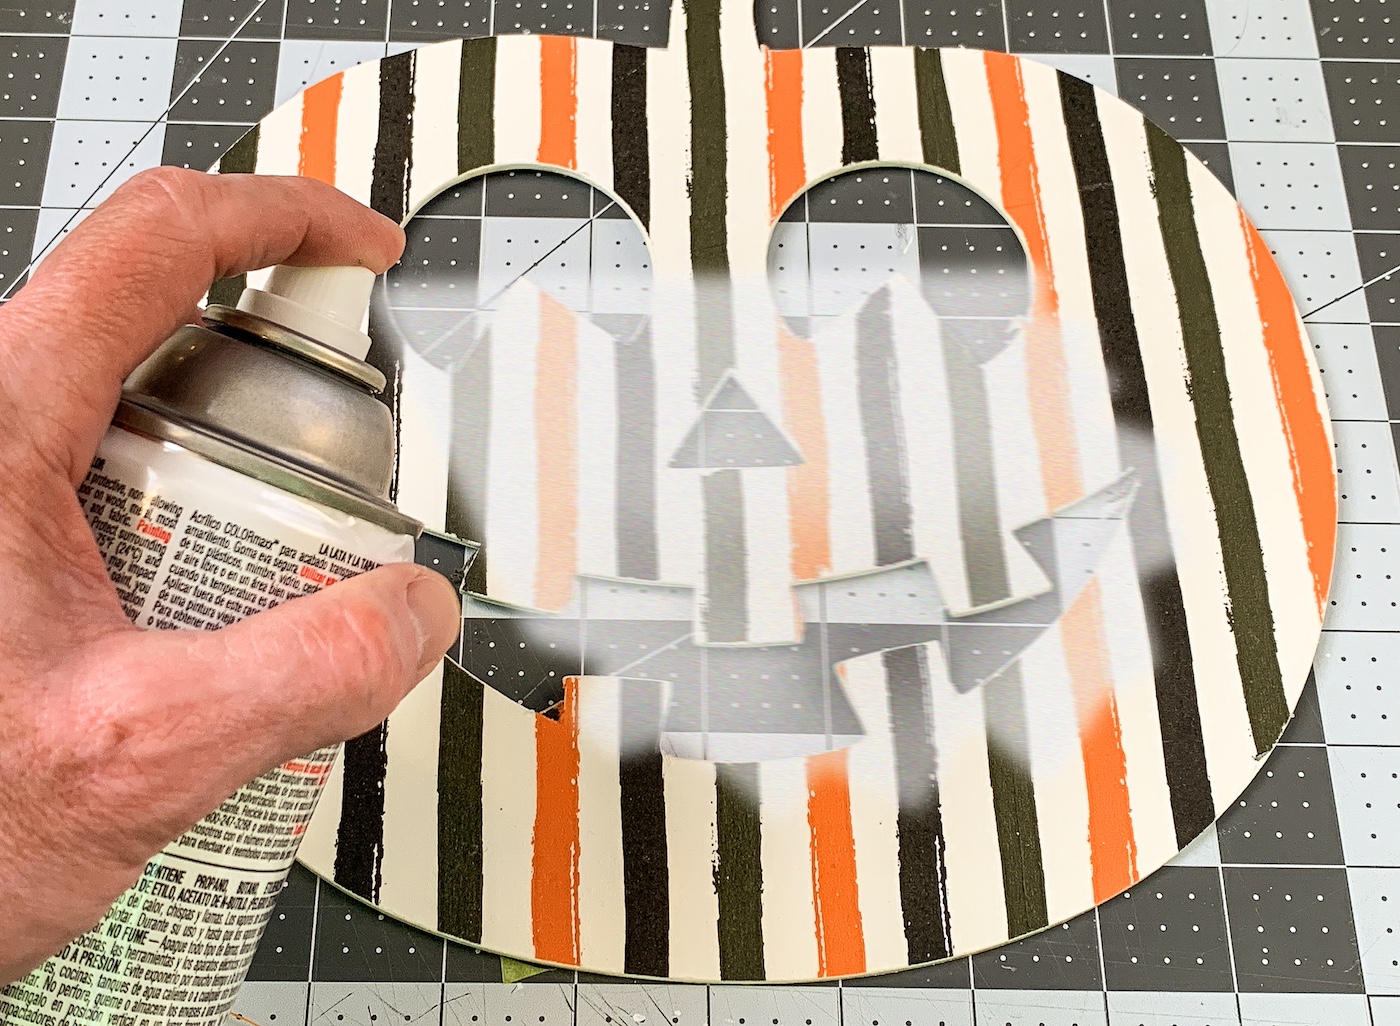
I didn’t seal the napkin on top with Mod Podge. You can, but it might wrinkle. If it does, you can re-iron it (use the parchment paper again). Another option is to use a clear acrylic sealer on top (spray), which is what I did.
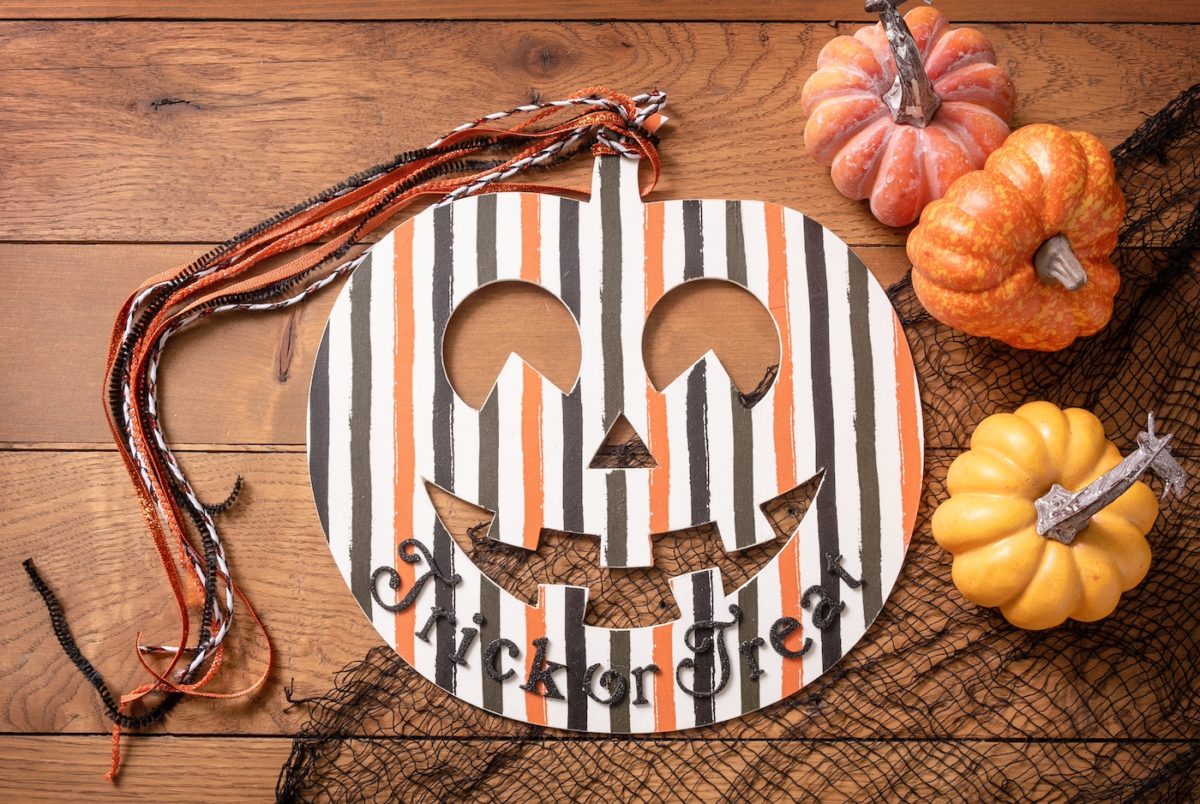
My wood pumpkin had a hole at the top, so I can hang this anywhere with the ribbon! It can also be used as part of a larger Halloween decor project (the center of a wreath, for example).
Get the printable how to card for this project below:

Dollar Tree Wood Pumpkin DIY
Equipment
- Parchment paper
Materials
- Wood pumpkin shape Dollar Tree
- Craft paint white
- Mod Podge any formula
- Halloween napkin
- Adhesive letters
- Halloween ribbon
Instructions
- Paint the wood using white craft paint. Roll on one side, let dry, and flip over. Paint other side and let dry.
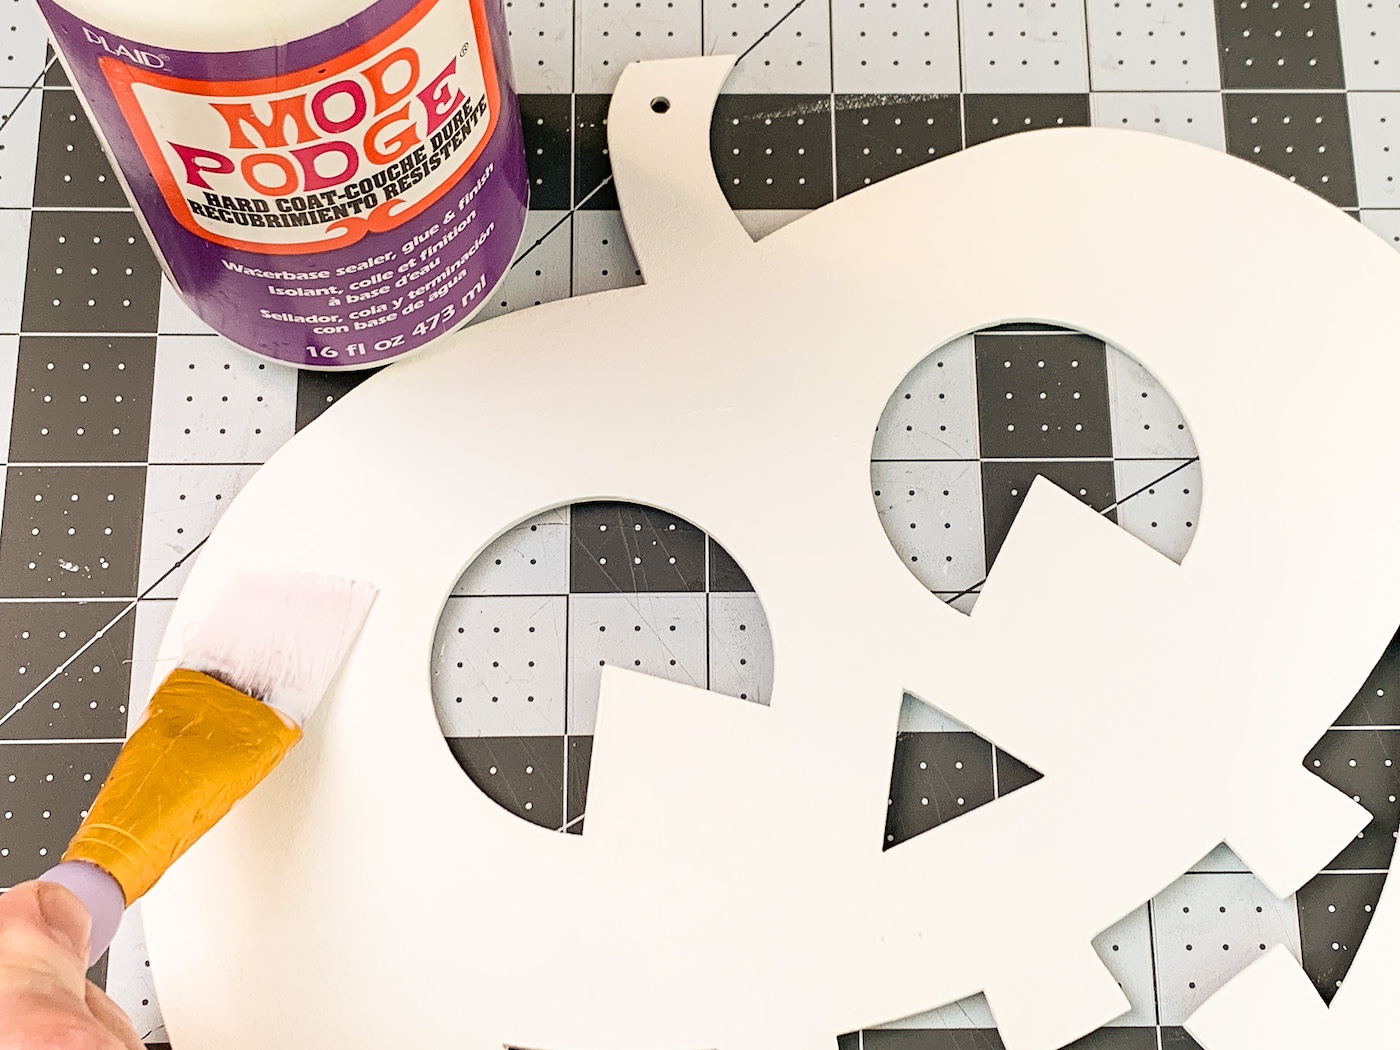
- Apply a coat of Mod Podge to the wood; don't do the edges. Let dry 15-20 minutes and repeat.
- While the Mod Podge is drying, separate the napkin from the bottom layers. You can use tape to help. You just want the top layer with the design.
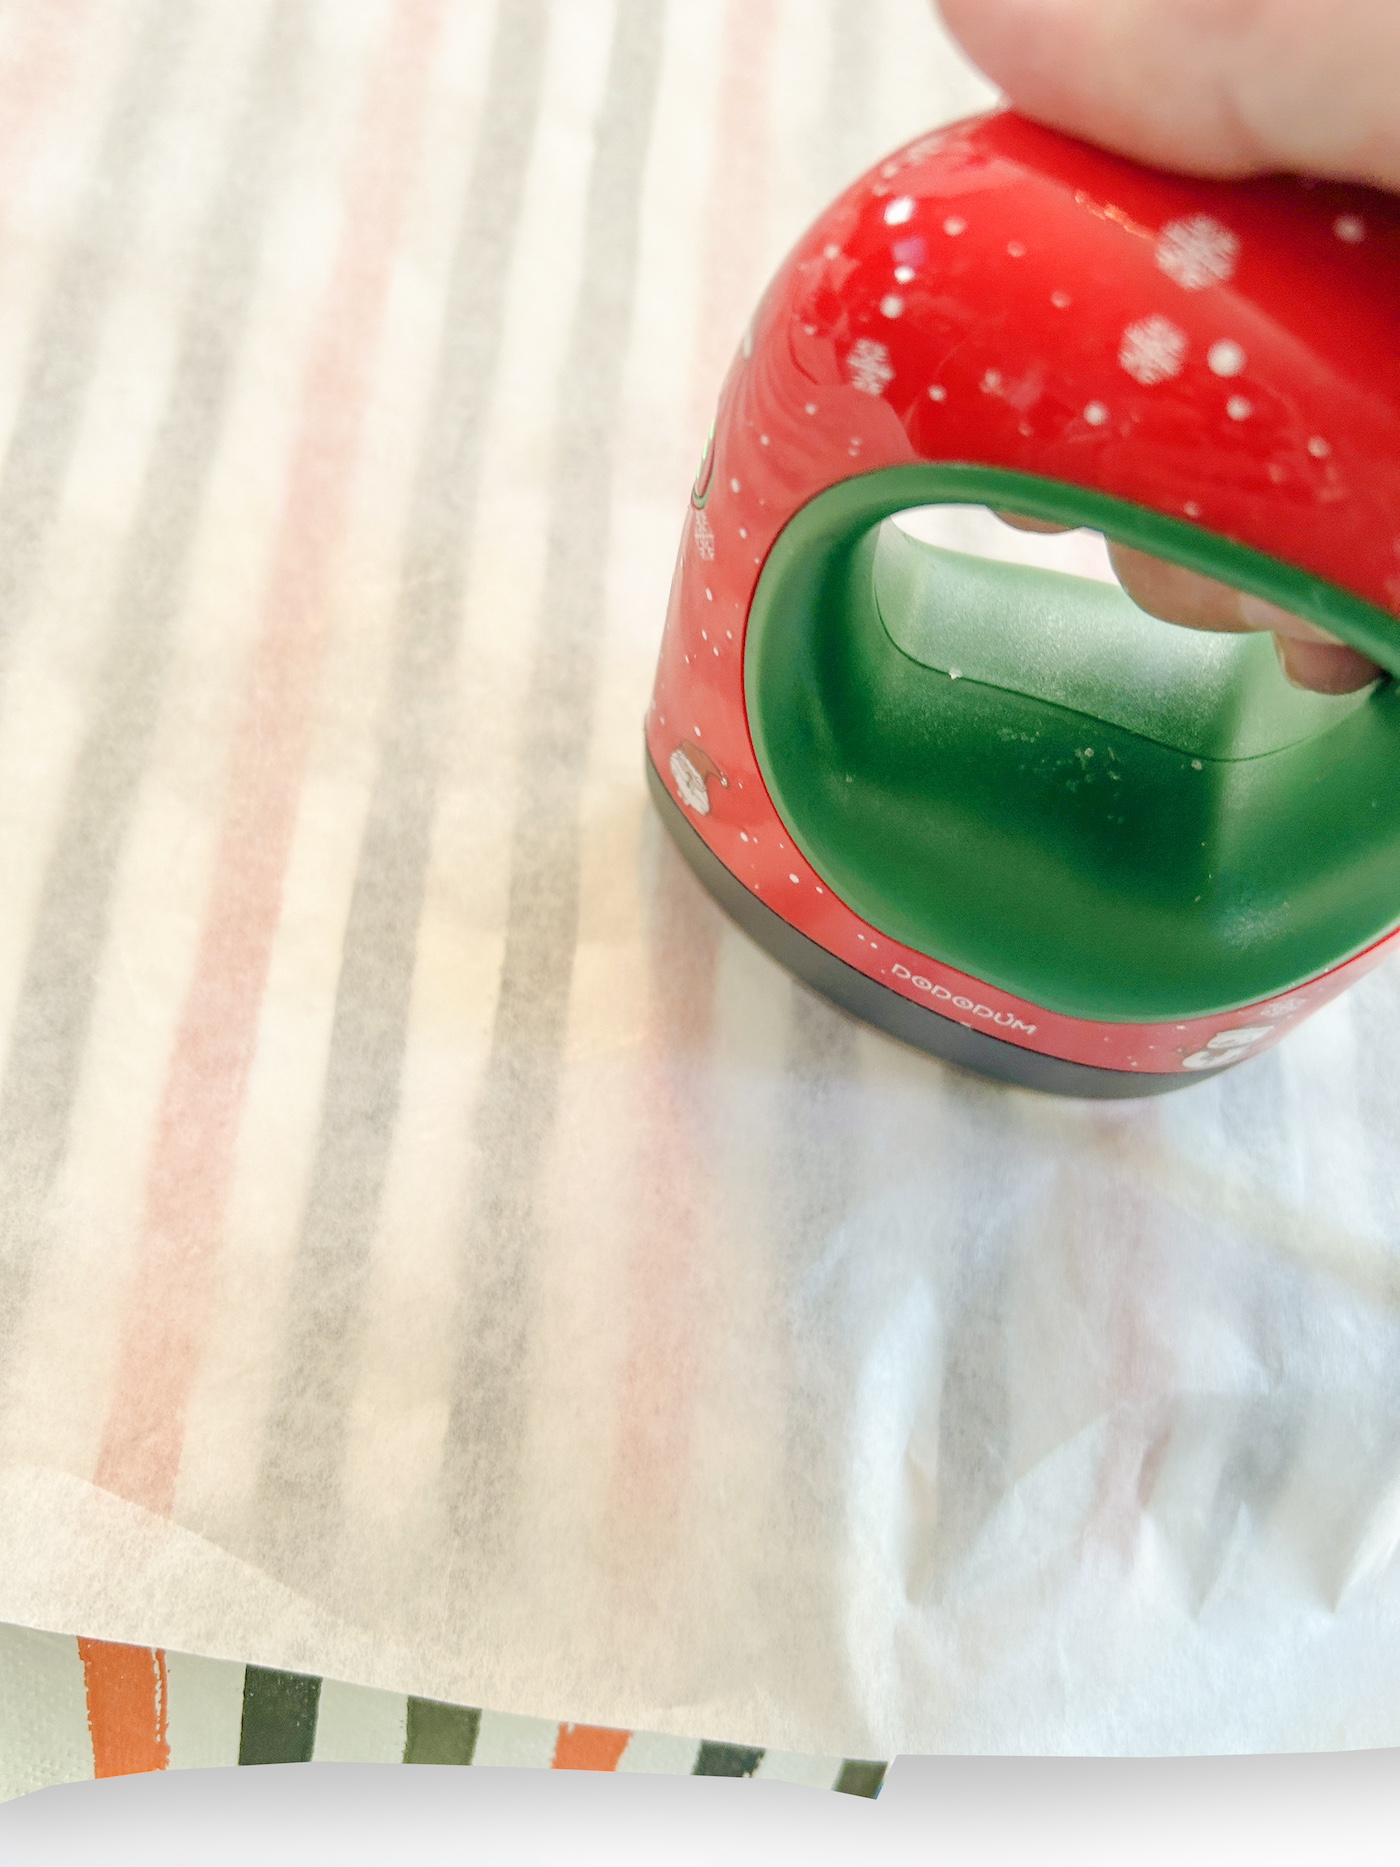
- Place the napkin down onto the wood and align. Place a piece of parchment paper on top of the napkin, and run the craft iron across the top several times. While you are doing this, the Mod Podge is melting below the napkin, and the napkin is adhering. Keep going until the napkin is fully adhered, including the edges.
- If desired, spray the top of the napkin with clear sealer. Let dry.
- Apply letters to the front of the pumpkin spelling whatever you like. I spelled "Trick or Treat."
- Cut lengths of Halloween ribbon in a variety of designs. Attach them to the hole at the top of the pumpkin to hang.
If you enjoyed this Dollar Tree wood pumpkin craft, let me know in the comments! I’d also love for you to check out these other posts and projects: