
Give your filing cabinet a fresh look with this easy DIY update! Transform your office space with a stylish and budget-friendly makeover.
Skills Required: Intermediate. I would say this project fits on the low end of the intermediate category. It’s easy to paint a cabinet (using my tips).
Don’t forget to scroll down to the bottom of the post to get a video of the process in action!

How many of us have an old filing cabinet lying around? I know I do. I actually have one in my craft room right now that has been sitting there, ripe for a makeover. If you don’t, head to a thrift store. They are always there, waiting for decoupage and to be a part of your home decor.
I’m excited to share my process for a DIY file cabinet today, and also share a cool wood file cabinet makeover from Cathie and Steve at the same time.
By the end of this post, you’re going to have the confidence you need to do your own version of this DIY project. It’s not as hard as you think!
If you want to read my tips for this wood craft, that section follows – otherwise just scroll down to the end to see the video of the DIY file cabinet in progress.

Preparing a Wood File Cabinet
I’ve got a ton of detailed instructions in my article “how to prepare furniture for Mod Podge” that should be helpful to you. Generally speaking you’re going to want to remove all hardware, clean off any dirt, and then sand your piece to prepare it for Mod Podging.
If your cabinet is wood, you don’t necessarily need to prime it before you paint (if you choose to paint). Having said that, this project uses black chalk paint, which has great coverage. If you want to turn the cabinet a lighter shade, I would use a primer.
How to Paint a Filing Cabinet
There’s no rule that says you have to paint your filing cabinet before Mod Podging it. Technically you could just add paper or fabric directly onto the surface using Podge.
Usually I paint first. I did that with my upcycled table as well as with my endtable makeover. That’s just how I roll – I like color, so if I can bring it into a piece, I will.
Here’s what I would advise based on either a metal or wood surface:
Metal – I always prime first with Rust-oleum Painter’s Touch 2X primer. I have had nothing but positive experiences with this product, so I stick with what works for me. This primer forms a tight bond with the metal and works on metal, wood, and plastic.
After I prime with the Rust-oleum, I let that dry and then spray paint the metal with the color of my choice. Then I let that dry and Mod Podge my fabric or paper on top. You can absolutely Mod Podge on top of spray paint – I’ve done it many times.
Wood – I have used chalk paint, acrylic craft paint, and chalkboard paint pretty regularly on wood surfaces and they all work great. The key is that you are looking for an acrylic paint versus a latex paint. Latex paint doesn’t work well with Mod Podge.
Mod Podge Formula to Use
In this decoupage furniture project, Cathie and Steve use the Mod Podge Furniture formula. If you can’t find it, use Mod Podge Hard Coat with the purple label. It’s the same thing.
Tips for the Paper
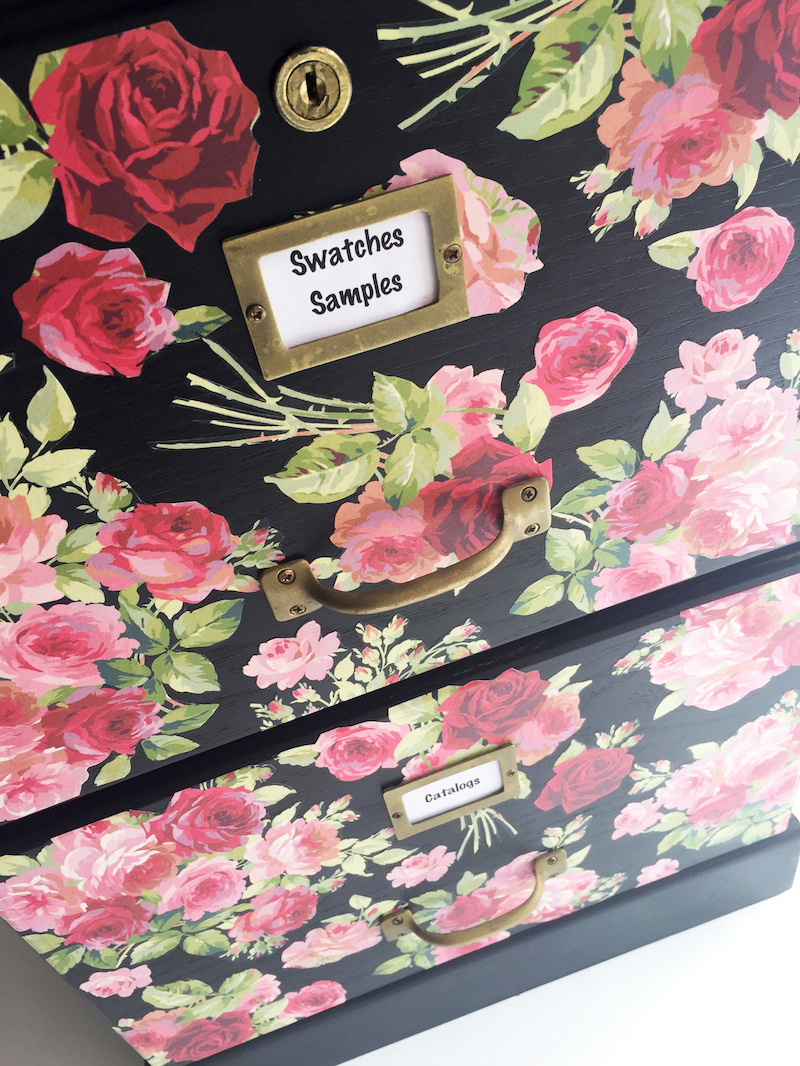
Scraps/Cutouts – In the video you’ll see that Cathie and Steve use cutouts from the scrapbook paper to Mod Podge. This is the easiest method to avoid wrinkles, and you have a lot more control over your design.
Piecing Together – Another method is to take scrapbook paper sheets and then piece them together on the fronts of the drawers.
The trick here is making sure that you have sheets with a design that continues from one page to another, or you’re going to see the paper seams.
One Large Sheet – If you’re going to use one large sheet on the front of the drawer, you’re probably going to end up using wrapping paper or something a little more thin (since that’s what typically comes in sheets).
In that case, you’ll want to mist the paper like I did for my DIY coat rack. This helps it go on easier, without wrinkles.
Are you ready to dive into the project? Let’s go!

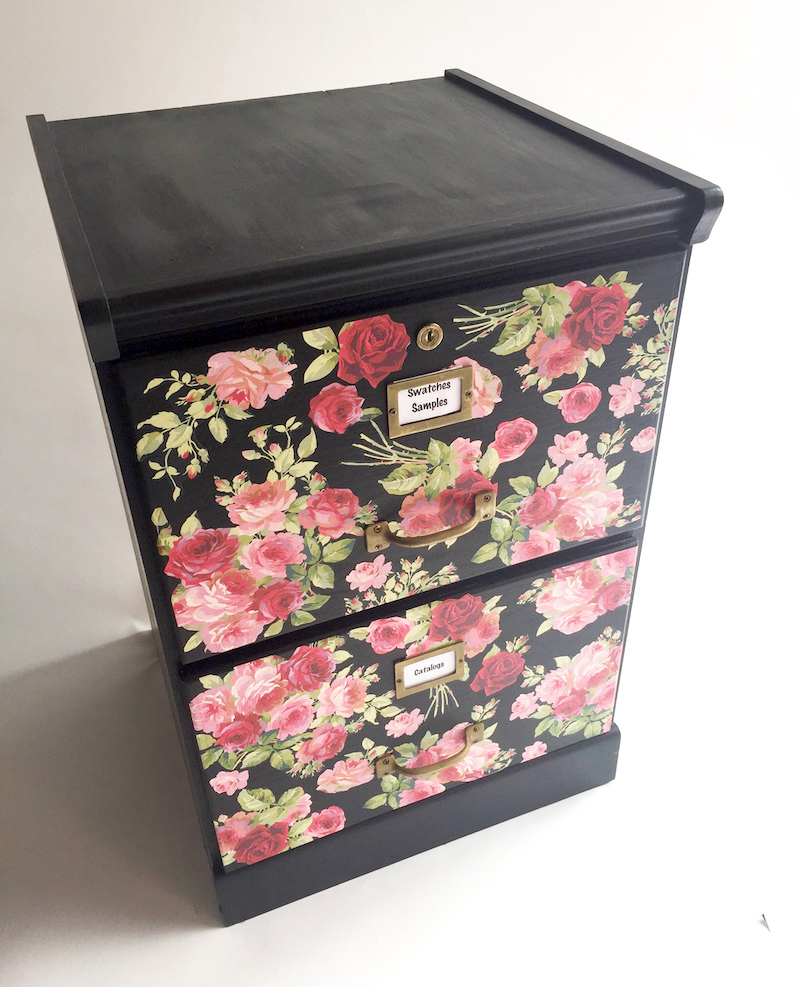
DIY Filing Cabinet Makeover
Equipment
Materials
- Wood file cabinet
- Chalk Paint Rich Black
- Chalkboard paint Black
- Mod Podge Hard Coat
- Paper or fabric to cover the fronts of the drawers
- Sandpaper optional
Video
Instructions
- Remove hardware and set aside. Clean your file cabinet; sand and remove any dust. Fill any holes.
- Prime your cabinet with paint following the tips outlined in the painting section of this post. Let dry.
- Trim your paper to fit the fronts of the drawers. Mod Podge the paper to the drawers and let dry. Give your cabinet several coats of Mod Podge to seal and protect.
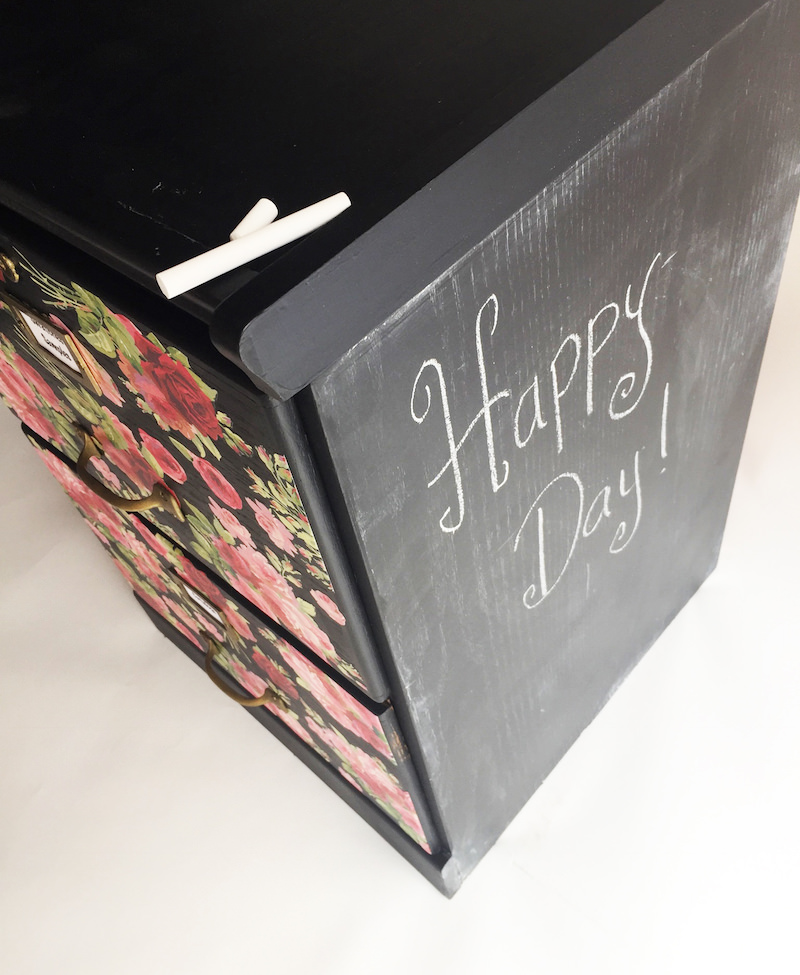
- Add any additional paint or embellishments that you’d like – for example, chalkboard paint on the sides, ribbon, buttons, glitter, etc.
- Let dry and replace hardware.
Want to see more projects along the lines of decoupage filing cabinet makeovers? Check these back to school or home office hotties:
Oh, and just for fun, here’s a picture of a metal filing cabinet makeover. See? The possibilities with Mod Podge are endless!


Hi Amy, lovely transformation. Your cabinet looks great! Thank you for sharing.
I saw a how-to for a file cabinet update that included spray paint and stencils. It was really cute, but something about spray paint scares me (I’m a messy crafter and I can imagine it ending up all over my things and my body…) but your idea is an equally adorable alternative. Thanks!