
Discover the art of transferring your cherished photos onto metal! Our step-by-step guide makes it easy to create stunning keepsakes.
Skills Required: Intermediate. I would have prior experience with photo transfer medium before attempting this project. Try it on a scrap piece of wood or metal first.
Hey there, crafty friends! It’s time to add a little metallic flair to your photo memories – because, let’s face it, everything looks cooler on metal!
Strolling through the hardware store, I stumbled upon copper-coated aluminum sheets and had an ‘aha!’ moment that would make even Edison jealous.
Why not combine my love for shiny copper accents with the magic of photo transfer?
Now, hold onto your crafting hats because I’m about to drop a little-known Mod Podge secret: did you realize that the Photo Transfer Medium isn’t just for wood?
That’s right, it’s a metal master, too! Imagine transforming a stark sheet of metal into a canvas for your cherished memories. It’s like giving your pictures a rockstar makeover!
And I’m going to show you how to master this photo transfer to metal is done with a medium.
Grab any laser-printed photo that makes your heart sing, and turn that plain piece of metal into a stylish, eye-catching display piece. It’s not just a craft; it’s a conversation starter.
This photo craft is perfect for adding a personal touch to your home decor or creating a gift that screams ‘I put thought into this!’
So, whether you’re a photo transfer newbie or a seasoned pro, let’s get ready to dazzle with images that pop on metal.
Prepare to amaze yourself (and everyone else) as we delve into the world of image transfer onto metal. It’s easier than you think and twice as fun.
Ready to transform your favorite pictures into metallic masterpieces? Let’s do this!
Gather These Supplies
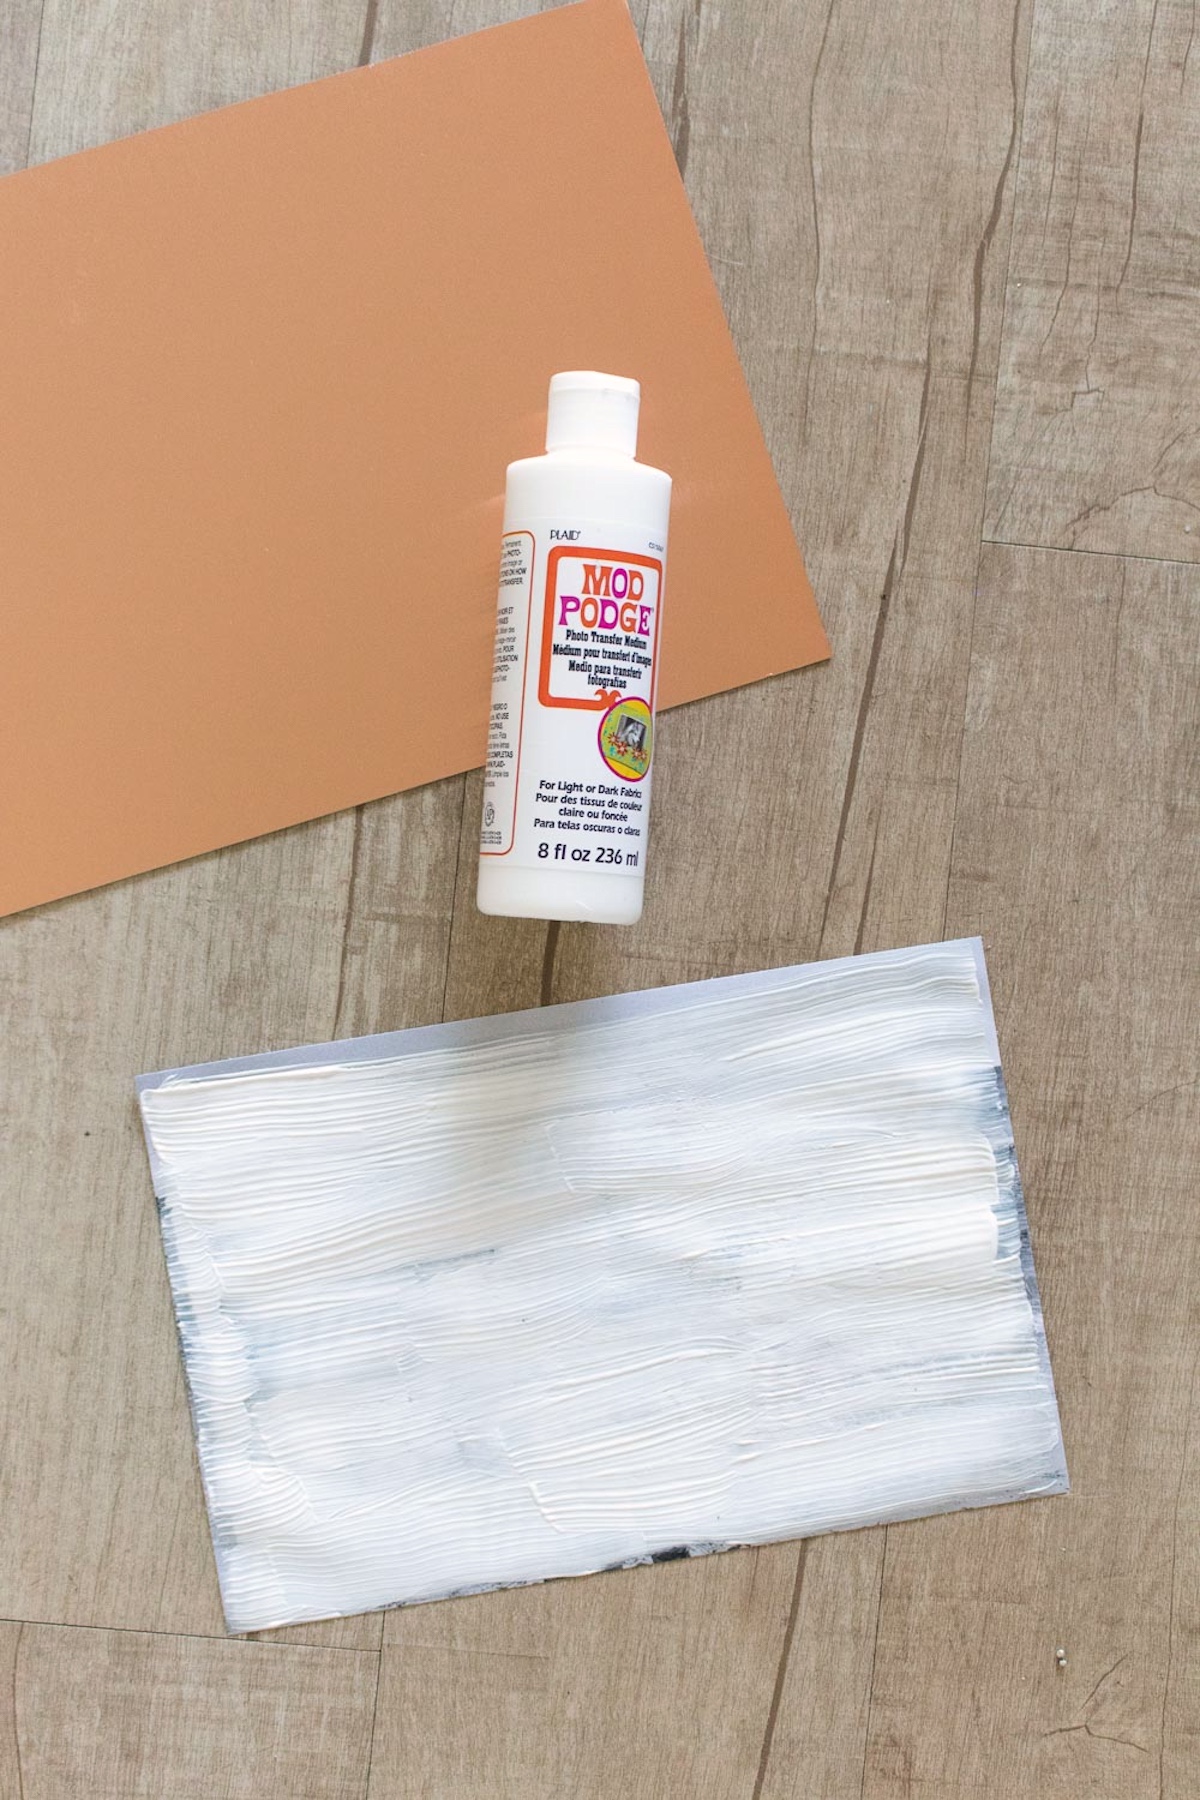
- Sheet metal, cut to size
- Laser printed photo in desired size, color or grayscale
- Mod Podge Photo Transfer Medium
- Paintbrush
Tips and Thoughts on This Project
First, a note about sheet metal. You can purchase sheets of aluminum at most hardware stores. In this case, I purchased one with a copper coating – and they can most likely cut it to your desired size for you.
Otherwise, you can cut it to size using a jigsaw or similar machinery at home. Do so very carefully and according to machine instructions.
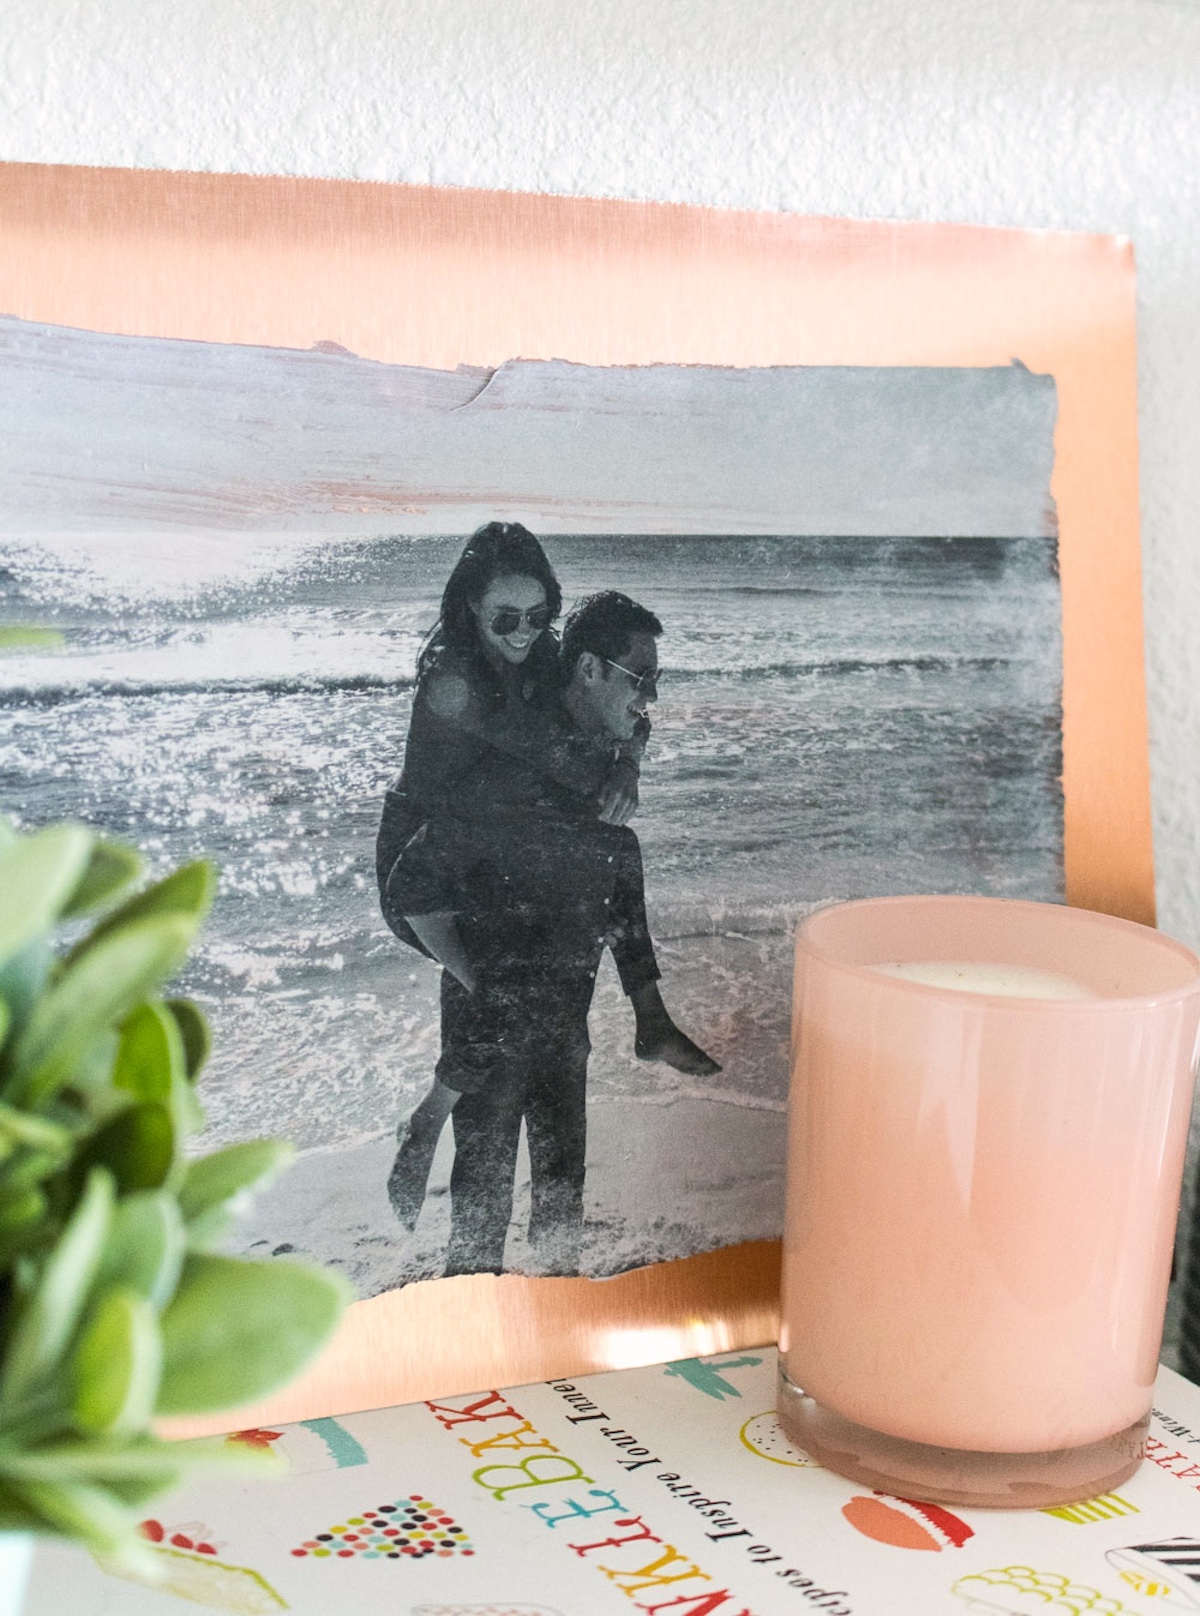
Also note, Mod Podge Photo Transfer Medium is unique in that it keeps the white portions of images white.
Similar brands may be clear, which means any white sections of your photos will take on the color of the background metal.
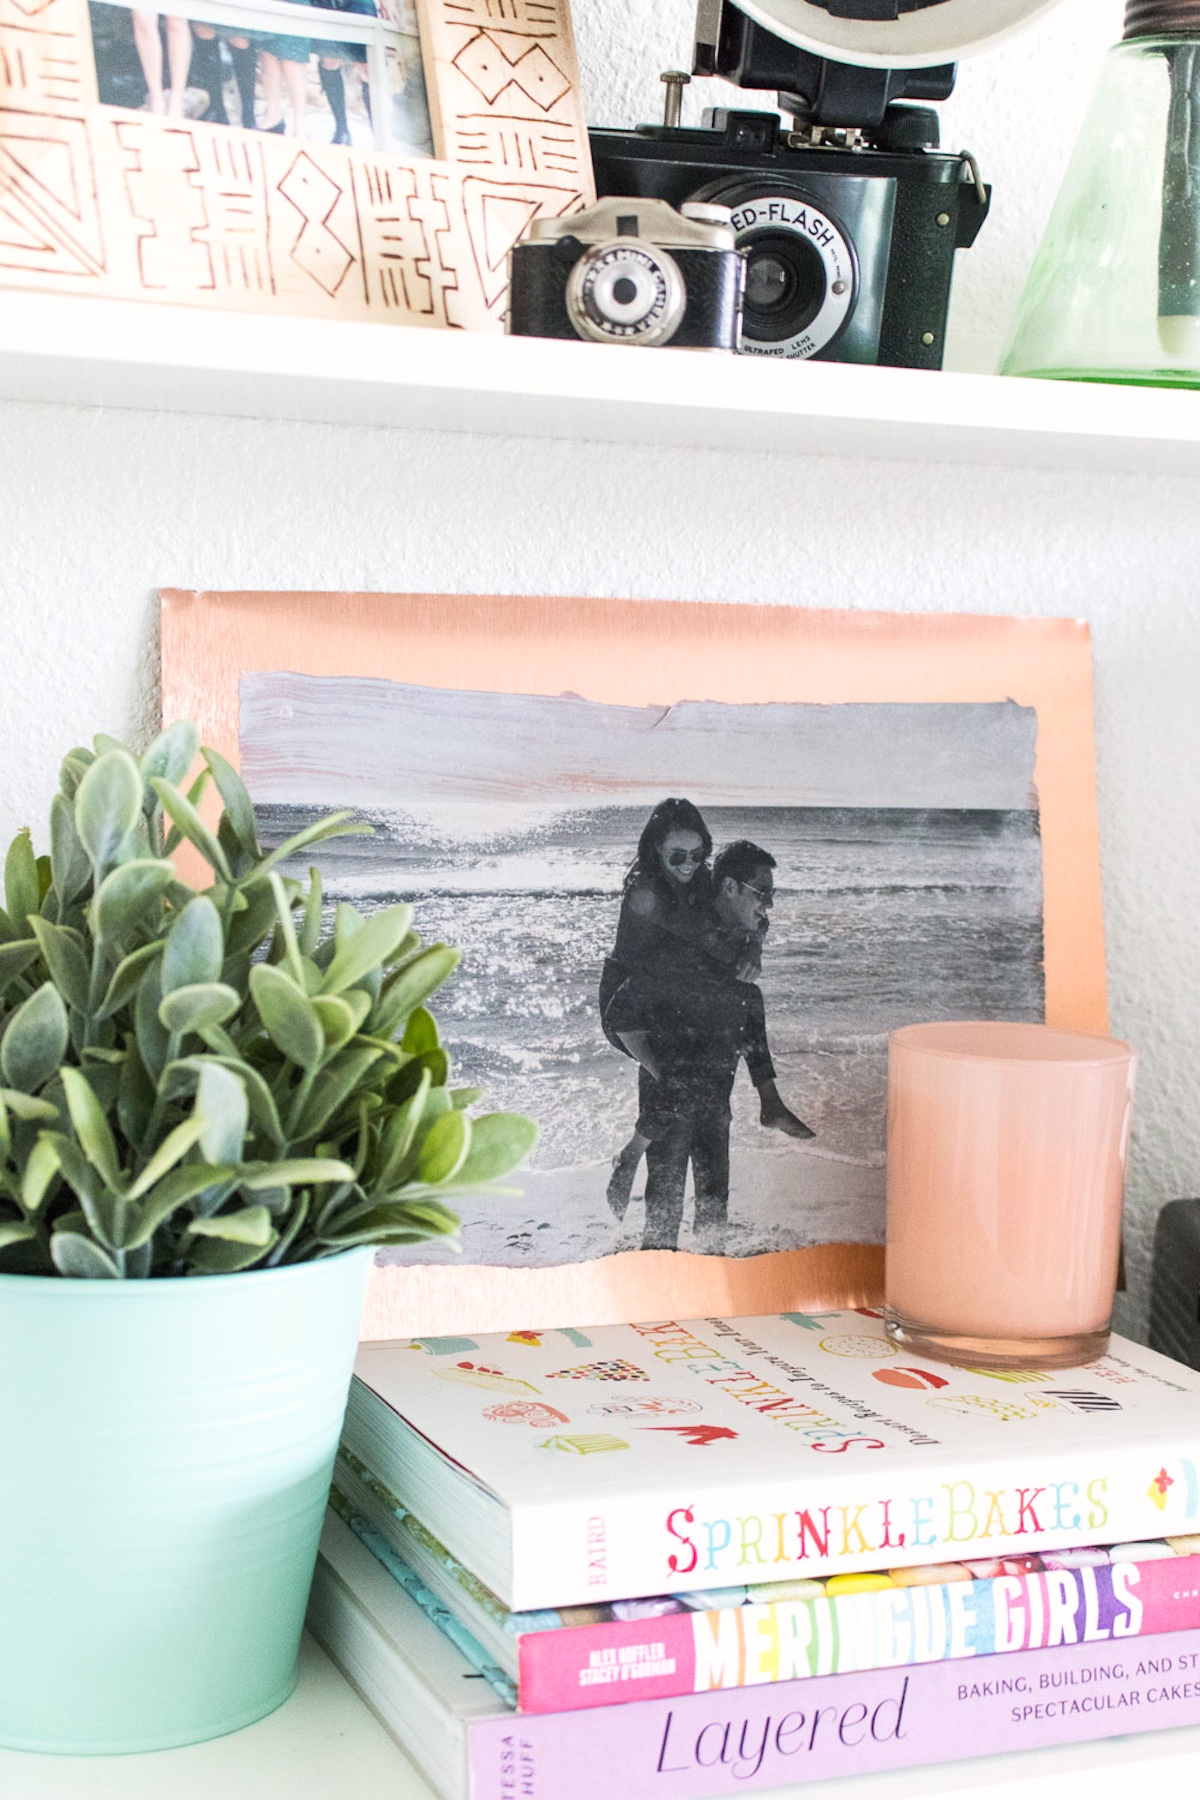
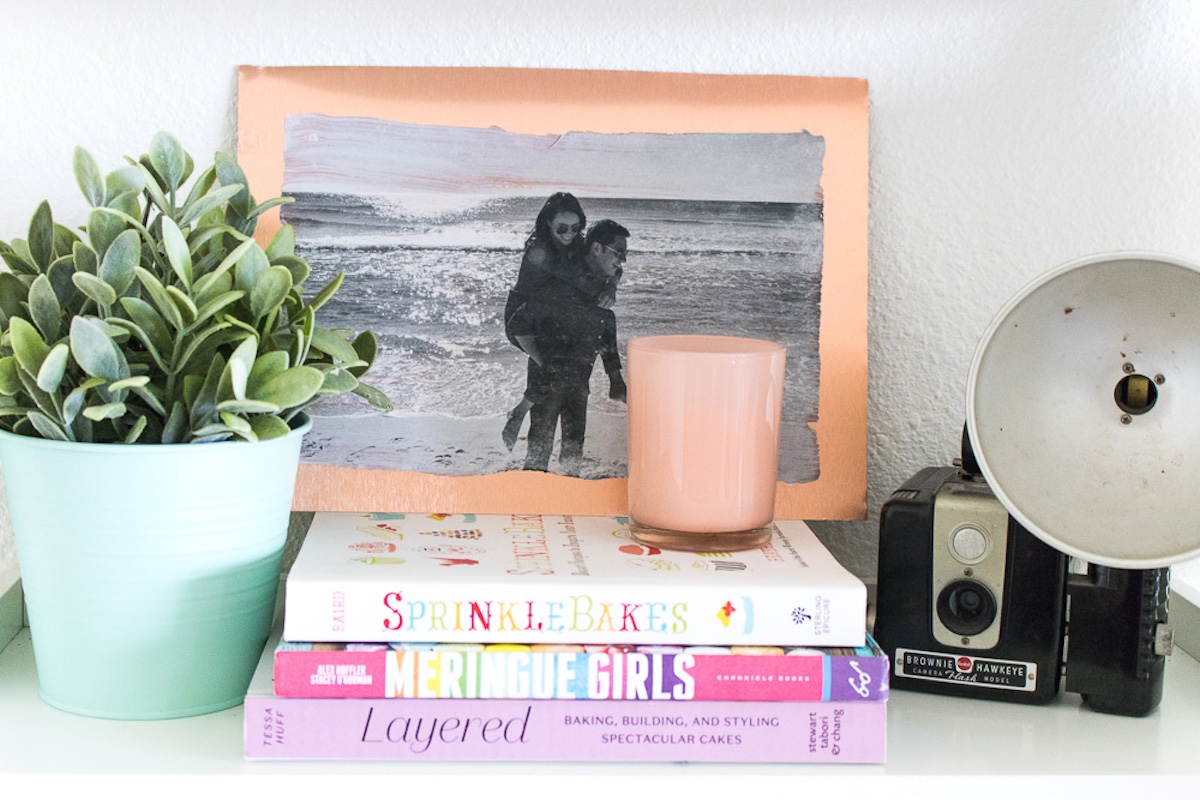
Set the final metal photo transfer on a shelf, mount on a wall or wrap as a gift! Get the printable how to card below:

Photo Transfer to Metal
Equipment
Materials
- Sheet metal cut to size
- Laser printed photo in desired size color or grayscale
- 1 Mod Podge Photo Transfer Medium
Video
Instructions
- Print the photo and cut to size so that no border remains.
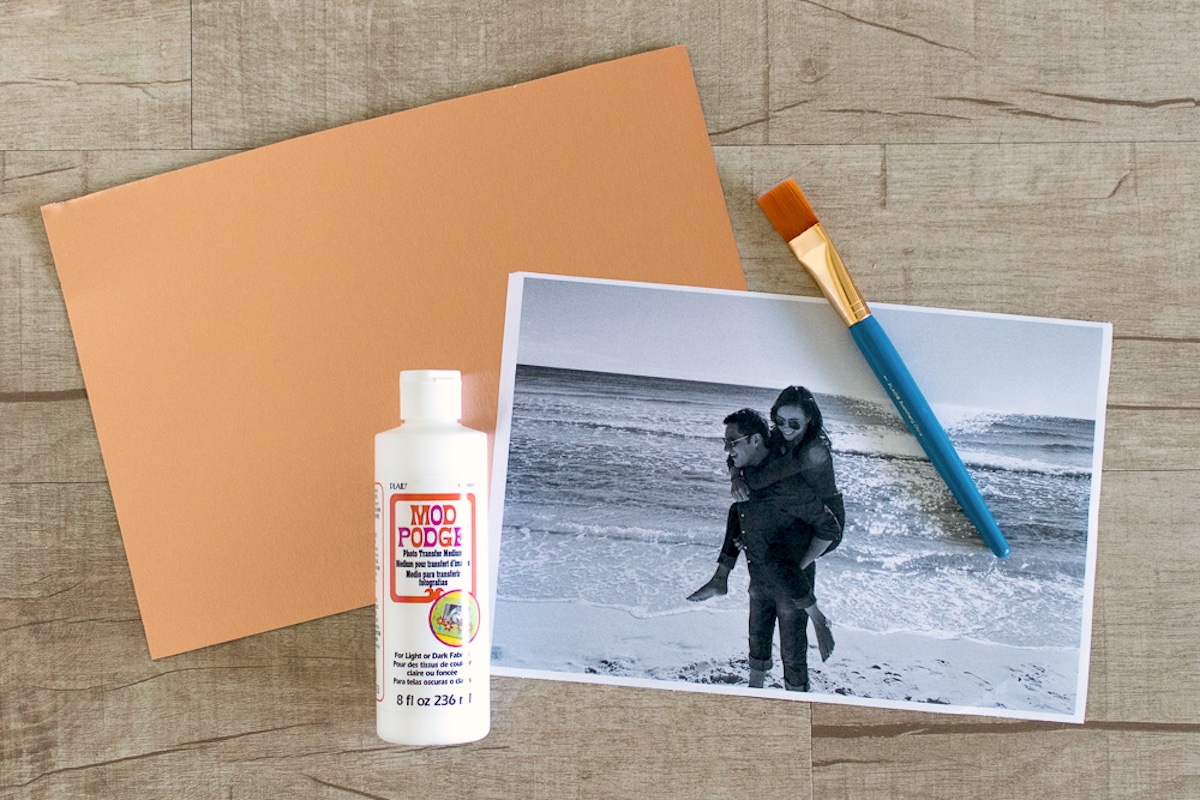
- Use the paintbrush to spread on a thick layer of Mod Podge Photo Transfer Medium on the image side of the paper. It should be even and entirely cover and obscure the image.
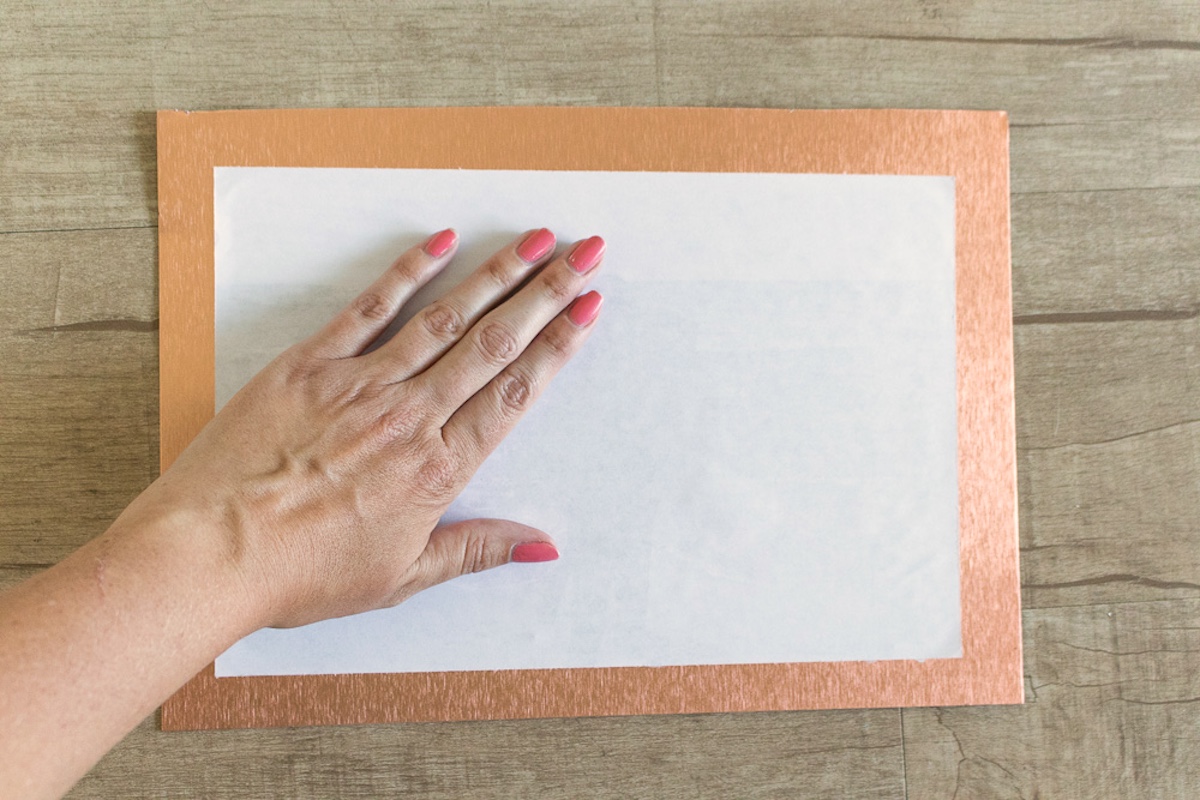
- Immediately place the image down on the sheet metal and use your hands to smooth out the paper and remove any air bubbles.
- Set aside to dry overnight. Depending on the temperature and humidity, it will be ready within 12-24 hours.
- Once completely dry and hard to the touch, use your fingers to add a little water to one corner of the paper. Press lightly and move your fingers in a circular motion to remove the layer of paper.
- Go slowly so that you don’t accidentally remove the image. Continue all over the paper with wet hands until all of the paper has been removed.
- Set aside to dry for about 10 minutes. If a white layer dries over the image, you didn’t remove enough paper and will need to repeat the last step.
Now that you know how to transfer printed image to metal, let me know if you have questions in the comments! Plus check out these other photo transfers here:
Breakfast in Bed Tray • Christmas Napkins • Family Reunion Centerpiece • How to Transfer Photos to Wood • Image to a Wood Block • Inkjet Transfer • Photo Keychain • Photo Pillows • Photo Transfer to Canvas • Transfer Paper to Fabric • Transfer Photos to Fabric • Transfer to Glass

This guide is fantastic! I’ve always wanted to try transferring photos to metal, and your step-by-step instructions make it seem doable. Can’t wait to give it a shot and showcase my favorite memories in a unique way! Thanks for sharing!
Can you paint with acrylic over the transfer to make it look more like a painting or to give accents of color?