
Create a photo keychain that comes together in a matter of minutes (excluding dry time). This picture keychain is a perfect gift!
Skills Required: Intermediate. This is a great project to try for your first photo transfer. You’ll learn how to transfer photos to wood – you need some prior crafting experience to master this technique.

Are you ready for Mother’s Day? I wasn’t, until recently – when I made this photo keychain! This photo craft was created for my mom, with a photo of me and my younger brother when we were kids since we don’t live near her anymore.
I think it’s a good gift to make for someone who has older kids, younger moms or even fur moms. You can create a basic one (like the one I made), or fancy it up with charms and other embellishments.
If you like DIY keychains, add this Mod Podge photo craft to your list of projects. Join me to see how easy this picture keychain project came together!
Gather These Supplies
- Wood Square
- Cutter
- Drill with bit
- Sandpaper
- Photo (laserjet printed)
- Matte Mod Podge
- Mod Podge Photo transfer medium
- Paintbrush
- Antiquing Wax
- Keychain Ring
I’m pretty sure my sentimental mom would love this photo keychain, and I hope yours would too! It’s something easy, simple and from the heart that you can give to your mom or make for yourself.
I’m going to be making one of these DIY keychains with a photo of my furbabies too! I know my mom likes this plain so I kept mine simple, but you can definitely personalize it even further with different embellishments or charms.
Get the printable how to below:

DIY Picture Keychain
Equipment
- Steel ruler
- Box cutter Or X-Acto made for thick materials
- Sandpaper
Materials
- Wood square(s)
- Photo laserjet printed
- Mod Podge Matte
- Mod Podge Photo Transfer Medium
- Antiquing Wax
- Keychain Ring
Video
Instructions
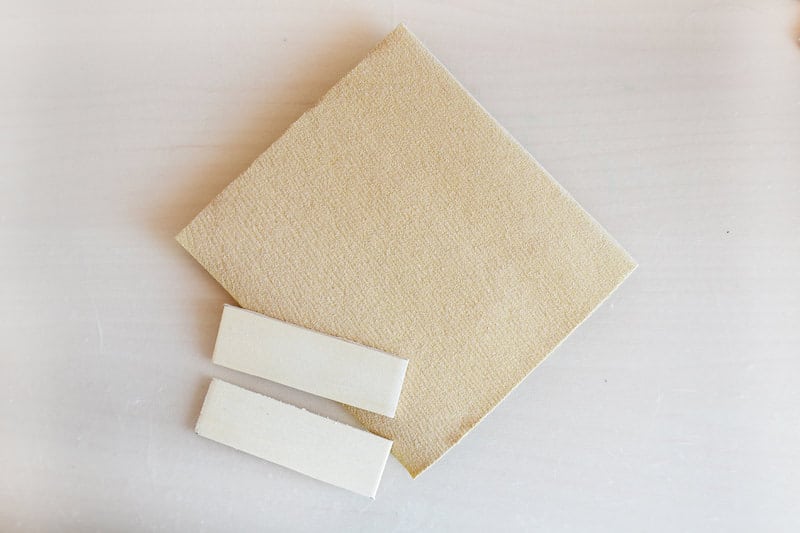
- To create a ‘long’ piece of wood perfect for a keychain, I used a 3″ x 3″ wood square. They’re soft enough to cut down to size with just a box cutter or X-Acto knife. You’ll want a steel ruler and patience, as well.

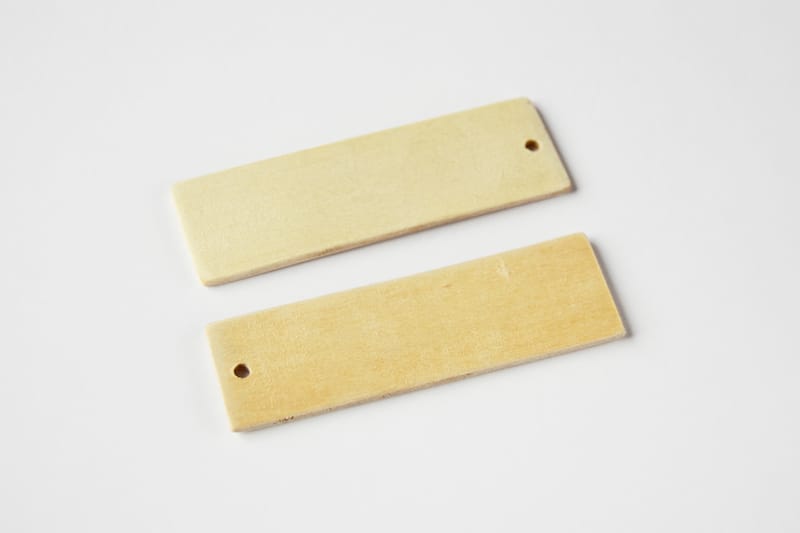
- Once you are done creating your wood rectangles, sand the edges as well as the front and back surfaces with fine-grit sandpaper.
- Drill a hole on the top to accommodate your keychain ring later on using a drill with small drill bit – the size would be relative to how big or small your keychain ring would be.
- Print the image – don’t forget to flip it before printing if there are words on it. Base the photo size on the size of the wood strip.
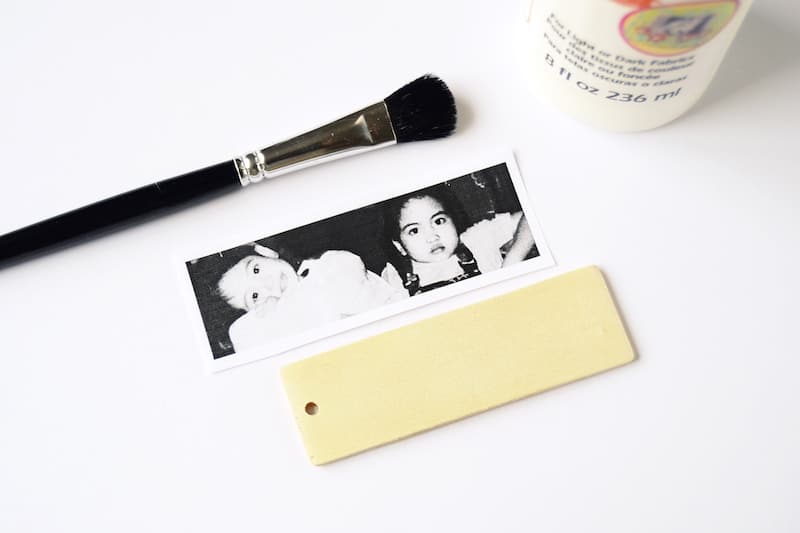
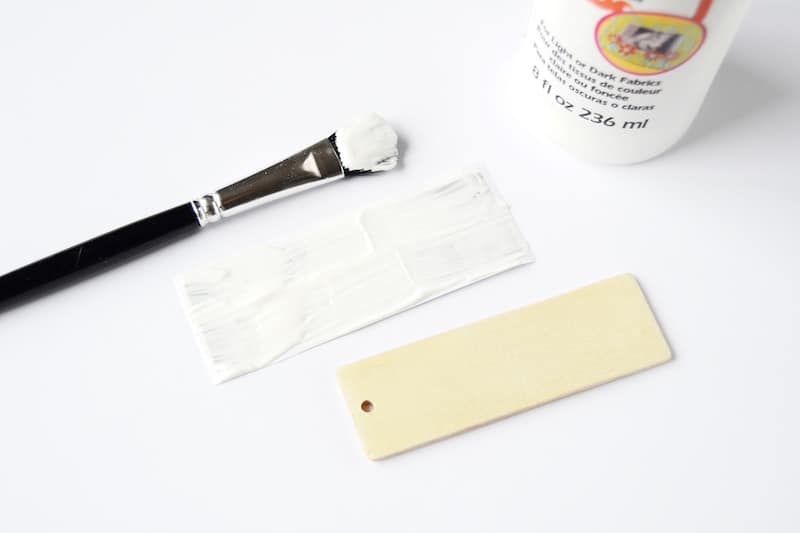
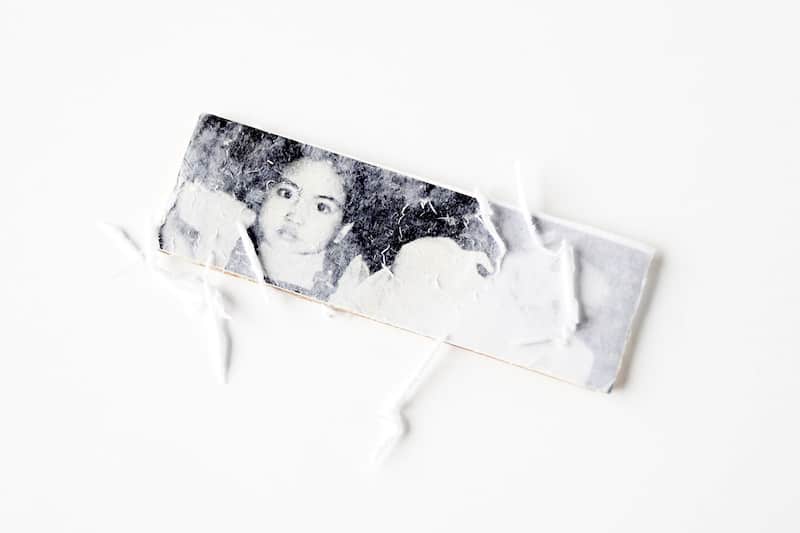
- Apply a thick coat of photo transfer medium to the image, and lay it face down on your piece of wood. Use a brayer to push out bubbles and flatten the image onto the wood. Leave to dry overnight.
- Once dry, wet the paper and carefully rub the paper until the image shows. Be careful with rubbing the paper too much, unless you want a really aged look to the keychain. Repeat until paper is removed.
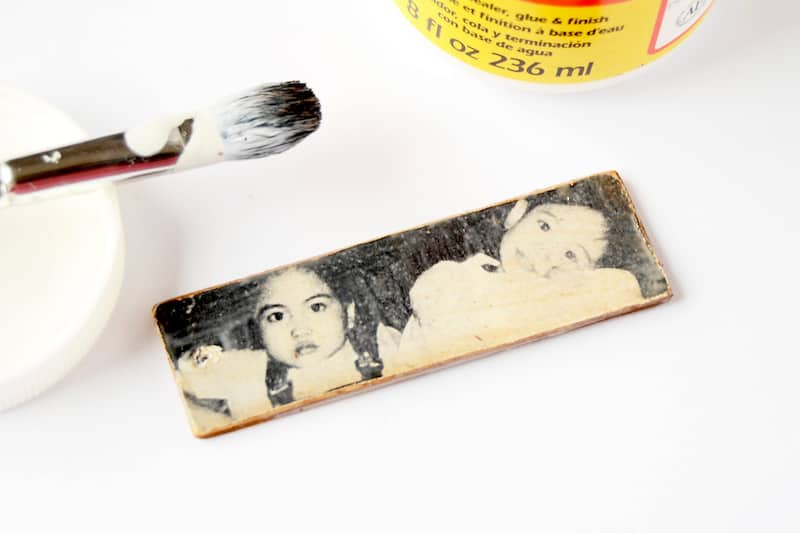
- Use antiquing wax and apply it on the edges of the keychain. This step is optional, but it's a fun effect.
- Using the same brush (unwashed), apply a layer of Matte Mod Podge. The remaining residue from the antique wax will mix with the Matte Mod Podge to create a slight sepia sheen. Make sure the faces don’t have any stray specks of wax or paper before it dries.
- Attach the keychain ring and chain to finish.
Notes
What are you planning on making for Mother’s Day? I’d love to know in the comments! I’d also love for you to check out these other keychain and photo transfer ideas here:
Family Reunion Centerpiece • How to Transfer Photos to Wood • Image to a Wood Block • Inkjet Transfer • Keychain from a Soda Can • Make a Keychain on a Budget • Personalized Wooden Keychains • Photo Pillows • Resin Keychains • Transfer Paper to Fabric • Transfer Photos to Fabric • Transfer to Canvas • Transfer to Furniture • Transfer to Glass • Transfer to Metal


This is a fun idea … and not overly complicated! I’m sure my mom would love this. I even have both the matte Mod Podge and the Antiquing Wax! Thank you for the idea. 🙂