
Learn how to hang Christmas stockings without a mantel or fireplace! This DIY stocking holder is perfect for any wall and adds festive flair to your holiday decor.
Skills Required: Beginner. It helps to have experience with Mod Podge and chalkboard paint to do this project – but it’s not required. You’ll also need to be able to use a drill.
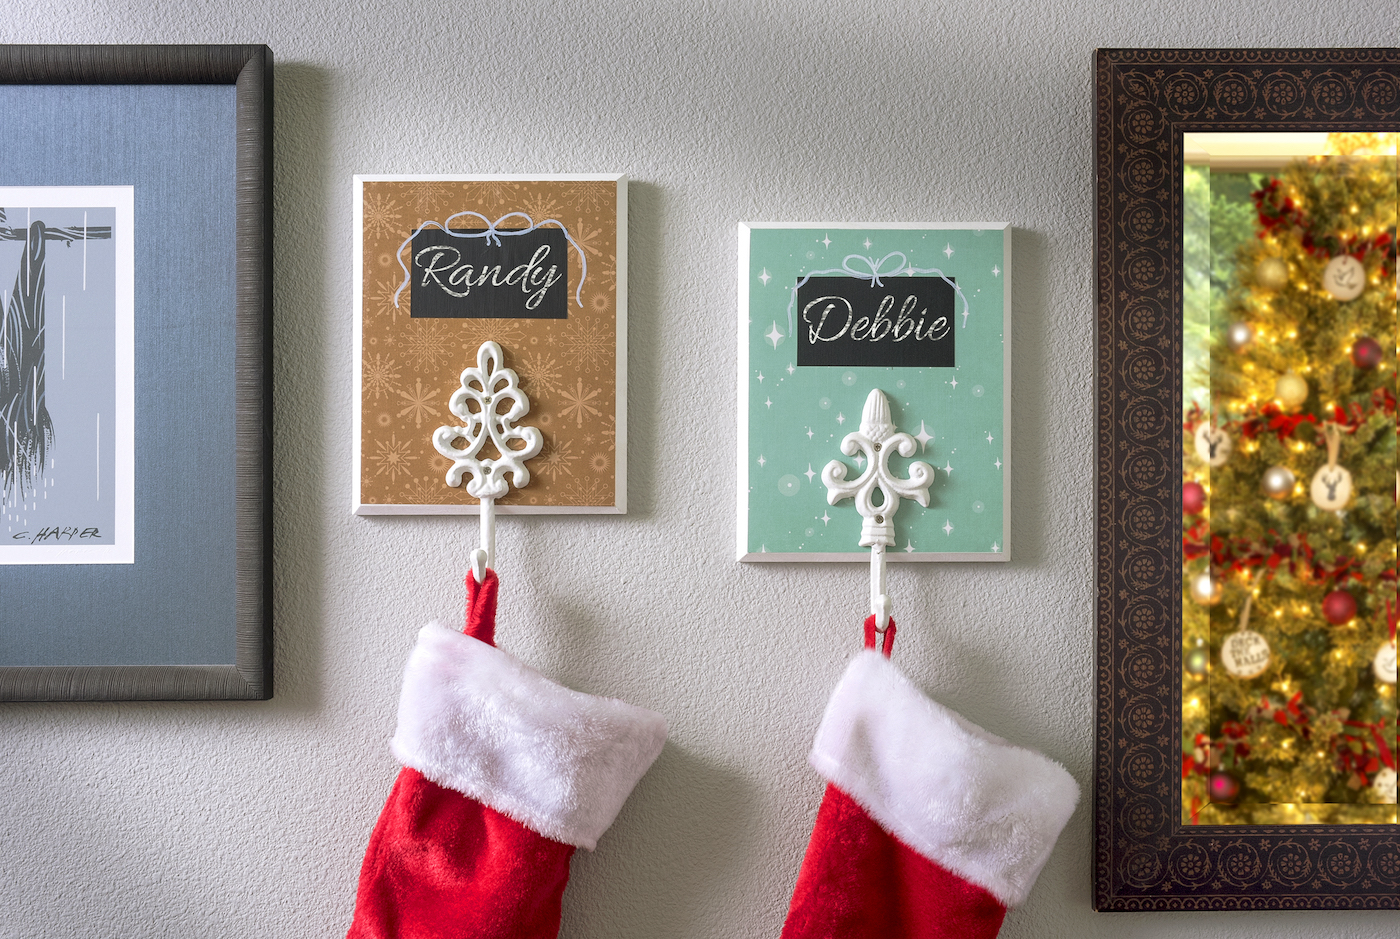
If you’re wondering how to hang stockings without a mantel or fireplace, you’re not alone! Many homes and apartments lack these traditional spots for displaying holiday stockings.
But with a little DIY magic, you can create your own Christmas stocking holder that’s perfect for any wall.
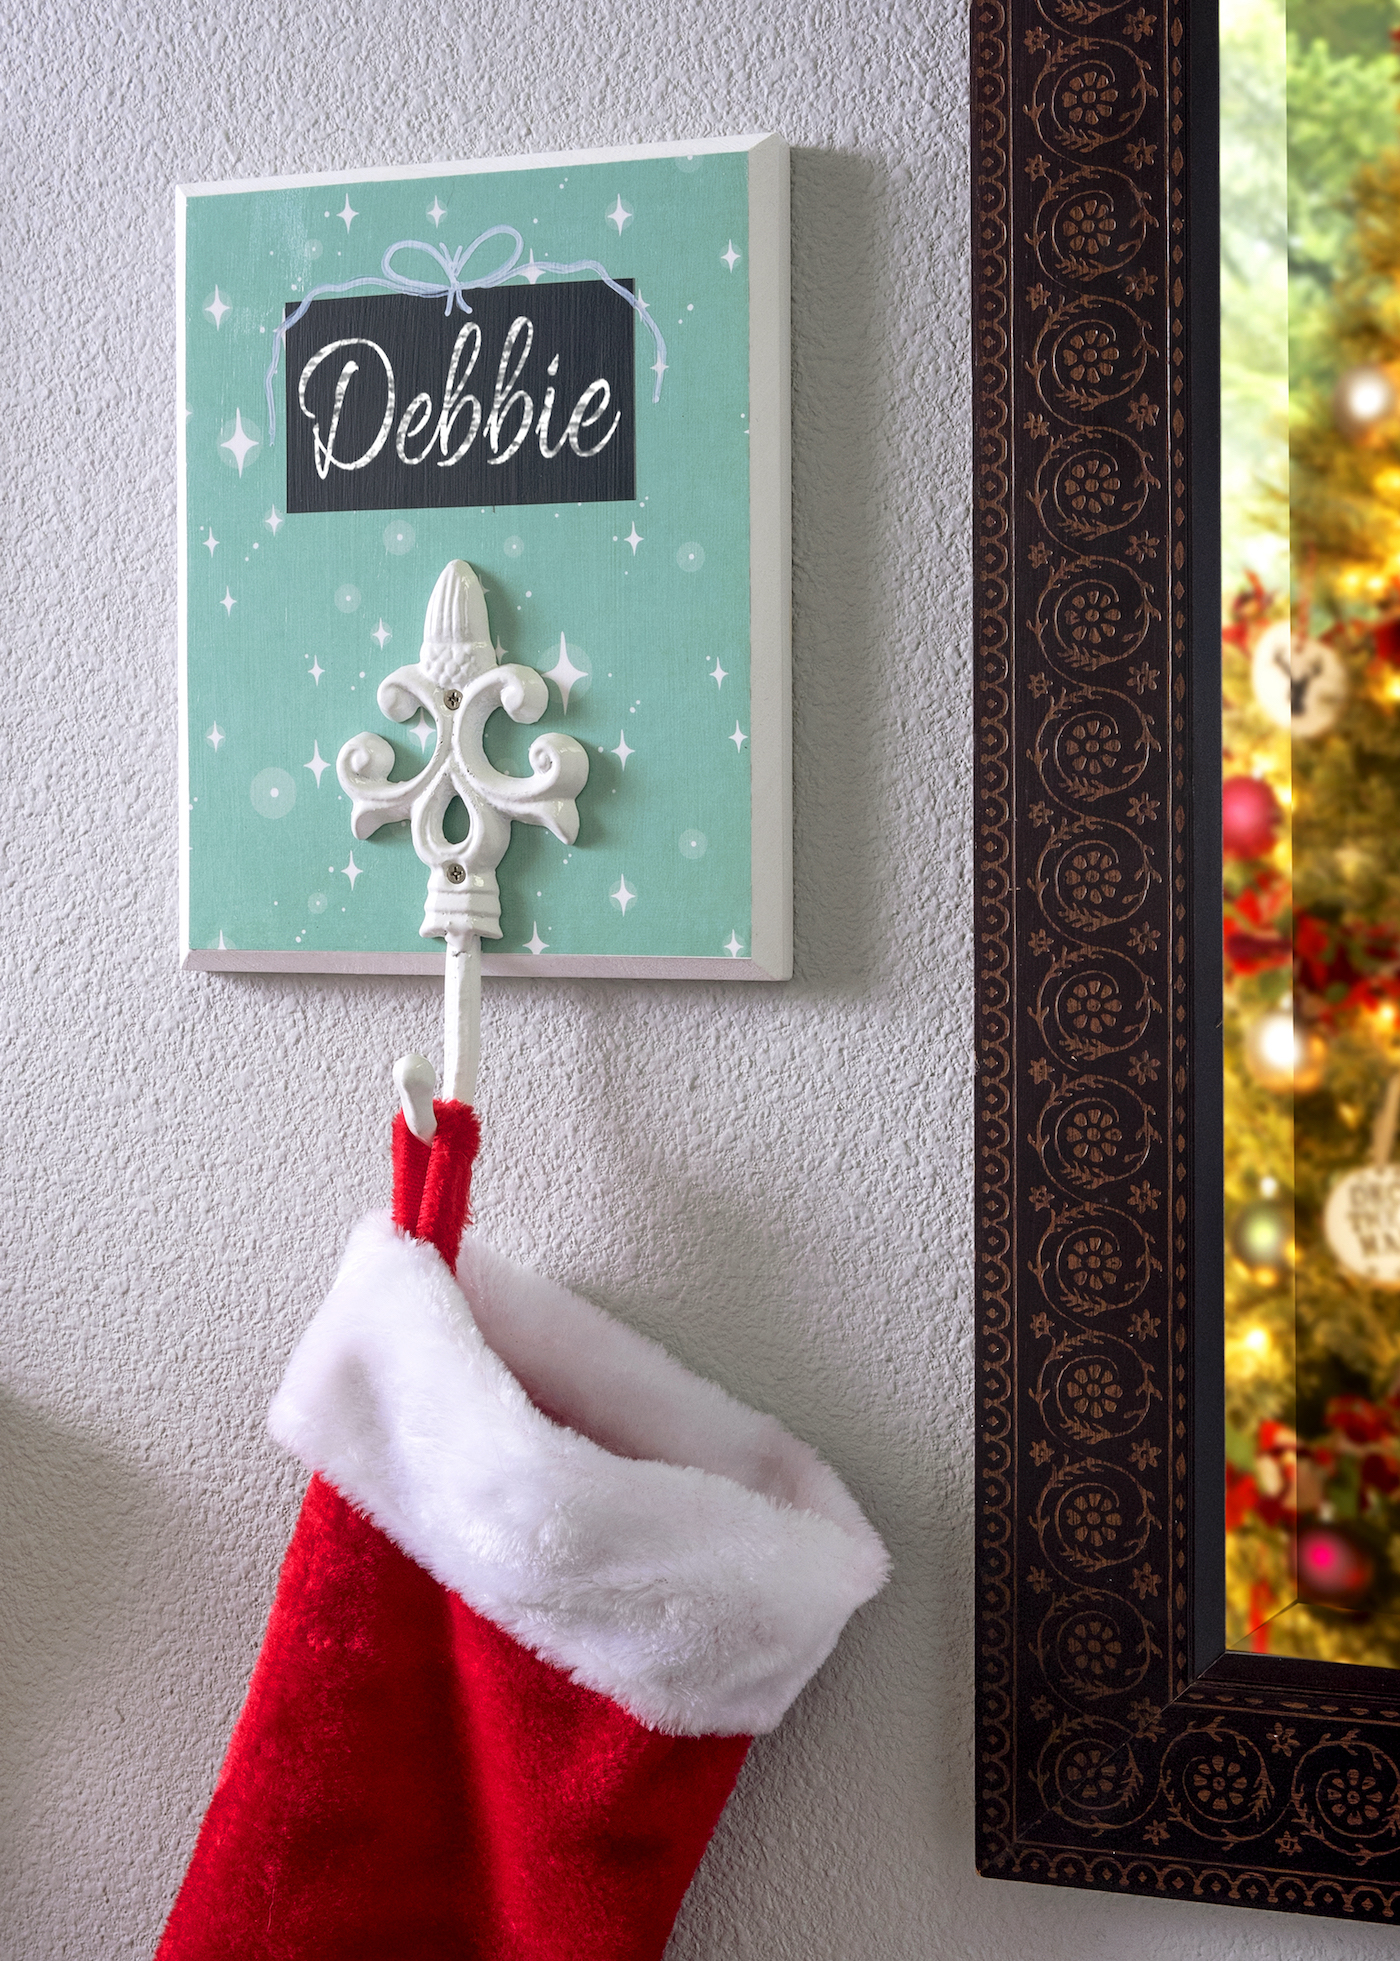
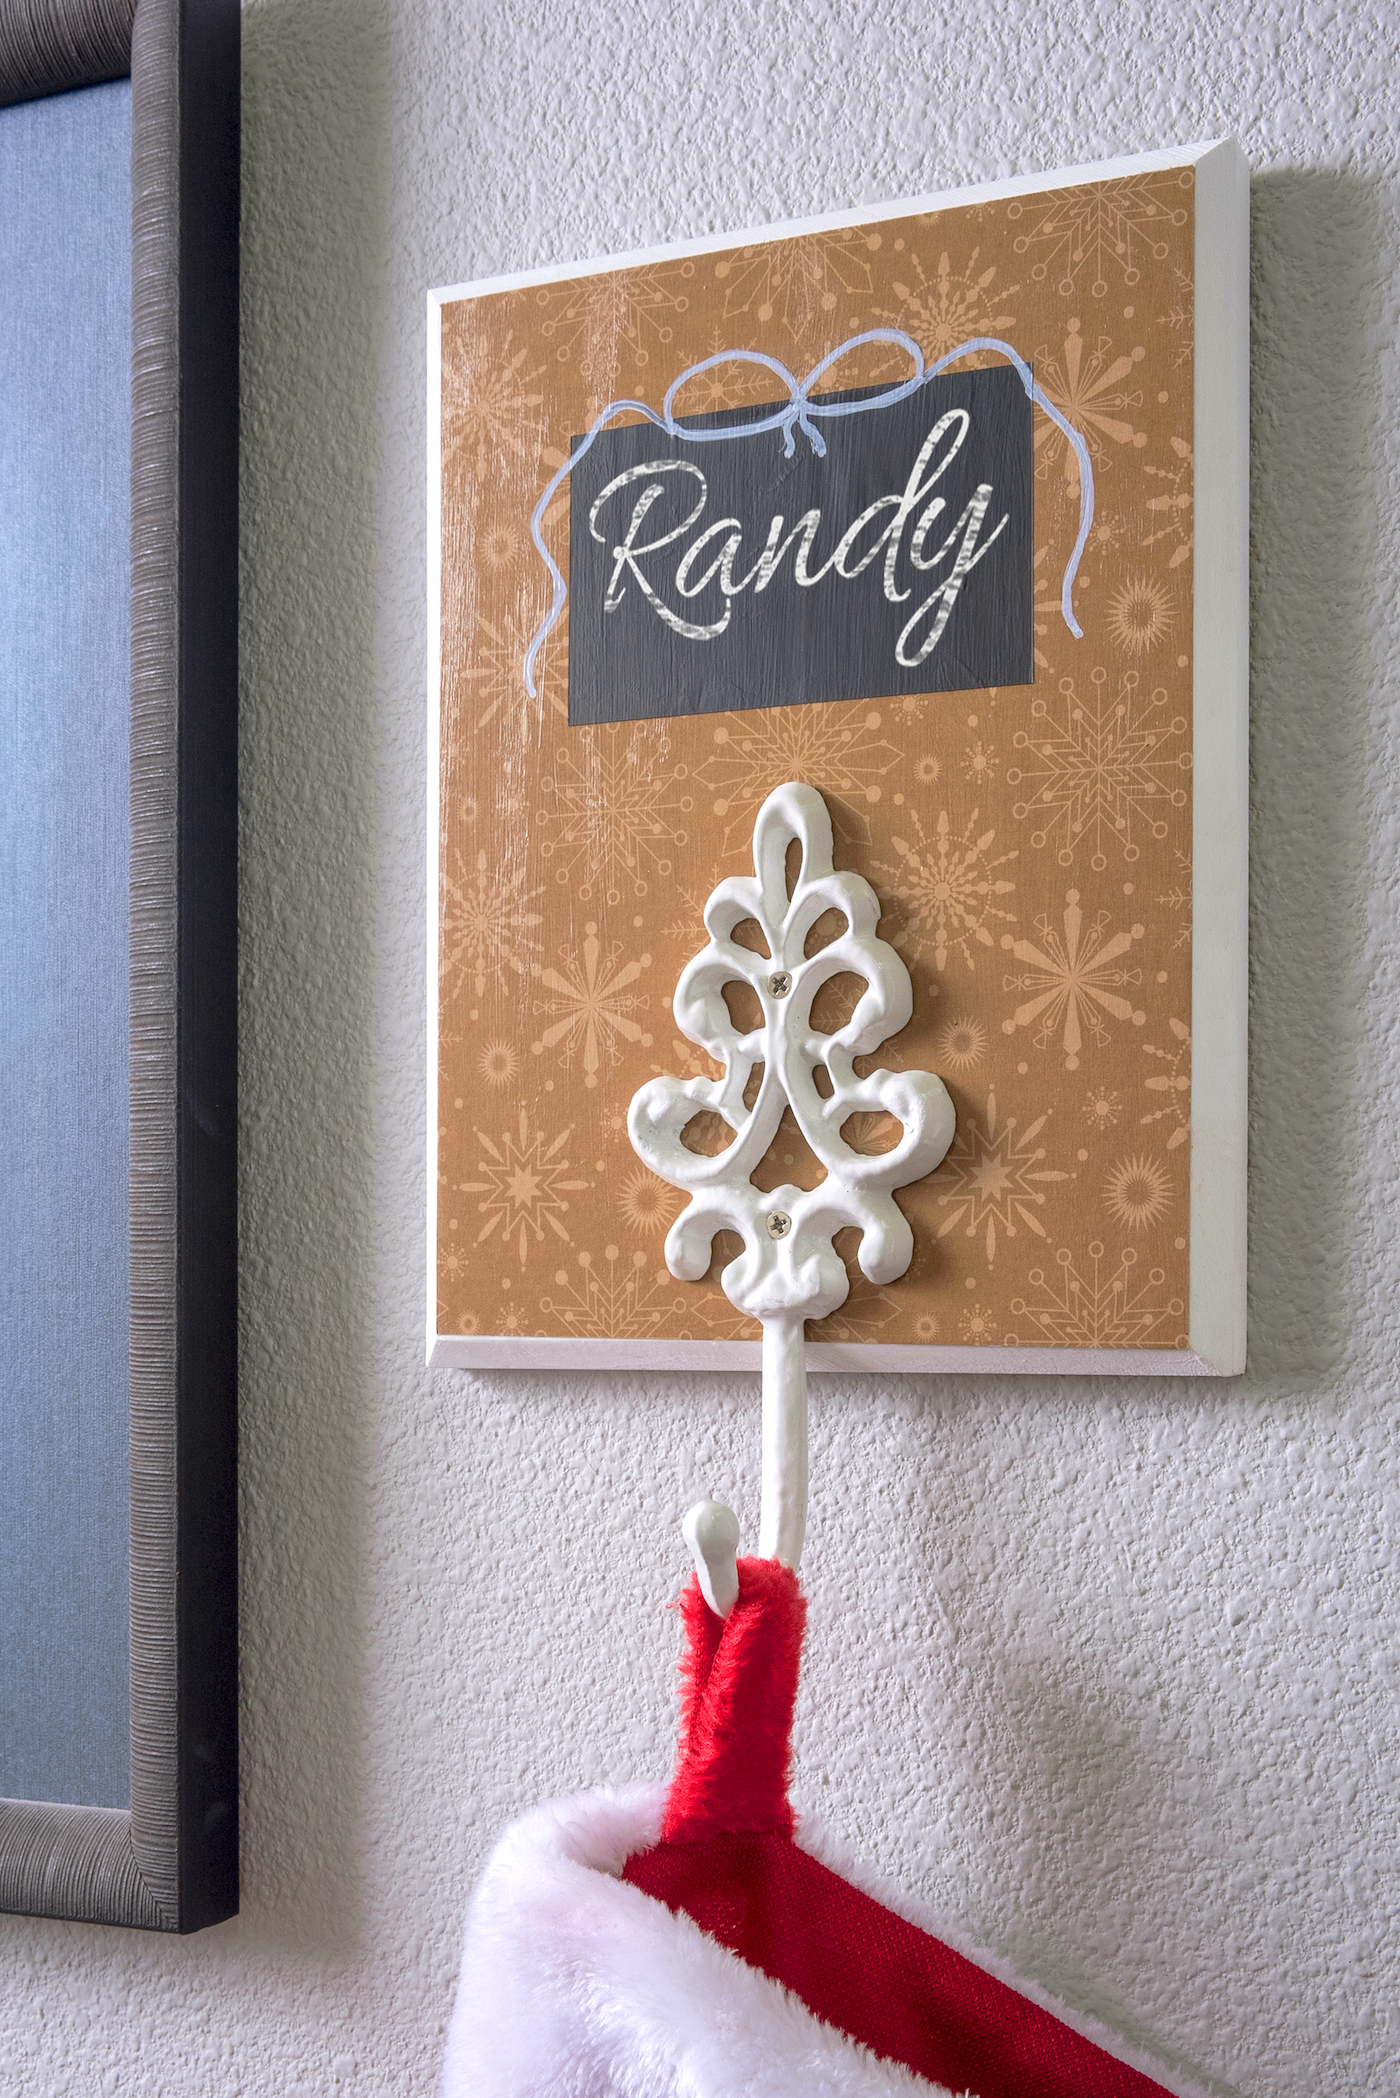
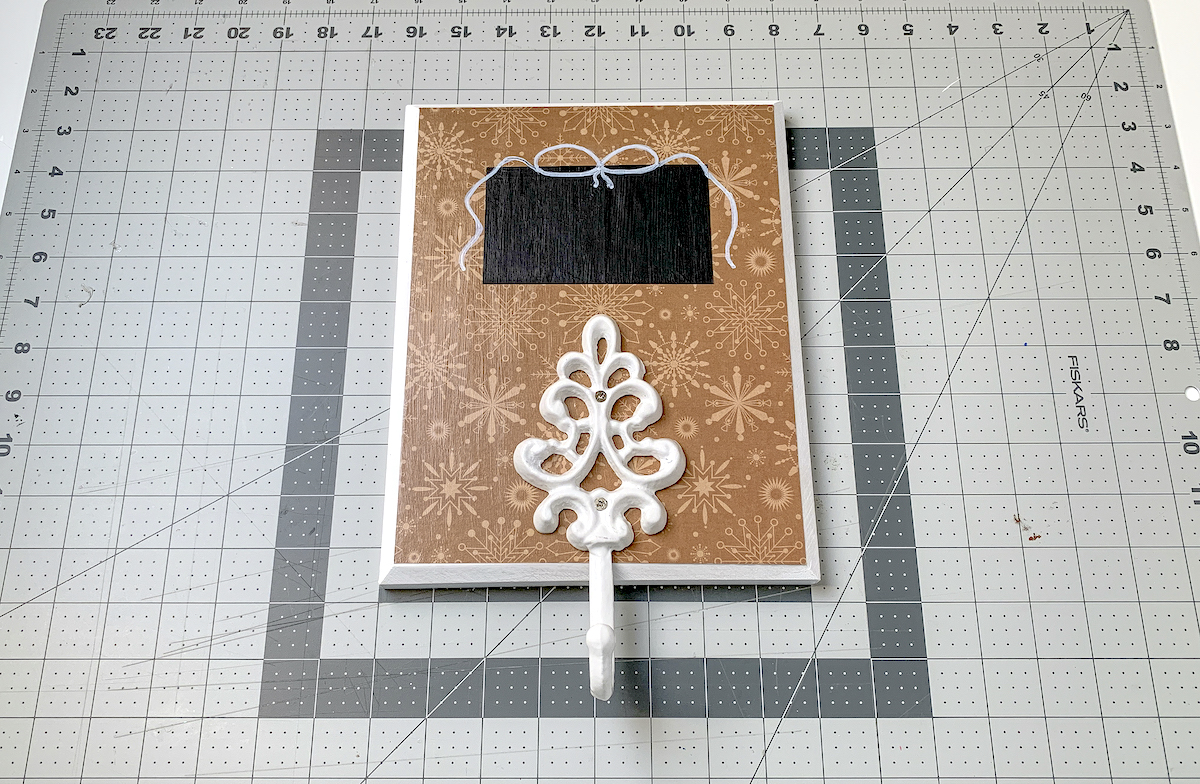
This simple Mod Podge project includes a charming chalkboard square for adding names and a sturdy hook for hanging each stocking securely.
This beginner-friendly project requires just a few tools and supplies: Mod Podge, chalkboard paint, and a drill for assembling your custom stocking holder.
Not only does this project solve the “no fireplace” dilemma, but it also doubles as beautiful holiday wall decor, adding a touch of rustic or farmhouse style to your space.
With just five easy steps—paint, Mod Podge, add a chalkboard square, accent with a bow, and attach the hook—you’ll have a stocking holder ready to go up on your wall.
Attach sawtooth hangers or Command Strips, and your stockings will be ready for Santa’s visit (don’t forget the Magic Key), wherever you decide to place them in your home.
Follow along to learn how to make this wood Christmas craft and create the perfect festive solution for a mantel-free holiday!
Gather These Supplies
- Wood plaques – size of your choice – mine were about 8″ x 10″
- Hooks for hanging – 1 per plaque
- Craft paint – white
- Mod Podge Satin – or any Mod Podge formula you like
- FolkArt chalkboard paint
- White paint pen
- Pencil
- Painter’s tape
- Ruler and craft knife
- Scissors
- Paintbrush
- Foam brush
- Drill or screwdriver
- Command strips
- Chalk
Any size plaque will work, or you can use raw wood slices. You don’t have to use a rectangle. Pick a shape and make it fun, depending on your style.
You might need new screws for your hooks. The screws that came with my hooks were too long (probably made to go into the wall), so I had to get some that were shorter.
This is such a great idea if you don’t have a fireplace to hang your Christmas stockings.
But it doesn’t just need to be for Christmas! You can also use this project for your pets leashes, with a photocopy of a pet picture decoupaged to the plaque.
Or, use images of people you love, this way you can use the holders in rooms to hold, keys, blanket, robe, etc . . . use your imagination!
Give this Christmas craft a try and let me know in the comments. I’d love to hear how yours turned out.

Hang Stockings Without a Mantel
Equipment
- Drill or screwdriver
Materials
- 2 Wood plaque(s)
- Hooks for hanging on the front 1 per plaque
- Craft paint white
- Mod Podge Satin
- Chalkboard paint
- Paint pen(s) white
- Painter’s tape
- Chalk
- Command Strips
Video
Instructions
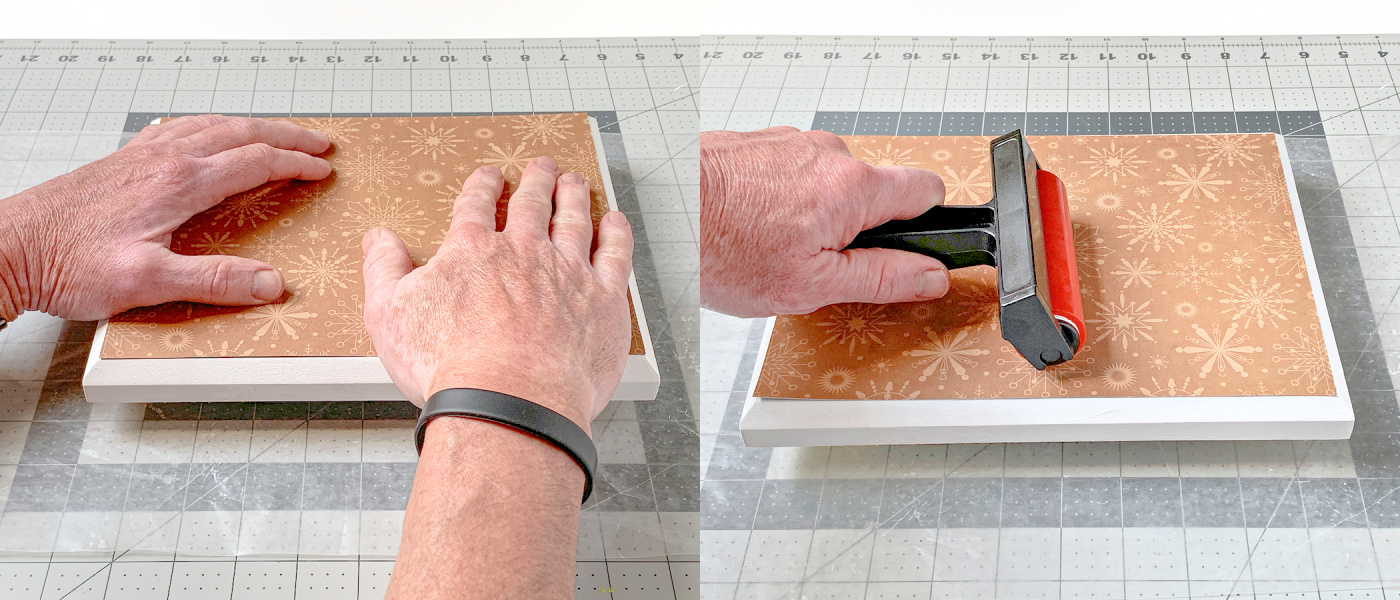
- Cut the scrapbook paper to fit the top of the plaque. I used a craft knife and ruler since it was rectangular.
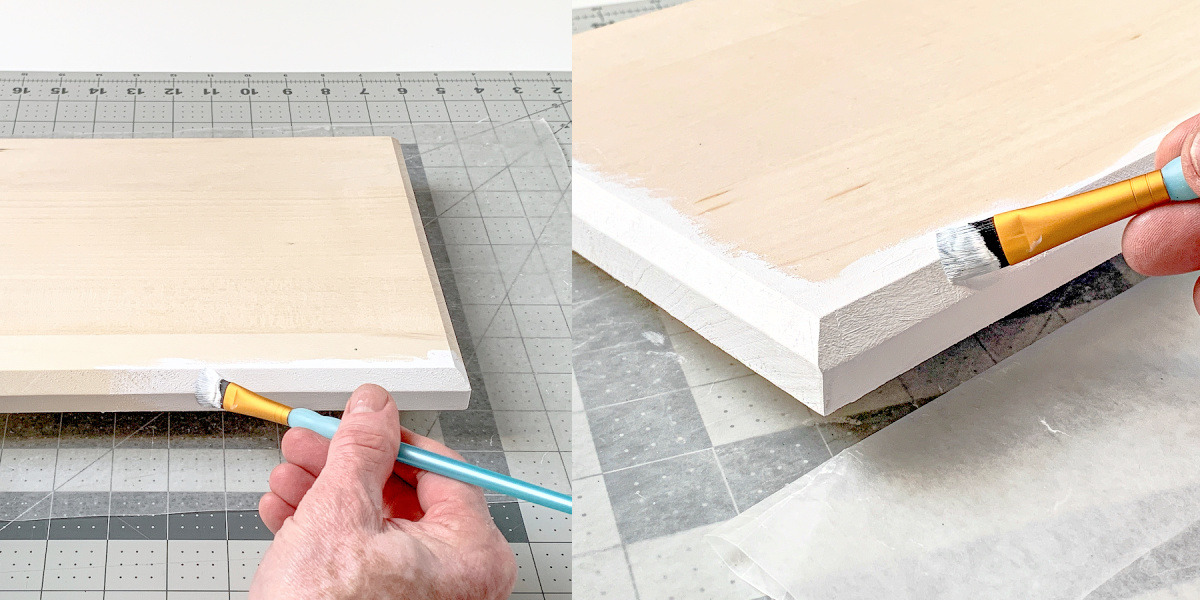
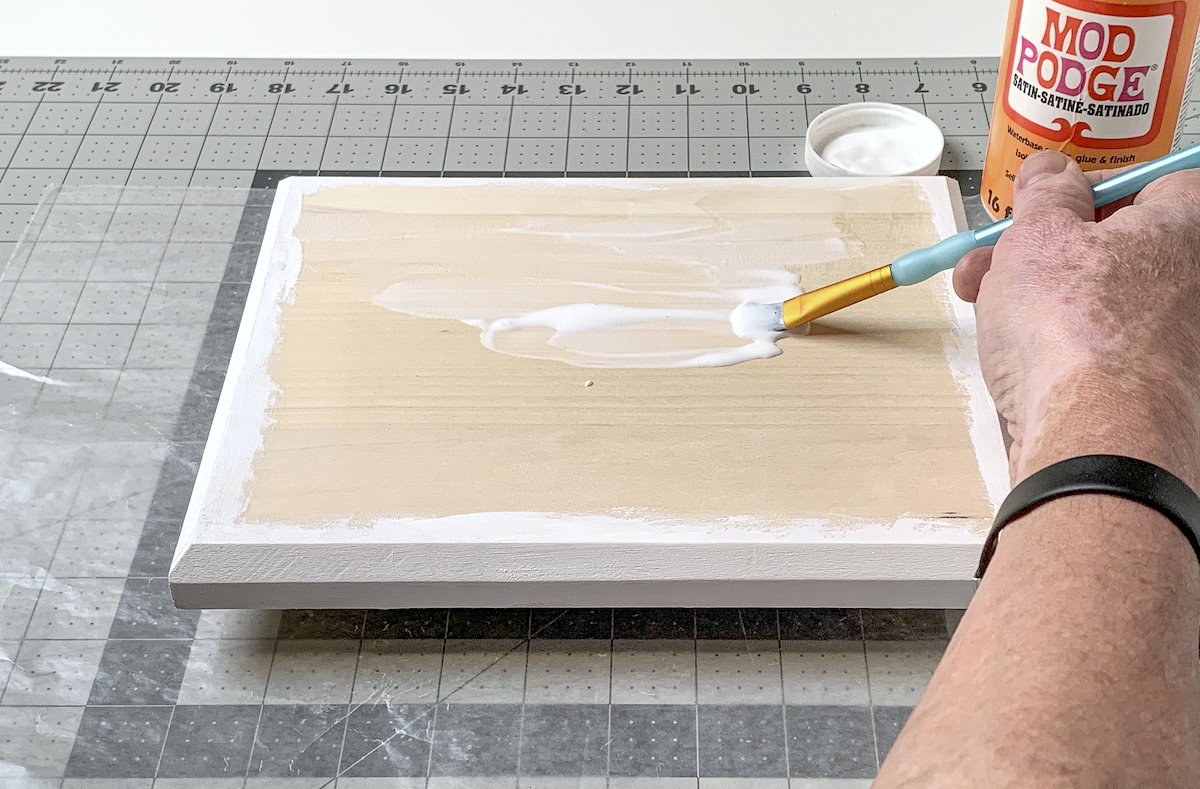
- Use the acrylic craft paint to edge the side of your plaque, and the back too if you like. Let the paint go up over onto the top in case there are any gaps in the paper. Let dry and give a second coat; then let dry completely.
- Put a medium layer of Mod Podge on top of the plaque. Work quickly, as Mod Podge starts to dry right away. If you see a dry area before you apply the paper, put more Mod Podge down. It's better to use too much than not enough.
- Take the scrapbook paper you cut and smooth it down onto the Mod Podged surface. Smooth with your fingers, and then use a brayer if you have one. Let dry 15 – 20 minutes.
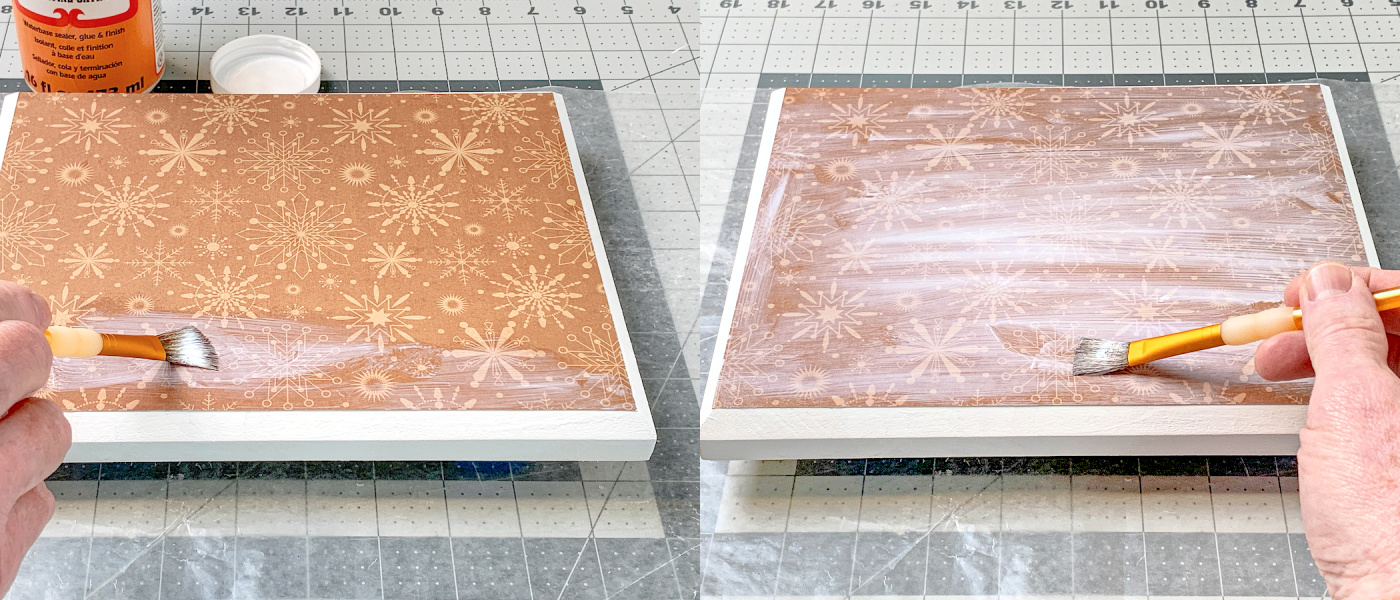
- Paint a layer of Mod Podge over the top and let dry (include the sides). Repeat and let dry completely, overnight if you can. You want it to be as dry as possible before adding the chalkboard paint.
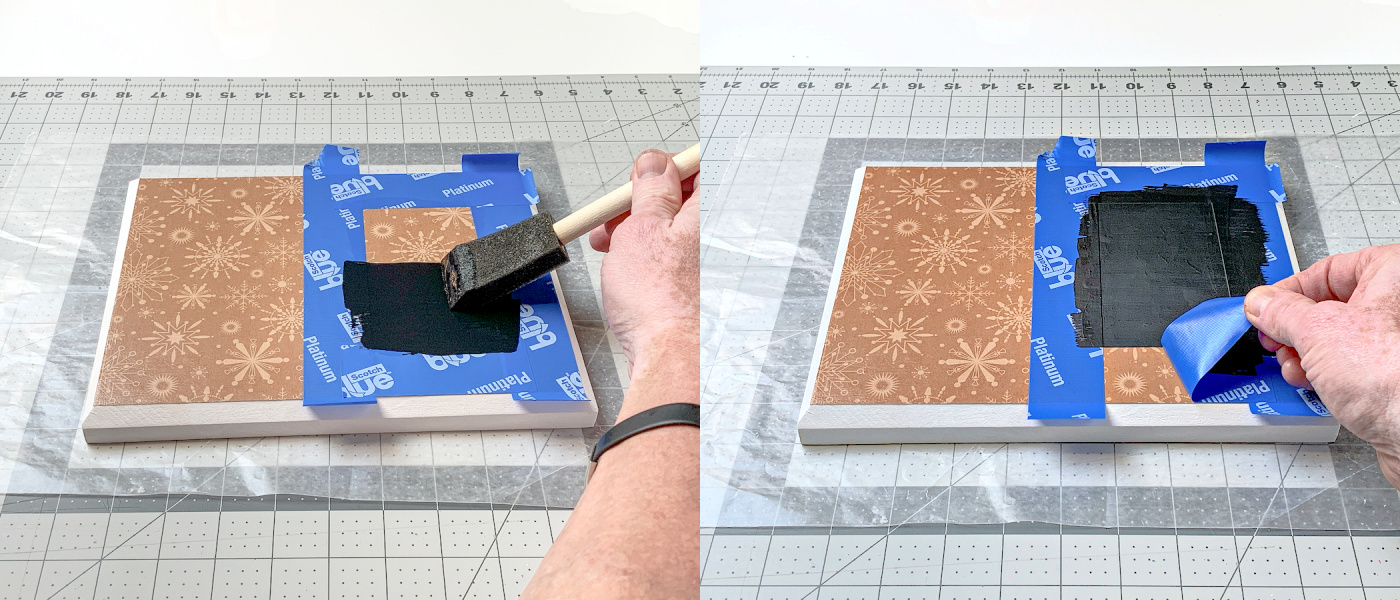
- Section off the area you would like to be chalkboard with painter’s tape.
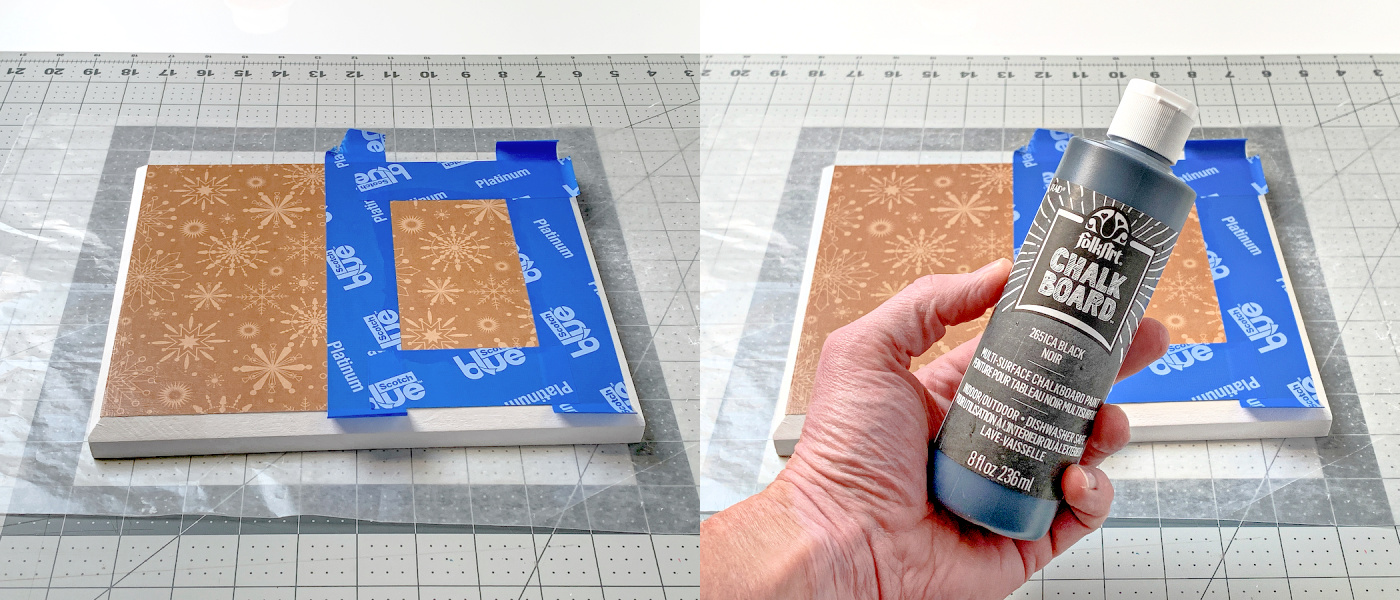
- Paint the chalkboard paint in the area you have sectioned off with a foam brush. Let the paint dry and see if you need two coats. The coats must dry completely before applying another. Once the paint is completely dry, peel away the tape.
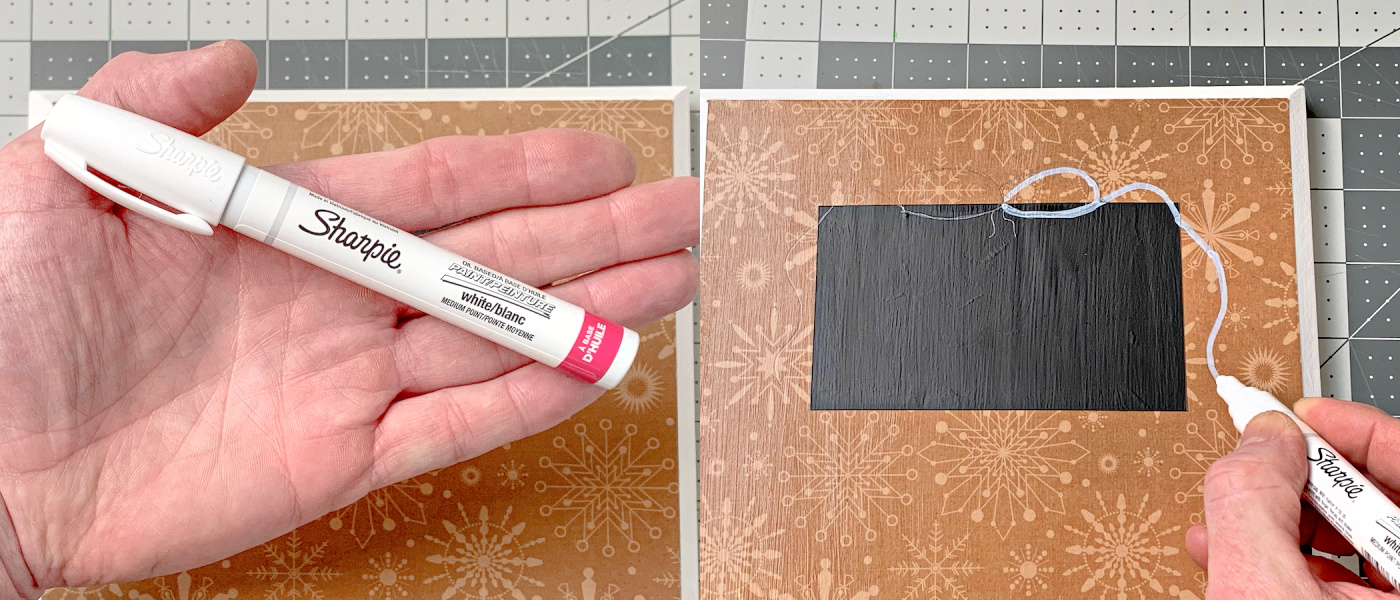
- Remove the painter's tape. Add a bow to the top of the chalkboard rectangle with a paint pen. Start by making your bow (or other design) with a pencil. Then go over it once with the paint pen. Let dry.
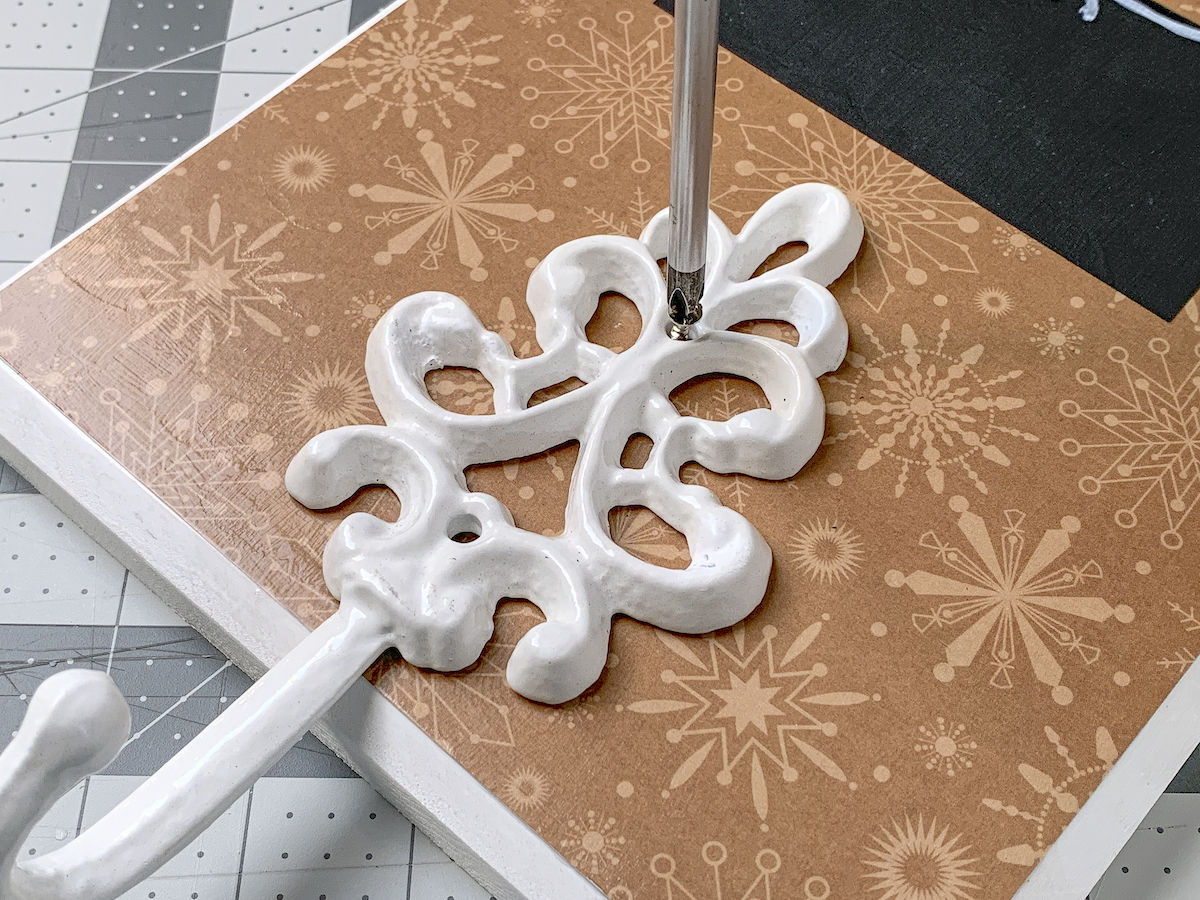
- Add the hook to the bottom of the plaque with a screwdriver or drill.
- Attach to the wall with a Command Strip or sawtooth hanger and hook.
Notes
If you love this project, check these other Christmas decorating ideas from the blog:
Believe Wood Star • Busted Canvas • Chalkboard Trees • Countdown Chalkboard • DIY Christmas Village • Fabric Christmas Bowl • Farmhouse Door Decor • Farmhouse Sign • Frosted Mason Jar Luminaries • Gnome Wood Gift Tag • Holiday Door Hangers • JOY Plaque • Merry Christmas Decor • Peace Wood Decor • Tree Mantel Decor • Wood Ornament Decor • Whimsical Wood Trees • Wood Trees with Book Pages


this is awesome , I love Mod podge!!!
This is a great idea and so darn cute.. I love Mod Podge!!!!
Oh that is gorgeous. hmmm might be time to hit the thrift stores
Adorable!
I loooove this idea!